Happy Addons team recently launched a chunk of widgets for helping the Easy Digital Downloads (EDD) users. Among the widgets, the EDD Product Grid is one of the exclusive one. If you are an Elementor user then with this widget you can showcase your store’s digital products in an organized way.
Moreover, you can include/exclude products,add product carousels to your shop using the Happy Addons EDD Product Grid widget.
In this blog, we’re going to have a look at the Happy Addons’ new Easy Digital Downloads Product Grid widget and also see how to design a stunning product grid using this effective Elementor widget.
Let’s start with the basic introduction of the widget.
Happy Addons Easy Digital Downloads Product Grid Widget at a Glance
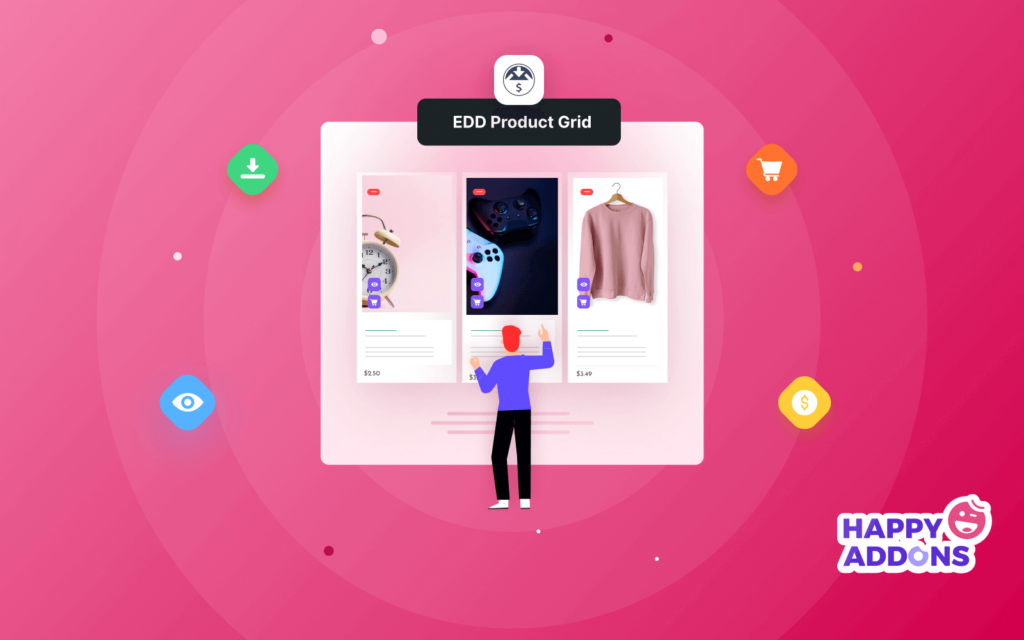
Happy Addons’ Edd Product Grid widget allows you to showcase your store’s digital products in a grid layout. You can display products in different design formats. This is fully customizable and comes with readymade samples.
Key Features:
- Set different design layouts
- Include & Exclude products using Query
- Manage the number of products
- Add a custom badge.
Benefits of Using Happy Addons EDD Product Grid Widget
The default features of Easy Digital Downloads don’t have enough functionalities to add products in a responsive grid. However, the Happy Addons’ EDD Product Grid widget solves this problem. You can easily customize the default product page or make a new one in your own style.
You will get other benefits as well. Like,
- Display featured/best-selling products
- Increase sales
- Improve customers’ user experiences
Efficiently Showcase Digital Products On Your Elementor Website (6- Easy Steps)
In this part, we are going to show you how to design a product grid feature using the Happy Addons’ EDD Product Grid Widget.
We will use the Happy Addons single product landing page template for the demonstration. You also need to install and activate the following plugins to your website:
Pre-requisites
- Easy Digital Downloads (EDD)
- Elementor (Free)
- Happy Addons (Free)
- Happy Addons Pro
Let’s get started:
- Step 1: Add EDD Product Grid Widget
- Step 2: Configure the Content Layout Settings
- Step 3: How to Add Selected Products
- Step 4: How to Remove Selected Products
- Step 5: Advanced Product Grid Content Settings
- Step 6: Customize with Available Style Options
Step 1: Add EDD Product Grid Widget
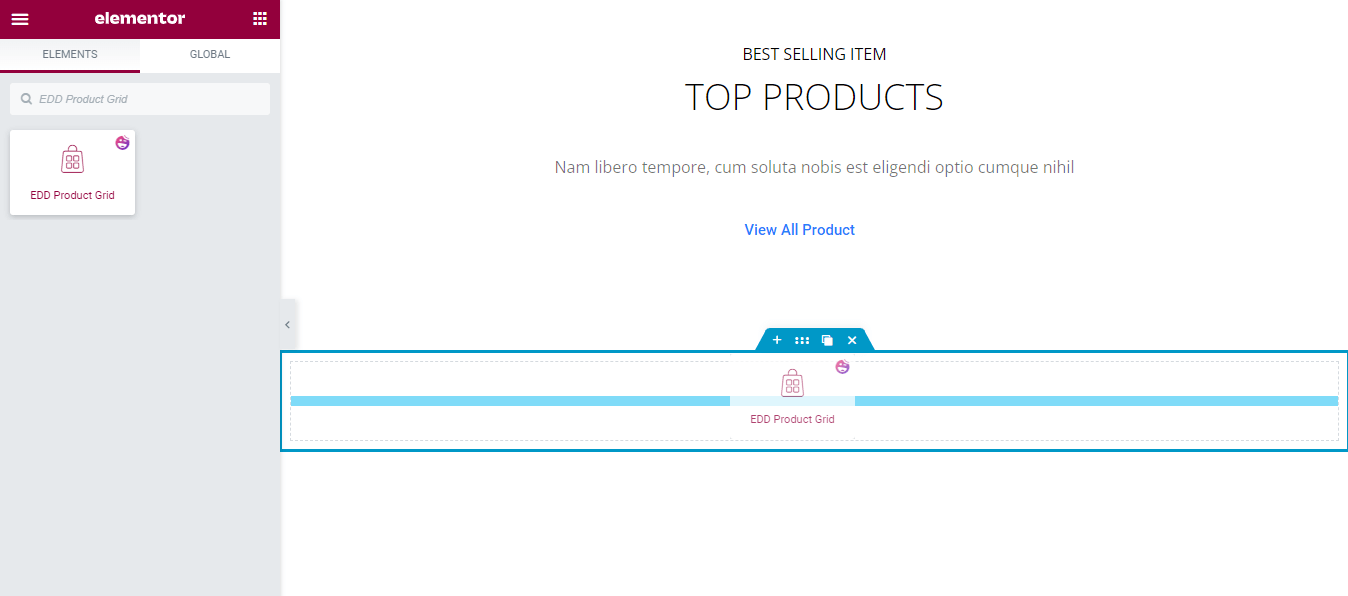
First, you need to add the widget to the right section of your webpage. Find the widget from the left-side Elementor widgets gallery area then drag & drop the widget. You can follow the below image.
Step 2: Configure the Content Layout Settings
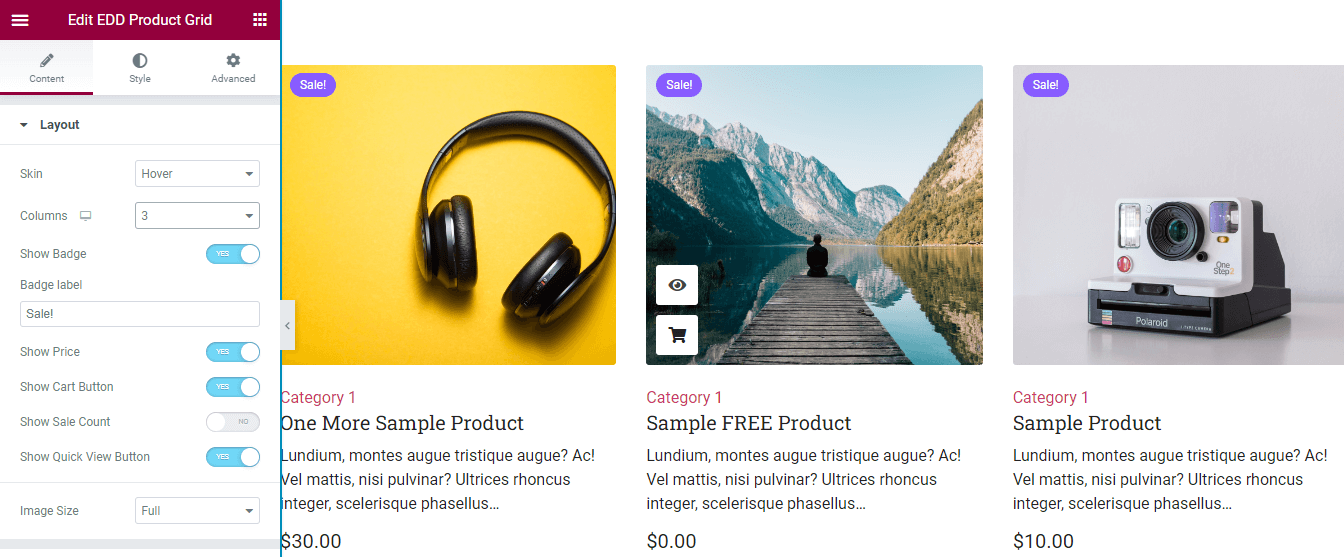
After adding the widget, you’ll get the interface like the below image. Go to the Content->Layouts section to manage the widget’ different settings. You can select a design Skin from the two “Classic and Hover“. Here, we’ve chosen the Hover as our design Skin.
You are able to set how many products will show in a Column. Also, you can enable the Show Badge option, write the Badge Label, and activate the Show Price feature.
To display the cart button, you should Show the Cart Button option. If you need, you can Show Sale Count and Show Quick View Button.
You can also control the Image Size on different devices.
Step 3: How to Add Selected Products
You can add products into the grid using the Query->Include option. Here, you can include products using Query->Features Products. Or you manually search and add products with Query->Terms option.
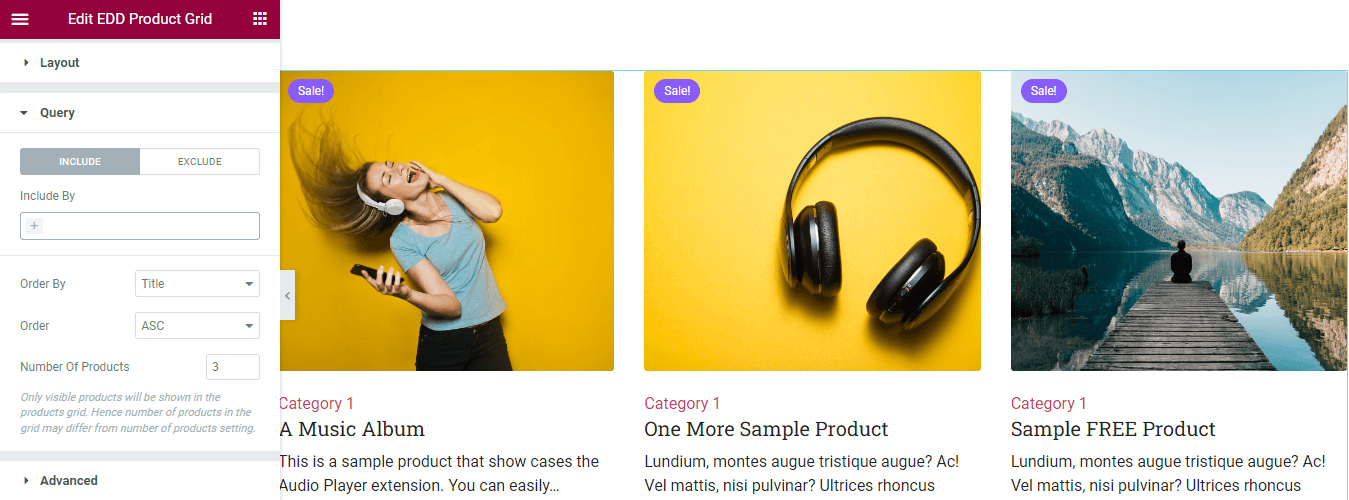
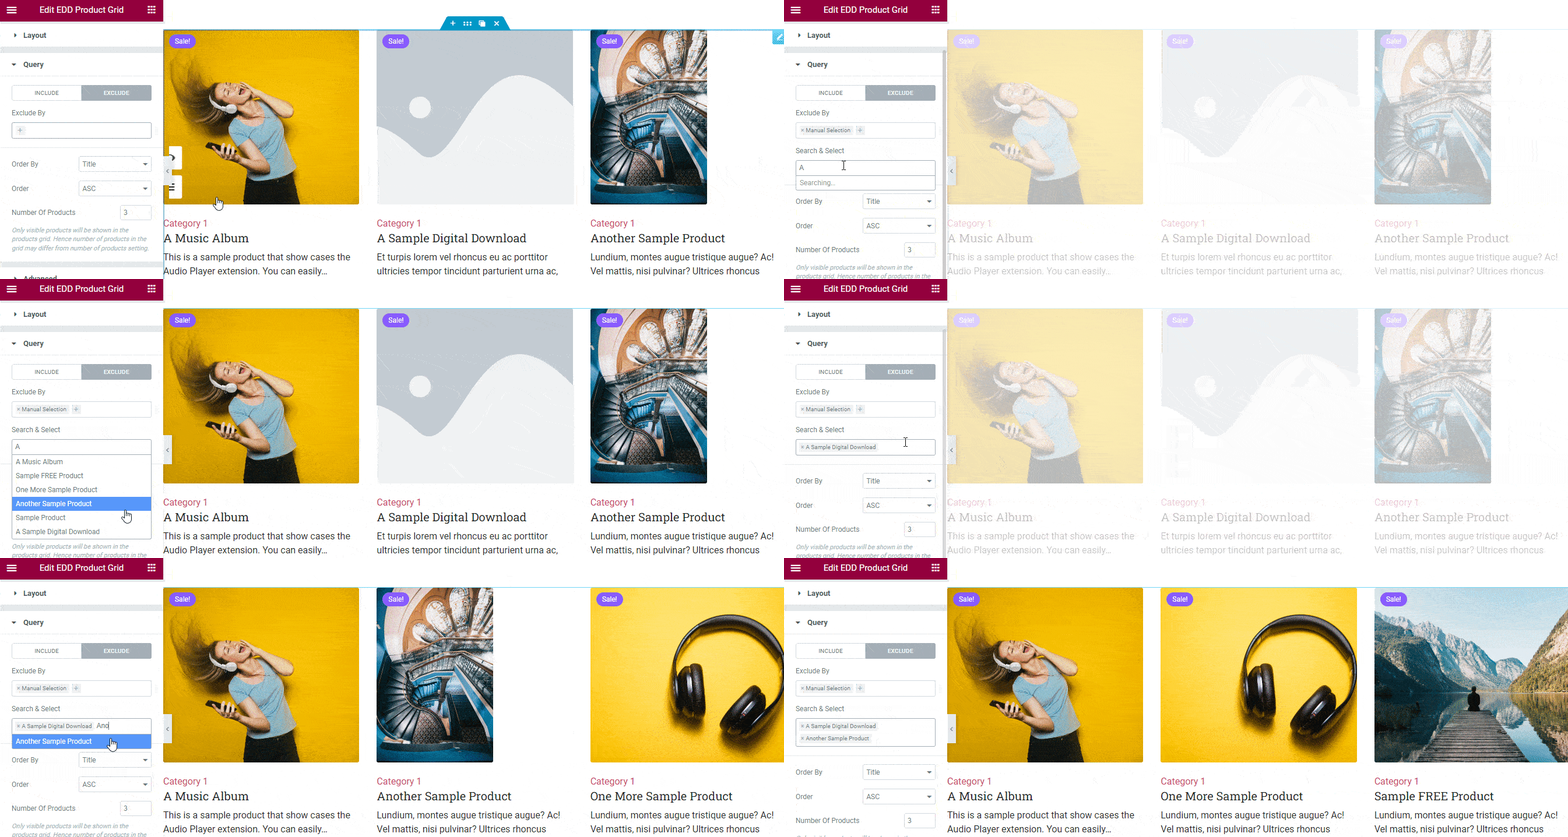
Step 4: How to Remove Selected Products
If you need to remove products from the grid, you can use the Query->Exclude option. You can exclude the Current Products, use the Terms option or try the Manual Selection process. here, we’ve excluded two products using the Manual Selection option. You can follow the below image.
Step 5: Advanced Product Grid Content Settings
In the Content->Advanced area, you will get some other essential sections.
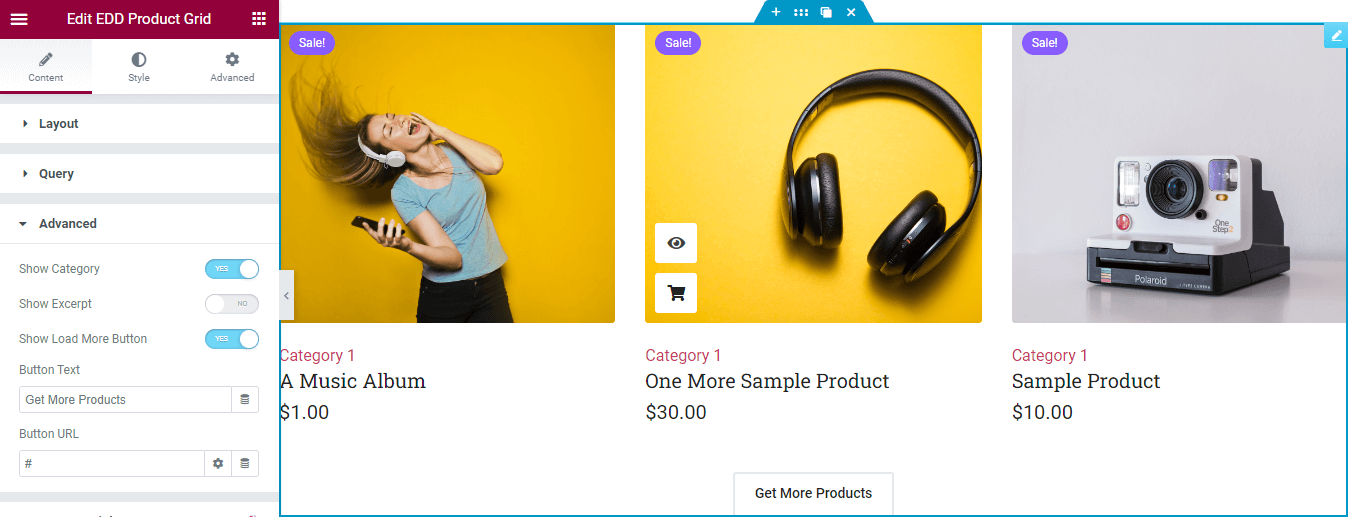
- Show Category: You can display the product category by enabling this option.
- Show Excerpt: If you want to show the product description, you can activate this setting.
- Show Load More Button: For loading more products, you can enable this feature.
- Button Text: You are able to write the button level.
- Button URL: Also, insert the Button URL.
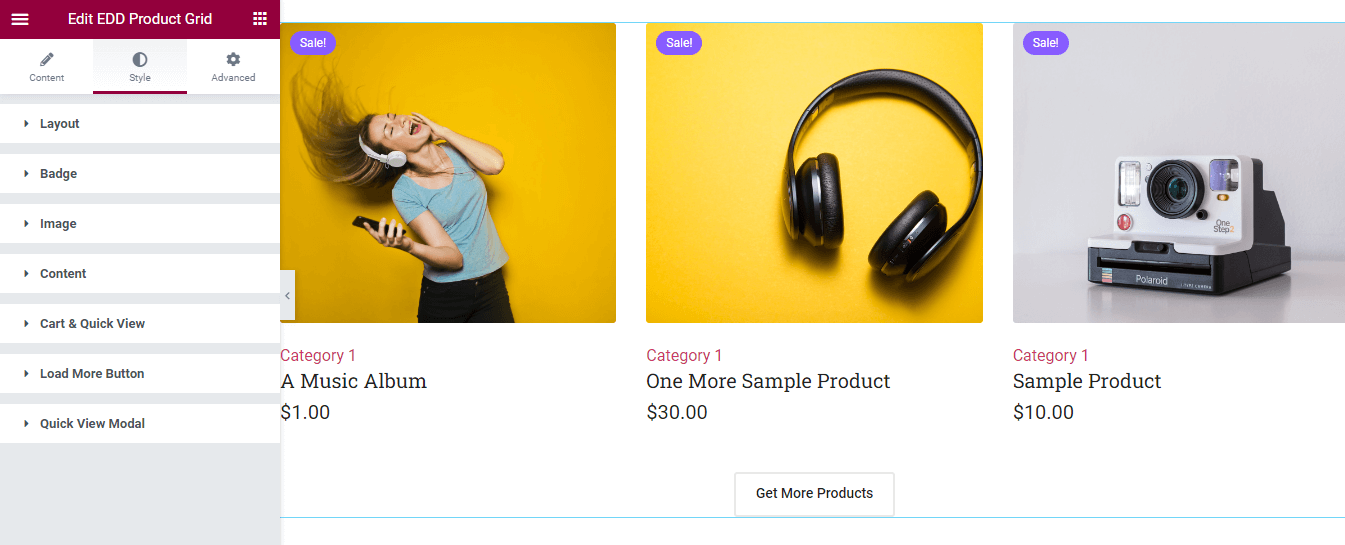
Step 6: Customize with Available Style Options
You are able to change the default design of this widget. You’ll get all the necessary styling options in the Style area. You can stylize the,
- Layout
- Badge
- Image
- Content
- Cart & Quick View
- Load More Button
- Quick View Modal
Check out the full official documentation of the EDD Product Grid widget. Or you can check out the video guide if you are in a hurry.
Final Preview
Here is the final outlook of our single product page after finishing the customization.
Start Customizing Your Digital Products
With the right tool like the Easy Digital Downloads Product Grid widget, you can turn your product page more appealing to your customers. A well-design product page not only improves your customers’ user experience but also increases conversion.
In the above guide, we’ve shown how you can use use the Happy Addons’ EDD Product Grid widget to showcase your store’s products in an organized grid layout. Happy Addons comes with other necessary Easy Digital Downloads Elementor widgets as well. You can also try them to make your online store more functional.
You can check out the video guide if you are in a hurry.
If you can face any difficulties while using this widget, leave a comment. We request you to join our newsletter and stay with our social channels.
Subscribe to our newsletter
Get latest news & updates on Elementor


