If you are writing articles on a website, we know how irritating it is to type the same texts over and over again. But what if you could get rid of this hassle by simply clicking on a tool? Yes, you heard it right!
With the release of the Gutenberg block editor, you can now easily create reusable blocks and can use them on any post or page with just a single click. What’s more! You can edit the blocks at your disposal.
In this post, I will show you how to create, manage, edit, export or import Gutenberg reusable blocks in your WordPress website with the easiest and quickest way.
Let’s move forward…
What is a Gutenberg Reusable Block in WordPress Block Editor?
When you save your content as a reusable block in the Gutenberg editor to use them later then that block editor is called reusable block editor. The best part is that you can not only create Gutenberg
Web writers often save texts on a doc file in order to use them later in different posts. And it eats up a lot of time to search for them and open up in the browser. The Gutenberg reusable block can be pretty useful to reduce this extra time and effort.
The use of reusable blocks is pretty useful, especially when you are adding,
- Reusing a call to action button
- Adding links to a post to follow the blog on social media.
- Adding feedback forms
- Adding inline affiliate banners.
- Reusing tables
So, using reusable blocks is that useful in WordPress Gutenberg posts or page editors.
But how can you create and use reusable blocks? Let’s dig deeper.
Creating a Reusable Block in WordPress Editor
In the WordPress Gutenberg editor, every block is independent of editable elements. You can just add content to these elements and can save them to reuse in the future.
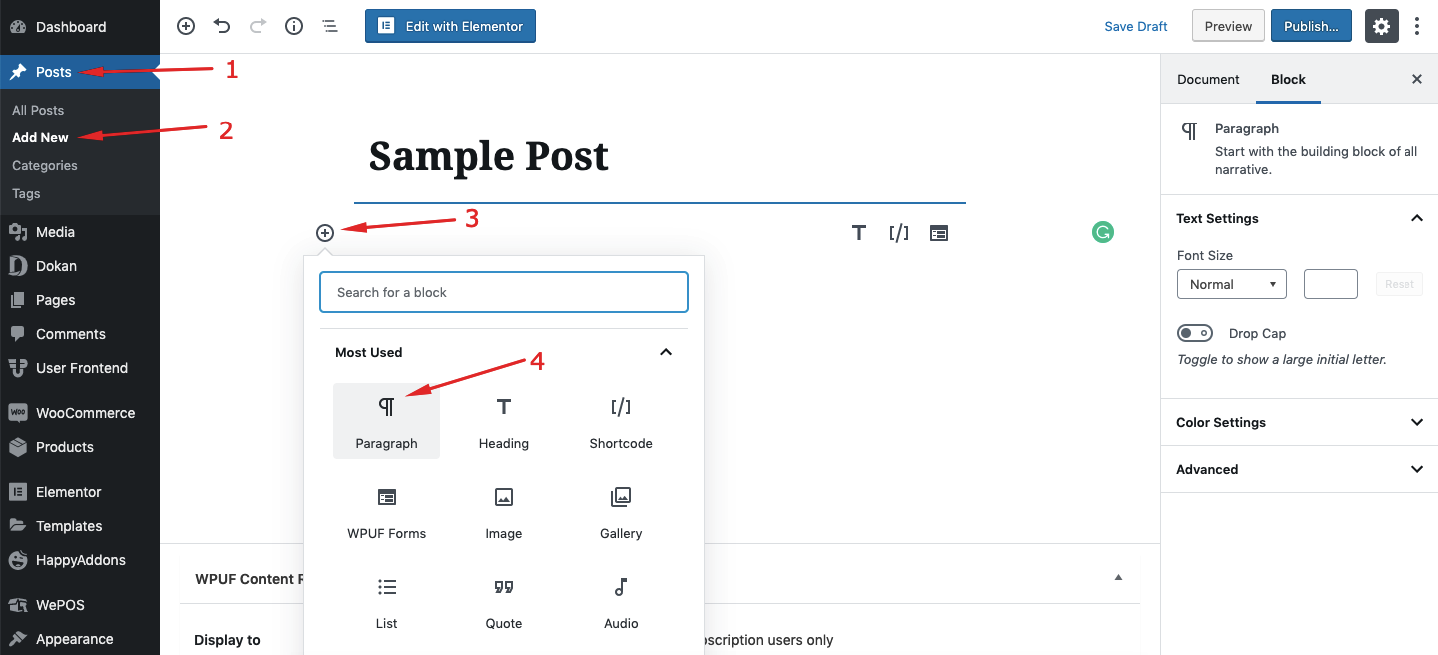
To create a reusable block, navigate to the WP Admin Dashboard > Posts or Pages > Add New.
In this example, we will create a reusable paragraph block. So, select the paragraph block:
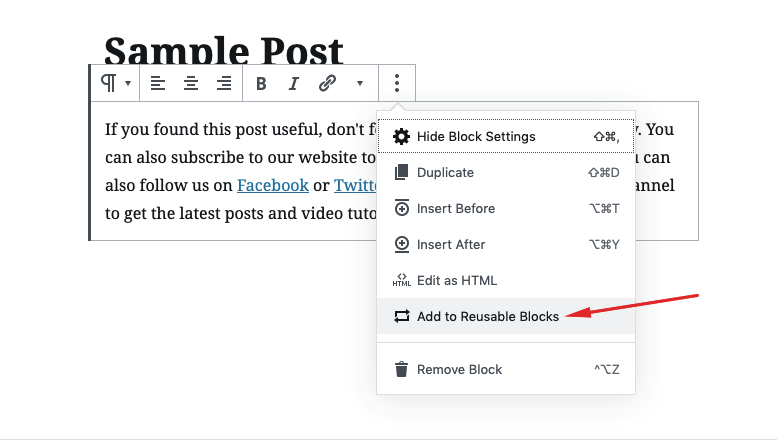
Now, you can add your content. You can also use the block editing options to style your block. When writing or adding contents, you can click on the three vertically aligned dots to get more options:
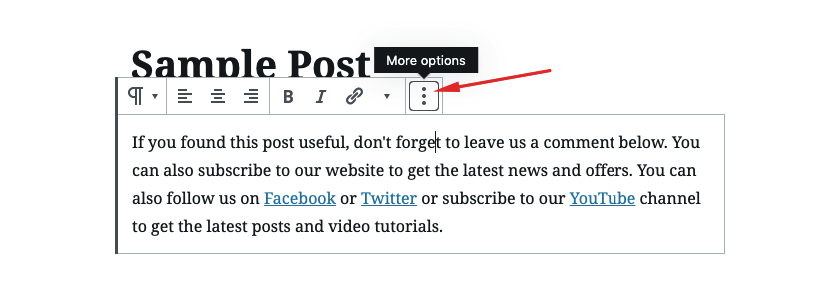
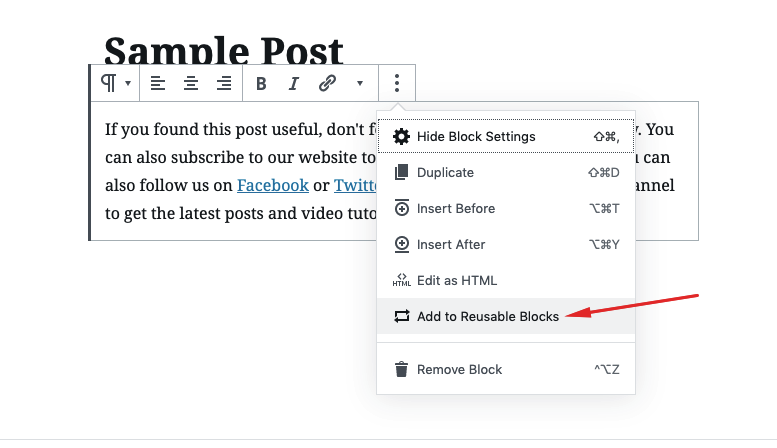
After that, click on the “Add to Reusable Blocks”:
Now, give a name to the reusable block. Next up, hit the ‘Save’ button:
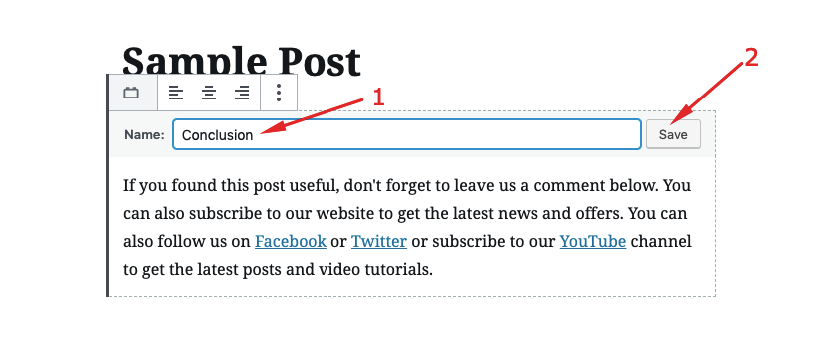
Bingo! You have successfully made it!
That’s how you can create reusable blocks in the WordPress Gutenberg block editor.
How to Reuse the Block You Have Created Just Now?
Now that you have created a reusable block let’s use the block on another post or page.
Navigate to the WP Admin Dashboard > Pages or Posts > Add New.
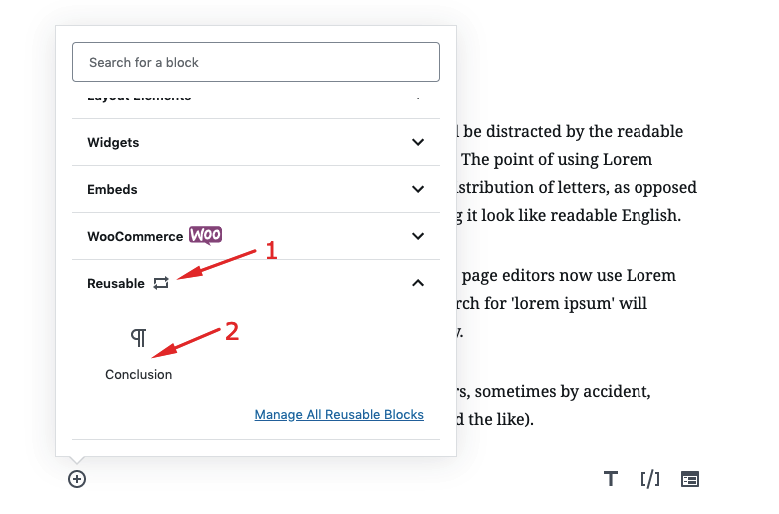
If you want to reuse the block that you created just now, then take a paragraph block > click on the reusable block.
Now, select the block (in this case, ‘paragraph’) you created.
Now, select the “Convert to Regular Block”.
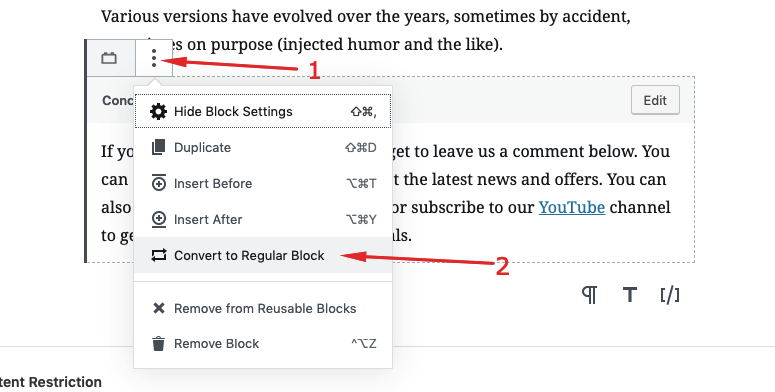
Now, you will get all the regular options to edit the block.

Exporting, Importing, Editing or Deleting All WordPress Reusable Blocks in Gutenberg Editor
With time, you will be creating a host of reusable blocks. And, you won’t use some of the blocks or you may also want to rename them.
To edit, delete or export a reusable block, click on the “Manage all Reusable Block” option:
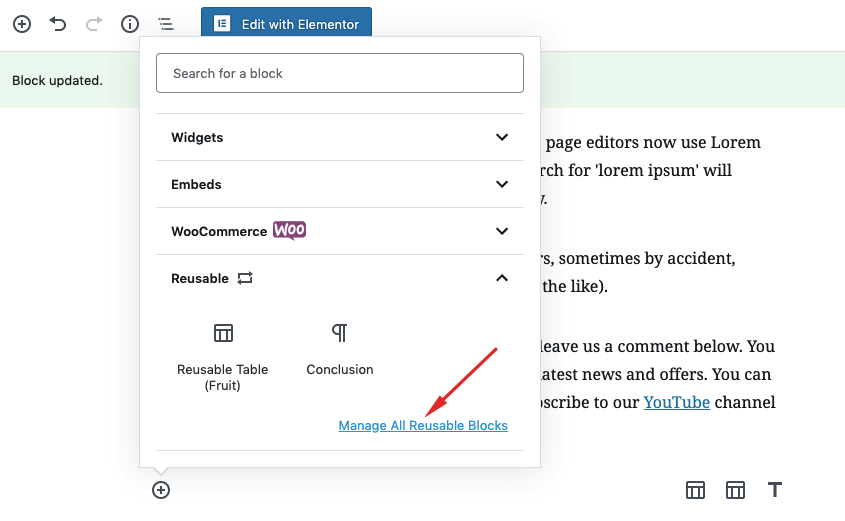
After that, hover on the block that you want to edit or delete or trash.

When you click on the Edit button, you will find the block on an editor to edit it:

You can also import any block using the “Import from Json” option:
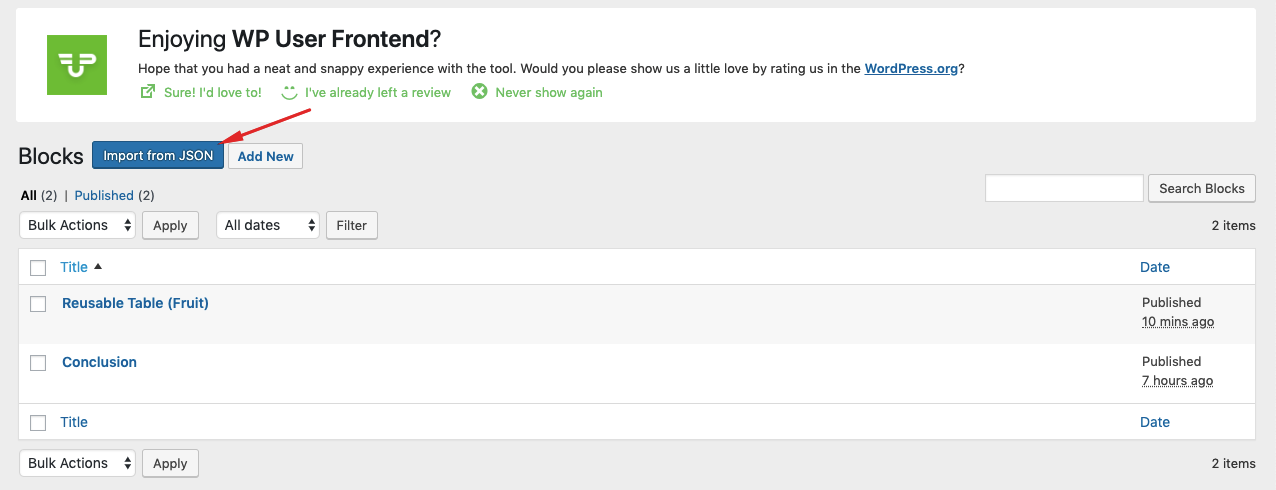
It will show a “File Upload” option so that you can export blocks on Gutenberg Editor. Find an already imported JSON file containing reusable block(s) and select it to start importing. That’s it!
That’s how you can manage all your reusable blocks in WordPress Gutenberg Editor.
Looking Forward To
If you are a web writer and are on the thought to save your time and effort, then we hope that this article will be helpful for you.
If you have found this article helpful, then don’t forget to subscribe to our website to get the latest updates, news, offers, and tutorials on WordPress.

