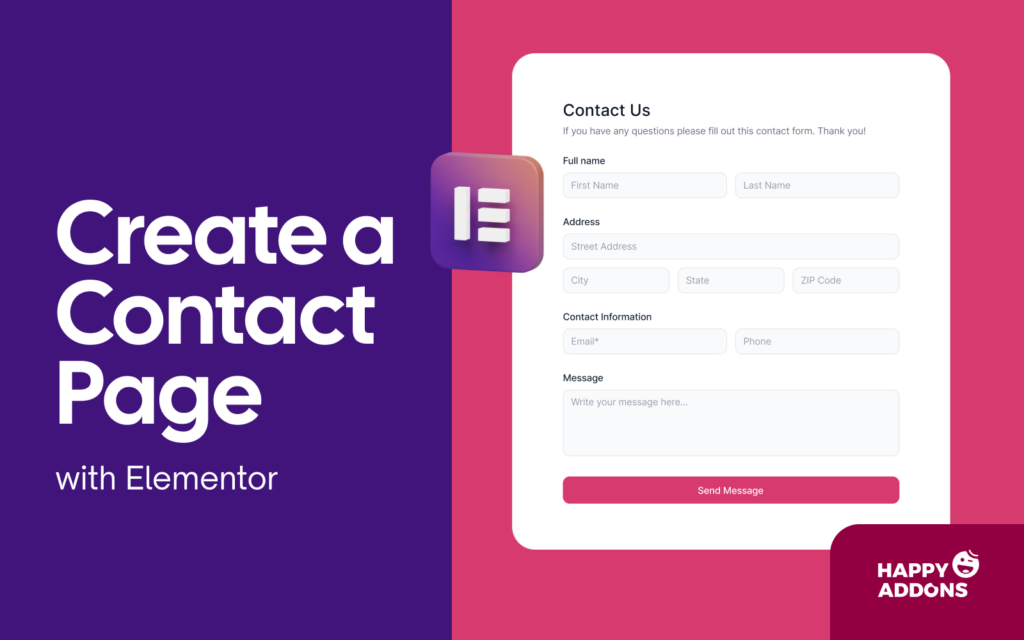

Building a contact page is one of the most crucial parts of your website. It provides a simple way for people to reach you without any trouble. When visitors see a clear way to talk to you, they feel much better about your brand. It helps you turn new visitors into loyal customers very easily today.
In this guide, we will show you how to create a contact page with Elementor step by step. No coding needed. You can do it simply by dragging and dropping various elements using the Elementor free plugin and addons. Let’s get started right away.
Why Your Website Needs a Contact Page
A contact page is a vital part of your website. It gives visitors an easy way to get in touch with you. When people can reach you without confusion, they feel more confident about your brand. This simple step can help turn visitors into loyal customers.
Having a special space for questions ensures that you do not miss out on new business deals. It also keeps your inbox clean by sending clear notes to the right place. This improves your professional look and shows that you truly value every person who visits your site now.
Prerequisites to Create a Contact Page on WordPress
Before you create a contact page on WordPress, you need a few basic things ready. These simple requirements will make the process smooth and fast. If you prepare them first, you can build your contact page without confusion or technical problems later. They are:
Let’s have a short overview of them in the discussion below.
1. Elementor Free
Elementor is a popular drag-and-drop page builder for WordPress. It helps you design pages visually without coding. You can create sections and layouts for your contact page using various free widgets and features of the plugin, which is extremely beginner-friendly.
 1")
2. HappyAddons Free
HappyAddons is a popular addon for Elementor. It adds many extra widgets and features to improve your page. The plugin integrates and offers widgets for numerous contact form plugins, like Contact Form 7, Ninja Forms, weForms, Caldera Forms, WPForms, Gravity Forms, and more.
 2")
3. Contact Form 7
Contact Form 7 is a popular and free form plugin for WordPress. It allows you to create the actual input fields where your visitors will type their notes. It is a very reliable tool that ensures all your incoming messages reach your email inbox safely today.
 3")
Note: Though there are many contact form plugins, we’ll use Contact Form 7 in this post to explain the tutorial.
How to Create a Contact Page with Elementor: Step-by-Step
Creating a professional contact page is a very easy process once you have all the right tools installed. You just need to follow a few simple steps to get your new page live and running. This process will help you design a great layout that looks good on every device now.
Step 01: Open the Elementor Page Editor
To start, you need to navigate to the Pages section of your WordPress dashboard. From there, click on the Add New button to create a fresh page for your contact information. This step is necessary to define where your content will actually live on your website today.
 4")
Once you have given your page a clear and professional title, you will see a large blue button. Click on the Edit with Elementor button to launch the visual builder on your screen. This will load the design interface so you can begin to add your unique style now.
After the editor finishes loading, you will see a sidebar full of widgets on the left side. The main area on the right is your blank canvas where you will place your contact form. This clean workspace makes it very easy for you to focus on your modern design today.
 5")
You can now explore the different settings available within the Elementor interface safely. It allows you to drag elements directly onto the page without any technical knowledge. Getting comfortable with this layout is the first step to building a great contact page now.
Step 2 – Set Up the Page Name and Layout
Before adding any widgets, you must configure the basic settings for your page. Click on the gear icon at the bottom left to access the page settings panel today. This allows you to set the page title and the layout style that fits your website theme best now.
You should choose the Elementor Full Width layout for a clean and modern design style.
 6")
This option removes the default sidebars and gives you more space for your content. It ensures that your contact form remains the main focus for every person visiting you now.
Setting a clear page name like Contact Us helps with search engine optimization results. It makes it very easy for your visitors to find the right page on your website today. A simple and direct name is always better for user experience and site navigation now.
Once you have set the layout to full width, your canvas will expand to fill the screen.
 7")
This creates a professional look that is consistent with the rest of your website today. It is the perfect foundation for placing your contact widgets and other page elements now.
Step 3 – Adding the Contact Form Widget and Design
To create a clean and effective contact page, start by selecting the Layout option and choosing a vertical container.
 8")
This will give you a structured section where you can organize the content neatly.
Next, add a Heading widget followed by a Text Editor widget.
 9")
The heading can introduce the contact section, while the text editor can include a short message encouraging visitors to get in touch.
Do not forget to make the content alignment in middle. It will make it visually nice.
 10")
After that, chose 3 grid from the layout box.
 11")
Then drag in an Info Box widget into all 3.
 12")
This is where you can display your essential contact details such as your address, email, and phone number in a clear and organized way.
 13")
Once the basic information is in place, add a two-column grid container. In the left column, place an image along with some supporting text to make the section visually appealing.
 14")
In the right column, add the Contact Form 7 widget so visitors can easily send you a message directly from the page.
 15")
Once you drop the widget, you will see a drop-down menu in the left panel settings. Choose the specific contact form you created earlier from this list to display it now.
 16")
You can then customize the look and feel of the form to match your brand colors. Change the button style and the spacing between fields to make it look professional now. This visual control helps you create a high quality page for your website users today.
 17")
Step 4 – Check if the Contact Form Works
After you publish your new page, you must verify that the form is working. Open your site in a new tab and navigate to the contact page to see it now.
 18")
This step is vital to ensure that your visitors can actually reach out to your business with ease today.
Fill out all the form fields with test information to see how it looks. Enter a valid name and email address before clicking the submit button on your site now. This test mimics a real user experience and helps you find any possible errors with your form today.
Now you should log in to your WordPress dashboard to check the backend list. For that you might need a data store plugin. Most popular one is Flamingo. Now Look for the email submissions section to see if your test note arrived safe now.
 19")
This confirms that the plugin is storing your data and sending the right mail to you today.
If you see your test email in the list, then your contact form is working fine. You can rest easy knowing that you will not miss any messages from your users now. This simple check gives you peace of mind that your site is fully functional for all today.
Step 5 – Add the Contact Page to Your Navigation Menu
To make your contact page easy to find, you must add it to your main menu. Go to the Menus section under the Appearance tab in your WordPress dashboard now.
 20")
This step is vital to ensure that every visitor can access your new page with a single click today.
Select the Contact page from the list of all your available pages on the left. Click the Add to Menu button to move it into your current menu structure now.
 21")
This allows you to place the link exactly where you want it for your site users today.
You can drag and drop the menu item to change its position in the list very easily. Most people look for a contact link at the end of the main navigation menu now. This logical placement helps your visitors find a way to reach you on your site today.
Once you are happy with the order, click the Save Menu button to update your site. Your new contact page will now appear in your header for everyone to see now.
 22")
This final step completes the setup process for a professional and accessible site today.
Bonus Tips to Make Your Contact Page Stand Out
You can make your contact page even better by adding some extra details for your visitors today. These small changes will help you build more trust with your audience and improve your site now. By making your page more useful, you can engage with your users much faster today.
Practical Ways to Improve Your Contact Page
Adding your business address and phone number helps build a lot of trust with your users today. It shows everyone that you are a real person with a physical location for your office now. This simple addition can make a huge difference in how professional your website looks now.
You should also add a live Google Map so people can find your office location without any trouble. This interactive local SEO implementation makes your contact page look more modern for all your visitors today. It provides a helpful visual guide for anyone who wants to visit you in person now.
 23")
Writing a short and friendly message above your form can make your visitors feel more welcome today. A simple greeting like We would love to hear from you works very well for most sites now. It sets a positive mood for the entire conversation with your potential customers now.
Finally, you must ensure that your contact page looks perfect on every screen size for your users. A responsive design is vital for providing a good experience on mobile phones and tablets today. This final check ensures that your form is very easy to use for every person now.
Conclusion
Now that your page is ready, you can start receiving messages from your users directly in your email inbox. This setup ensures that you stay organized and professional while managing your customer requests. It is a great step forward for your WordPress website success now.
If you want to take your website to the next level, start using HappyAddons with Elementor today. It offers many unique features that help you build stunning pages in a very short time. Download the plugin now and start creating a better experience for all your users today!