What comes to your mind when you think about a popup? Annoying, isn’t it? No, you will have to think differently from now on as a web professional. Because the concept of popup has changed significantly in recent years.
Using popups is now an important way to increase conversion rates. According to the recent statistics of OptiMonk, the average conversion rate for popups is over 11.1%.
Then, how to create a popup on WordPress and how to apply it effectively? And can it be done for free? Don’t worry. We have got you covered.
In this article, we will show you two methods of creating popups on your WordPress websites.
Method 1: Creating a Popup on a General WordPress Site for Free
Method 2: Adding a Popup on an Elementor-based WordPress Site
We will also let you know the difference between conventional and modal popups, the benefits of using popups, and their best practices.
Let’s get started:
Conventional vs Modal: Which Popup to Choose
Popups have different types and use cases. Generally, a popup is a graphical user interface (GUI), usually displayed in a small window, that suddenly appears (pops up) in the foreground of a website or app.
People have been using popups that open beyond the current window for years. This conventional method of using popups is not effective. Because, these types of popups, in most cases, miss users’ attention, and they are actually annoying.
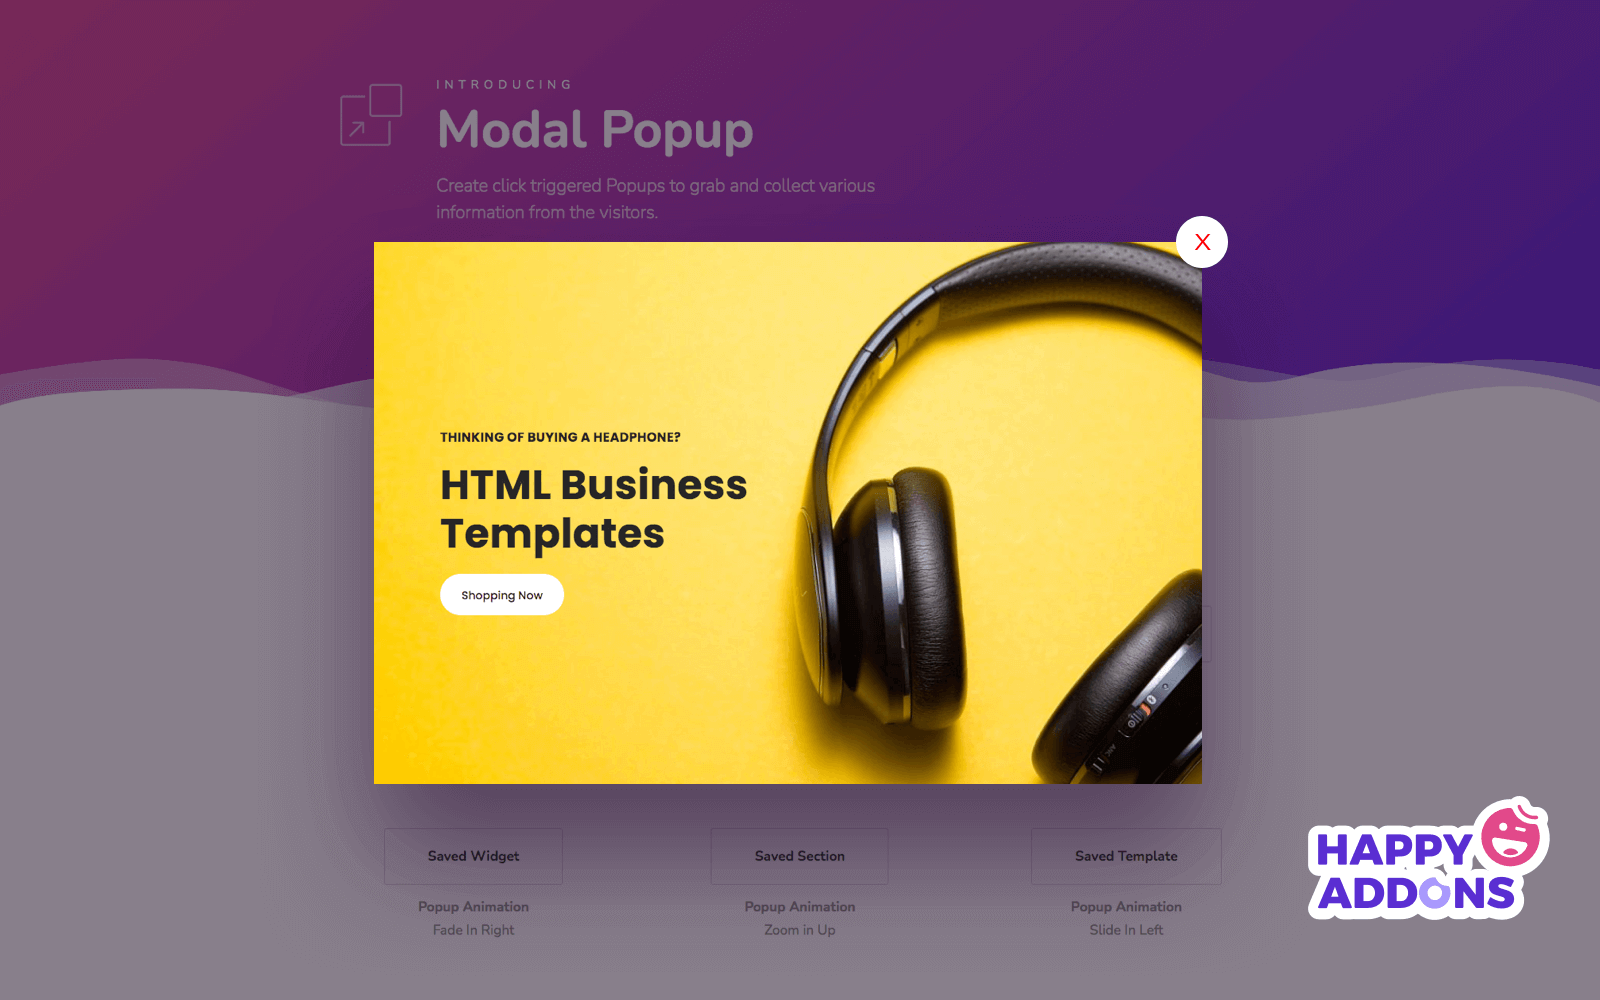
On the other hand, modal popups (also known as modal windows) are the modern form of popups that open inside the current page or window. Modal popups are much more effective as they do not miss users’ eyes, and the chance of getting interaction is obviously high here.
Perhaps, you have got which one is to go for – the modal popups of course.
Benefits of Using Modern Popups
Popups can benefit you in many ways – from informing the users to increasing the conversion rates – if you use the modern ones (like the modal popups) and apply them smartly.
Now, we will let you know the benefits of using modern popups briefly in the following points:
- Grab users’ attention 50% faster than banner ads – (Campaign Monitor)
- Provide a useful way to show important messages or notification
- Increase user interaction, like click-through rate and conversion rate
- Let you show ads or promotions that users cannot avoid
- Help you increase sales, subscribes, web traffic, and session duration
- Let you receive feedback from the users and collect their data
- Drive excellent return on investment (ROI) rates as they are cost-efficient
We hope you have realized the benefits and importance of using popups. We will talk about the popup best practices after showing how can you create them by yourself.
How to Create a Popup on WordPress
You can create a popup on WordPress sites in various ways for free. The easiest ways are associated with plugin installation. We are going to show you two methods in particular. They are:
- Creating a Popup on a General WordPress Site for Free
- Adding a Popup on an Elementor-based WordPress Site
Before getting started, you have to make sure that you have administrative access to the site where the popup will be created. You will also need to prepare the content of the popup.
Now, we will discuss all the processes in detail with the necessary visuals. So, stay with us.
Method 1: Creating a Popup on a General WordPress Site for Free
You can create beautiful and useful popups on your WordPress sites for free with the help of a plugin. You will find several free plugins to get your job done. We have prepared a shortlist of the top plugins below to help you make a quick decision. Let’s check it out:
Each of the plugins is good, and they excel in different use cases. We are going to demonstrate this method using “Popup Maker” as it is versatile, easy to use, and very popular.
Install the Plugin: first, you have to install the “Popup Maker” plugin on your WordPress site. Most probably, you know how to install a plugin. No problem if you don’t. Just read this article and follow the instructions: How to Install a WordPress Plugin.
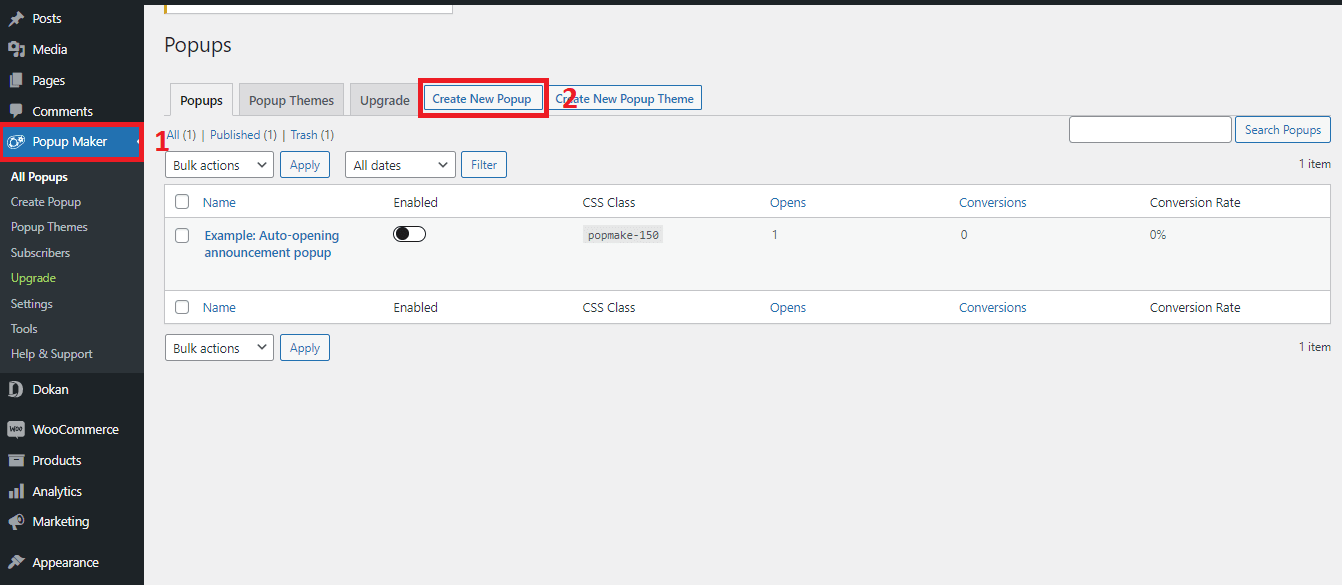
Create the Popup: After installing and activating the plugin, you will have to create, set up, and design the popup from the plugin’s menu. It’s as simple as creating a post on WordPress. Just follow the steps below:
- Go to the “Popup Maker” menu from your dashboard
- Click the “Create New Popup” button
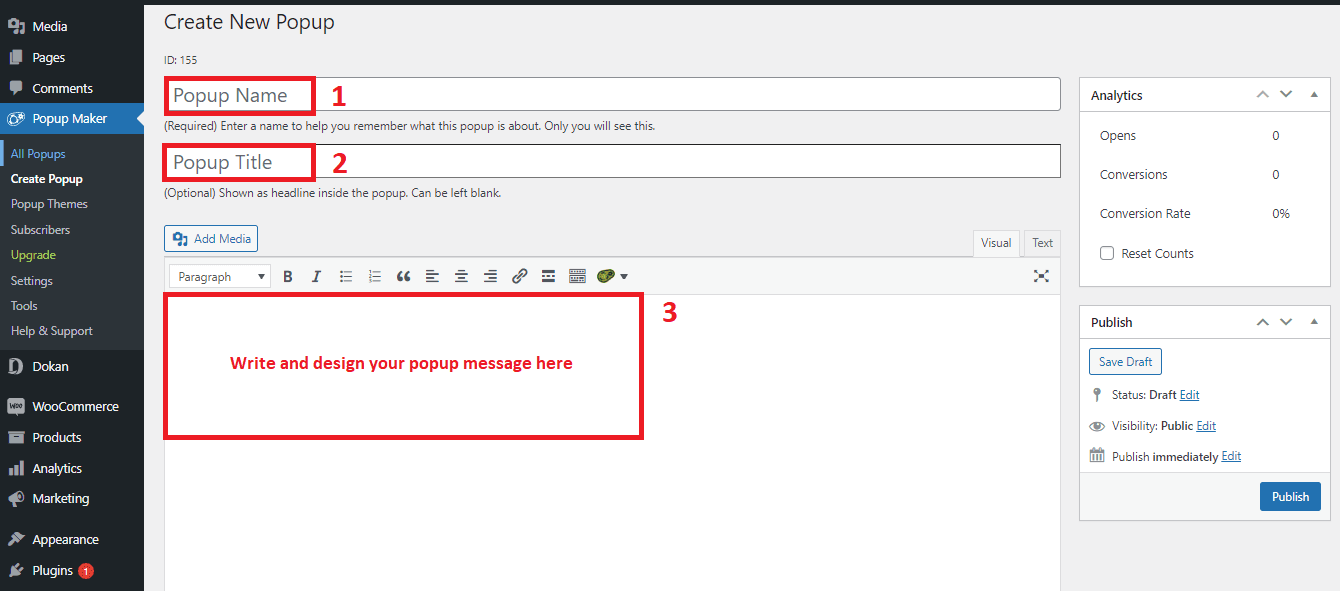
Give Input to the Popup: Now, your popup editing panel will open (it will look like the image below). Here, you will set up and design your popup by giving different inputs. Follow these steps:
- Give a Popup Name (it’s just an ID which won’t be visible)
- Write the Popup Title (it’s the header part of your popup)
- Write and design the message you want to show in the popup
Explore the Popup Settings: You are almost done. All you have to do now is to finish some basic settings of the popup and then press the “Publish” button. The following settings are currently available to this plugin:
- Triggers (set conditions why and when the popups will open)
- Targeting (lets you target a specific group of users)
- Display (defines the appearance of the popups)
- Close (creates condition how and when the popups will close)
- Advanced (a few advanced settings for expert users)
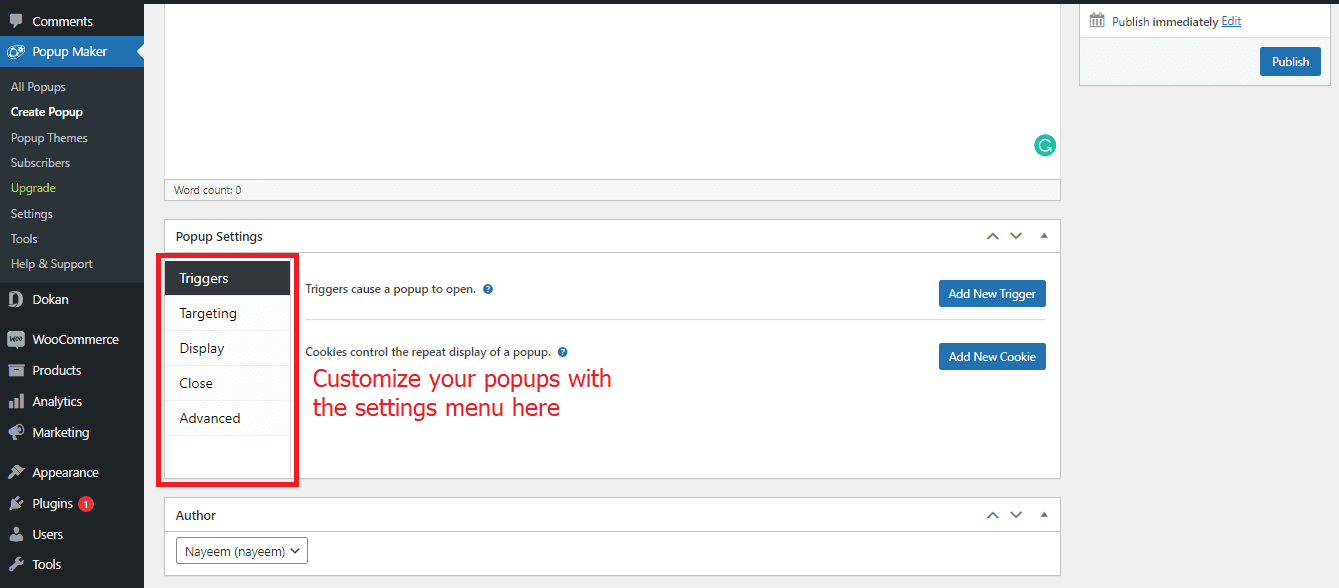
Primarily, you won’t need to bother about all the settings options. It will be enough if you set a trigger and do some tweaking in the “Display” menu. Working with the “Close” menu is optional.
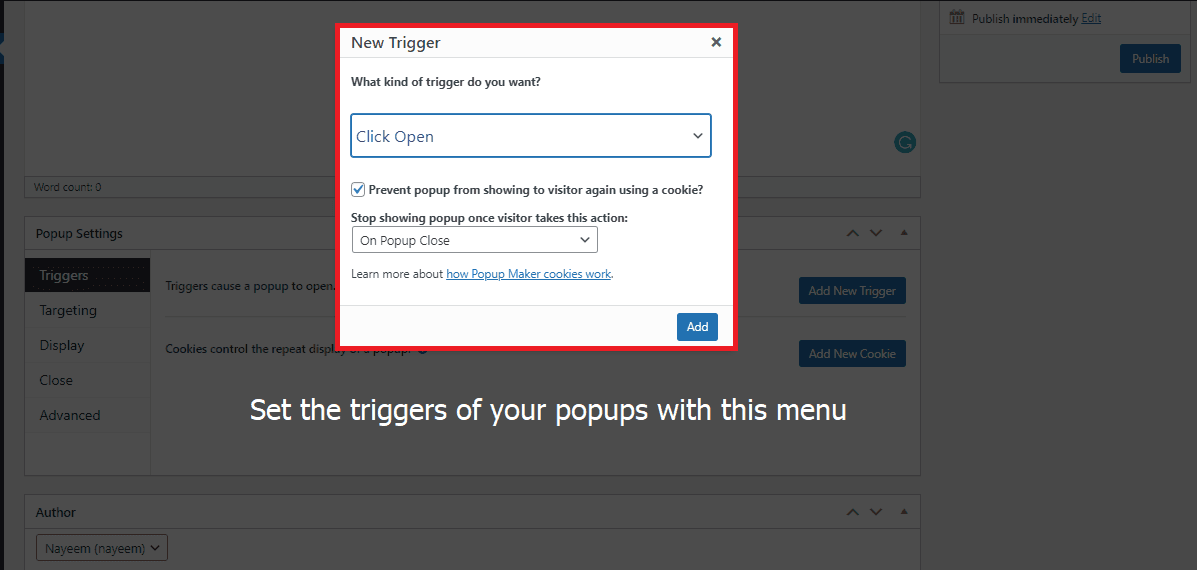
Set the Triggers: Setting triggers is very important. Because your popups will not open unless you add triggers to them. Follow the steps below to add the triggers:
- Go to the “Triggers” settings menu
- Click the “Add New Trigger” button, then a little panel will open (like the image below)
- Here, you will have to give the conditions to open the popups
Play with Display Settings: In this part, you will be able to tweak the display options of your popup – including size, animation, and cunds. Just follow these steps:
- Go to the “Display” settings menu, several tabs will opne on the right side
- Click your preferred tabs where you want to make the changes
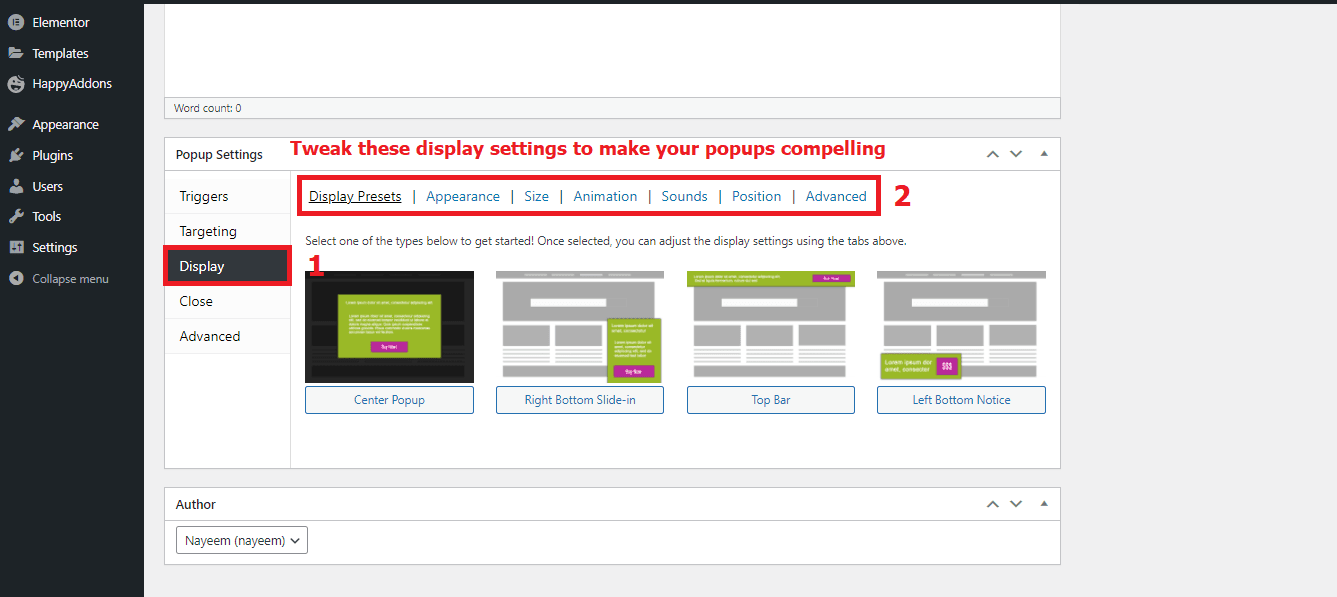
You are all done. Now, press the “Publish” button we cited earlier. We have created a popup (the image below) by following these steps. You will also be able to create something like this, even better if you try.
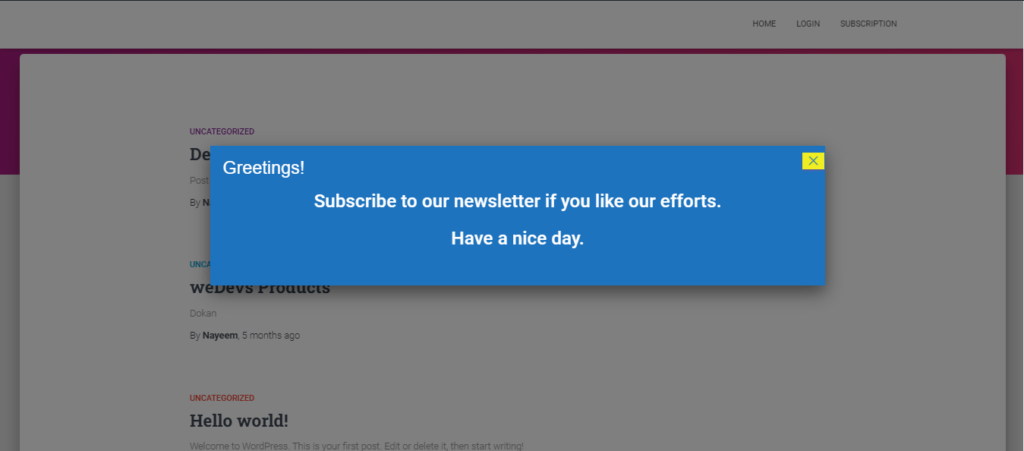
To see your popup in action, you have to open your site from the front-end after publishing it. You are able to edit or modify your popups from the backend any time you want.
Method 2: Adding a Popup on an Elementor-based WordPress Site
If your WordPress site is built on Elementor, you will be able to create some beautiful and intuitive popups with the help of the HappyAddons plugin – an effective Elementor addon. It has a useful widget called “Modal Popup” which will make your job done very easily.
Install HappyAddons: Since your site is based on Elementor, you obviously have the Elementor plugin installed on your website. Now, you need to install the Happy Addons plugin and its Pro version.
Add the Modal Popup: After installing the plugin, you can add a modal popup to an existing or a new page with the Elementor.
Read this tutorial if you don’t know How To Use Elementor.
Now, we will show you how you can add a modal popup to your website. Follow these steps:
- Search and find the “Modal Popup” widget from the Elementro editor
- Just drag and drop “Modal Popup”, and you are done!
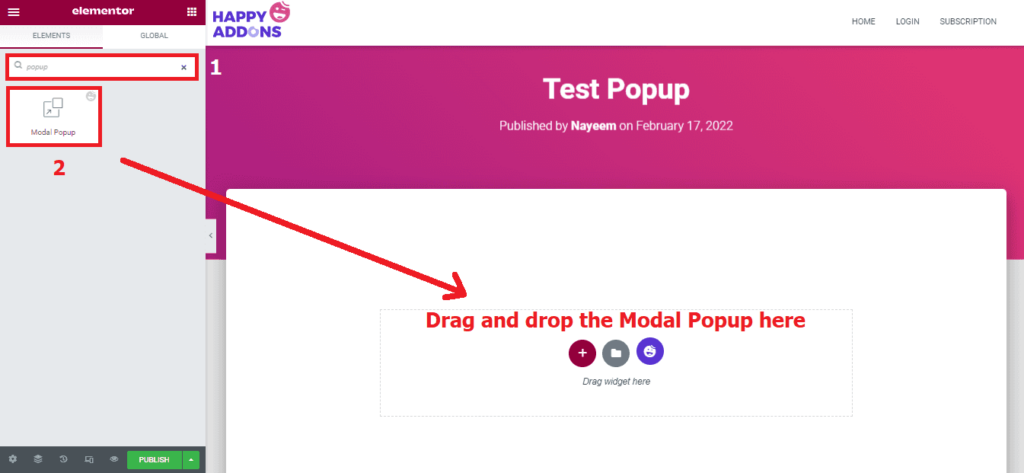
Customize the Popup: You have already created a popup on your Elementor-based WordPress site. Now, it’s time to customize it. Just follow the steps below:
- Click on the popup you just created
- Now, several customization options will open on the editor panel
- Customize your popup the way you want with these options
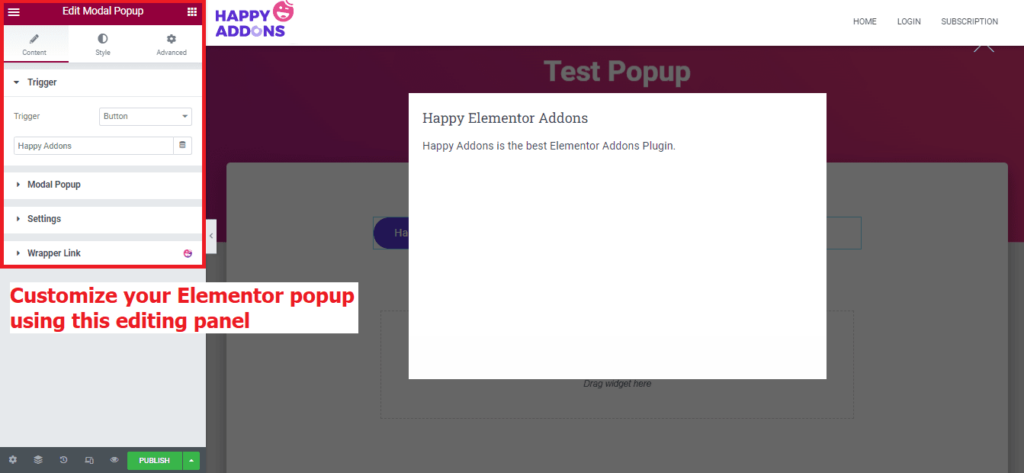
By following these steps, we have added a modal popup to our Elementor site like the screenshot below. Let’s check it out.
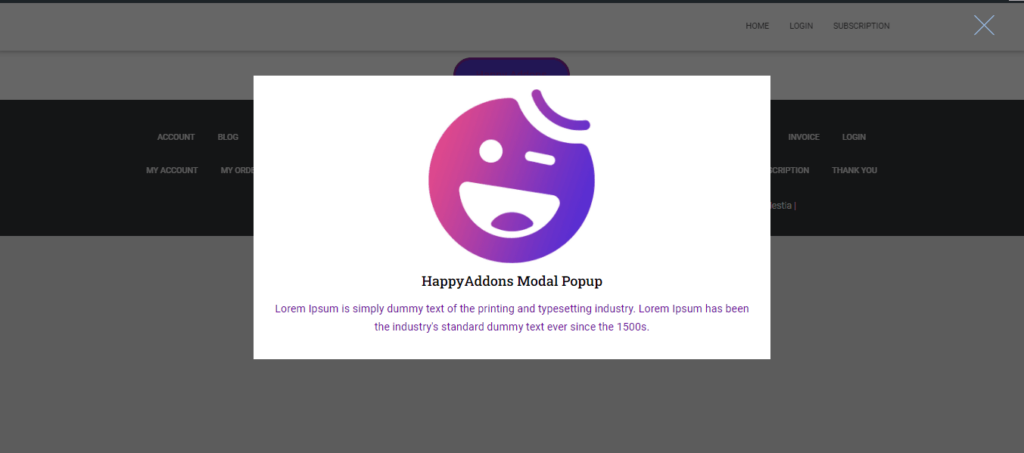
The process of seeing your popup is the same. Just open your site from the front-end after publishing it. Yes, you can edit or modify the Elementor popups any time you want from the backend.
You can also check the documentation of the Happy Addons’ Modal Popup widget.
Relevant Article to Read: How To Add Modal Popup In Elementor
Popup Best Practices: What to Do for the Best Outcome
If you want to get the best out of a popup, you have to use it smartly and carefully as popups sometimes might ruin the user experience. The best practices you should follow for a popup are:
- Add popups only the places where it is necessary
- Use the popus that are relavant to your page
- Make sure the popups are compelling and useful
- Use them at the right time and right place
- Choose the right format and design
- Determine what do you want from the popup
- Target different users with different types of popups
- A/B test before finalizing any popup
- Make sure the users don’t have to spend much time interacting with
These are very necessary and mandatory practices you should follow. There are some other things you need to maintain. We will recommend you do some research before executing your popups.
Now It’s Your Turn
Just remember, popups are getting useful day by day. But you have to be smart and innovative to get the best out of it. Otherwise, your popups may end up being annoying like the people who care less about them.
In this blog, we have shown you the methods for both general and Elementor-based WordPress sites. Now, it is your turn to apply these methods while creating your popup.
We hope you will be able to create some nice and effective popups with the help of our comprehensive tutorial. Please feel free to let us know in the comment section if you face any problems in the process.
Also Read: Build A Professional Website With Elementor & Happy Addons

