Elementor is a leading page builder plugin for WordPress that has made web design easier than ever before. One of its standout features is the Background Overlay option. By properly utilizing the feature, you can take your website’s appeal and aesthetics to the next level.
Elementor provides you with multiple background overlay options. In this article, we will show you a step-by-step guide on each of these options. So, let’s get into the article on how to add background overlay in Elementor for web design.
What Is Elementor Background Overlay?
A background overlay is a semi-transparent layer that is added on top of an existing background image, pattern, or color. You can customize the overlay with different colors, opacities, gradients, and even patterns to create visually stunning effects.
The Background Overlay is a core feature of the Elementor plugin, which comes built-in. You can use it for both free and premium versions. This feature is particularly useful when using low-quality images or showcasing text on the top of any background.
Types of Elementor Background Overlay
There are basically three types of background overlay you can add in Elementor. They are:
1. Solid Color Overlay: It just adds a solid color overlay to a web section or element. You can customize this overlay by selecting a solid color and its opacity level.
2. Gradient Color Overlay: Gradient allows you to add multi-color overlay effects to the background of any web section or element. Hope you already know what gradient is. Or wait, we’ll discuss it later in this post.
3. Image Overlay: This feature lets you apply a solid color, texture, or pattern overlay on top of an image to enhance its appeal.
Special Notes About Elementor Background Overlay
The Background Overlay option in Elementor allows you to add overlays only to the widget background, not to the content background.
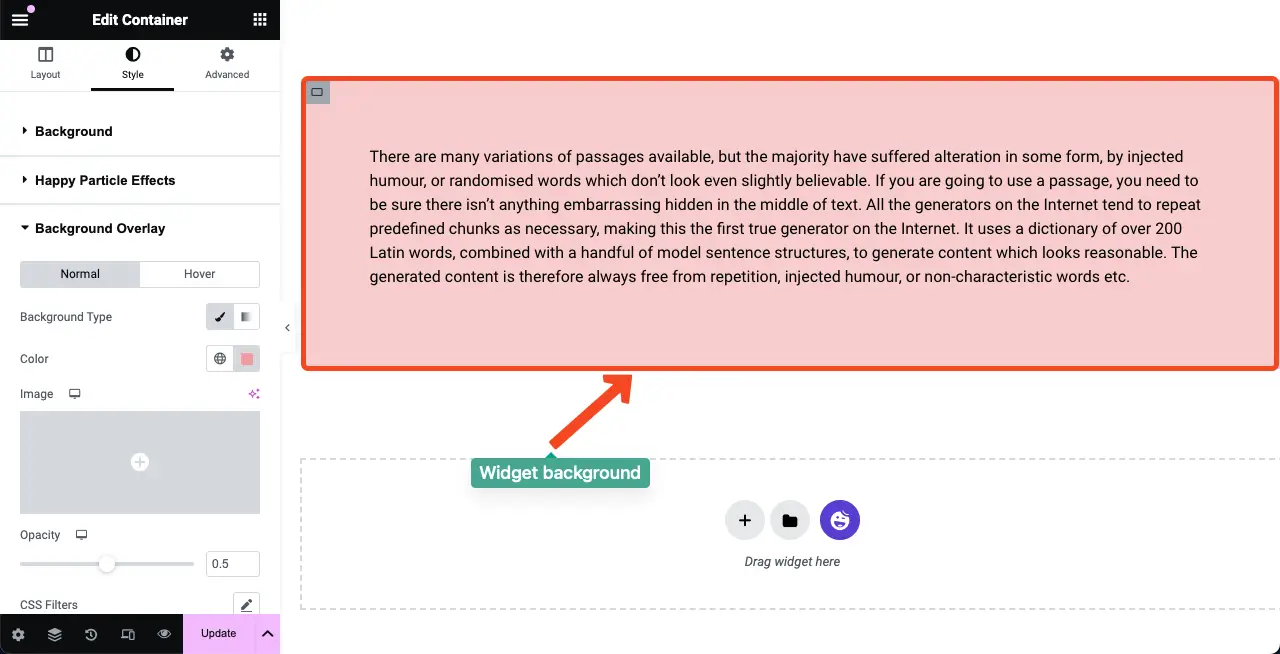
You need an additional plugin like HappyAddons to add the overlay effect directly to the content background.
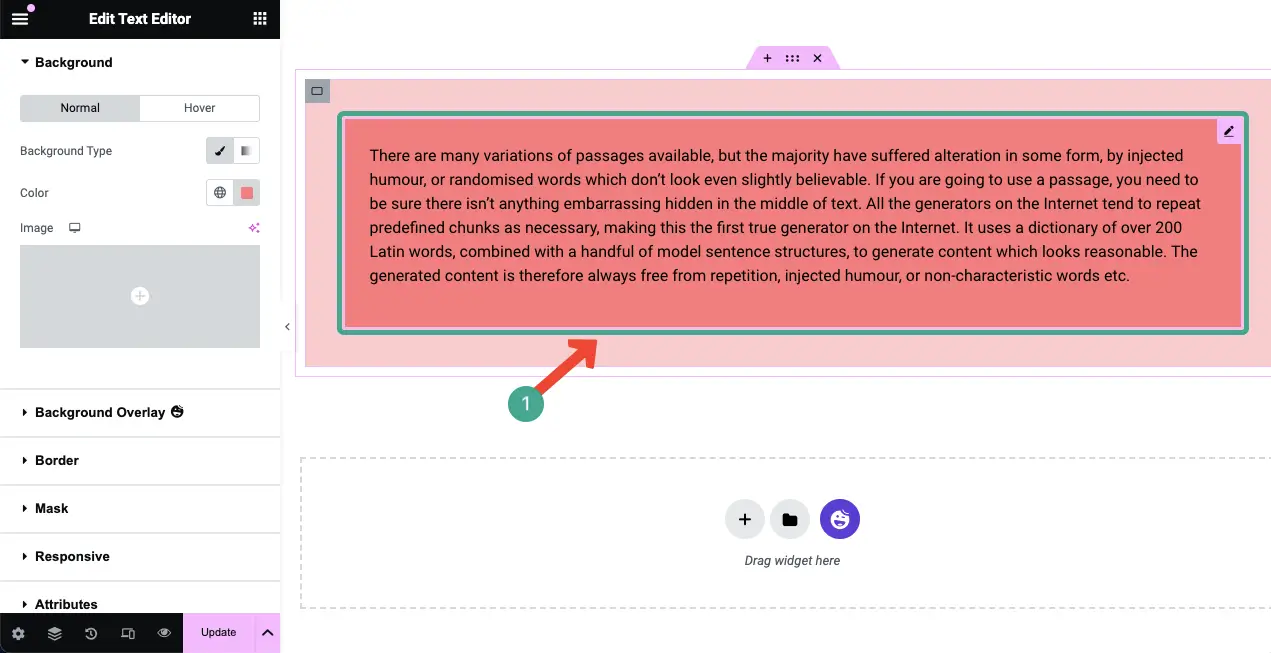
So, if you have both Elementor and HappyAddons on your site, you can use the suitable background overlay option wherever you need it. Let’s explore the methods.
Method One: How to Add Overlays to Widget Background in Elementor
As we already said, there are three types of background overlays you can add in Elementor. We’ll now show you how to add all these types of background overlay to Elementor widgets.
Type 01: Add a Solid Color Background Overlay to the Elementor Widget
Hope your section and content are ready. Click the Edit Container icon of the entire section.
Go to the Style tab. You will get two options: Background and Background Overlay. Using these two options, you can add background overlays to Elementor.
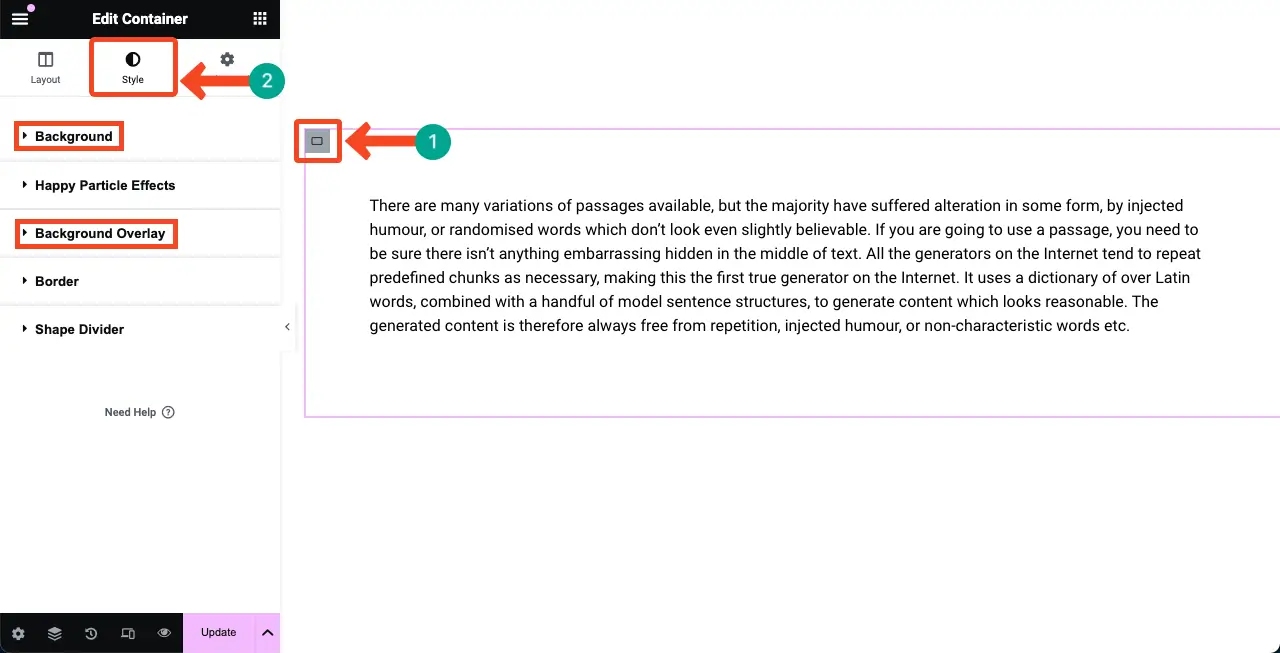
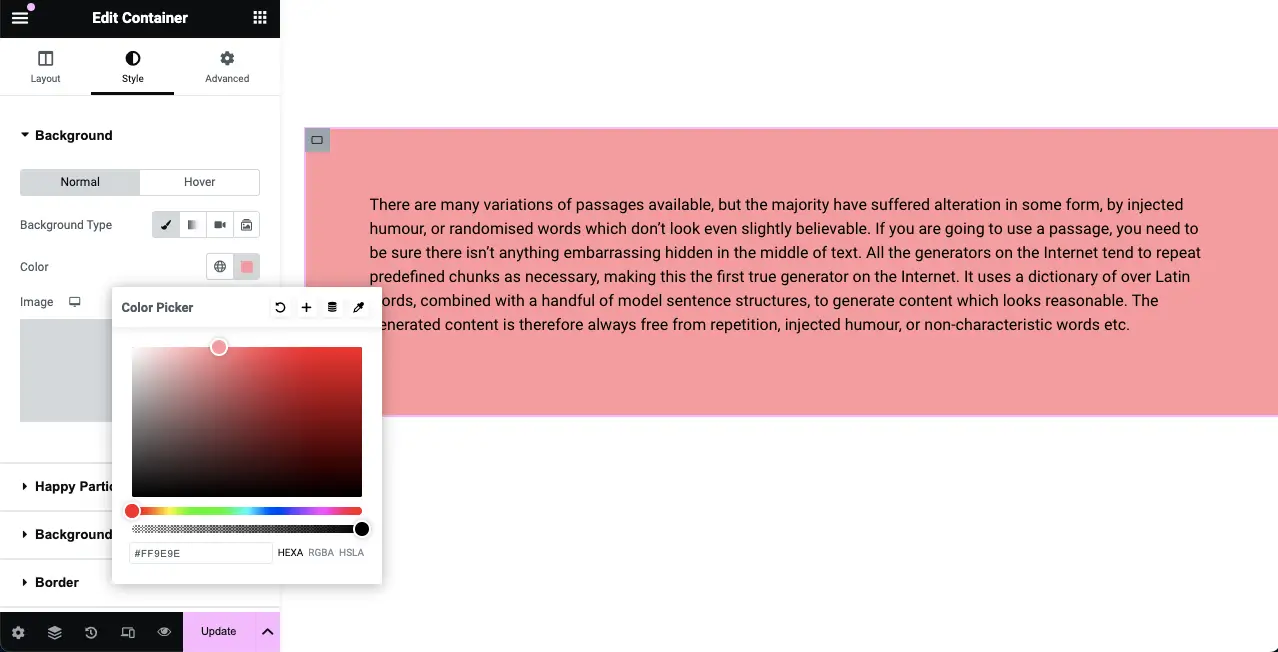
For example, open Background. Select the Brush icon. Below, you’ll get the Color option, by which you can add a solid color to the background.
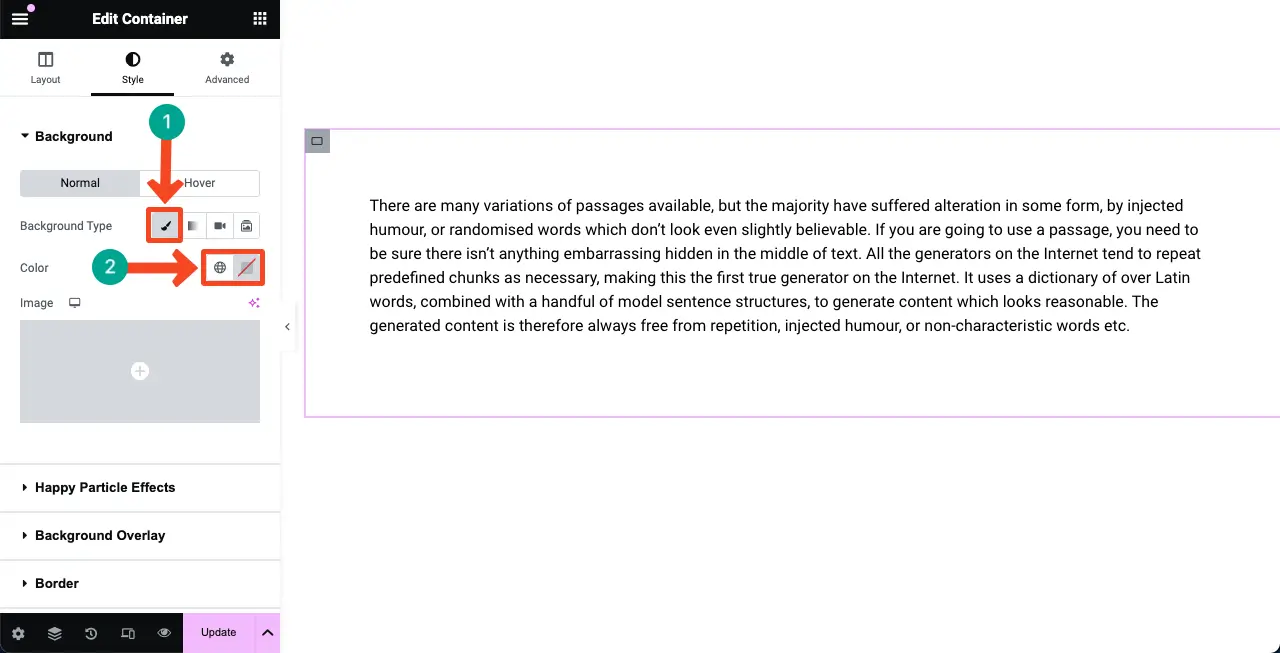
You can see that we have selected a color for the background overlay of the widget section.
Type 02: Add a Gradient Color Background Overlay to the Elementor Widget
Select the widget again. Go to the Style tab. Expand the Background option.
Select the Gradient option next to the Background Type. You’ll get options more color options appearing beneath it.
Now, select a primary and secondary color to create your gradient pallet. You’ll see the colors are displayed over your widget as a background overlay.
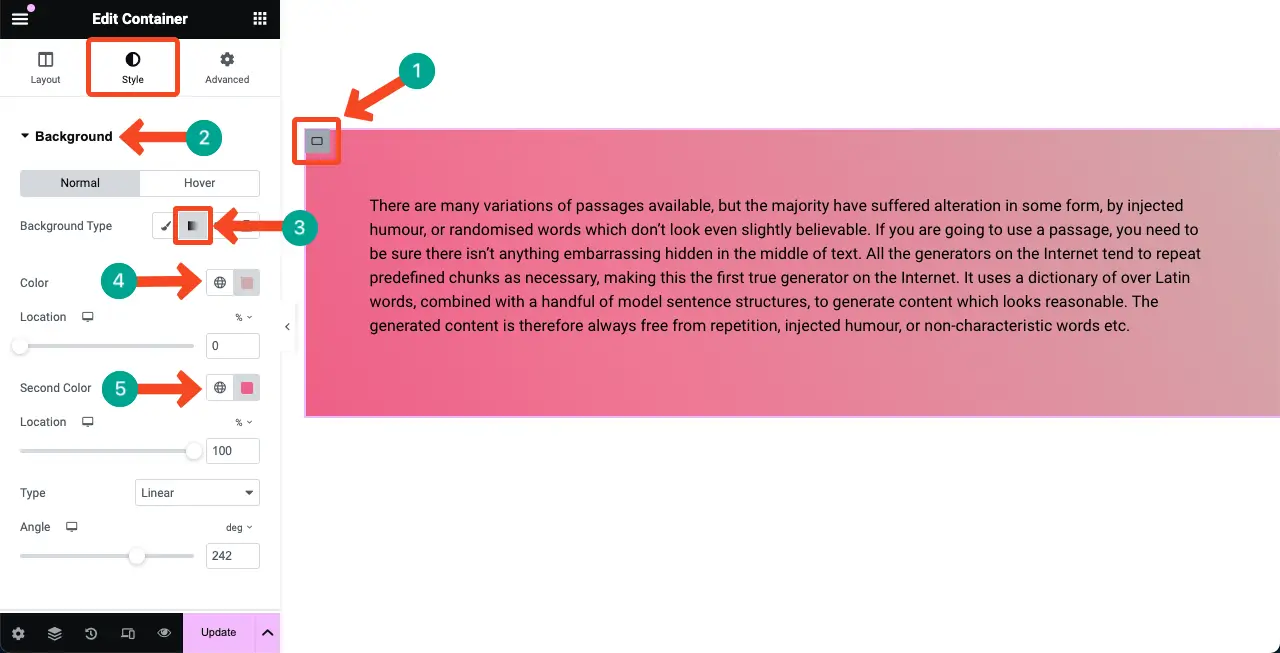
Thus, you can create gradient color background overlays for your widget background. There are many other options in Gradient. Hope you can explore and use them yourself.
Type 03: Add an Image Background Overlay to Elementor Widget
For image overlays, you can use images and a solid collar combined. By using a solid color combined with the image, you can create a perfect contrast so that the content above is better visible. Let’s see how to do this.
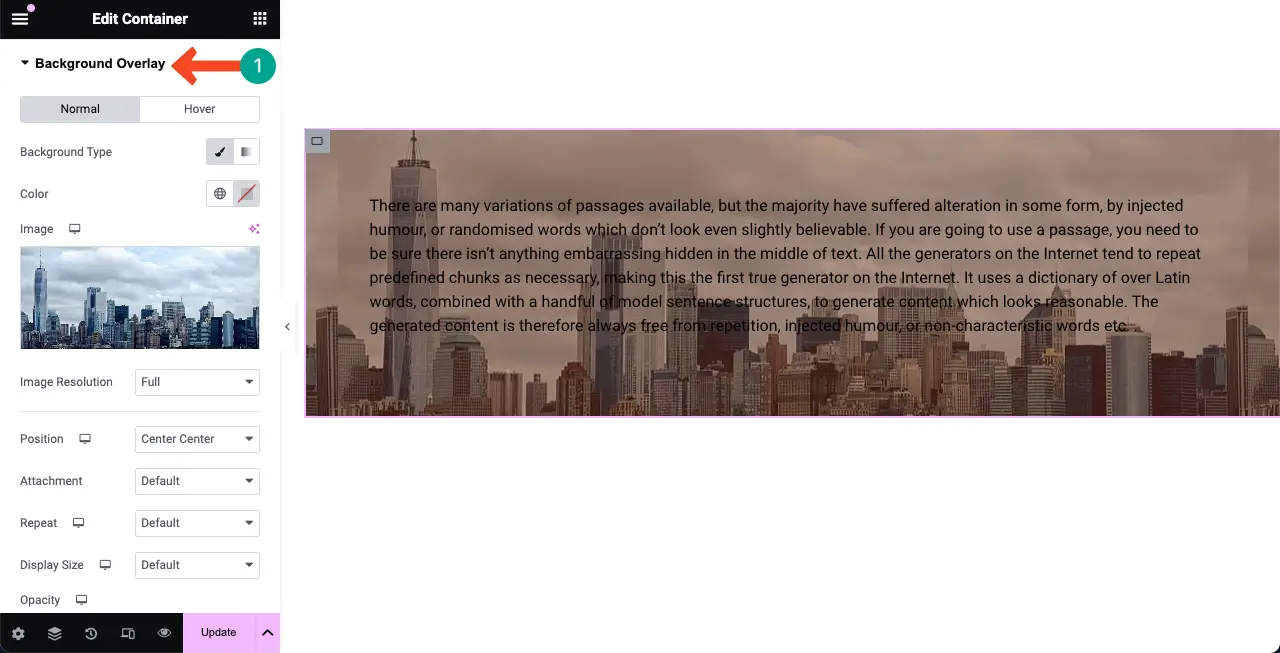
Go to the Style tab. Expand the Background Overlay option. Click the Image option. You’ll be allowed to select and add an image whether from the local drive or media library.
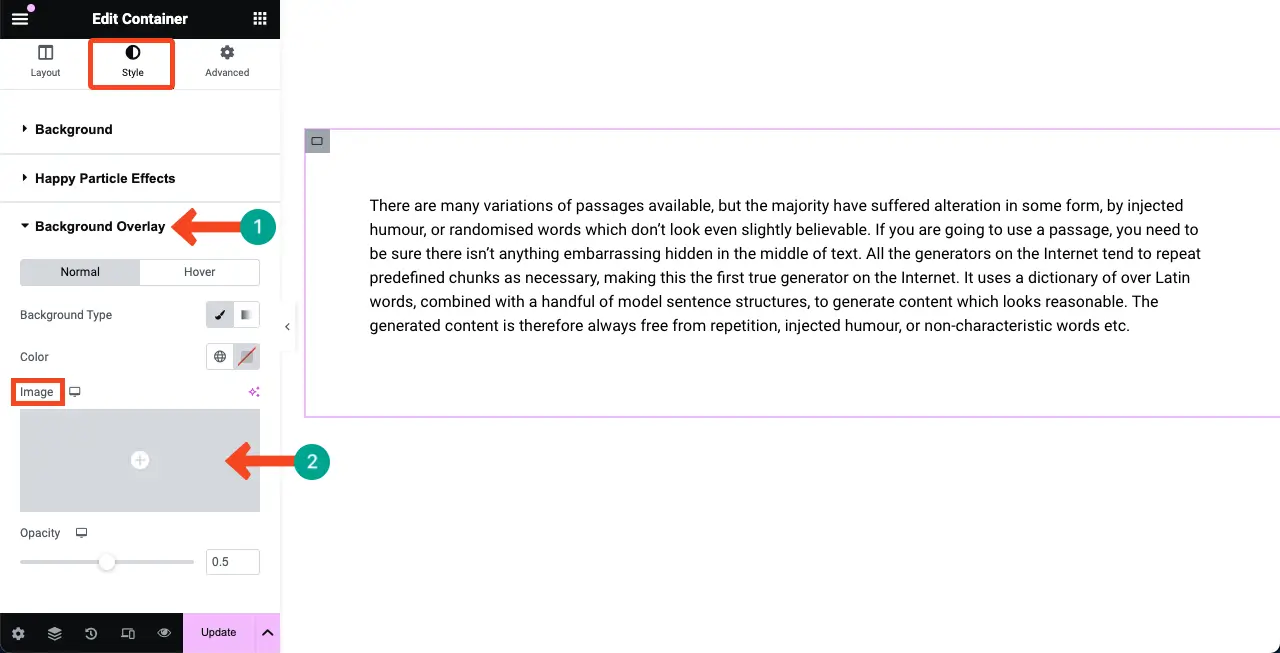
You can see we have added an image to the Background Overlay. Next, select a suitable position so it perfectly fits with the content.
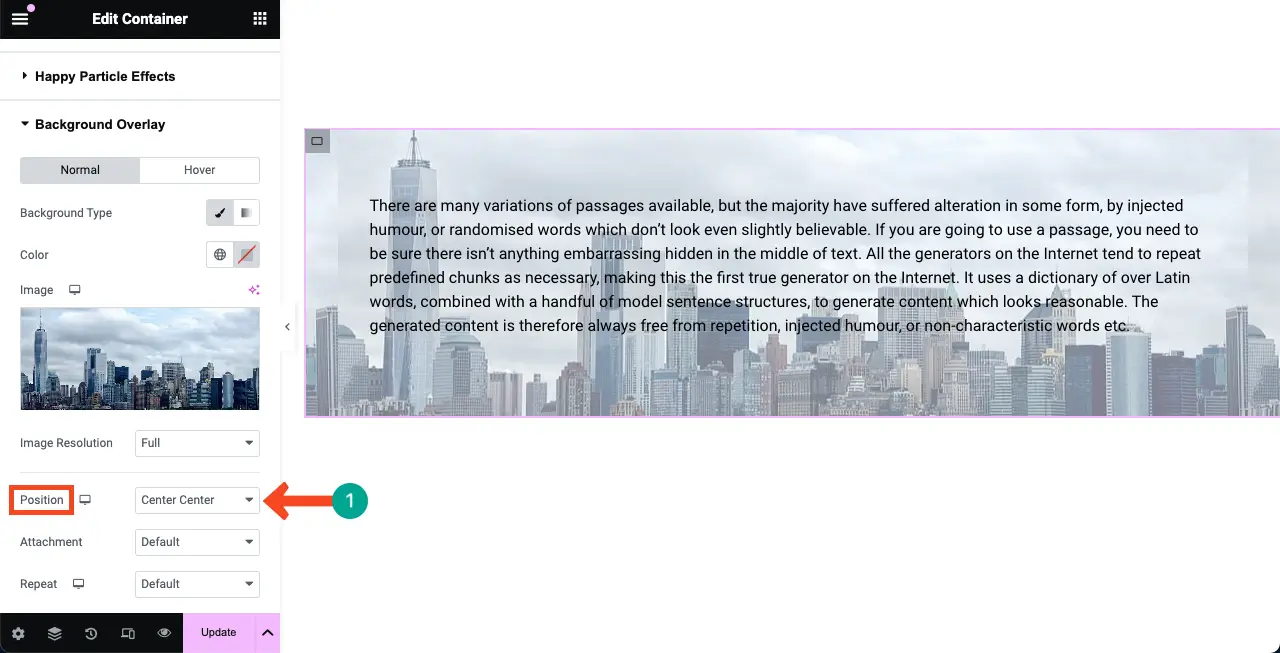
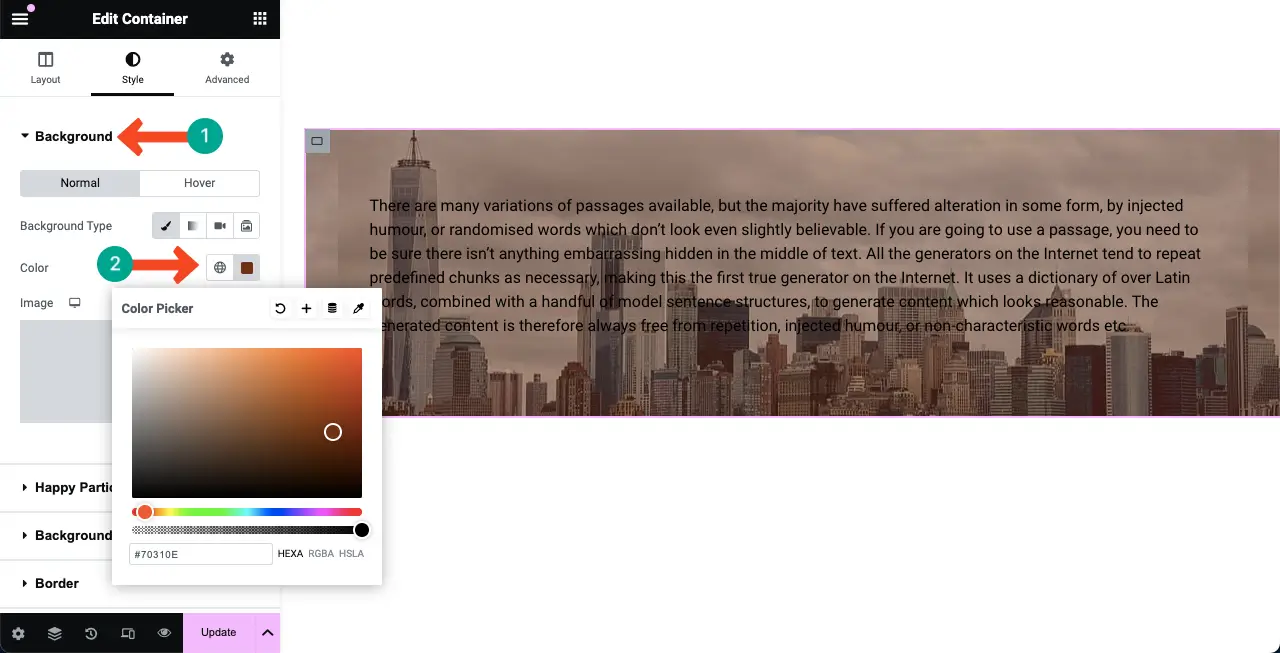
Expand the Background option. Next, select a suitable solid color that goes with the image. You’ll see a layer has been added over the image.
Go to the Background Overlay option.
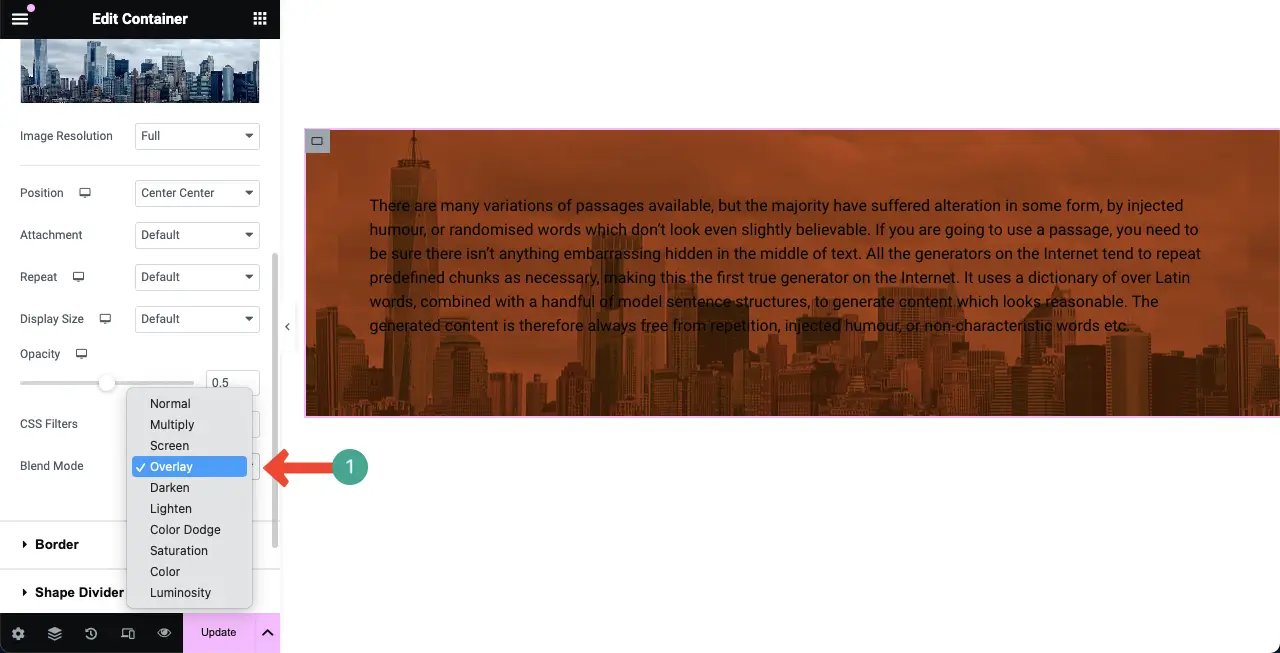
Come to the Blend Mode by scrolling down the Elementor panel. Click the icon on the right side. It will open a list of blend modes.
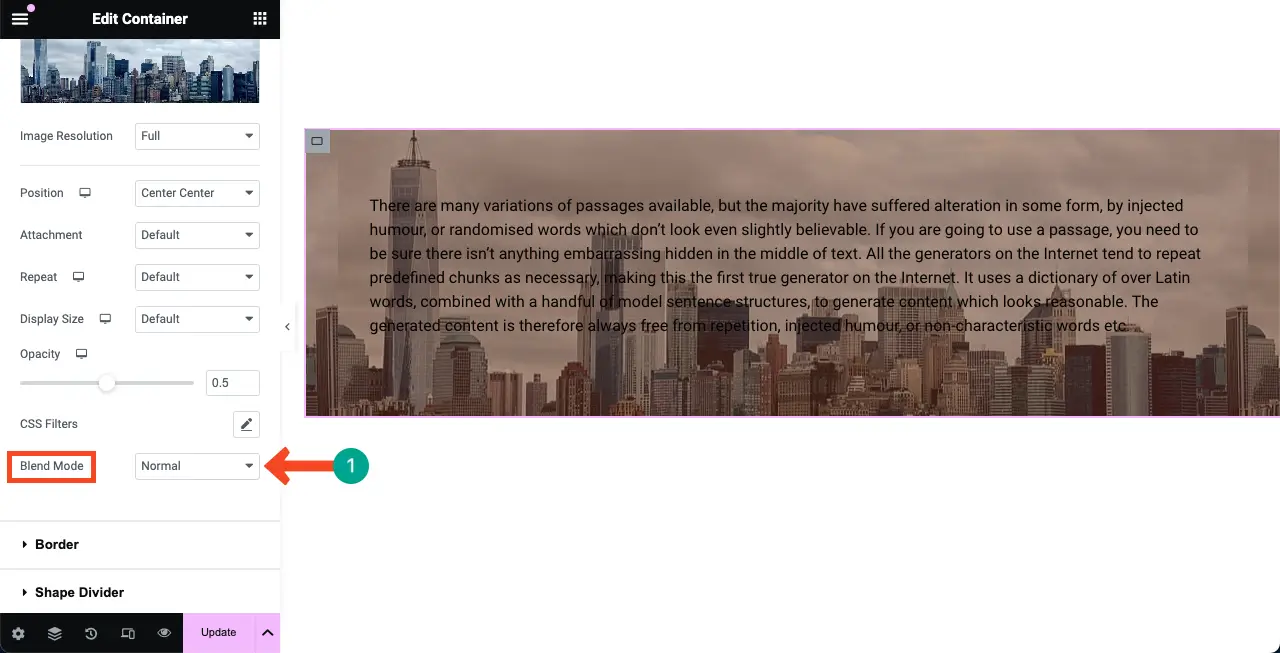
Select a mood you like by exploring all the blend moods on the list. You’ll see the effect on the image.
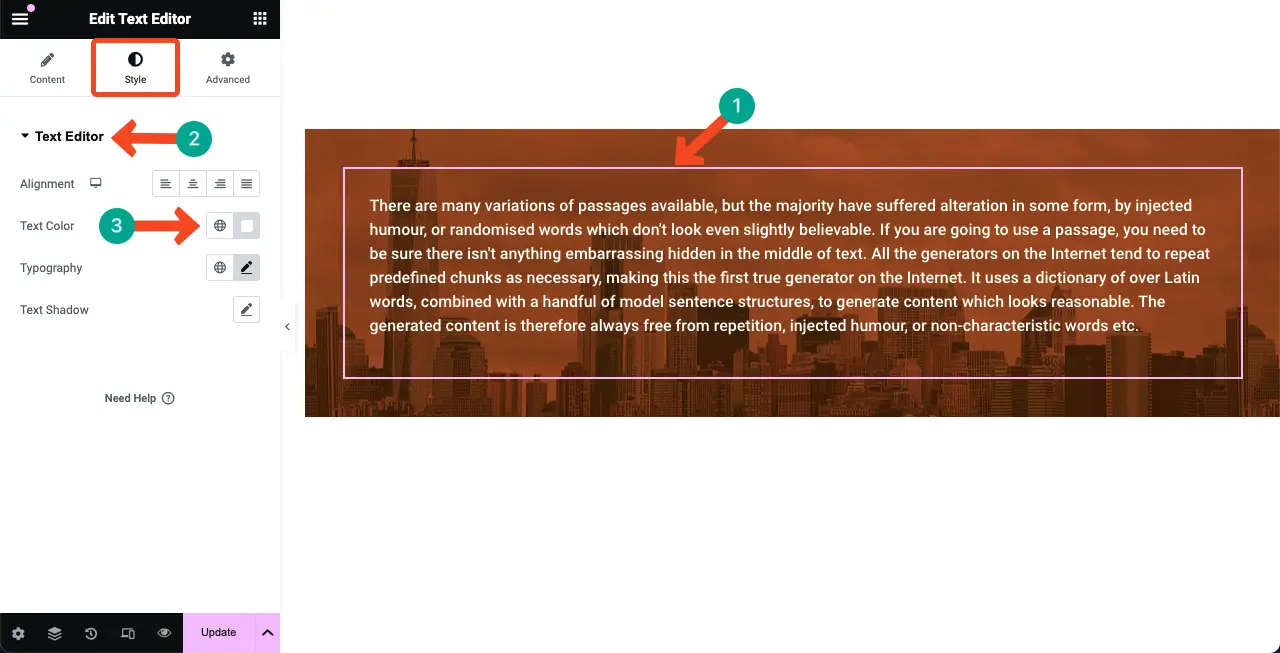
You can see that the background overlay and the text colors are almost similar. This is why, we have changed the text color to create a contrast between them so the text is highly readable.
Thus, you can add a Background Overlay to the background of the Elementor widget.
Method Two: How to Add Overlays to Content Background in Elementor
The process of overlaying the content on the background is exactly the same as the above method. This is a free feature of HappyAddons plugin. If you don’t know much about the plugin yet, explore what HappyAddons is.
In short, HappyAddons is an exciting addon to the Elementor plugin. It comes with 120+ additional widgets and 20+ features. Using them, you can overcome the limitations of Elementor and add more exciting functionalities to your site.
So, where are the Background Overlay options in HappyAddons? Select the content widget. Go to the Advanced tab. You’ll see the Background and Background Overlay options under this tab.
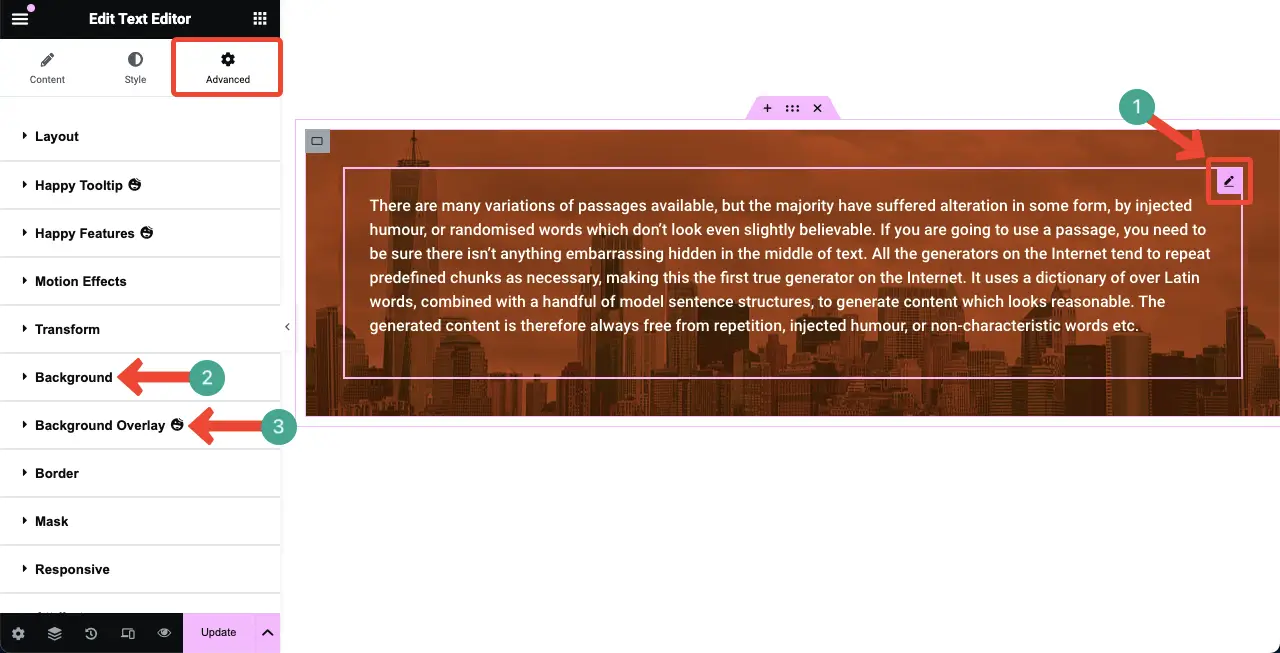
You can see that the names of these two options and the names of the two options of Elementor are exactly the same. And their working process is also the same. Let’s explore the process.
Type 01: Add a Solid Color Background Overlay to the Added Content
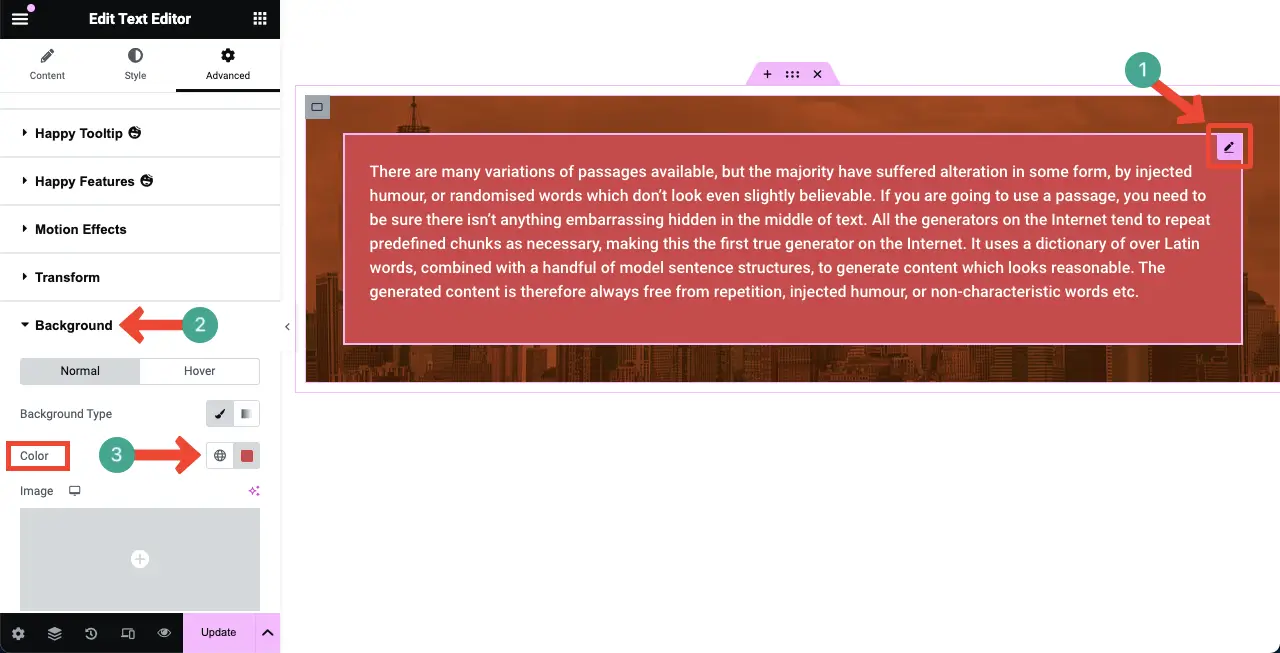
Select the content widget. Come to the Advanced tab on the Elementor panel. Expand the Background option.
Select a solid color. You’ll see the color has been applied to the background of the content.
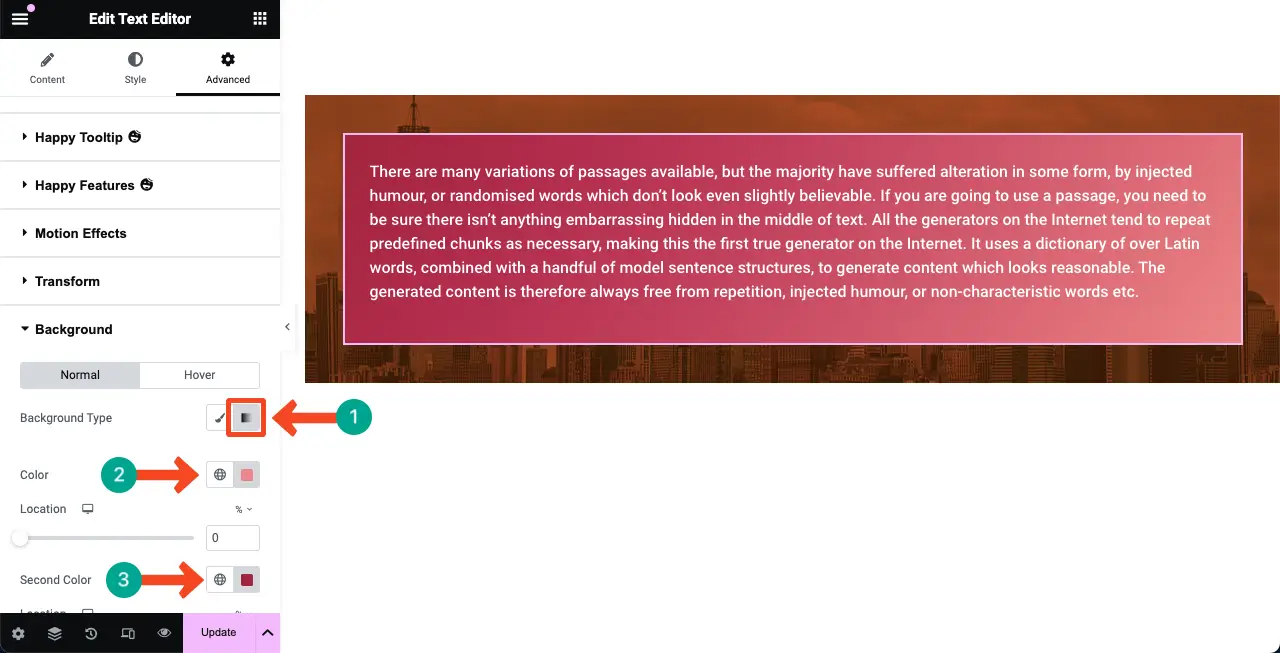
Type 02: Add a Gradient Color Background Overlay to the Added Content
Like the above method, select the Gradient option under Background. Set a primary and secondary color. The color pallet will be displayed behind the content on the Elementor canvas.
Type 03: Add an Image Background Overlay to Added Content
Select the content widget. Go to the Advanced tab.
Expand the Background Overlay option. Click on the Image area.
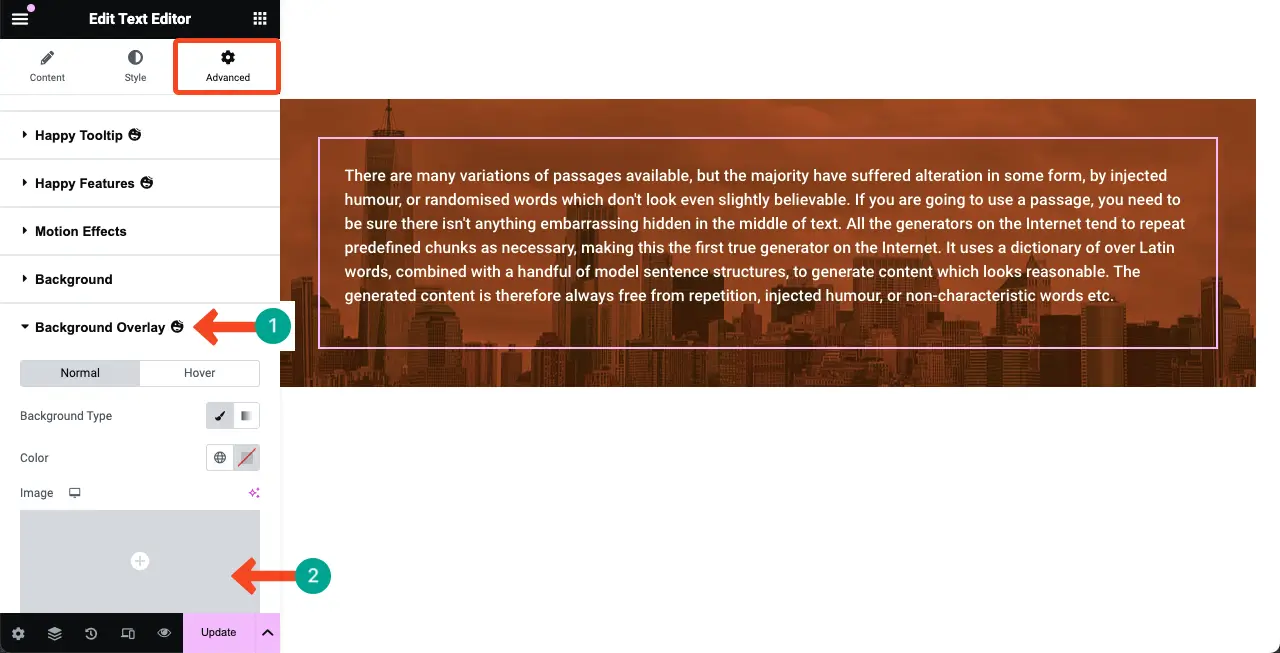
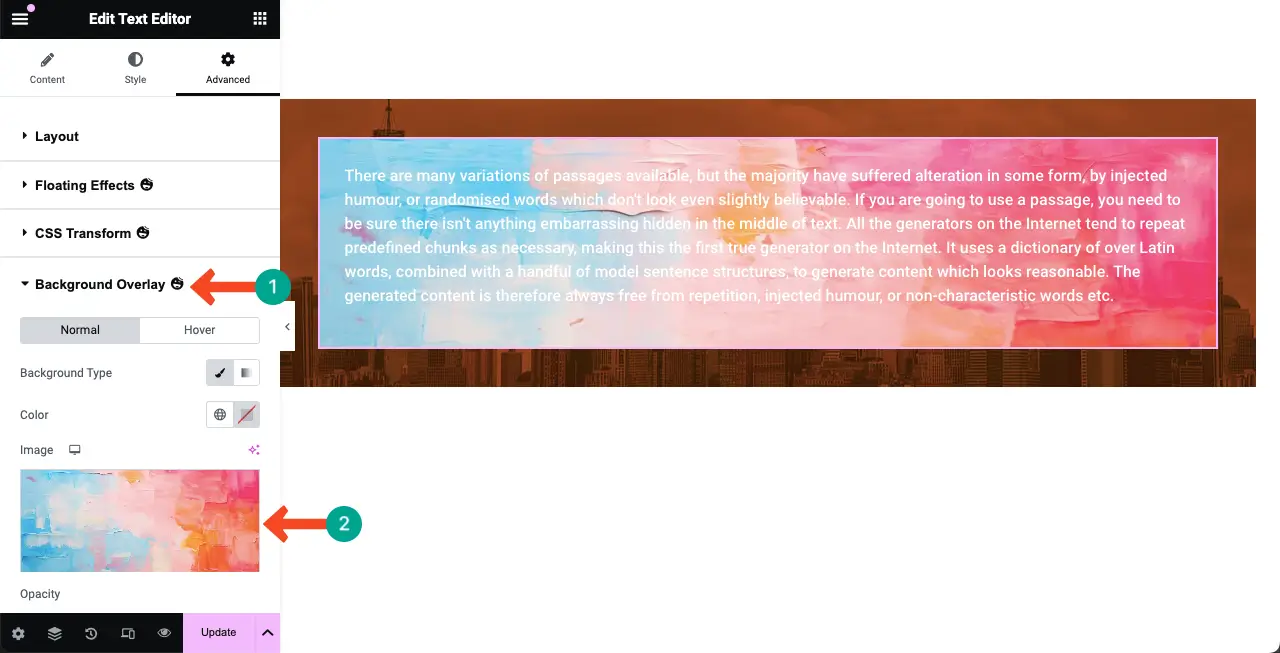
You’ll be able to add an image whether from your local drive or media library as described in the above method. Hope you can do it here as well.
Now the text color has been changed to make the text content stand out on the background. Hope this has made the content better and further readable now.
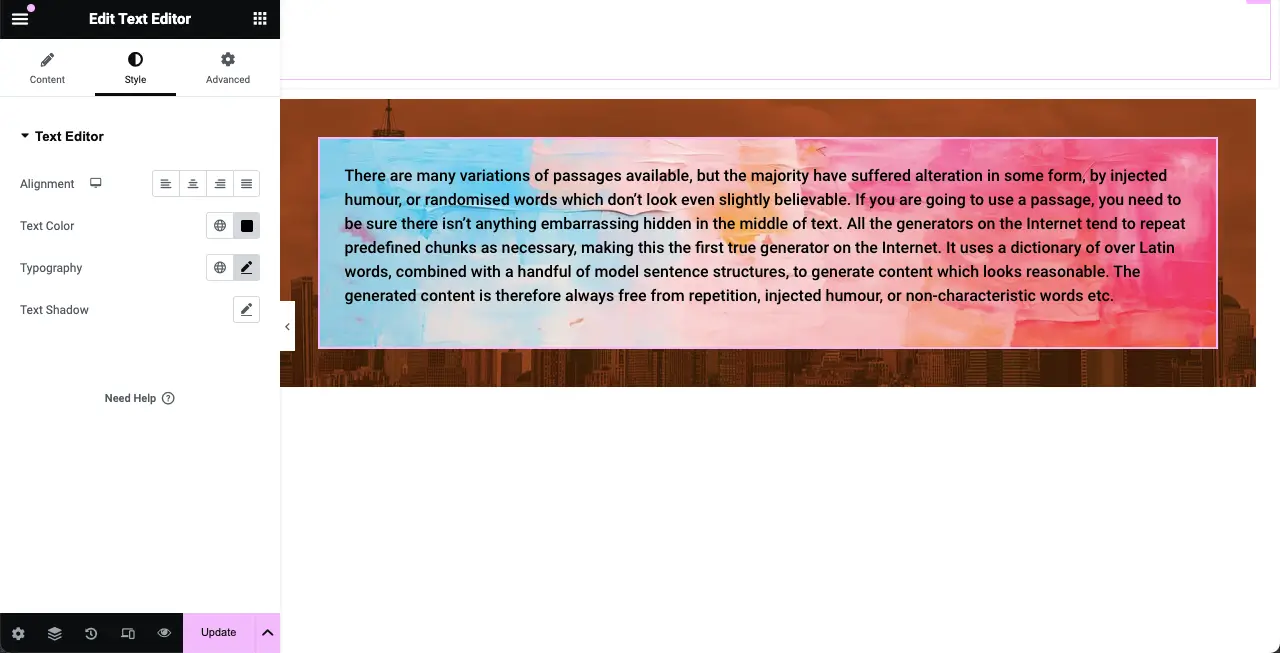
Thus, you can add image background overlays to your content in Elementor.
Note: Elementor plugins usually slow down sites a bit. But there are many ways to speed up such websites. Explore how to optimize website speed.
Final Notes!
Adding a background overlay today has become a common practice among most professional website designers. It’s a simple and easy web design feature but has tremendous power to make your web sections and content gorgeous and exciting.
Years ago, it was really very difficult to create background overlays with the HTML and CSS languages. But Elementor has made it flexible which has been much furthered with the HappyAddons plugin. Hopefully, by following the blog post, you’ll now be able to create captivating overlays of the background and content on your website.
If you still face any problems with this feature, kindly reach us through the comment box or live chat option. We’ll get back to you very soon with a viable solution.

