







Is your WordPress website based on Elementor? Are you facing performance issues with your hosting provider? Are you tired of migrating from one Elementor hosting to another? I assume that you’ve already spent a lot of time and money due to their marketing gimmicks.
If this is the case with you, then let me introduce you to Cloudways – A Managed WordPress Hosting Platform that’s built for high-performing websites. Its feature-set is best suitable for individuals and businesses; from freelancers to SMBs and from eCommerce stores to corporate network websites.
In this review, I will overlook all the hosting features that are necessary for a WordPress website. Let’s read on!
Cloudways- Managed Cloud Hosting Platform Simplified
Launched in 2011, Cloudways has now become an industry-leading hosting provider in the WordPress realm and web hosting general. It allows you to host or migrate your websites on top cloud providers such as DigitalOcean, Linode, Vultr, Amazon Web Services, and Google Cloud Platform, along with the choice of 60+ data centers spread in 5 continents and 33 major cities of the world. Cloudways is the ultimate choice for everyone looking to maximize their global reach.
As a fully managed WordPress hosting, Cloudways provides you a platform with dedicated resources (RAM, processor, storage, and bandwidth) so your WordPress website never faces performance and security-related issues or goes offline. Besides this, its hosting stack comprises PHP 7.x, Memcached, Varnish, Redis, PHP-FPM as performance-boosting technologies, Apache, and Nginx as web servers.
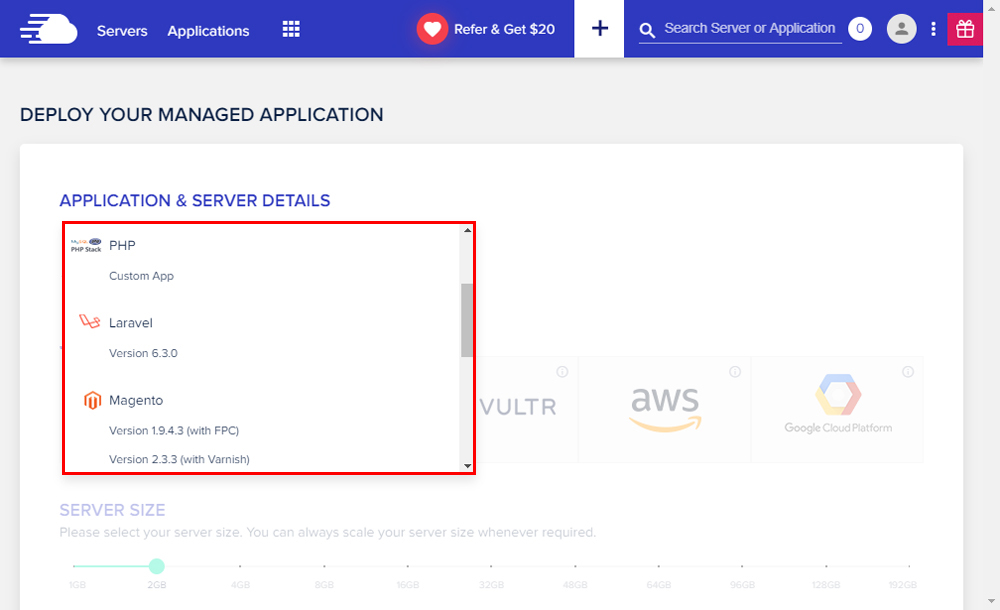
It takes only 7-8 minutes to launch a server on the Cloudways Platform with pre-installed WordPress. When you select your application in the Application and Server Details, you will see four different installers for WordPress.
The first one always comes with the stable version of WordPress, Breeze plugin, and Varnish enabled. The other ones are WordPress with WooCommerce, WordPress with Multisite, and default WordPress (without optimization).
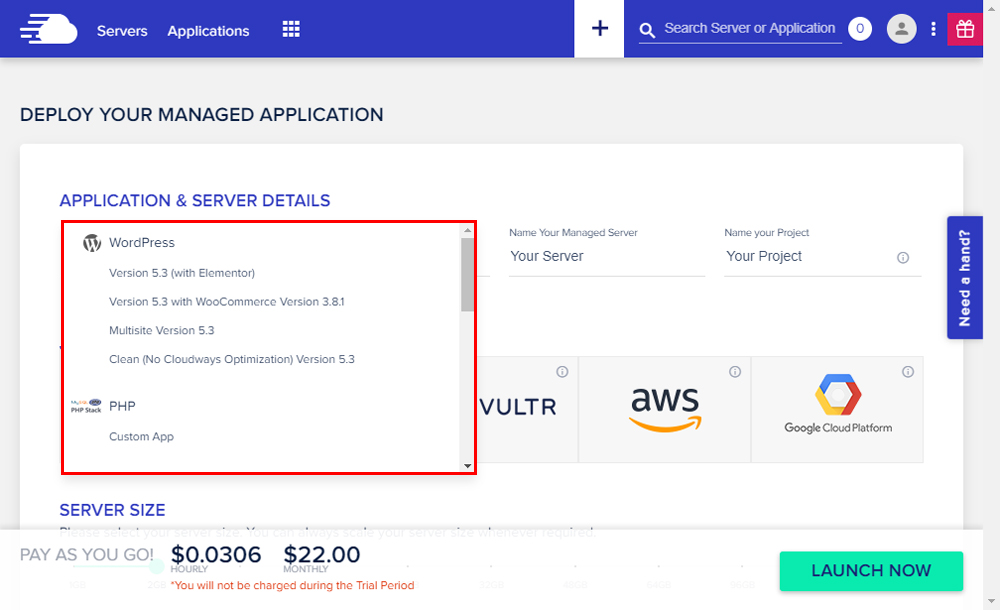
There’s a noticeable catch that I’d like to highlight here. When you sign up/log in to Cloudways Platform for server launch, you will notice that there is a 1-click installer for different PHP-based applications (see below).
After launching your server, you’ll see Cloudways Platform is basically divided into two sections: server and application management. Let’s further drill down and see what each section has to offer for WordPress users.
Server Management
Master Credentials
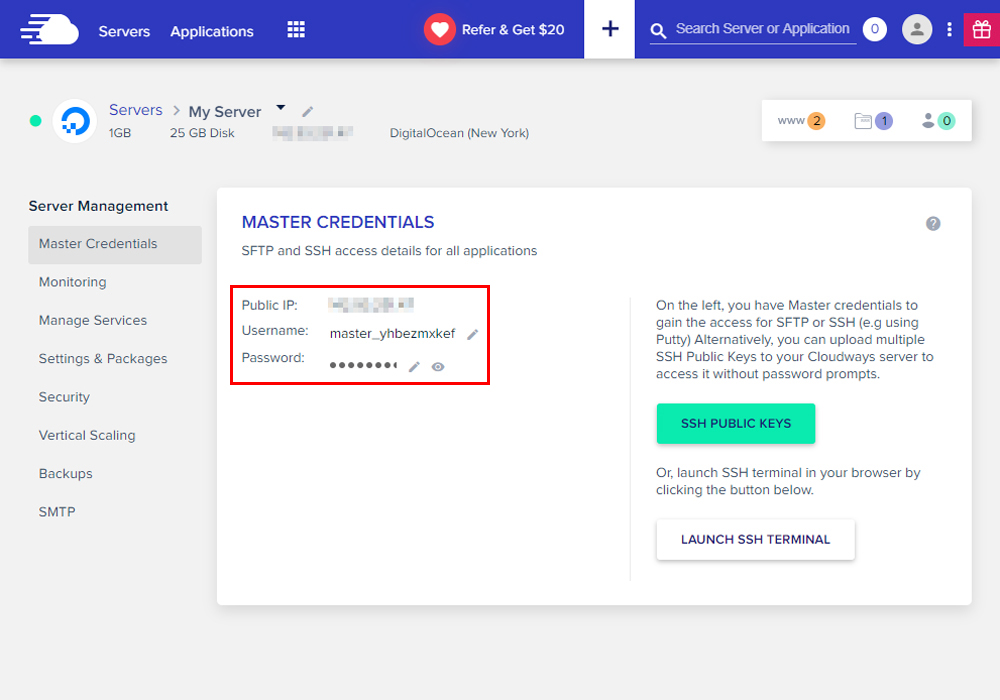
You can get public IP, username, and password to access your server and applications via SFTP or SSH. Alternatively, you can also create SSH Keys and use them to avoid password prompts while accessing your server or launch the SSH terminal from the Platform itself.
Monitoring
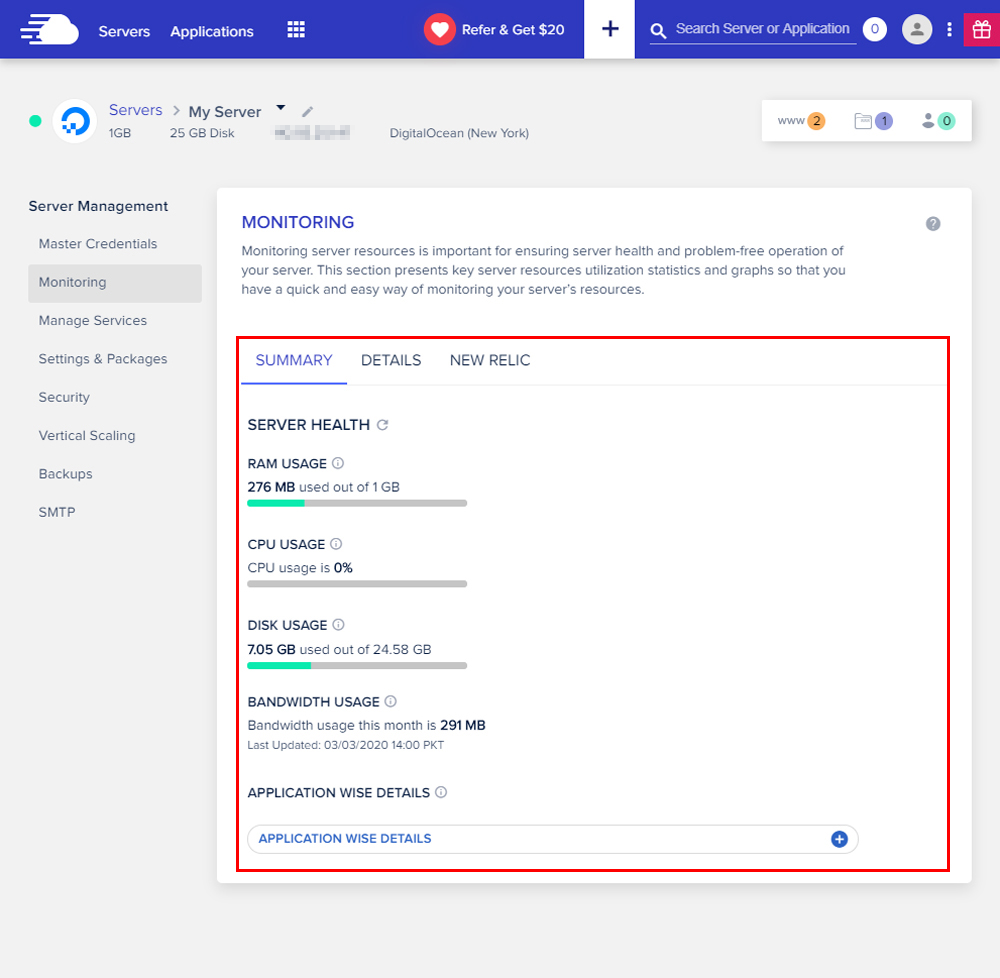
Real-time monitoring ensures that your server is healthy and all the operations are going smoothly. This section has three subsections.
- In Summary, you can see how much your server resources have been used, including application-wise details.
- In Details, you get a graphical chart of your server health for the past 6 months.
- In the end, you have New Relic: you can enable it to monitor your website’s performance.
Manage Services
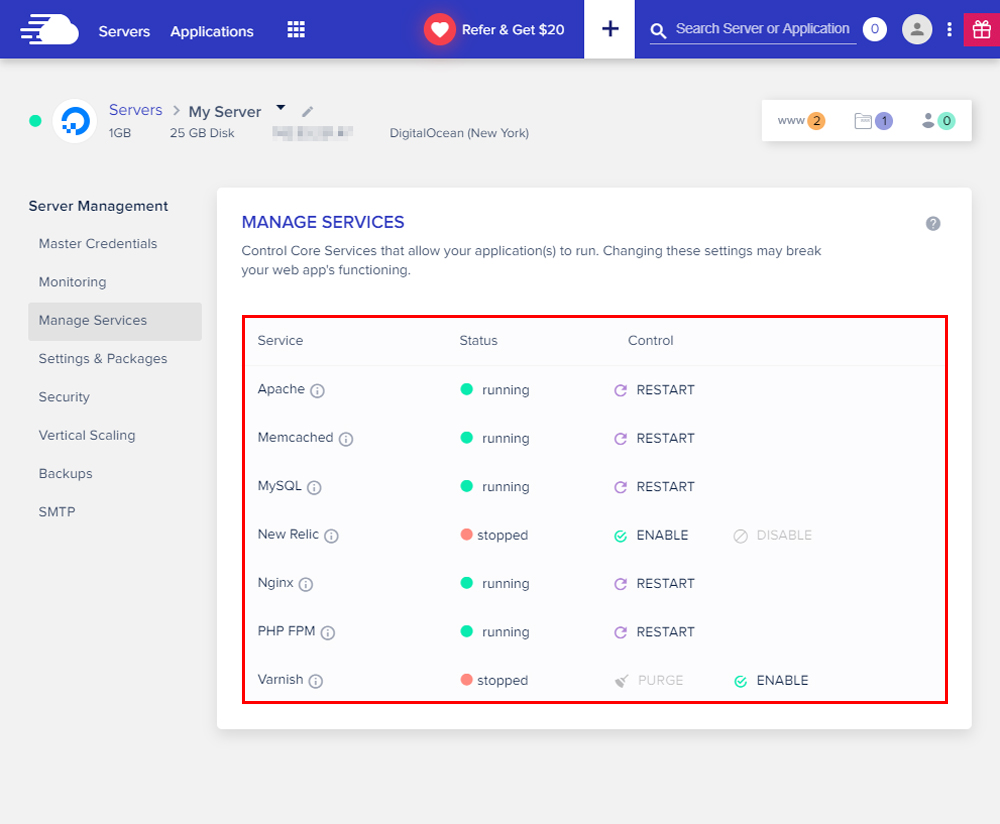
Cloudways hosting stack comprises caching mechanisms, web servers, and databases. You can simply check their status (running/stopped) and manage all of them from this section. This shows how managing individual server services on the Cloudways Platform is easy.
Settings and Packages
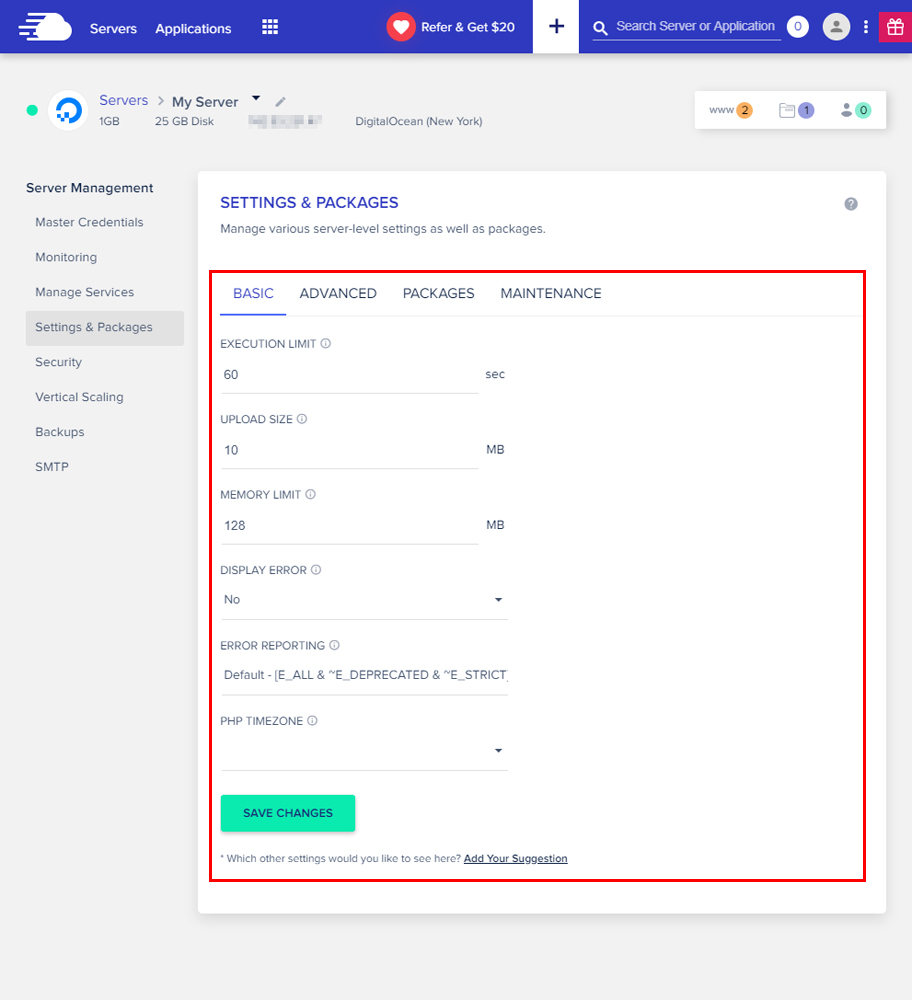
Cloudways allows you to manage different server-level settings and packages in just a few clicks. You can change the settings that you would use to control PHP from UI instead of file level. It’s easy to set up Cloudways.
This section has 4 subsections: Basic, Advanced, Packages, and Maintenance.
- In the Basic section, you can change the values of Execution Limit, Upload Size, Memory Limit, Display Error, etc.
- In the Advanced section, you can change the values of PHP, Database, Apache, Nginx, and other server modules.
- In the Packages section, you can switch to different versions of PHP/MariaDB, enable/disable Elasticsearch, install Redis and Supervisord.
- The last one is related to Server Maintenance. You can set the timezone to let Cloudways update your system packages and apply security patches.
Security
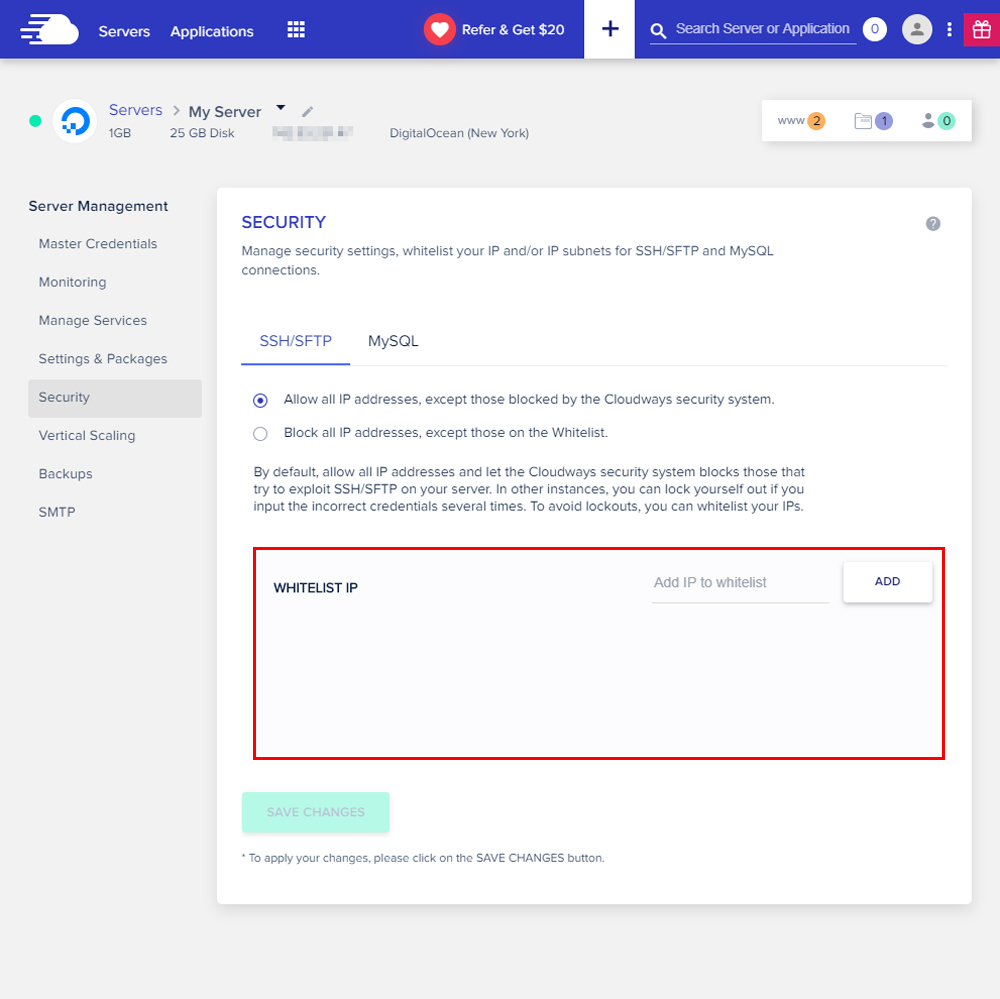
By default, Cloudways blocks all suspicious logins that try to exploit your server and websites. From this section, you can further tighten your server security by whitelisting your IP addresses and/or IP subnets for SSH/SFTP and the database connections.
Vertical Scaling
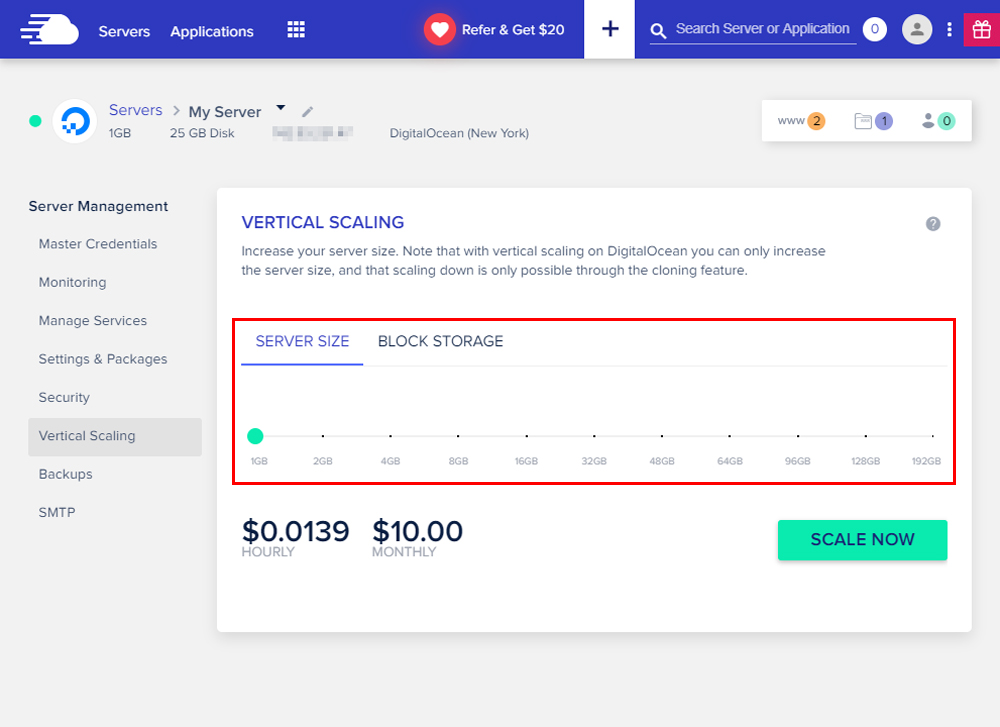
If you are out of server resources, you can always scale them using the Vertical Scaling feature. It should also be noted here that you cannot scale down server resources if you’re using DigitalOcean, Linode, and Vultr. For that, you need to clone your server to a low-spec server.
With DigitalOcean, you also get the Block Storage to increase your server storage only (this costs $0.0140/hour for 1 GB). Besides, you can always scale up/down resources with Amazon Web Services and Google Cloud Platform without cloning your server.
Backups
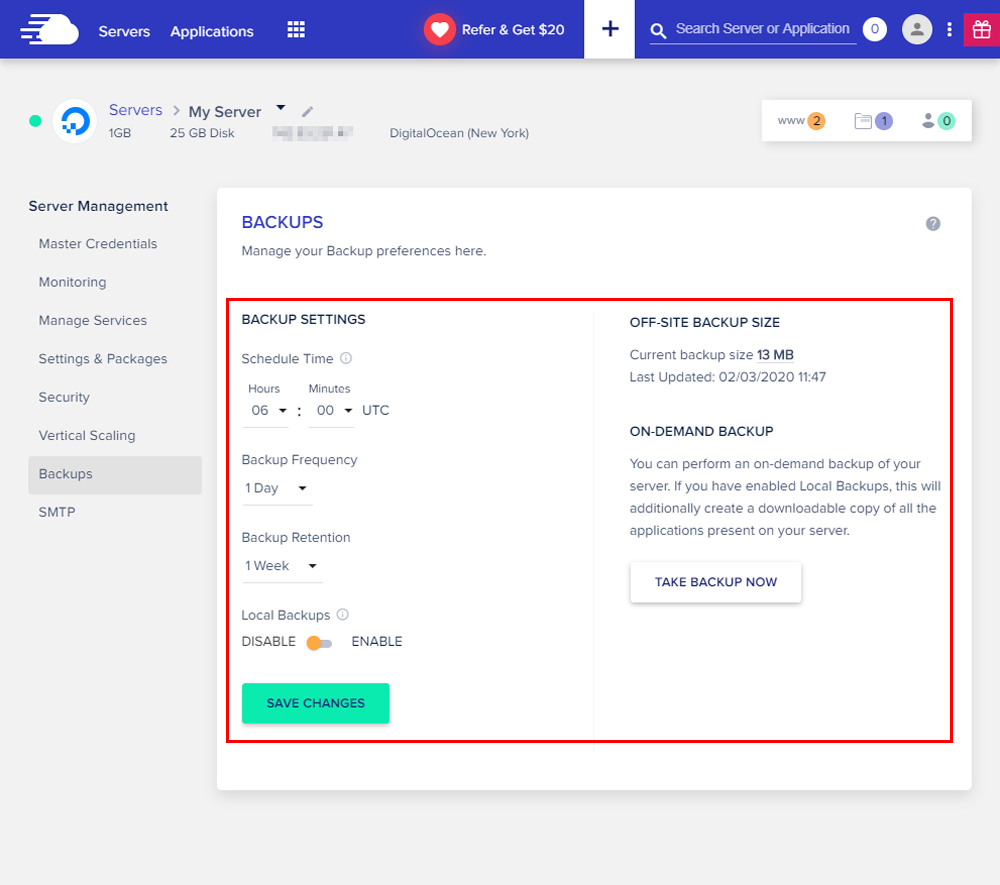
Your server and websites are always in safe hands with automated or on-demand backups. You can schedule your backup time, frequency, and retention. Similarly, you can also enable local backups that you download via SFTP/SSH or create off-site backups for disaster recovery that cost $0.033 per GB. Besides, Cloudways maintains offsite backups on Amazon S3 servers.
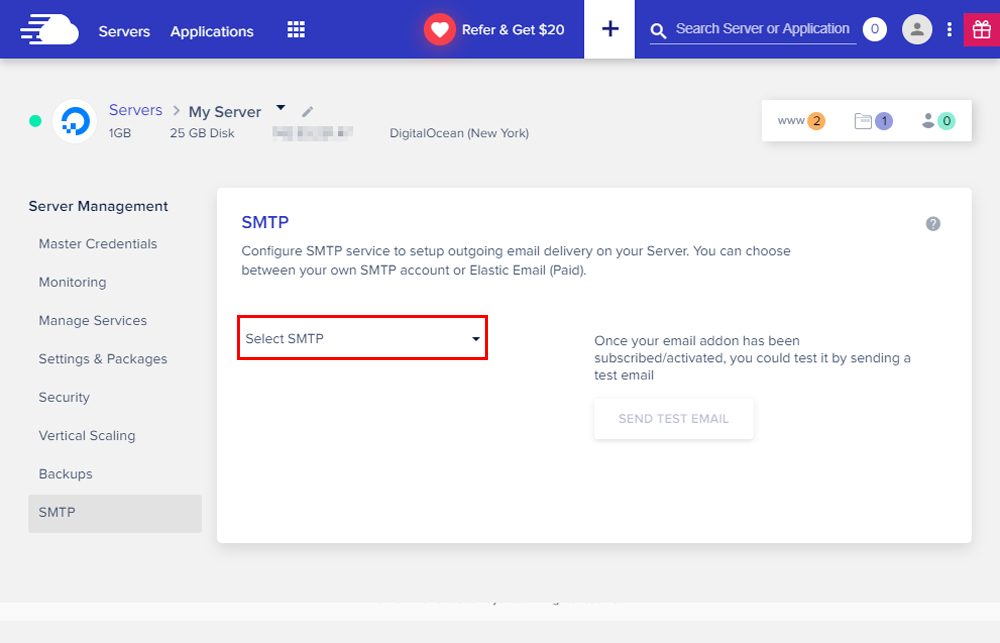
SMTP
By default, Cloudways offers an Elastic Email add-on for transactional/outgoing emails starting from $0.10/month for 1000 emails. You can also set up other SMTP services such as Mailgun, Mandrill, AuthSMTP, SendGrid, etc.
Application Management
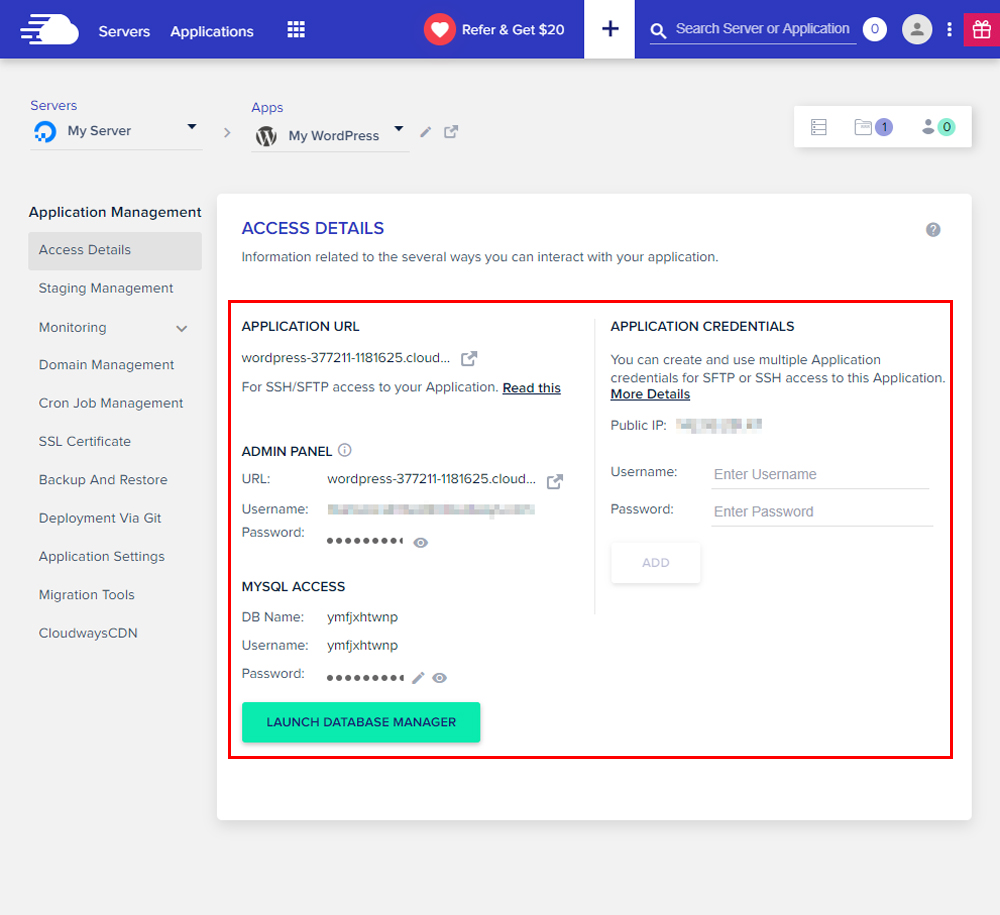
Access Details
All the access details of your WordPress website are available here: website access (URL, username, and password) and Database access (DB name, username, and password). Besides, you can also create multiple credentials to access your application via SFTP.
Staging Management
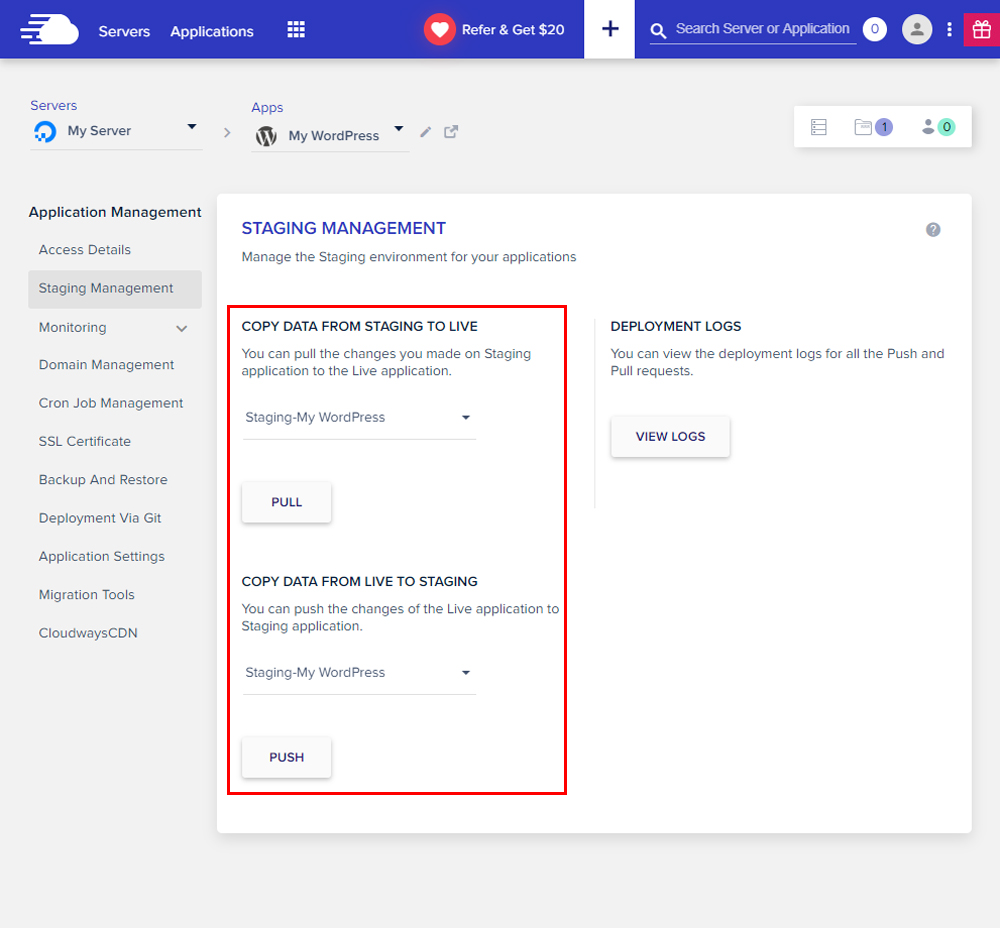
This is one of the most important features for developers and designers equally. Imagine you update/install an Elementor add-on, but it’s not compatible with your theme. What do you think will happen to your WordPress website? I guess you know it all.
This is where staging URLs come in handy. Whenever you want to update any element of your website, simply create a staging of your live website and test changes without any issues. Once you’re satisfied, push all those changes to your live website. Here is how you can create a WordPress staging environment.
Monitoring
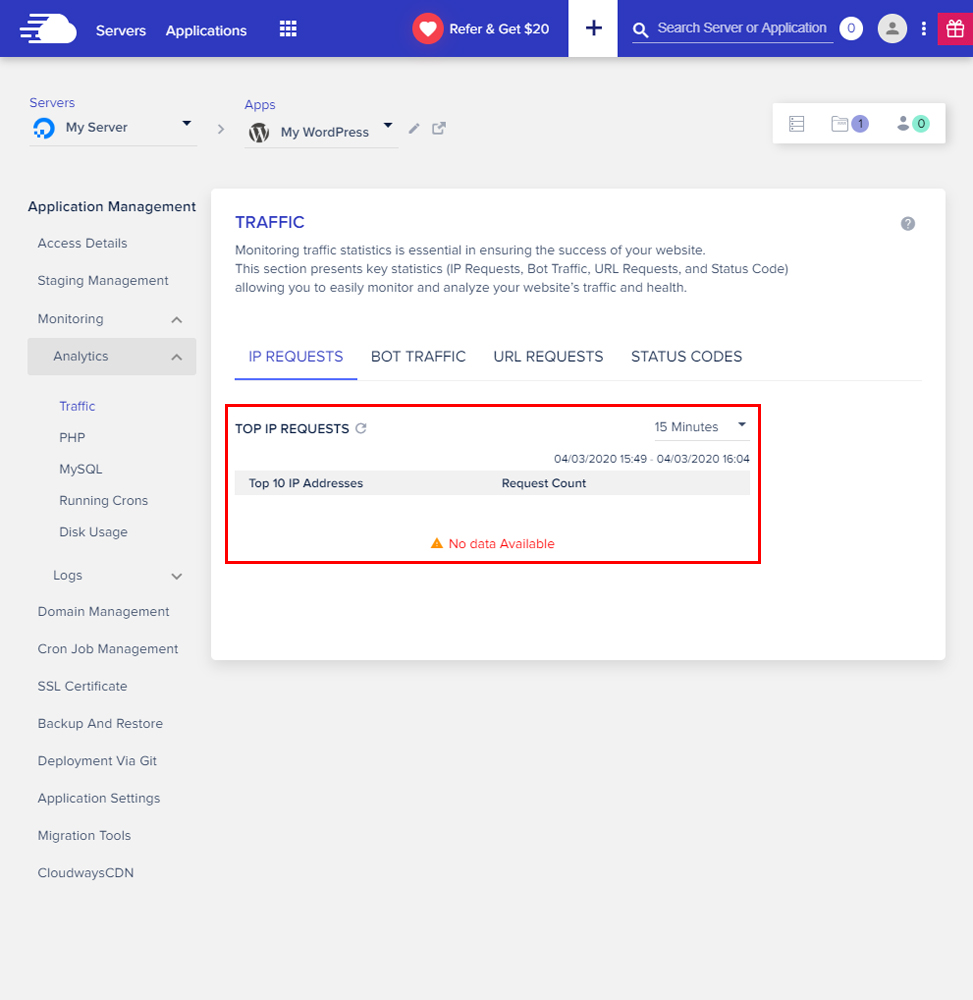
It’s the same as monitoring in Server Management but with more details on an application level. This is further divided into multiple subsections: the main ones are Analytics and Logs.
- In the Analytics section, you can see the statistics of Traffic, PHP, Database, Running Crons, and Disk Usage. This helps you better understand and monitor your website’s health.
- In the Logs section, you can understand and analyze web requests, visitors’ IP, viewed pages, user agents, etc. Apache error log shows you the details and warnings of your website encounters.
Domain Management
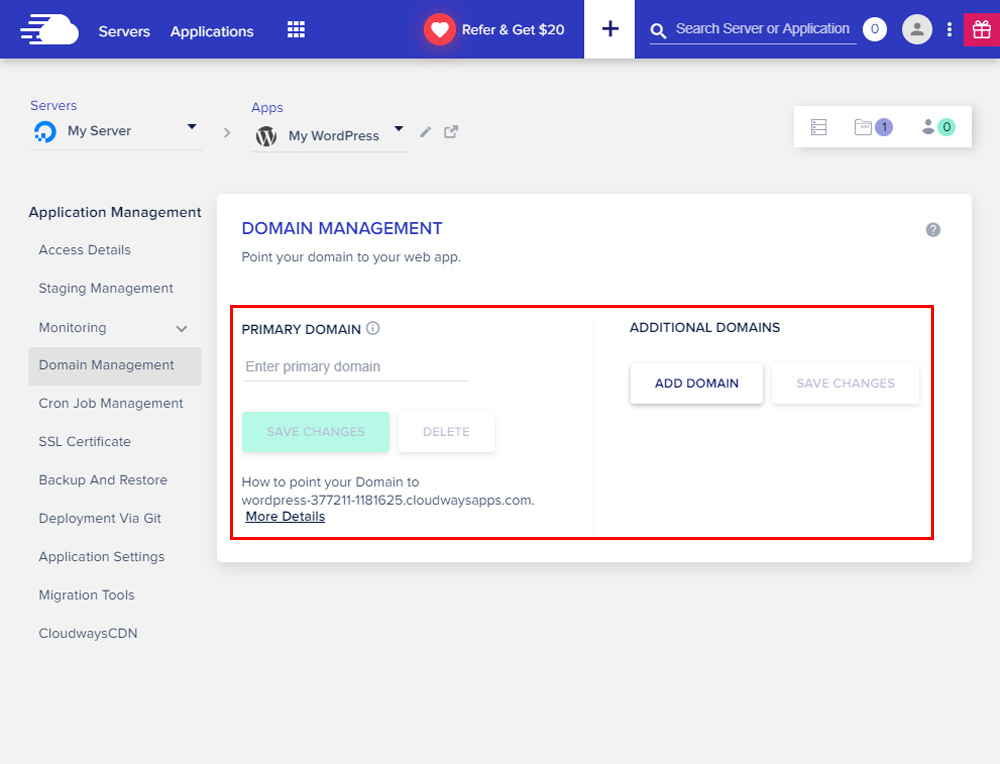
Pointing domains is easy with Cloudways. First, you need to add an ‘A’ record to your domain registrar, enter your Primary Domain name and then click the Save Changes button. Similarly, you can also add subdomains by adding a wildcard entry to your domain registrar.
Cron Job Management
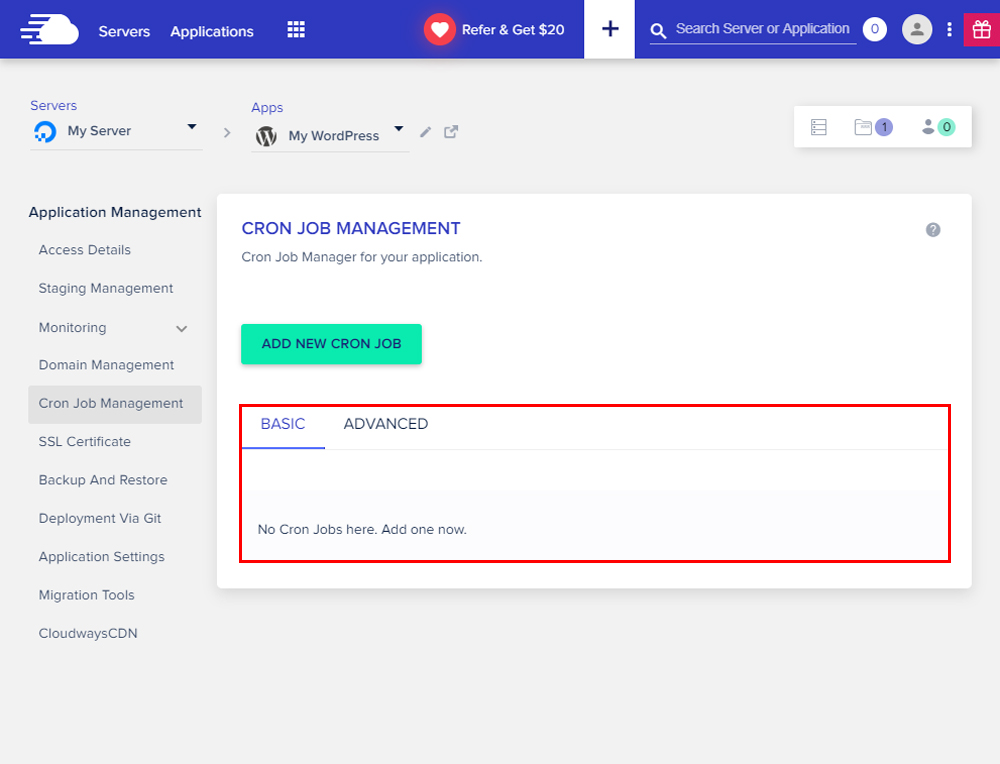
Cron job feature lets you run scheduled maintenance tasks, clear cache, and execute a code snippet on your WordPress website. Cloudways allows you to create cron jobs right from within the platform. If you select “Basic” the platform will ask you for a schedule and file you want to execute. This can’t get easier than this.
SSL Certificate
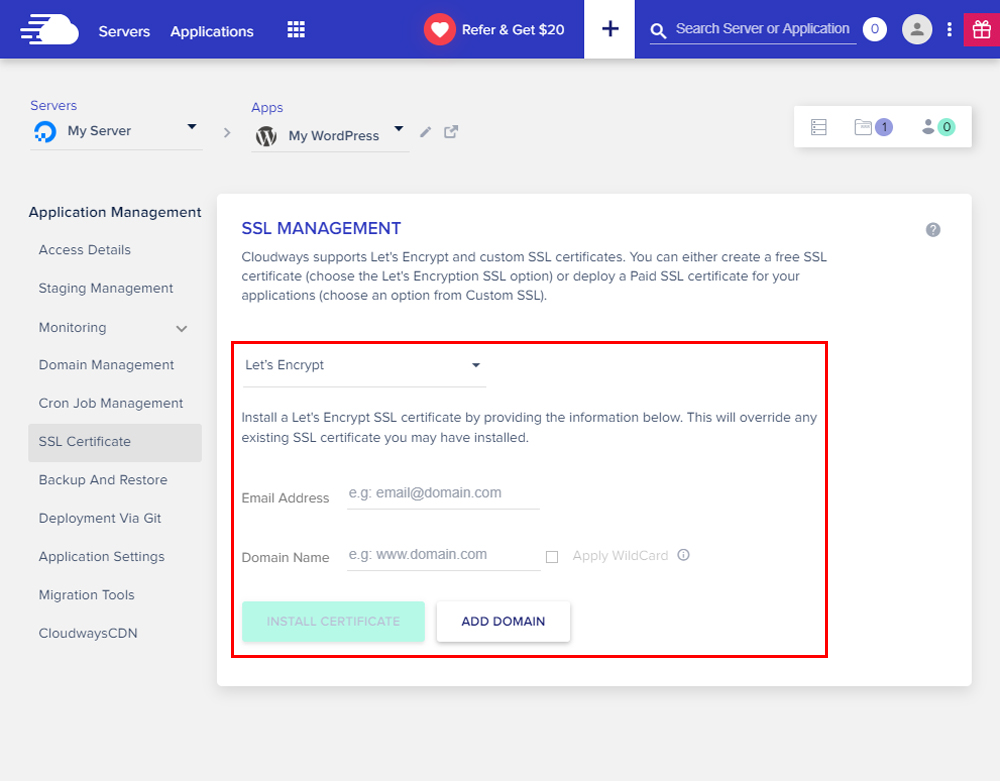
SSL certificate is a must-have to ensure your visitors that your WordPress is secure and all the transmitted data is encrypted. By default, Cloudways offers you a free Let’s Encrypt SSL certificate, which you can install in just a few clicks. Besides, you can deploy WildCard and custom SSL certificates to your WordPress website.
Backup and Restore
Backing up your website data is a highly recommended best practice that forms the core of the WordPress disaster recovery processes. In effect, you should back up the app data before making any changes that could break your website.
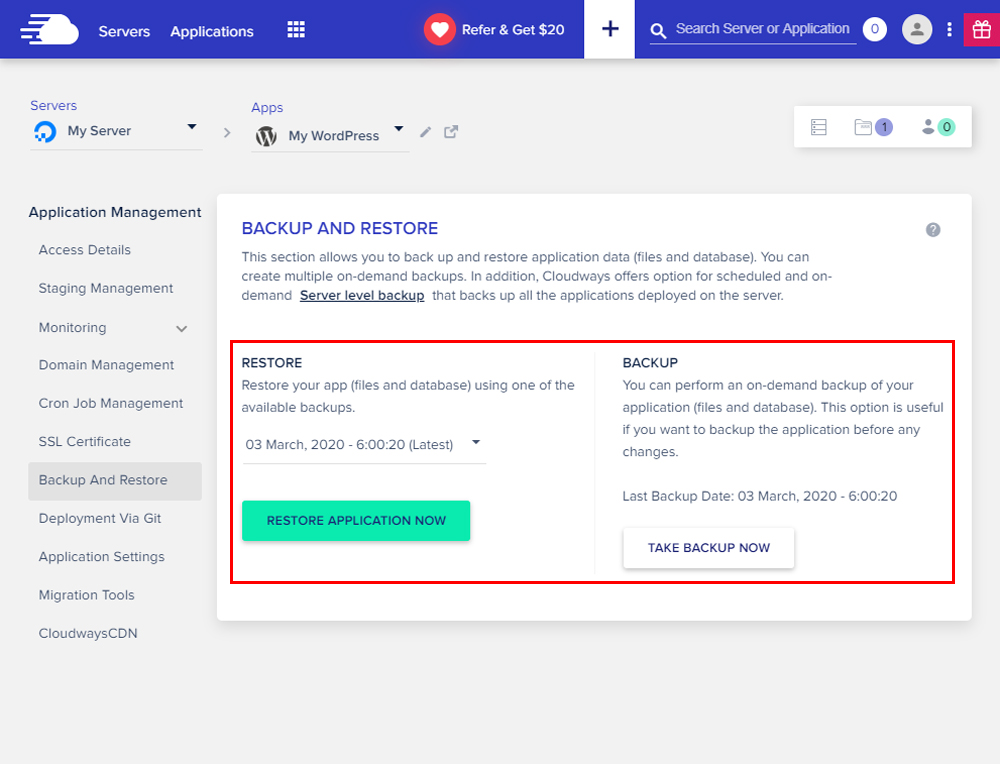
In this section, you can also take on-demand backups of your individual WordPress websites and restore them from an old point. The backup archives are stored either locally (on the same server) or at a separate location.
Similarly, restoring a backup point is a simple matter of selecting a rollback point. The data is restored without any problems, and your website is back in action.
Deployment via Git
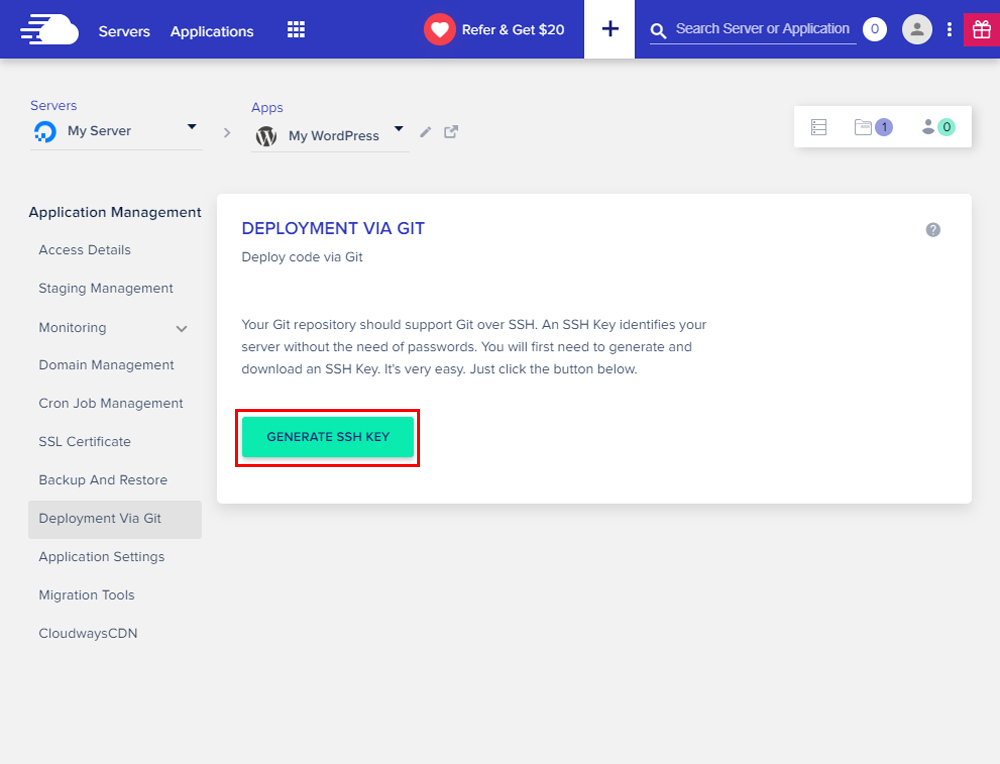
Git has become the standard way that WordPress developers take care of version control and codebase management issues. Since Cloudways is a developer-friendly platform, it supports deployment via Git so that you can have access to the repositories hosted on Git-enabled platforms.
Connecting your Cloudways-hosted app with a Git platform is simple and requires you to generate an SSH key to streamline the connection process.
Application Settings
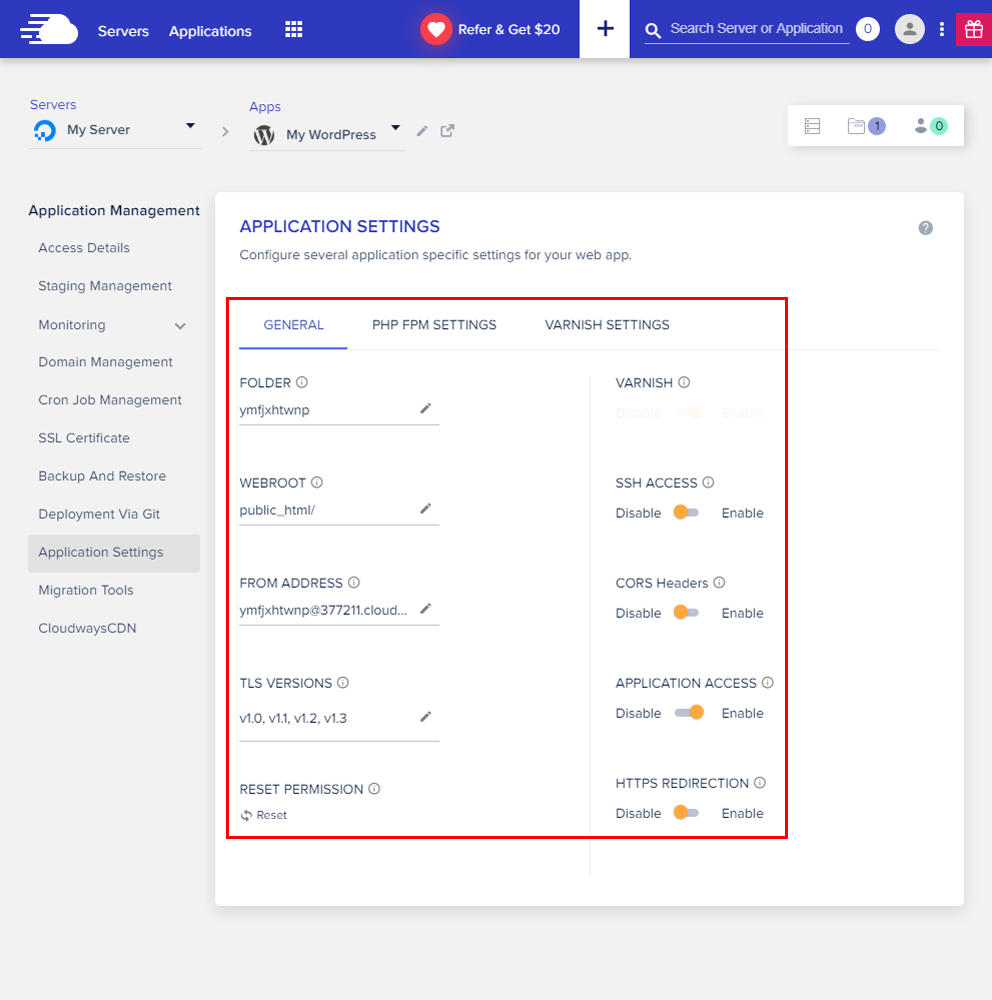
The Application Settings section offers access to all the important settings that help you optimize the application as per your requirements.
As you can see from the following screenshot, the section is broadly divided into three tabs – General Settings, PHP-FPM Settings, and Varnish Settings.
In the General Settings section, you can change various aspects of how the application operates. In particular, you can change the webroot, enable HTTPS redirection and SSH access to the application.
Similarly, in both PHP-FPM and Varnish Settings sections, you can set several variables to optimize the performance of your application.
Migration Tools
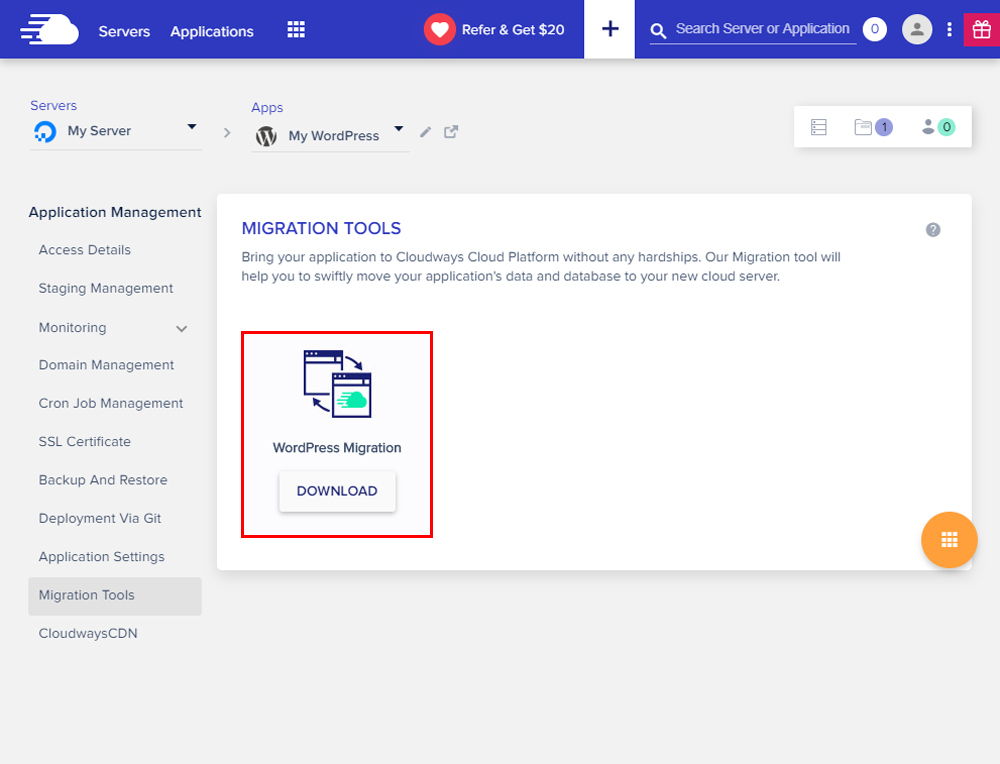
Migrating your WordPress websites to the Cloudways Platform is a really simple process. Just install (and activate) Cloudways WordPress Migrator plugin and migrate your websites in just a few clicks. Cloudways also offers one managed migration for free. Just let their support team know about it and they will migrate your website. You have got both ways to opt for!
CloudwaysCDN
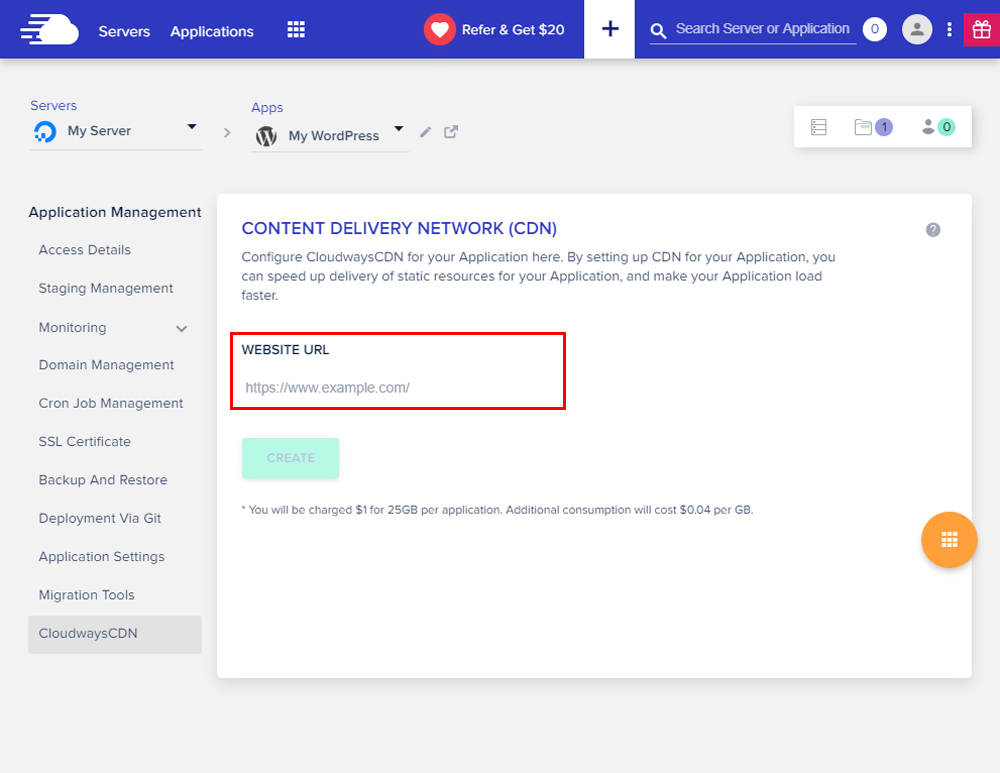
CloudwaysCDN is a platform-native CDN solution that works seamlessly with the websites hosted through the Cloudways Platform. When integrated and enabled, CloudwaysCDN dramatically improves the user experience for the visitors on your website regardless of their geographical location.
The CloudwaysCDN is really economical to use with a monthly cost of just $1 per 25 GB of bandwidth per month for a single application.
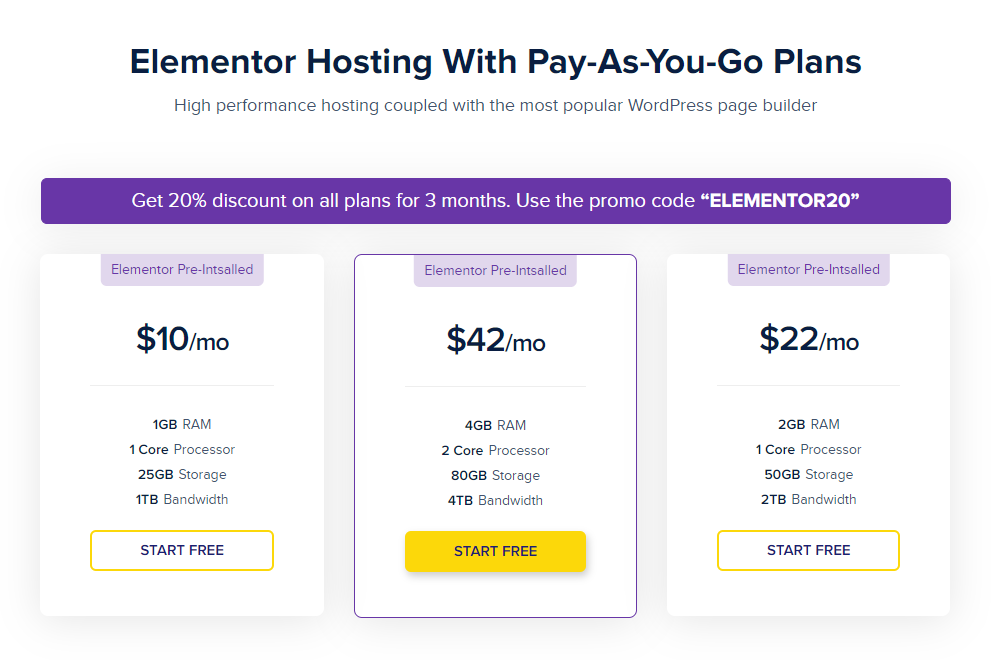
Get Cloudways Hosting Plan for Your Elementor Sites
Cloudways offers a powerful yet simple-to-use platform that takes away the hosting woes for designers and developers. The idea is to provide a secure environment where WordPress designers and developers could build their dream projects without worrying about the server and hosting complexities.
Cloudways is a modern hosting platform that has automated almost everything in 1-click actions: website/server monitoring and cloning, backup/restore, SSL installation, website migration and staging, CDN integration, and much more.
Of course, just don’t take my word for granted! You should also try out Cloudways with a 3-day free trial to better understand whether this is your cup of tea.

![Black Friday and Cyber Monday are around the corner, and people are waiting for these festivals to grab the best product deals. That is why giving an attractive look to your website during this festive season is very necessary. But, creating a whole new landing page might be difficult in a short period of time. Don't worry. By using Happy Elementor Addons Black Friday and Cyber Monday Landing Page templates, you can easily develop a whole new landing page in a few minutes. In this today's blog, we are going to show how to boost your website design using HappyAddons templates during this festival season. Before that, we'll talk a bit about these two festivals and why they are important to online business communities. What are Black Friday and Cyber Monday? Black Friday is the immediate following of the famous Thanksgiving day. This is when people start shopping to celebrate the Christmas festival. Since the late 1980s, retail sales on this day have constantly been suppressing the past volumes. See the graph below. Source: Salecycle.com The first Monday following Thanksgiving day each year is called Cyber Monday. It was first introduced in 2005 by the USA National Retail Federation to encourage people to buy online. Though this festival originated in the USA, it is celebrated globally today. See the stats below. Source: Salecycle.com It indicates customers' buying behavior around this day is growing up over time. Many customers today keep a budget to buy products on these two days. So, why won’t you prepare a Cyber Monday landing page if you have an online store? Importance of Designing Landing Pages for Black Friday and Cyber Monday Festival Having a well-design website is one of the major checklists if you are running an online business. Most importantly, you have to make sure that your website remains up-to-date to boost your sales. That is why you need to redesign your website or make a new landing page during the Black Friday and Cyber Monday festivals. Because most online product & service-based businesses promote special deals during these two festivals. Here are some remarkable ways dedicated landing pages during these festivals can positively impact the performance of your online business. Boosts your product salesIncreases conversion rateOpportunity to collect potential email leadsGrabs users' attention toward your siteReduces bounce rateIncreases website visitors. Elementor Black Friday New Seasonal Kit is Already Here! Source: Elementor To make this Black Friday more enjoyable, Elementor has launched a New Seasonal Kit that includes landing pages, sections, pop-ups, and vector assets. All these design elements are made by the Elementor team so that one can easily use them on their website to ensure more sales and conversions. New Elementor Black Friday Seasonal Kit offers: 3 Landing pages6 Sections 6 Popups A collection of stickers & animations You can only get these ready-made Black Friday landing pages and sections if you have Installed Elementor Pro on your site. However, if you are looking for templates that are outside of the box, you can go with Happy Addons, the fastest Elementor Addons on the market. It's very easy to use, flexible and has tons of advanced features and widgets that can ease your website design journey. Also, you'll get several festival landing page templates & blocks. Moreover, you can use free Black Friday and Cyber Monday design blocks and templates to decorate your site. Most importantly, these templates and blocks are easy to customize and can be used for multiple purposes. Now let's see how you can use the Happy Addons templates to design your website according to the Black Friday theme. Pre-Requisites to Use HappyAddons Templates to Design Black Friday and Cyber Monday Landing Pages You must have the following plugins installed on your site to get access to the HappyAddons Template library. Make sure you’ve installed and activated the Happy Addons Free & Premium version of your website. Elementor (Free)Happy Addons (Free)Happy Addons Pro If you are new to Elementor, check this Step By Step Guide For Beginners. If you want to explore the readymade templates of HappyAddons before installing these plugins, you may visit by clicking on the button below. Check out Happy Addons Templates How to Design Black Friday Landing Page on Your Website Once you have the plugins (mentioned above) installed, your website is ready to follow the tutorial guide explained in this section. Get ready now! Step 1: Open a New Page with Elementor Create a new page or open the existing page with Elementor. Next, you have to select the Elementor Canvas option.Unless you select Elementor Canvas, you may watch the header, footer, and unnecessary other texts on the page. These might be irritating to you.Once you open the page with Elementor Canvas, your page will be completely clean. Watch the video below on how to do it. Step 02: Go to HappyAddons Library Click on the HappyAddons Library Icon. It will open up a modal popup. Here you'll find numerous stunning premade Blocks and Pages created by the Happy Addons team. Kindly explore them to create a list of your favorite items. Step 03: Import a HappyAddons Black Friday Template Go to the Page tab on the modal popup.Select Black Friday from the left-side filter option.You will several good-looking templates on your screen.Take your cursor on the one you like and hit on the INSERT button. Wait for a while to finish the installation process. You will get the template on your screen with editable sections and options. Step 04: Set the Black Friday Campaign Deadline A deadline creates a sense of urgency in customers' minds. So, better if you add a deadline section on the page to show your Black Friday deals. The good thing is that if you select the template as we did, you will automatically get a deadline or countdown option. You have to customize it as you want. Step 05: Show Image Carousel Slider on Your Black Friday Landing Page Using the Image Carousel, you can slide show demonstrating discounts on your product categories. Drag and drop the Image Carousel widget on any landing page section. Next, from the Elementor panel, you can add photos and text to the widget. Do it accordingly. Thus, you can add more sections and options on the landing page. Hope you can do it yourself. Step 06: Make the Black Friday Landing Page Mobile Responsive Making a web page mobile responsive with Elementor is super easy. You'll get the mobile responsive option on the Elementor footer section. Clicking on it will open up the option to view your landing page on different device screens. We have explained the process in the video below. Note: Don't delete any widget or section while customizing your landing page for any particular device. Because if you delete a widget or section on any device screen, it will also be applied on other devices. However, you may change their position or alignment or hide them. It won't make any impact on other devices. Step 07: Final Preview of Our Landing Page Here is the final interface of our Elementor Black Friday landing page that we've designed using the Happy Addons' ready-made Template. Get Happy Addons to Add a Black Friday Theme Landing Page on Your Website How to Design Cyber Monday Landing Page on Your Website You will require the same prerequisites (Elementor and HappyAddons Plugins) to design the Cyber Monday landing page on your website. Hope you have them ready on your website. Now, let's get into the tutorial part. Step 01: Import a Cyber Monday Readymade Landing Page Template Go to the HappyAddons Template library.Choose the Cyber Monday template you like.Click on the INSERT button. Wait for a while to finish the installation process. You'll get a page design like the following image below. Step 02: Edit Different Sections of the Page In the first tutorial, you saw the deadline/countdown option was already embedded in the template. But this template doesn't have it. So, you can bring it to your page? Very simple. Create a new section by clicking on the plus icon.Type Countdown on the Elementor search bar.Drag and drop the widget on the section. Customize the Countdown section from the Content and Style tabs of the Elementor panel. Using the Heading widget, we have added the FLASH DEALS text next to the countdown to make it more meaningful. Thus, you can use other exciting widgets on the template to make your landing page super gorgeous. Step 03: Promote Products on the Landing Page Promotional landing pages usually include a section to showcase some hot-selling products to generate instant sales. Using the Image and Button widgets, we have created this section under the FLASH DEALS.You may customize it more as you wish. Step 04: Make it Mobile Responsive We already showed you the process in the first tutorial on making a mobile web landing page responsive. Hope you can do it here as well, following the same guideline. Click on the Responsive Mode icon and do the rest yourself. Bonus: Black Friday and Cyber Monday Landing Page Design Key Considerations Whenever you design a landing page, you need to consider why you need to design this page and what elements they should keep on the page. Because if you are not adding all the necessary features to your page, it will not serve its purpose. This is why you need to focus on a few things before designing your Black Friday landing page. Here are some points you must consider in designing Black Friday and Cyber Monday landing pages. Add Black Friday textSet deals deadlineShow your best-discounted productsAdd coupon code Focus on responsive page designMake your page visually appealingImprove your page user experience or page structureSet a proper website navigation FAQ on Black Friday and Cyber Monday Landing Page Design Now, we'll answer some common questions on Black Friday and Cyber Monday Landing page designs commonly found online. How much does it cost to design a landing page?The cost of designing a landing page varies depending on the complexity of the design, the level of customization required, and whom to hire for the page. A simple landing page can be designed for as little as $25, while a more complex design with multiple customizations can cost upwards of $2,00.However, if you have Elementor and HappyAddons installed, you can design unlimited landing pages at a minimal cost. But like any other tool, you must have a kind of enterprise on them. As they are drag-and-drop builders and their numerous tutorials and documentation are available, they won't take you more than a month to be used to. Check out some wonderful YouTube tutorials on these two plugins. Hope you will enjoy them.How many hours does it take to design a landing page?It mainly depends on the level of design complexity and your web design skill. However, both in Elementor and HappyAddons, you will get countless readymade templates and block sections. You can design a beautiful landing page in 3-5 hours by making a proper combination of them.Can I design Black Friday and Cyber Monday Landing pages with Elementor and HappyAddons free versions?Surely, you can design Black Friday and Cyber Monday Landing pages with Elementor and HappyAddons free versions. But only with the pro versions, you can't add too many exciting features to your pages. For example, free versions will give you access to only a limited number of readymade templates.If you are just a beginner-level designer, free versions are enough. But if you are a professional designer or have a web designing agency, pro versions are a must. Are You Ready To Design Your Black Friday and Cyber Monday Landing Page? Customers look forward to this kind of occasion to buy their favorite products at a minimum price. Naturally, they are drawn to websites that look good and give a festive vibe. That is why adding a Black Friday and Cyber Monday landing page during the festival season will give you an extra edge over the competitors. The above guide shows how to design your Elementor Black Friday Landing page using the Happy Addons' Black Friday Templates and how it can help boost your holiday sales. So if you have any queries regarding this blog, you can comment on us in the below box. If you like this post, then share it on your social channel. Don't forget to subscribe to our newsletter. Also, follow our Facebook and Twitter channels for regular updates. Subscribe to our newsletter Get latest news & updates on Elementor [yikes-mailchimp form="1"] ":36560} /--](https://happyaddons.com/wp-content/uploads/2021/11/How-to-Design-Black-Friday-and-Cyber-Monday-Landing-Page-300x188.png)