

Managing an EIementor site is very easy in every aspect. From publishing content to optimizing a site for security everything requires only a few clicks to perform. Also, Elementor enables you to build a multilingual website with ease by translating the content into more than one language.
If your target audience consists of speakers of different languages, it’s better to introduce your products or services to them in their local language. It helps you expand your reach and make an effective connection with your target audience.
You can use any popular and useful WordPress translation plugin to convert your Elementor site into a multilingual website.
In this blog, we’ll show you how to turn your site into a multilingual website step-by-step. Let’s first explain to you-
Why You Should Turn Your Site Into A Multilingual Website

To convert your website into multilingual means to make your sites available in more than one language.
In addition, you can translate your whole website or some important portion of your site into local languages. As a result, you have a great possibility to get traffic.
Sri Sharma, Net Media Planet’s Managing Director, stated that on average their clients witnessed a 20% increase in conversion when landing pages translated in the local language
Therefore, you can’t drop the idea of investing to make your site multilingual unless your target audience belongs to only one locality.
Today, with technological advances the borderline has diminished and business becomes globalized. With the flow of globalization, people turn to online shopping.
In 2023, over 2.14 billion people worldwide were expected to buy goods and services online.Moreover, it is vert high up from 1.66 billion global digital buyers in 2016. – Statista
In addition, language plays a vital role for the consumers making the final decision of purchase.

Furthermore, not only for eCommerce sites but also it is true for other websites like entertainment, educational, personal, or nonprofit sites.
Therefore, businesses that maintain great website translations will be able to win the trust of their audience and reap the benefits. Above all, optimized website translation helps to increase the rank on the Search Engine Result Page.
Benefits of Multilingual Website
Concisely, a multilingual website is beneficial due to:
- Cost-effective and reliable marketing strategy
- Reach more audiences from different localities
- Boost traffic to your site
- Amplify the conversion rate
- Improve your multilingual SEO
- Increase the trust and brand value
So, it is the right time to get more traffic to your site and boost your profit margin drastically by making your site multilingual.
Popular Translator Addons for Elementor
Therefore, to keep the high demand for multilingual websites in mind a wide range of addons has been introduced. It can translate the sites built with Elementor into a multilingual site easily. Such as-
- WPML– The Best WordPress Multilingual Plugin
- Polylang– Free WordPress language plugin
- Weglot– Automated WooCommerce Multilingual Site Builder
Today, I will show you how to create a multilingual website built with Elementor easily.
Are you new to Elementor? With Elementor Page Builder you can develop your site as per your desire without knowing any code.
Read the ultimate guide on how to build a WordPress site with Elementor to get your site ready by yourself.
Tools and Resources You Need to Build a Multilingual Website
To build a multilingual website in WordPress with Elementor, you will need the following tools and resources:
- WPML Multilingual CMS package, which includes WPML Translation Management and WPML String Translation add-ons
- Elementor plugin, free or paid version
- Quick Installation guide of WPML for easy setup
- Elementor documentation to get all the information regarding setting up different features or WPML documentation to learn more about translating your site.
How to Configure WPML for a Multilingual Website
You need to install and activate the following plugins to your website for translating the web page into different languages.
- WPML Multilingual CMS
- WPML String Translation
If necessary, check this guide to learn how to install a WordPress plugin the right way.
After successfully installing and activating the plugins on your site, you have to configure the WPML on your website.
Let’s do it.
First, go to the Dashboard->WPML->Setup section. Here, you’ll get an interface like the following image.

Here, you need to set your website’s Default language and Translation Language.
You see that we’ve defined our Translation Language ‘Spanish‘. You can set your own.

You can set your translated website page’s URL format from the URL Format area, like the following example.
- www.example.com/es/
- www.example.com/fr/

In the Register WPML area, you add the Site Key provided by WPML.

Just paste the key into the Site Key area and click on the Continue button. Now, you’ll get auto plugin updates.

Now, come to the Who Will Translate tab. Here, you can enable automatic translation and choose who can translate the site – either Only myself or Users of this site.

There are some plugins that WPML recommends for adding more features. If you need, you can install and activate the recommended plugins.

Manage WPML Settings
After finishing the WPML Setup, you need to set the essential settings. To do this, you should go to the WPML->Settings area.
You can follow the below image to set your WPML setting like us.

Congratulations, you have successfully configured the WPML plugin on your website. Let’s focus on the following part.
How to Translate Elementor Pages Using WPML
New WPML makes the translation process simpler for those pages built with Elementor. You can translate your pages individually or multiple pages at once. Let’s see how to do this.
Translate Pages Individually
You can access the WPML’s translation editor only from the back end of your site. Design a page with Elementor, as we have done below. Then, come to the WordPress dashboard by clicking the Exit button.

After publishing the page, the plus button will be activated and you can translate the page. You will get these plus buttons in the language box while editing your page or on the listing pages.
You’ll get the option on the page list.

You’ll get the option again on the editor.

Once you click on the plus button, it will take you to WPML’s Translation Editor. Translate all the content of your page by using the translate editor of WPML.
So, be aware of checking the box after completion of the translation. You can see the complete translation on the front end, after 100% completion of the translation in the editor.

When the translation is complete, the plus button will turn into a symbol of a pencil.
Translate Multiple Pages At Once
You can individually translate the posts and page, or translate all of them at once. To do this, go to WPML > Translation Management. From the top bar, select a source language and a language to which it will be translated.
Select the posts, pages, navigation menus, and other options that you want to translate. For this tutorial, we’ve selected only the pages.

Scrolling down the page a bit, come to Step 2. Configure the translation method. We have selected translate automatically.

You can review the translated content before publishing. But if reviewing isn’t important, you can select the option to publish without review. Finally, click the Translate button.

Click here to see the detailed process of using Translation Management.
Add New Content to the Page and Update Translation
Now, if you need to add a new element to your page and translate it, then simply follow the same mentioned steps above: Go to your front-end builder and add a new element, Save, and Click the Go To Dashboard button.

Here, you will find a spinning arrow button instead of a plus. This indicates the translation needs an update.

Click on the spinning arrows and re-open the translation editor. You will see all the previous translations. You have to translate the new contents only.

You can see the translated content has been published on the frontend.

Update an Existing Content and Its Translation
Often, you may need to edit the original language of the existing page or post.


If you update anything, the existing translation is not lost. The updated text will be simply translated.
So that you can build your WooCommerce marketplace easily with Elementor without being a technical gig. Lastly, to grab international clients from all over the world you must turn your site multilingual.
Get the Complete Guide for your WooCommerce Multilingual Marketplace.
Elementor Global Widget Translation
Global Widget is a premium feature of Elementor. It allows you to control a particular widget displayed in a different part of a website.
Also whenever you update the Global Widget content in one place, it will update the rest automatically.
Translation supports the templates and global widgets for the following versions-
- WPML Multilingual CMS (4.0.5 or above)
- WPML String Translation (2.8.5 or above)
- Translation Management of WPML (2.6.5 or above)
We have designed a simple page using Elementor, like the picture. This page contains a text editor widget and a call to action widget which we set as a global module.

Follow the below steps to translate the Global widgets:
- To translate the page, click the Plus icon that appears in the Language Meta Box. It will open the translation editor.

2. Fill in the translated texts and mark them as completed. Save it when the translation is completed. You will find that the text of the Global Module has not appeared on the translation editor page.
3. If you intend to translate the Global Widget Text then go to Elementor -> My Templates. Click the plus icon and select the desired language to translate the Global Widget. It will take you to the Translation Editor page.

4. Insert the translated text and mark it as completed. When you have done translating the text, simply save them.
The below image shows how a Global Widget looks on the front end.

Add Translated Global Widget to a Page
You can simply insert the already translated Global Widget into any page without translating the text as it will be updated automatically.
You can translate any page content by simply clicking on the Plus Button. WPML for WordPress takes the responsibility to display the translated version at the front end.
Unlink turns a global widget into a normal widget on the webpage. Now, during translating, you will find the global widget on the translator editors’ page.

Edit or Update the Global Widget Content
If you edit or update the Global Widget Content from the original, you have to update the translation page.

Updating the translation is simple. To update the translation of Global Widget, navigate to Elementor-> My Template.
Click on the pencil or setting icon to update the translation. It will bring you to the Translation Editor page.

You’ll be taken to the translation page. Click the Complete Translation button. The text will be translated immediately.

Translating Elementor Template for Multilingual Website
You can create a template-using Elementor, which can be easily added to any page of your website. The Elementor WordPress template translation is almost the same as the Global Widget translation.
Follow the below-mentioned steps to translate a section, page, footer, single, and archive templates.
- You can create a simple block template by navigating Templates-> Add New. Create a simple template and publish it.

2. Go to the saved template and click the plus button to translate the section template into the desired language. It will bring you to the translator editor page.
3. Fill in the translated texts and once you have translated the texts save changes.
4. Insert the updated template to a webpage and click on the Publish button.

5. In the back end Page Editor, click on the plus icon to translate the content into the desired language, it sends you to the Translation Editor page.

6. You will find the translated text in the section template is pre-loaded into the translation fields. Finally, add the updated text for other elements on the page, and don’t forget to save them.
The following image shows how a translated page looks like on the front end.

Translatable Elementor Items in Multilingual Website
WPML generally supports the following textual items in Elementor-
- Heading
- Text Editor
- Video
- Button
- Icon
- Price List
- Price Table
- Flip Box
- Slides
- Image Box
- Icon Box
- Icon List
- Counter
- Progress Bar
- Testimonial
- Tabs
- Accordion
- Toggle
- Alert
- HTML
- Form
- Posts
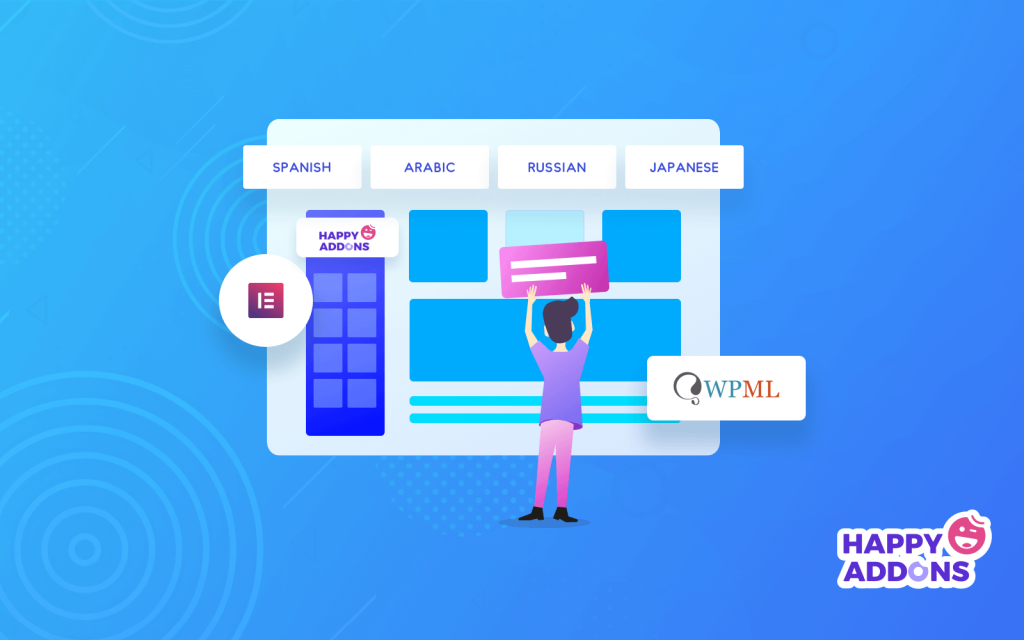
How To Add WPML Support For Elementor Pages Using Happy Addons
Happy Addons is fully (both free and pro) compatible with WPML. So you have the flexibility to translate into the WPML-supported languages of the sections made with Happy Addons on your website.
Let’s see how can you make your page multilingual using the Happy Addons.
We’ve already created a page for the demonstration.
First, you need to go to the Pages->All Pages area for translating the pages.

Next, select a page and click on the (+) icon to add the language.

You are able to select multiple pages for translating as well as set translation language.

Now, in the same way, as shown above, scrolling down the page a bit, come to second step. Select Translate automatically for all the languages.

Finally, click the Translate button.

Now it’s time to activate the translation.
To do this, you need to edit the page first and then define the translation language.

How To Translate Strings With WPML String Translation?
The theme or plugin you have on your website has tons of string text. You should focus on the string text translation.
Visit the WPML->Theme & Plugins Localization area to translate your themes or plugins’ string text. Then, you need to define your theme and plugin’s name for translating the string.
Now hit on the Scan selected plugins for strings area to scan the plugin’s strings. It takes some moments so wait for a while for counting the strings.

After scanning all the plugin strings, you should go to the WPML->String Translation area.

Now, click on the (+) icon to add the language.

Now, go to WPML > Translation Management. Expand the Other texts (Strings) section.
Filter the Domains you want. Then, select strings as many as you wish.

In the same way, as described above, select the Translate automatically option for all the languages in the second step.
Finally, click the Translate button.
That’s all.
Also Check: How to Build a Website with ChatGPT (7 Simple Steps)
Final Thoughts
You may lose your potential consumers due to language issues and eventually, it will affect your business growth.
Therefore, to improve your client’s experience you may offer easy navigation and their preferred language for easy understanding of your products or services.
Moreover, Elementor lets you customize your sites according to your requirements.
In addition, it is the best fit for your business where WPML adds a language switcher widget to the Elementor Page Builder.
Also, WPML offers a dedicated customer support system to assist you in any difficulties.
Hence, you will get a refund within the 30-day trial period if you are not satisfied with their services.


