There is no doubt that captivating product presentations can substantially influence potential customers and drive sales. One currently trending and effective way for product presentation is through 360-degree rotating product photography. It allows customers to explore a product from various angles.
This can give users a better overview of the products, potentially leading to higher conversion rates. While advanced tools and cameras make it easier to shoot 360-degree product photography, the real challenge begins when it comes to displaying it on a website.
No worries if your site is built with WordPress. In this article, we’ll show you the easiest guide on how to display 360-degree rotating product photography in WordPress with Elementor. Along with that, we’ll also cover some theoretical aspects related to the topic.
What Is 360 Degree Product Photography?
360-degree product photography shows you a product from different points of view so users can feel like they are seeing it from their hands. This method involves taking a series of photos of the item and combining them together to create an interactive experience.
When the photography is displayed on a website, customers can move and zoom the item to see it from any angle. It gives the users a somewhat realistic experience. Not only is this approach aesthetic, but it can also ensure trust and take the online shopping journey to the next level.
What Tools Do You Need for 360 Degree Rotating Product Photography?
Hope you already know what you need to take perfect 360-degree rotating product photography. Still, we have briefly covered the tools and equipment you need for this.
1. Camera
A good quality camera is the foundation of any perfect photography setup. Although a DSLR or mirrorless camera is generally chosen because of the image resolution and clarity, there are many smartphones with cameras that you can use to do this.
2. Tripod
You need a good tripod so that your camera stays stable while shooting. Stability is essential when taking multiple shots, as even a small movement can result in worse photos. A tripod that’s height-adjustable and pan-tilt will make you more flexible.
3. Turnable Stand/Table
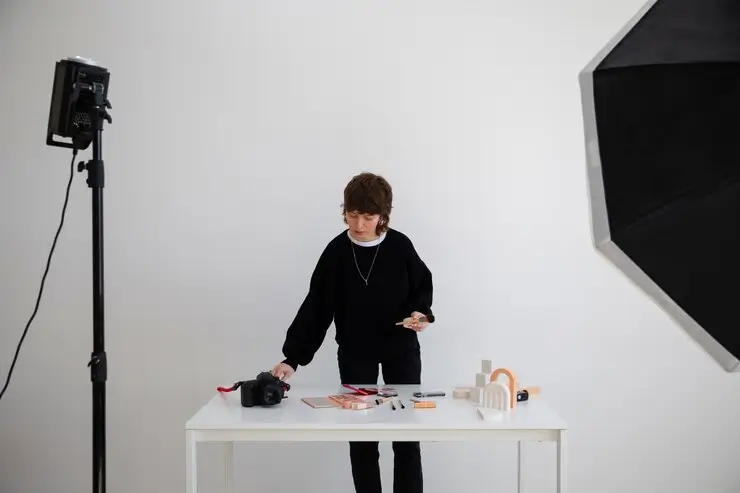
For a smooth rotation and stable angle, a motorized turntable is the best choice. These turntables can be adjusted for speed and rotation angle to get your product properly shot from all angles. It is also possible to use manual turntables, although these will require a bit more work to turn.
4. Lighting Equipment
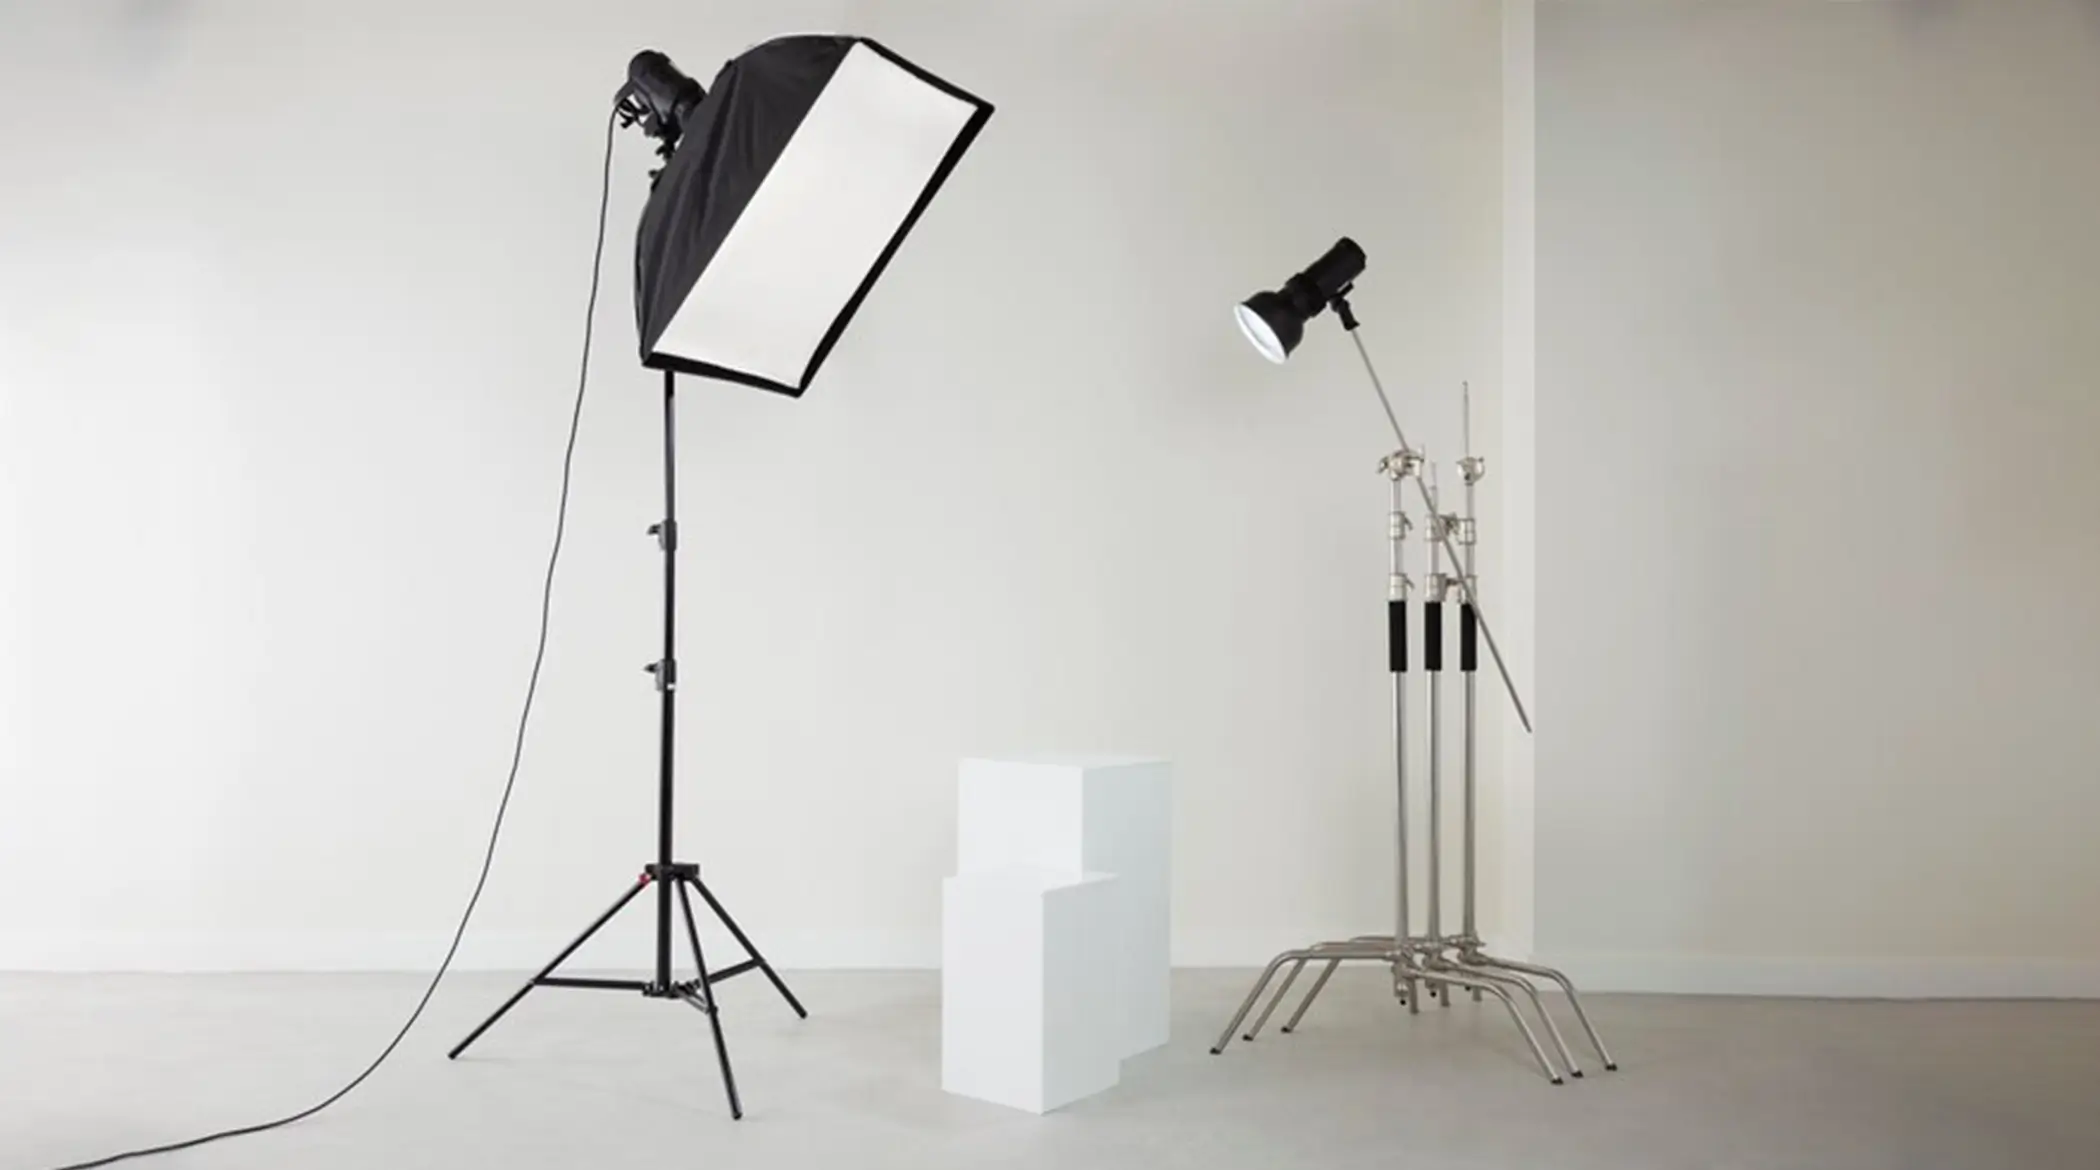
Good lighting is the key to good product photography. Use softbox lights or ring lights to produce smooth and diffused light that eliminates shadows and emphasizes details. Natural light can also help, but it’s not always reliable, so having artificial lighting will ensure more predictable results.
5. Use Photography Software for Editing
You need 360-degree photography software to load, process, and combine your photos interactively. You can also adjust the colors, contrast, and sharpness of the images so the photography looks good.
Want to create a multi-seller photography business website? This tutorial explains how to create a photography business website on WordPress.
How to Display 360 Rotating Product Photography in WordPress with Elementor (Step-by-Step Guide)
Once you have your product photographs ready, it’s now the time to display them on WordPress in a 360-degree rotating format. But for that, you need the following plugins on your site.
HappyAddons is a notable addon to the Elementor plugin. It comes with the 360 Rotation widget, which allows you to create such photographs on WordPress. Once they are installed and activated on your site, start following the steps explained below.
Here’s a guide on how to get started with HappyAddons.
Step 01: Open the Elementor Canvas and Add the 360 Rotation Widget
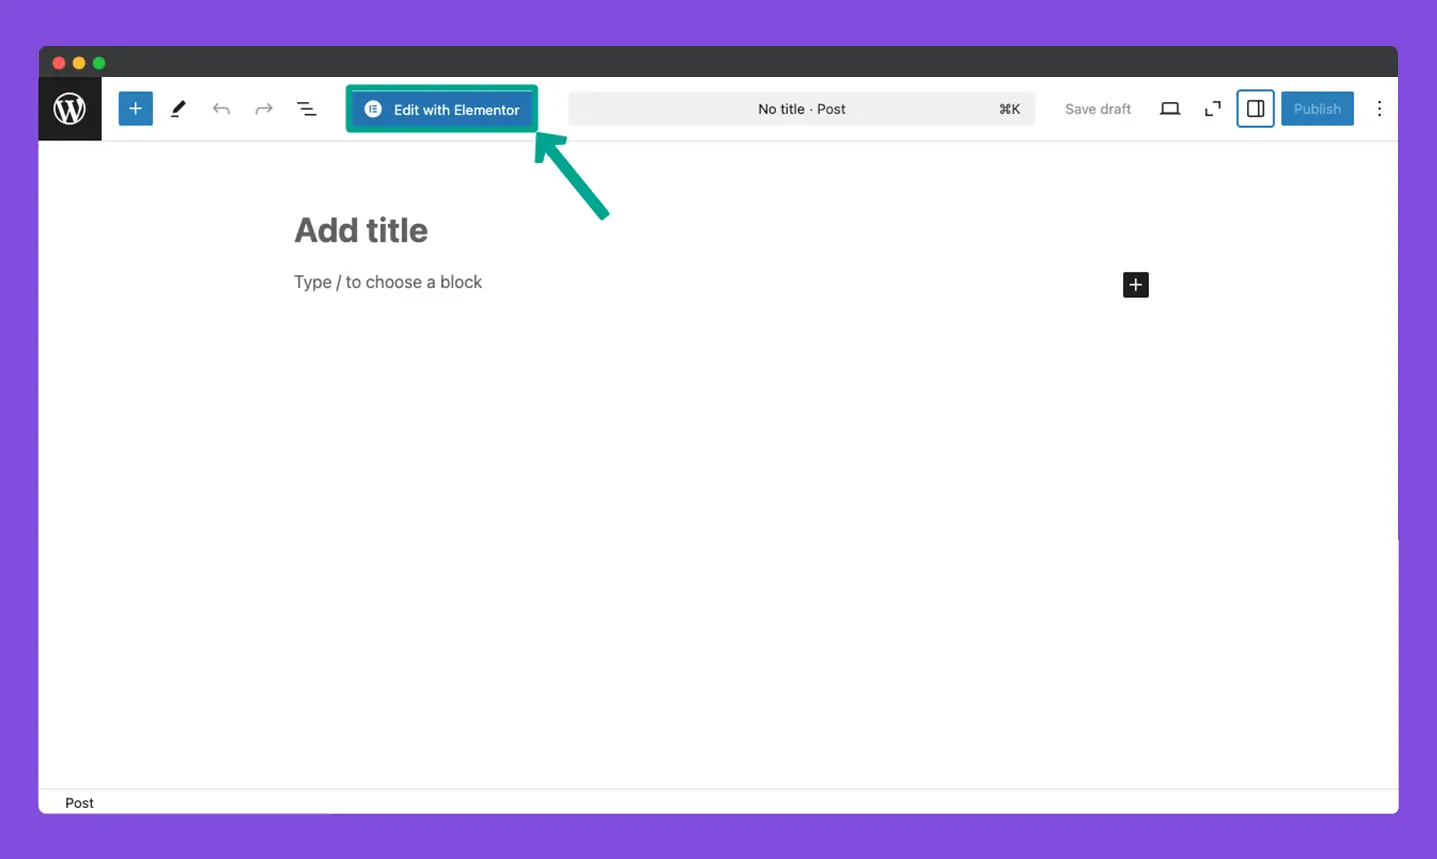
Open the post/page with Elementor Canvas where you want to add the 360 degree rotating product photography.
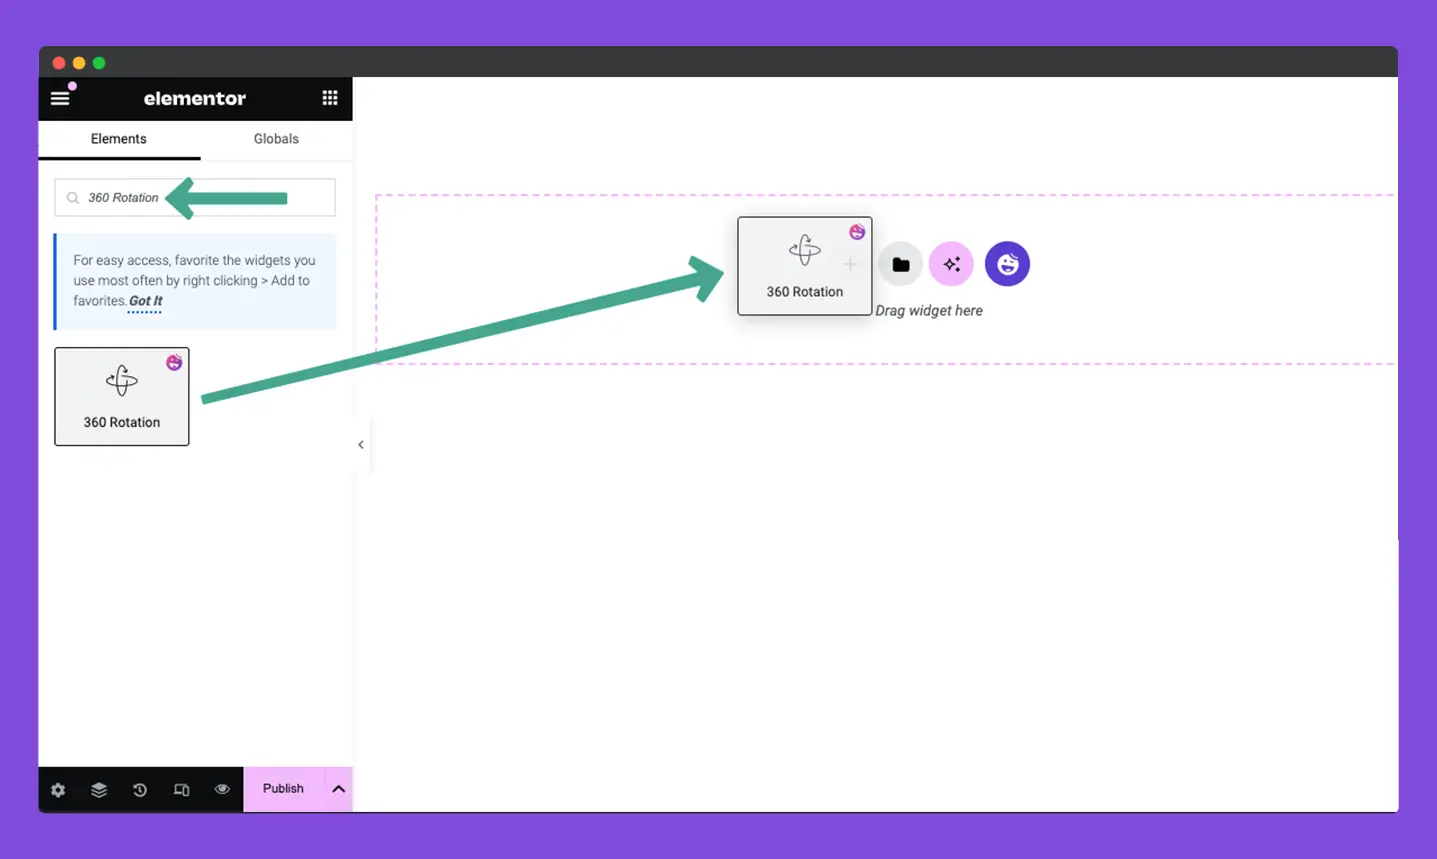
Find the 360 Rotation widget on the Elementor panel. Drag and drop it to the canvas.
Step 02: Add Product Images to the Widget
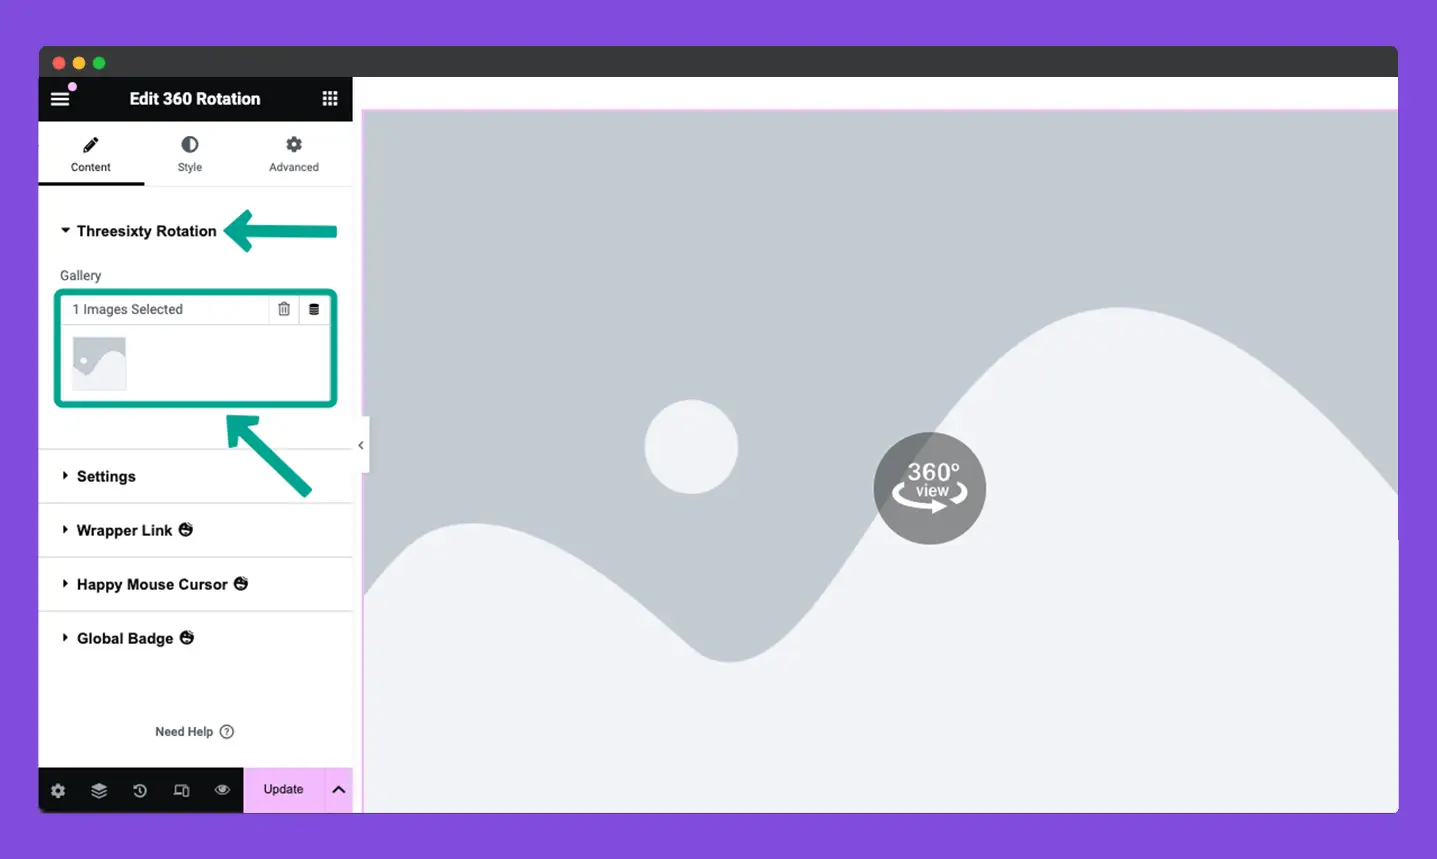
Once the widget is added, come into its Content tab. After that, expand the Threesixty Rotation section. Click on the Gallery option.
This will allow you to select images to create the 360-degree rotation product photography.
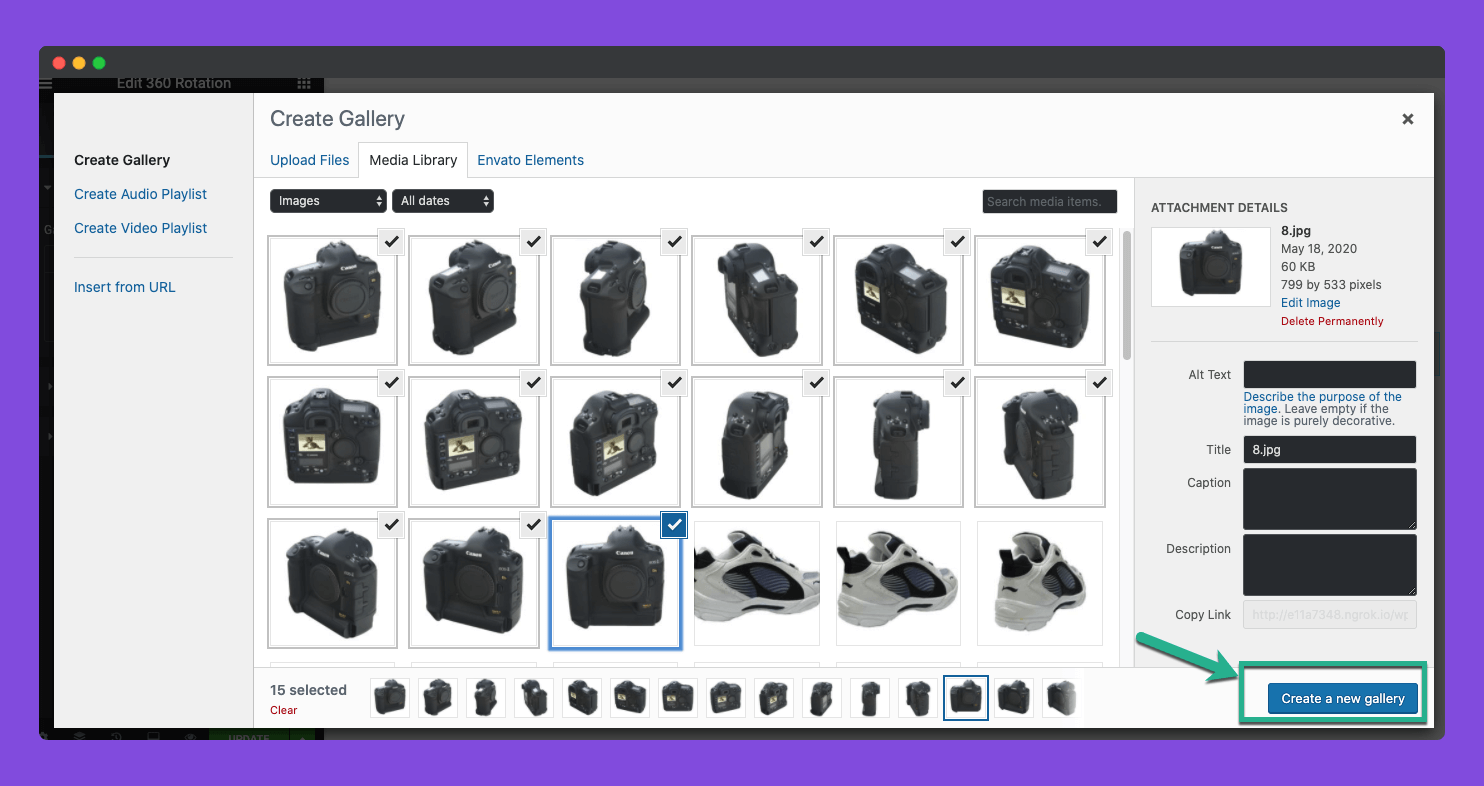
You may upload images from your local drive or from your media library. For this tutorial, we’ll upload images from the media library.
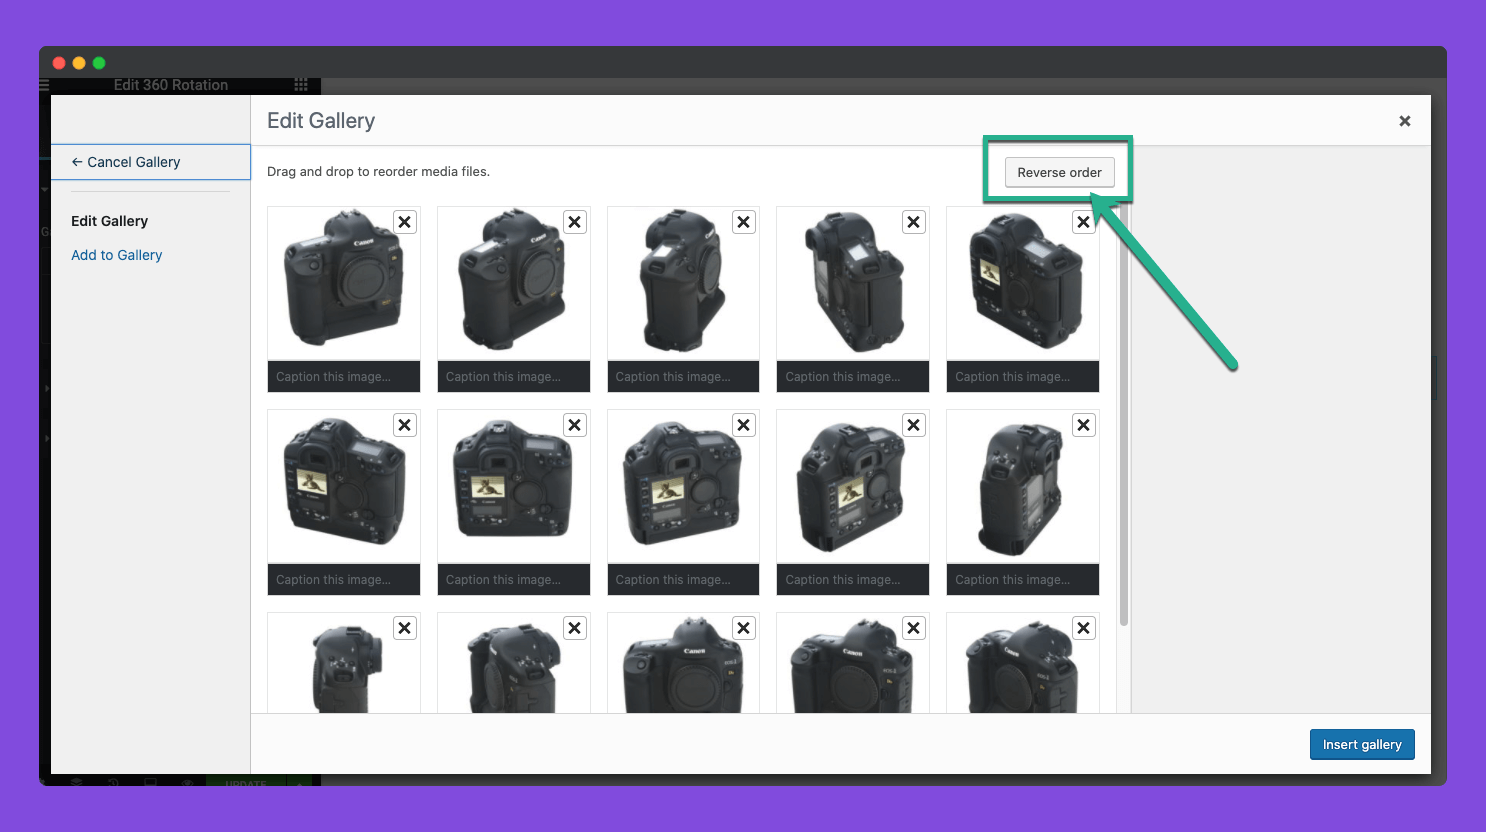
You can select as many images as you want for the widget. Once the images are selected, click the Create a new gallery button.
Before adding them to the Elementor Canvas, you’ll be allowed to review the selected images one more time. You may remove it if there are any wanted ones. You can also reverse the photo order.
Finally, click the Insert gallery button.
The images will be added to the canvas. You can see the in the Gallery section on the Elementor panel.
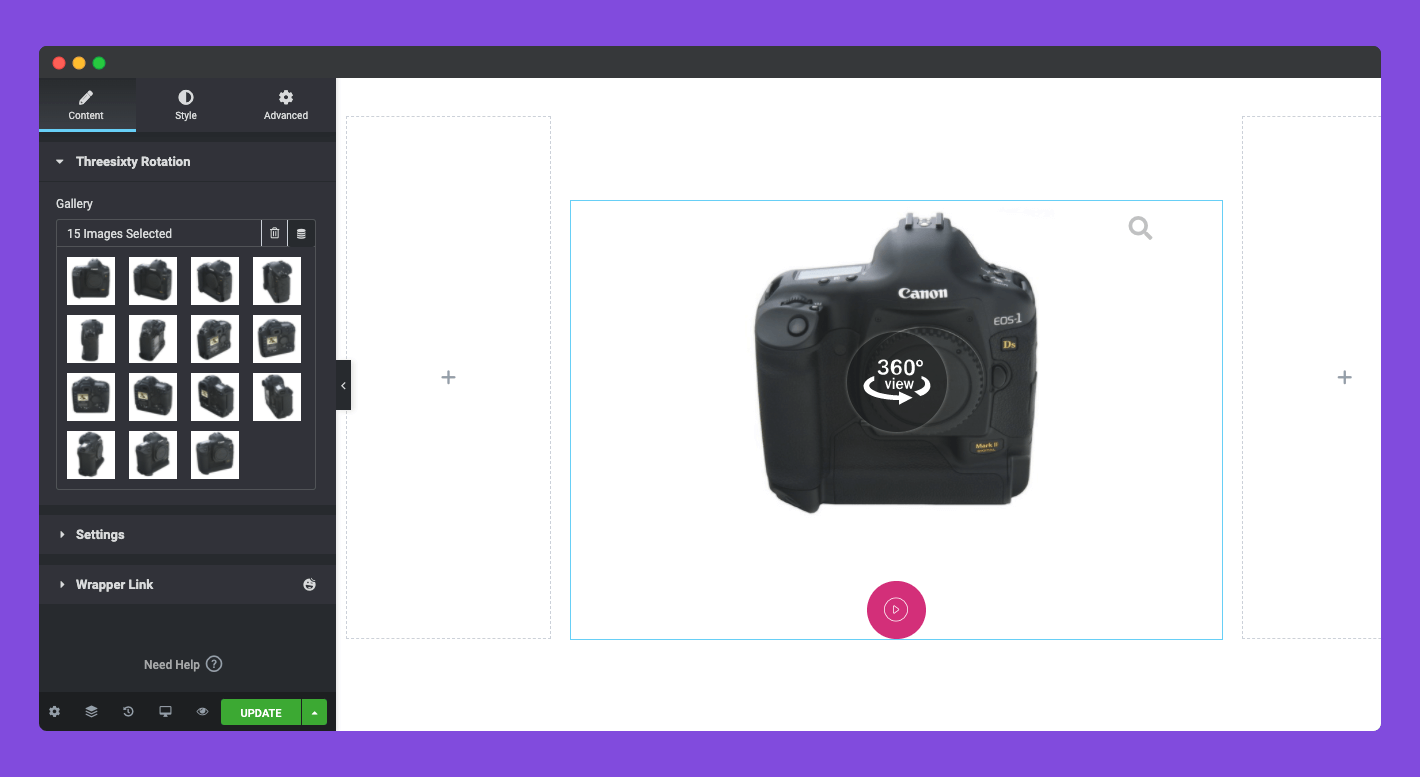
Step 03: Configure Settings for the 360 Rotation Widget
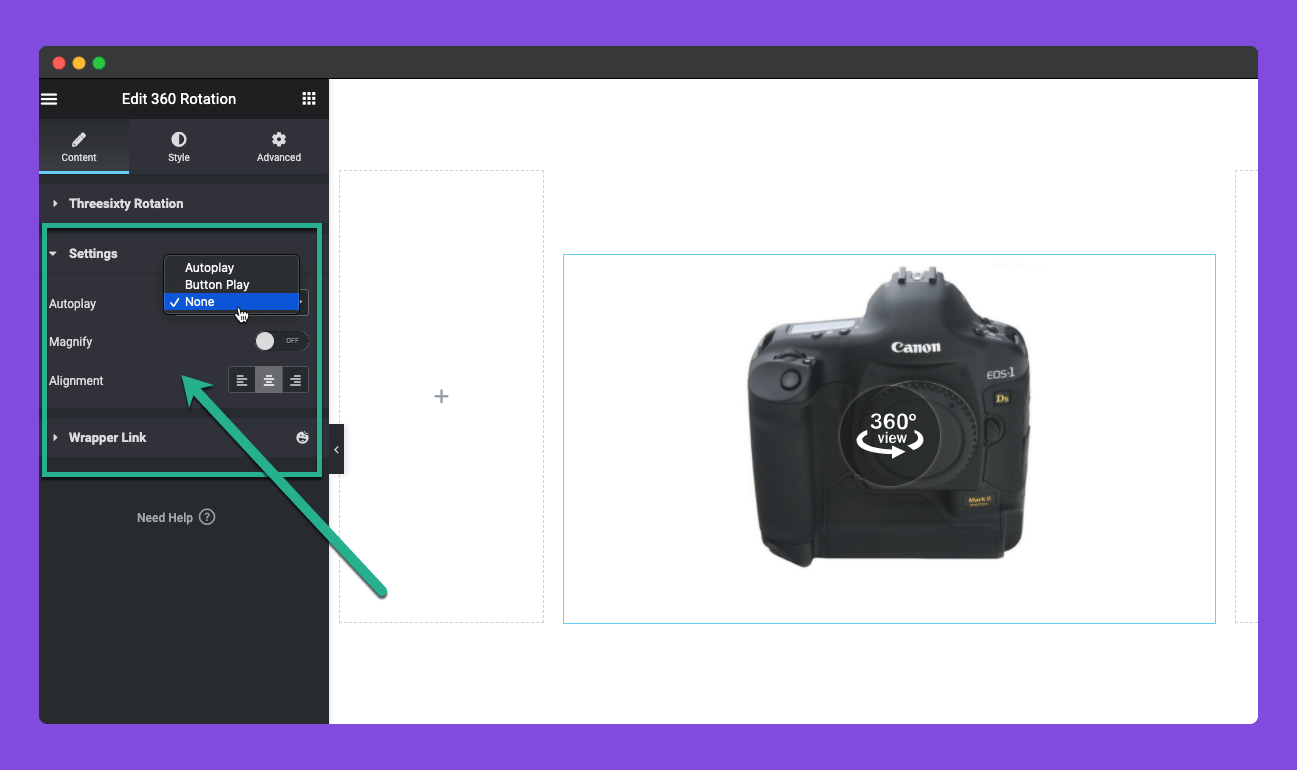
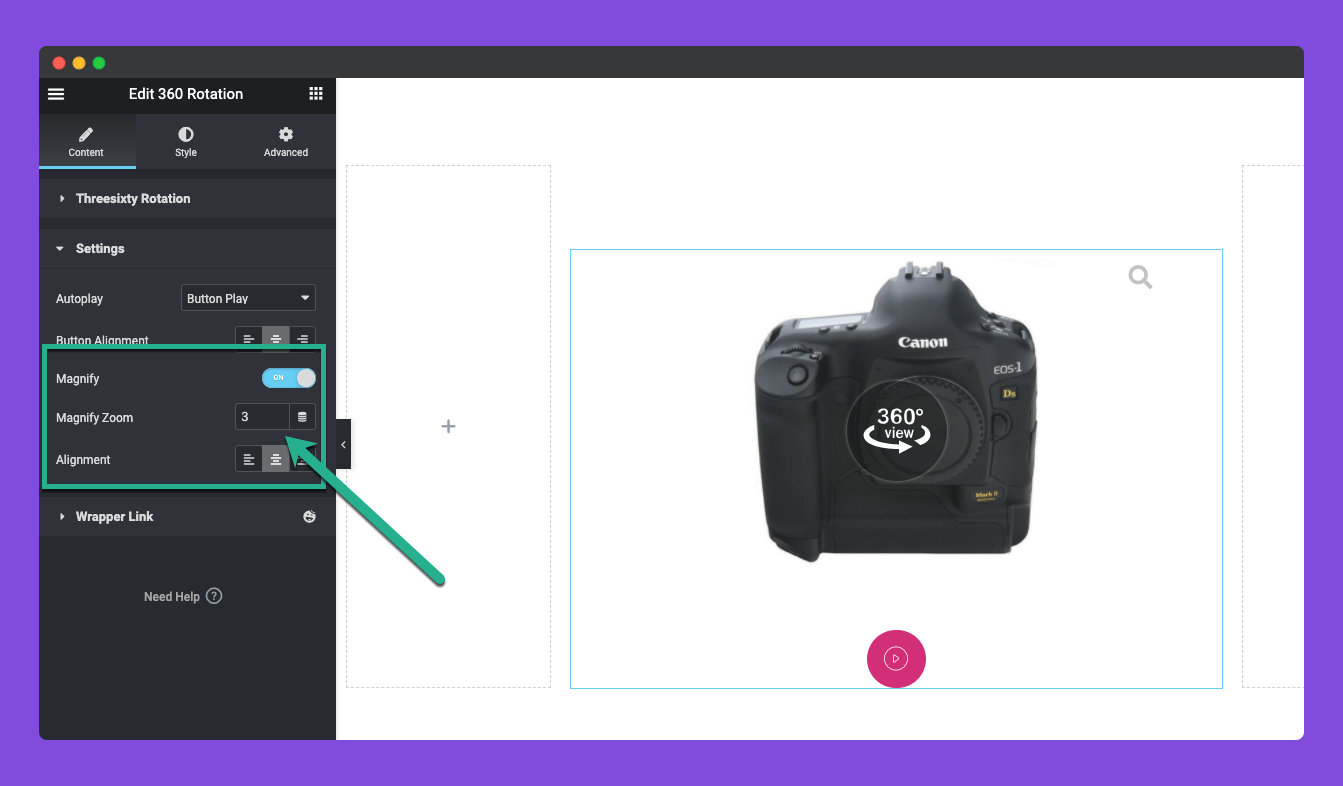
Expand the Settings section under the Content tab. You’ll see three options – autoplay, magnify, and alignment.
If the Autoplay is enabled, photographs will automatically rotate in 360 degrees without any human effort. Here are again three options – Autoplay, Button Play, and None. Choose the suitable option you need.
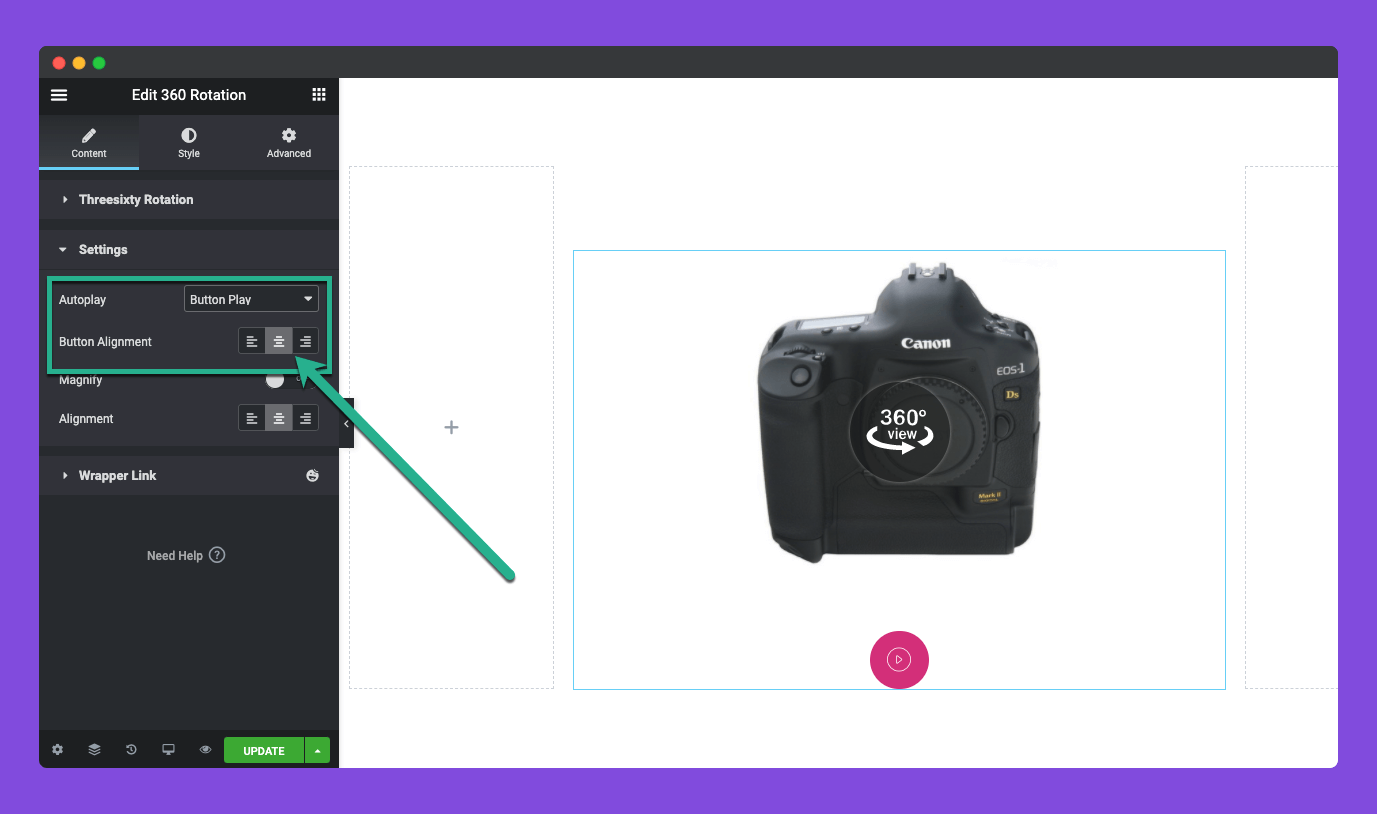
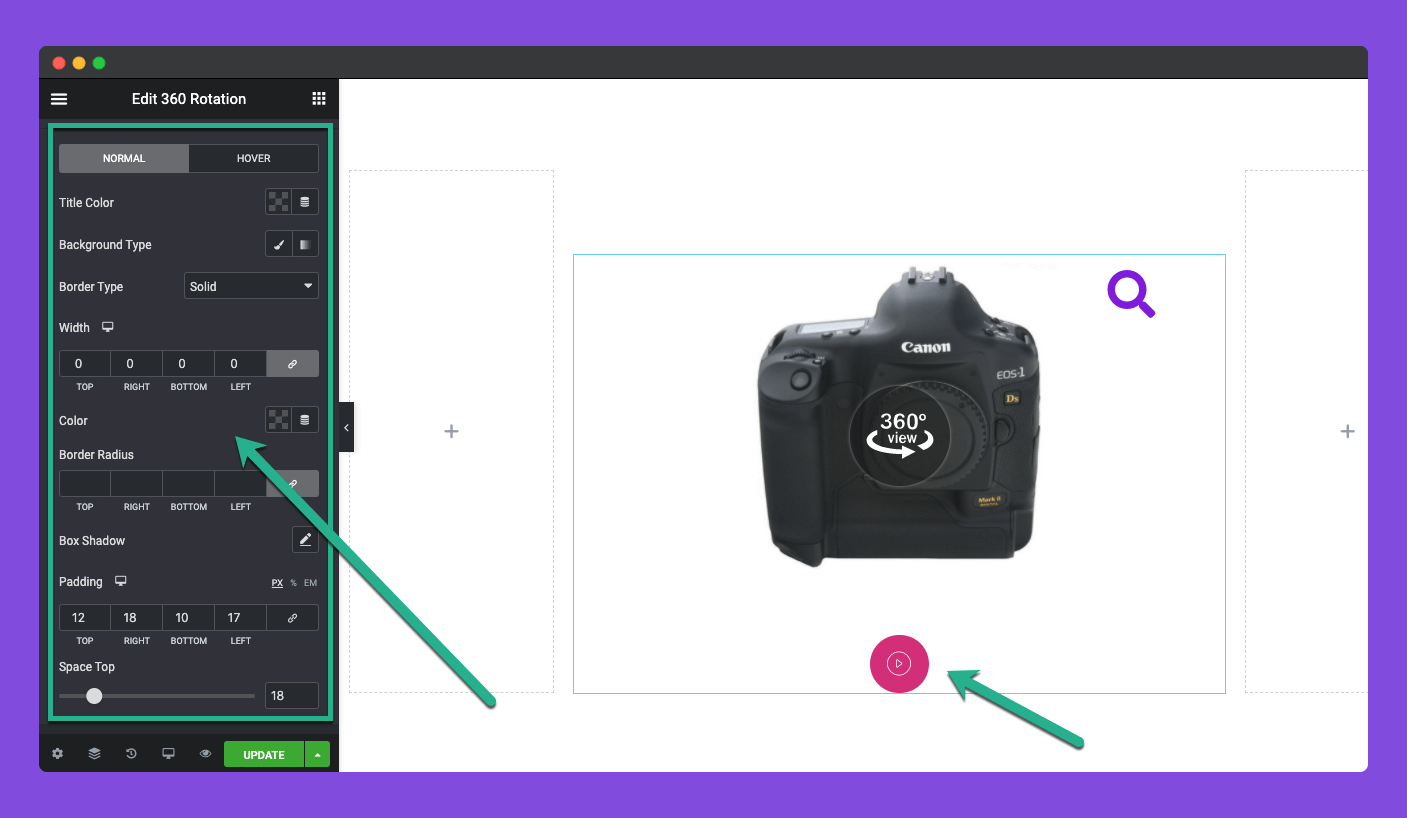
For this tutorial, we’ve selected the Button Play option. This will add a button under the photograph on the frontend. When clicked, the photograph will automatically rotate.
You can even align the button wherever you want on the canvas. We have centrally aligned it.
Enabling the Magnify option will let users zoom in while rotating the photographs. You can even set the zoom-in amount.
Finally, align the photograph using the Alignment option within the widget area.
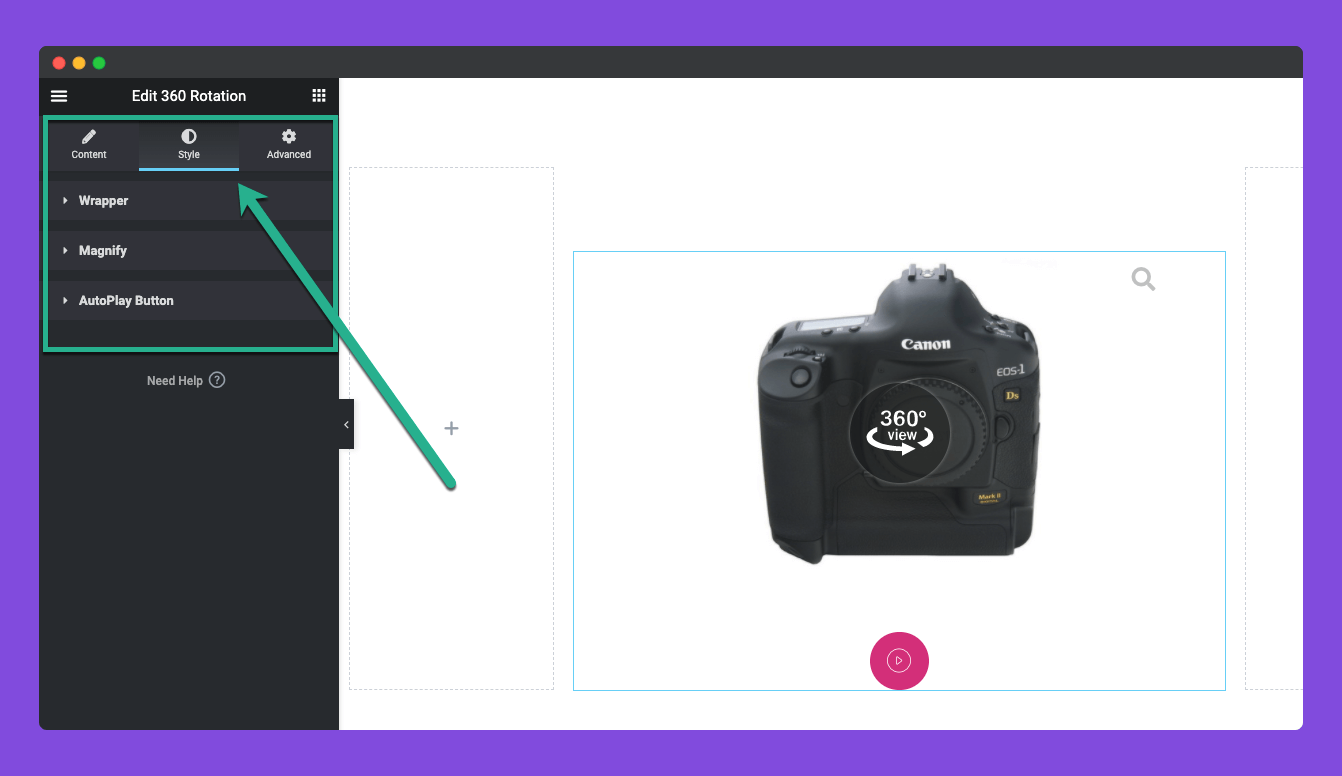
Step 04: Stylize the 360 Rotating Widget
Come to the Style tab. You’ll see three options sections here. They are Wrapper, Magnify, and Autoplay Button to further stylize and customize the widget.
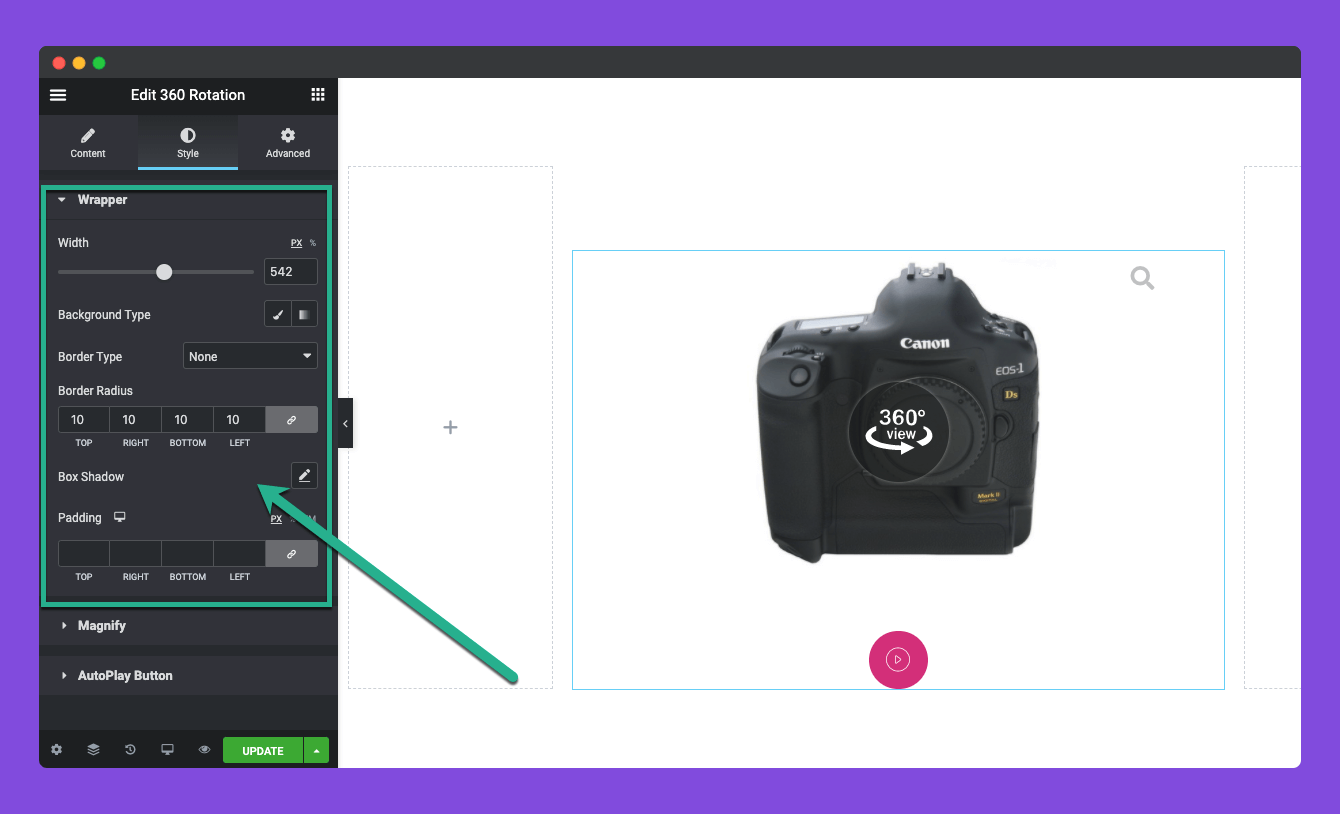
Expand the Wrapper section. It allows you to stylize the container for the widget. You can change the wrapper width, background type, border type, border radius, box shadow, and padding.
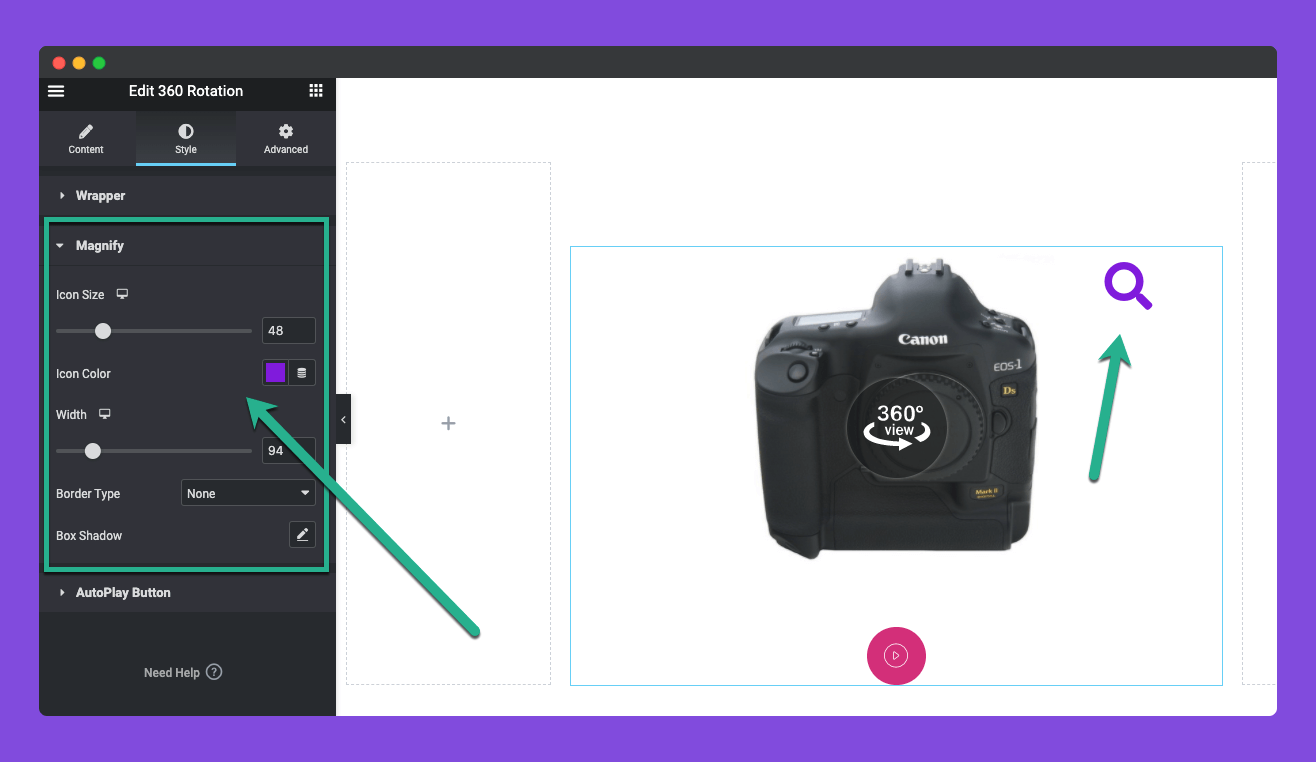
Once you enabled the Magnify option, an icon will appear on the widget. Now, from the Magnify section under the Style tab, you can customize the icon size, icon color, width, border type, and box shadow.
In the same way, expand the Autoplay Button section under the Style tab. You can change the title color, hover effect, background type, border type, width, color, border radius, box shadow, padding, and space top.
Thus, you can make the autoplay button attractive.
Step 05: Preview the 360 Rotation
When all the settings and customizations are done, go to the preview page and check if the widget is working perfectly or not.
You can see that the widget is working well on our end.
Tips for Creating a 360 Product Photo
The quality of your product photography should be finalized before you display it on the website. Otherwise, no matter how advanced WordPress or Elementor features/widgets you use, it won’t be possible for you to perfectly present your product photography to convert visitors.
1. Use Consistent Lighting
Lighting is one of the most important elements of product photography. To produce a high-quality 360-degree image, ensure that the lighting is consistent throughout the shoot. It’s a must to make the product photo visually pleasing.
2. Capture High-Resolution Images
Get a camera that allows you to take high-resolution images so you can showcase the details when zoomed in. Keep resolution at 300 DPI (dot per inch) so the photos look sharper. You can also consider a lens with a moderate focal length (50mm-ish) to avoid distortion.
3. Edit and Optimize Your Images
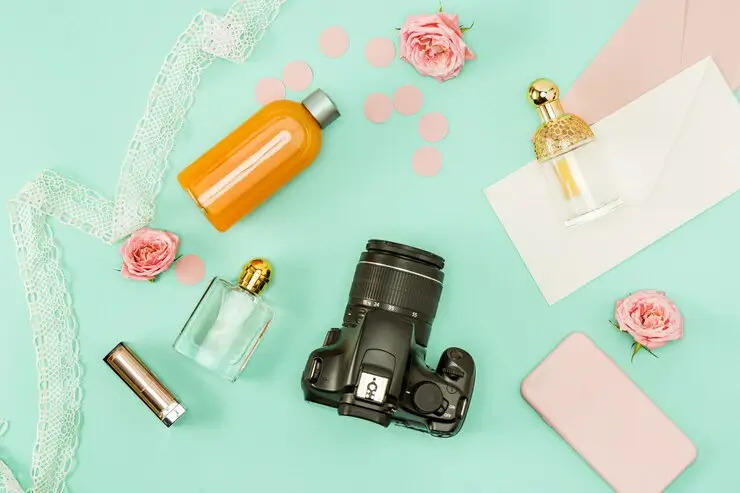
Do at least some basic editing to make the images look good. Ensure a good balance of color, contrast, and light. Finally, before uploading them to your site, compress them by reducing unnecessary weight so they don’t make your page heavy. Check how to optimize images for WordPress.
4. Maintain a Consistent Background
If you have different backgrounds for each shoot, it can really create an eye-creaming environment for the viewers. Besides, separate backgrounds can have individual lighting effects on the photography. So, to stay in a safe zone, ensure a solid-consistent background for the photos.
5. Use a Comfortable Stand or Table
Use a suitable stand or table that you can move around to take pictures. This will help you significantly reduce the extra effort you have to put into 360-degree photography.
Benefits of 360 Degree Rotating eCommerce Product Photography
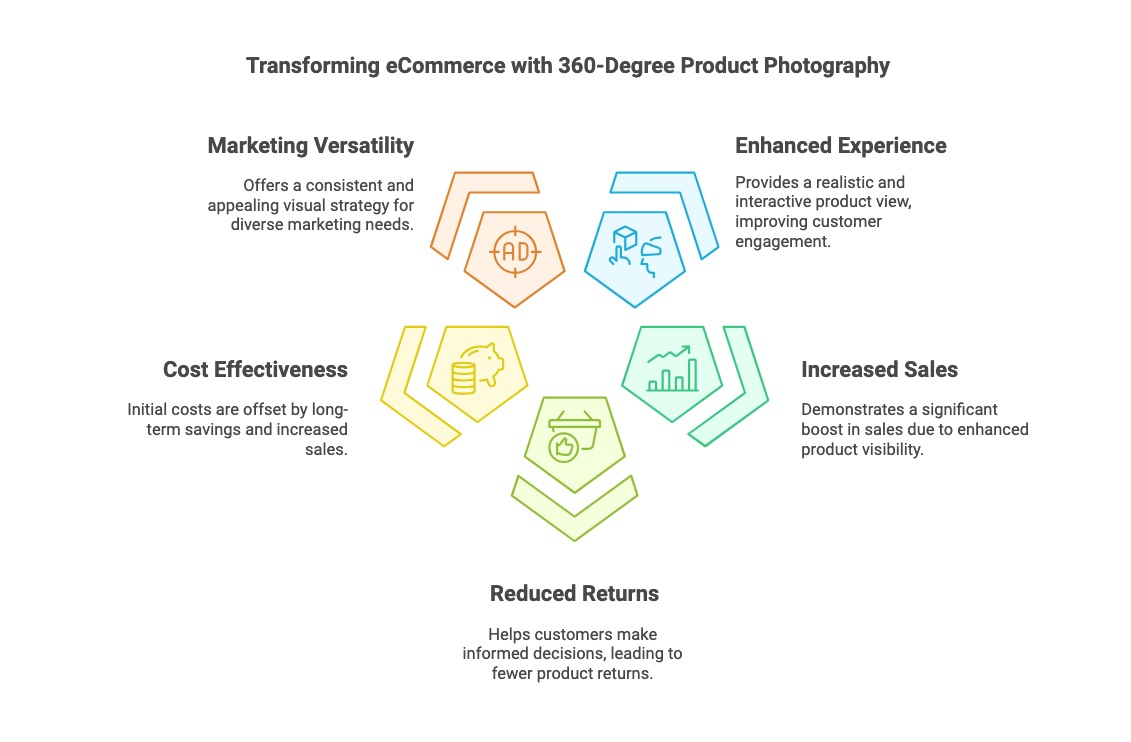
Before ending this discussion, we want to cover a few points about the benefits of displaying 360-degree rotating eCommerce product photography on business websites. Hope you are already aware of these benefits. Still, we request that you look at our points below.
Enhanced Customer Experience
360-degree product photography provides a realistic view of the products that enable users to interact with the products as if they are real. This experience can significantly improve the shopping experience. Learn how to engage customers to grow more sales and satisfaction.
Increased Sales Potential
The use of 360-degree product photography will increase sales dramatically. According to research, eCommerce companies see an increase in sales of as much as 47% when they display this kind of imagery on product pages.
Reduced Return Rates
By giving the customers a 360-degree product experience, the customer can make better decisions, resulting in lower returns. Because when customers get to inspect every angle of a product, they are less likely to be surprised and disappointed upon opening it.
Cost Effective
The initial expense of 360-degree photography might be expensive. But it can save you money in the long run by eliminating bounce rates and increasing customers’ likelihood of buying the product.
Versatility in Marketing
360-degree photography can bring versatility to product marketing. This enables companies to have a consistent, appealing visual appearance, increasing brand visibility and recognition. Explore the trendy eCommerce marketing strategies.
Final Thoughts
We are now at the end of today’s discussion. Hopefully, you have already realized that creating 360-degree rotating product photography isn’t difficult. You can easily do this with the widget described above. You have to spend the maximum amount of time, money, and effort photographing your product from various angles.
Once this part is done, HappyAddons will take care of the rest. Using this plugin, you can enjoy many more exciting web design features. It has a premium version as well, alongside the free one. Explore the plugin by clicking the buttons attached below.

