

Images have been an integral part of any website today. They play a vital role in breaking up the long blocks of texts, tutorials, and paragraphs while providing a strong visual appeal. But the increasing use of high-quality images often leads to slowing down a website and harming user experience.
This problem occurs mostly in eCommerce, photography, and event management websites. According to numerous statistics, we have found that 60% of visitors move away from websites that take over three seconds to load. This can affect the website conversion rate severely.
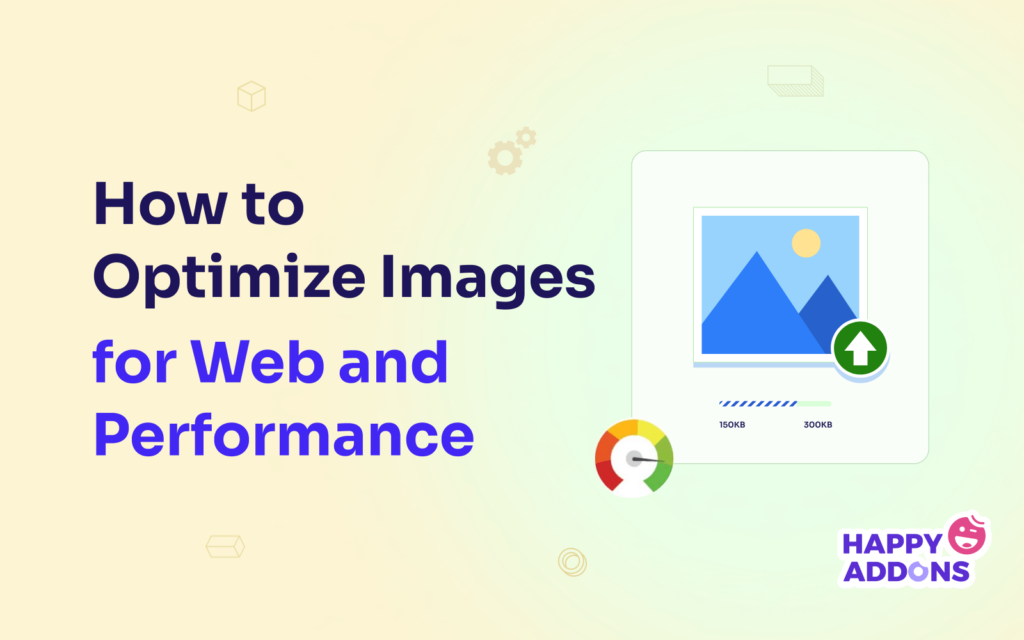
Fortunately, there are many ways by which you can optimize images without compromising their quality. We’ll help you explore all the possible tips on how to optimize images for the web and seamless performance in this article. Let’s get started!
Table of Contents
- What is Image Optimization?
- Benefits of Optimizing Images for Websites
- How to Optimize Images for Web: Tips and Guidance
- Best Image Optimization Plugins for WordPress
- FAQ on How to Optimize Images for Web and Performance
- Final Takeaways on Image Optimization
What is Image Optimization?
Image optimization is the process of reducing the size of images and delivering them in the right size, format, and resolution that fit on any device. Optimization aims to make images lightweight so that web pages are loaded quickly without causing any negative impact.
You’ll come across numerous methods for optimizing web images once you search online. Some most popular of them are compression, resizing, format changing, enabling lazy loading, using Content Delivery Networks (CDN), etc.
- Compression shrinks the image size removing the additional data and metadata.
- Resizing reduces the dimension of images.
- Lazy loading ensures images are loaded only when they are needed.
- Content Delivery Networks (CDN) deliver images from the closest servers to users.
Benefits of Optimizing Images for Websites
 1")
There are numerous benefits to optimizing website images. Check out some most valuable of them in the list below.
- Fasten the page loading speed.
- Reduce bandwidth consumption.
- Boost SEO score and improve ranking in search engines.
- Minimize server load and ease web maintenance.
- Save costs by allowing you to manage data in limited storage.
- Help in responsiveness and better mobile performance.
- Increase user engagement, sessions, and conversion rate.
How to Optimize Images for Web: Tips and Guidance
Image optimization doesn’t mean compressing and resizing images only. Several other aspects and techniques are also involved in the process. Let’s explore the necessary tips and guidance on the most effective methods of optimizing web images in this section.
1. Select the Right Image Format
Before cropping, resizing, or modifying any image, you must decide on the image format for your website. There are some popular image formats that we see commonly used on websites. Each of them has unique characters and a specific set of demands. They are:
- JPEG – It uses lossy compression in which some data is lost while compression without compromising quality. JPEG is good for photographs and graphics with complex colors.
- PNG – It uses lossless compression in which no data is lost during compression and maintains high quality. So, PNG files are comparatively large. PNG suits best with Logos, text graphics, and web images.
- GIF – If you want to show a low-resolution short animation clip, GIF works best. It uses lossless compression, but the file’s visual quality isn’t as good as the others.
- SVG – This is a vector-based image format using lossless compression. It ensures high image quality and retains the file data. SVG works well with Logos, Icons, and complex graphics.
Note: GIFs aren’t created from static images but from video clips. You’ll get lots of free and paid tools online to convert video clips into GIFs. Ezgif.com is such an online solution.
2. Compress Images to Reduce Extra Weight
Compression reduces the extra size and heaviness of image files, which saves bandwidth loading web pages. Some most popular tools for image compression are TinyPNG, Imagify, Optimole, and WP Smush. Here’s how to compress large images with TinyPNG.
- Go to Tinypng.com.
- Click on Drop your WebP, PNG, or JPEG files.
- It will allow you to upload photos here.
- Once the photos are uploaded, they will automatically be compressed.
- You’ll get the download options on the right side.
- Click on them to download images.
 2")
3. Resize Images Properly for Desired Dimensions
While designing a website and creating new posts, you’ll have to add images in different web sections to make your content eye-catchy. They may be featured images, inline banners, side banners, and infographics. However, their sizes and dimensions won’t be the same in every case.
Using a larger image on a position requiring a smaller dimension can cause serious problems and stop displaying the image correctly. To help you out, we have provided a collection of commonly used image sizes and dimensions in the image below. You may take them as a reference.
 3")
4. Write a Concise and Relevant Alt Text to the Image
Note that search engines can’t read images. They rely on alt-texts to understand the graphical content on the images and crawl them. So whenever you add an image to your website, be sure to add relevant and keyword-rich alt-text to them. This can provide you with SEO benefits as well.
There are several key points to remember when writing alt-texts. They are:
- Write concise and meaningful texts that reflect your image context.
- Don’t include unnecessary details and links.
- User proper capitalization, punctuation, and grammar.
- Make sure the title doesn’t contradict the image content.
5. Use a Meaningful Thumbnail
A thumbnail is a smaller version of an image representing a collection of closely related large images. For example – eCommerce websites, portfolio sites, and galleries. In eCommerce websites, thumbnails are used to represent single product pages on the home page and category page.
If you visit any photography website, you’ll see thumbnails are used to illustrate the categories of image galleries. The biggest benefit of thumbnails is that you can display lots of product information and images in a limited space.
Watch the video below. This is the home page of an eCommerce website that displays the thumbnails of all the products in their store.
Here’re some best practices you must follow in using thumbnails:
- Use a consistent thumbnail image size.
- Display them in a grid or gallery format.
- Make the thumbnail clickable.
- Use high-quality images.
- Test them on different devices to check responsiveness.
6. Enable Lazy Loading
Lazy loading is a technique that delays the loading of images until you scroll the web page to view them. For example, let’s say an eCommerce page has a total of fifteen images, with five on the top section. When a user lands on the page, only the first five images will load initially.
As the user scrolls down the page, the remaining images keep loading one by one and come into view. This reduces initial loading time and improves user experience. Plus, it saves your website from consuming bandwidth until necessary.
7. Use Image Sitemaps
 4")
An image sitemap (also known as an XML sitemap) is a file that lists all the URLs of images on a website, including other information like alt-tag, caption, and file type. This enables search engines like Google to discover and crawl new website content and index it quickly.
Sitemaps are important for many food reasons. If you are running a brand-new website, search engines will take time to crawl and index your information, which may take days to weeks. But by adding sitemaps, you can reduce this time considerably.
Besides, there are some web types (newspapers, magazines, portals) whose daily posts must be indexed day-to-day. Here as well, sitemaps can play a helpful role for you. Check out how to create XML sitemaps and add them to search engines.
8. Use Content Delivery Networks (CDNs)
A content delivery network (CDN) is a network of servers located in different locations that store website information, including texts, images, videos, GIFs, and other files. When someone visits the website, the content delivery network delivers the information from the closest location.
Using a content delivery network can remarkably improve page loading speed. Content stored on multiple servers helps you save extra bandwidth consumption. This enables a website to handle huge traffic pressure without causing any problems.
In addition to these, CDNs offer some security features, like DDoS protection and SSL encryption. These can save a website from malicious attacks.
9. Clean Unnecessary Images from Media Library
Over time, the media library of a website may become cluttered with images that are no longer useful. This will take up your valuable space, slowing down your website. Cleaning unnecessary files from the media library can help you better organize your image files, save storage space, and improve website performance.
 5")
Below are the types of files you should focus on cleaning from the media library.
- Duplicate images
- Images that aren’t used on any post or page
- Graphically low-quality images
- Properly not optimized images
10. Use a WordPress Plugin
Hopefully, from the discussion above, you understand the numerous factors involved in image optimization. And this is impossible to carry out all these things manually. For example, enabling lazy loading and using the content delivery network.
You’ll find many well-rated plugins online that can handle all these tasks alone. This can save you a considerable amount of time by reducing many manual work. Besides, if you already have a running website filled with many unoptimized images, you can’t start optimizing them from scratch.
Because doing so can severely impact your web performance on search engine result pages. Using a plugin is the ultimate solution in this case.
Best Image Optimization Plugins for WordPress
WordPress is a robust and feature-rich content management system with solutions to almost any web-related problem. The section will introduce you to some great plugins that can optimize images seamlessly on WordPress websites. Take a quick look at them.
a. TinyPNG
 6")
Most of you who have explored optimization for at least a few days may have heard of the websites: tinypng.com and tinyjpg.com. The TinyPNG WordPress plugin automatically optimizes images by integrating these two popular image compression websites.
This plugin automatically optimizes images whenever uploaded. It also optimizes all the images that are already existing in the media library using the bulk optimization feature. It converts the CMYK color model to RGB for better color compatibility.
b. Imagify
 7")
Imagify is one of the most advanced image optimization plugins. It allows you to resize, compress, and reduce the weight of images – all in just one click. If the resize and compression don’t meet your expectation, you can instantly restore them to their original versions.
An interesting part of this plugin is that you can convert images to WebP, the next-generation image file format. This format is more lightweight, speeding up WordPress sites with improved user experience and SEO performance.
c. Image optimization and Lazy Load by Optimole
 8")
With full automation and tons of features, Optimole offers an all-in-one solution for image optimization. It cleans up heavy images and bloaty pages without compromising quality in the slightest. Optimole works with all types of images and supports both WebP and Retina.
You can also enjoy cloud image library support and global CDN. You can enable lazy loading, smart cropping, and watermarks. Optimole is compatible with Elementor and all the other popular WordPress plugins.
d. Smush
 9")
Smush has been a benchmarked image optimization plugin for speed and quality. It meticulously scans all the images you upload and removes unnecessary data before adding them to the media library. Smush can optimize images up to two times more than regular images.
You can also enable lazy loading, bulk optimization, image resizing, incorrect size detection, and conversion to WebP. Smush is compatible with the Gutenberg block and multisite integration.
e. ShortPixel Image Optimizer
ShortPixel is a lightweight and easy-to-use image optimization plugin offering you both loosely and lossless image optimization. You can convert images to JPG, PNG, GIF, WebP, and AVIF formats. ShortPixel allows you to optimize PDF files as well.
Alongside smart cropping, this plugin generates subject-centric thumbnails using ShortPixel’s AI engine. You can set CMYK to RGB color format. It works great with WooCommerce, Gravity Form, NextGEN gallery, and many other top plugins.
FAQ on How to Optimize Images for Web and Performance
 11")
We have seen on various platforms like Quora, Reddit, Ask.com, and Answer web users ask different types of questions about image optimization. Here we’ll answer some hand-picked ones that we commonly find almost everywhere.
-
What is the best image size for SEO?
According to Google, large images should be 1200px wide and enabled max-image-preview by AMP for a good SEO score.
-
What are the best practices for compressing images for good web performance?
1. Decide on the image format (JEPG, PNG, JPG, WebP) suitable for your website
2. Don’t reduce image resolution below the minimum requirement
3. Remove hidden backgrounds, unnecessary layers, and metadata from images
4. Never compromise quality for sizes
5. Use a loose or lossless approach and experiment with the images on test sites -
How to enable image lazy loading on a WordPress website?
Tons of plugins are available in the WordPress repository by which you can enable image lazy loading in a couple of minutes. Smush is such a plugin.
1. Install and activate the Smush plugin from WP Dashboard > Plugins > Add New
2. You’ll find the Enable Lazy Load option in the setup wizard
3. Toggle on the feature and save it. -
What is image metadata and how to edit it in WordPress?
Image metadata refers to the information embedded in an image when it is captured or prepared. For example, the camera model name, time of capturing, location, pixels, sizes, and image tools used to modify the image.
Once your images are uploaded to the media library, click on the particular image. It will open a popup with attachment details where you will get options to edit the image metadata.
-
Can browser caching impact image optimization?
Yes, browser caching can have a significant impact on image optimization. When someone visits a website, his browser saves various resources available on the website so it can quickly load the site once he visits it again.
If images aren’t optimized well, the caching memory will always take additional time to load web pages. However, if you optimize images at some points later, they won’t make any positive impact until users clear their browsers. Because the browser will keep depending on the old memory.
Final Takeaways on Image Optimization
Today’s users are comparatively less patient and look for instant solutions when they search for anything online. According to Portant, maximum eCommerce conversions happen on pages that take 0-3 seconds to load. If it takes longer, conversion rates start falling and hike the bounce rate.
So no matter how hard you work at producing image-rich content, you’ll fall behind other websites in the competitive online space if you can’t optimize images properly. In this article, we have tried to cover all the latest tips and guides you can use for image optimization.
Now, it’s time to apply them on your and let us know your feedback on them. If you need more assistance, we request you explain your problem in the comment box.
Subscribe to our newsletter
Get latest news & updates on Elementor
[yikes-mailchimp form=”1″]


6 Responses
Source: None.
Smush-free is a joke; paid with the super smush option on kills the image quality.
On the other side, Shortpixel, which has been consistent as either number one or top 3 with people who actually show data, nas AVIF (better than WebP), an option with a great ratio compression/image quality ratio (Glossy, which honestly, I don’t see any difference in the image quality vs original) is mentioned like you were getting some more words for the article.
Thanks Cesare for sharing the insights with us. Since WebP has been around a lot longer, it is more widely accepted than AVIF. It’s supported by all popular browsers including Microsoft Edge and Firefox. Plus, all major mobile browsers also support WebP formats.
On the other hand, AVIF still has a way to go in terms of browser support. Chrome and Opera offer full support for AVIF images, while Firefox users can configure this setting manually. On mobile, however, you can only use AVIF on Chrome for Android, Samsung Internet, and the Android Browser.
Regards,
Gobinda
Team happyAddons
My point wasn’t that ShortPixel is better because it has AVIF, my point was that it is a much better plugin in getting the job done in a image quality/compression ratio.
You even have unlimited mode for just 10$.
Thanks Cesare for sharing your feedback.
Regards,
Gobinda
Team HappyAddons
Another interesting plugin to speed up your site:
OptiPic automatic convert image to Webp (for webp-supported browsers) and compressed/optimized png/jpeg (for webp-unsupported browsers).
Due to the optimization of images, their loading on the page is accelerated and page rendering is accelerated.
Thanks Olga, for sharing another tool with us.
Regards,
Gobinda
Team HappyAddons