Impression and user experience are two crucial factors in any website design. Even a small detail can make a huge difference. Yet one powerful feature is overlooked in web design today – the cursor hover effect. This interactive element can remarkably improve your site’s aesthetics.
The cursor hover effect not only adds a layer of visual appeal but also works as a helping tool to guide visitors to explore your content. This can lead to increased user engagement and satisfaction. And you can easily achieve this on your WordPress site using Elementor and HappyAddons.
HappyAddons is a powerful addon to the Elementor plugin. It allows you to personalize and enable this feature on your Elementor site. In this article, we’ll cover a step-by-step guide on how to add the cursor hover effect on WordPress websites. Get started!
What Is the Cursor Hover Effect on a Website?
The cursor hover effect refers to a visual change that occurs whenever a user hovers over his/her cursor on a web page. The cursor comes with an additional element, such as a circle, icon, text, or image, displayed right below the cursor pointer whenever hovered on the website.
One of the most important ways any commercial site analyzes and understands its users is to track their activities on the web interface. But most users don’t use the cursor much unless they have to scroll the page, making it difficult for the web owner to evaluate which particular products or information the potential customers focus on.
Once you enable the cursor hover effect, users will be more likely to hover their cursor while exploring your site. In the following parts of this article, we’ll explain how to add the cursor hover effect on Elementor websites.
How to Add Cursor Hover Effect on Elementor Website
To add this feature, you must use the following plugins. Once they are installed and activated on your site, you can follow the steps explained in the tutorial below.
You can enable the cursor hover effect throughout your page or configure different effects separately for each page element. In the following tutorial, we’ll explore them all.
Tutorial One: Enable the Cursor Hover Effect Throughout the Page
In this case, the cursor hover effect you configure will be displayed uniformly for all elements throughout the page. Explore how to do it.
Step 01: Go to the Happy Mouse Cursor Option (without Selecting any Web Element)
Don’t select any web element since you’ll enable the cursor hover effect throughout your page.
Simply navigate to the Settings tab on the Elementor panel. Expand the Happy Mouse Cursor section. Toggle on the Enable Happy Mouse Cursor.

Once this feature is enabled, you’ll see a default hover effect while moving your cursor on the web page, as shown in the video below. The cursor will appear as a plain circular icon.
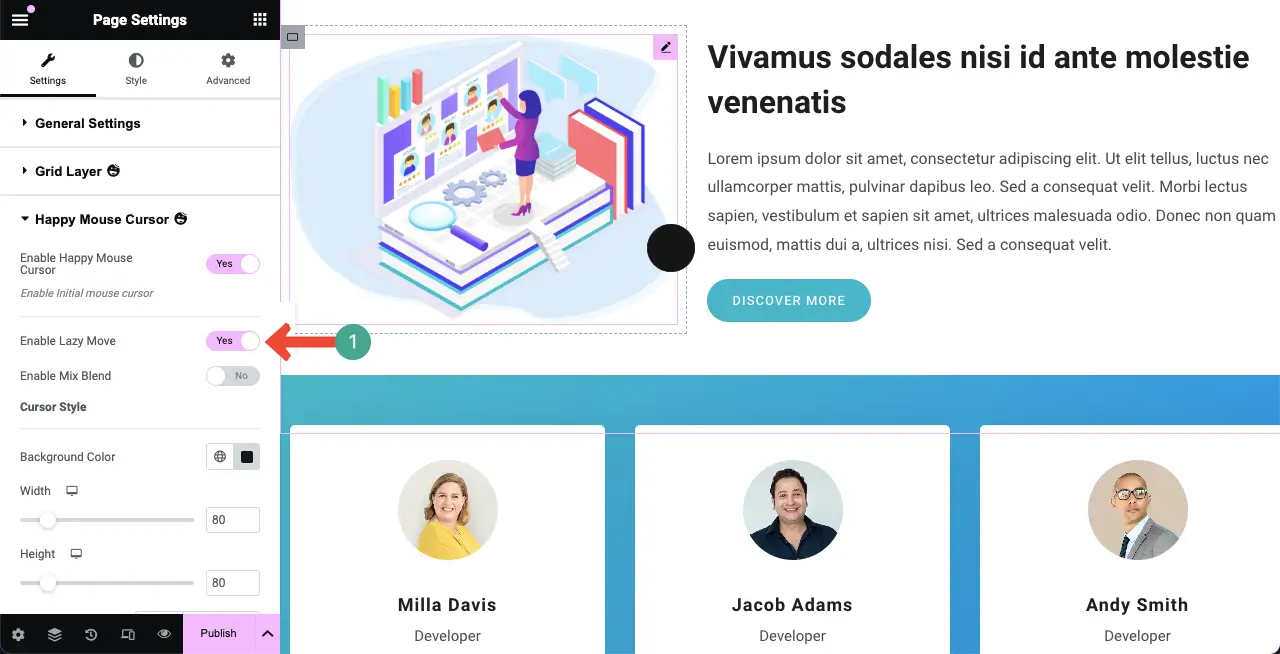
Step 02: Enable Lazy Move
Enabling the Lazy Move feature will allow the selected effect to follow your cursor, maintaining a slight distance and curved motion.
Just Toggle on the Enable Lazy Move option.
Step 03: Enable the Mix Blend Option
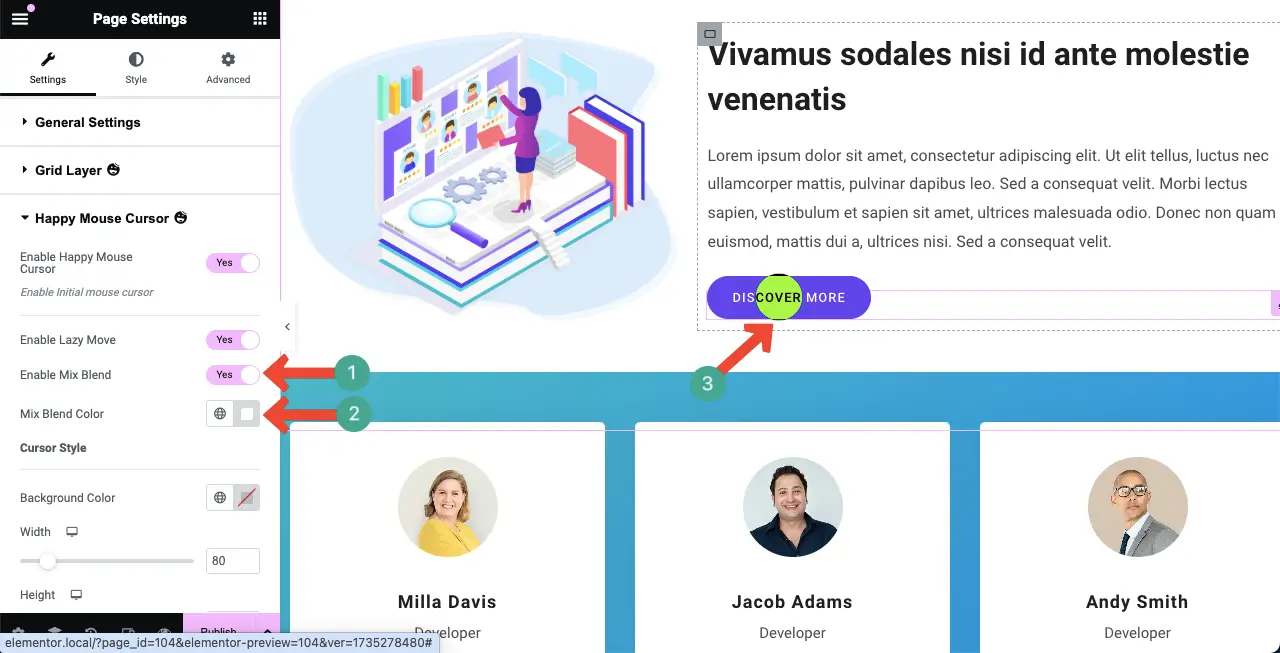
By default, when you hover the default cursor, the content behind it becomes invisible as it gets covered. Enabling the Mix Blend option will allow you to see what’s behind the cursor.
So, toggle on the Enable Mix Blend option. Then, select a color from the Mix Blend Color option. It will dynamically blend the cursor color, adjusting according to the respective page on which you hover.
This will create an effect like a magnifying glass.
Step 04: Change the Default Cursor Hover Effect
You can even change the default cursor hover effect without depending on the mix blend option. To do this, toggle off the Enable Mix Blend option first.
Then, select a color for the Background Color option. This will immediately change the color for the default cursor hover effect.

Step 04: Customize the Size, Border, and Radius of the Cursor
You can customize the border type, border width, border color, and border radius for the cursor hover effect.

HappyAddons has a Hover Box widget that allows you to create an interactive web section. Explore how to use the Hover Box widget of HappyAddons.
Tutorial Two: Enable the Cursor Hover Effect to Specific Web Element
Any web page is made up of various web elements. You can enable the cursor hover effect separately for each element. This means that only specific effects will be displayed while hovering the cursor over particular web elements. Let’s check how to do it.
Step 01: Select an Element and Enable the Happy Mouse Cursor
Select any element by clicking its container. Then, navigate to Layout > Happy MouseCursor. Toggle on the Enable Happy Mouse Cursor option.

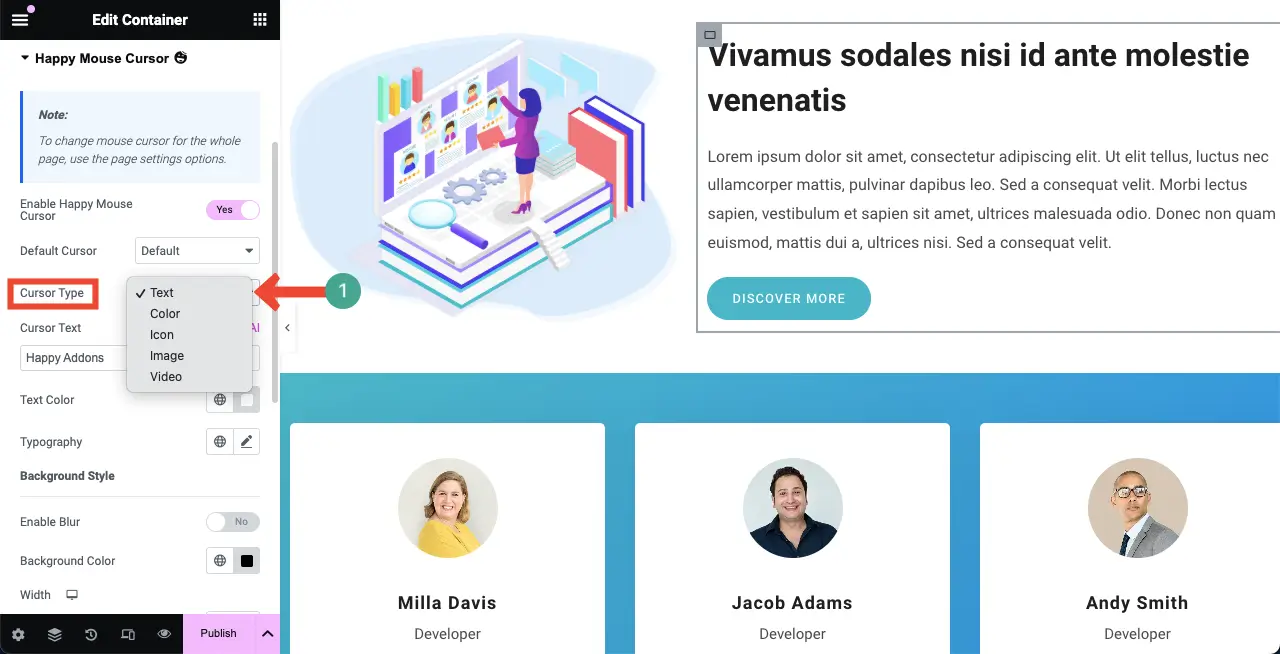
Step 02: Select a Cursor Type
This feature allows you to choose between five types of cursor effects. They are:
- Text
- Color
- Icon
- Image, and
- Video.
Each type comes with its own styling options. By default, the Text cursor type is automatically selected when you enable this option.
Now, the cursor effect will be shown only when you hover the cursor on the specific web element. We have shown it as for example in the video clip below.
Let’s now explore all the cursor types in the following sections, discovering the things you can do with the available options.
# Text Type
We hope you have the Text Cursor Type selected, as it comes by default when the Happy Mouse Cursor option is enabled.
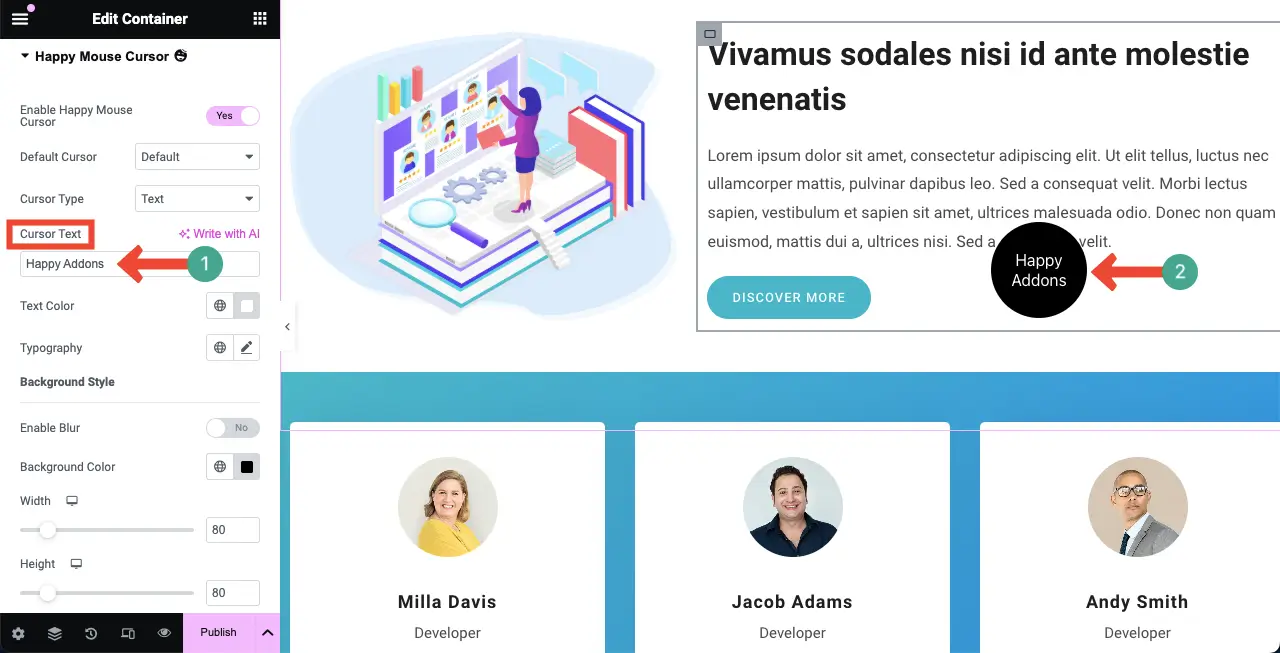
Change the Cursor Text:
Go to the Cursor Text option and write the words you want to display on the cursor. After that, you can change the Text Color and Typography as you wish.
Blur the Cursor Background:
By default, a deep-flat color is displayed in the background of the cursor. But for more stylization, you can blur the cursor background by toggling on the Enable Blur option.
Then, you can change the intensity of the blurriness and the opacity of the background color.

Stylize the Hover Cursor:
Once the above parts are done, you can customize the width, height, box shadow, padding, border type, and border radius of the cursor. Hope you can do these customizations yourself.

# Color Type
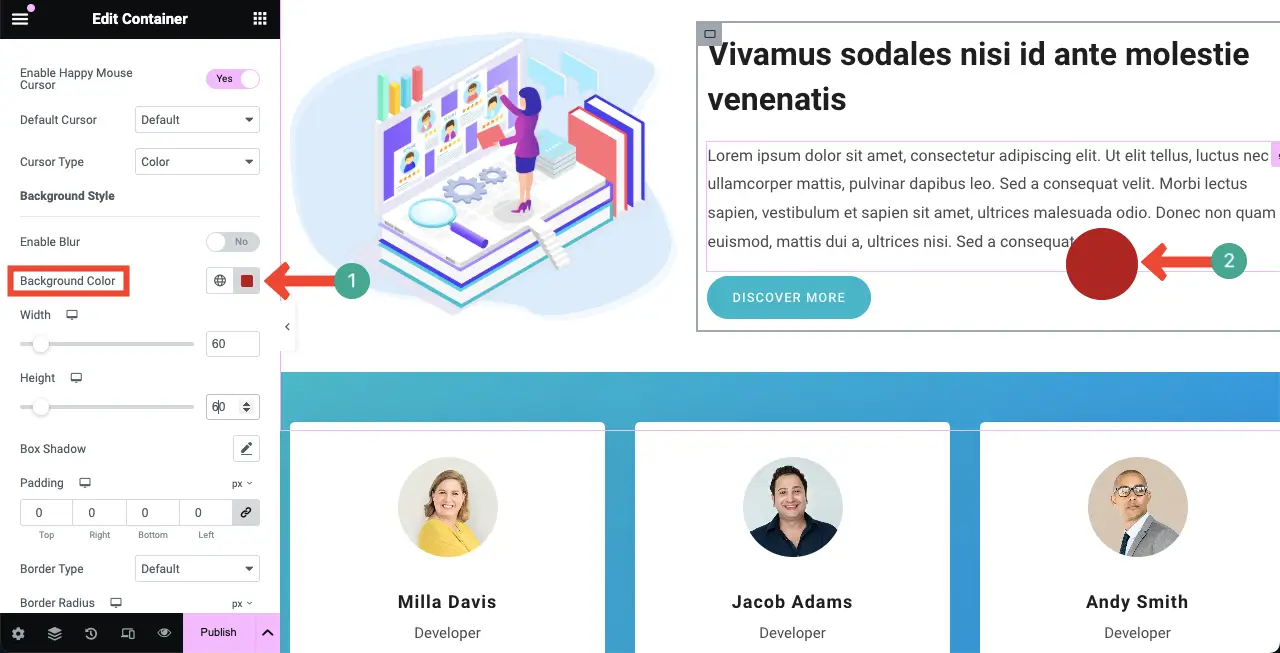
This one is a very simple cursor type. It allows you to display a simple flat color instead of the cursor icon. Choose Color from the Cursor Type.
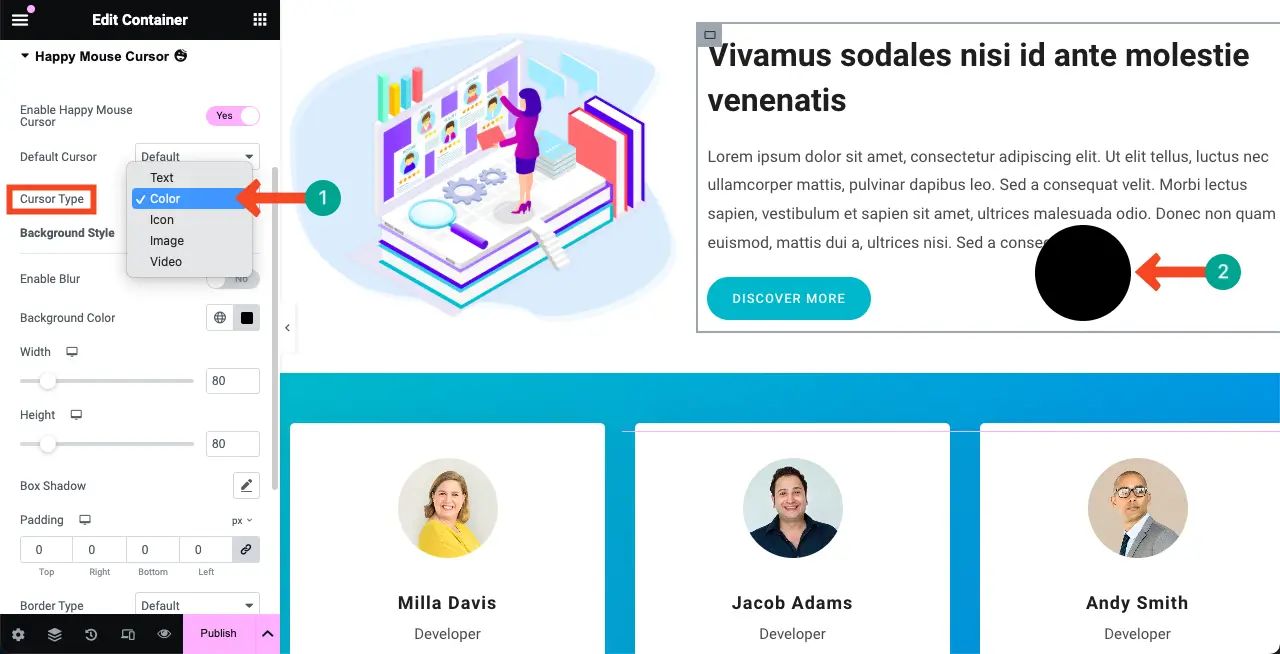
Now, go to the Background Color option. Select a color that you want to display as the color cursor type.
# Icon Type
In the same way, select the Icon Cursor Type. A default icon will be displayed on a circle as you can see in the image below.
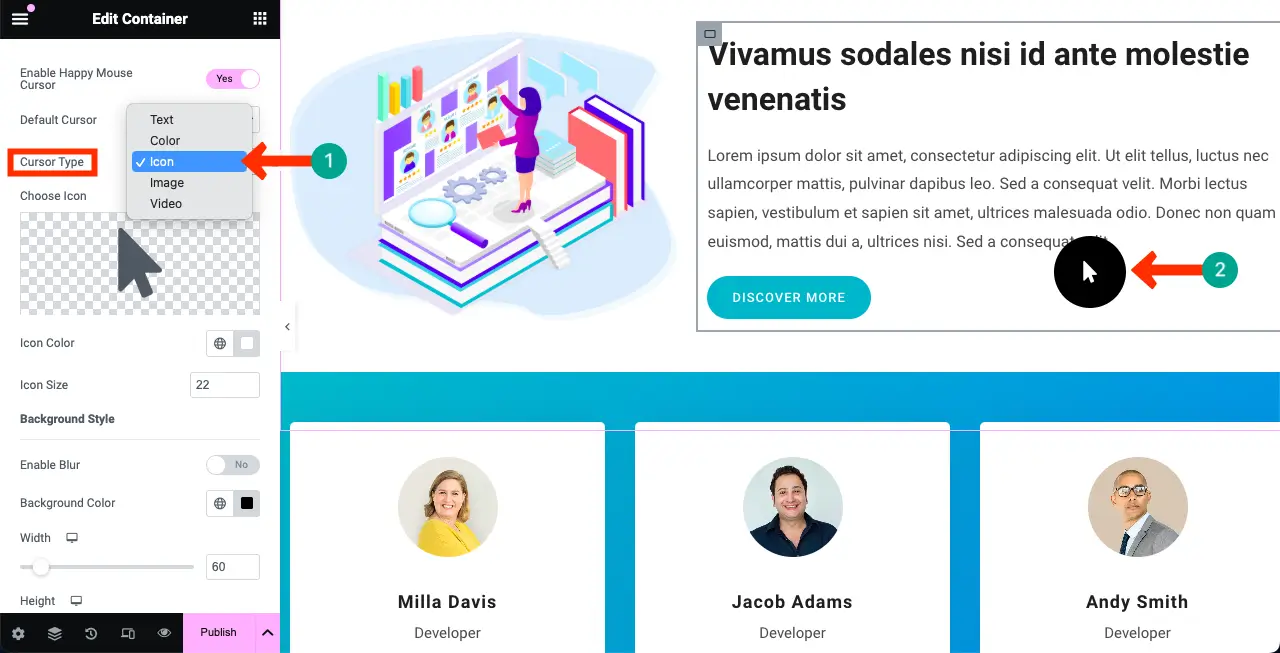
Change Icon:
To change the icon, click on the section as marked in the image below.

The icon library will be opened up. Select an icon you like for the cursor. Hit the Insert button after
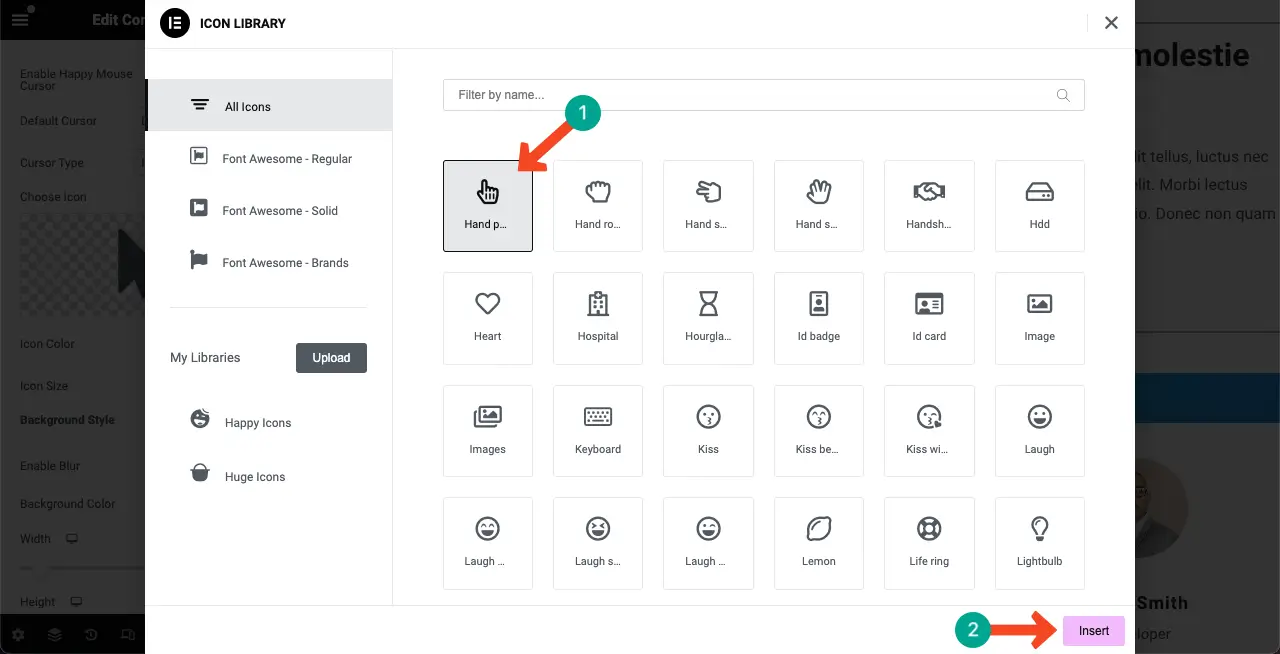
After that, you can change the Icon Color and Icon Size for the cursor hover effect.

The rest of the options (width, height, blur, padding, radius, border type, etc.) are the same for all cursor types. So, we are not explaining it again here.
# Image Type
Now, switch to the Image Cursor type.
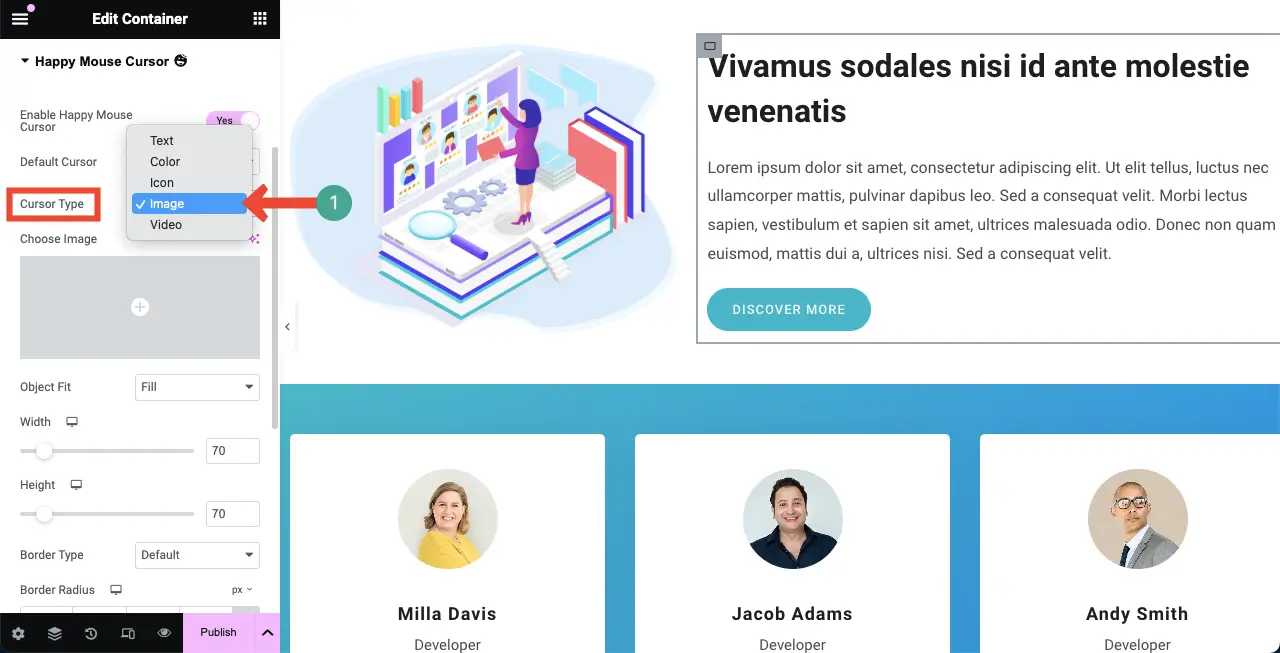
Click the section marked below. This will allow you to upload an image from the local drive or media library.

You can see the image we have added for the hover cursor effect. Additional options that come with this feature is Object Fit and 360 Rotate.
Choose Fill for the Object Fit option. If you want to display the image slightly tilted, set a value in the 360 Rotate option.

After that, customize width, height, border type, border radius, opacity, and other options as you wish for the hover cusror type.
# Video Type
Now, switch to the cursor Video type from the drop-down list.

Similar to the icon and image types, add a video from the Choose Video option for which you want to use the cursor hover effect.
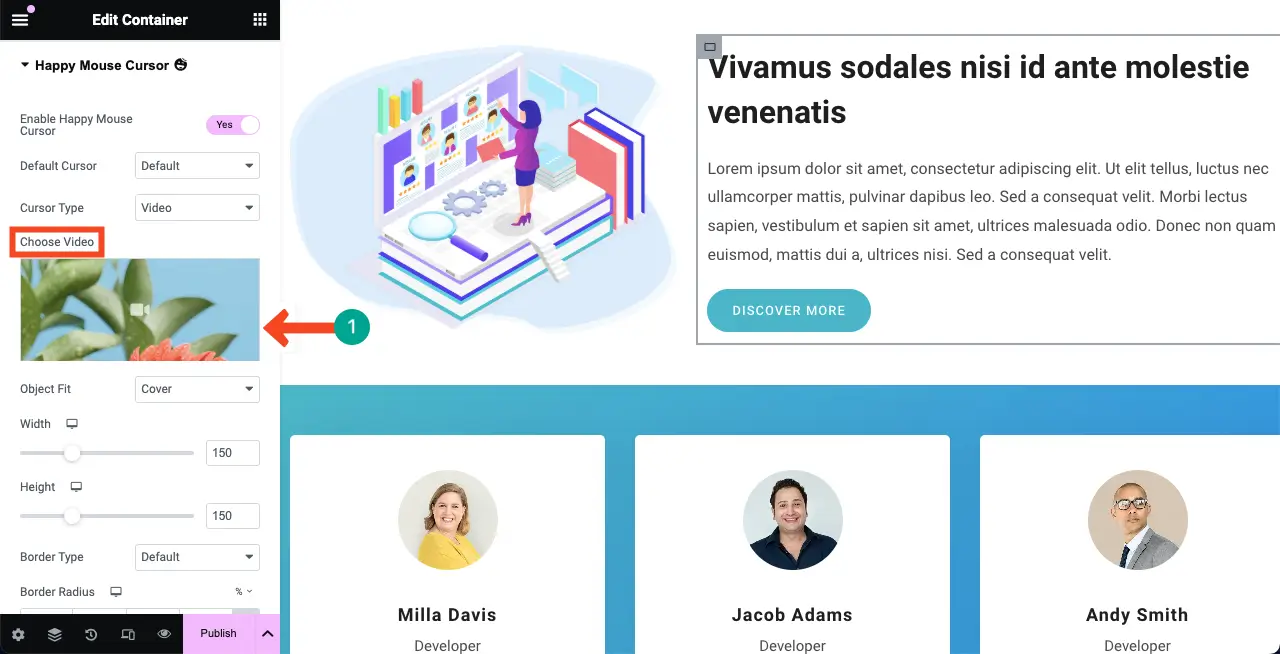
Then, resize and make it objective fit using the respective options as shown above. You’ll see the changes on the canvas in real time.

Once done, go to the preview page and see if the cursor is working perfectly. Hope everything will work fine. Thus, you can enable different hover effects separately for web elements that perfectly match with the content type.
However, if you face any problems, you can contact our support team through the live chat box. We are ready to provide any kind of help regarding the HappyAddons plugin. Learn how to build a professional website with Elementor.
Use Cases of the Cursor Hover Effect
The cursor hover effect is a flexible component. It can be modified to suit the requirements and branding of any Elementor website. When applied, it can ensure the best possible user experience, engagement, and data for site improvements. Take a quick look at how the cursor hover effect does these for your website.
- Engaging Page Scrolling Experience
Adding hover effects is helpful to keep the scrolling experience interactive. Through visual triggers or animations, you can provide users with a more enjoyable scrolling.
- Display Additional Information/Navigation
You can display additional information through text, image, and video hover effects. You can also use them to provide a navigational guide without cluttering the main video, just like a tooltip.
- Enhance Aesthetics
Nicely crafted hover effects can make a website look and function better. Little animations or cursor styles can really make the interface interesting and memorable.
- Make Web Content More Interactive
Hover effects can turn static web elements into interactive ones to draw users into a deeper visit to the page. This can drive more interaction and page views.
- Provide Visual Cues
Hover effects can notify the user visually of whether or not something is clicked or highlight information. This can improve the overall user experience. So you might change the cursor color or put a faint glow around a button to indicate that it’s moving.
- Track User Engagement
By keeping track of what features users hover over, you can learn user habits and preferences. It can provide information that can be used to make future design and content decisions.
FAQ on Cursor Hover Effect on Elementor Website

Hope you are enjoying this discussion. In this section, we’ll cover answers to some questions that might poke your mind while reading this post.
What are the different types of cursor hover effects available in Elementor?
Well, Elementor doesn’t have this feature. You must install the HappyAddons to get this feature. It’s an addon to the Elementor plugin. It comes up with four cursor hover effects. They are:
- Icon cursor type
- Text cursor type
- Image cursor type
- Video cursor type
Is it possible to add a hover effect to images in Elementor?
Yes, it’s easily possible to add a hover effect to images in Elementor. We have already covered a detailed tutorial post on this topic. It’s difficult to explain it entirely in this small space. It’s better if you explore this post on how to add image hover effects to your Elementor website.
Should I optimize the cursor hover effect for mobile devices?
Yes, since mobile screen sizes are comparatively smaller than desktops, you have to adjust the cursor hover size for smaller screens so they look good.
Will the cursor hover effect slow down your site if enabled?
Not at all. If you use a lightweight image or video as the hover effect, it won’t slow down your site.
Conclusion
Hope that at this stage of the discussion, there isn’t anything new left to say or explain. Everything that needs to be said has already been covered above. However, if you think we have missed any important point, please mention it in the comment box.
We’ll cover it in the next update of the post. However, if you are interested in HappyAddons, you’ll find a great collection of tutorial posts on our archive page. You’ll also find all the necessary documentation about each of our product features and widgets.
Keep exploring them and enjoy happy web design.

