





Images are usually the first thing people notice on a page. When they slide, open, or grow into view as the visitor scrolls, the page feels like it’s telling a story instead of just showing pictures.
Scroll animations also pace your content. Each image appears exactly when the reader gets to it, which keeps their attention on one thing at a time. That’s why travel blogs, portfolios, and product pages use them so often.
Elementor makes building pages easy, but its built-in entrance animations are basic. In this blog post, we’ll show you how to animate images on scroll in Elementor without coding, using the free HappyAddons plugin. We’ll try five different effects on a demo travel journal. Let’s get started!
What Is a Scroll Image Animation?
A scroll image animation plays when an image enters the screen. The image can be revealed by a sliding mask, split into tiles, opened from a corner, scaled up, or stretched to full width.
HappyAddons builds these effects with GSAP and its ScrollTrigger plugin, the same tools used on many award-winning websites. You only pick the options in the Elementor panel. Here’s a guide on how to add scroll animation to any Elementor element.
Why Animate Images on Scroll?
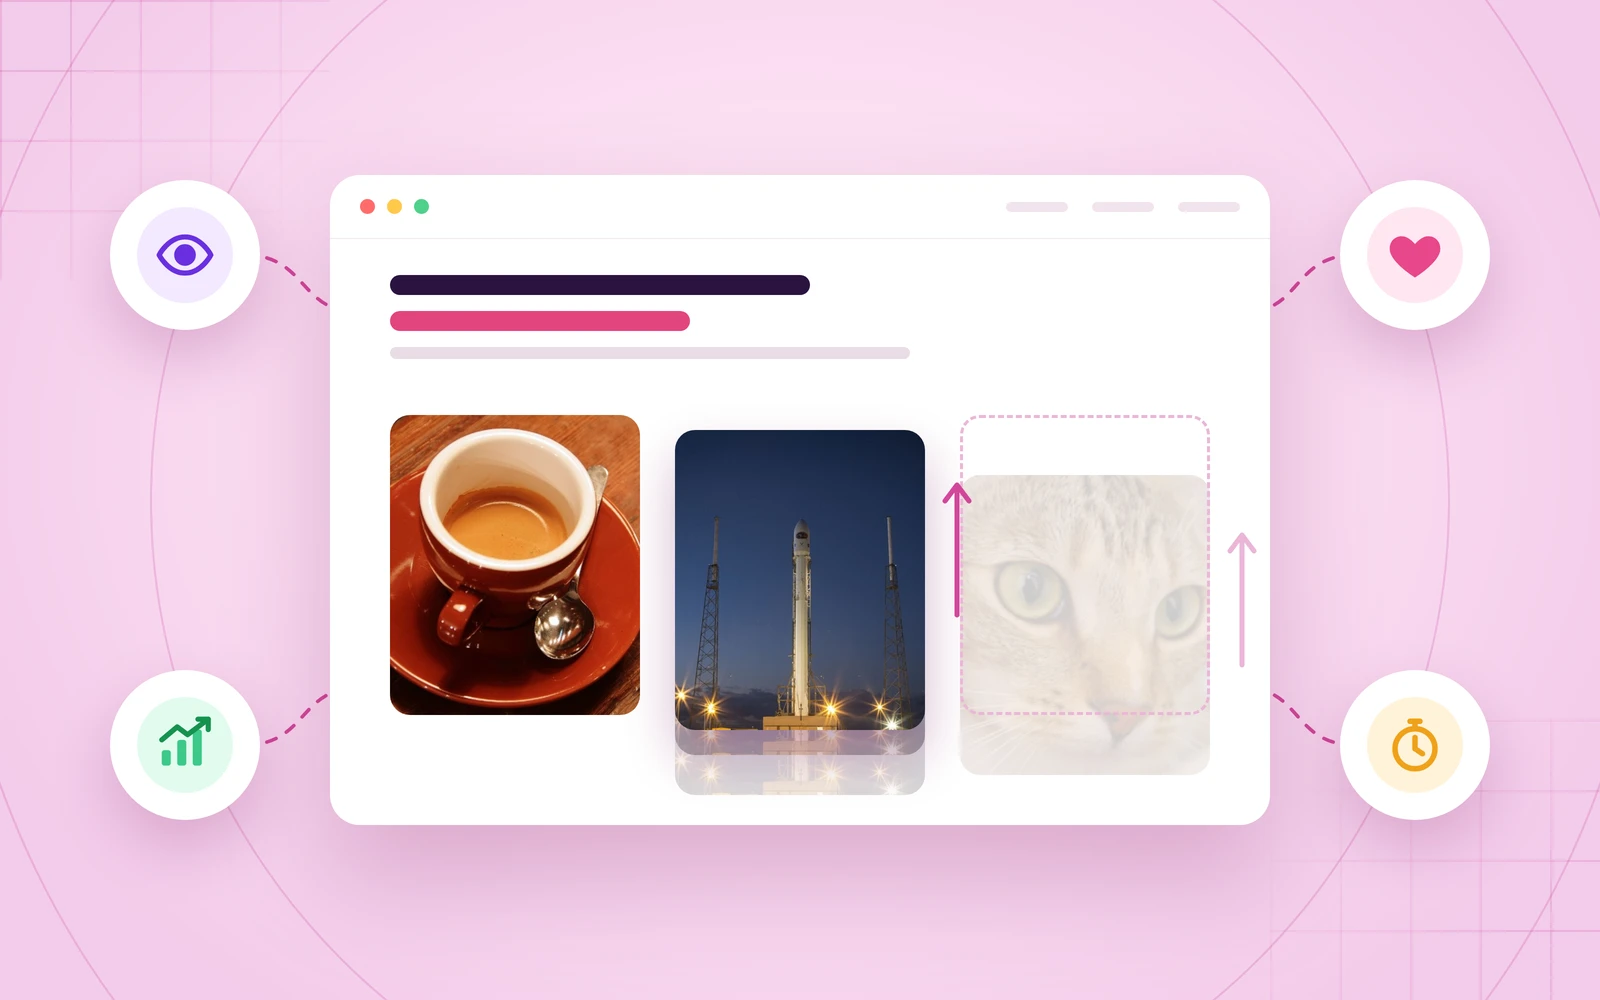
Scroll animations make your website more engaging by adding movement to otherwise static images. They help guide visitors through your content, highlight important visuals, and create a more enjoyable browsing experience.
a. Draw Attention to Your Best Visuals
A moving image naturally catches the eye and makes important visuals stand out. Use scroll animations on your hero images, featured products, or best projects to give them more attention.
b. Make Long Pages Easier to Follow
Revealing images as visitors scroll helps guide their attention from one section to the next. This works especially well for blog posts, case studies, and image galleries.
c. Add a Premium Feel Without Extra Plugins
Smooth image animations are a common feature of modern, high-end websites. With HappyAddons, you can create these effects directly in Elementor without writing custom code or installing another animation plugin.
d. Keep Visitors Scrolling
Scroll animations add small visual surprises as visitors move down the page. This creates curiosity about what comes next and encourages them to explore more of your content.
Check how to create SVG morphing animations with Elementor in WordPress.
5 Ways to Animate Images on Scroll with HappyAddons
The Appearing Image Animation feature adds five modes to the Elementor Image widget:
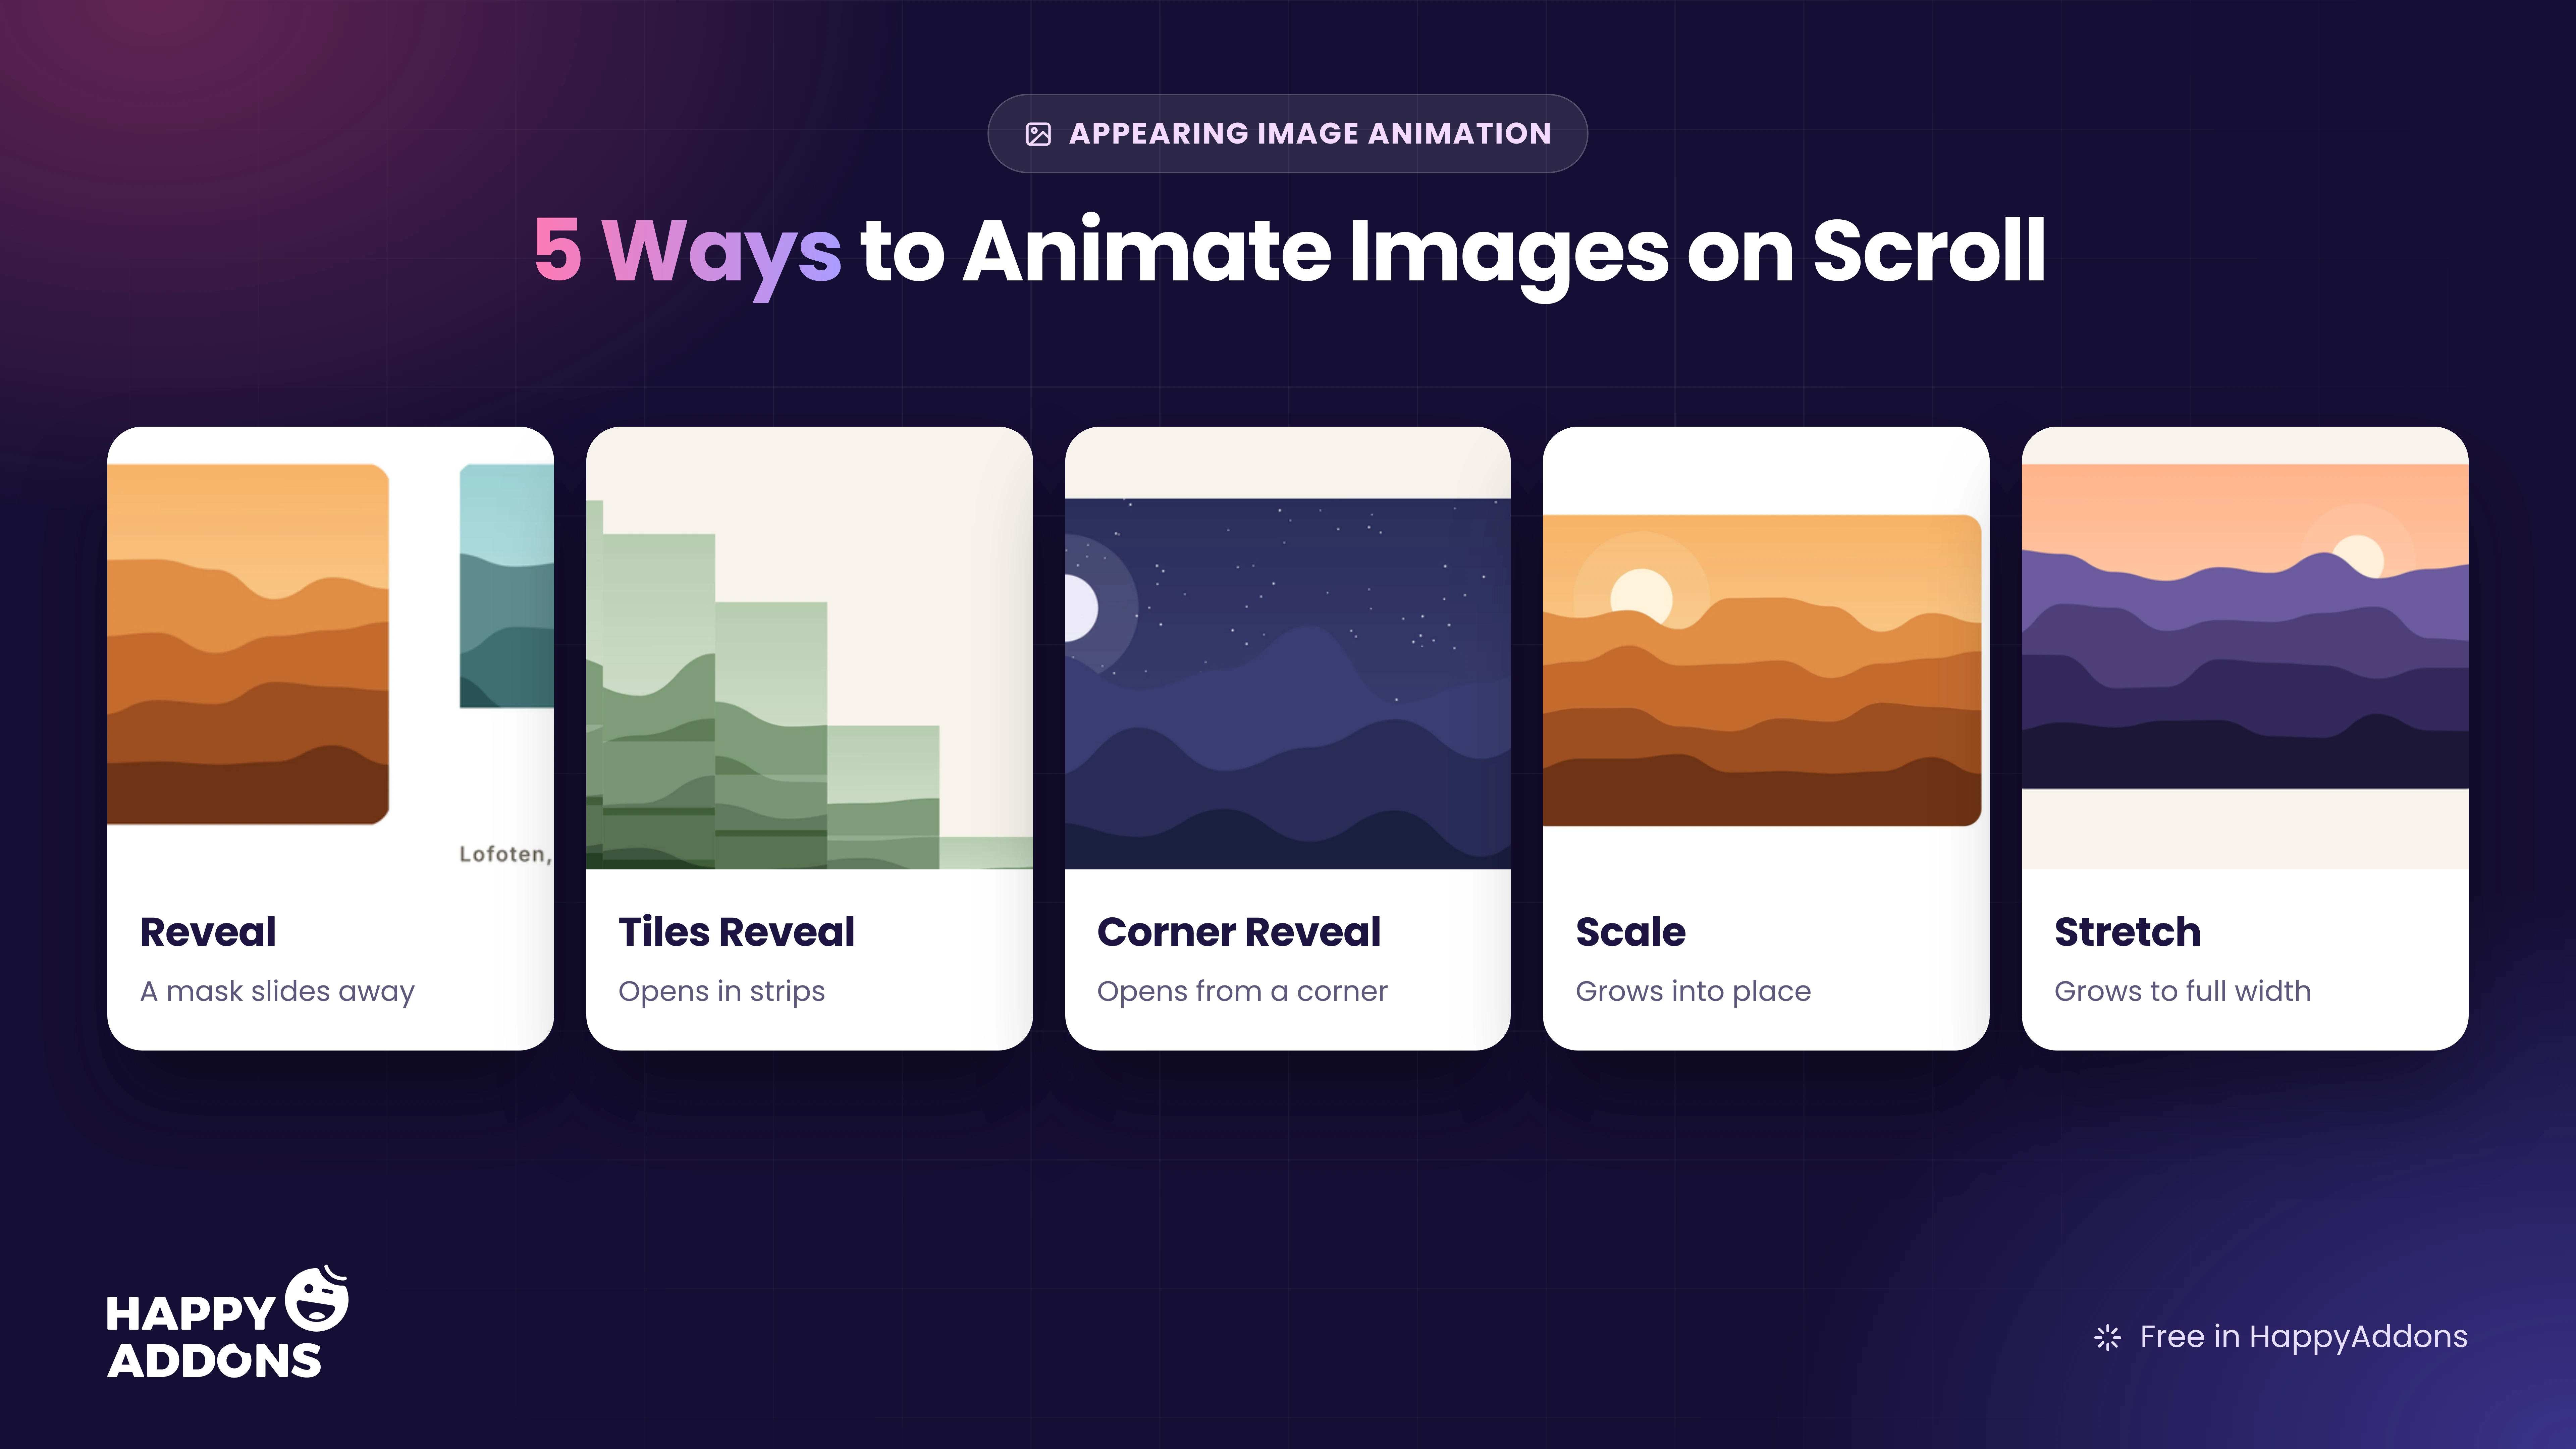
| Mode | What it does |
|---|---|
| Reveal | A mask slides away from the left, top, right, or bottom and uncovers the image |
| Tiles Reveal | The image appears in strips, one after another |
| Corner Reveal | The image opens from a corner or from the center |
| Scale | The image grows from a smaller size to its full size |
| Stretch | The image grows to the full width of the screen as you scroll |
Learn how to make Elementor websites feel more interactive with GSAP.
How to Animate Images on Scroll in Elementor: Step-by-Step Guide
As already said, HappyAddons adds scroll image effects to Elementor. It comes with 160+ widgets and 40+ features, and Appearing Image Animation is part of the free version.
For this tutorial, we’ll build the homepage of Wander Journal, a demo travel magazine, and use all five modes.
Prerequisites
- Elementor (Free)
- HappyAddons (Free)
Note: You don’t need HappyAddons Pro for this tutorial. Appearing Image Animation is a free GSAP feature. Once these plugins are ready on your site, start following the tutorial explained below.
Step 01: Enable Appearing Image Animation in HappyAddons
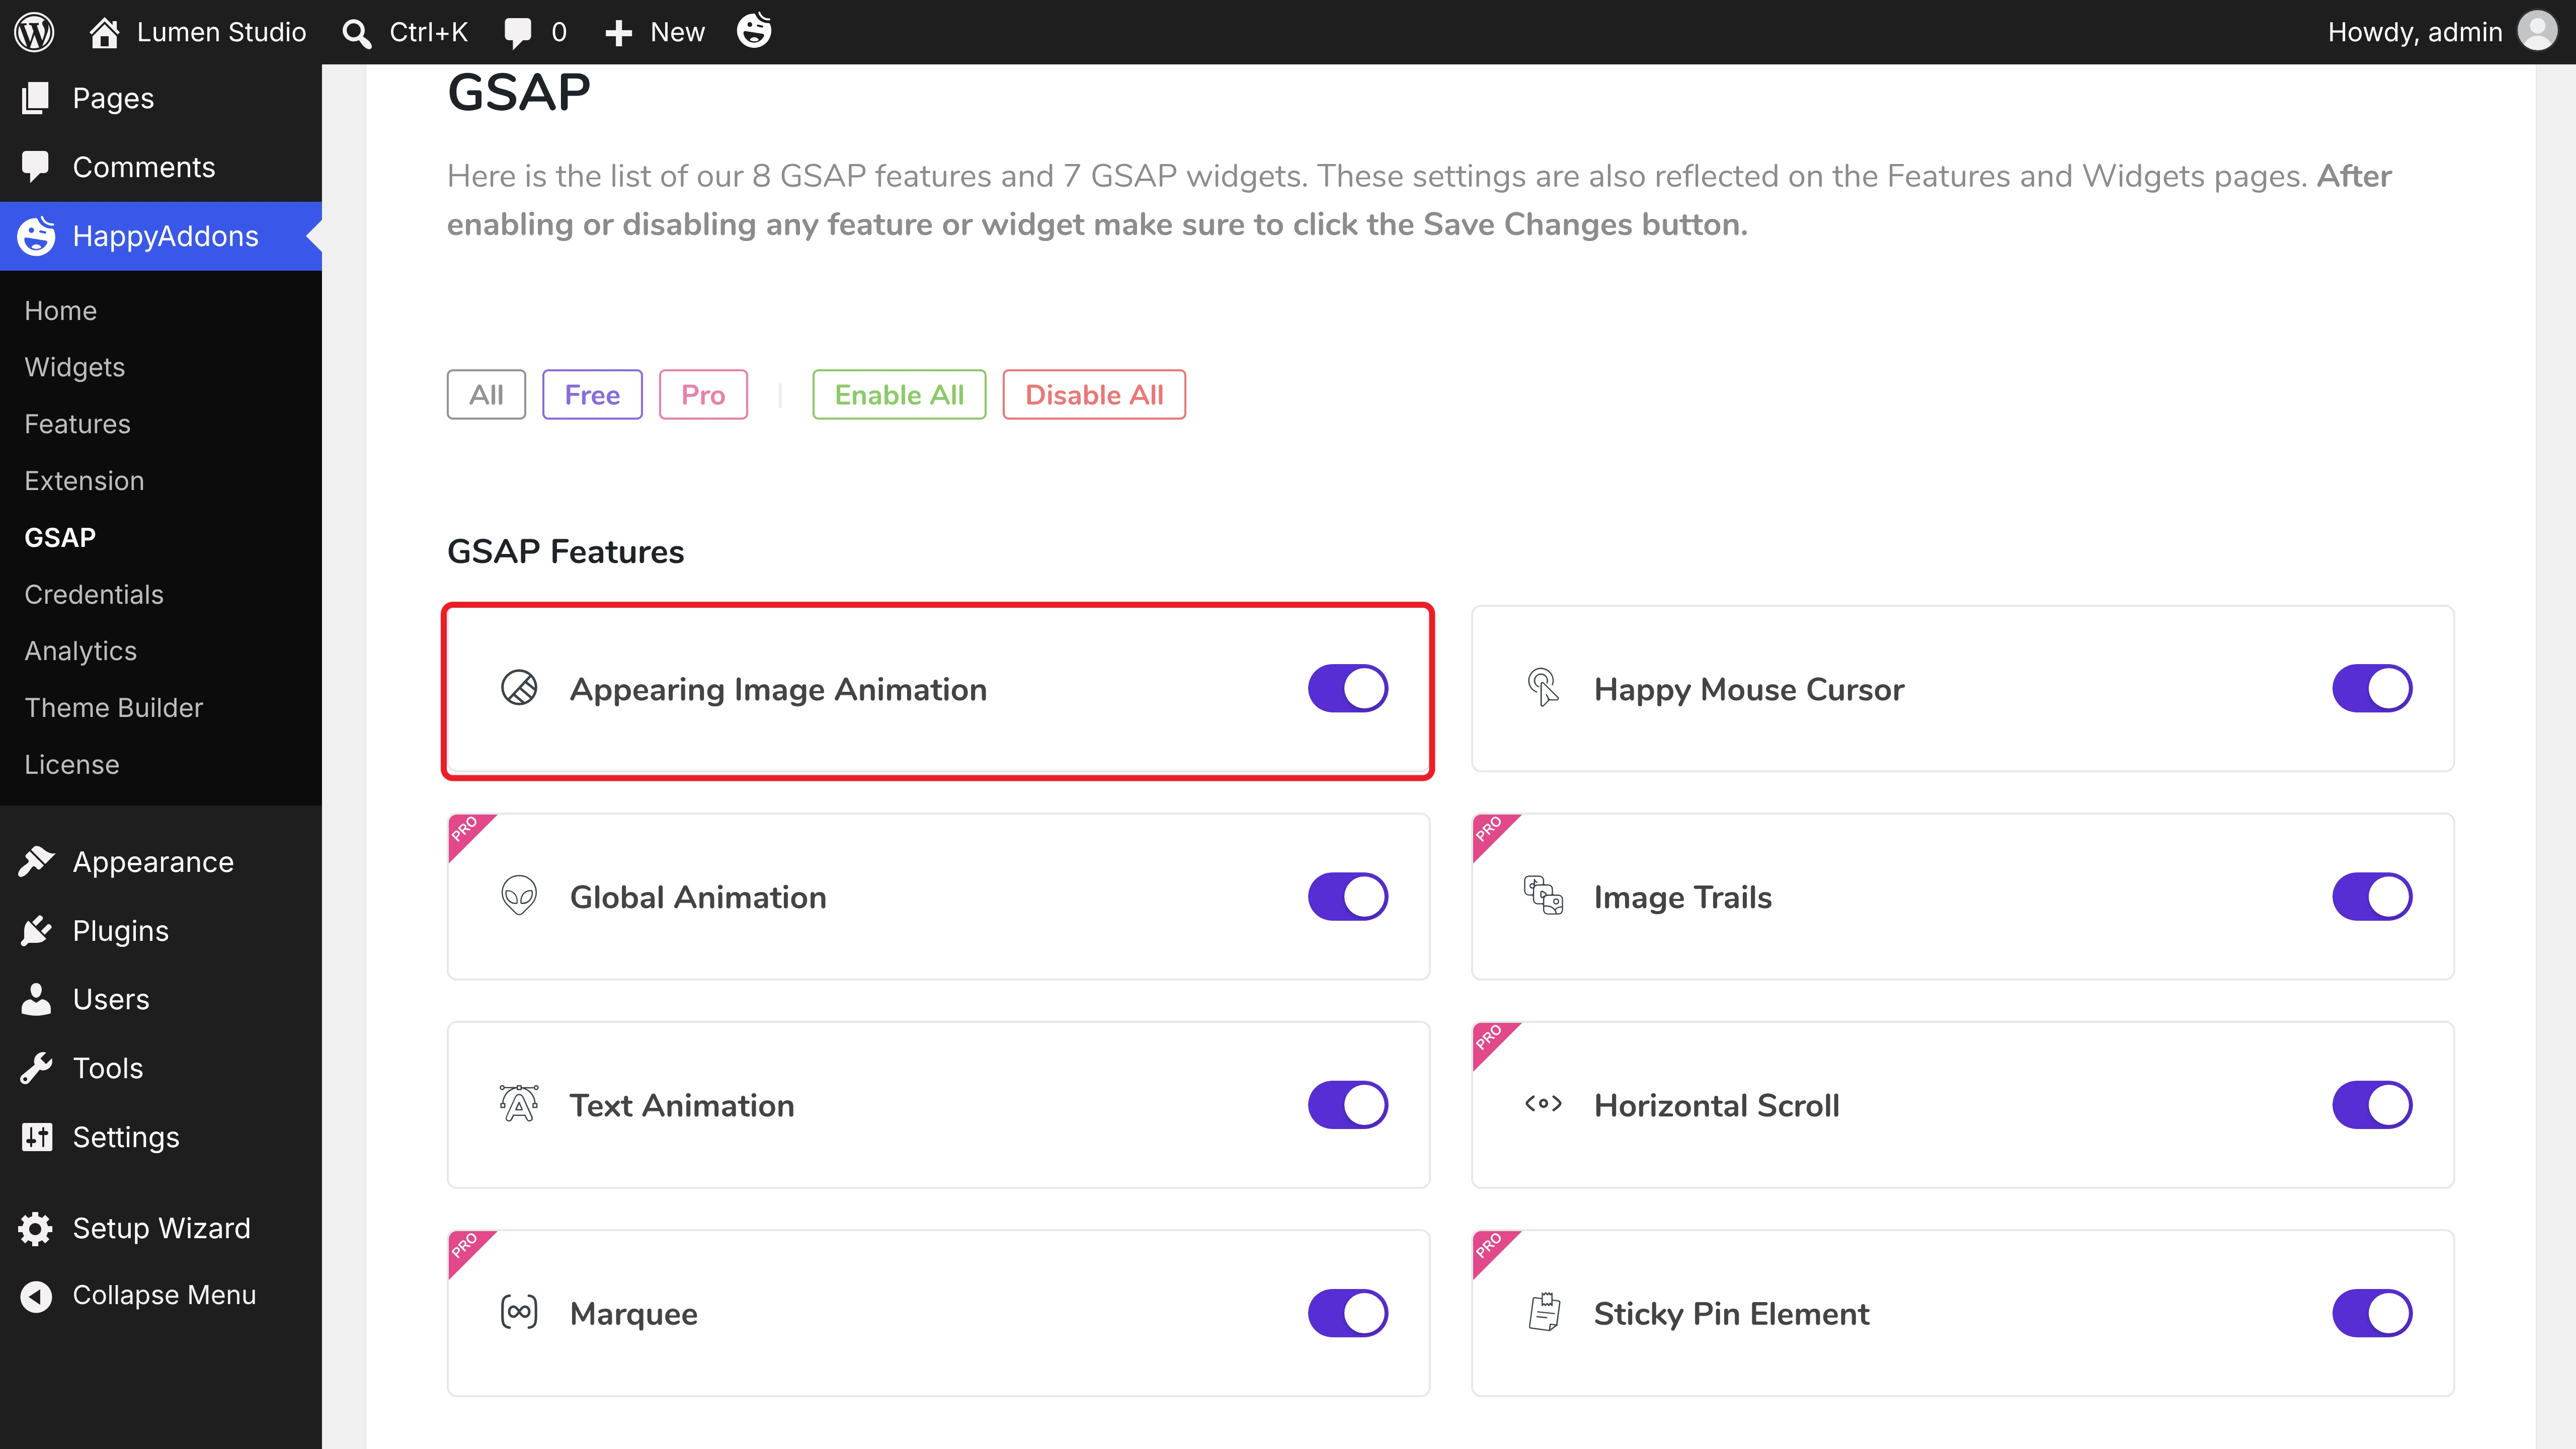
Navigate to HappyAddons > GSAP from your WordPress dashboard. Under GSAP Features, make sure Appearing Image Animation is toggled on. If you change anything, click the Save Settings button.
Step 02: Add an Image and Turn On Appearing Animation
Open your page with Elementor and drag and drop an Image widget onto the canvas. We added three story images in a row.
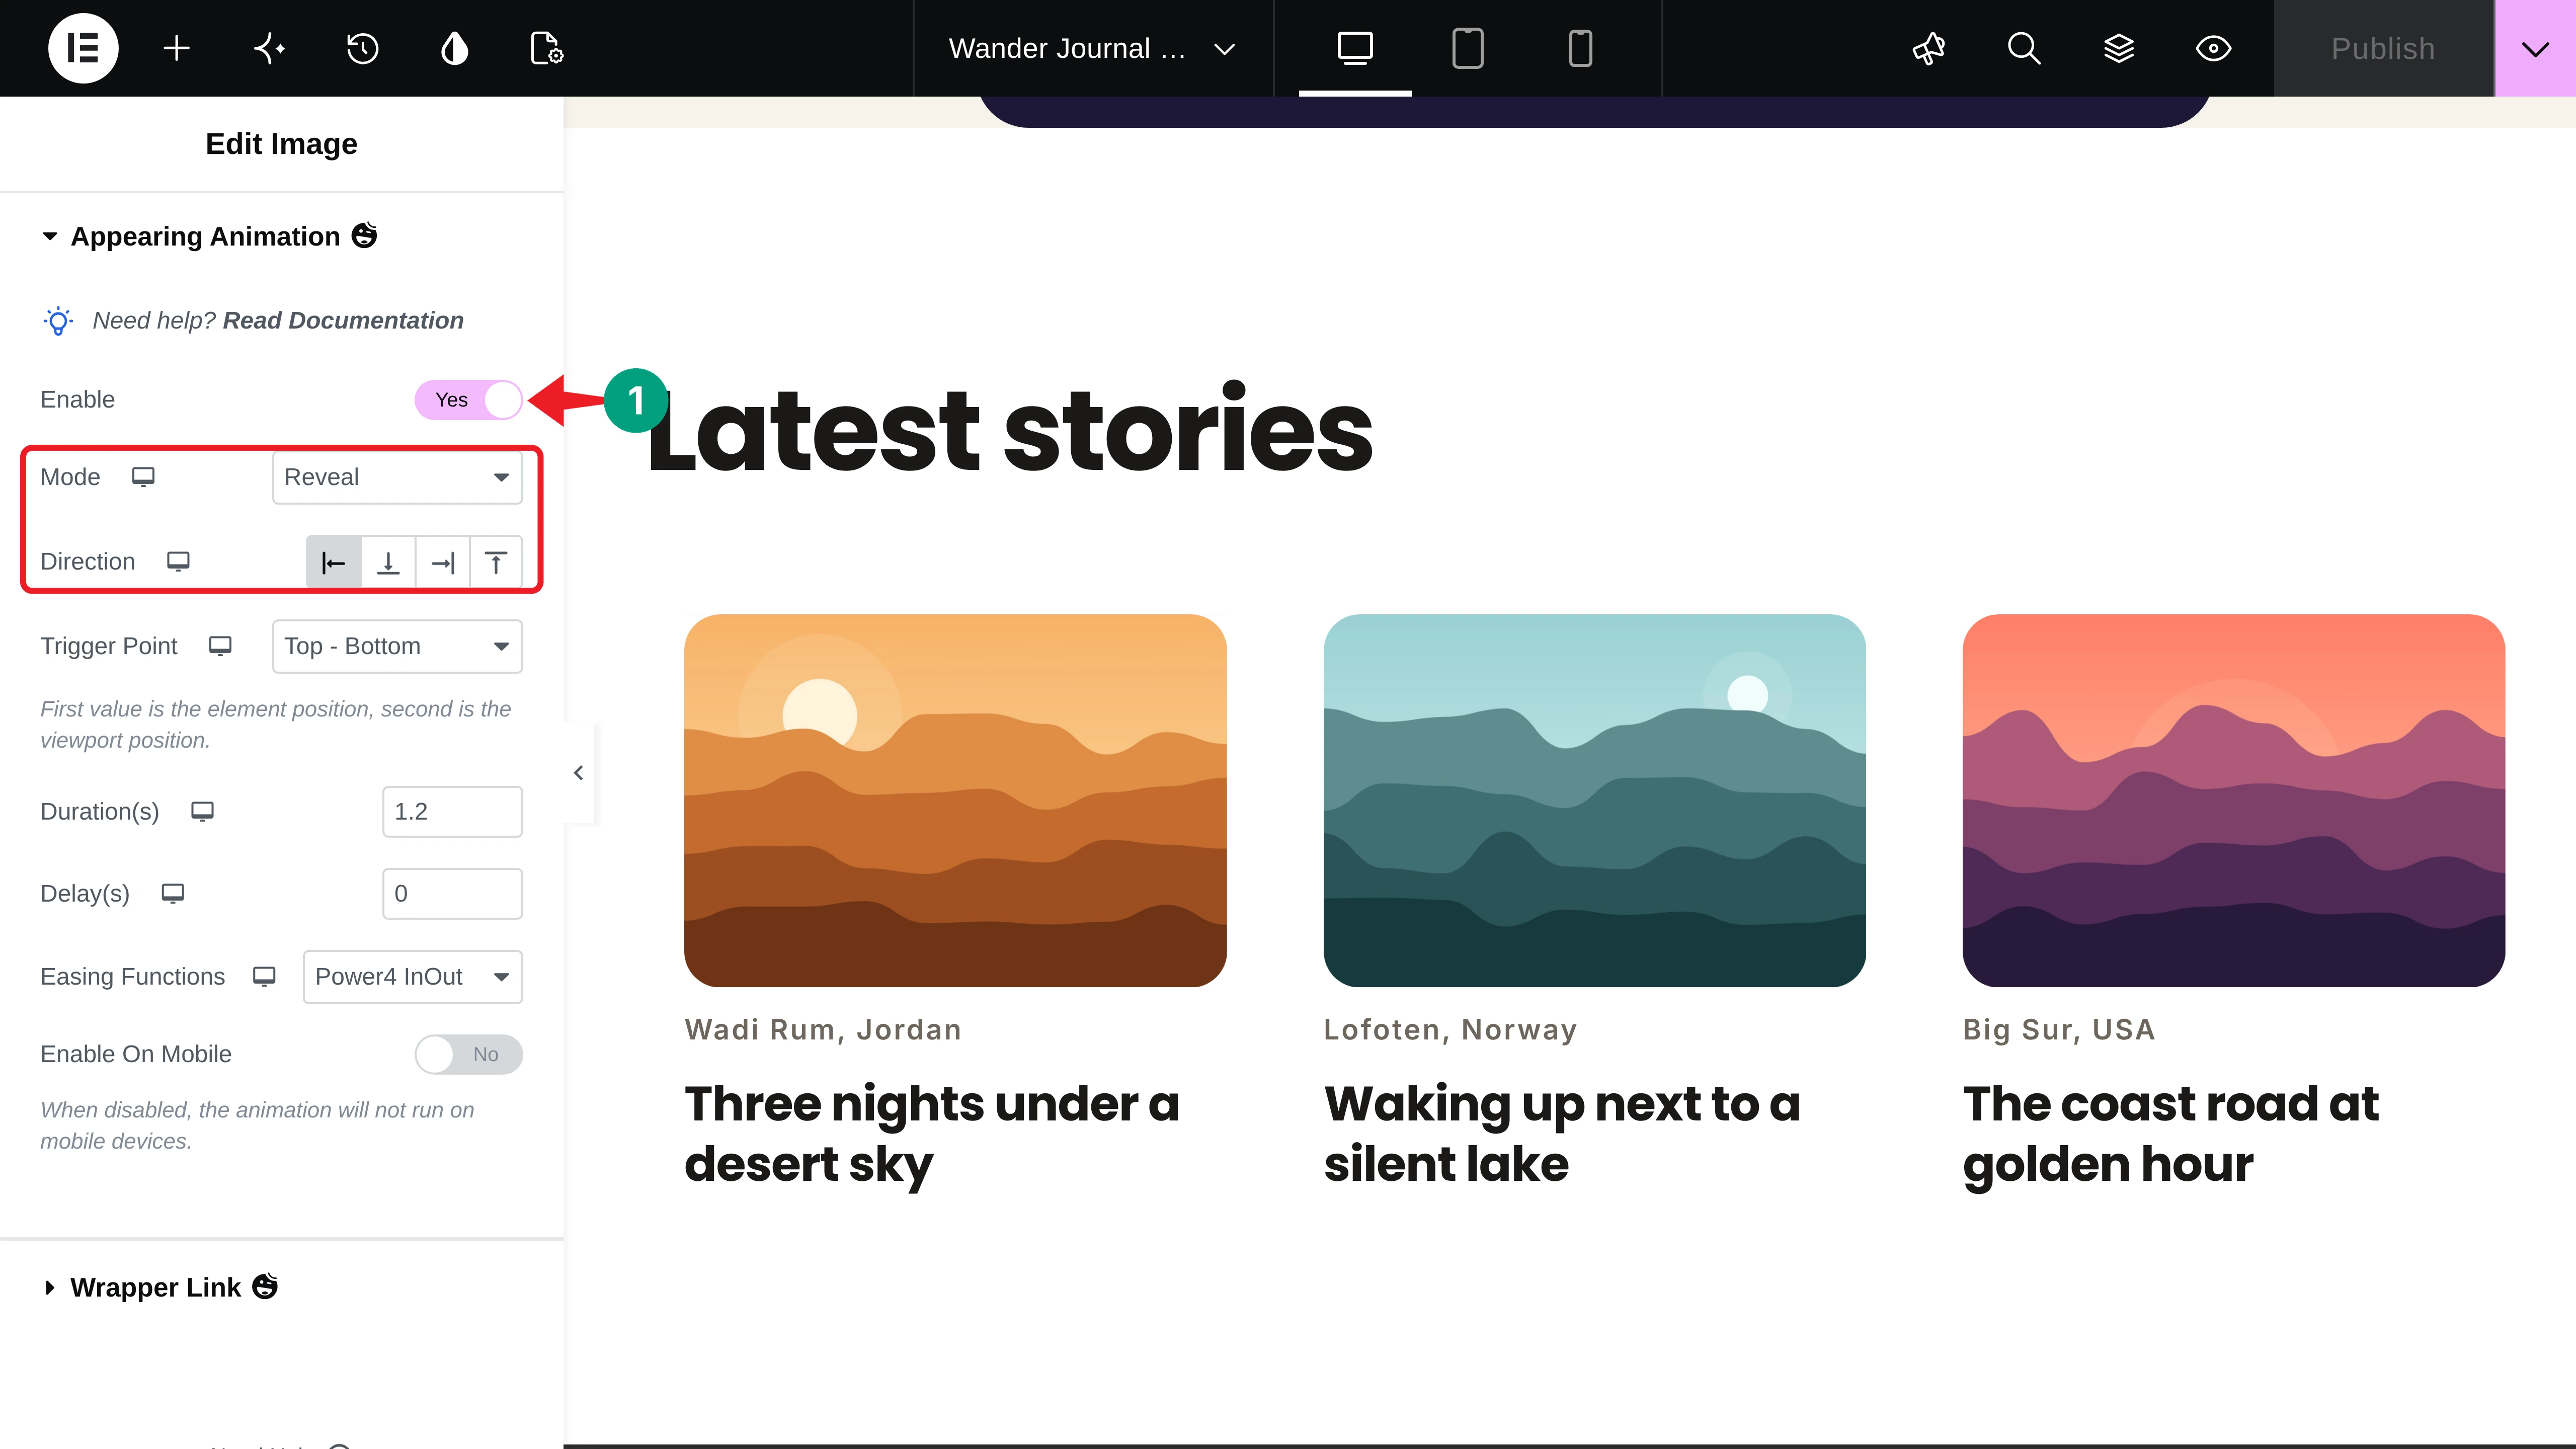
Select the first image. In the Content tab, expand the Appearing Animation section and toggle on Enable. Keep the Mode on Reveal and choose a Direction. We used Left for the first image, Top for the second, and Right for the third.
Step 03: Choose When and How Fast the Image Appears
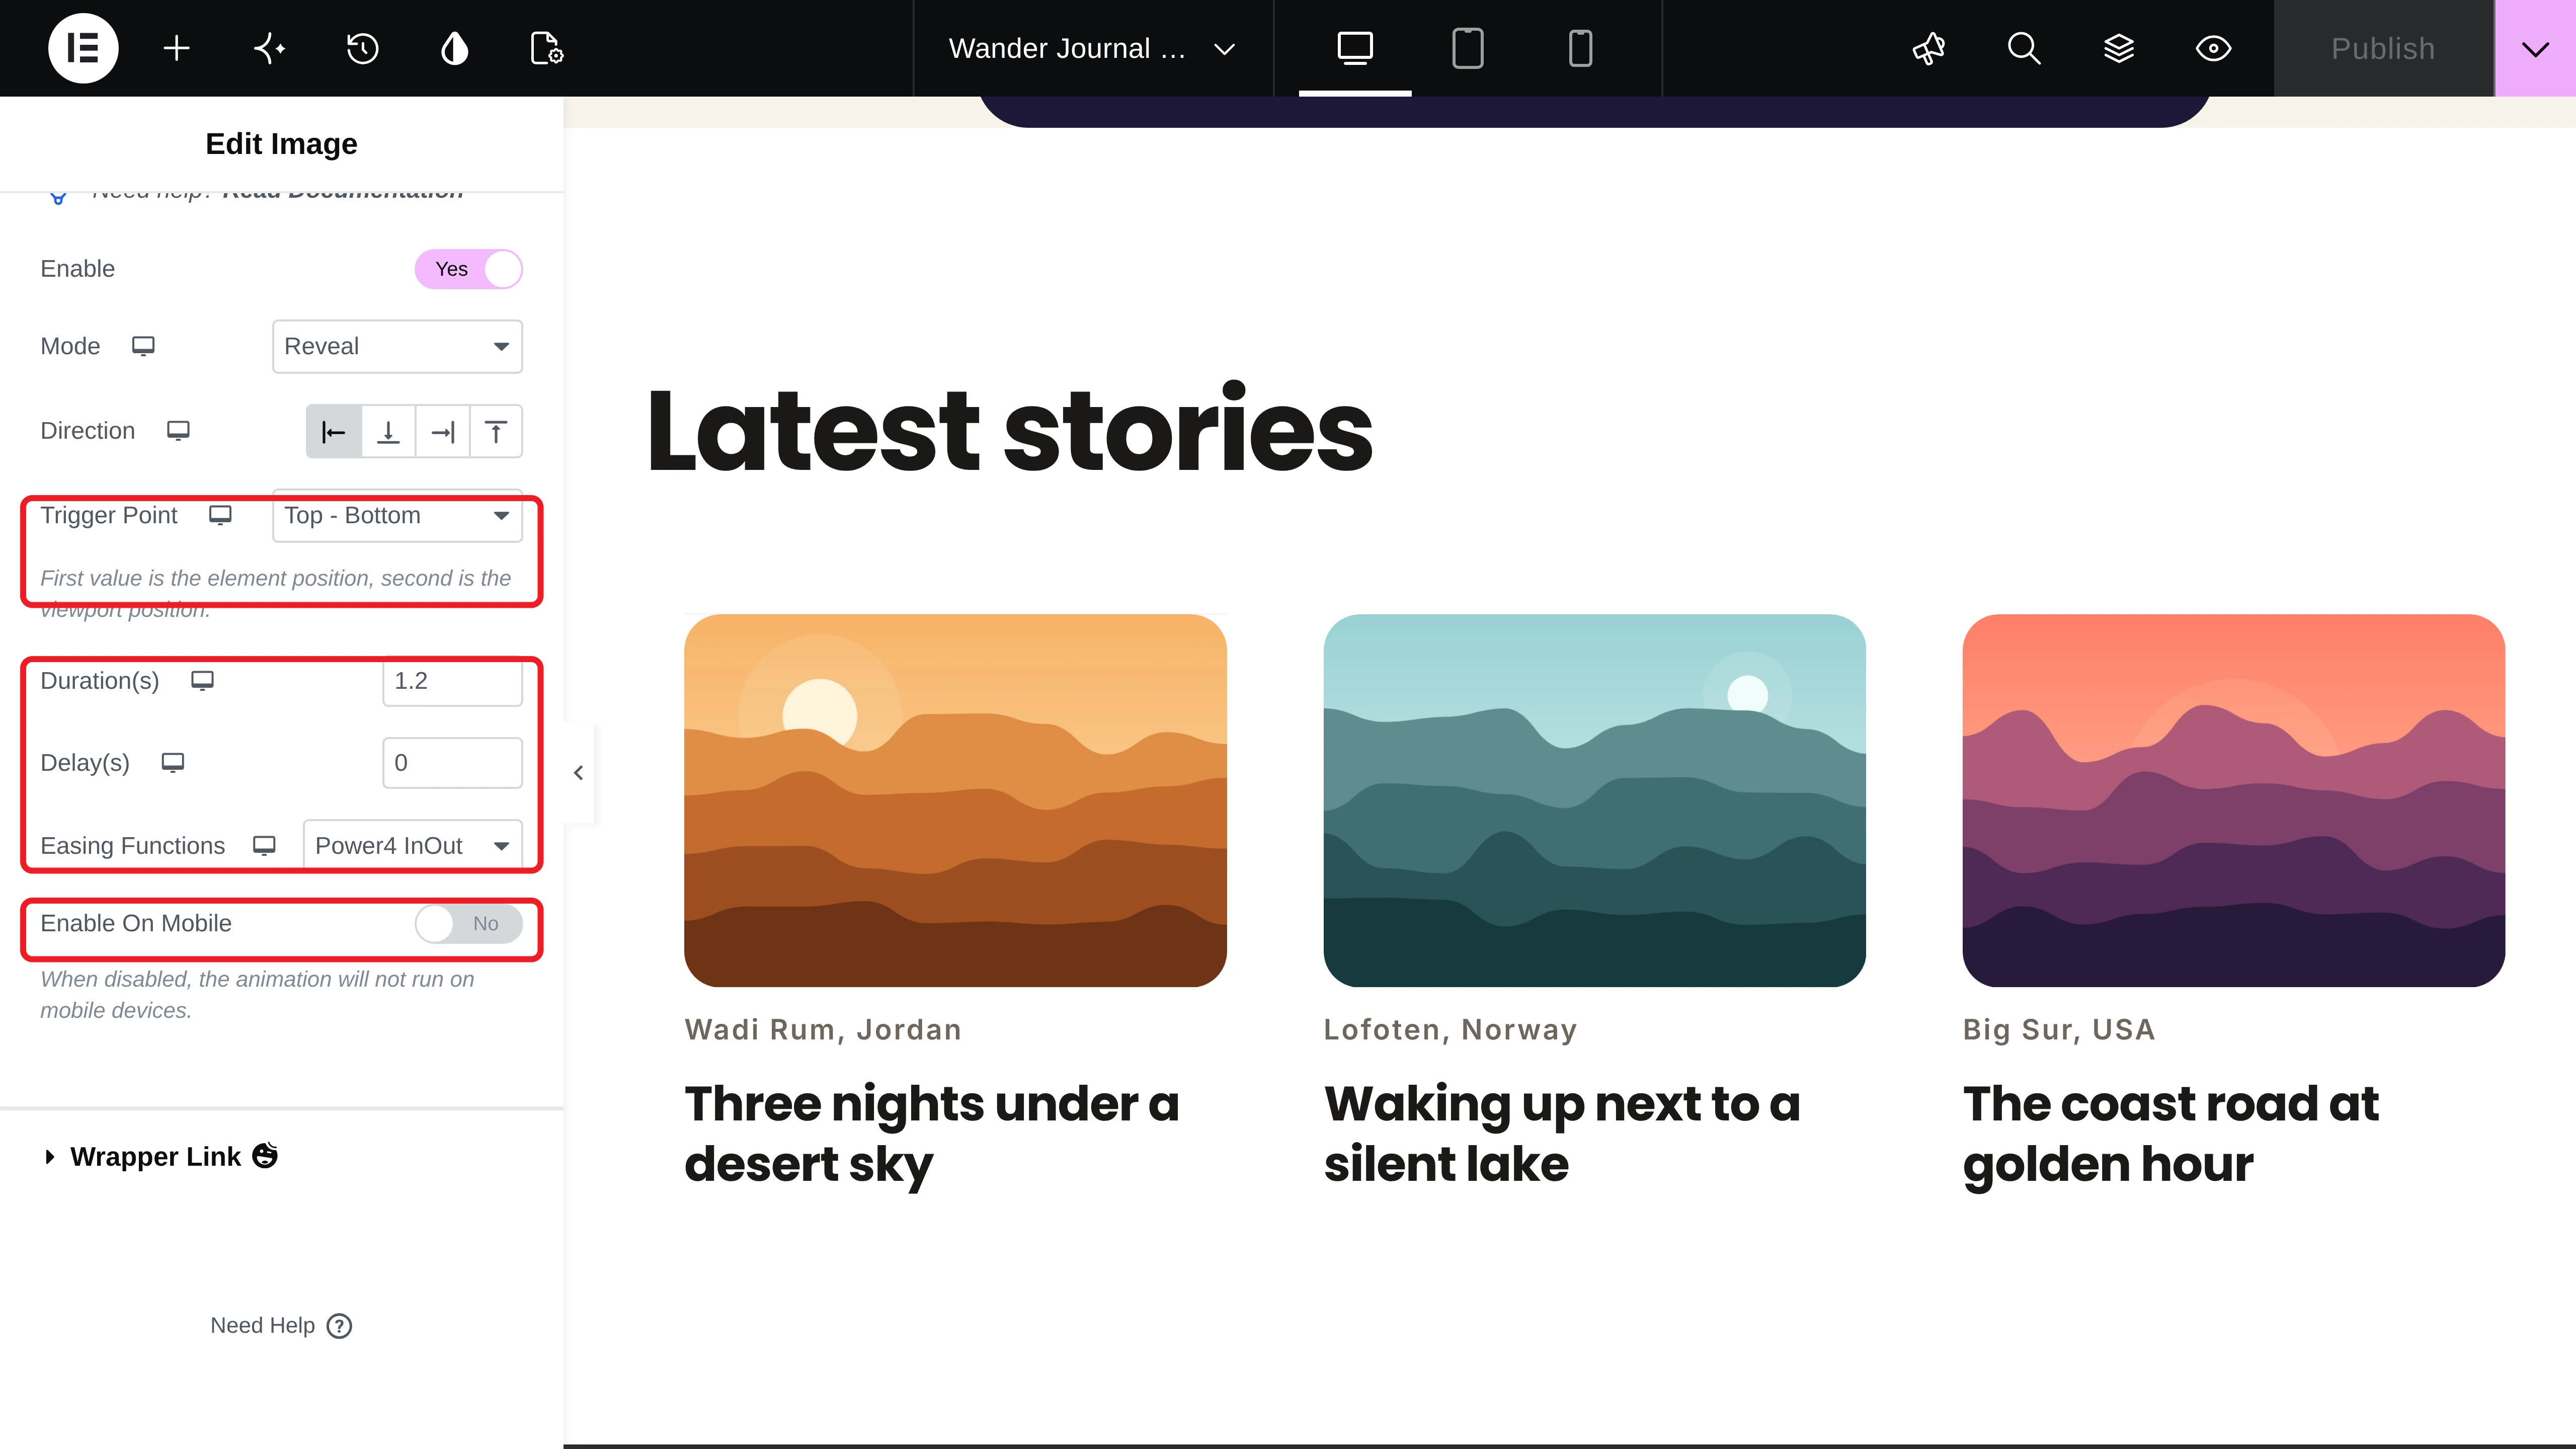
Below the mode options, you’ll find the trigger point, duration, delay, and easing functions. We used these values:
- Trigger Point: Top – Bottom, so the animation starts as soon as the image enters the screen. The default, Top – Center, waits until it reaches the middle.
- Duration(s): 1.2 and Easing Functions: Power4 InOut
- Delay(s): 0, 0.15, and 0.3 for the three images, so they open one after another
Here’s how the three images reveal on scroll:
Step 04: Reveal an Image in Tiles
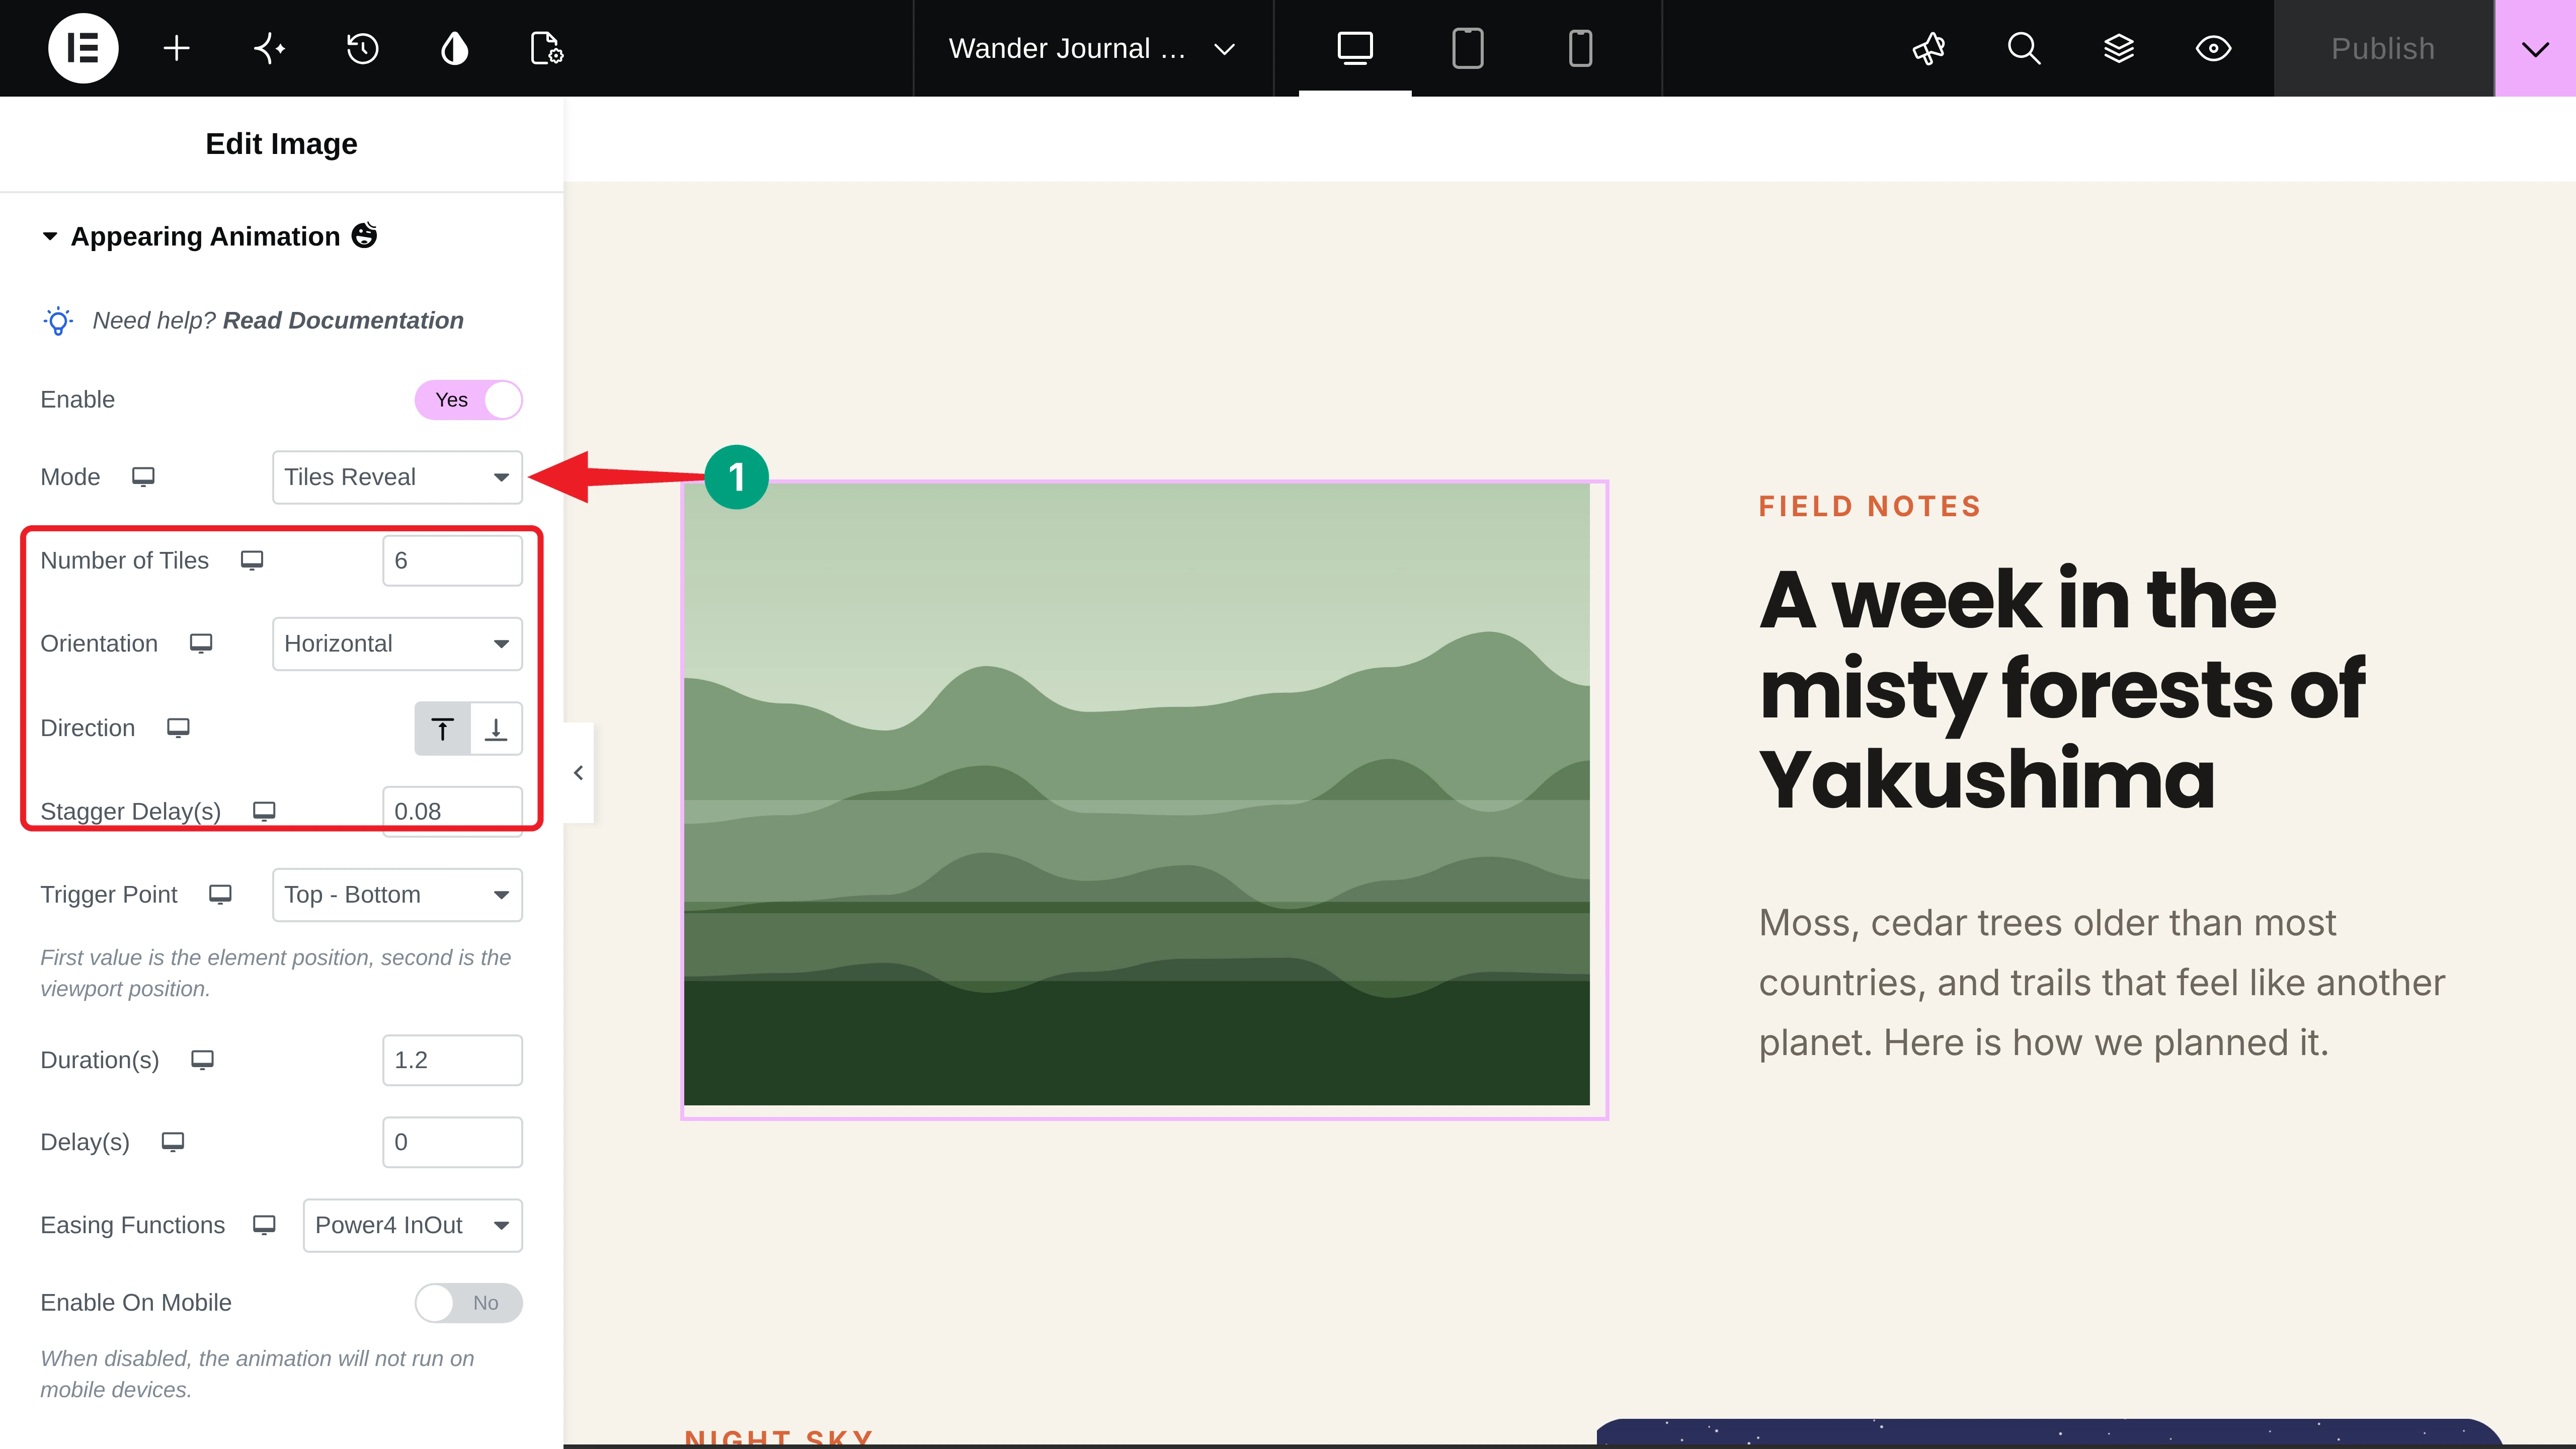
Select the next image and choose Tiles Reveal. You’ll get options for the number of tiles, orientation, direction, and stagger delay. We used 6 horizontal tiles that open from Bottom to Top, with a 0.08 second stagger.
Step 05: Reveal an Image from the Corner
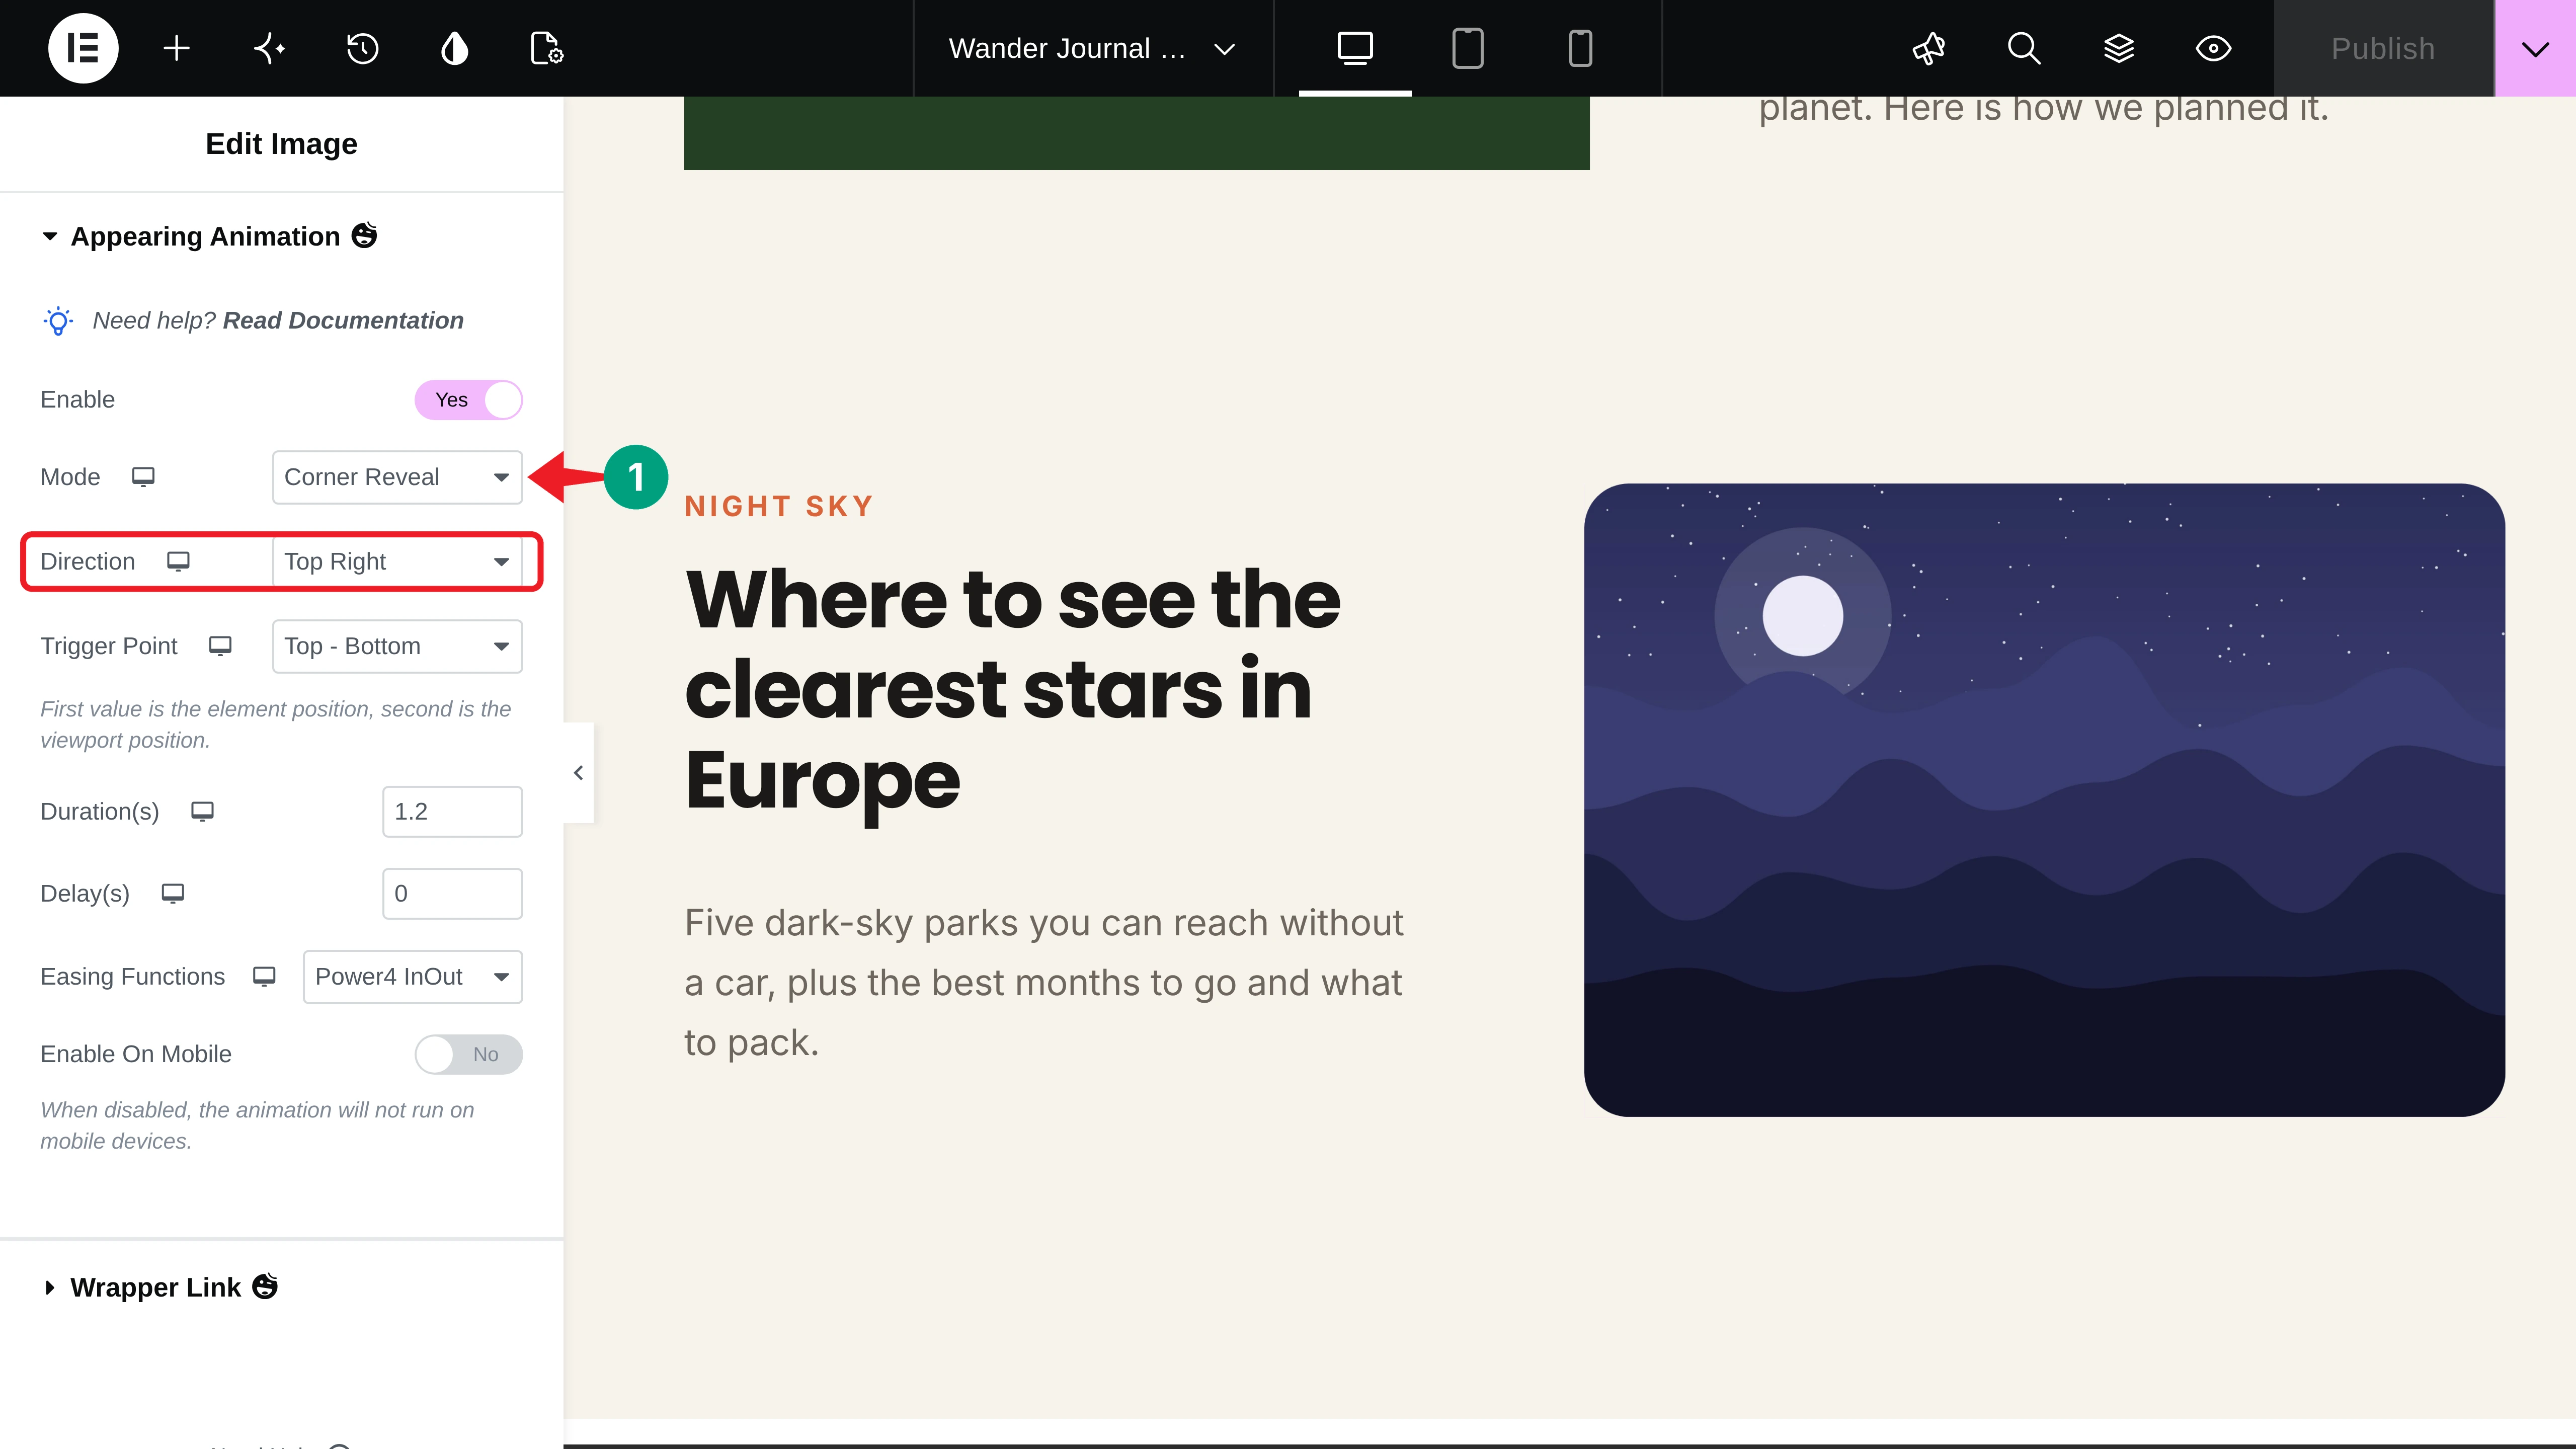
For the next image, choose Corner Reveal and pick a Direction. You can start from the Top Left, Top Right, Center, Bottom Left, or Bottom Right. We used Top Right.
Let’s see both effects in action:
Step 06: Scale the Gallery Images into View
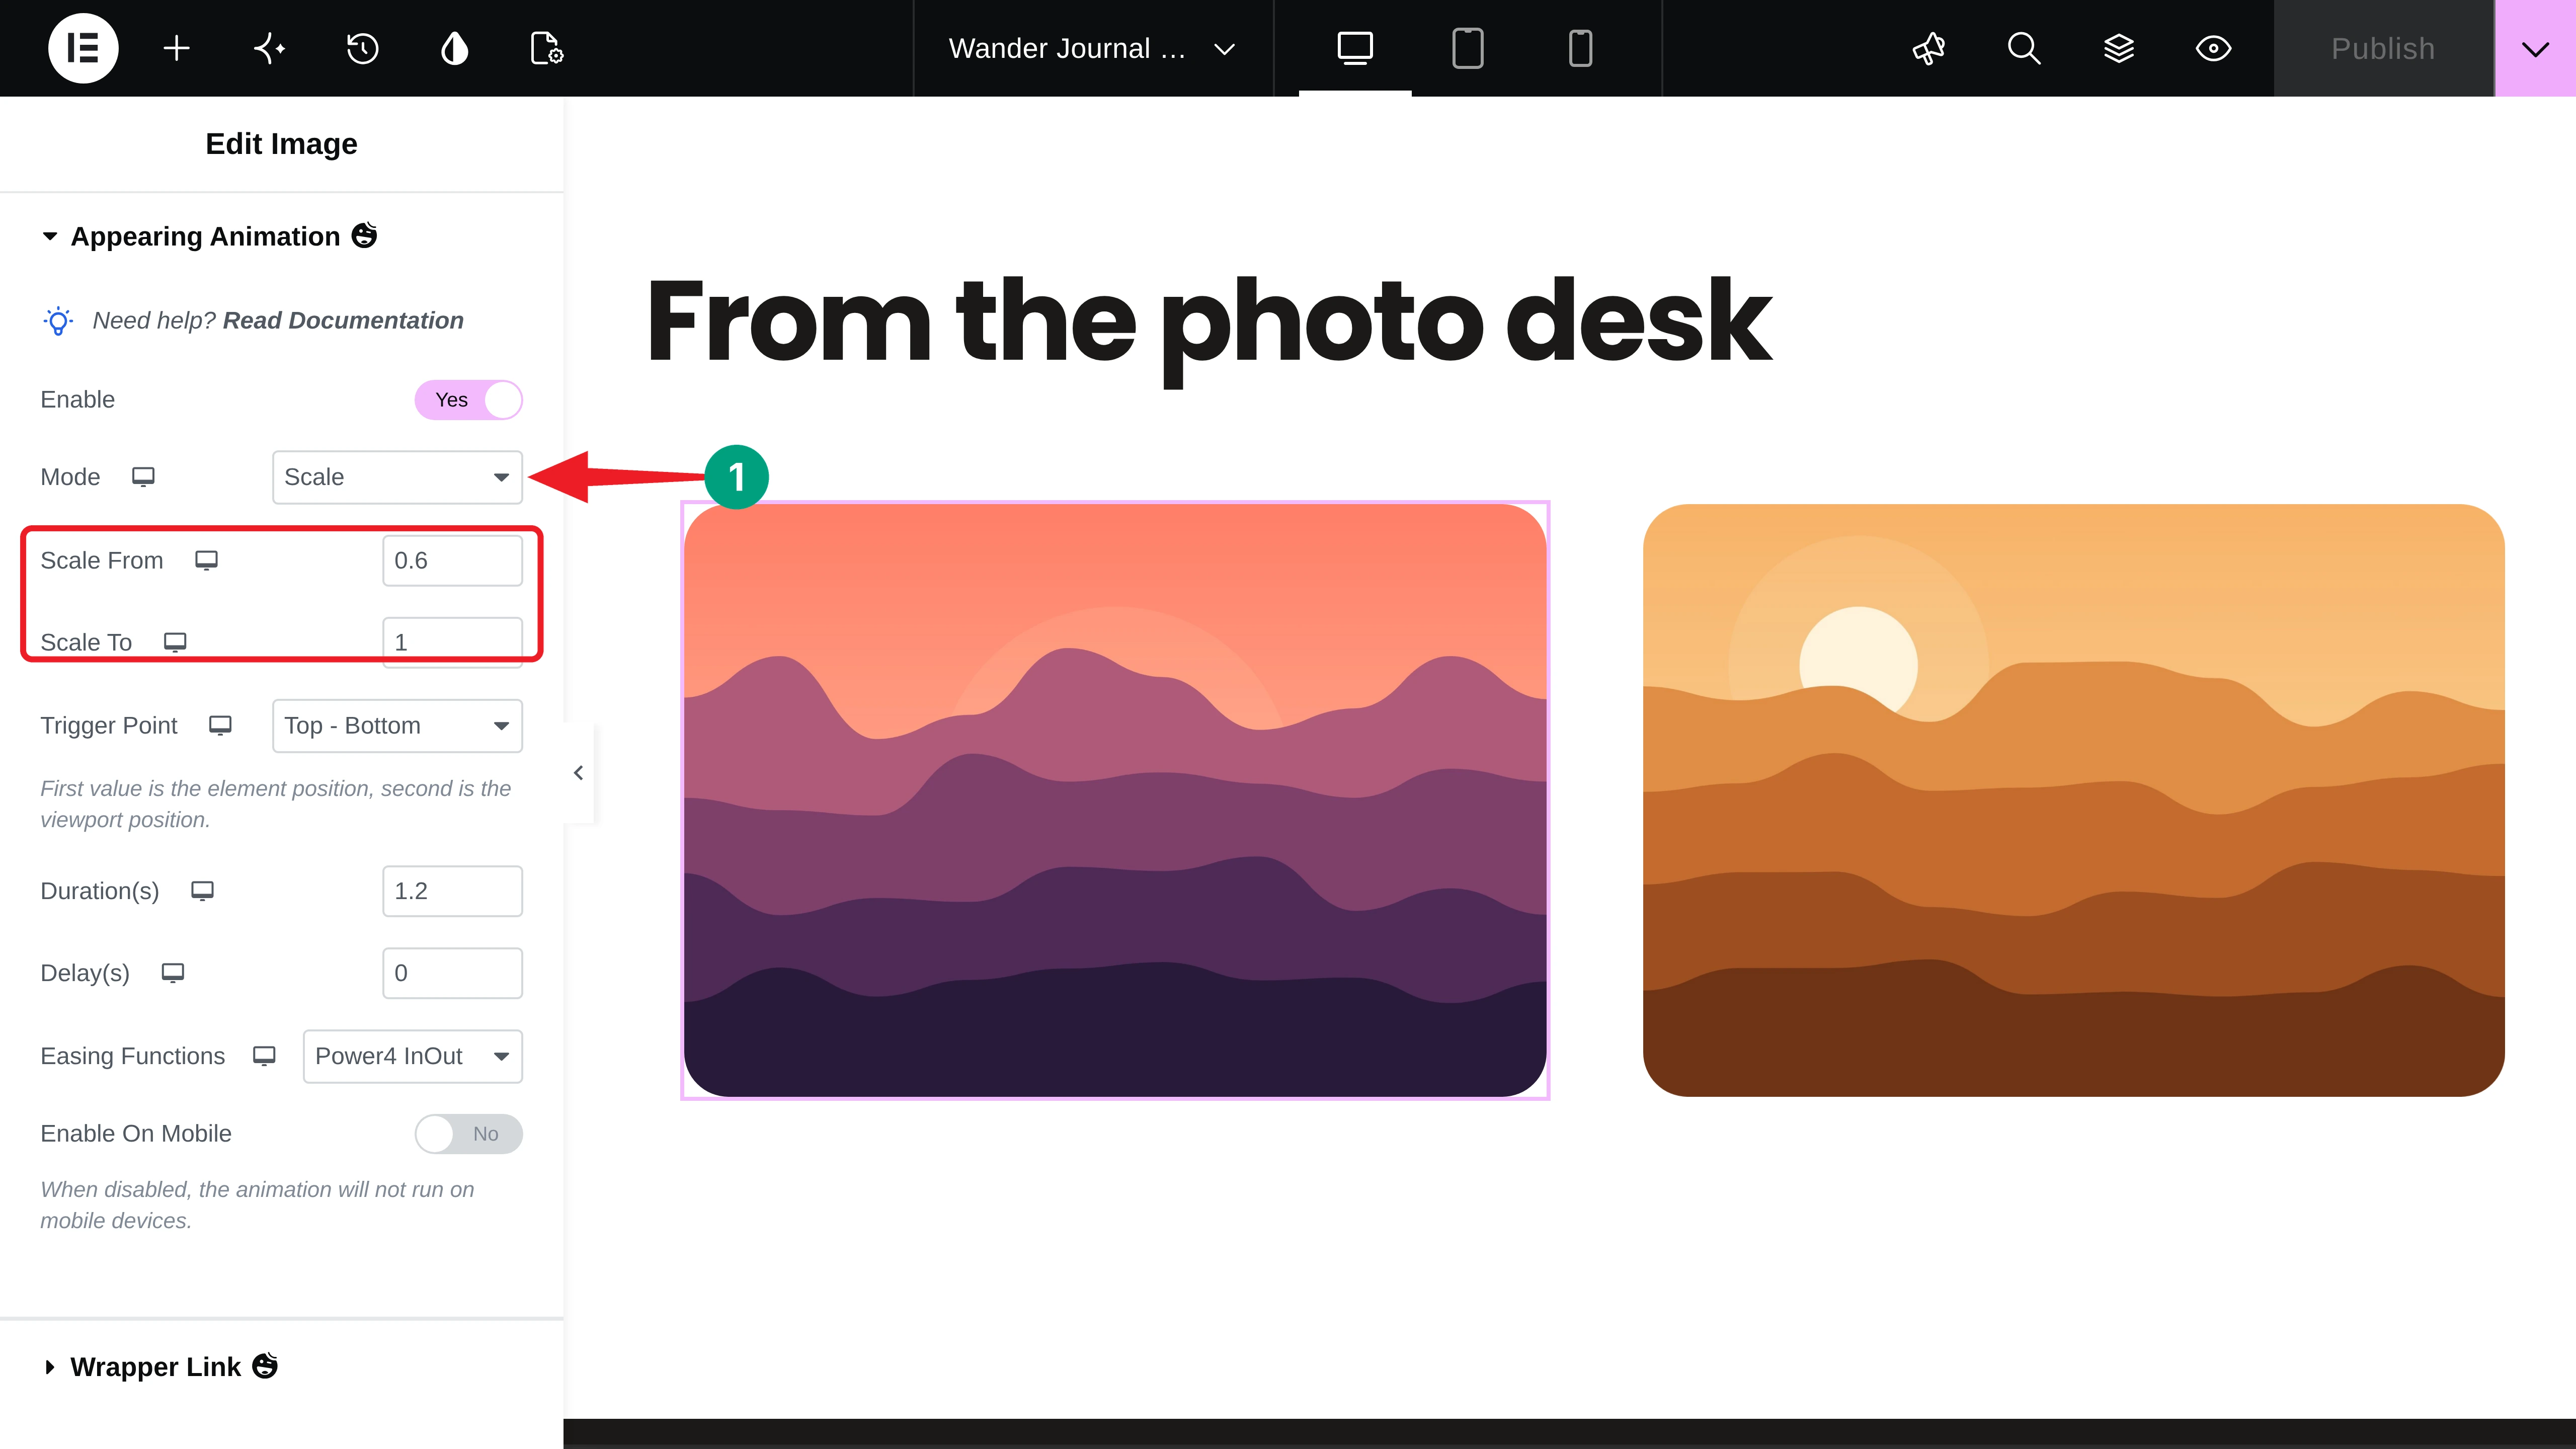
For the photo gallery, select an image and choose Scale. Set Scale From to 0.6 and Scale To to 1, so the image grows from 60% to its full size. We added a 0.2 second delay to the second image.
Step 07: Stretch the Hero Image to Full Width on Scroll
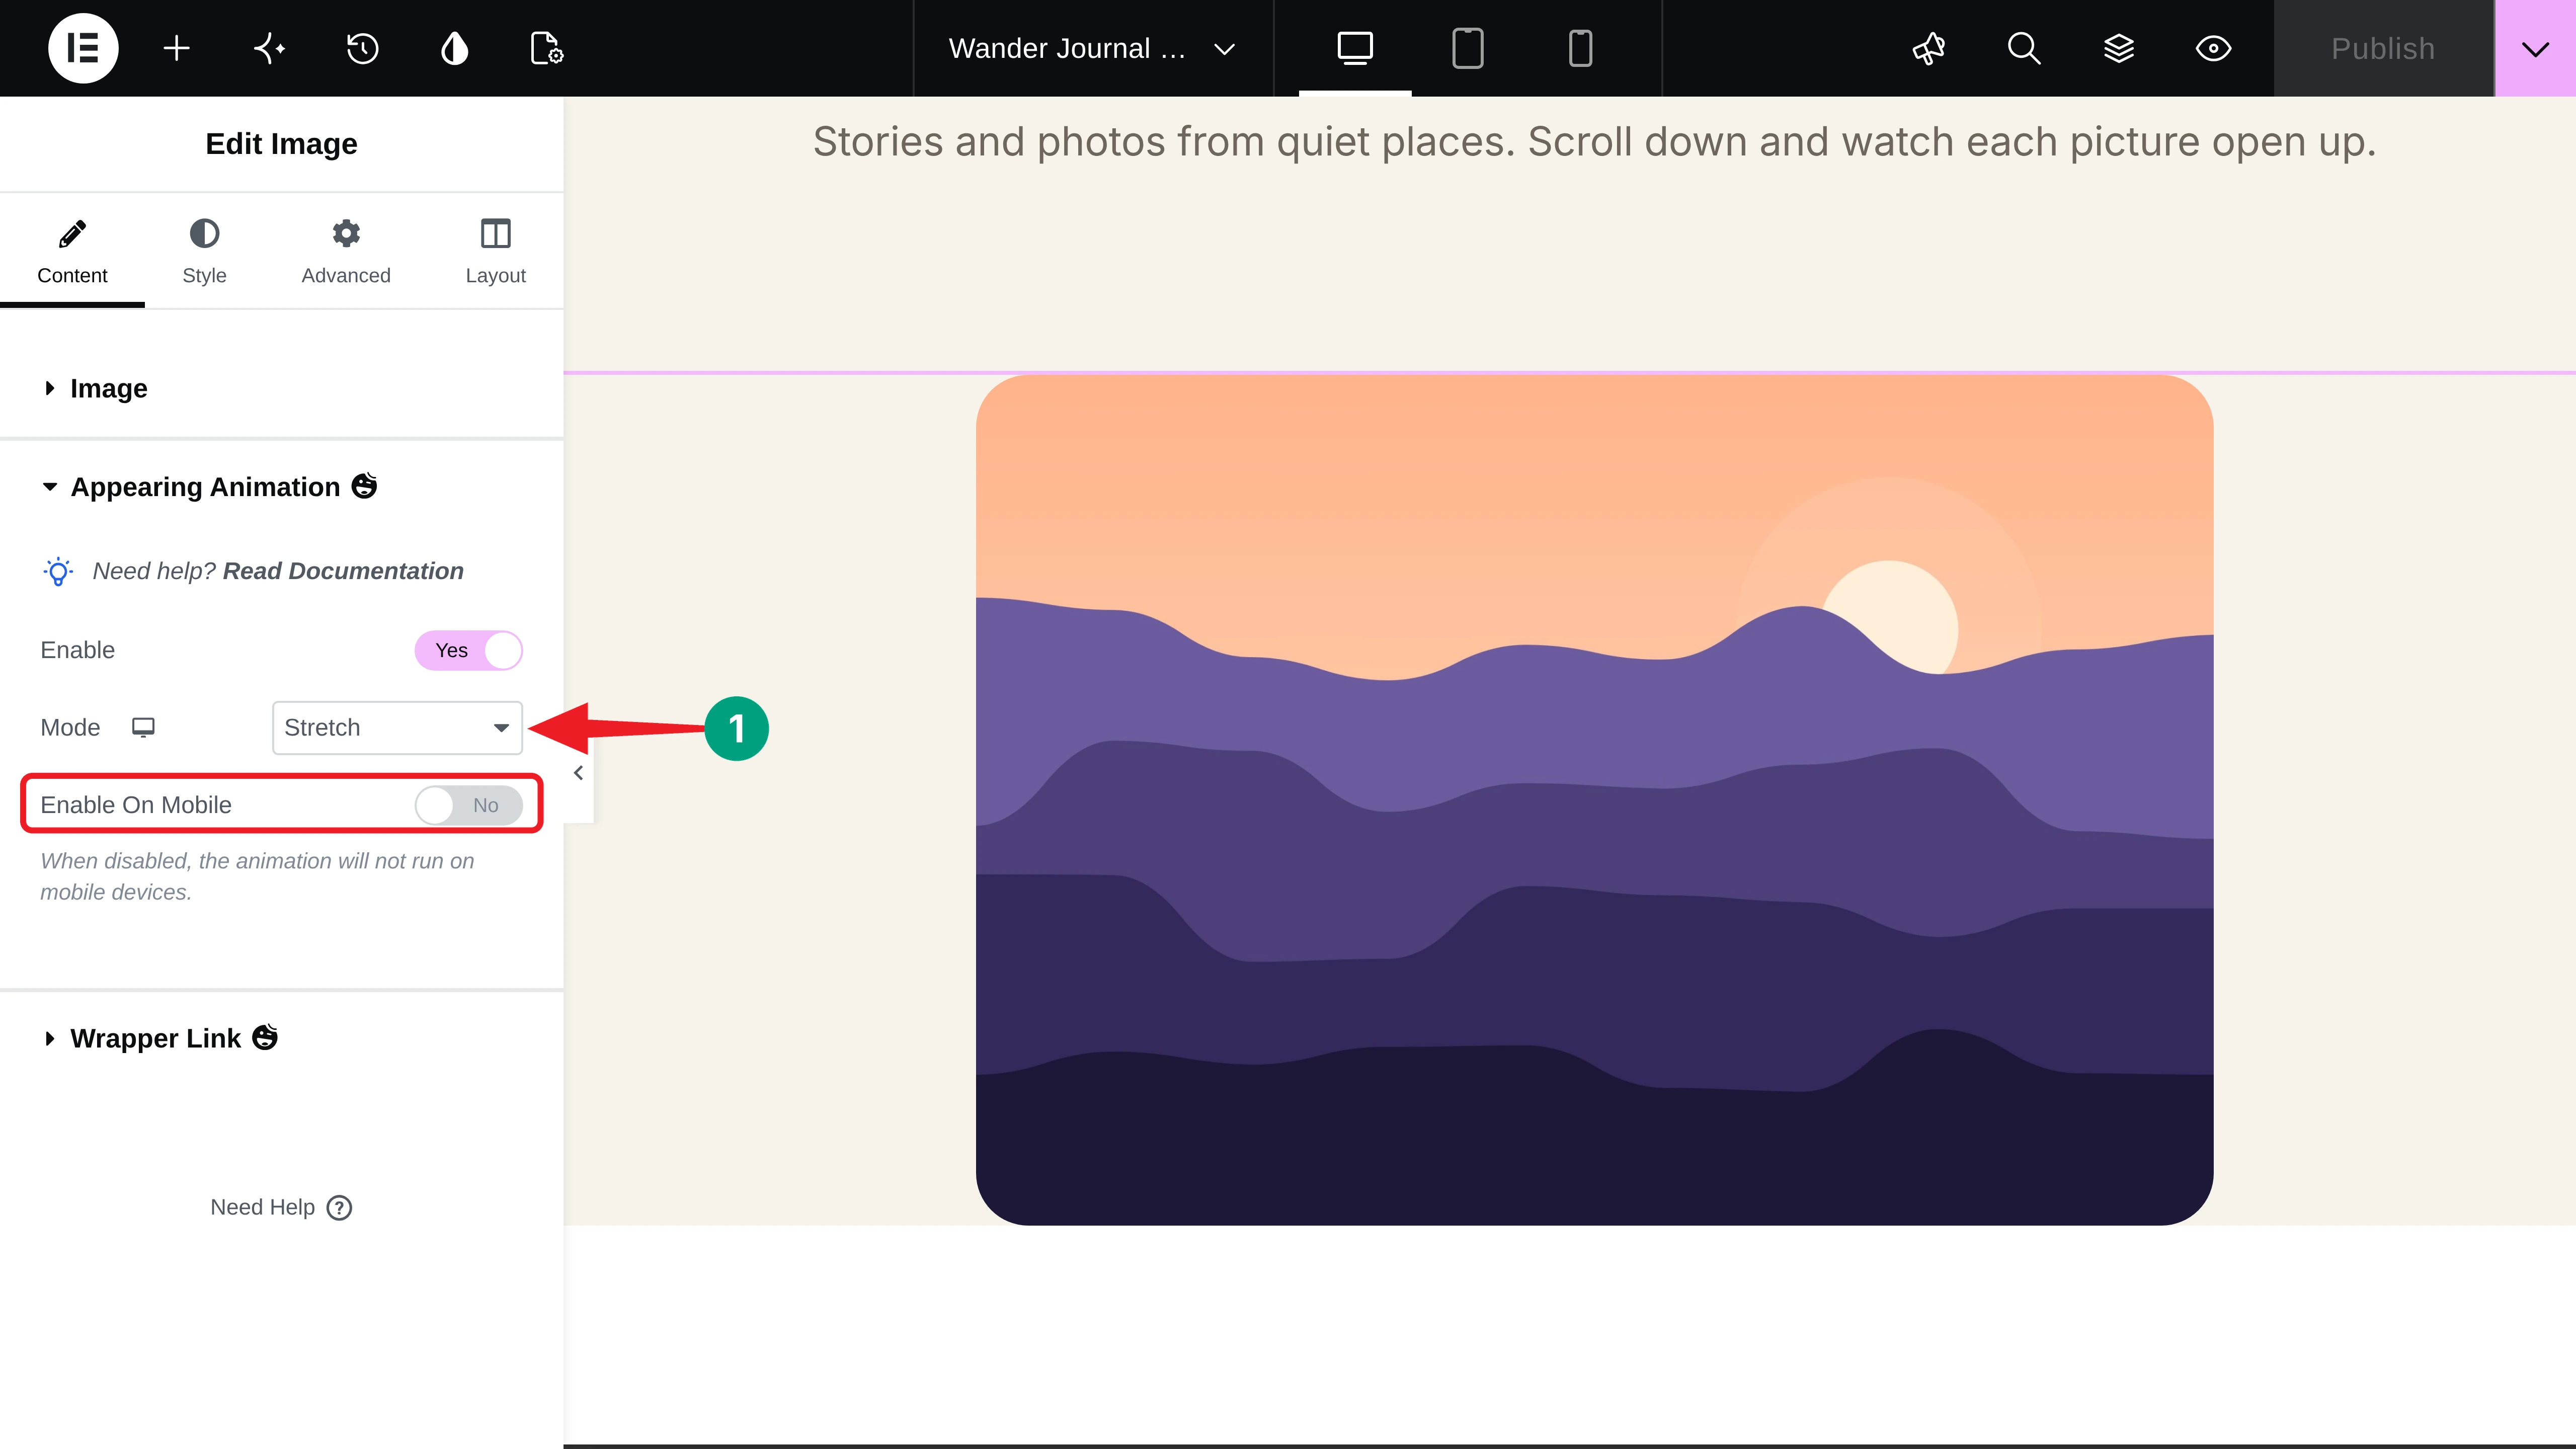
The Stretch mode is perfect for a big hero image. Select the image, enable Appearing Animation, and choose Stretch from the Mode dropdown. There’s nothing else to set here.
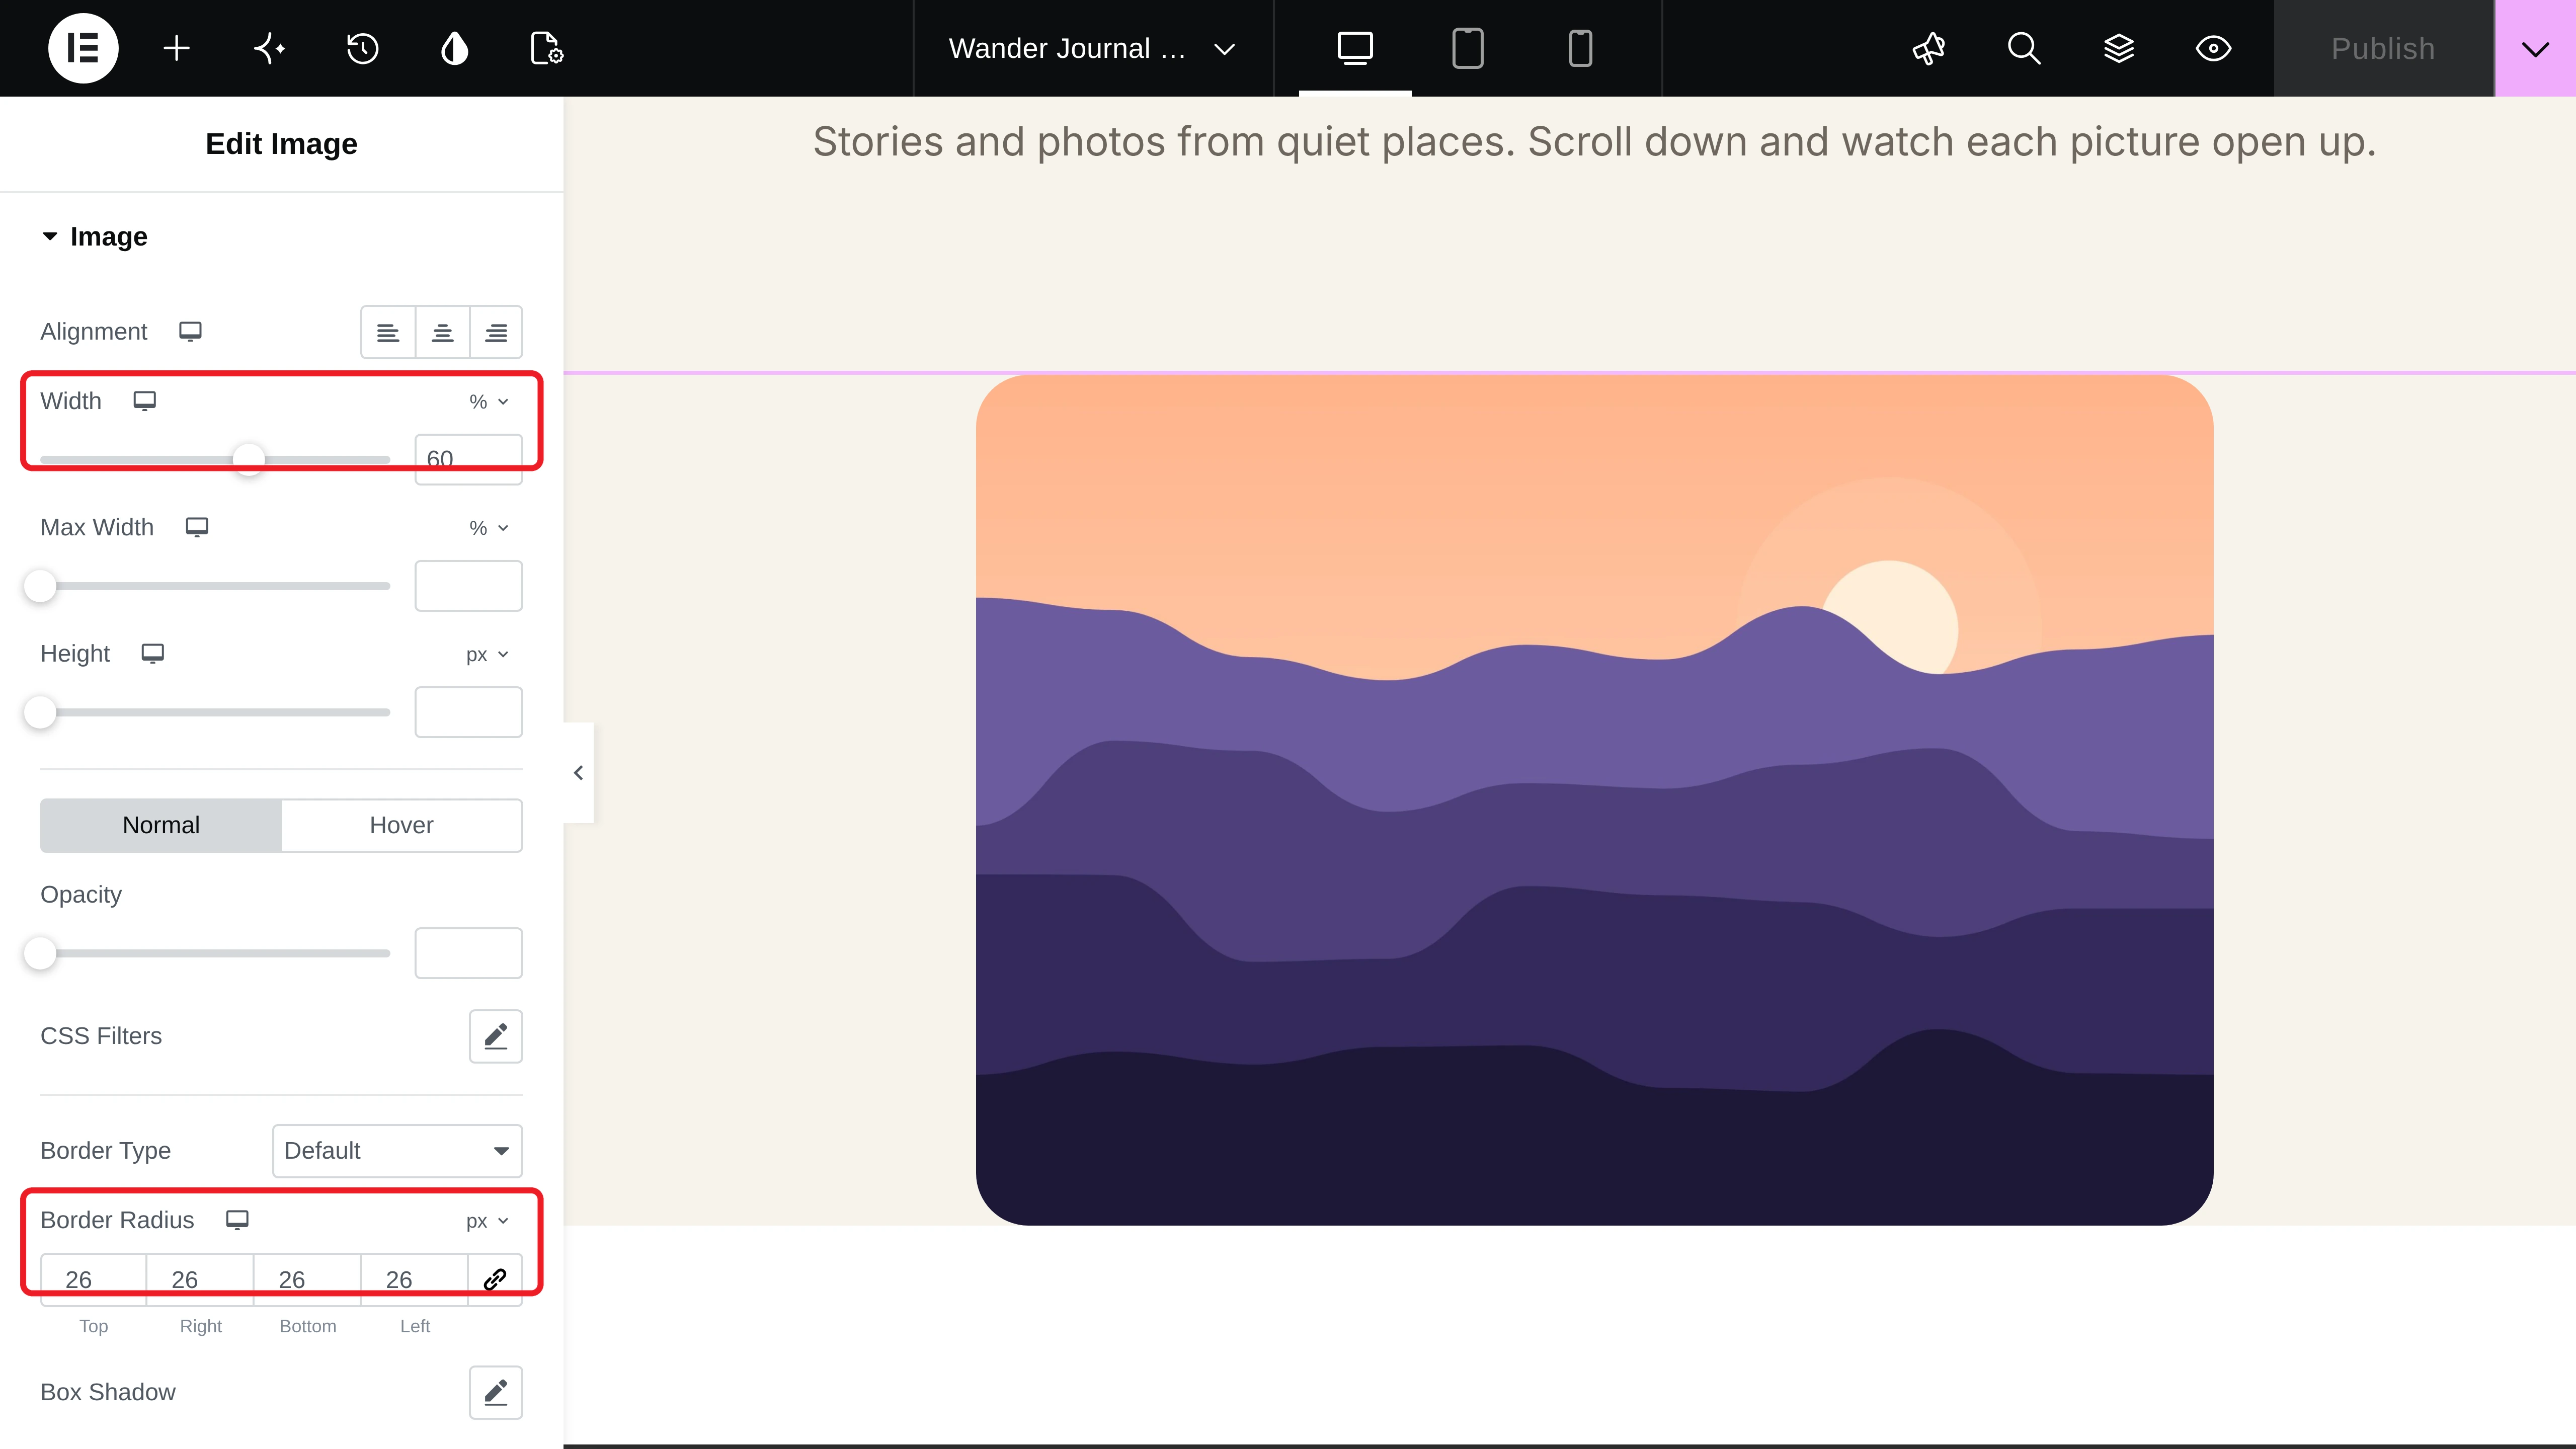
The image grows from its own width to the full screen width, so start with a smaller image. Go to the Style tab and set the Width to 60%. We also added a Border Radius of 26 px, which disappears as the image stretches.
Stretch doesn’t play inside the editor, so preview the page to see it. The image stays pinned while it grows:
Step 08: Preview and Publish the Page
Note: Enable On Mobile is off by default for every image. When it’s off, the animation doesn’t run on phones, and the image simply shows up. Turn it on if you want the effect on mobile too.
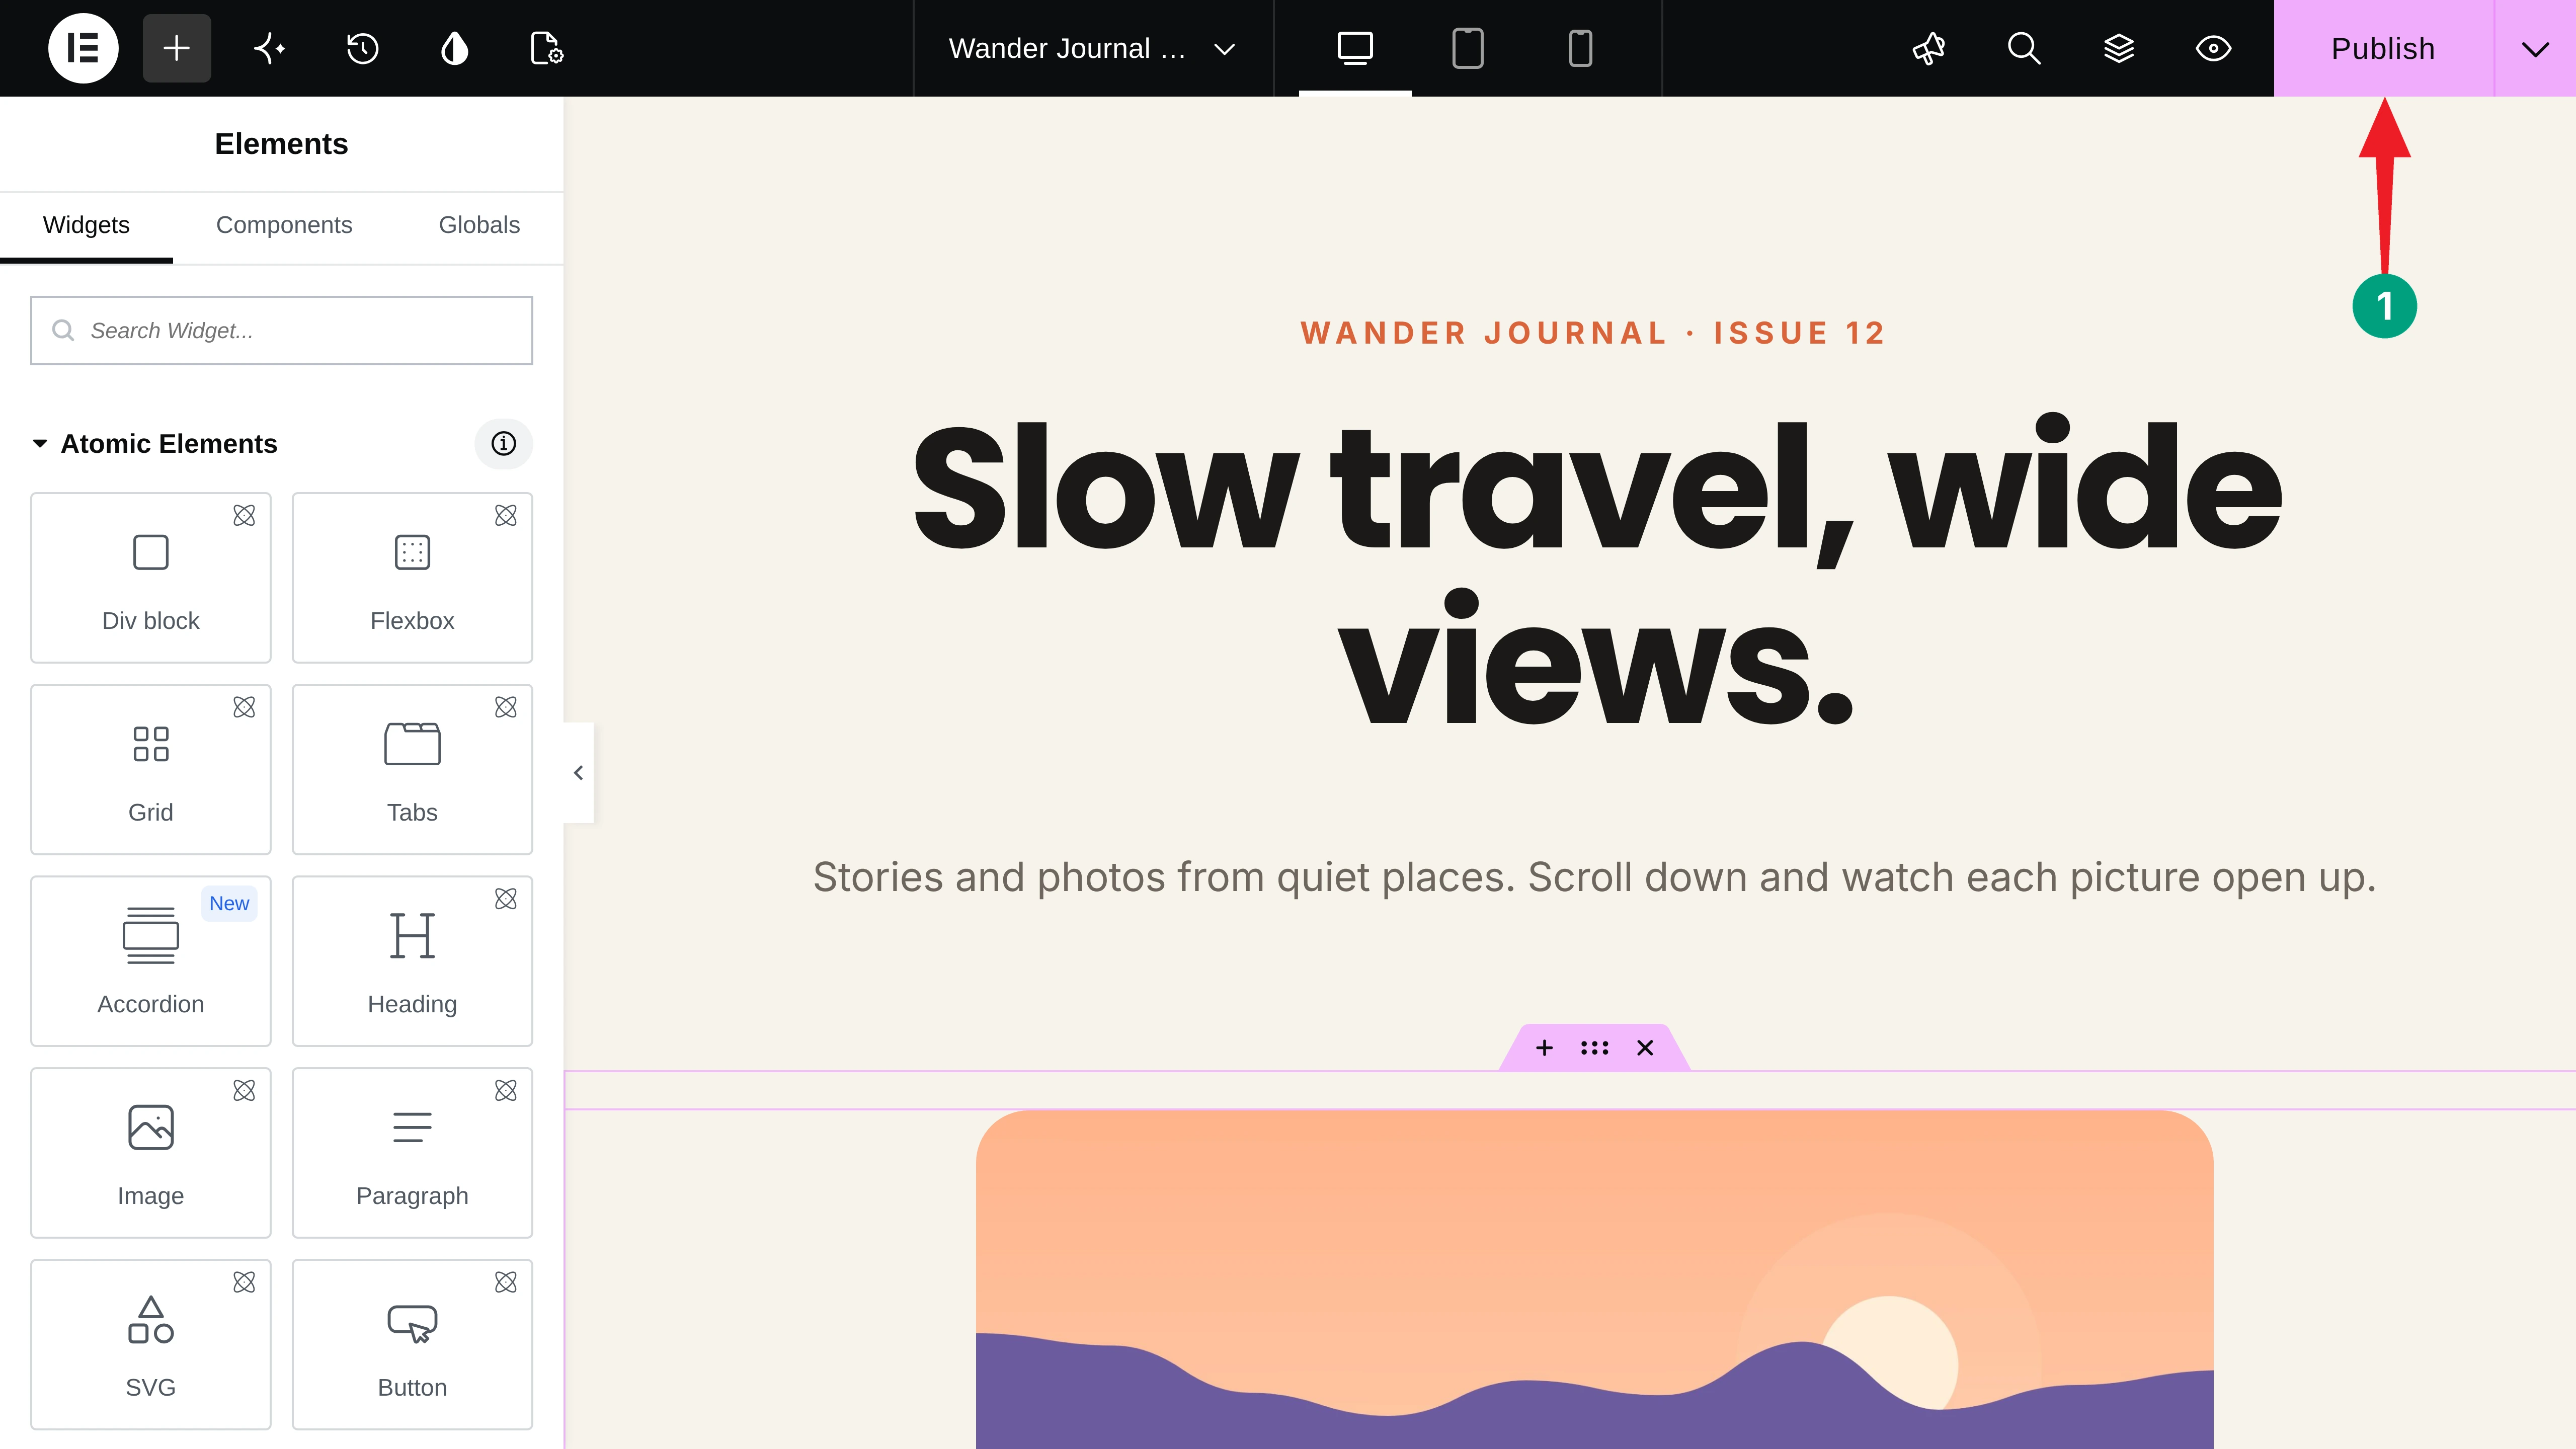
When everything looks good, click the Publish button.
Now open the page and scroll through it. You can see that it’s working fine on our end. Hope it will work well on your end as well.
Thus, you can animate images on scroll in Elementor without coding, using HappyAddons.
Tips for Smooth Image Scroll Animations
Good scroll animations should improve the user experience, not distract visitors. Follow these tips to keep your image animations smooth, balanced, and visually appealing.
a. Optimize Your Images First
Animated images still need to load quickly to keep your website fast. Compress your images and use modern formats like WebP before adding any animation effects.
b. Mix Modes, But Not Too Many
Using two or three animation modes on a page is enough to create visual variety. Avoid using all five modes on the same screen, as too many effects can make your page look busy.
c. Use Delays for Rows of Images
Adding a small delay between images in the same row creates a smooth wave-like effect. Keep the delay between 0.1 and 0.3 seconds to make the animation feel natural.
d. Save Stretch for One Hero Image
The Stretch effect pins an image in place while gradually increasing its size during scrolling. Use it on one important hero image near the top of the page to make a strong visual impact without overwhelming visitors.
Here’s a detailed guide on how to build an advanced Elementor layout without coding.
FAQ on How to Animate Images on Scroll in Elementor
In this section, we have answered some frequently asked questions commonly found on Google, online forums, and social media.

Is Appearing Image Animation free?
Yes. Appearing Image Animation is part of the free HappyAddons plugin, and all five modes are included.
Do I need to write any code?
No. You enable the animation in the Image widget, choose a Mode, and set the timing from the Elementor panel.
Which widget does it work with?
It works with the Elementor Image widget. Look for the Appearing Animation section in the Content tab.
Do the animations work on mobile?
They’re off on mobile by default. Turn on Enable On Mobile in the Appearing Animation section to run them on phones.
Will image animations slow down my site?
Not if you use them wisely. Compress your images, keep durations short, and don’t animate every image on the page.
Final Thoughts!
A few well-placed image animations can turn a simple page into a visual story. Now you know how to animate images on scroll in Elementor without coding, with five modes from a simple reveal to a full-width stretch.
Start with one effect on your most important image, check it on desktop and mobile, then add more where they help.
If you have any questions, mention them in the comment box below. You can also give a knock on our live chat box. Thanks for being with us till the end.
Before moving away, have a few more minutes to explore the post on how to add a parallax effect in Elementor.