Are you facing trouble creating data tables on your Elementor website and looking for a smart solution to go on?
Check out Happy Addons’ new Advanced Table widget that helps you create tables by importing data from Google Sheets, Website Database, TablePress Plugin, CSV Import, and more are on the way.
Website building is becoming easier than ever before with the power of WordPress and Elementor.
In this complete guide, we’ll show you how to use Happy Addons’ Advanced Data Table widget to create a data table for your Elementor website.
Let’s get started:
Why Use The Happy Addons’ Advanced Data Table Widget

It’s important to choose the right Elementor addons whenever you work with an Elementor website. Happy Addons is one of the most suitable 3rd party addons that offer tons of widgets and features to build a stunning website.
Among these powerful widgets, the Advanced Data Table is an exclusive widget that helps to create and import responsive data tables on your website in minutes.
You can also add other Happy Features and advanced functionalities to the data table and make it more user-friendly for your users.
These are significant reasons to consider the Advanced Data Table widget for your website:
- Allow better customization
- Exclusive predesigned demo tables
- Easy import option
- WordPress table plugin support
- Google sheet compatible
- Show database table data
- and many more
Seems interesting, right? Well, now let us guide you on how you can easily create a data table in your Elementor website using this widget.
How to Create a Data Table Using Happy Addons Advanced Data Table Widget
Before starting the tutorial, make sure you’ve successfully installed and used these below-mentioned plugins on your website.
Pre-requisites:
- Elementor (Free)
- Happy Addons (Free)
- Happy Addons Pro
Learn everything about Elementor: How To Use Elementor (Step By Step Guide For Beginners)
Step 1: Create a New Page
To create a new page, you have to visit WordPress Dashboard –> Pages–> Add New. Wait for a while, you will get the page setting options.
Step 2: Add Happy Addons ‘Advanced Data Table’ Widget to Your Web Page
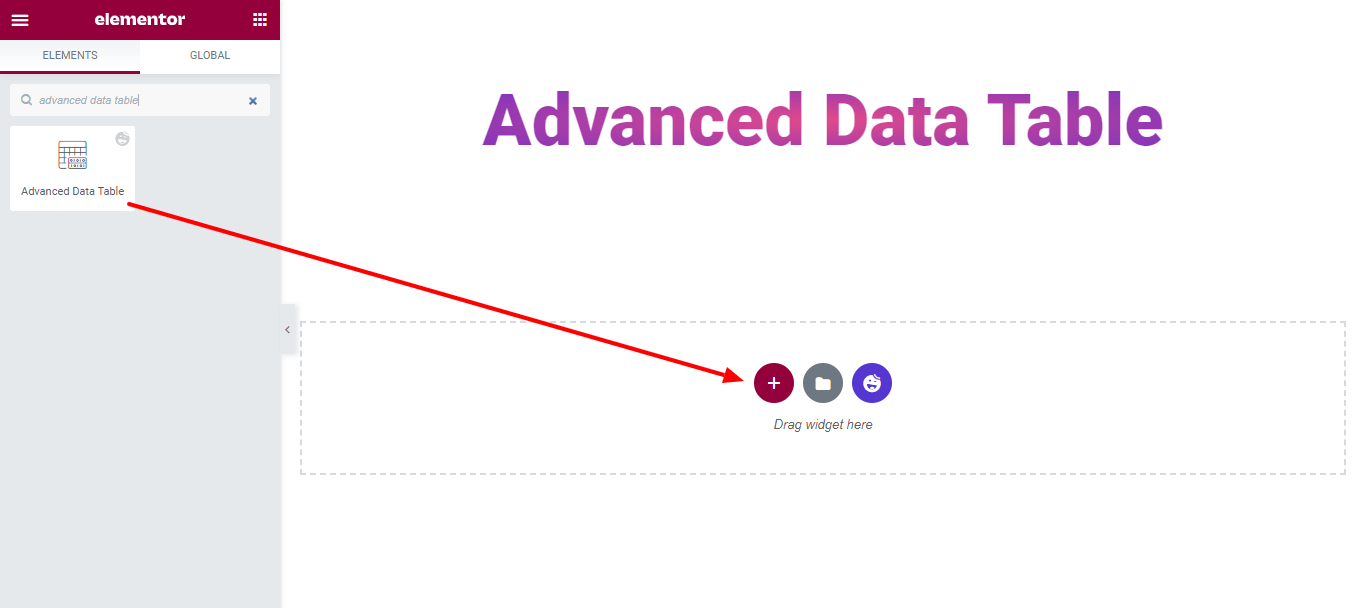
Find the ‘Advanced Data Table‘ widget in the search bar.
Then select the widget from the left side menu. Finally, drag and drop it onto the selected area.
Step 3: Select Suitable Data Table
It’s time to select a suitable data table according to your needs. There are 4 different Table Types that you can use to create the table.
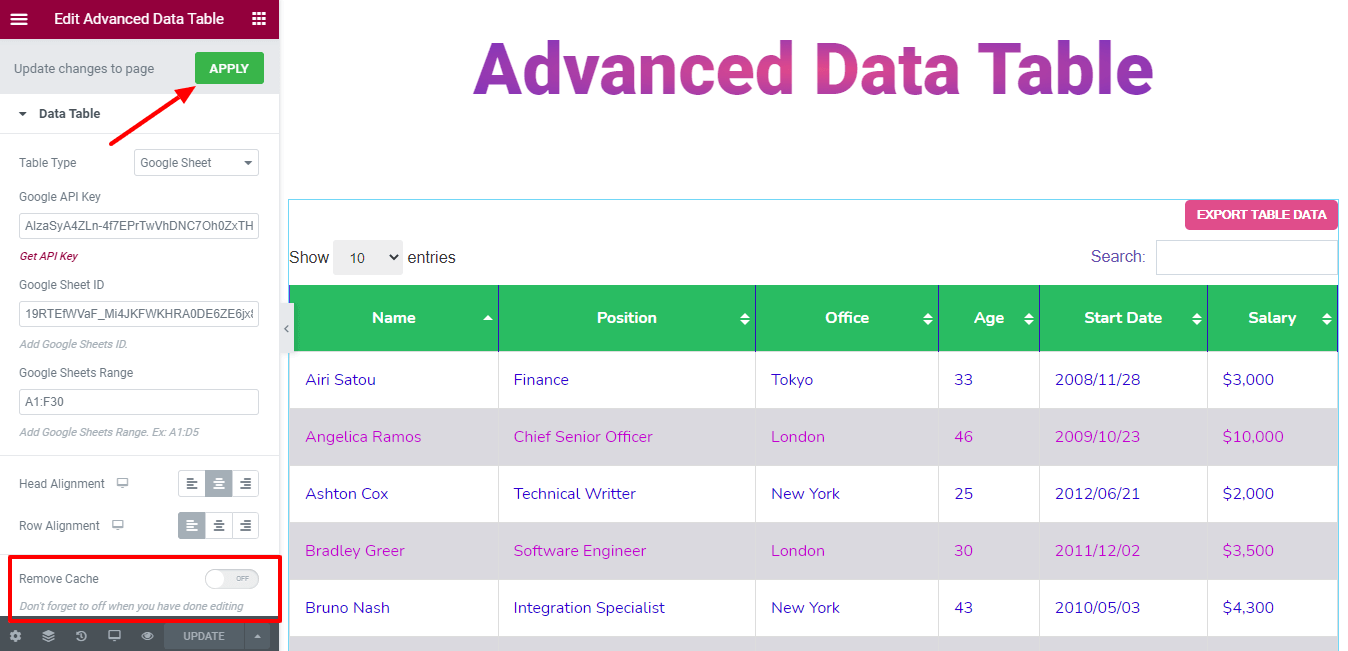
1. Google Sheets: You can use a Google Sheet to insert a table. To do this, you have to add Google API Key and set Google Sheet ID, and define the Google Sheets Range. That’s it.
2. TablePress: With the Happy Addons Pro Advanced Data Table widget, you can also create your data table using the TablePress plugin.
Check out the blog to compare the best WordPress table plugins side by side.
3. Database: Sometimes, you need to show data from your database using a table. To do this, you can choose the Database as your table type.
4. Import: You can easily Import any table on your Elementor website. You need to paste your table data in CSV format.
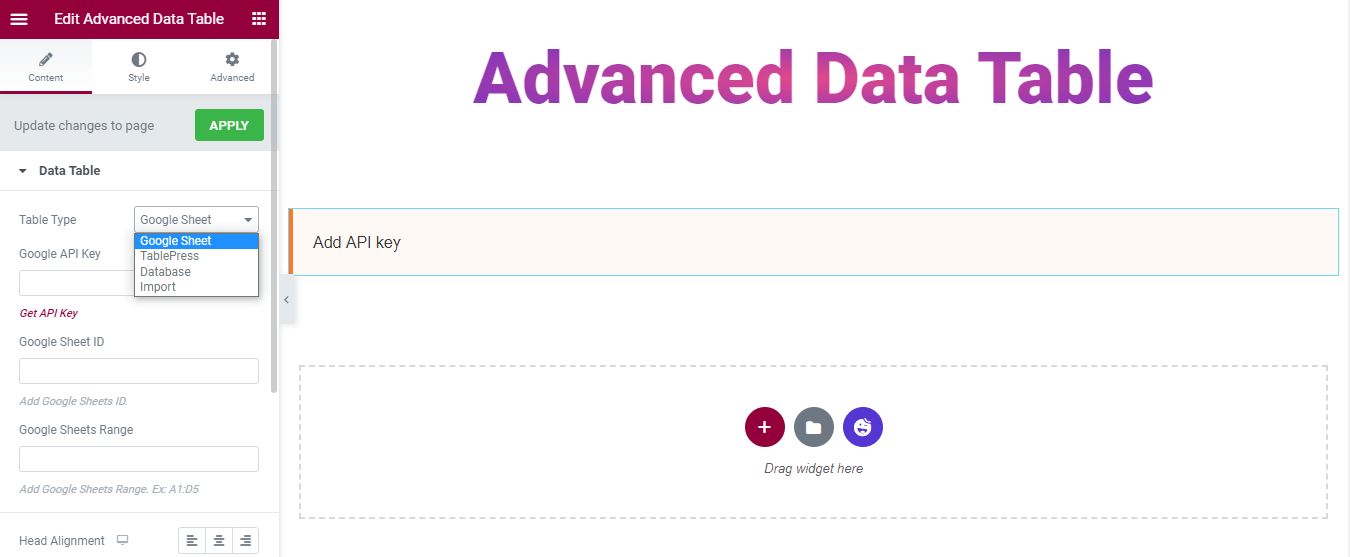
In this guide, we’ve used Google Sheets as the table type. Check out the below image.
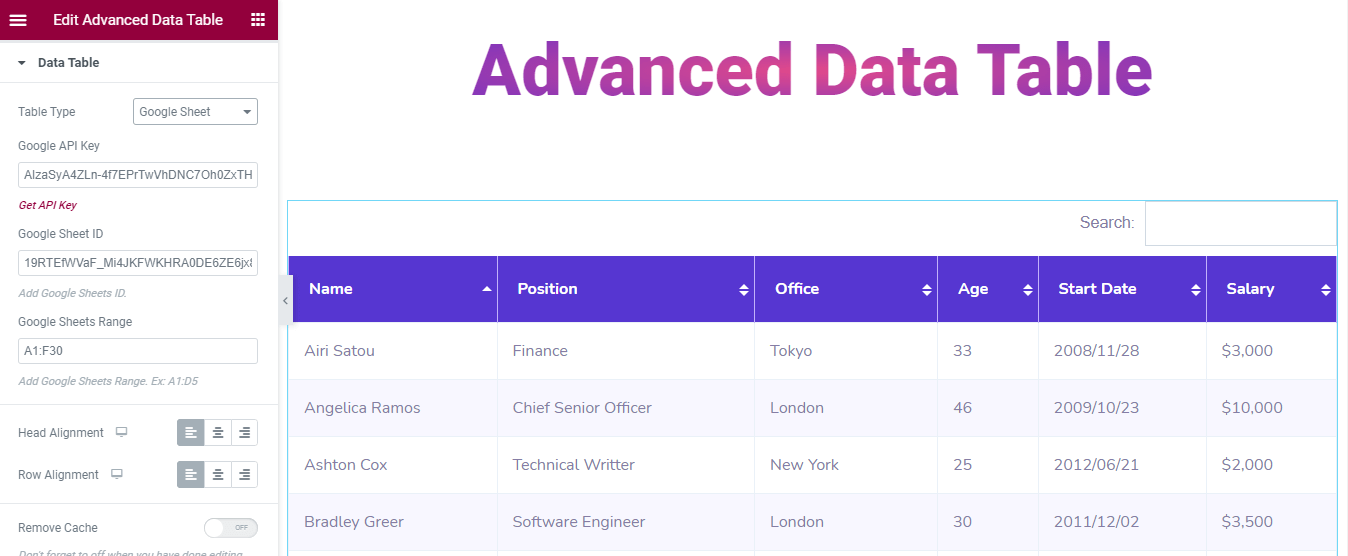
You can also set table’s Head and Row alignment.
Step 4: Customize Advanced Data Table Widget
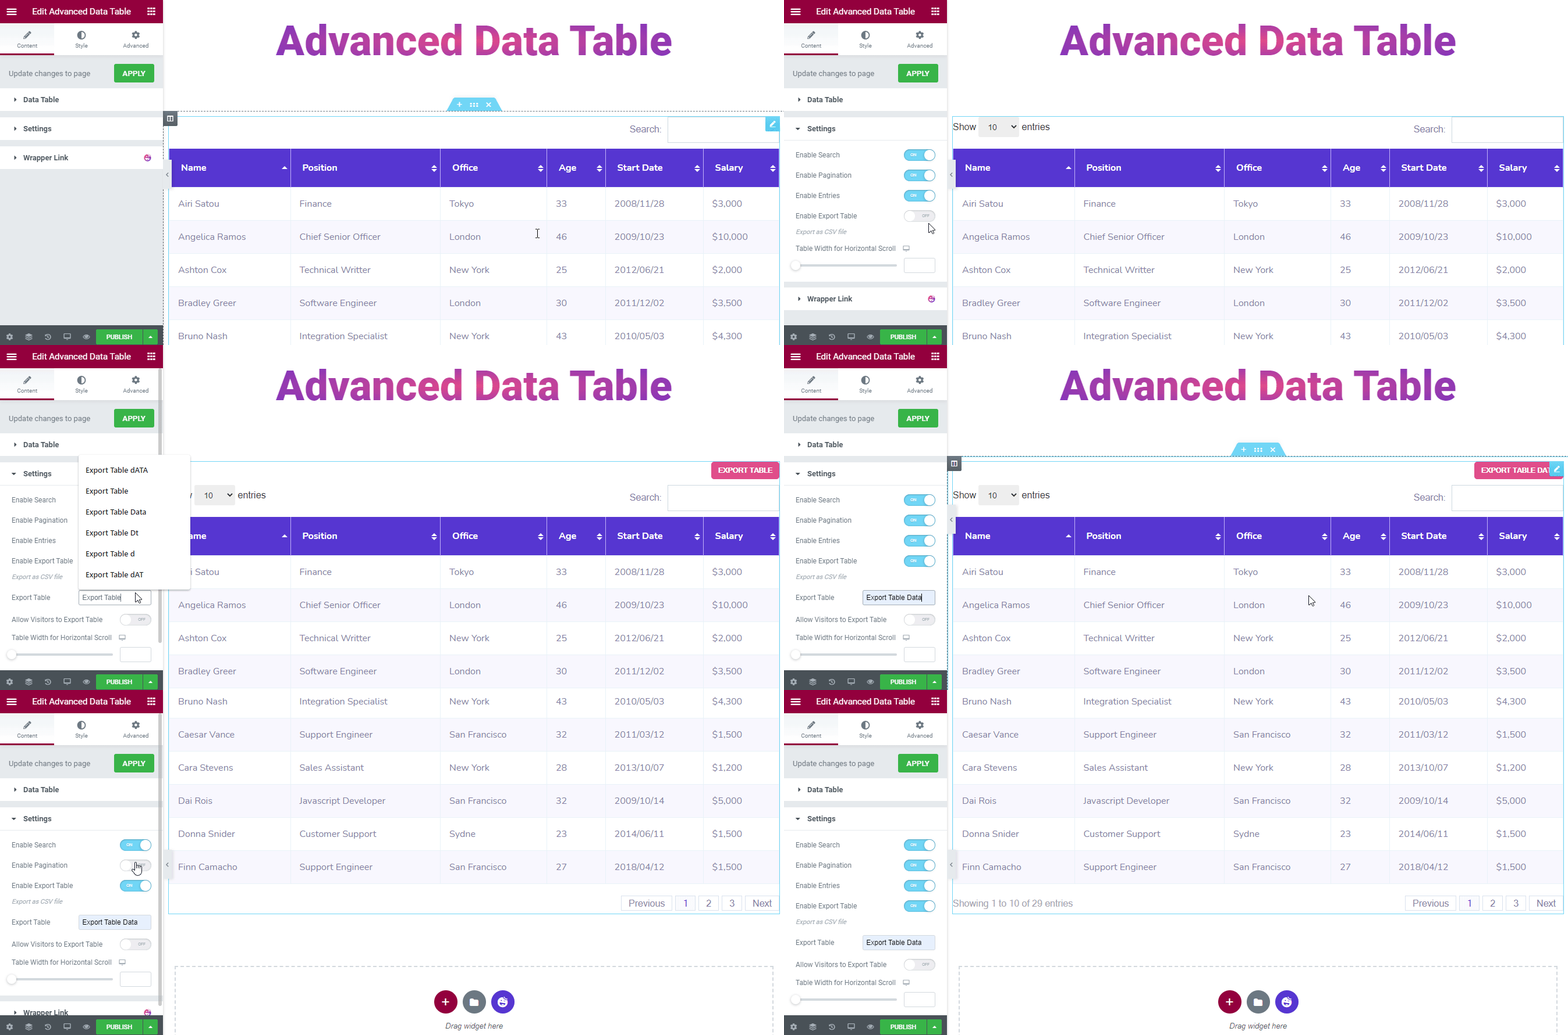
You can customize your table settings. Go to the Content –> Settings and set your table in your own way.
You’ll get all these multiple settings options:
- Enable Search
- Enable Pagination
- Enable Entries
- Enable Export Table
- Export as CSV file
- Export Table
- Allow Visitors to Export Table
- Table Width for Horizontal Scroll
In the Style section, you’ll get 3 styling options to design the table.
- Common
- Table Head
- Table Row
Common Style
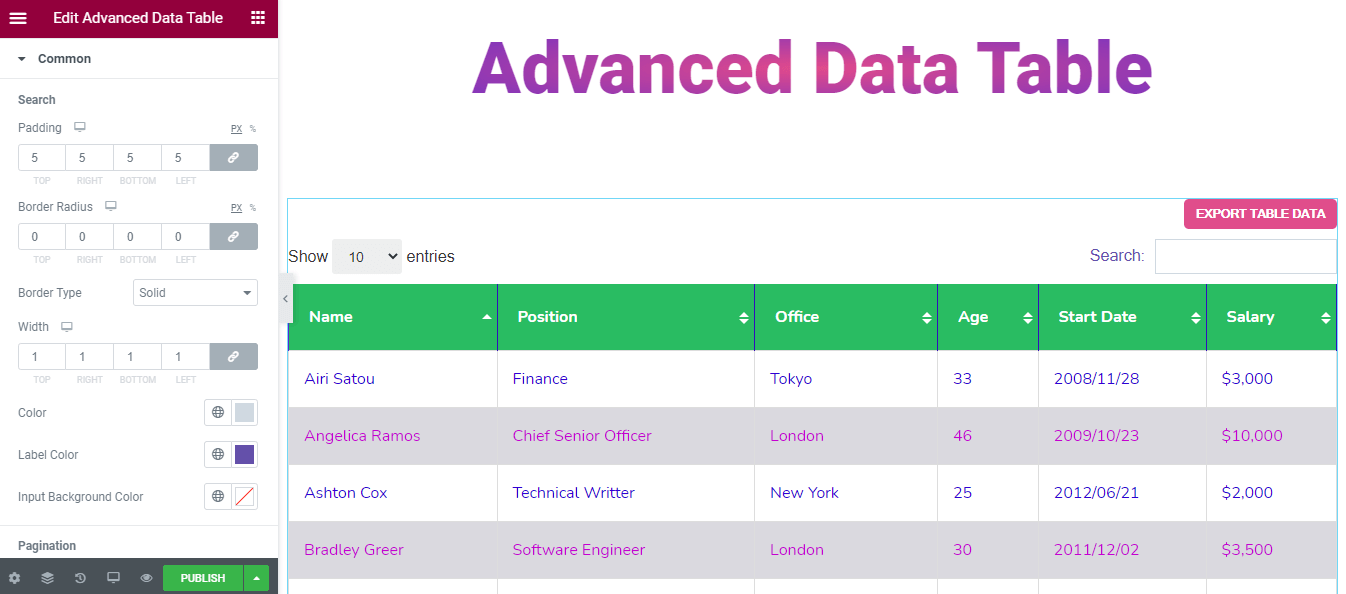
In the Style–> common, you can redesign the Search and Pagination styles. You can also change the search bar style using..
- Padding
- Border Radius
- Border Type
- Width
- Color
- Label Color
- Input Background Color
And also redesign the table Pagination using..
- Top Spacing
- Space between
- Padding
- Unlinked values Border Radius
- Border Type
- Width
- Color
- Show Entries Color
- Data Counter Color
- Background Color
- Color
Style Table Head
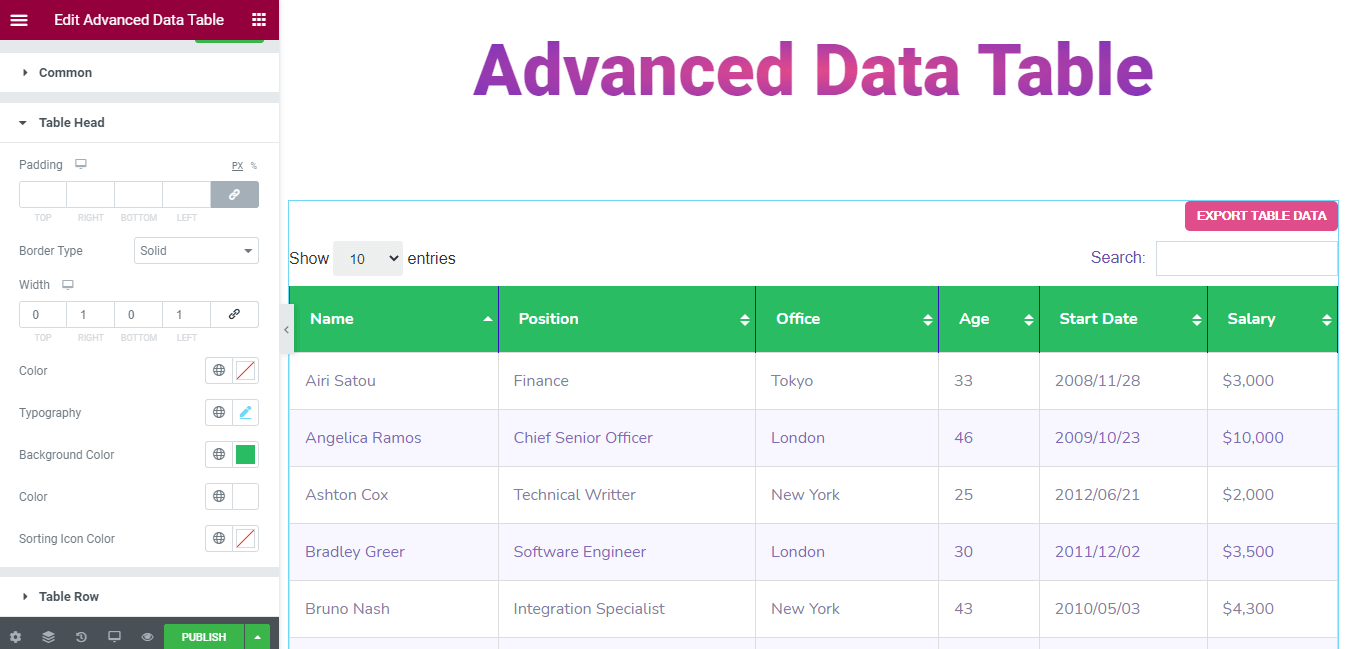
You can even give a stunning look to the Table Head. These are the styling options that will help you to do so.
- Padding
- Border Type
- Width
- Color
- Typography
- Background Color
- Color
- Sorting Icon Color
Style Table Row
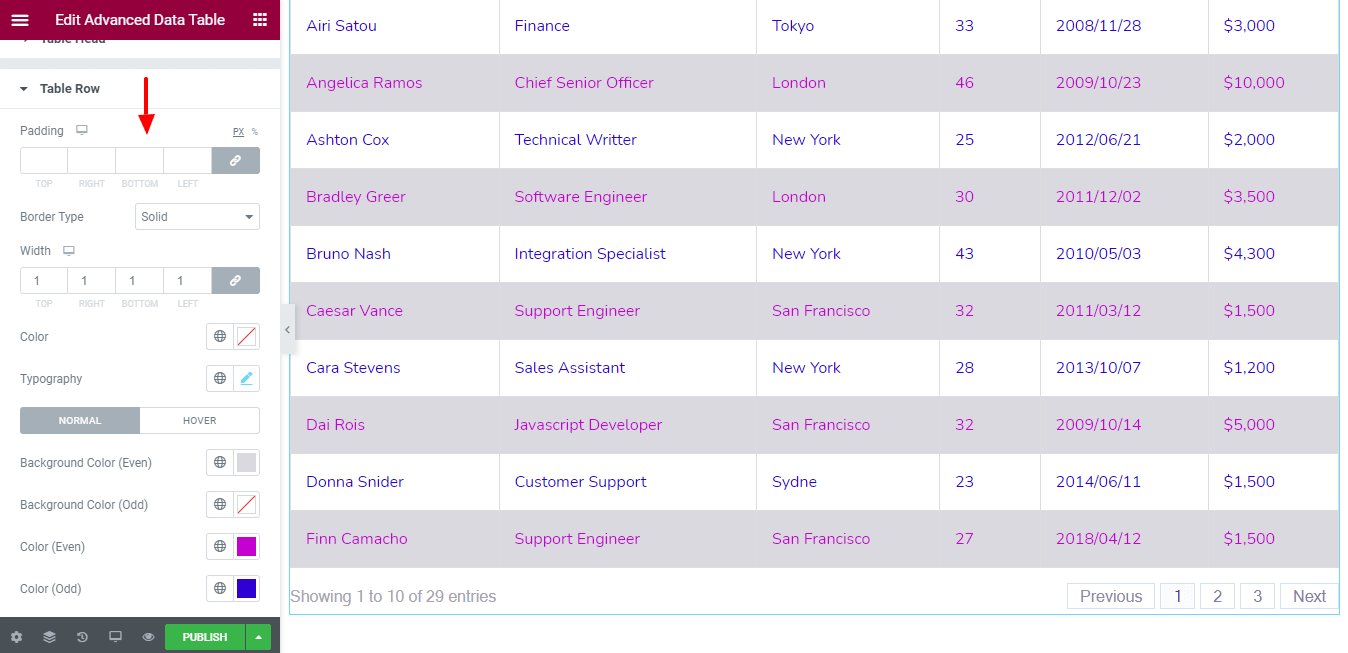
If you want to change the Table Row Style in your own style. You can use the below options.
- Padding
- Border Type
- Width
- Color
- Typography
- Background Color (Even)
- Background Color (Odd)
- Color (Even)
- Color (Odd)
Note: Don’t forget to off Remove Cache when you have done editing Google Sheet. And make sure to click the Apply button to update the changes on your web page.
Step 5: Use The Advanced Section to Add More Styles and Effects
In the default Elementor ‘Advanced‘ option, you’ll get more options to add motion effects, Happy Effects, background, and an option to make your page responsive as well.
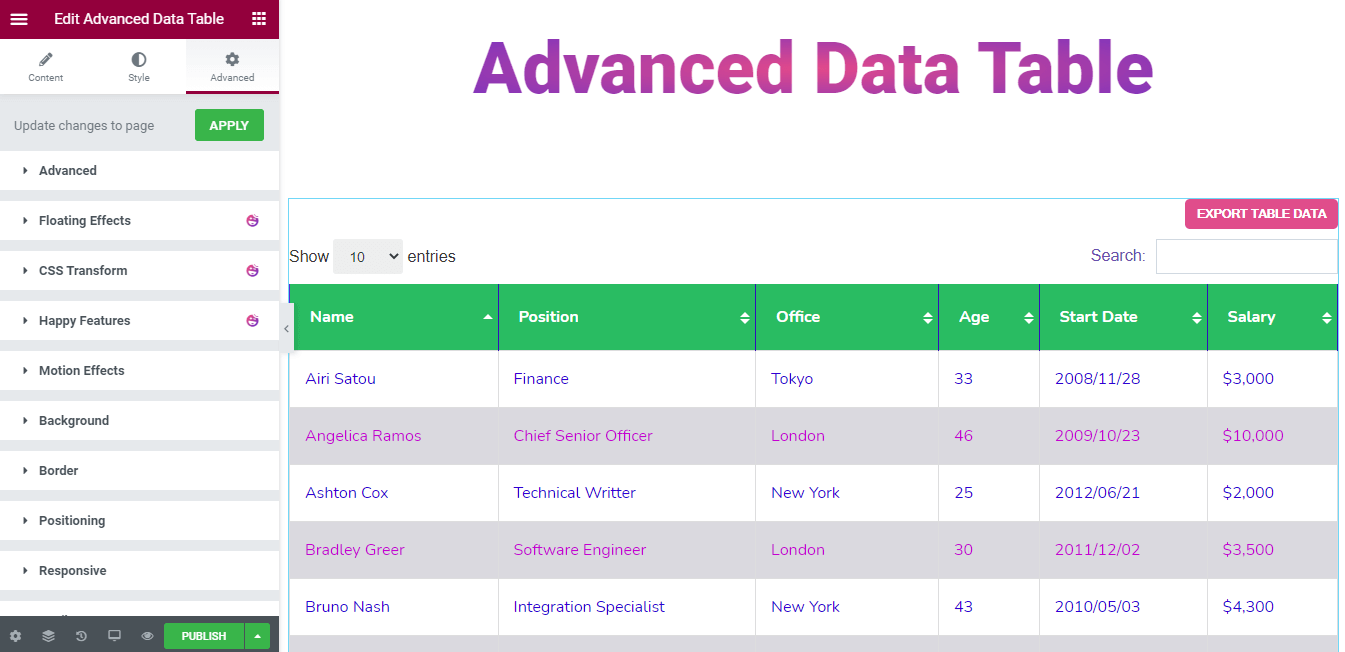
Read this Document to know more about Advanced features and their uses.
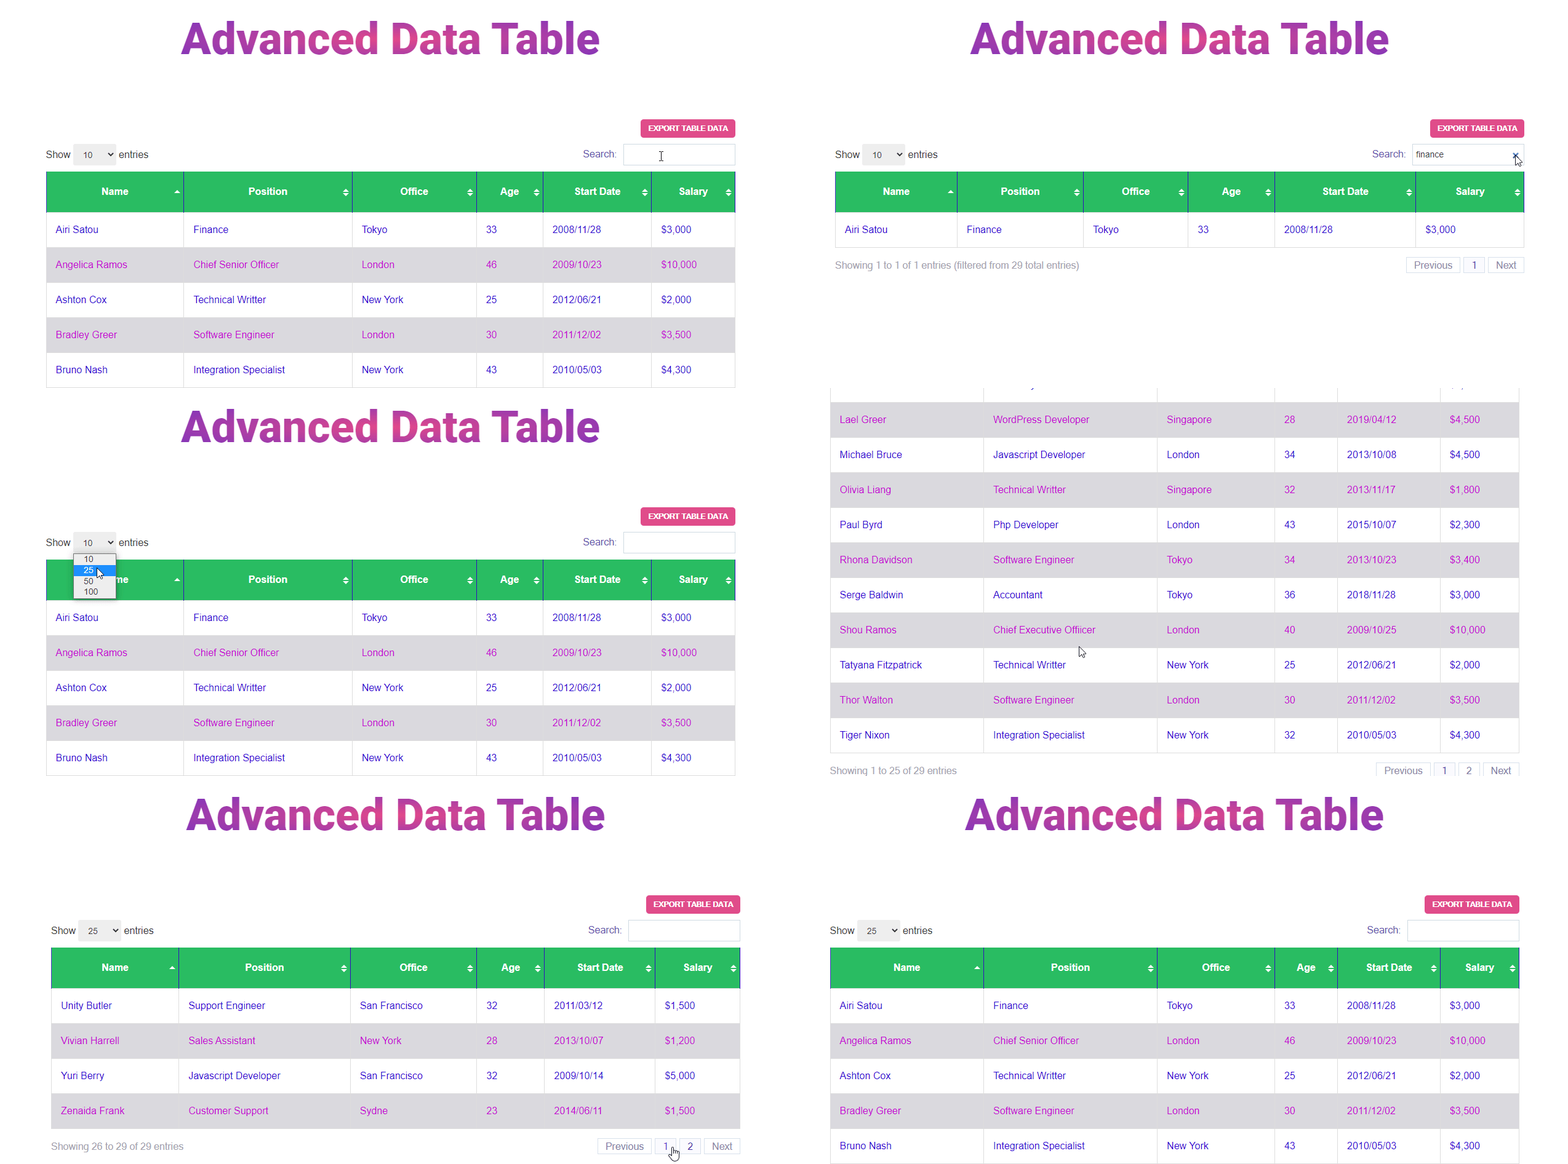
Final Preview of The Web Page
After working with this handy widget, here is our final output.
Are You Ready to Use Advanced Data Table Widget
In this blog, we have shown how you can efficiently create a data table on your Elementor website. We also explained why you should use the Happy Addons Advanced Data Table widget to create and customize the data table.
Now, it’s time to create the data table for your site. Are you ready to go? Before the dive, make sure that you read the full documentation.
You can share this blog on your social channels if you like it.
And don’t forget to subscribe to your newsletter. It’s FREE!
Check out How To Utilize WooCommerce Product Table on Your Online Marketplace!




2 Responses
The system no have a gid (tab in gsheet select)…
Hello Francisco,
Sorry, I failed to understand. Can you please explain a bit more?
Regards,
Gobinda
Team HappyAddons