Well, Happy Addons recently introduced the Data Table widget ( in the Free version), where users could easily create a data table on to their Elementor site & give it a design whatever they want.
But now we’re thinking to add more advanced functions & features to our data table feature. That’s why we have released the Advanced-Data table widget for our users.
How To Use Advanced-Data Table
Here is how you can utilize the Advanced-Data table widget on your elementor site easily by the following steps:-
Step One:
First of all, you’ll need to drag the widget and paste it on the screen that we work.
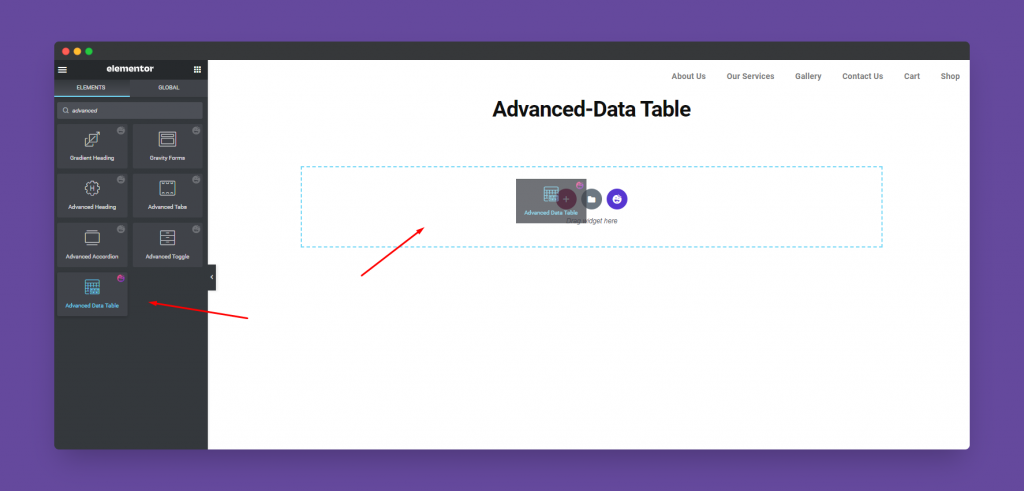
Anyways, after selecting the widget, you’ll get the following options to start customizing this widget.
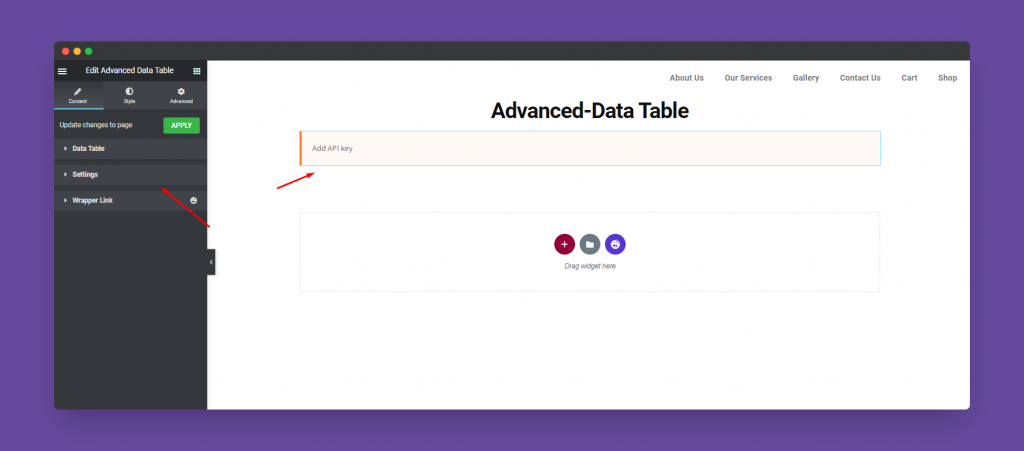
Step Two:
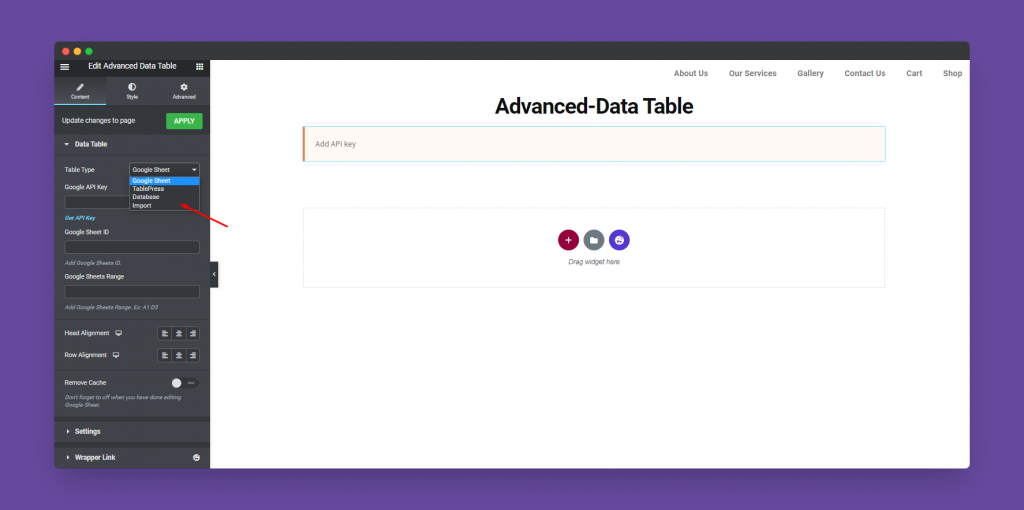
Here you can see, there four types of table options are available. To use each of these tables, you’ll need to perform individual activities.
Four types of tables that you can use:-
- Google Sheet
- TablePress
- Database
- Import
Google Sheet
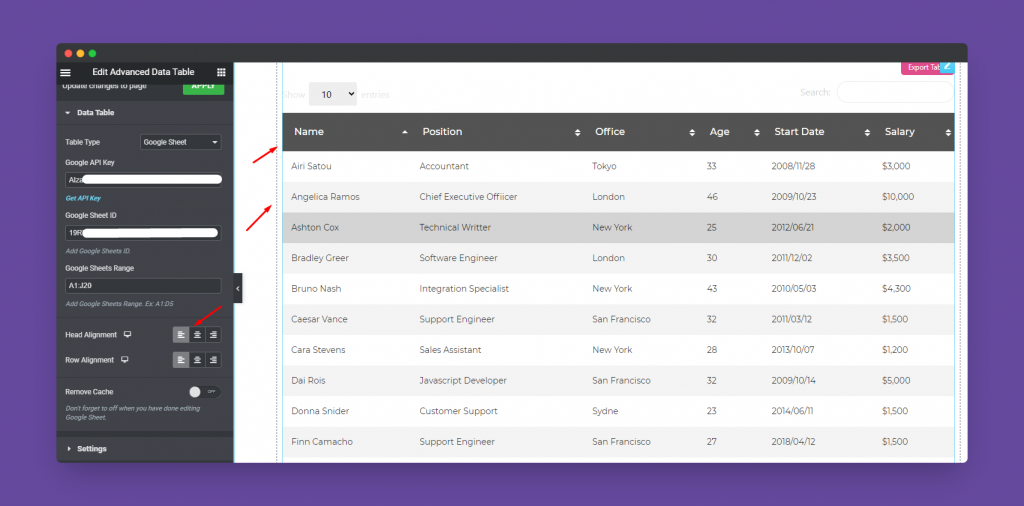
Well, using the Google Sheet feature, you can directly use your Google Sheet data right on this widget. But in that case, you need to generate Google API keys and Google Client id. And then select the range that you want to show from your Google sheet.
So if you want to get the Google API keys, click here to get now!
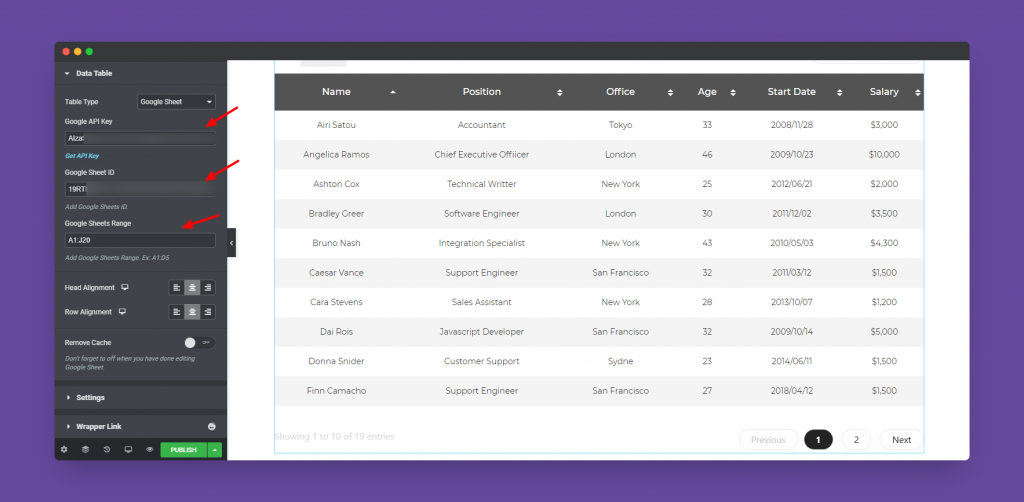
Here you can align your format. For example, heading & content alignment.
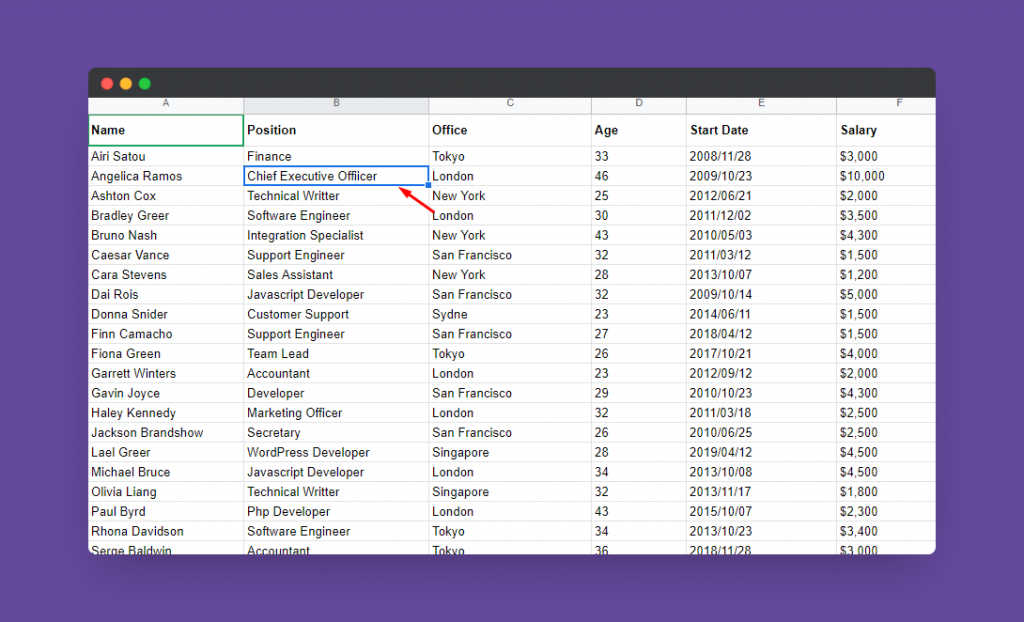
Now comes the important part. Enabling/disabling cache. If you want to update your data from the table, then first of all you should insert the information to your Google sheet.
Let’s say we’re changing the designation of Angelica Ramos, Cheif Executive officer to Chief Senior Officer.
And then come back to this page, and enable remove the cache. After sometimes you could see that the information you changed in your Google sheet, will appear here.
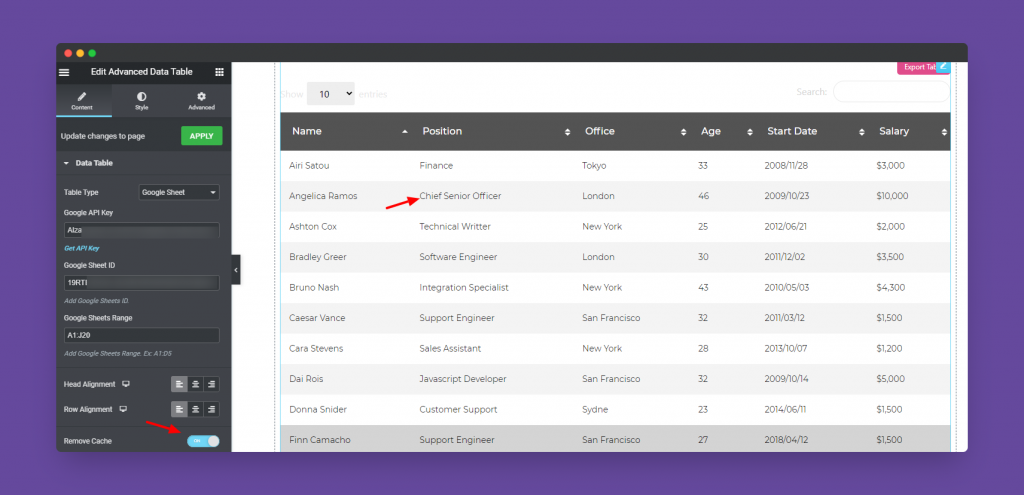
But Don’t forget to turn it off when you have done editing Google Sheet.
TablePress
To add data from TablePress, you need to install it on your WordPress site. After that, you can use it.
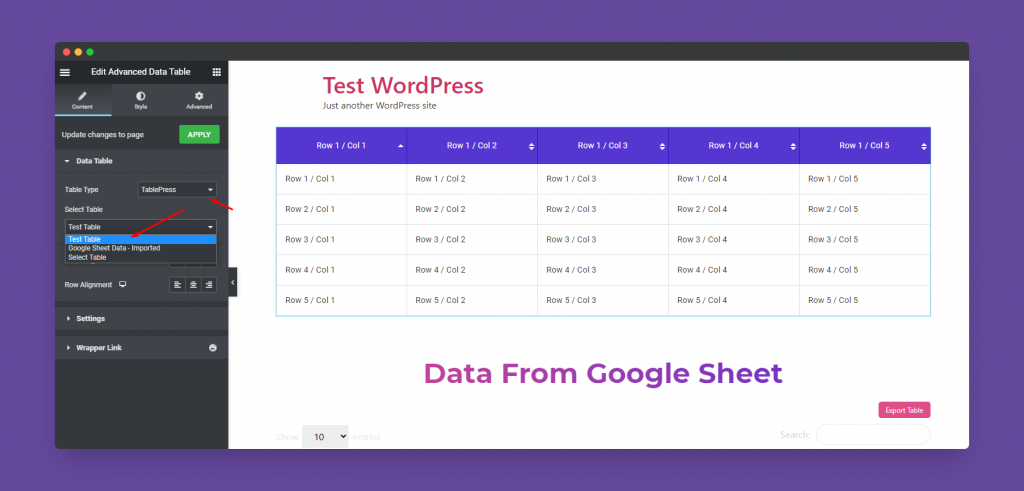
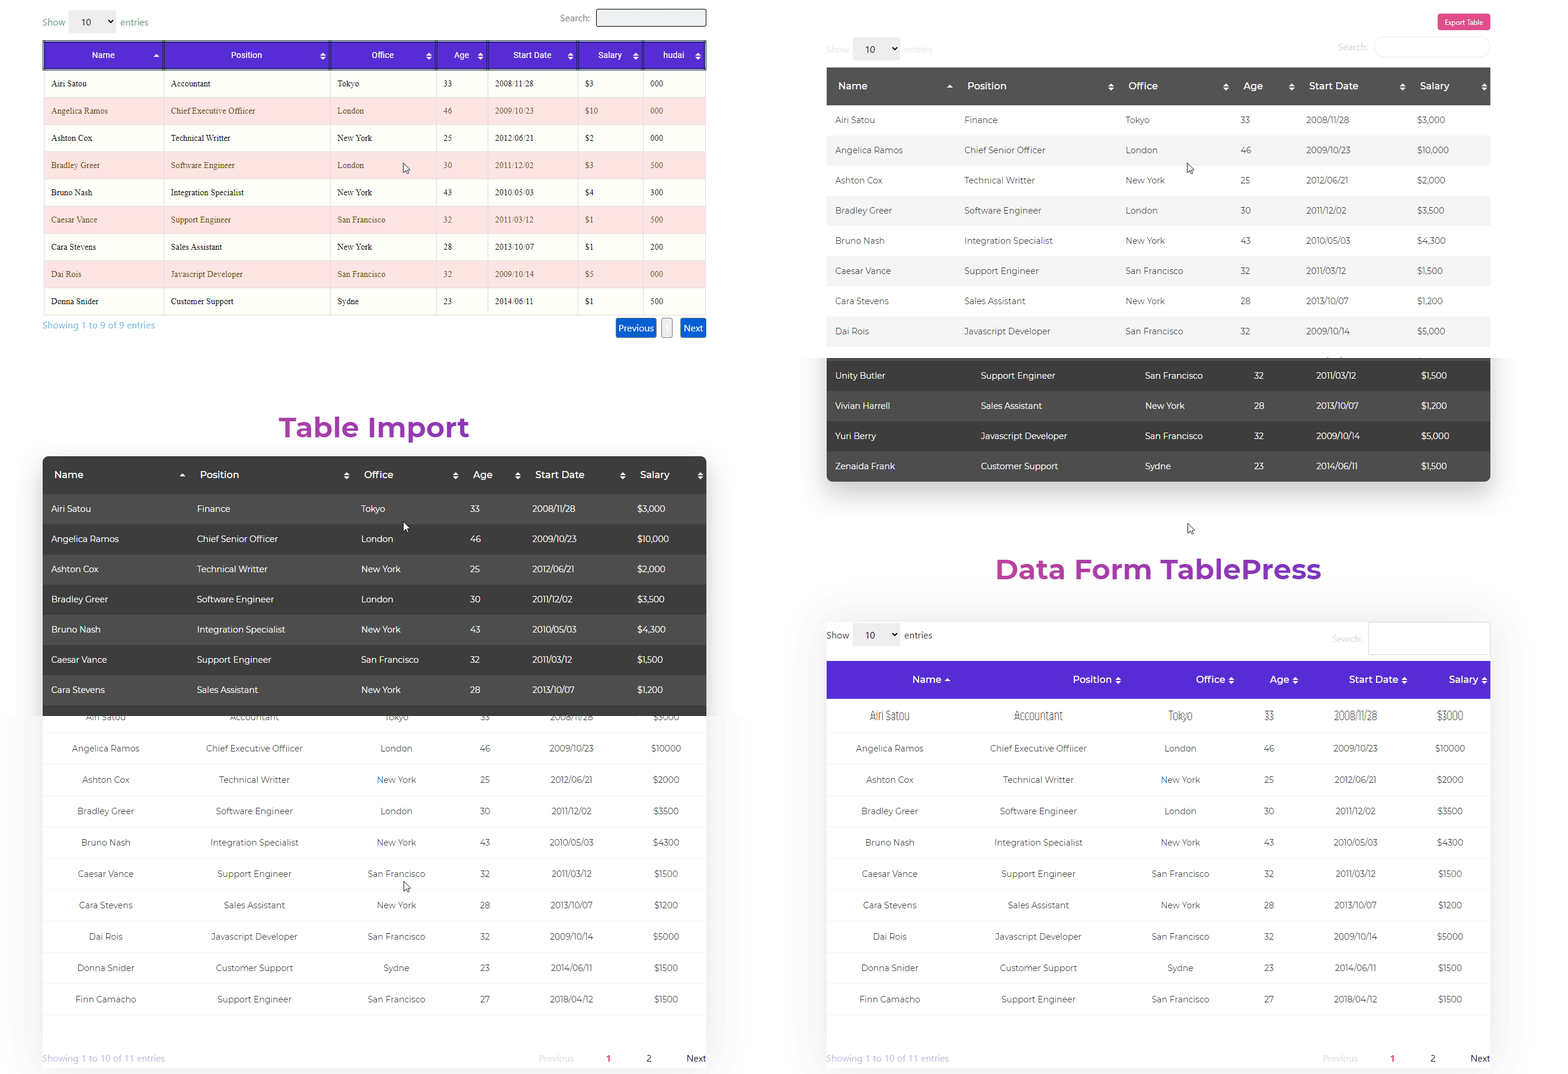
So first of all, you’ll need to create a table with TablePress and input the essential data on it. After selecting the table that you created, you could see the table here in the TablePress option.
Database
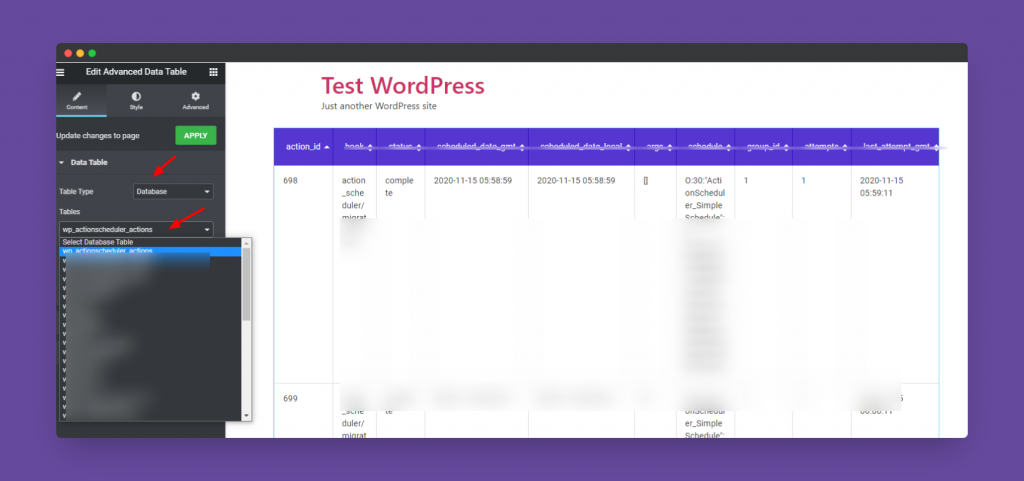
To use Database is so easy. Yes, while you choose Database option, you could find all the database option of your site. Then slightly pick up any one from the list. As a result, it will appear next to the window.
Import
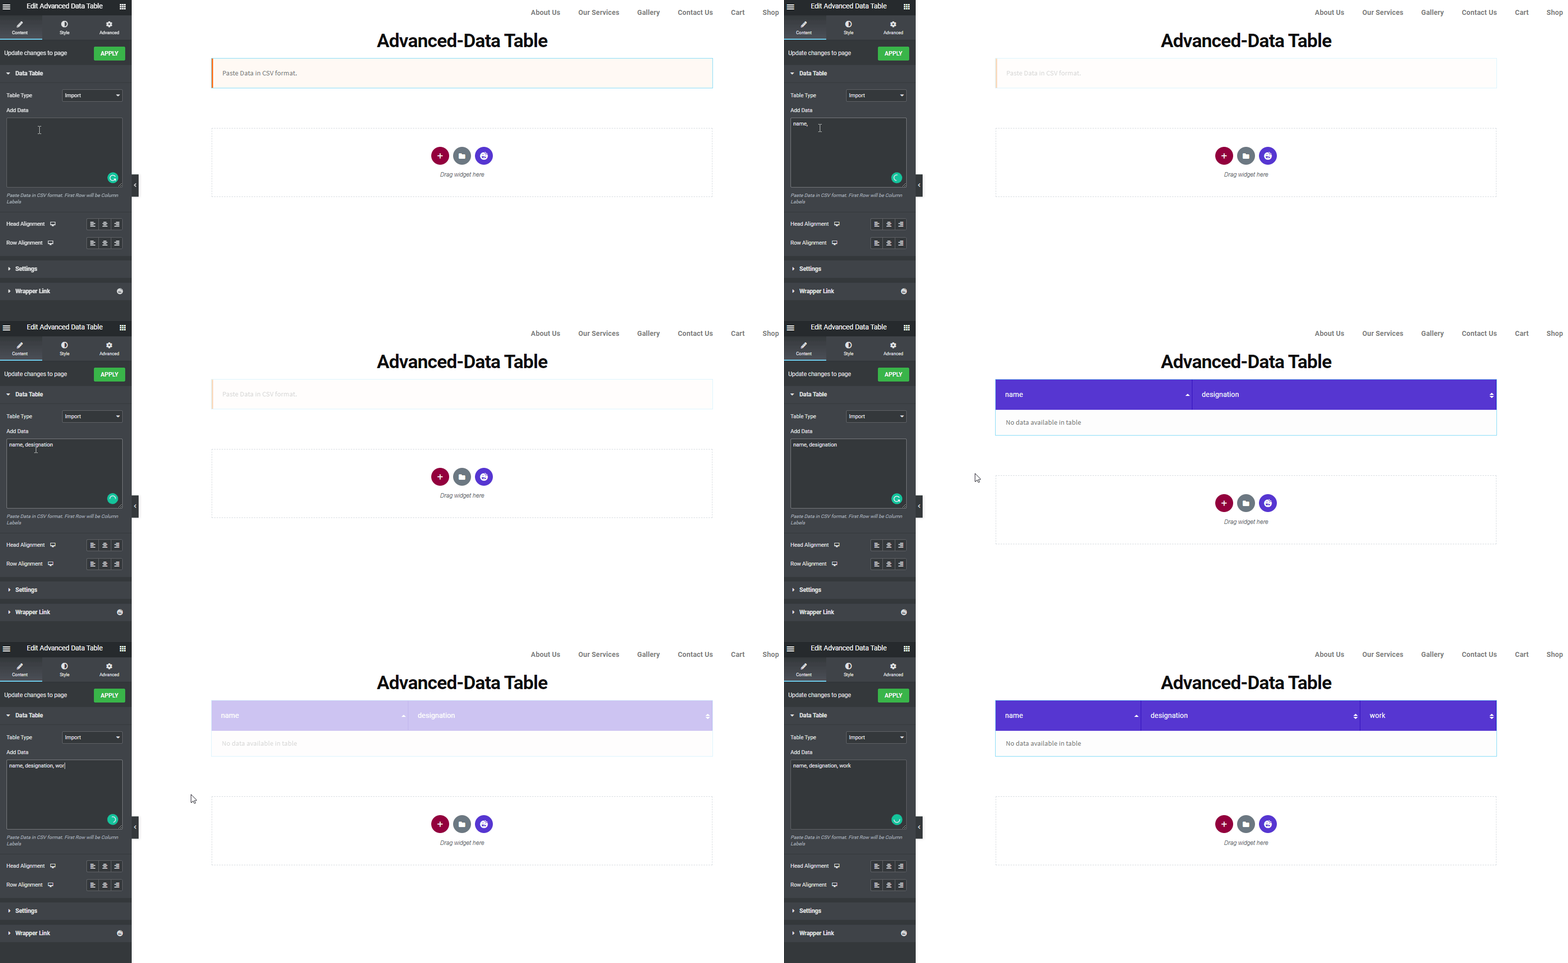
This feature is so cool and easy to use. Only you need to put the table value and separate them by using a Comma.
So let’s see how to do it:-
Settings
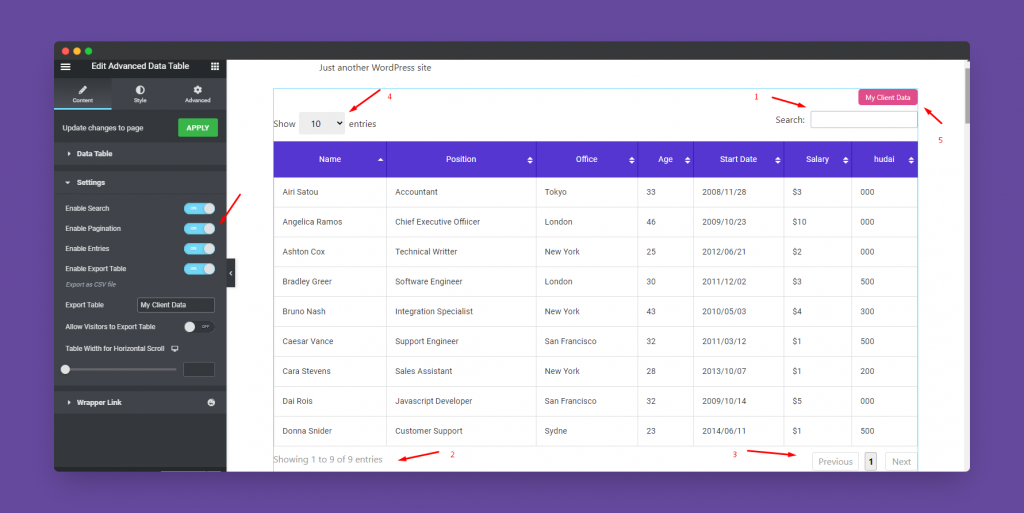
Here are some of the basic settings that you can do or change. For example, enabling advanced search bar, pagination, entries, table name. And also you can allow your users to directly export your data if you enable the option.
Step Three:
Well, now it’s time to stylize the Advanced-Data table a bit. To do that tap on the Style button.
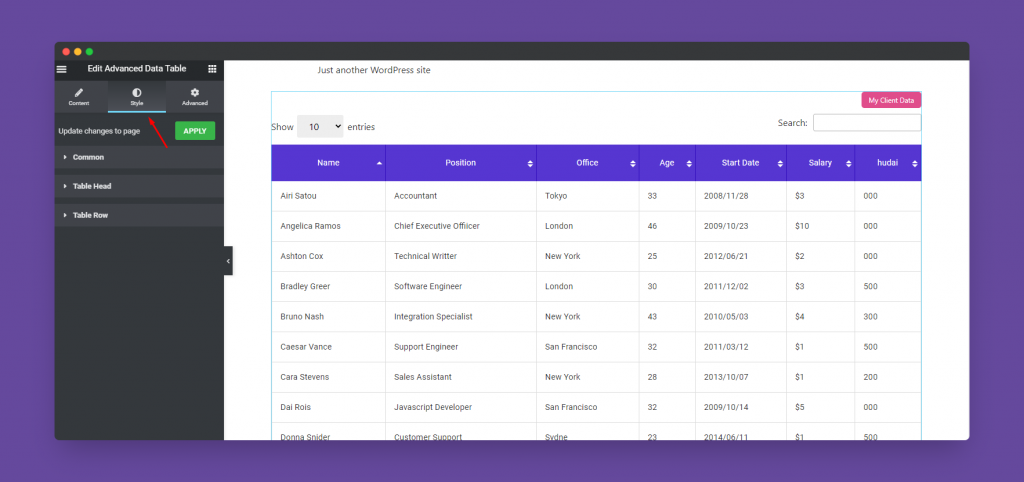
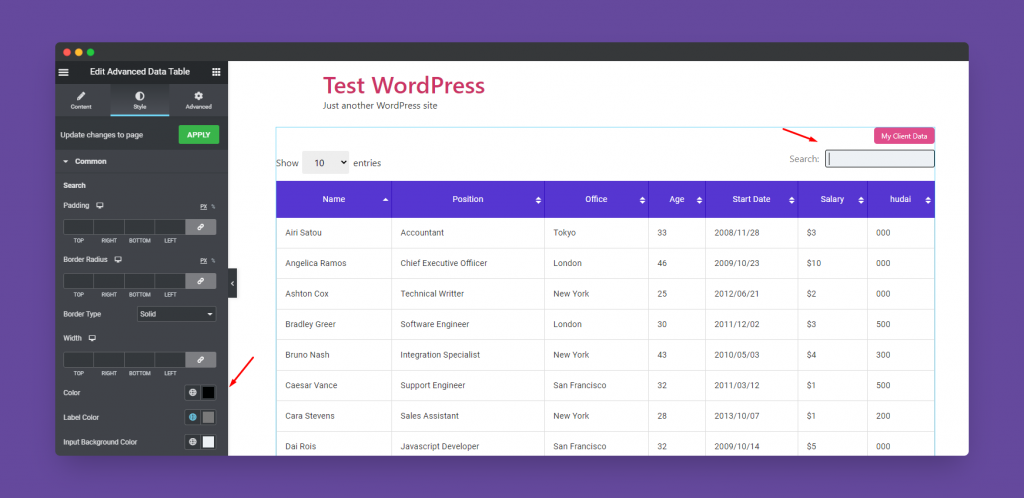
Here you’ll get the style options one by one. And first of all the Search Bar to customize. For instance, you can change its padding, margin, border, colors, background color, page pagination space, and label color.
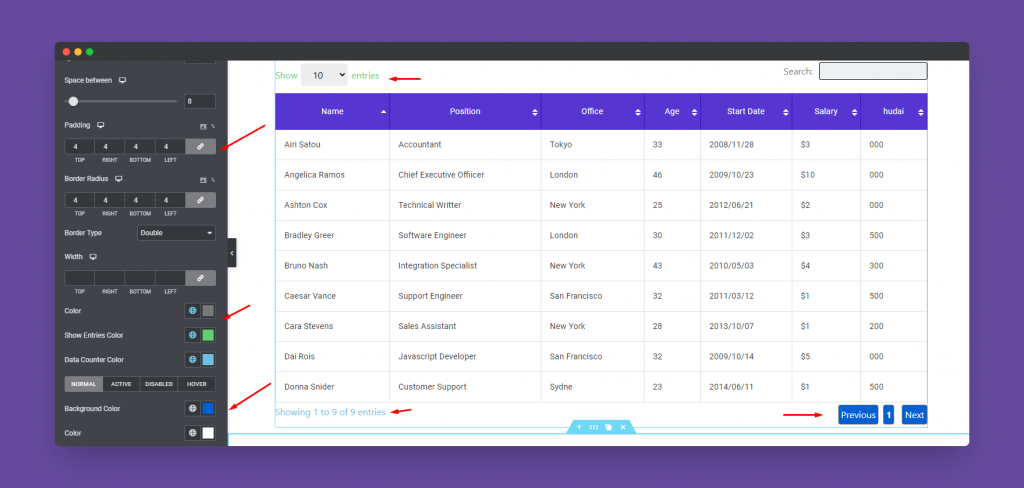
Then slightly scroll down to the page, and you’ll find the pagination option to stylize. Similarly, you can change the color, background,
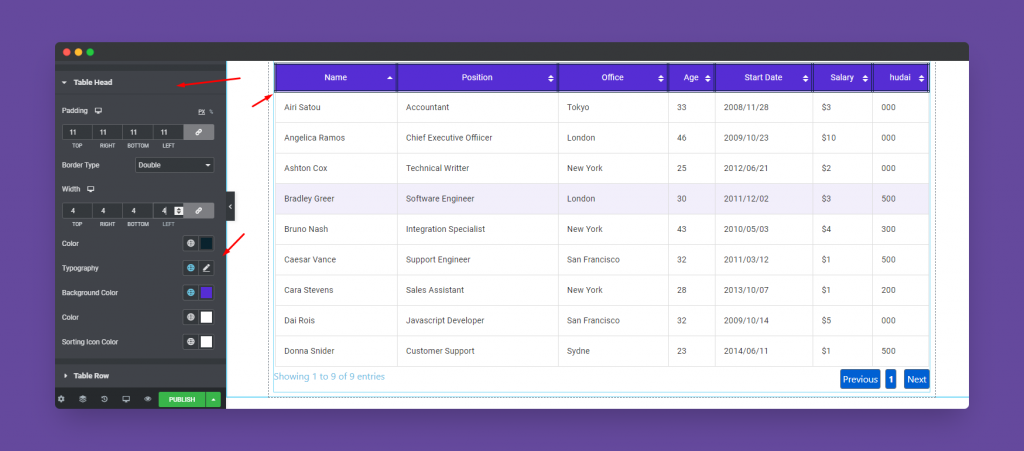
Now tap on the Table Head or header portion to customize. Similarly, you can change its margin, padding, border, border-radius, colors, typography etc.
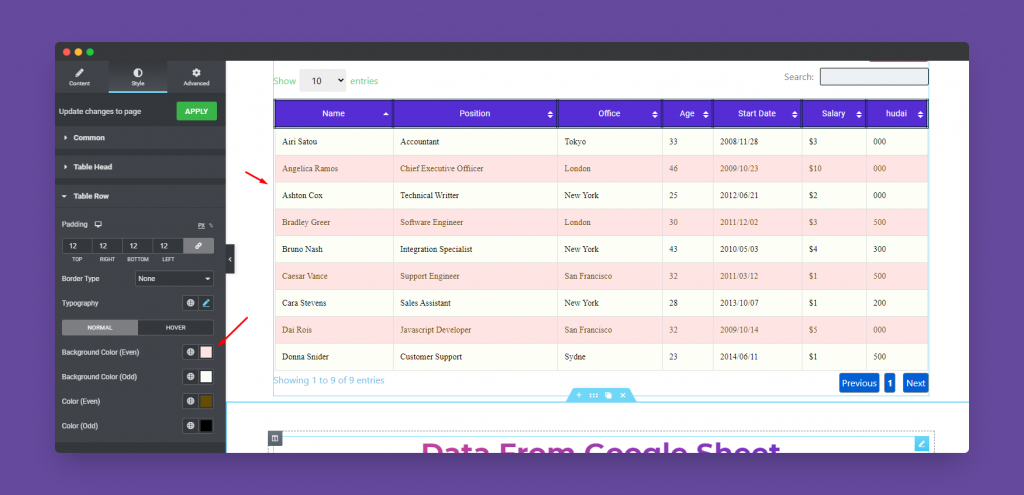
Again tap on the Table Row. Here you can stylize Table row. Like the previous item, here you can change padding, border, color (odd-even), background color.
Step Four
If you want to add motion effects, happy effects, background, or make it responsive and more intriguing, click on ‘Advanced‘ to explore those options. the ‘Advanced‘ is a default feature of Elementor.
Give a read to this Document to know more about advanced features & functions.
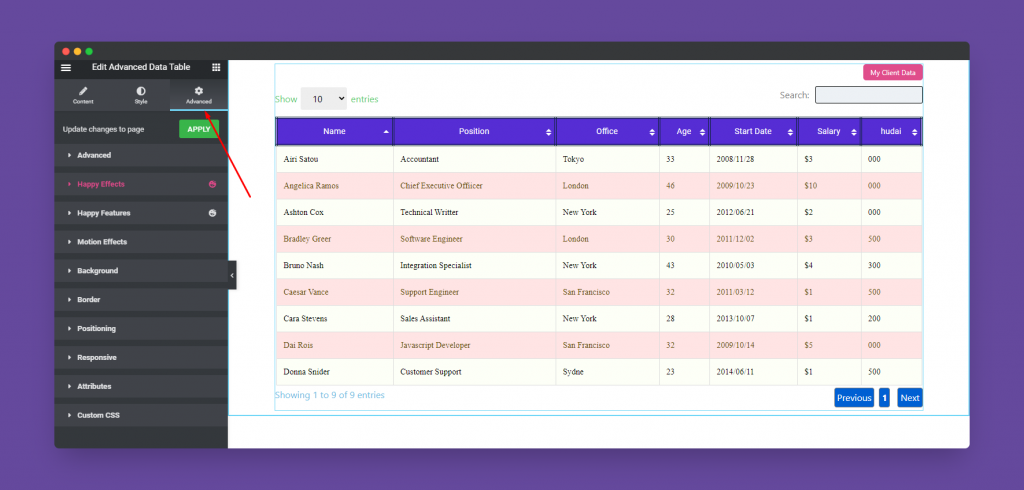
So here is how the final design will look:-
Enhancement in Advance Data Table in Version v2.6.1 – 18 October 2022
You can now enable the Word break option in the Advance Data table.

That’s it!


