Adding floating elements to your WordPress website can make your design more dynamic and eye-catching. These moving objects, like floating shapes, icons, or images, create a modern and interactive look that instantly grabs visitors’ attention.
If you’re using Elementor, you can create these floating effects without touching a single line of code. You can make text, buttons, images, or even sections float in different directions with custom speed and transparency. Once you learn how to do this, you’ll feel like a powerful web designer.
In this step-by-step guide, we’ll show you how to add Elementor floating elements to your WordPress site with ease. You’ll learn how to use Elementor’s built-in motion and floating controls to create stunning visual effects that enhance user experience. Let’s get started!
Which Is Better for Floating Elements: Elementor or HappyAddons?
Elementor itself has an option to create floating elements. Besides, HappyAddons, which is a well-known addon of the Elementor page builder plugin, also has an option to create floating elements. But they approach this feature with different goals and styles.
Elementor’s native motion effects focus on simple, elegant animations that enhance the overall design without adding too much complexity. On the other hand, HappyAddons provides more advanced floating controls for designers who want fine-tuned, multi-dimensional motion effects that stand out.
The following table compares the differences between Elementor and HappyAddons in terms of floating effects. Please take a look at them.
| Aspects | Elementor | HappyAddons |
| Animations | Includes basic motion options like Translate, Rotate, and Scale effects | Offers advanced controls with X, Y, and Z axis animations for 3D-like floating effects |
| Best For | Clean and subtle movements | Complex, multi-layered animations where elements can bounce, spin, and float simultaneously |
| Combination of Effects | Can integrate with Elementor’s other motion and scrolling effects | Allows combining Translate, Rotate, and Scale together for more dynamic, custom results |
| Control Options | Provides standard controls like duration and delay | Includes advanced controls for speed, direction, and range |
In this tutorial post, we’ll show you how to create Elementor floating elements using both these tools. Keep reading!
How to Create Floating Elements and Effects with Elementor
To get started with the process, you need the following plugins installed and activated on your site.
Once they are ready on your site, start following the tutorial as explained below.
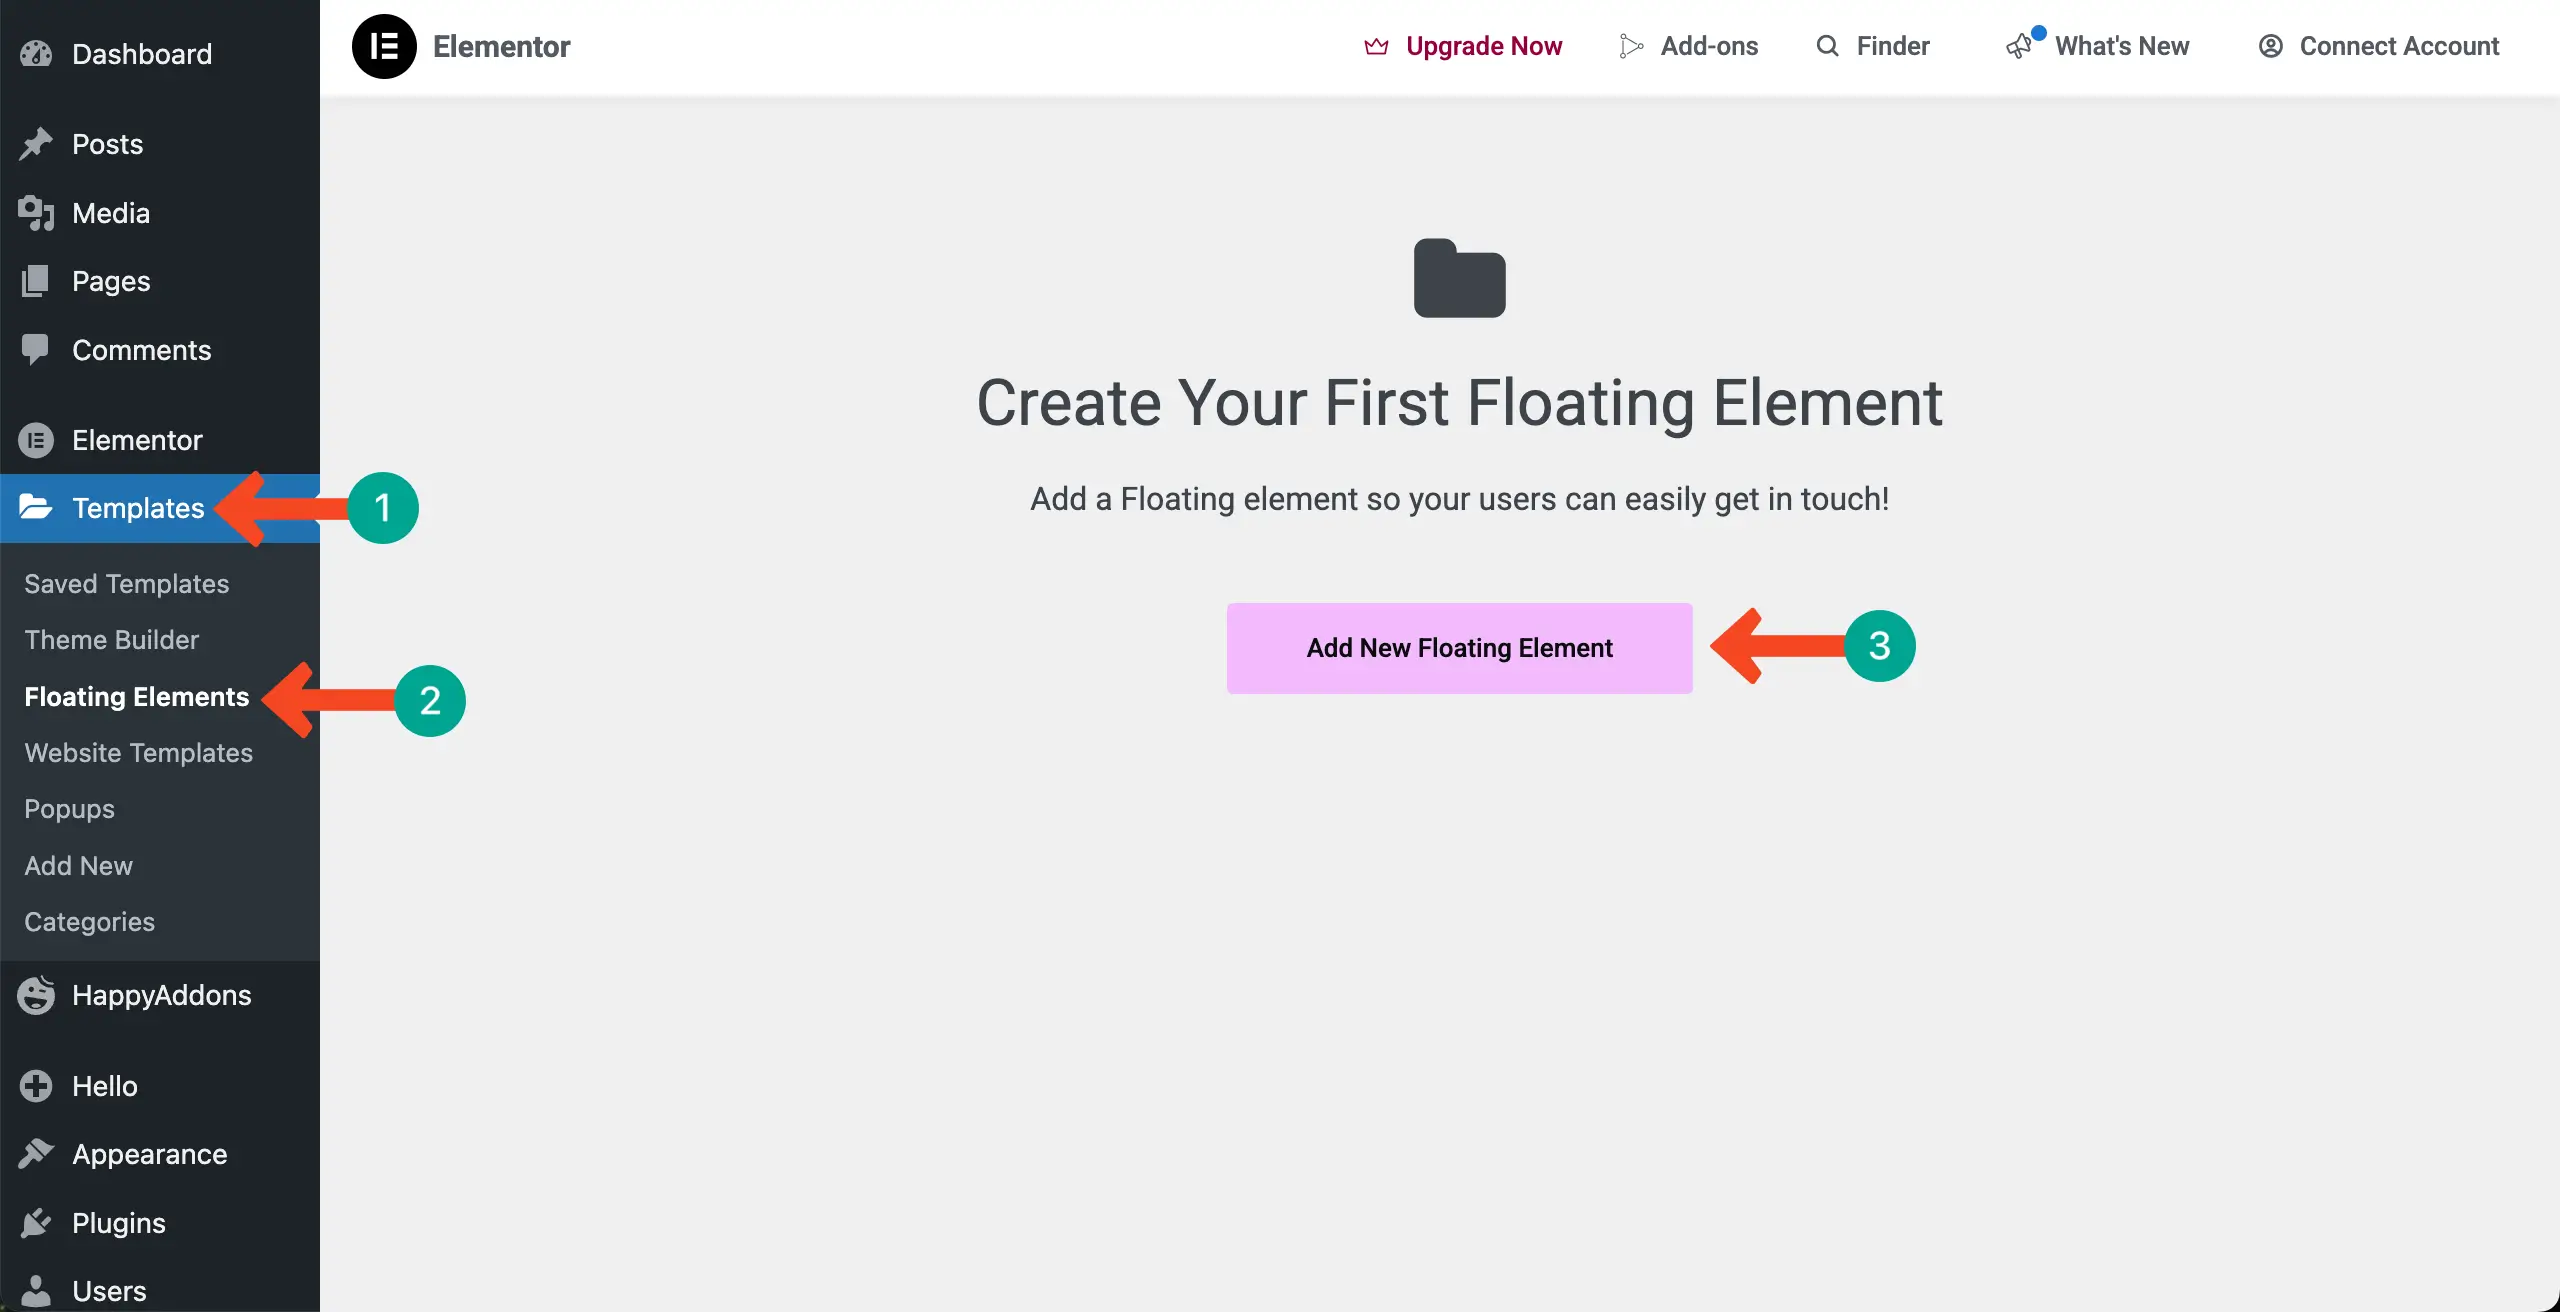
Step 01: Go to Floating Elements
After logging into the WordPress dashboard, navigate to Templates > Floating Elements. Then, click the Add New Floating Element button.
Step 02: Select a Floating Element
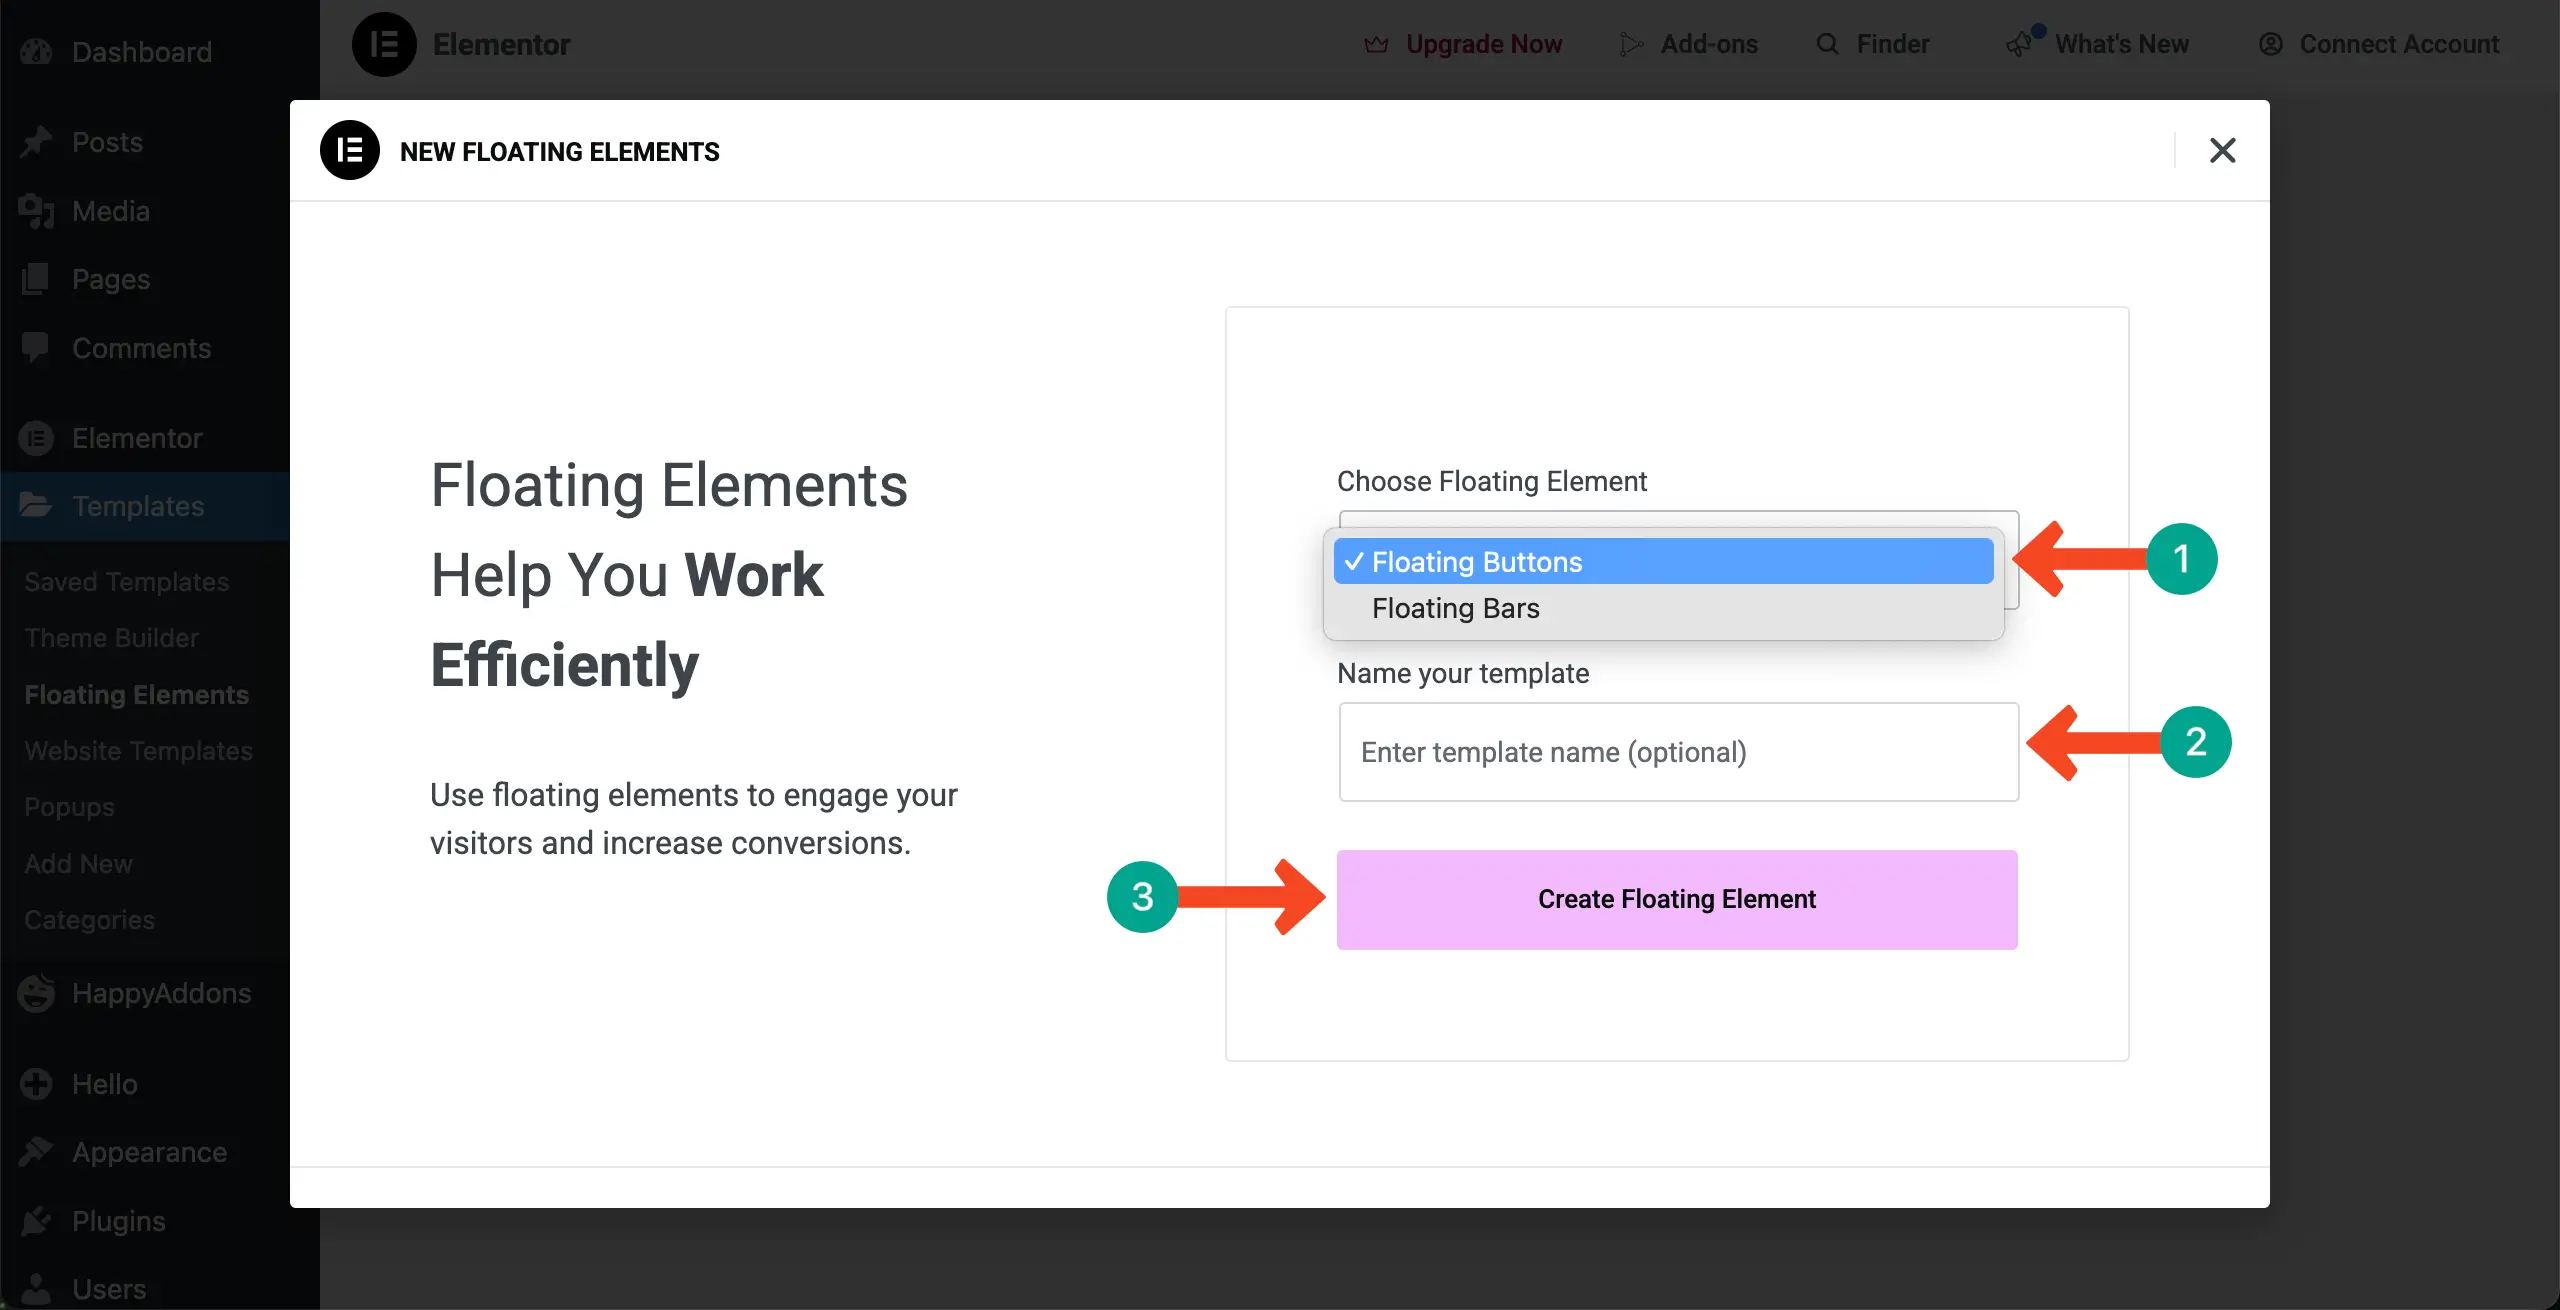
A popup will show up. You’ll be allowed to choose a floating element – whether buttons or bars. Choose an element type you like. For this tutorial, we’ll select Floating Bars.
Then, give your template a name you like. Finally, hit the Create Floating Element button.
Step 03: Choose a Template for the Floating Button
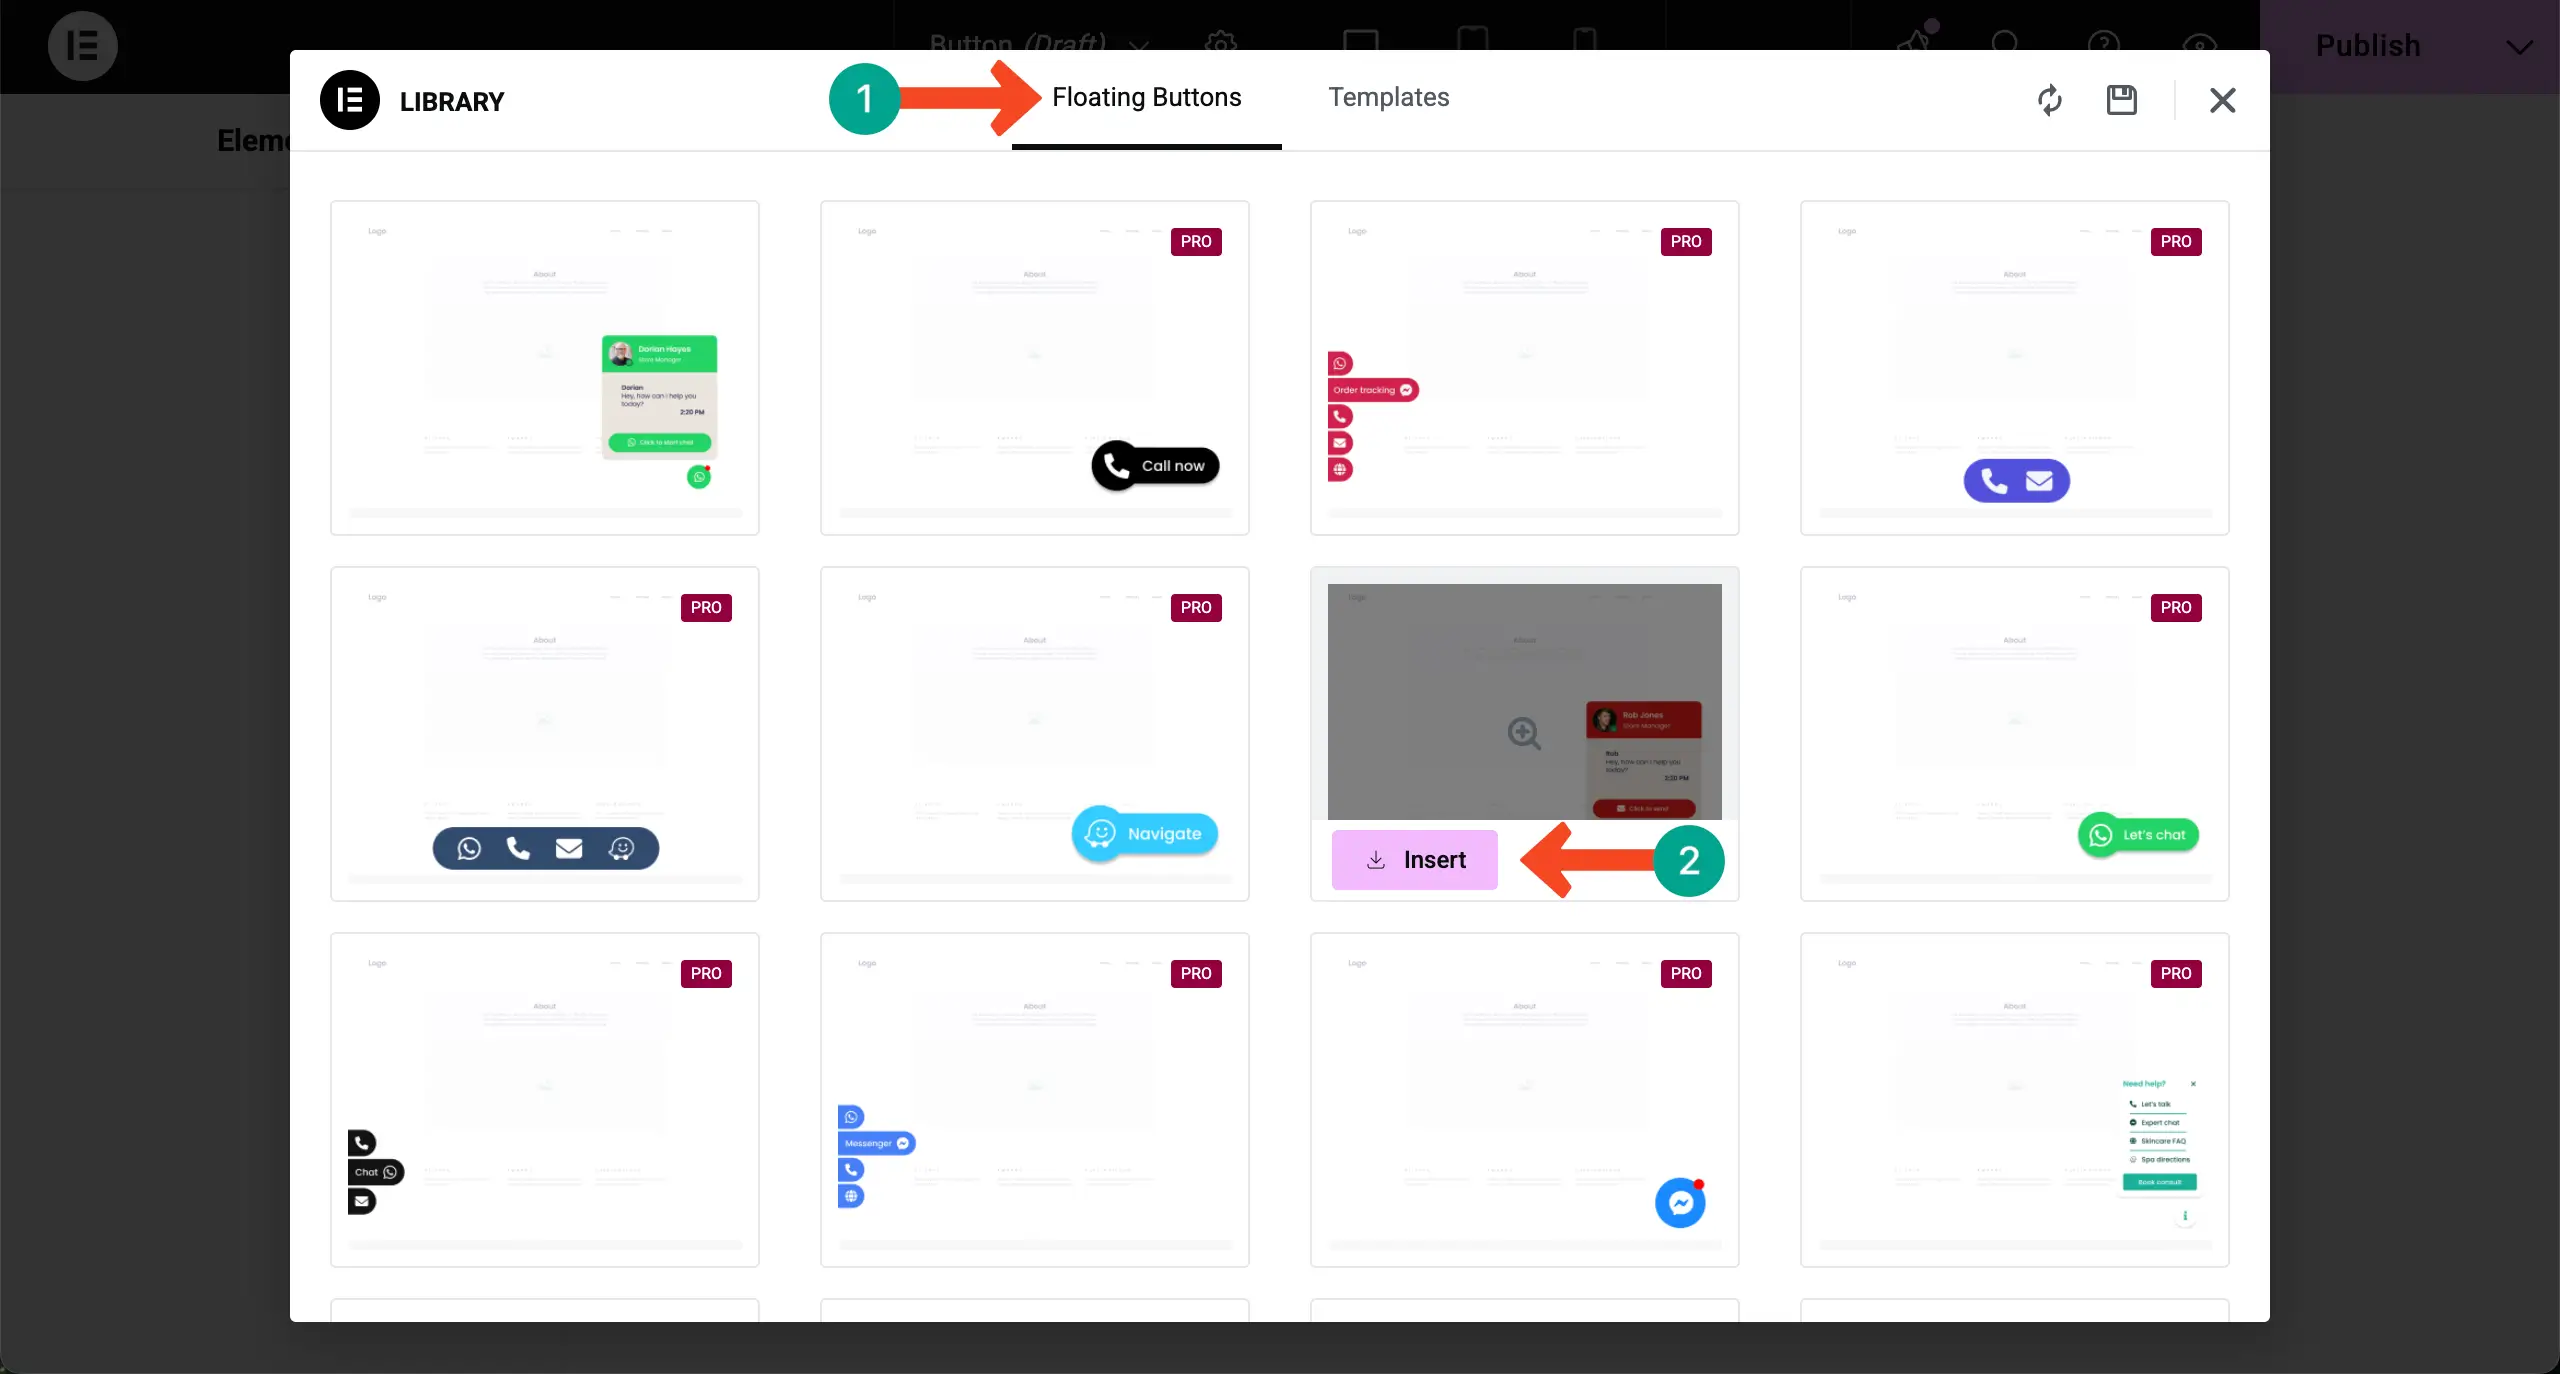
The template library will appear on your screen. Explore the library and hover over the one you finally like. You will see the Insert button. By clicking the Insert button, you can add the template to your website.
Step 04: Customize the Floating Button
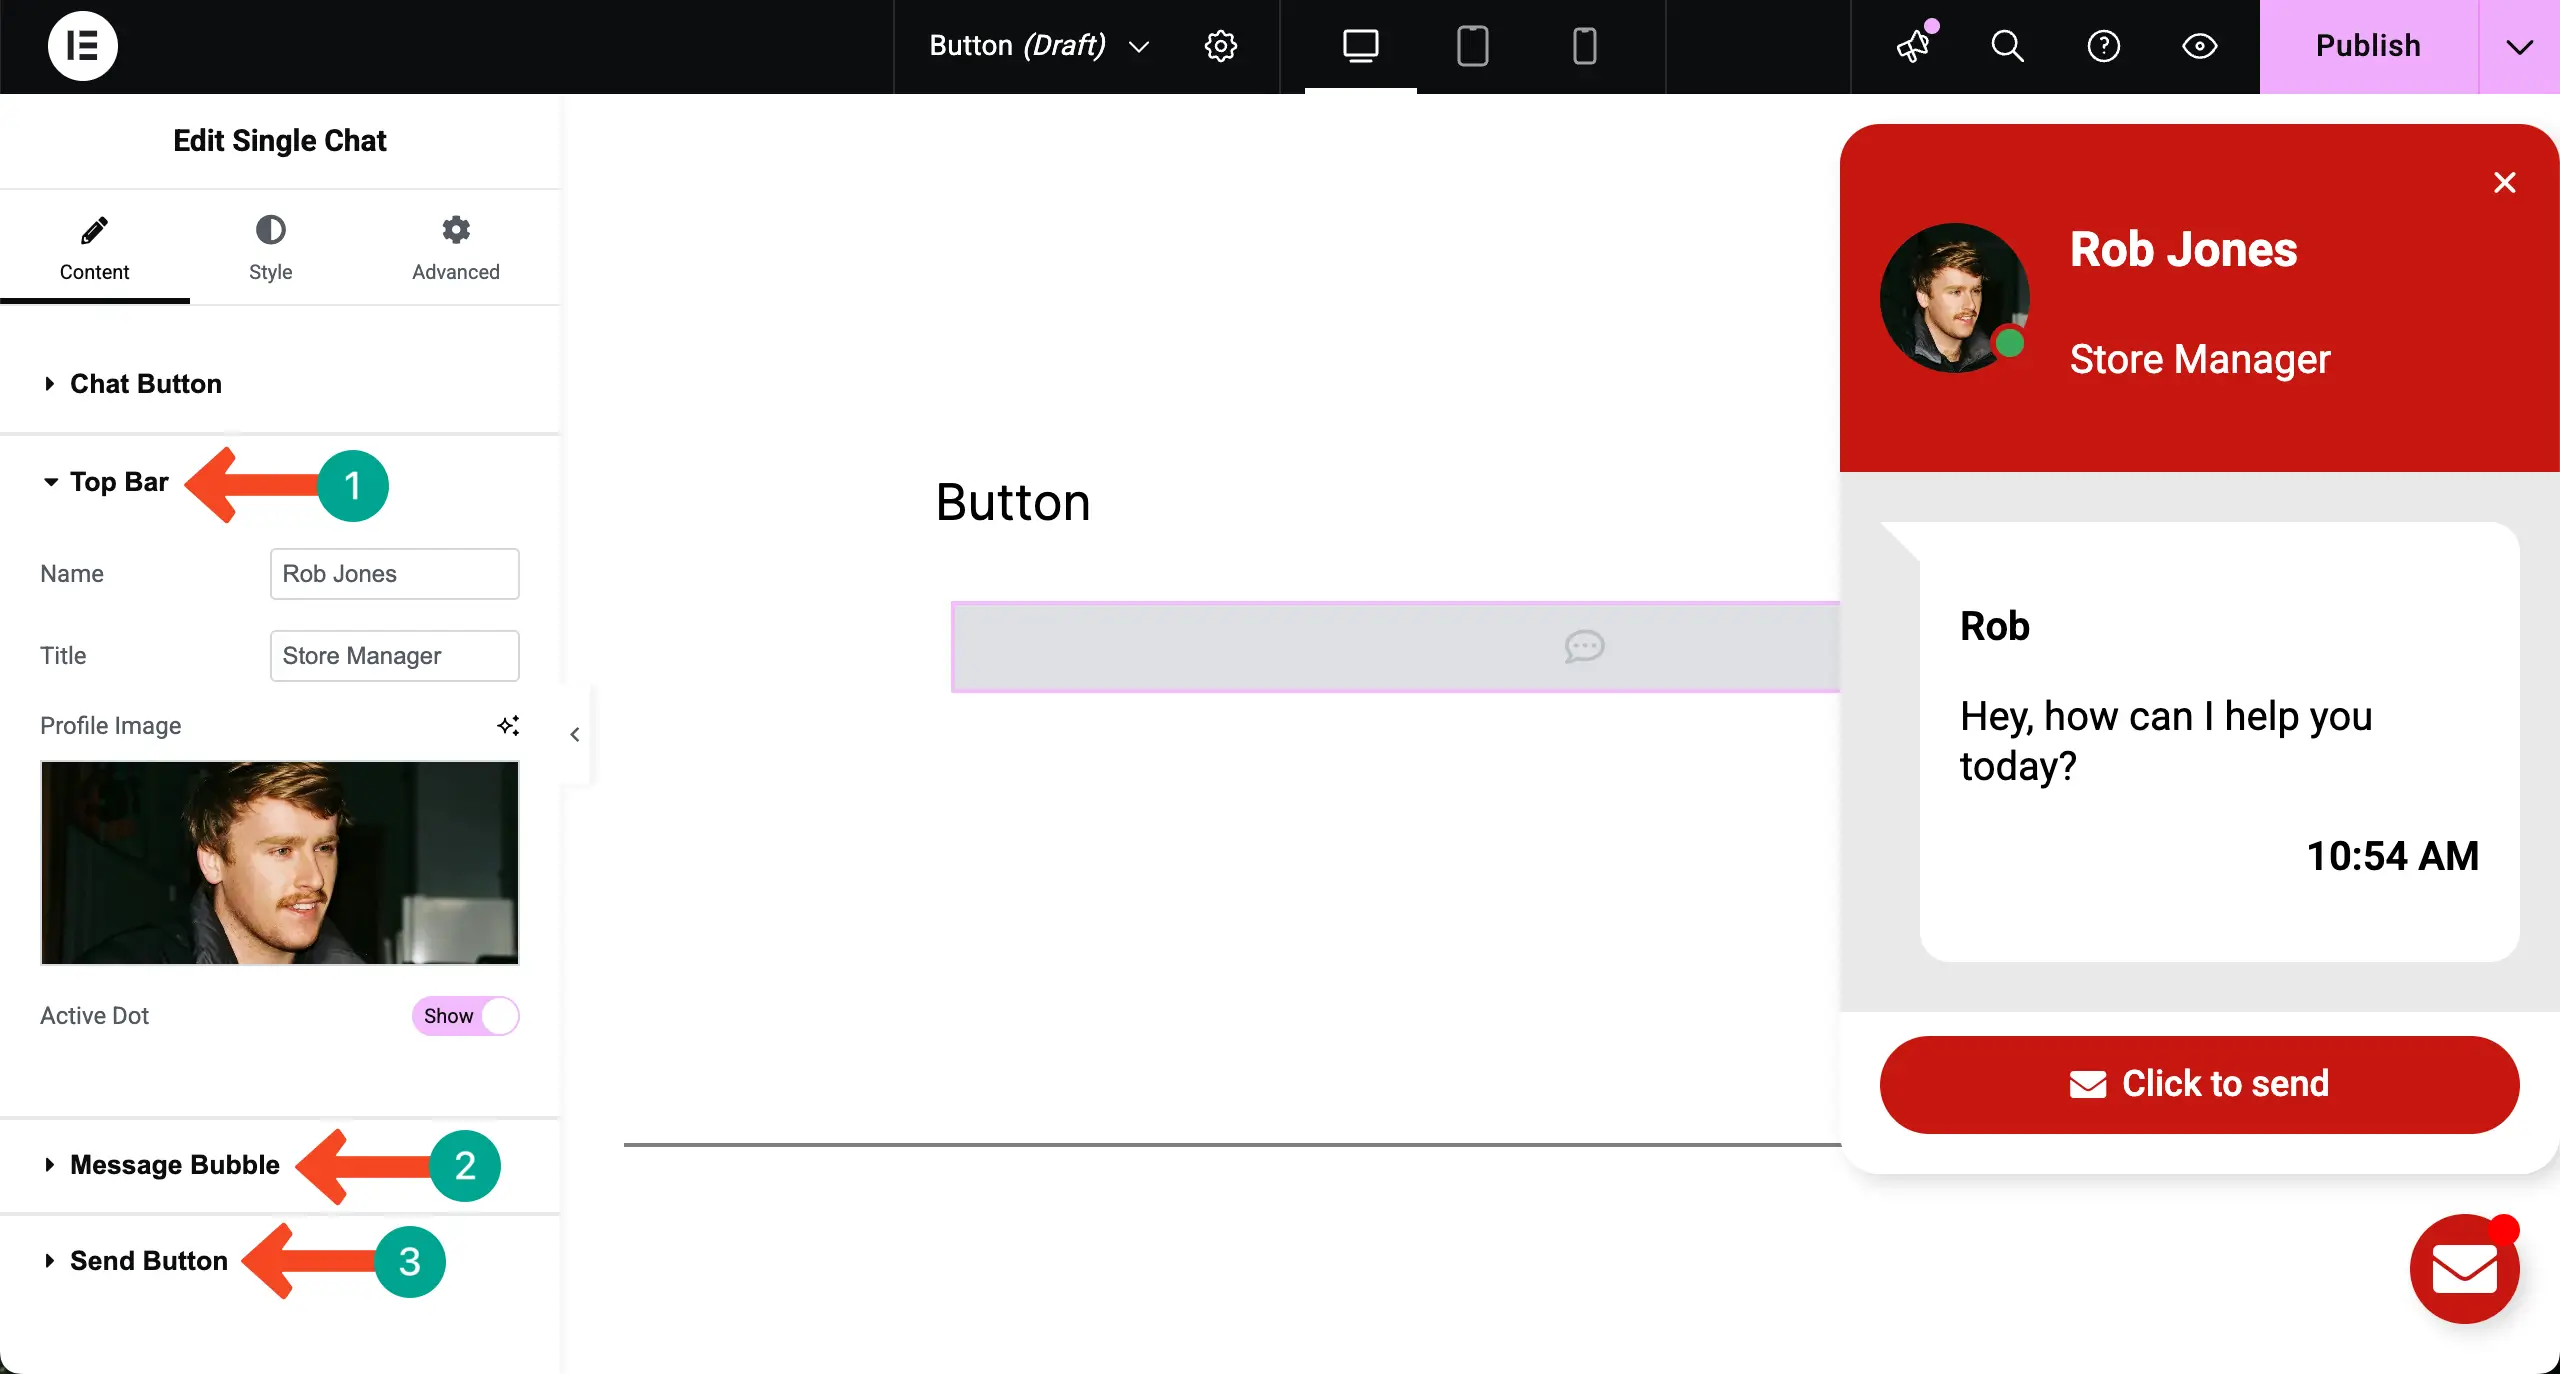
Now the process of editing and customizing the button is completely similar to any Elementor widget. The interface is also the same. So, we don’t have to guide much in this case.
From the Content tab, you can
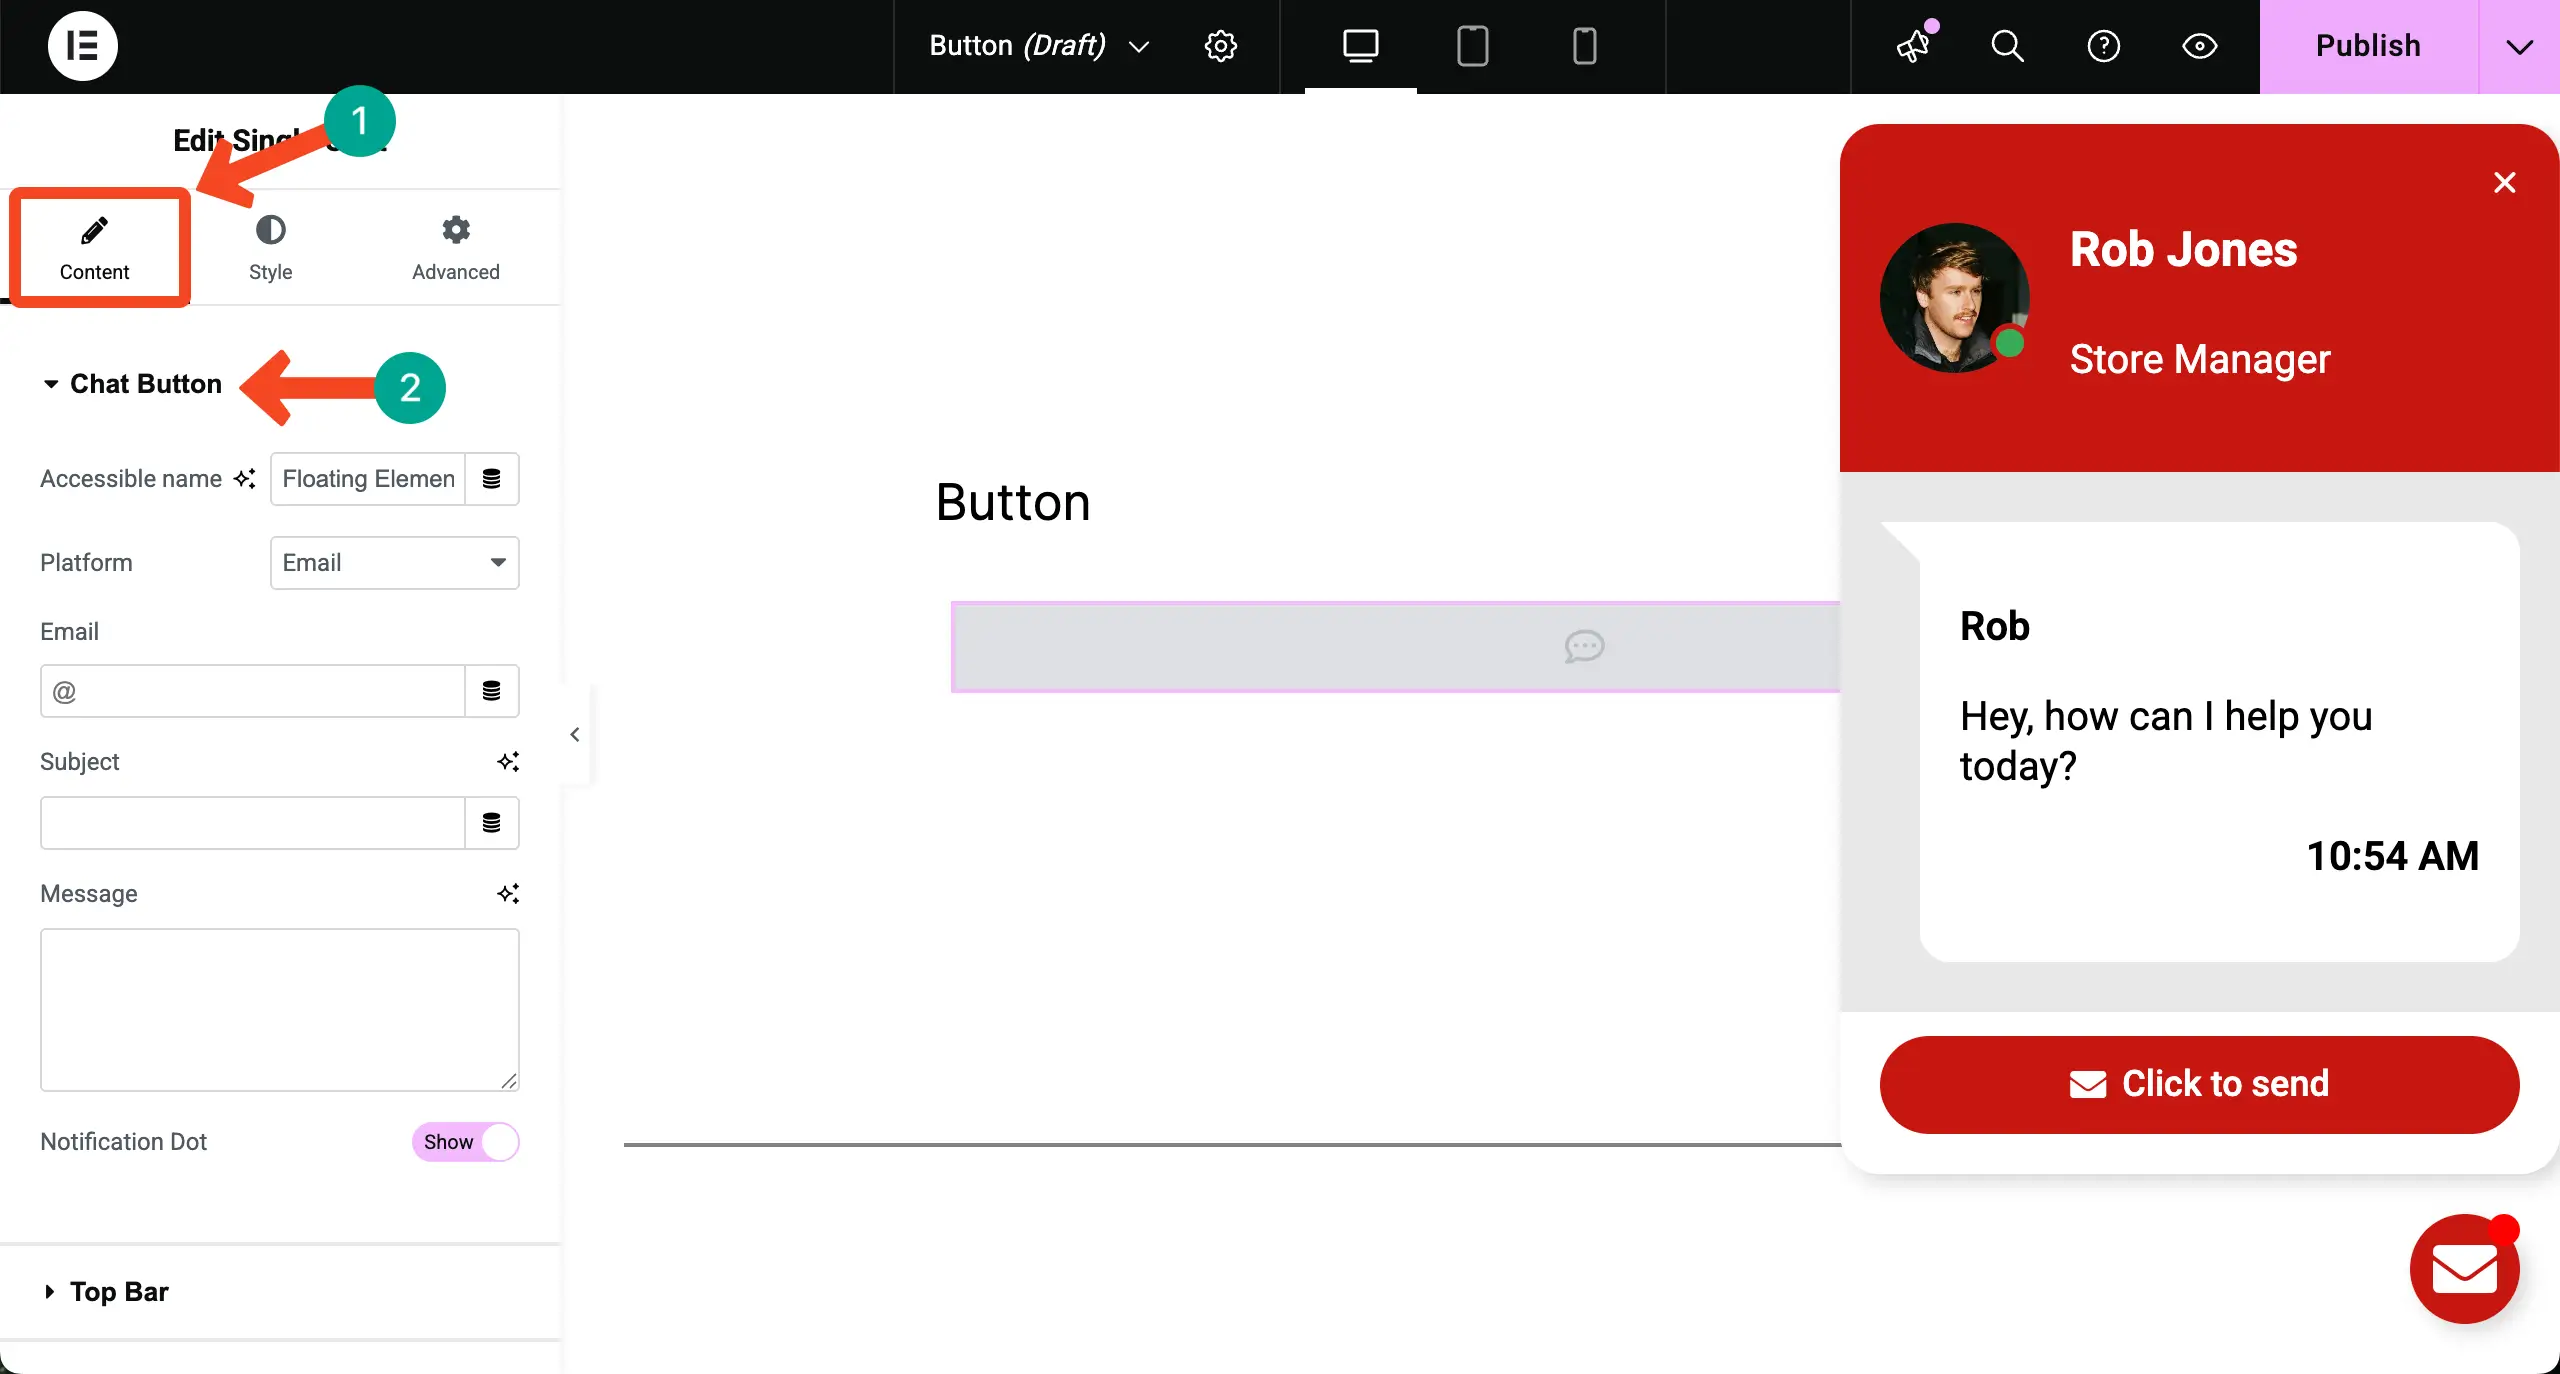
In the same way, expand all the other sections under the tab and customize content for the chat box.
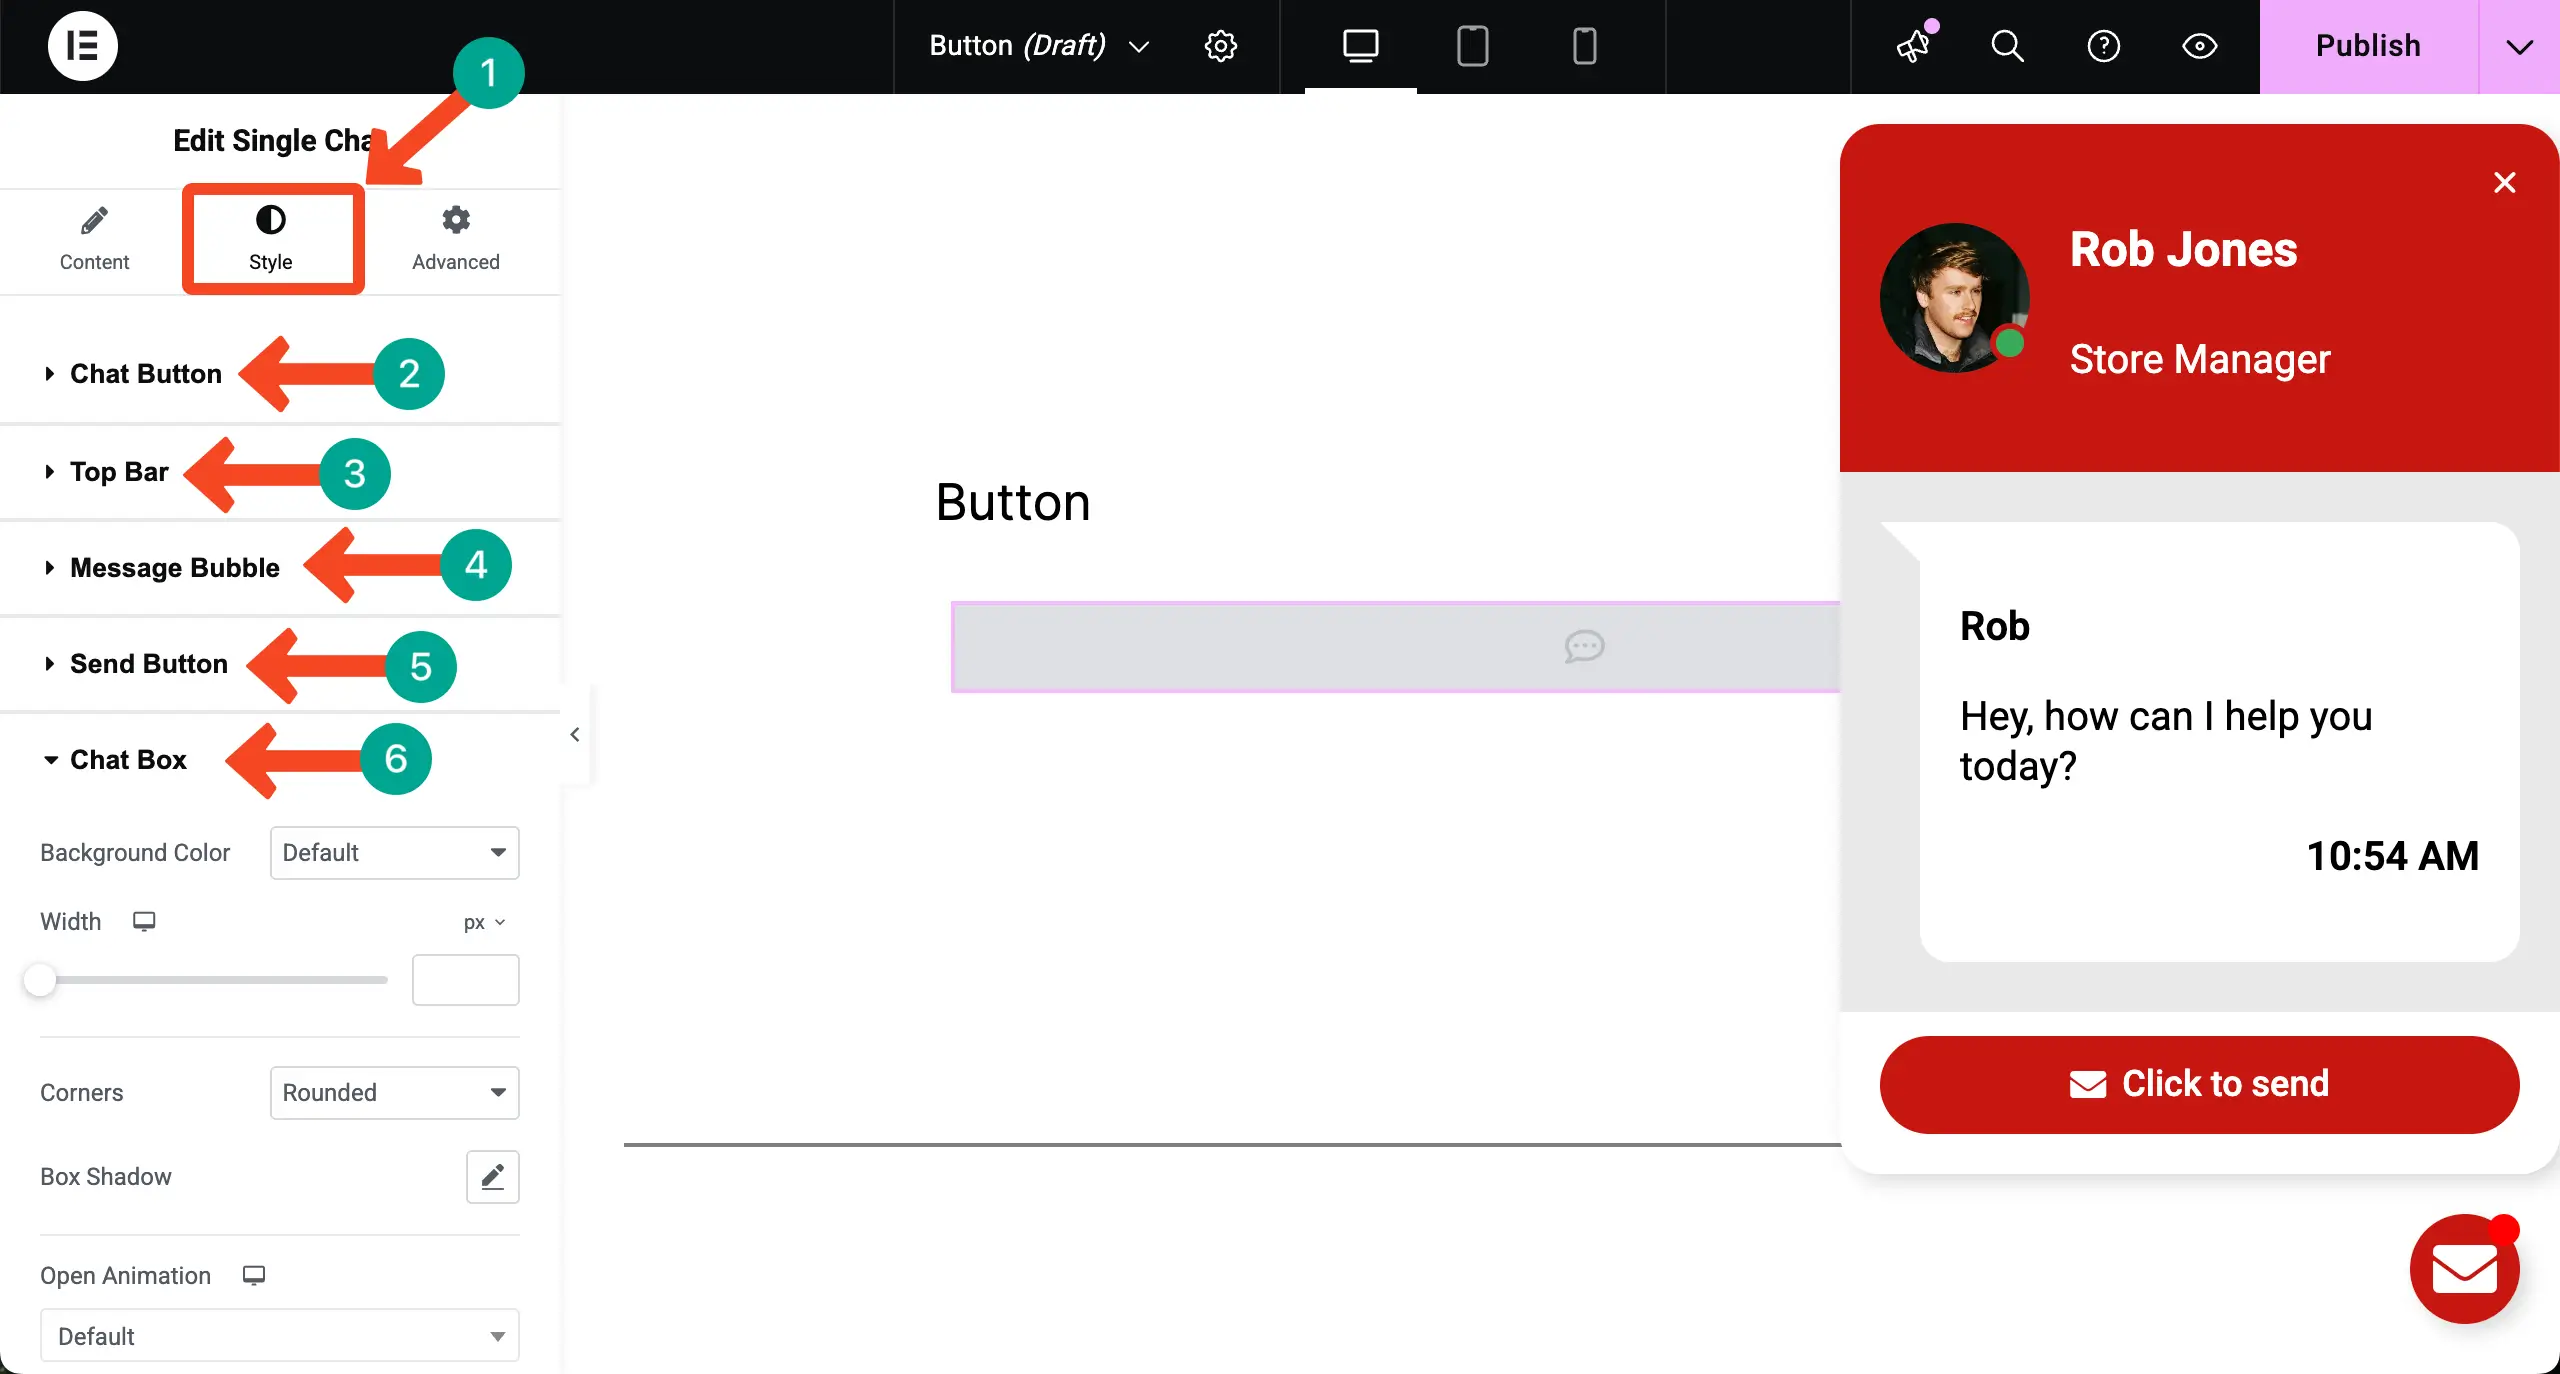
When the content part is done, come to the Style tab. From here, you can do everything to adjust the appearance of the floating button and the chat box as you want by expanding all the sections.
Step 05: Publish and Add Conditions
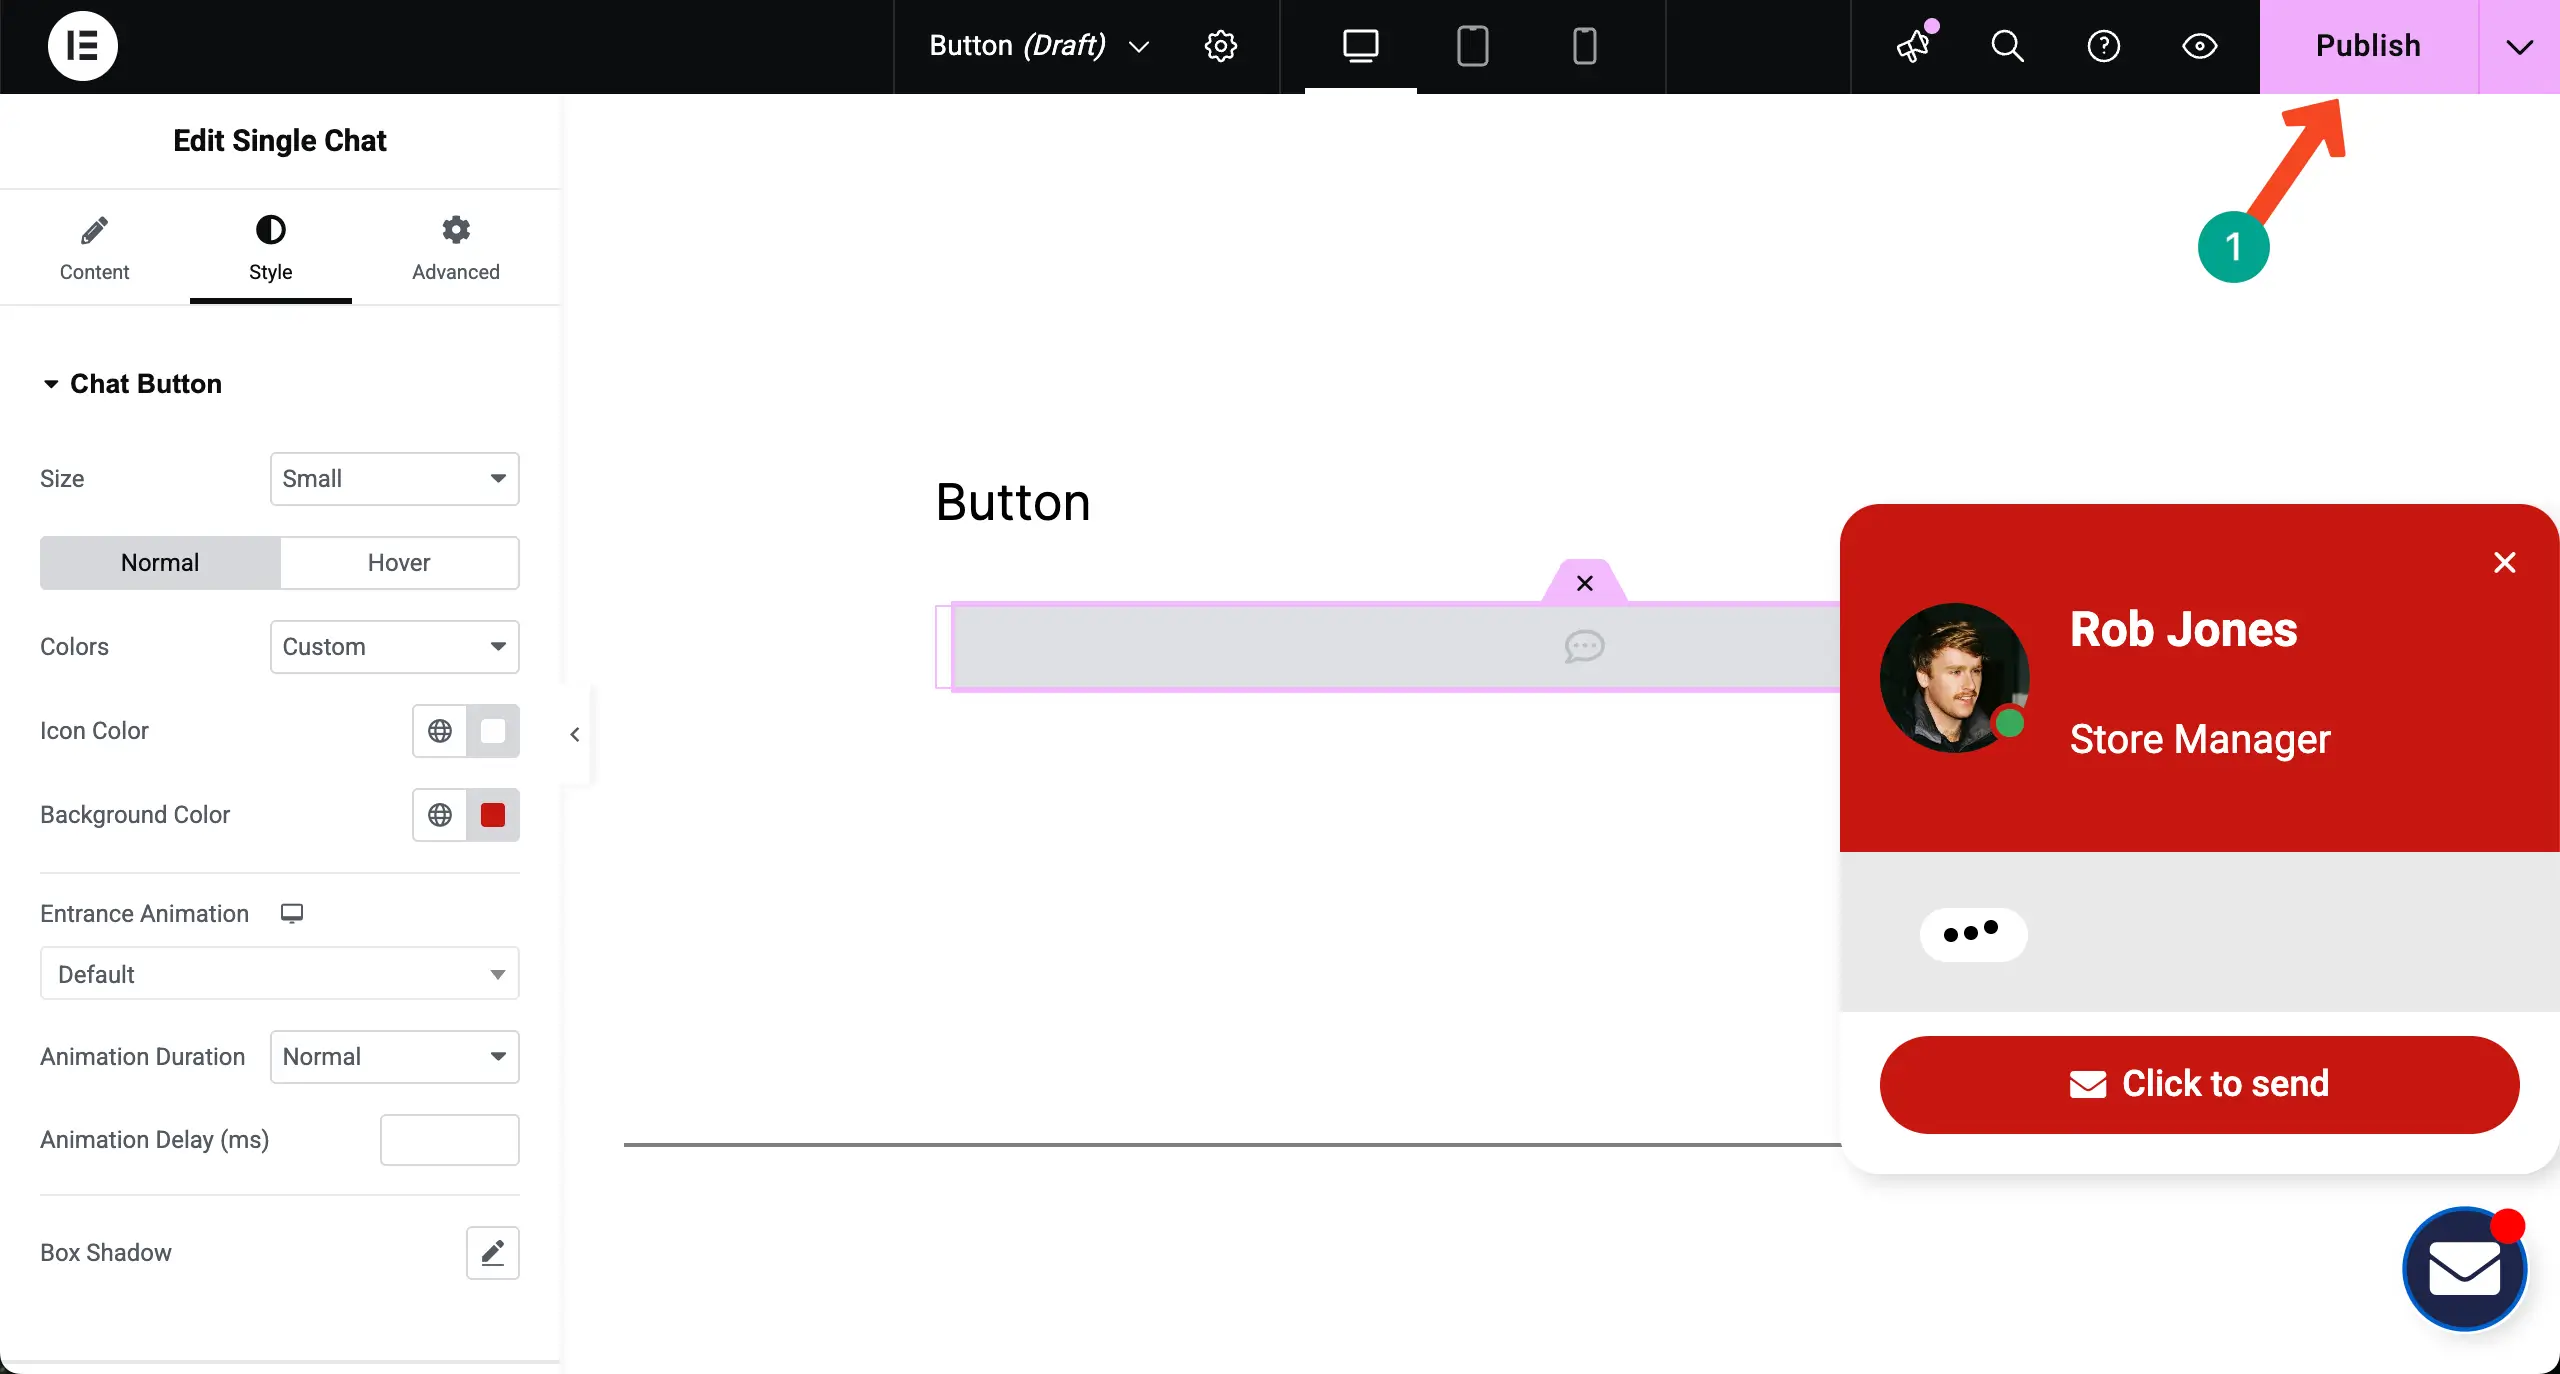
When the Elementor floating button is ready, click the Publish button in the top-right corner.
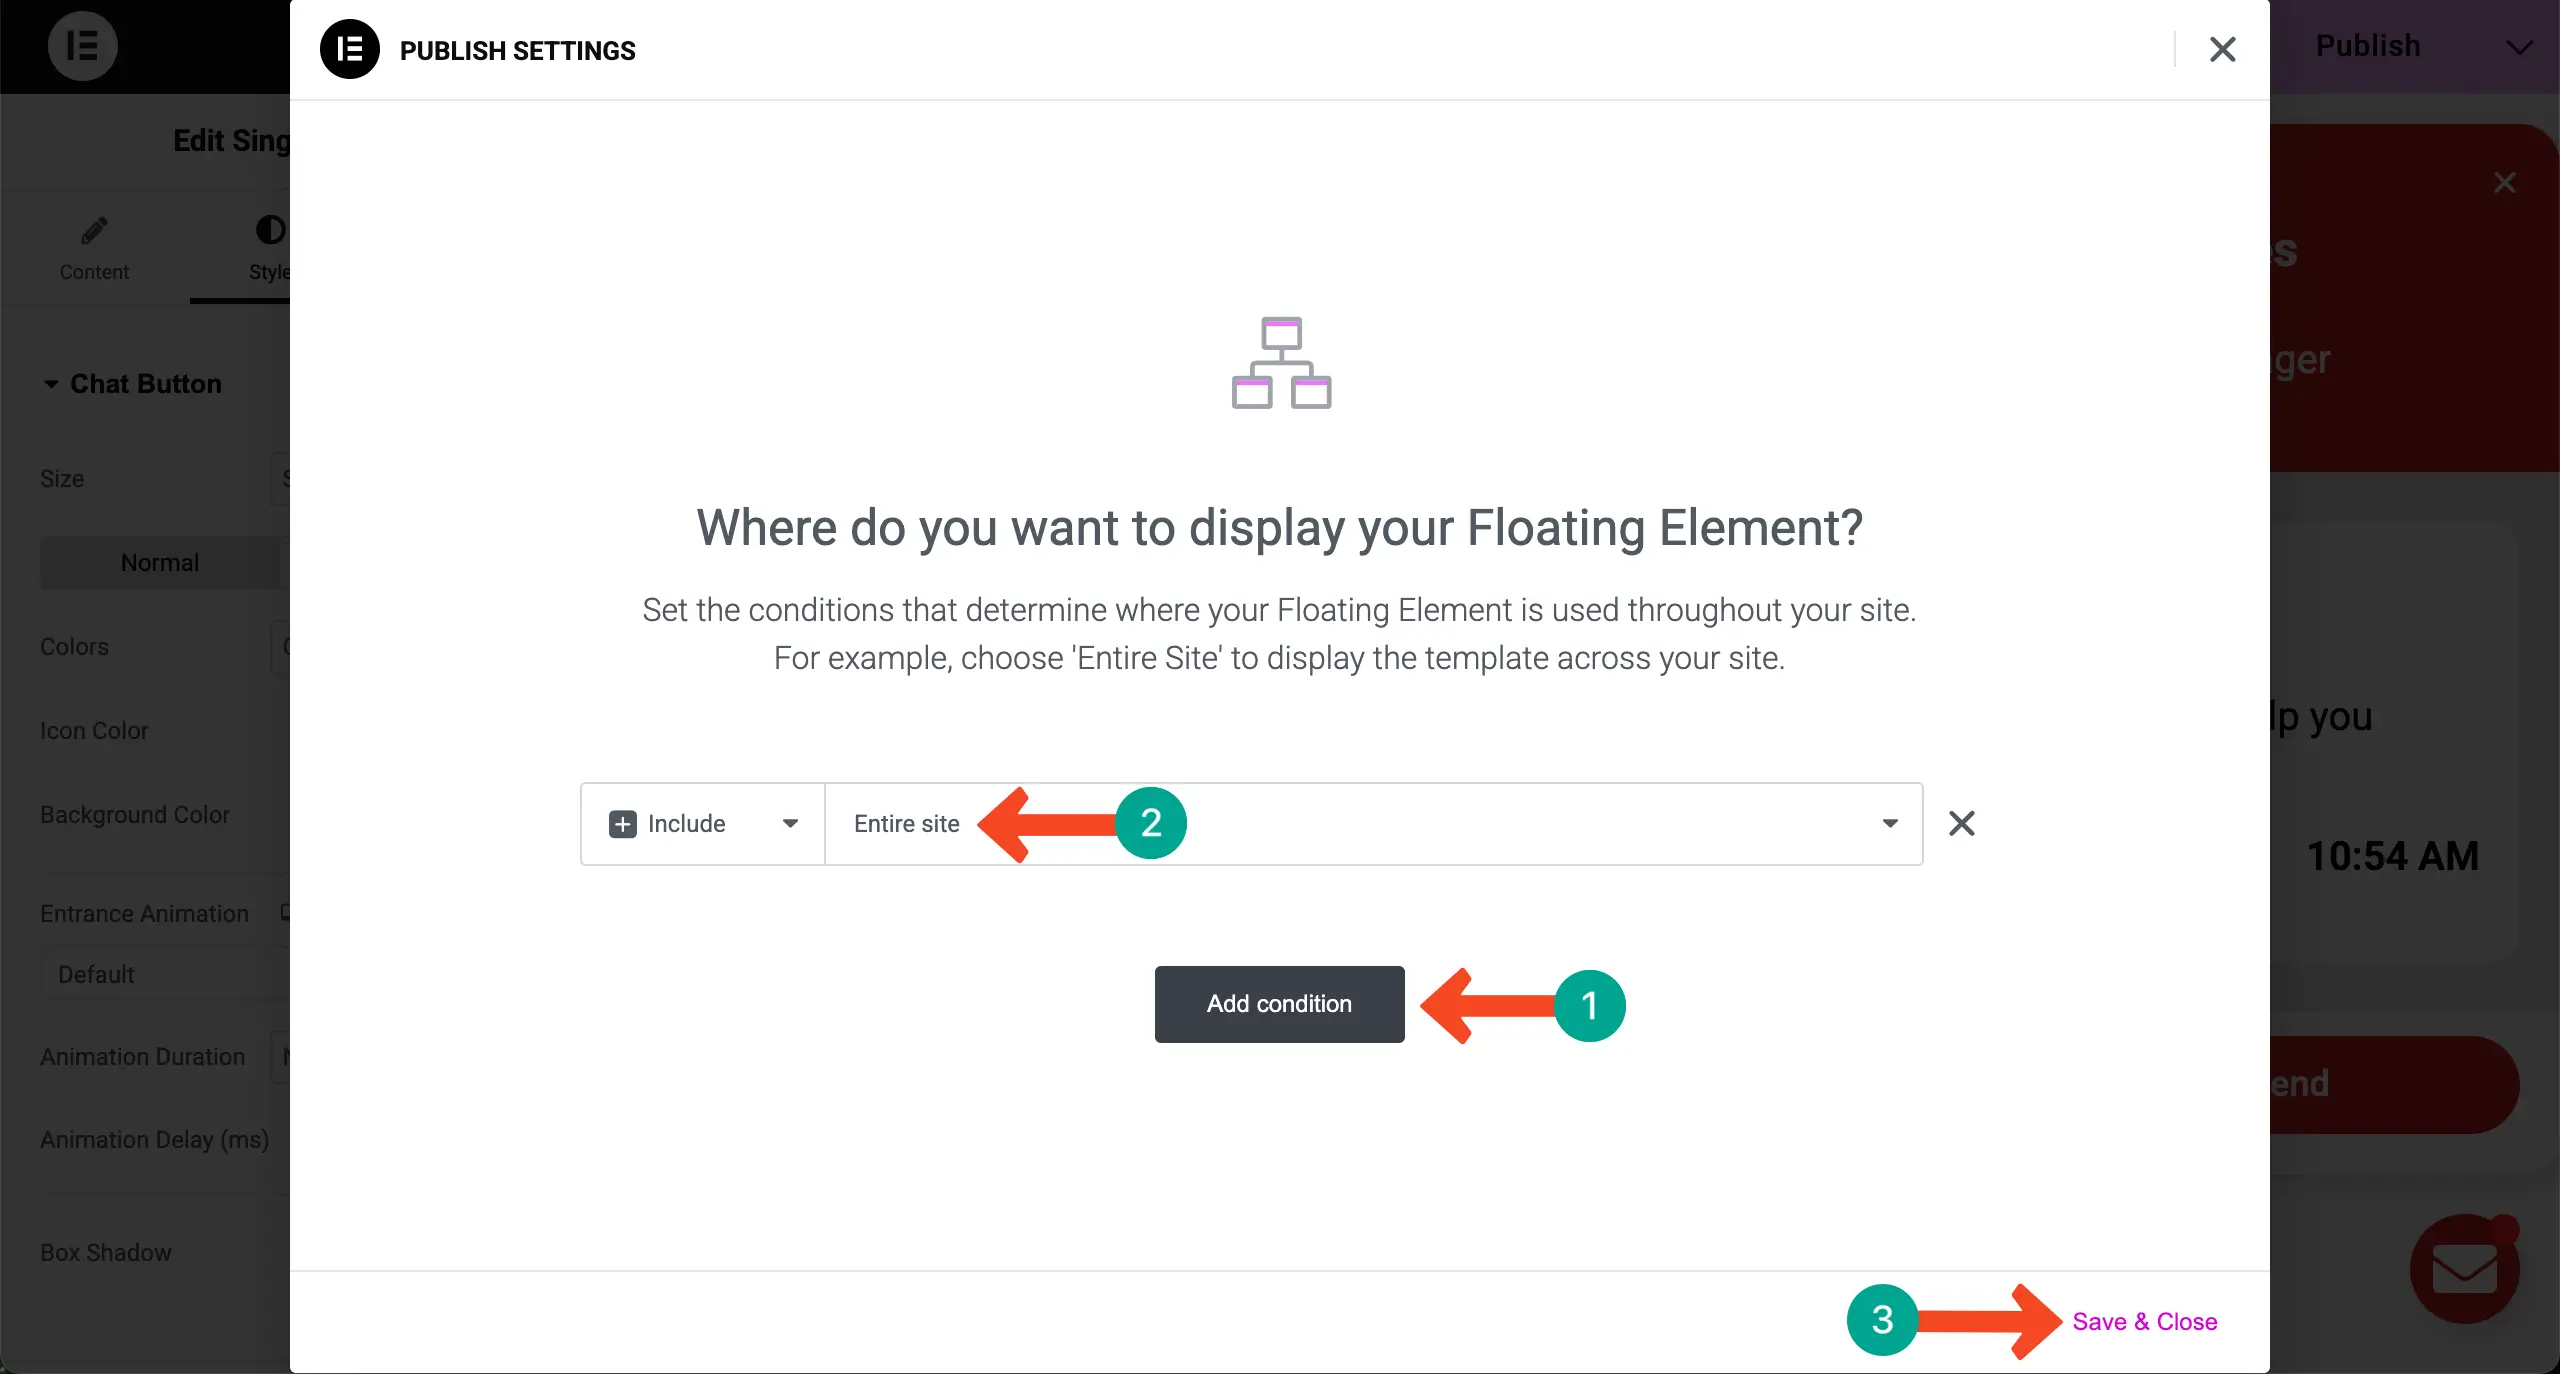
You’ll be asked to add condition(s) for the floating button. Do it by clicking the Add condition button. When it’s done, hit the Save & Close button in the bottom-right corner.
Step 06: Preview the Elementor Floating Button on the Frontend
If all your configurations have been accurately executed, you’ll see the Elementor floating button on the frontend right away.

Thus, you can add floating buttons and floating bars to your WordPress site using the Elementor plugin.
How to Create Floating Elements and Effects with HappyAddons
To get started with the process, you need the following plugins on your website:
Once these plugins are ready on your site, start following the tutorial as explained below:
Step 01: Open a Page and Select an Element
Open your desired page. Add the element you want to the page or select an exisiting element to which you want to add the floating effect.
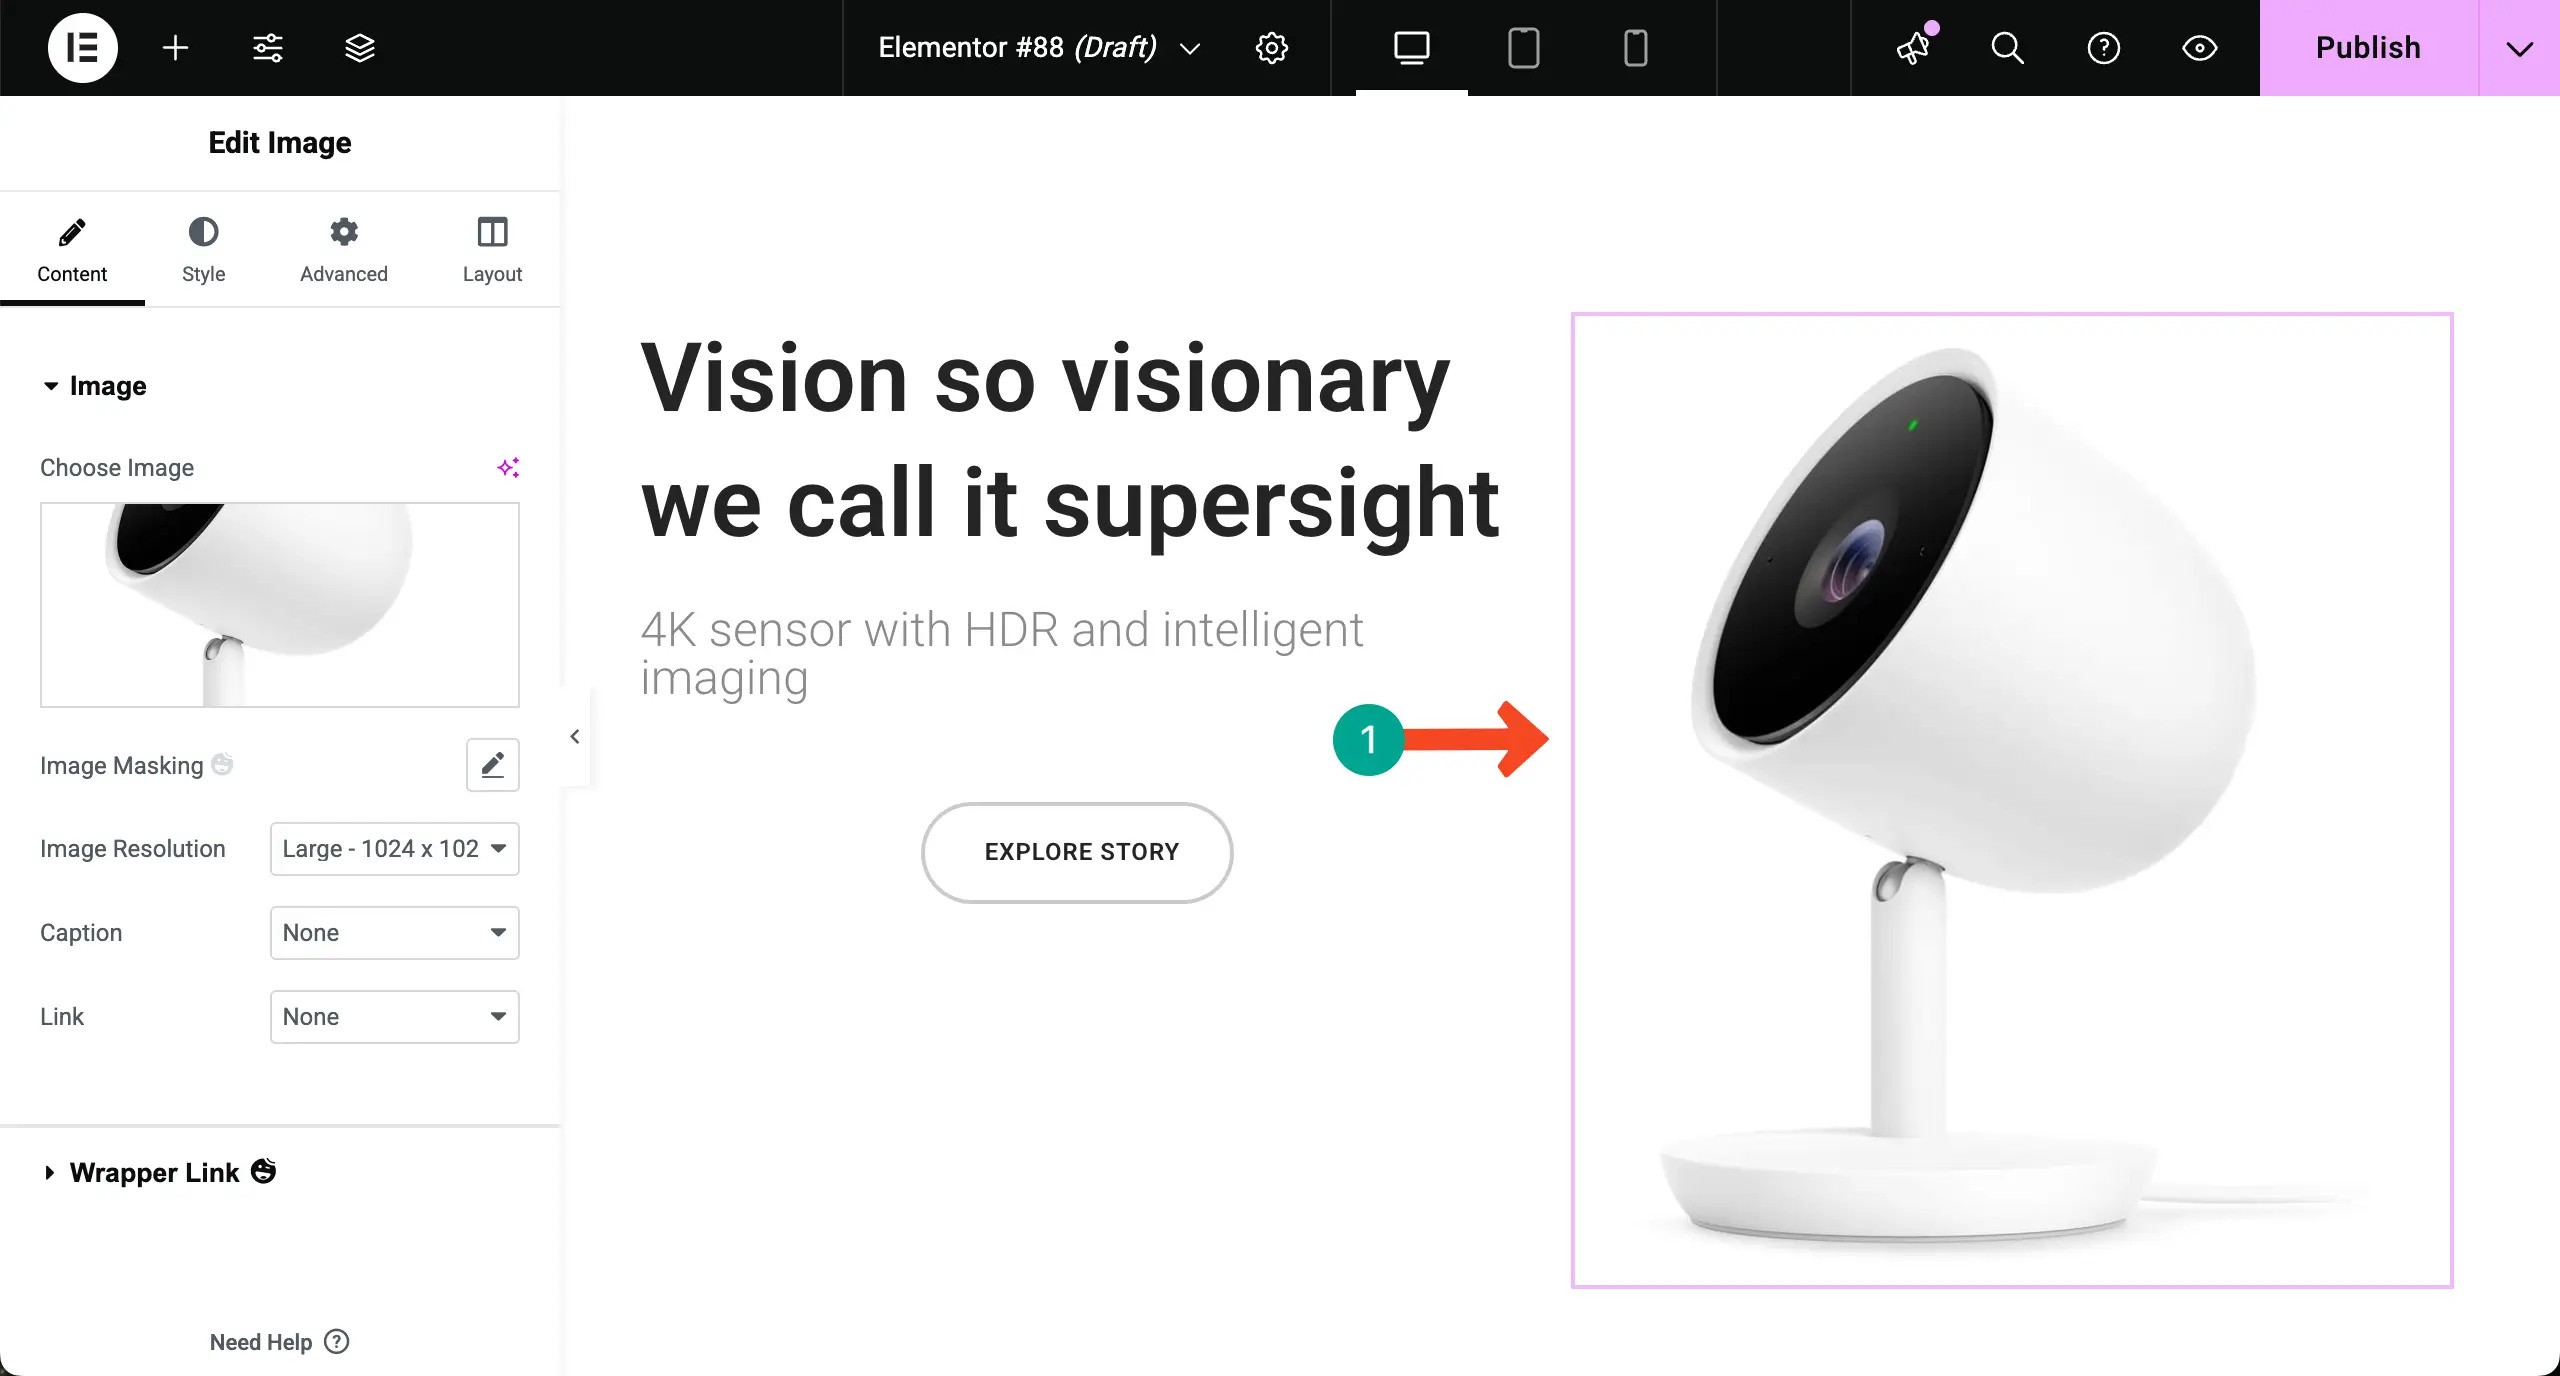
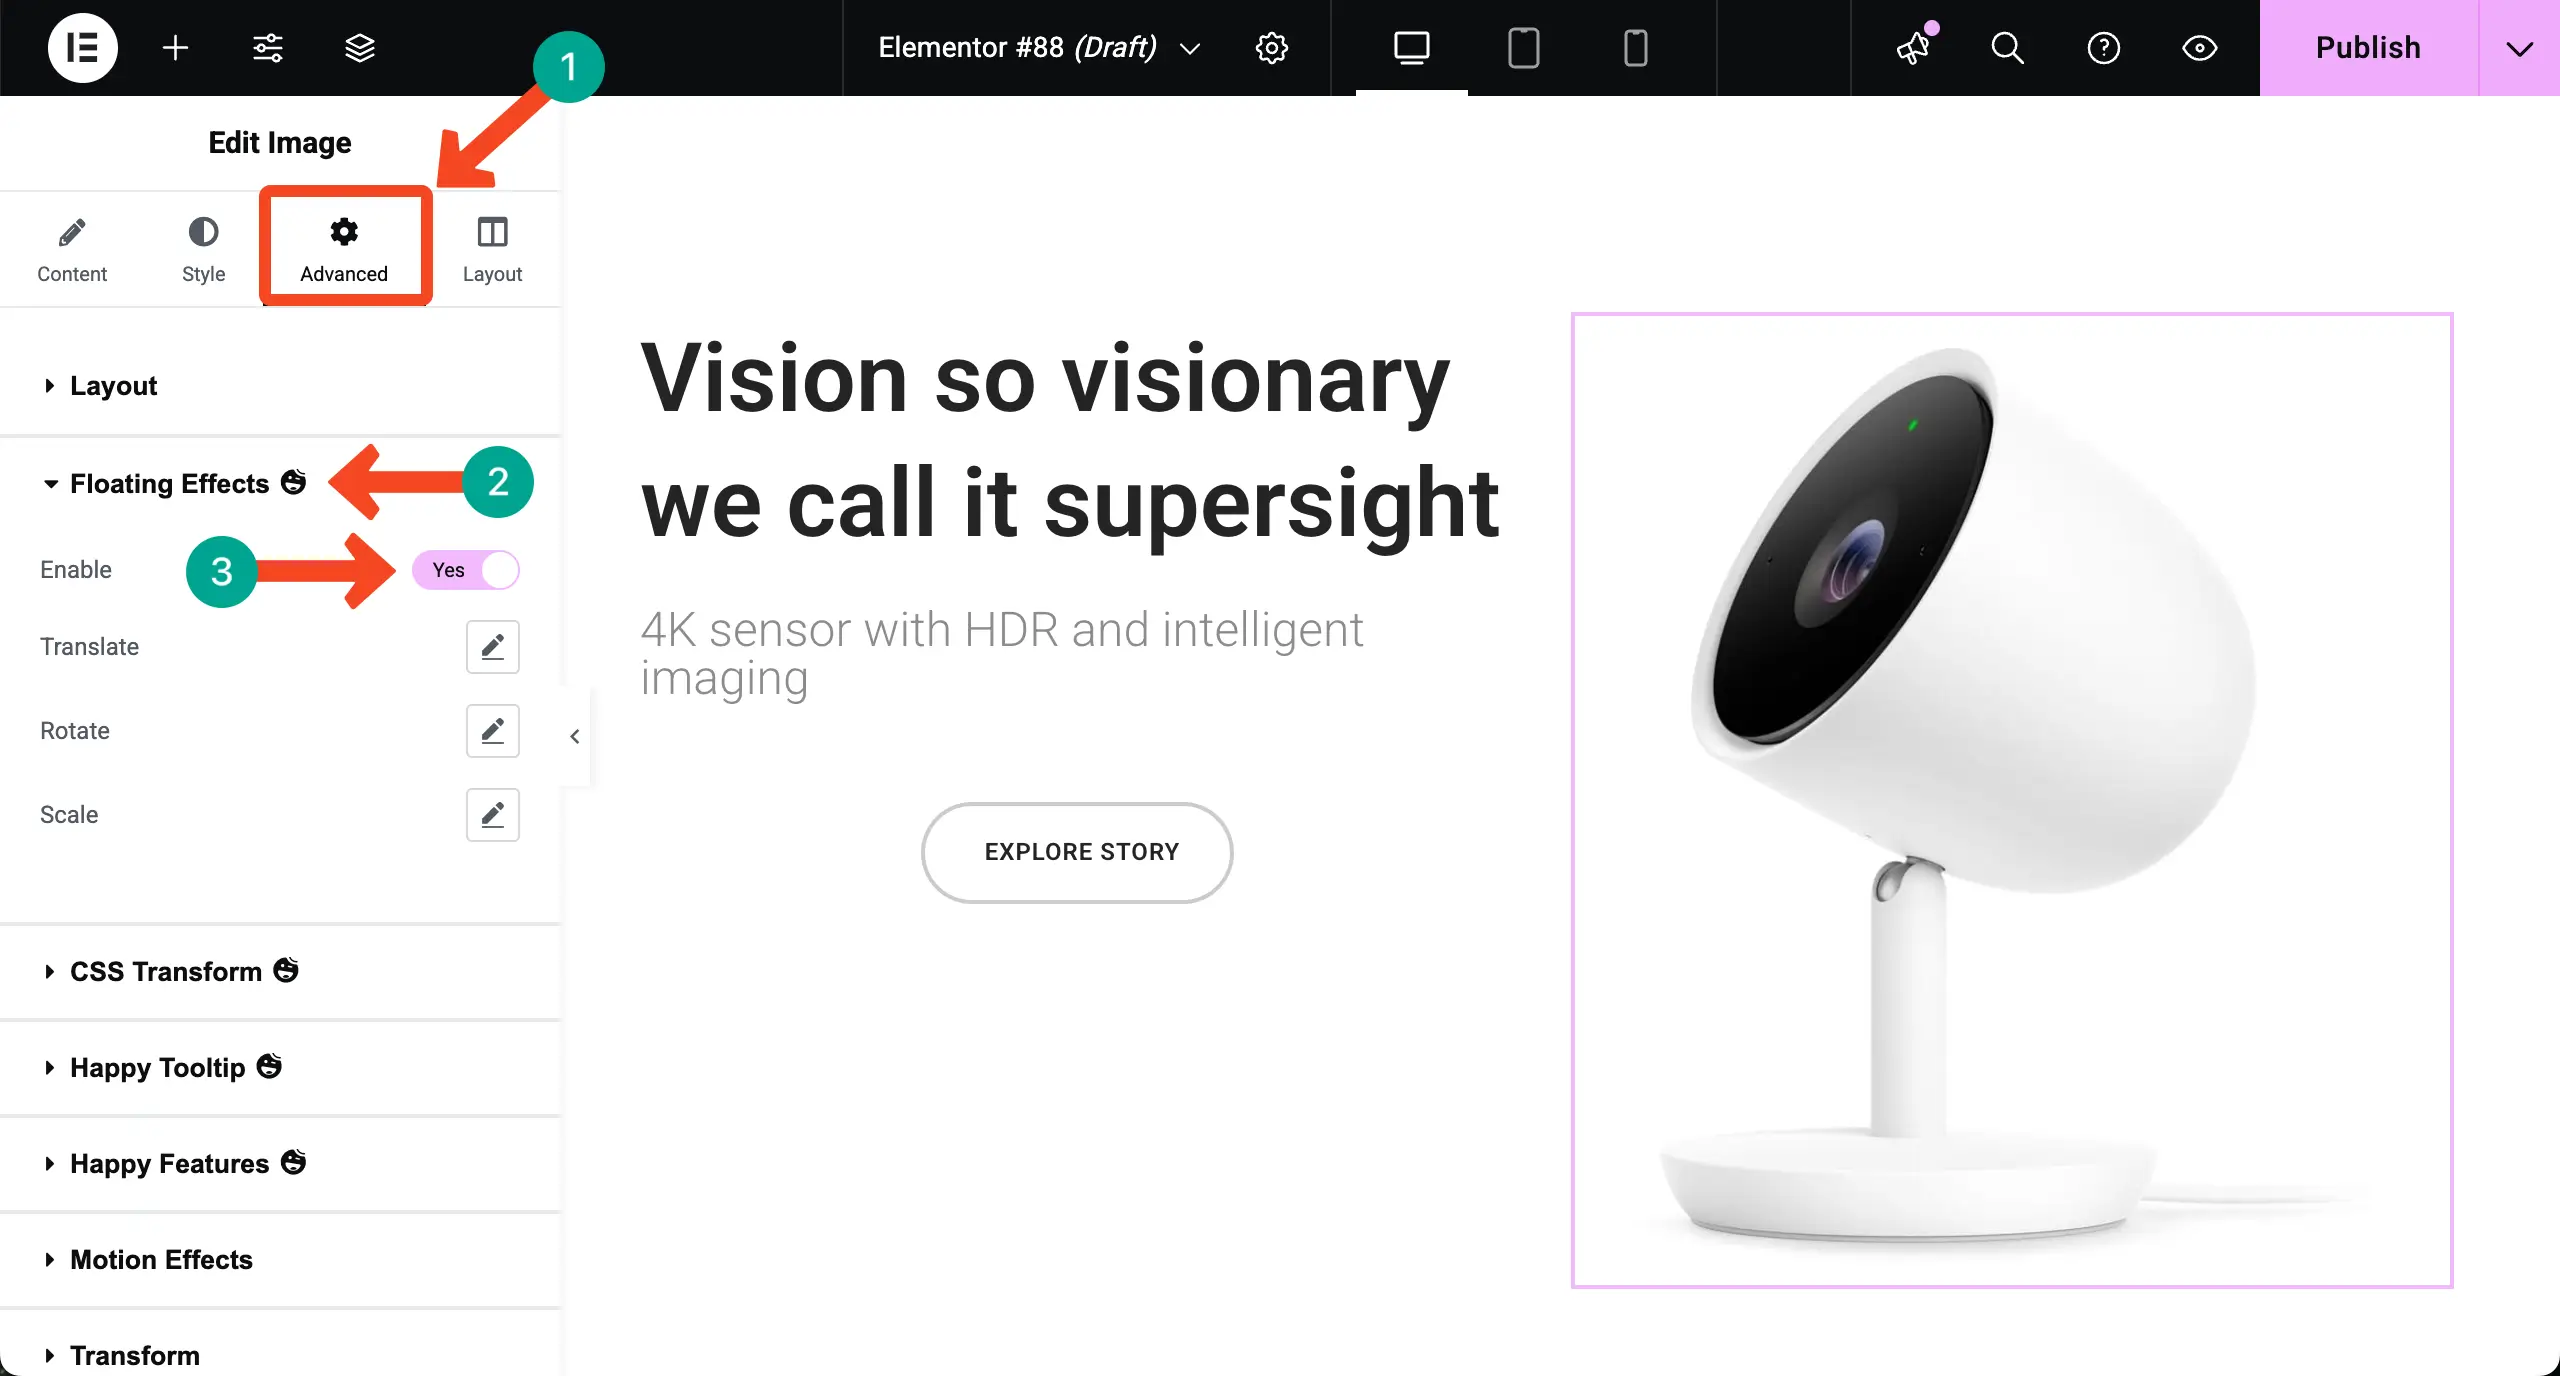
Step 02: Enable Floating Effects for the Element
Come to the Advanced tab. Expand the Floating Effects section. Enable the feature.
Once the floating effects have been enabled, the selected item will start floating. But unless you add other types of effects, this element won’t look good.
HappyAddons allows you to add rotate and scale effects to the selected element.
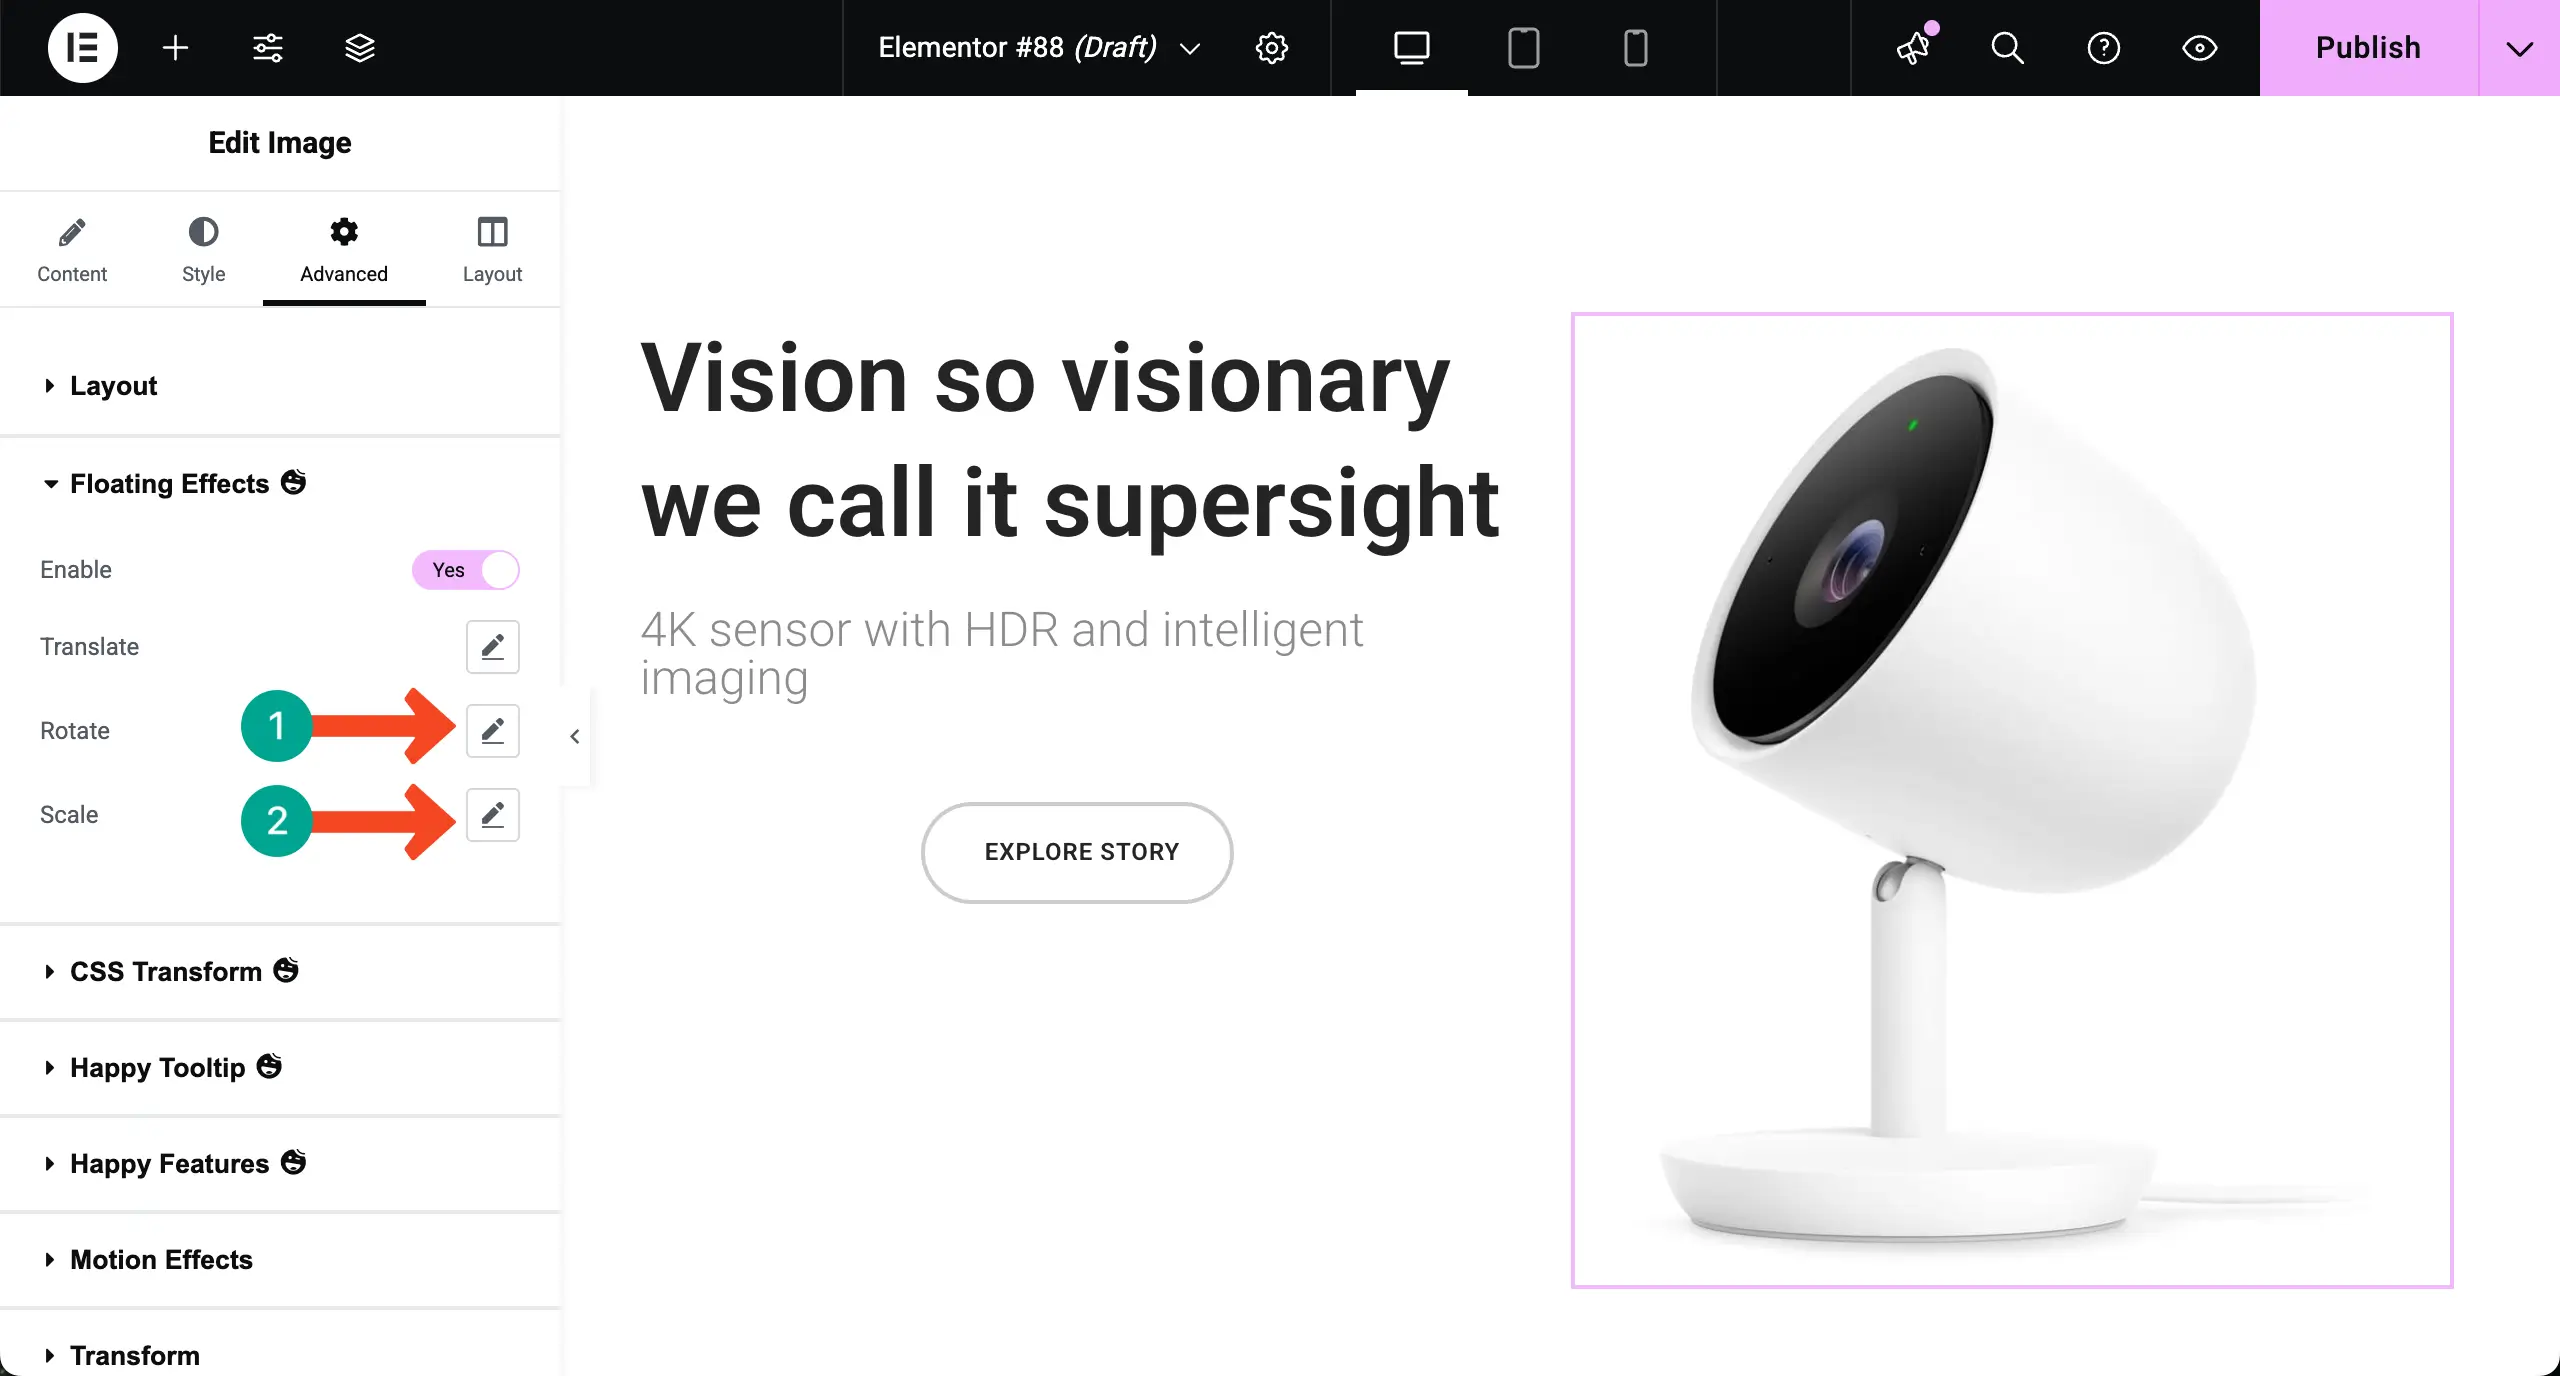
Step 03: Add Rotating Effect
Click the pencil icon next to the Rotate option. You can set various values to define how the element will move and rotate.
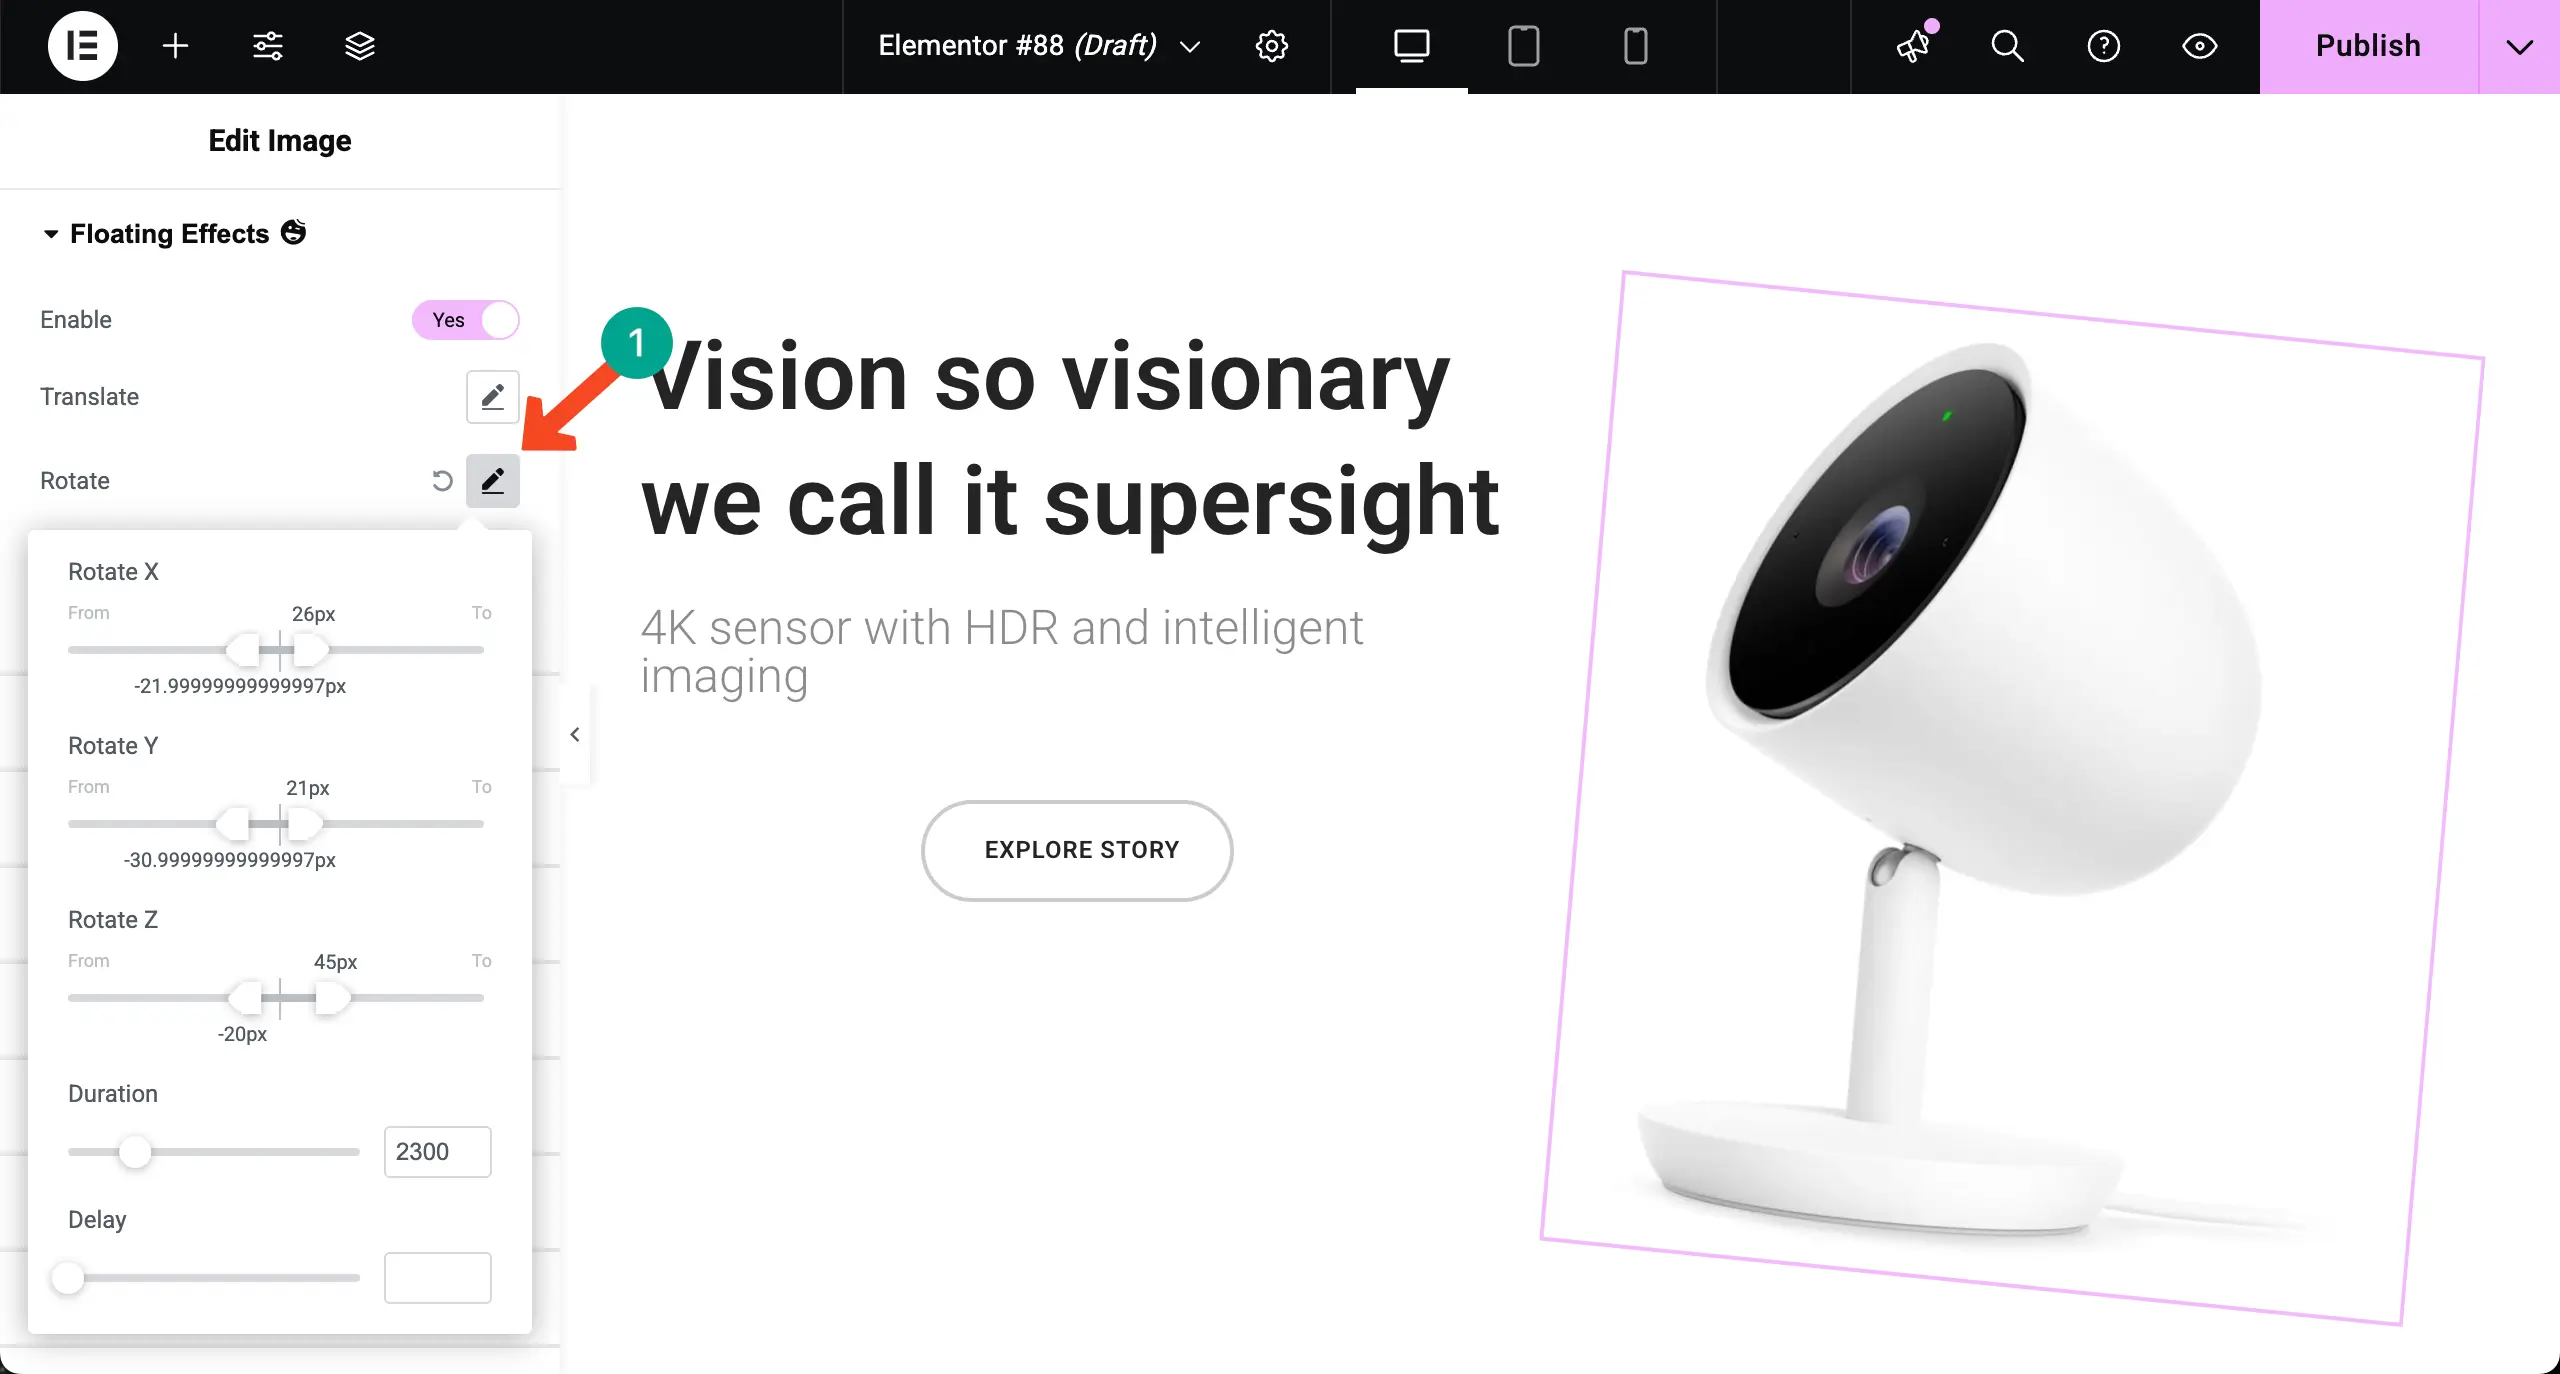
You can see the video clip attached below showing how the element is rotating according to the settings defined above.
Step 04: Adding Scaling Floating Effect
In the same way, hit the pencil icon next to the Scale option. Here also, you’ll get options to set values for showcasing how the selected element will scale up and down on the frontend.
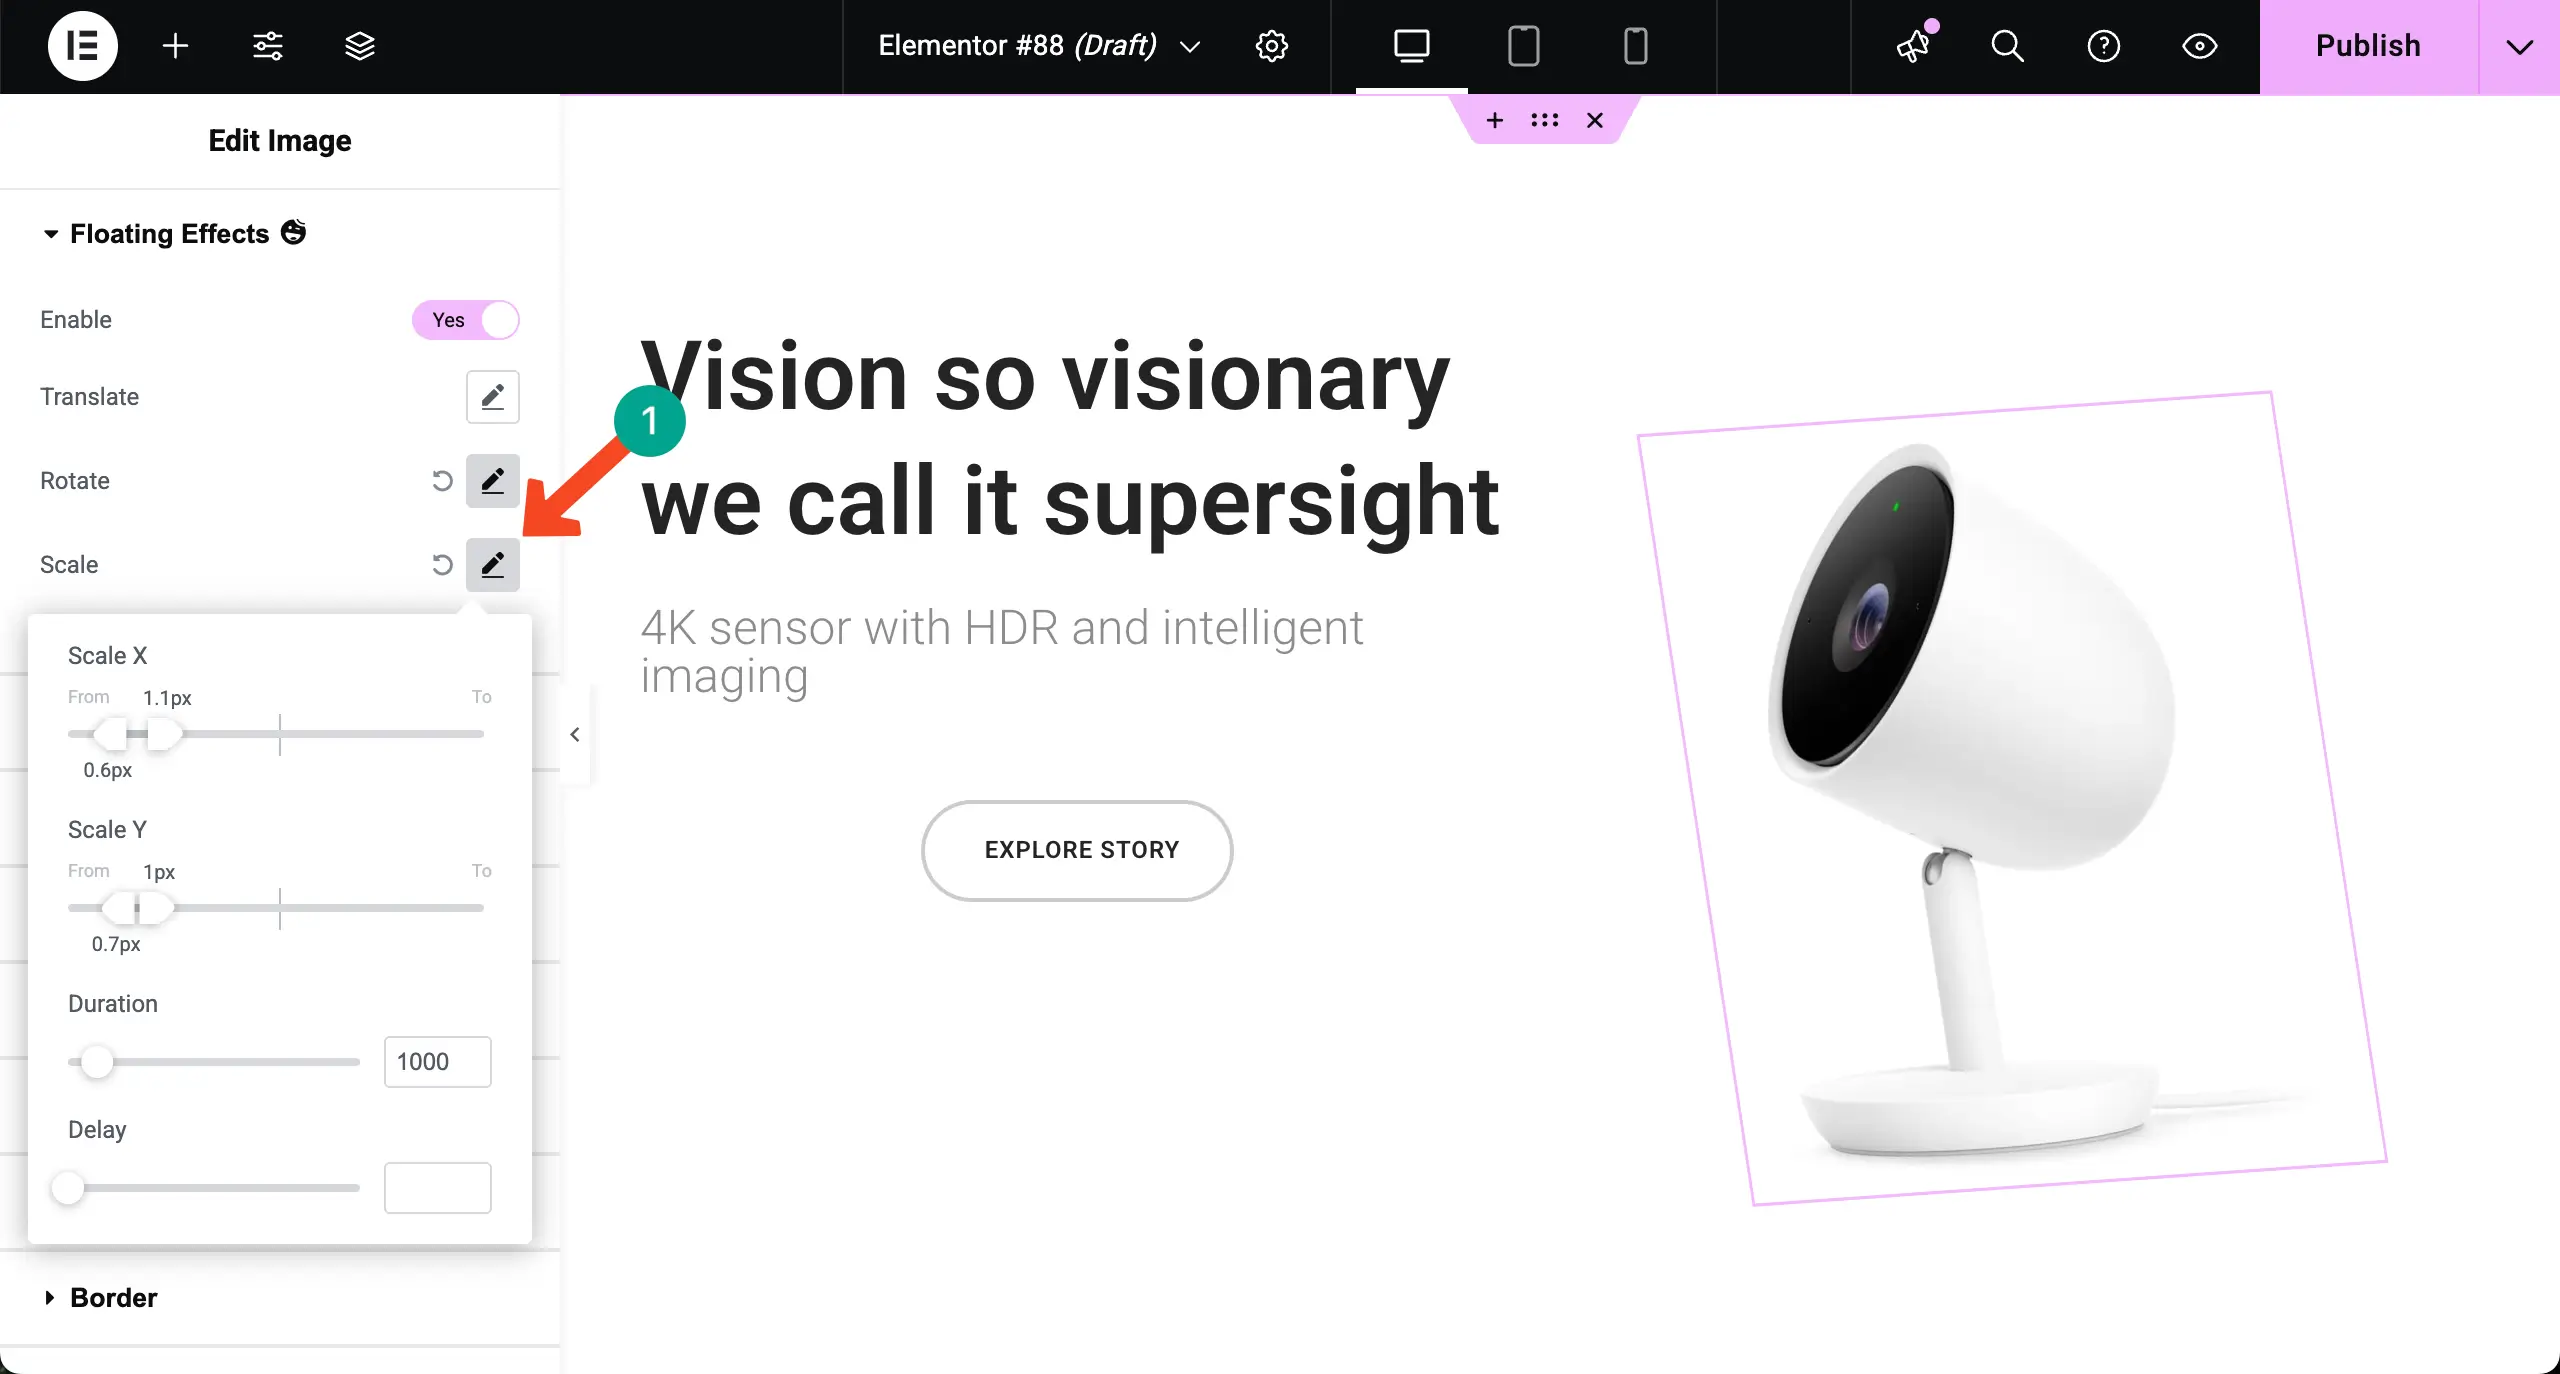
You can even configure both these options together – rotate and scale. You can see the video clip attached below.
Thus, you can add the Elementor floating effect to any elements on your web pages using the HappyAddons plugin. We have just shown you an idea of how to use the tool. Hope you can do the rest yourself.
Explore Some Video Tutorials on How to Add Elementor Floating Elements
Above, we have tried to cover two tutorials on texts and screenshots. But to further help you out, we have created some video tutorials as well, so you can understand the process better. Hope you will enjoy them. Explore those video tutorials below.
The following video tutorial explains how to add floating effects to textual elements using the HappyAddons plugin. Take a look.
The following video tutorial explains how to custom position and add a floating effect to an element.
The following tutorial showcases how to add Elementor floating elements to a web section and make it extremely beautiful to watch.
Final Takeaways!
Hope you enjoyed this tutorial. Now, you know how to add Elementor floating elements to your WordPress sites both in free and paid ways. If you think of adding simple floating elements to your Elementor site, the core Elementor plugin is good enough. But for advanced design options, you must try the HappyAddons plugin.
However, while using floating effects, always follow a few best practices. Keep animations smooth and subtle so they don’t distract users or slow down your site. Avoid using too many floating elements on a single page, as it can make your layout look messy. Also, test your design on different devices to ensure the animations work well on both desktop and mobile.
If there is any more question left in your mind, mention it in the comment box below. Also, you can knock at our support team. Our professionals are ready to help you round the clock.




9 Responses
Wonderful beat ! I would like to apprentice even as you amend your site, how could i subscribe for a blog website? The account aided me a applicable deal. I were a little bit familiar of this your broadcast offered brilliant clear idea
Hi Leila,
Thanks for stopping by and sharing your kind words with us. You can subscribe to our newsletters from our footer section as well. We have started to share newsletters to our respected users. Stay connected. ?
Great video, we are also developing webpages with Elementor, and maybe Happy Addons we be part of it. Interesting blog, and interesting product.
Regards
Hello Morten,
Thanks, man. It’s really means a lot to us. If you need any sort of help you can discuss in our Live Chat regarding HappyAddons anytime.
Stay connected.
How to move objects with the mouse
Hi Updesire,
Thanks for stopping by.
Here is the detailed tutorial by Elementor on How to Add Mouse Track Animations to Your Hero Section in Elementor ?
https://www.youtube.com/watch?v=FAqAsEEwu0M
Or if you want to create Mouse track animation without page builder then you can have a look here, https://gtarafdar.com/wordpress-tutorials/how-to-create-parallax-effect/
Have a nice day.
Regards,
Gobinda.
Is it possible to create floating forms with Elementor?
Hi Mike,
Good day,
Thanks for stopping by,
If I’m not wrong, you are asking for a sticky form for your website, right? If your answer is positive, then you can do it by using the motion effect of Elementor Pro. Here is the simple setup,
https://prnt.sc/10g0anq
It will help you to create the sticky/floating form with Elementor.
Let me know if you find this helpful.
Regards,
Gobinda Tarafdar,
Product Co-Ordinator of HappyAddons.