

The idea of online businesses not only gives you the freedom to make money but also reduces many potential costs involved with offline businesses. It enables you to reach wider audiences with minimal resources and create an additional income source.
If you have ever dreamt of starting an online business, WooCommerce can help you remarkably. It allows you to create almost any type of online store, add products, and integrate various features. This article will show you how to add products in WooCommerce easily with a detailed guide.
Let’s get started without wasting any more time.
Table of Contents
- How to Add Products in WooCommerce
- Types of Products You Can Add With WooCommerce
- How to Import WooCommerce Products
- How to Export WooCommerce Products
- Bonus: 5 Must-Have Elementor WooCommerce Widgets for Your Online Store
- FAQs on How to Add Products in WooCommerce
- Get Ready to Add Products in WooCommerce
How to Add Products in WooCommerce
Adding products to online stores is a basic and regular eCommerce task. You will find the process is quite similar to editing WordPress posts. However, there’re several steps involved in the process of adding products to WooCommerce. Explore them in the steps explained below.
Step 01: Go to Add New Product
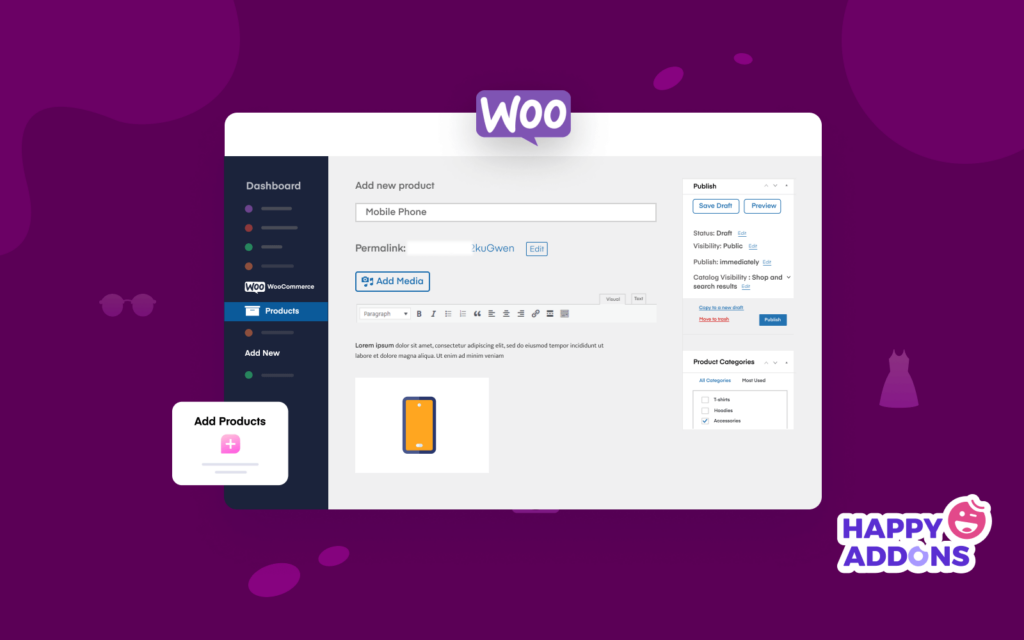
Open your WordPress Dashboard and make sure the WooCommerce plugin is installed on the website. If everything is okay, Navigate to Products > Add New.

Step 02: Add Title and Engaging Product Description
Give a name to your product in the title section. Keep the permalink the same as your product name. Write a short but engaging description of your product.
Specify the key takeaways, advantages, and reasons to buy the product in the description. You can use bold and italic formats to stylize your text and font, adding bullet points and alignments.

Note: Don’t forget to optimize your title and description using the right keywords. It will help you with a good SEO score.
Step 03. Select Product Type
By default, WooCommerce allows you to add six different types of products to your online store. They are simple products, grouped products, external/affiliate products, variable products, virtual products, and downloadable products.
We have talked about these product types minutely in the next section. But you can choose any product type if you already know about them.
- Click the dropdown box next to Product data.
- Select the product you want from the list.
Note: We have selected the Simple Product for the running tutorial.

Step 04: Fill Out Product Data Tabs
When shopping online, customers can’t physically touch or examine your products. This is why value-added information is so crucial in eCommerce websites. It enables them to evaluate the features, benefits, and qualities of the products and make informed decisions.
Below the product type dropdown menu, you’ll get several tabs where you have to specify your product price, attributes, inventory, and other information. We’ll take you to explore all the tabs here.
# General
The General tab lets you add the regular price and sale price. The sale price refers to the discounted price from the regular price.

# Inventory
The Inventory tab allows you to show the product’s current stock status and SKU number. You can also limit the number of units that can be purchased per WooCommerce order.

# Shipping
Courier companies charge for a product based on its weight and size. From the Shipping tab, you can specify the weight and dimensions of your product.

# Linked Products
In the Linked Products tab, you can add upsell and cross-sell products. Explore the best practices to get the most from your upsell and cross-sell.

# Attribute
If your product belongs to any specific brand and you want to show this information to your customers, you can do it from the Attributes tab.

# Advanced
If you want to pass any specific message to your customers once they complete a purchase, you can set it up from the Advanced tab.

# Get more options
In this tab, you’ll get to know about additional extensions that you can install to power up your WooCommerce website further.

Step 05: Add Product Images
Adding images can help customers visualize your products. According to numerous statistics, eCommerce websites with good quality and meaningful product images are likely to get 70% more traction. You must add a featured image and several other images for the gallery.
You can do that in the following ways.
# Set Product Image
Click on the Set Product Image option from the right sidebar.

This will take you to a new window. Upload your product photo, whether from your hard drive or from the media file section. Click on the Set produce image button to complete this process.

# Product Gallery
Adding several images to the gallery can help you see the product from different angles and perspectives.
Click on the Add product gallery images option.

You will get the option to add images to the gallery. You may add images from the media file or upload them from the drive. Once you are done, hit the Add to gallery button.

You will see the photos added to your gallery in your backend.

Step 06: Give Finishing Touch
Your product page is almost ready. But before hitting the publish button, there are a few more things to complete. You need to select a suitable product category, add tags, set an image, and add gallery images. You will find all these options on the right sidebar.
# Select Product Category
You will get Product Categories on the right sidebar of your screen. According to your product type, select a specific category for your product.

If your category isn’t available on the list, click on +Add new category. You will get options to add a new Parent category and subcategories.
Once you complete them, hit the Add new category button. Your new options will be added to your category list.

# Add Product Tags
Type some relevant keywords in the box pointed out below that better describe your product. Use comma(,) to separate them. Then, hit the Add button.

If necessary, you can change or edit items. Hit the Publish button after completing all the above steps. People will be able to see it on your WooCommerce store.

Thus, you can add more new products to your website.
Types of Products You Can Add With WooCommerce
Choosing the right set of products is the prerequisite to starting any profitable online business. Below are the six types of products WooCommerce allows you to add to your online store.
- Simple Product
- Grouped Product
- External/Affiliate Product
- Variable Product
- Virtual Product
- Downloadable Product
Each of them has unique characteristics. Let’s break them down in this section.
1. Simple Product
The simple product type refers to the physical commodities (fabrics, books, electronic devices, kitchen items, etc) that you have to ship to the customers. This is the most basic type of WooCommerce product and is easy to configure. You can easily add prices, stock details, and SKU numbers.
You have to select the Simple Product option from the drop-down menu while creating a new product.

If you want to use more functionality, click on Get more options. It will offer you recommended extensions such as ‘Additional Variation Images’, ‘Name Your Price’, and others.

2. Grouped Product
A grouped product is simply a bundle of multiple relevant products that are already existing in your store. It aims to increase the likelihood of customers buying more products whenever they come into your store. However, you cannot set any discount or add new prices.
To create a product bundle, you have to select the Grouped product option from the drop-down menu.

Then, click on Linked Products. You will get the grouped products box like the one below. Just type the product names where you want to offer in a cluster.

3. External/Affiliate Product
This product category lets you display someone else’s products on your website and allows you to earn commissions on sales. You have to add a product URL and a button text that will be displayed as a Call to Action (CTA) button. When customers click on it, they will be redirected to the URL you have specified in the product settings.
You can include regular and sales prices in the following boxes and change them anytime.

4. Variable Product
If you want to add different variations (weight, color, size) to the same products and change prices accordingly, you must select the variable product option.

To add variations, you require setting up some attributes and defining their values. Go to the Attributes option and then click the Add button.

Give a name to the attribute. We have set the name ‘Custom Attribute 1’ and added two values ‘Option 1 | Option 2’. Click on the checkbox of Used for variations. Finally, hit the Save attributes button.

Now, go to Variations. From the drop-down option of Add variation, select Create variations from all attributes. Then, click the Go button.

You will get a new interface. Double-click Option 1 and Option 2.

You will get more options to add variations such as weight, SKU, size, shipping class, and more.

Thus, you can add variable products to your WooCommerce store.
5. Virtual Product
Virtual products refer to items with no physical existence, like simple products. For example, ticket booking, reserving online appointments, software licenses, etc. As they have no physical existence, you don’t have to set their weight, size, color, and other variations.
Just you have to tick the Virtual checkbox option while creating a product.

6. Downloadable Product
Games, software, PDFs, images, movies, songs, etc., are downloadable products. These are other versions of the simple and virtual product types. However, you will find a shipping option for this product type. If you want to send these products on a DVD disk or pen drive somewhere else, you can use this option.
Here again, you have to tick the Downloadable checkbox.

But if there is no shipping option for your product package, tick both the Virtual and Downloadable checkboxes.

These are all the six product types of WooCommerce. Next section, we will walk you through how to add products in WooCommerce.
How to Import WooCommerce Products
If you want to avoid the hassle of manually adding products to your WooCommerce store, there is another way to do this. This is importing products using the CSV file. First, you need to export the product data of WooCommerce to a CSV file. Only then can you import it to your Website.
WooCommerce offers you a dummy product CSV file. You can use this file to practice how to import products to your website. We have added the dummy CSV file below to make your job easier. Just click on the download button next to the link below.
Download WooCommerce Sample Products.
Once the download is completed, navigate to Products > All Products. Then, click on the Import button.

After that, click on the Choose File button. You will be given the option to select the CSV file of your WooCommerce Sample Products that you downloaded just a while ago. Then, click on the Continue button.
Note: You may tick or leave the Update existing products checkbox. Here, we are leaving it unticked.

You will find yourself on a new page. Leave all the fields and boxes untouched as they are. Just scroll down to the bottom of the page. Click on the Run the importer button.

This will start importing products from the CSV file.

You will see the following notification on your screen when the import is complete. Click on View Products.

You will see the uploaded products on your backend.

Thus, you can import products to your WooCommerce store through a CSV file.
How to Export WooCommerce Products
At this discussion stage, you may be wondering how to export the product to the CSV file. Like the other processes above, this step is very simple.
Suppose this one is a running WooCommerce store. Navigate to Products > All Products. Click on the Export button.

Scroll down to the end of the new page. Click on Generate CSV. And don’t forget to tick the checkbox of ‘Yes, export all custom meta’.

Your CSV file will be ready and automatically downloaded to your laptop/desktop. Thus, you can create CSV files and upload them to other WooCommerce stores.
Want to skyrocket your online sales? Don’t miss out on these game-changing tips to increase ecommerce sales! Check out this blog and start boosting your revenue today!
Bonus: 5 Must-Have Elementor WooCommerce Widgets for Your Online Store
WooCommerce widgets refer to the modular elements that allow you to add special eCommerce features to your website to increase its functionality. If you already have built your online store by Elementor, you can integrate the HappyAddons plugin to enjoy many wonderful widgets right away.
Let’s check out the five must-have WooCommerce widgets of the Happy Addons you should consider adding to your eCommerce site.
1. Product Grid (Pro)
The Product Grid enables you to display your products with a perfect and stylish gride alignment to make them more attractive to the customers.

Follow this documentation to make your online store more attractive with the Product Grid widget.
2. Product Carousel (Pro)
With the Product Carousel widget, you can slide show your product items on your website. This one is somewhat similar to the Product Grid widget.
Check out this step-by-step documentation to enable this widget.
3. Product Category Grid (Pro)
The Product Category Grid makes it easy to display your products category-wise to catch the eyes of specific target audiences.

Check out how to use this Product Category Grid.
4. Product Category Carousel (Pro)
The Product Category Carousel will slide show your products category-wise and give an attractive look to your website.
Let’s see how to activate this widget on your WooCommerce store.
5. Single Product (Pro)
The Single Product widget allows you to display your specific product information in a stunning way and make your product pages more attractive to visitors.

Here is documentation on how to use this Single Product widget on your website.
FAQs on How to Add Products in WooCommerce
Now, we are going to answer some frequently asked questions on how to add products to WooCommerce.
-
How do I add WooCommerce to WordPress?
1. Navigate to Plugins > Add New
2. Type WooCommerce on the search-bar
3. Click on Install and Activate it
4. You will get the WooCommerce setup wizard.
5. Right after you complete the wizard, your WooCommerce is fully ready to work. -
What is a coupon in WooCommerce?
The coupon is a promotional way to offer discounts and rewards occasionally to customers to increase sales overnight.
-
How do I activate a WordPress coupon?
1. Navigate to Marketing > Coupons
2. Click on Add Coupons
3. You will a number of fields and options to specify the details of your coupon
4. Right after you complete the details, hit the Publish button -
How do I show products on the WooCommerce page?
1. Navigate to Appearance > Customize
2. From the left sidebar, go to WooCommerce > Product Catalog
3. From Shop Page Display, select “Show categories”
4. Click on the Save Changes button after all changes -
How do I show 4 products in a row in WooCommerce?
1. Navigate to Appearance > Customize
2. From the left sidebar, go to WooCommerce > Product Catalog
3. Scroll a bit down, you will get the option to edit ‘Product Per Page
4. Increase the number as much as you want
5. Click on the Save Changes button after all changes
Get Ready to Add Products in WooCommerce
This is quite impossible to run a store without adding products to it. Once you complete adding your desired product items, you are almost ready to launch your WooCommerce store. But before hitting the publish button, check out if you can tweak something more on your website to have a standout appearance.
The following blogs can help you in this regard.
- Customize WooCommerce product pages
- Edit the WooCommerce cart page
- Customize your WoCommerce shop pages
- How to edit WooCommerce product page using Elementor
Hopefully, this article has met all your questions about how to add products to your WooCommerce store. If you still have a query on this topic or face any difficulty throughout the process, please let us know in the comment section.
If you love to receive more interesting articles like this one, subscribe to our newsletter and follow our Facebook and Twitter channels.
Subscribe to our newsletter
Get latest news & updates on Elementor


