44% of web visitors choose to stay with a business if it has proper contact information. That’s why a contact page is crucial for every website. It’s the simplest way for your visitor to ask queries, product info, or support through a contact page.
Despite its importance, most website owners and designers don’t pay too much attention to their contact page. Hence, they missed a step in providing timely customer support. But building a contact page is super easy, and it’s more than easier with Elementor.
If you don’t know how to create a contact page with Elementor, this post is for you. As Elementor page builder is one of the most popular ones, it’s quite a smart decision to build and customize every corner of your website with it.
Before You Create a Contact Page with Elementor
You need three core things to build a simple but effective contact page. They are –
- Elementor Page Builder
- Happy Addons
- A form builder (Contact Form 7, for example)
Anyway, you shouldn’t worry a bit. All three of them are free. You won’t waste any of your precious minutes while installing them on your WordPress site. Therefore, if you need more advanced-level features, you can upgrade to a premium plan anytime.
Well, let’s follow through with the installation process.
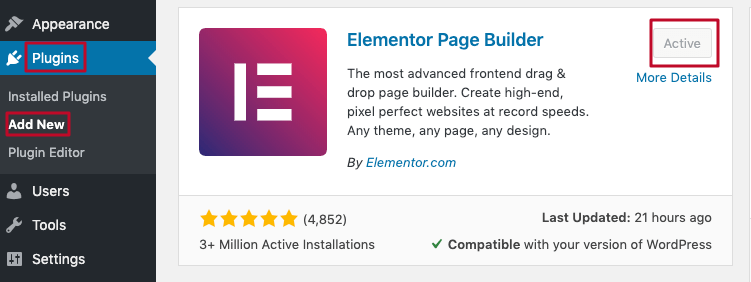
⇒ Install the Elementor Plugin in Your WordPress dashboard. To do this, go to your plugins section, click on “add new”, and make a search for Elementor in the search box.
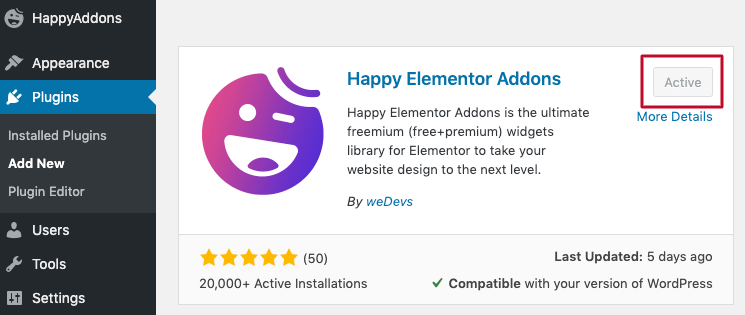
⇒ After you have installed Elementor on your website, make sure you have also installed and activated Happy Elementor Addons.
To unlock a library full of powerful Elementor widgets, you won’t find any better alternative.
⇒ Install Contact Form 7 by following the same procedure.

Now you are ready to go. Follow the steps below to create your very first contact page with Elementor.
Step One – Initiate the Page Builder Editor
⇒ Go to your pages from the dashboard, then click on “add new.”

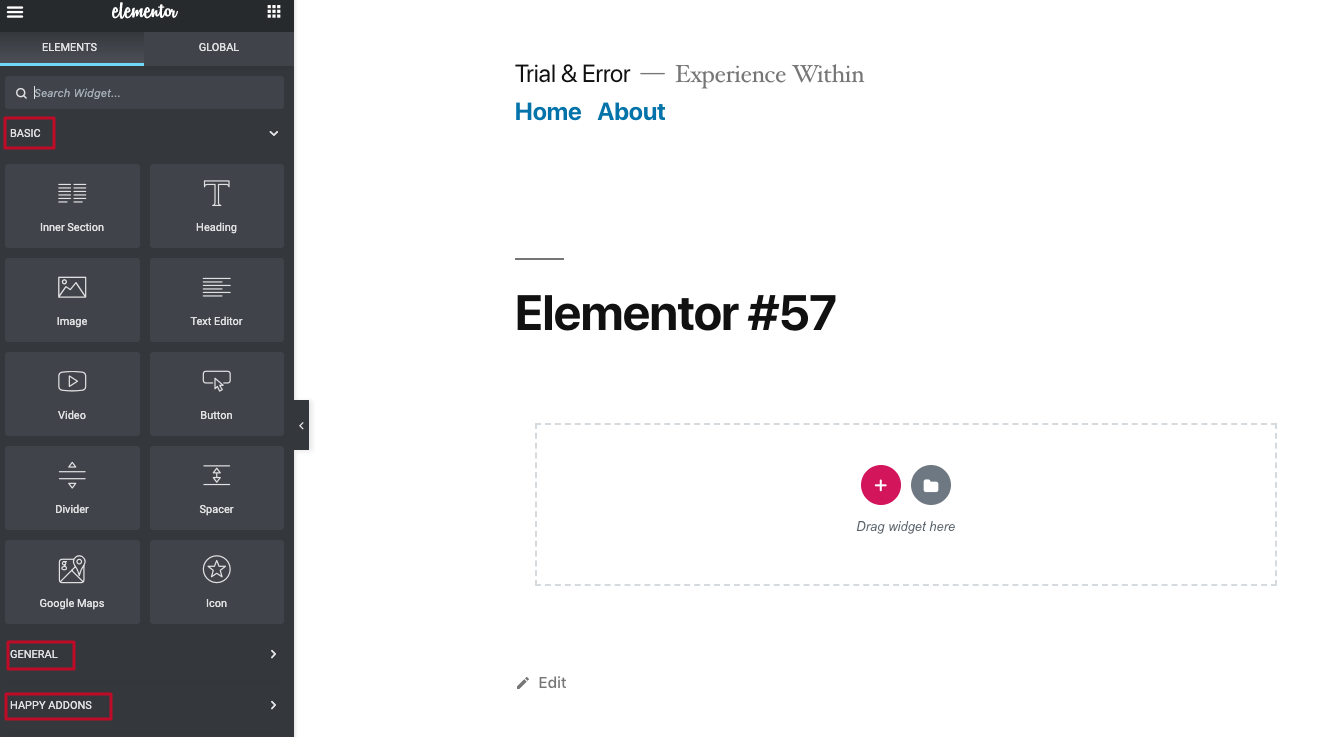
⇒ On the next page, you need to click on Edit with Elementor.
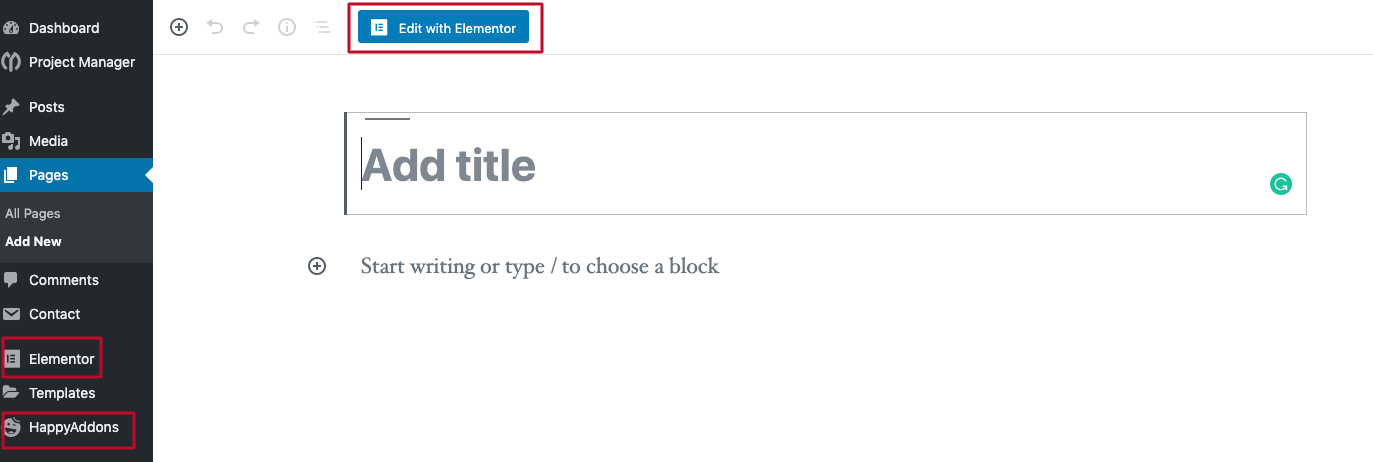
The next page will show you all the options to create any type of web page you want. Here we will be going through how to create a contact page.
Step Two – Writing the Page Name
⇒ Now Go to Settings from the bottom left bar.
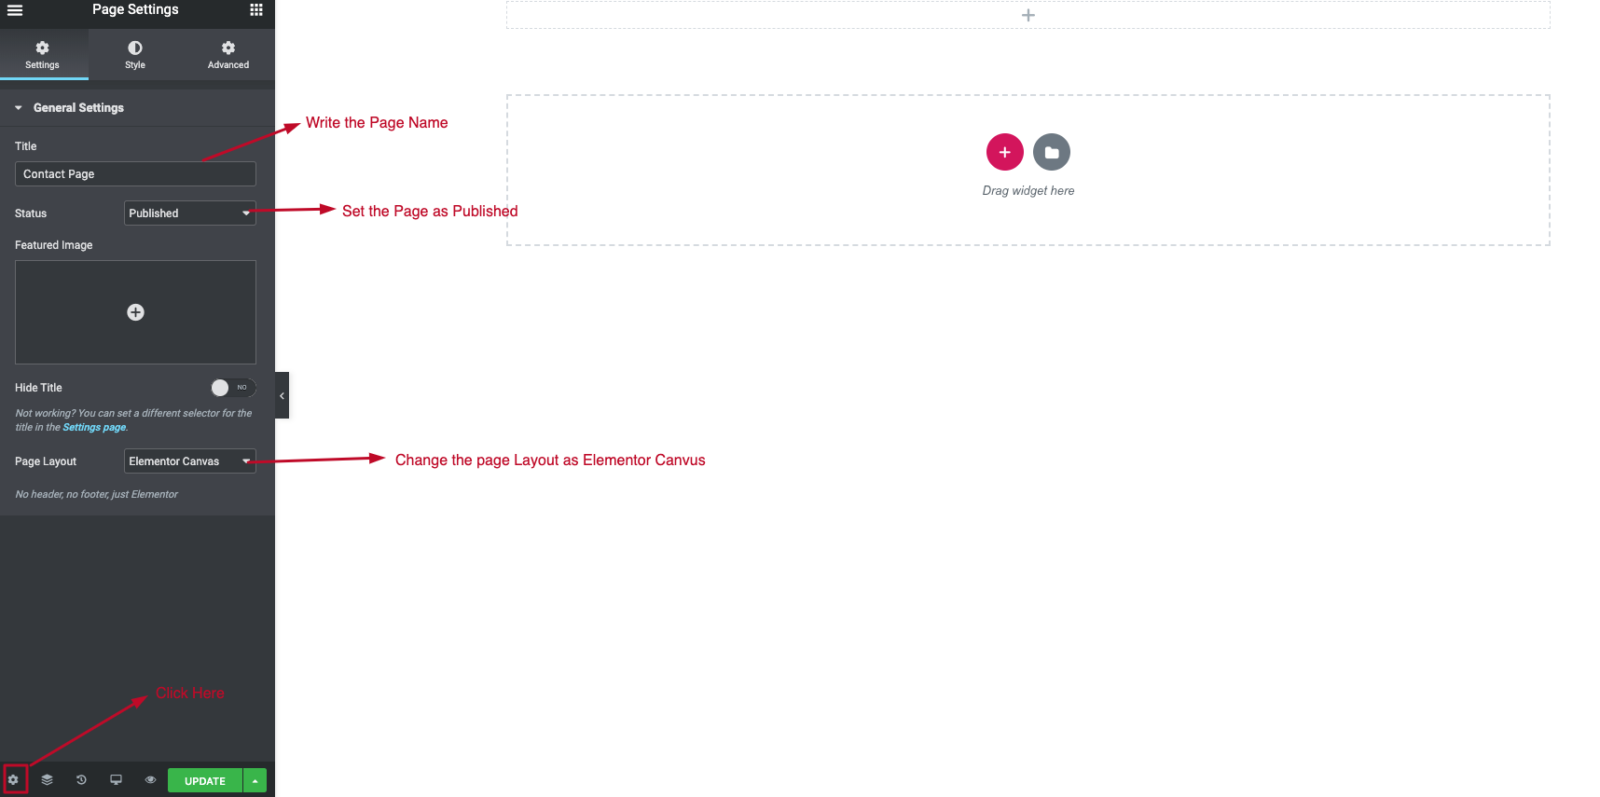
⇒ Write the page name as “Contact Page”. And change the page layout from default to Elementor Canvas. It’s possible to add images from this section.
However, you can write the page name with the drag-and-drop text editor from Elementor basic widgets, change colors, drop caps, and add images and backgrounds.
Step Three – Add the Contact Page Widget
Let’s get back to the editor. Click on the Plus button and select the first structure. It’s perfect for a contact page.


⇒ Go to the sidebar and then to the Happy Addons library. You will see the contact form 7 you installed in the beginning. Drag it and drop it on the Elementor editor.
⇒ Now select “Contact Form 1” from the drop-down menu.
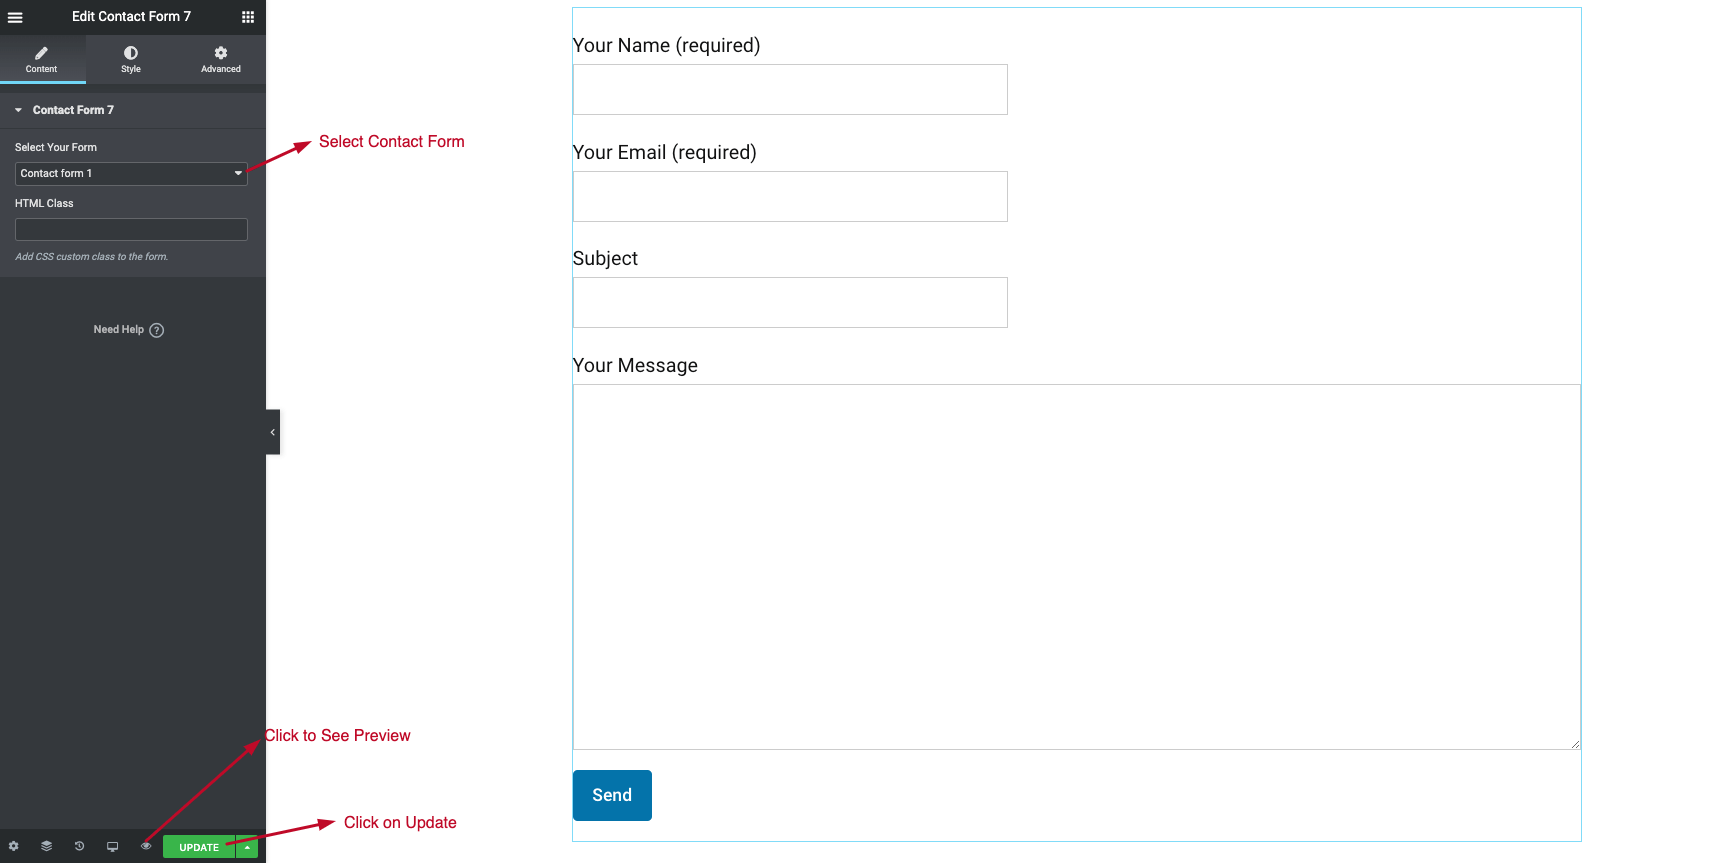
You can click on the “eye” sign to get a preview. Then click on publish the page. And, now your very first contact page is ready. You need just one step to cover.
Step Four – Add your Contact Page in Menus
It’s time to make the necessary changes to your menu. When you have a contact page, make sure it is visible in the menu bar unless the visitors won’t find it.
Hover over the “appearance” from the dashboard. Go to menus.
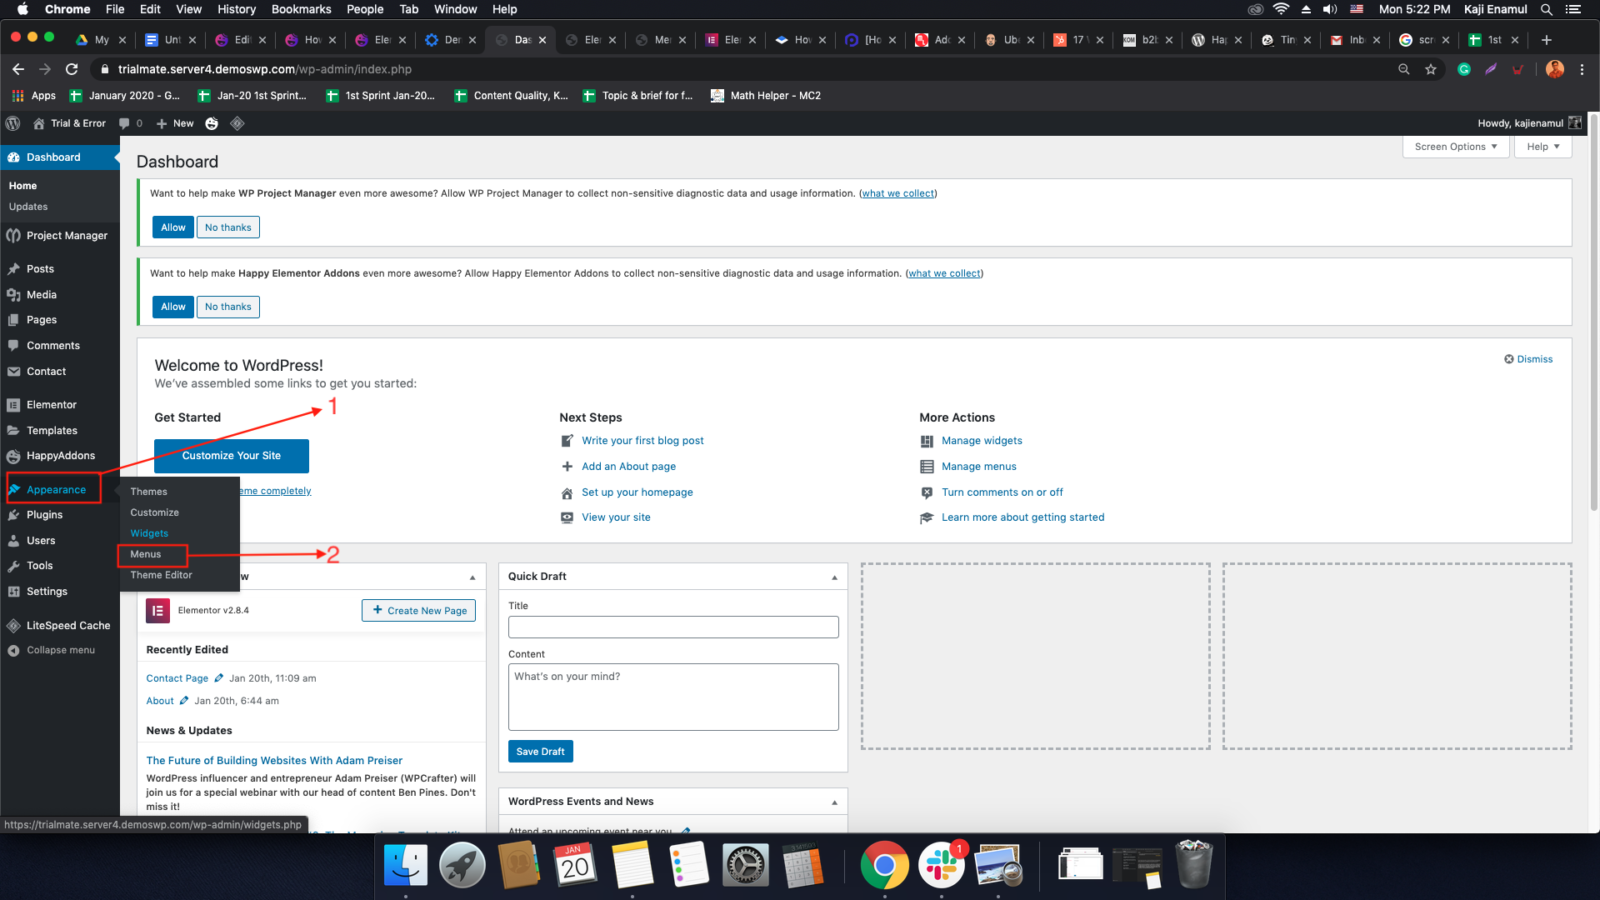
On the menu page, you can see the contact page you created a few minutes ago.

- Check the tickmark on the page you want to see on the front page menus.
- Click on “add to menu”
- Save Menu.
Well, let’s go to the landing page. Click on the page from your navigation bar. Your contact page with Elementor is ready and accessible to anyone.
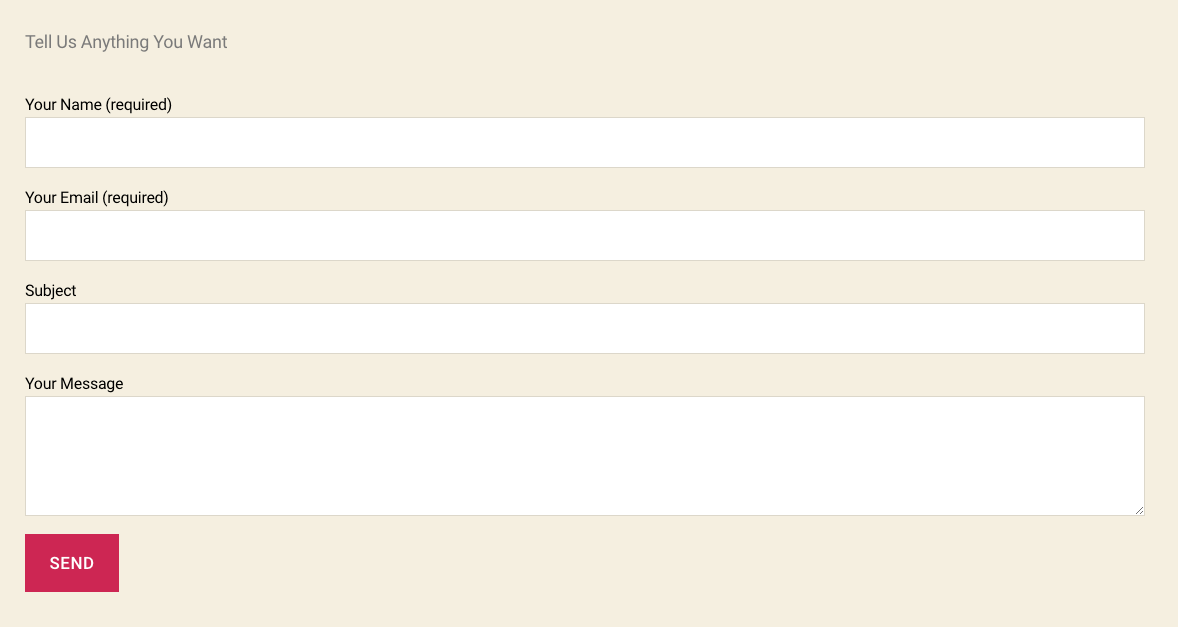
It will look like this. Here, you can use the drag-and-drop text editor as we did and guide users like “Tell Us Something You Want.”
Final Words on How to Create a Contact Page with Elementor
Now that you know how to create a contact page with Elementor and HappyAddons, it’s your time to customize it to any level you want. There are different layouts and styling options that come with your contact form builders. Besides, you can add other contact information and maps on the page to make it more outstanding.
So, have you got what you are looking for? If yes, do share this tutorial with others and spread the help.

