
A pricing list is a document or table that details the costs of products, services, or packages offered by a business. It provides customers with a clear understanding of pricing and may include various levels with corresponding costs. By helping potential buyers decide whether to purchase, it reduces pricing-related queries to the support team and enhances the overall user experience.
A comprehensive price list is essential for any website today that sells products or services. For example, eCommerce, restaurants, software companies, service-based agencies, etc. In this article, we’ll cover a clear guide on how to create a price list in WordPress with Elementor.
We’ll also describe the key features a smart price list must have to shoot up conversions. So, let’s jump into the post without further delay.
Key Features of a High-Converting Price List
There are several key features of a price to ensure it’s highly converting. Otherwise, achieving maximum conversions may not be possible, no matter how aesthetically beautiful the design is. So, before diving into the tutorial, let’s take a quick at the key features of a high-converting price list.
- Clarity and Simplicity
A great price list is easy to read and understand. Curate it with clear headings, logical layout, and concise descriptions. This will enable customers to find what they are looking for quickly.
- Highlighted Value
Instead of just listing prices, highlight the value of your products or services. Describe the benefits that explain why customers should spend on your products.
- Consistent Branding
Ensure the design, fonts, and colors of the price list perfectly align with the overall branding of the website. This can reinforce trust and professionalism.
- Transparency
Clearly explain if there are any additional costs, like taxes or shipping fees. Hidden charges can lead to cart abandonment and damage trust.
- Catchy Visual Elements
Add elements like dividers, borders, and shapes that make the price list visually appealing. But also ensure that you are not overloading the price list with unnecessary graphics that distract users.
- Mobile-Friendly Design
As so many users today browse websites from their phones, your price list must be responsive. Ensure it looks just as good and functions seamlessly on mobile devices.
How to Create a Price List in WordPress with Elementor
Creating pricing lists from scratch in Elementor could be time-consuming. HappyAddons is a powerful addon to the Elementor. It offers a feature-rich Price Menu widget by which you can create stunning price lists easily on your WordPress site.
In this section of the article, we’ll explain how to create a captivating price list on WordPress using this Elementor widget. But for that, make sure the following plugins are installed on your site.
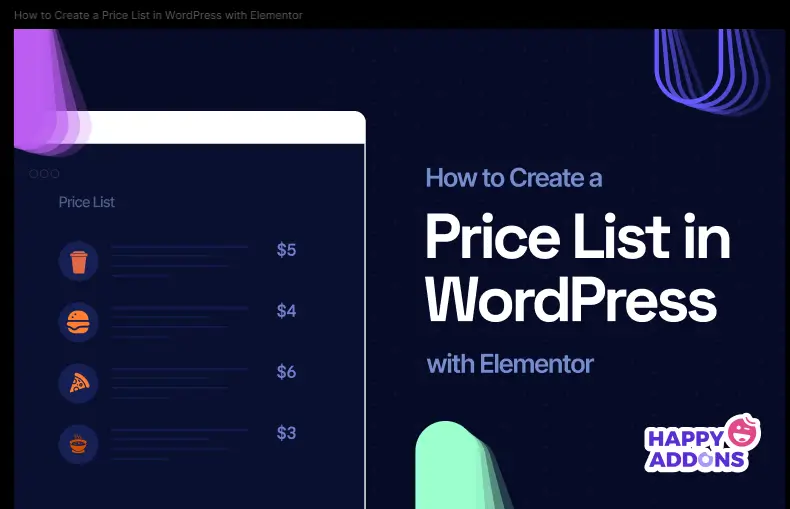
Once they are installed and activated on your site, start following the tutorial explained below. We’ll create something like the image attached below.

Get started!
Step 01: Create a Layout with Column(s)
Using the suitable column structure, create a layout for the pricing list. Click the plus (+) icon on the canvas. Choose a column structure you like. Then, customize its width.

Step 02: Drag and Drop the Price Menu Widget to Elementor Canvas
Find the Price Menu widget. Drag and drop it to the column structure you created just a while ago.

A default price list will appear with two items.

Step 03: Select a Price List Style
Expand the Presets section under the Content tab. You’ll see ten readymade price list styles there. Click on the style you like. You will see that the design of your default price list on the canvas has changed.
Thus, explore all the styles and stay with the one you finally feel is perfect.

For this tutorial, we’ll select the Design 4.

Step 04: Add More Items to the Price List
To add more items to the price list, expand the Price Menu section. Then, click the + Add Item button.

# Add Product Information
This will add a new tab under the Price Menu section. Fill it with your product name, description, price, and information as essential. You’ll see the new information added to the canvas in real time.

Elementor is now AI-powered. So, you can use its AI feature to curate wonderful product titles, descriptions, and more for captivating users. Here’s a guide on how to use Elementor AI.

# Add Product Price
Scroll down the tab, and you’ll see the option to add product price. Fill in both fields (old and current price), or you may leave the old price field untouched. But filling the old price field can add a marketing value.

# Add Product Image (Optional)
The price menu widget allows you to add an image for each item. By clicking this image option, you can upload and add a suitable image to present your product/item on the list graphically.

You can see that we have added an image next to the item of the price menu widget using the option.

Now, expand the other tabs and add suitable images for their product items. You can see that we have added images to the other tabs.

In the same way, you can add as many items as you want to the price list.

Step 05: Configure Settings for the Price Menu Widget
Expand the Settings section. You’ll get options to customize the Title HTML Tag, Image Resolution, Image Position, Content Alignment, Title Price Separator, and Item Counter.

Take a look at the things you can do with these options on the price list.
- Title HTML Tag – Set heading type (h1, h2, h3, h4, h5, or h6) for the product title.
- Image Resolution – Display product images as thumbnails, medium, large, or something else.
- Image Position – Show the images on the right, left, or top.
- Price Position – It allows you to put the product price beside the titles or at the bottom.
- Content Alignment – Arrange your text content on the left, right, or centrally.
- Title Price Separator – Add a separator shape between the produce titles and prices.
- Item Counter – Exhibit numeric listicle value for each item on the list.
Since adding screenshots for each option would make the tutorial too long, everything is explained in a short video clip below.
Step 06: Explore the Other Sections Under the Content Tab
The Content Tab has several more options. But we don’t think there’s any need to explore them further, because most of them are very simple and you can understand them on your own.
Among them, the Happy Mouse Cursor is quite special. It allows you to display a customized cursor while hovering over the specific web element. We have already covered a detailed blog post on this feature.
Here’s a detailed guide on how to add cursor hover effects in Elementor.

Step 07: Stylize the Price Menu Widget
Come to the Styles tab. You’ll get several options under the tab to customize the spacing between the items, title, pricing, images, and description. Check how to do it.

# Customize Item Spacing
Expand the Menu Box section. The first two options are Item Spacing. It refers to the distance between the items on the list.
By default, its value is 20. We have reduced it to 10 for the better design of the list.

The next option is Padding. It allows you to adjust the spaces between the elements on all sides (top, right, bottom, and left) within the widget. If not necessary, you can leave the padding option as it is.

# Add Background Color
You can add background color to the price list section in two ways – section background and widget background. You must know both ways so you can subtly beautify the section.
To add a color to the section background, select the entire section by clicking the six-dotted icon. Then, expand the Background section under the Styles tab.
Hit the Background Type to enable the color option. Finally, select a color that you like for the section.

To add a widget background color, select the widget by clicking the pencil icon on it.
Next, go to the Styles tab. Hit the brush icon next to the background type under the Menu Box. Finally, choose a color you love for the price list.

# Stylize the Titles of the Price List
Expand the Title section. You’ll get options to customize the title typography, color, hover color, margin, border type, space, box shadow, and separator.

This blog post will be so long if we explain every single customization option. So, in this short video clip, we’ve explained how you can stylize the titles of the price list.
# Stylize the Pricings
Expanding the Price section will allow you to customize the color and typography of the widget pricing (both old and current prices).

# Stylize Images
In the same way, expand the Image section. You can customize the width, height, space, box shadow, border type, border with, border color, and border radius.

# Stylize the Description
Last of all, you need to stylize the item description on the price list. To do this, expand the Description section. Customize the typography and color.
By default, the description comes as off-white. But you can now see in the below image that we have made it black.

Thus, you can acutely stylize the entire price menu widget, meaning your price list.
Step 08: Make the Price List Mobile Responsive
As a considerable percentage of visitors to any website comes from mobile devices, you should perfectly optimize the price list for mobile and tablet screen sizes so you don’t miss any potential traffic and leads.
Click the Responsive Mode option at the bottom of the Elementor panel. You’ll see the different size options on the top of the Elementor canvas.
By clicking on those options, you can switch to different screen sizes to check how the price list is displayed on them.

If you want to customize the price list for a particular device screen, start by selecting that desired screen size. Then, do the necessary customizations. Your modifications will be saved exclusively for that screen.
Note: Don’t delete any element. Because if you delete an element, it will be deleted from all the screens, not just from a specific device.

Step 09: Narrow the Width of the Price List Layout (Optional)
By default, any Elementor widget is displayed wide across the entire canvas, including the Price Menu widget. But for better presentation, you may want to narrow down its width.
To do this, go to the Advanced tab. Under the Layout section, come to the Margin option. Set values on the right and left boxes. You’ll see the changes immediately.
Thus, do the same also for other screen sizes as shown in the above step.

Step 10: Preview the Price List on the Frontend
Go to the preview page. Check if the price list looks good on all screen sizes by changing the width of your browser. You can see it looks quite on our end in the video clip attached below.
You can publish the price list once all the settings and customizations are done.
Conclusion
So, creating a price list in WordPress with Elementor is quite a simple and user-friendly way to display your products and offers in a clean and organized format. However, before we end, we want to clarify one thing that many users are still confused about – the differences between the price list and the pricing table.
While pricing tables are designed to showcase or compare different pricing packages, price lists focus on presenting individual items with their respective pricing. You can explore the following tutorials to learn more about creating tables using Elementor.