Are your website visitors drifting away from the pricing page, and you are losing the expected conversion rate?
Try the Happy Addons’ Pricing Table widget to create a new pricing table for your website. Or redesign the current one to improve your user experience and ultimately boost the conversion rate.
A pricing table is an essential feature for every website that offers products or services. A well-designed pricing table can help to increase the conversion rate of a website.
In this blog, we’ll walk you through how you can use the Happy Addons’ Pricing Table widget to improve your pricing table design.
Let’s get started.
Why Should You Use Happy Addons’ Pricing Table Widget

Creating a pricing table for your Elementor website is very easy if you have the right tool on your hand. Elementor itself offers a Price Table widget to design beautiful tables. With Elementor, you can add the table Header Title, Price, Currency & Period, Sale Mode, Features List, CTA Button, and Special Ribbon which are common features of a pricing table.
But if you need more advanced options like managing the heights of the different tables, add Tooltips, upload SVG images most importantly want unlimited possibilities while designing an engaging pricing table, you should consider the Happy Addons’ Pricing Table widget.
This handy widget allows you to create a custom table from scratch. You can also use its prebuild templates for showing the pricing plan and save valuable time.
How to Use Happy Addons’ Widget To Design & Customize Pricing Tables in Minutes
Happy Addons is one of the best Elementor addons that comes with 90+ free and professional widgets and tons of pre-built blocks and templates.
You can use the power of Happy Addons’ along with Elementor to design your dream website.
Now in the following segment of our blog, we’ll guide you on how to design a pricing table in two simple ways, both using the power of Happy Addons.
- Add Pricing Table Using The Happy Addons Widget
- Create Pricing Table To Your Site Using Happy Addonts Premade Template Blocks
Also, you need to have the following plugins on your website before you start designing your pricing table.
- Elementor (Free)
- Happy Addons (Free)
- Happy Addons Pro
Do make sure you have installed and activated both the Free & Premium version of Happy Addons.
First Way: Add Pricing Table Using The Happy Addons Widget
Let’s show you how to manage and work with the content of the Happy Addons Pricing Table widget. To build the structure of the design, first, we added three columns on the Elementor canvas.
Let’s go for it.
Add Pricing Table Widget
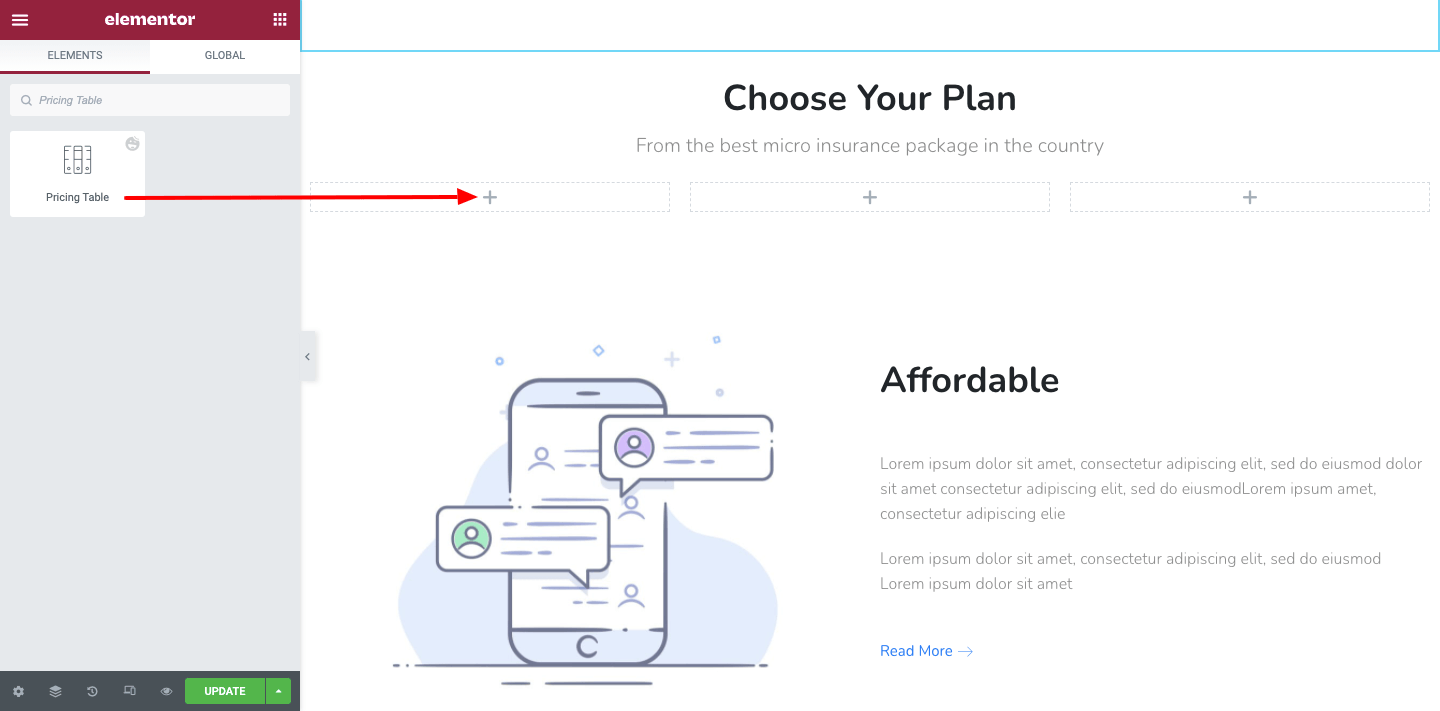
First, you need to add the Pricing Table widget to the preferred part of the page. You can find it from the widgets area on the left side.
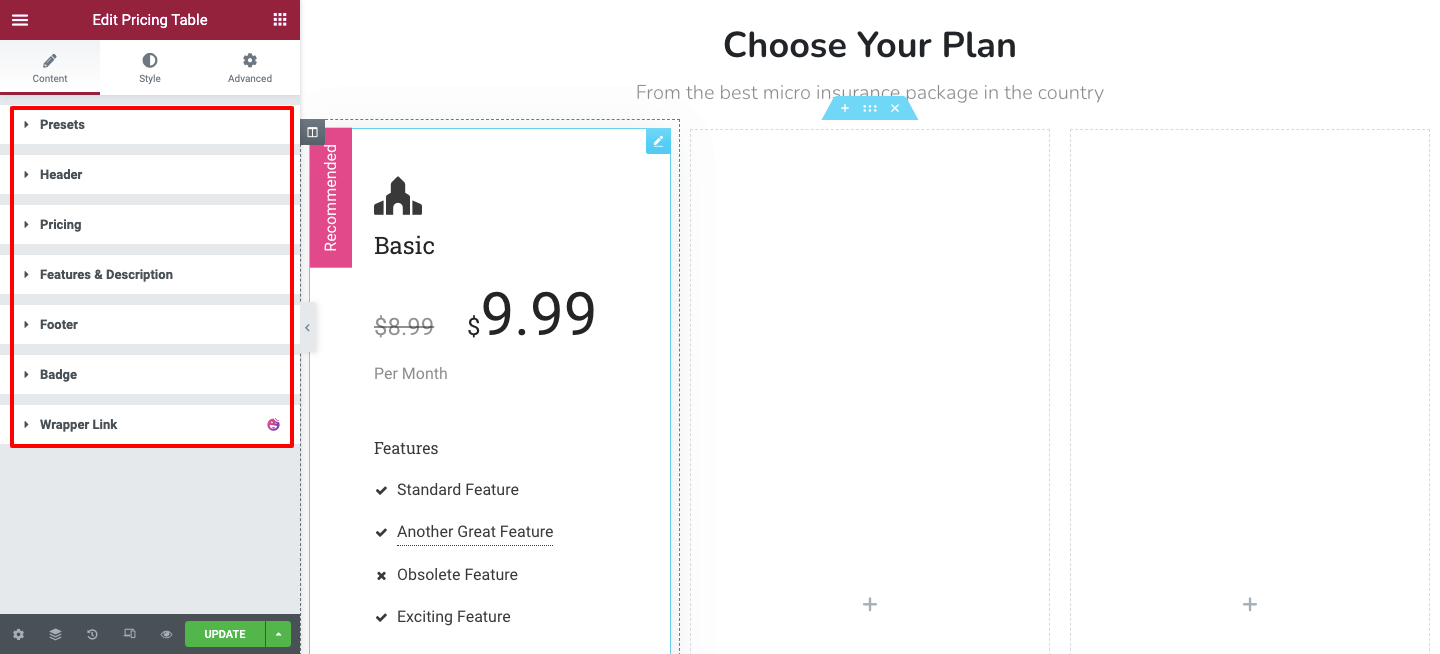
After adding the widget, you will see the default pricing table design and you can customize it on your own here in the Content area. These are the options that can help you to manage the table content.
- Presets
- Header
- Pricing
- Features & Description
- Footer
- Badge
Presets Design
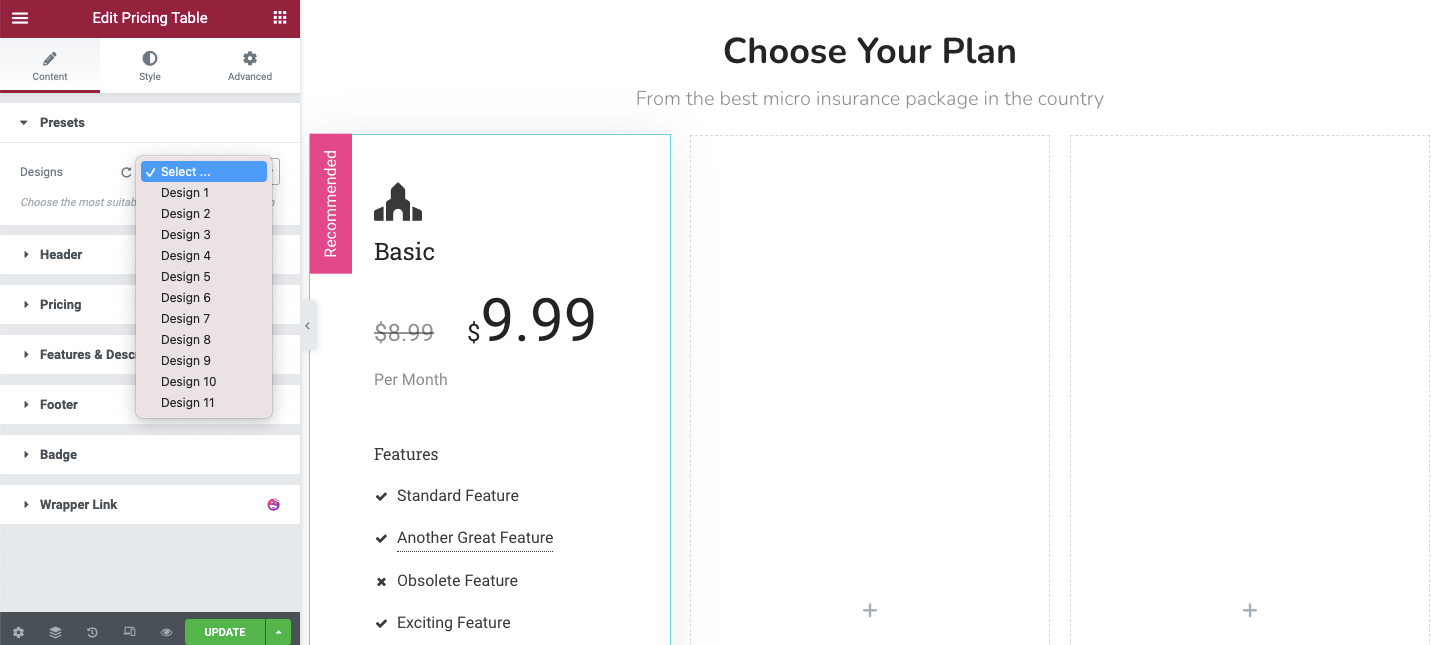
In the Content-> Presets, you can set the table design. You will get 11 Designs here. Select the preferred one for your need.
Manage Header Content
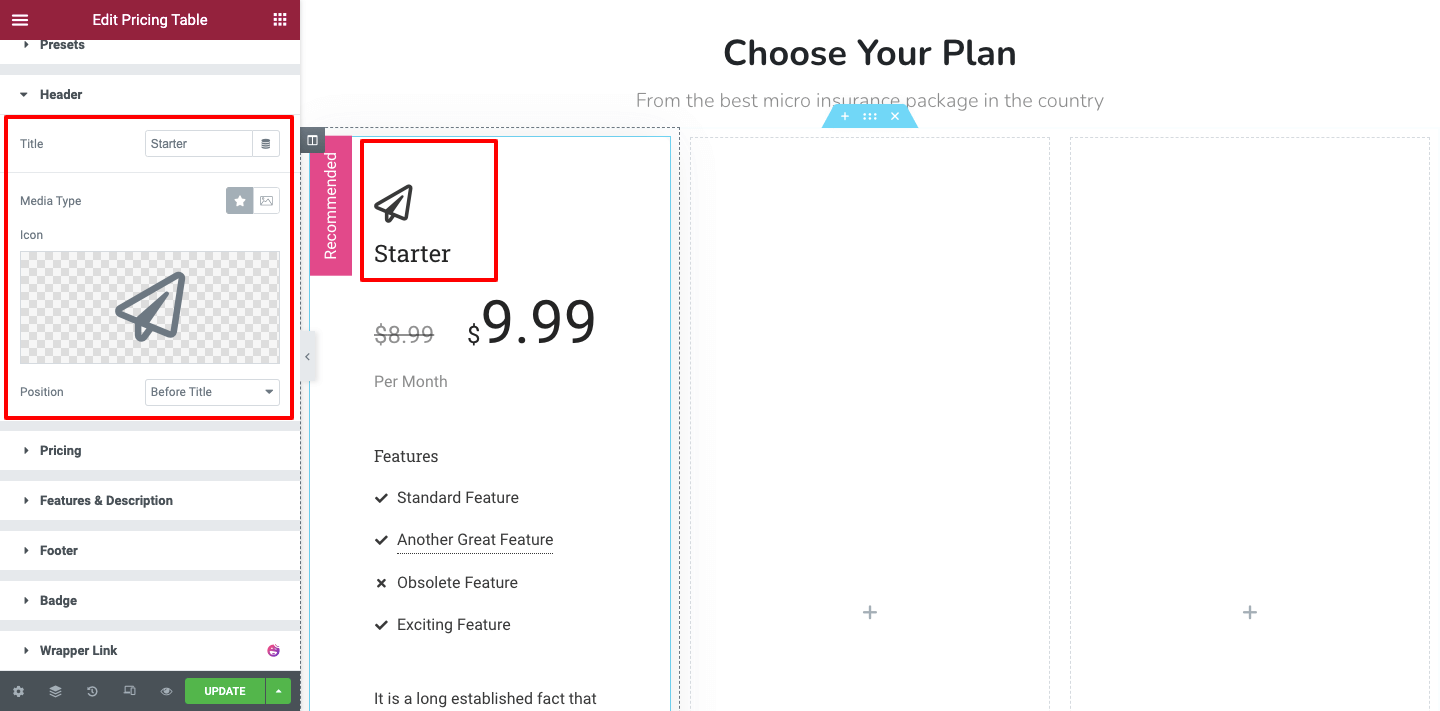
Go to the Header area to manage the table header. Here, you can add the title, icon, and position of the header content.
Set Pricing Content
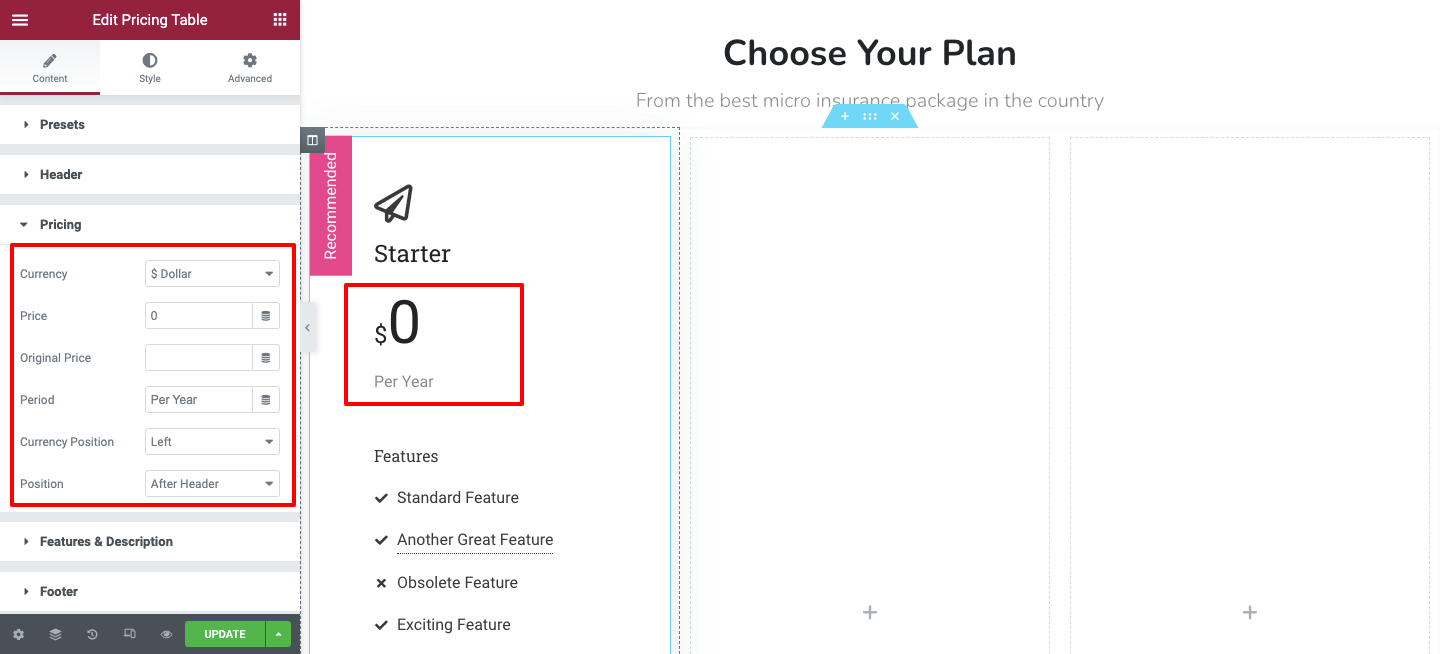
Now, you can set the pricing plan in the Content-> Pricing area. You can add currency, price, original price, set the currency position, and the entire pricing position here.
Features & Descriptions
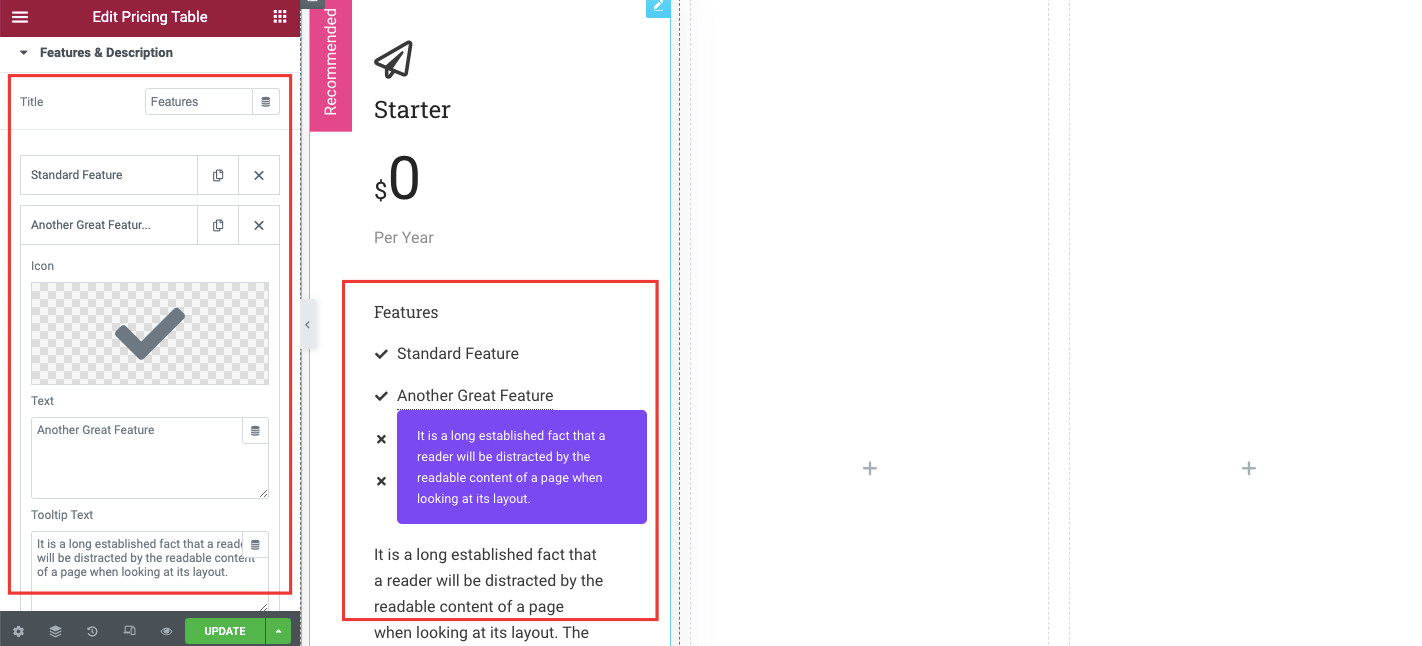
The Feature & Description option helps you to add your pricing plan details. You can add multiple items and a specific description. Also able to write a Tooltip text and define the Features Alignment in your own way.
Pricing Table Footer Content
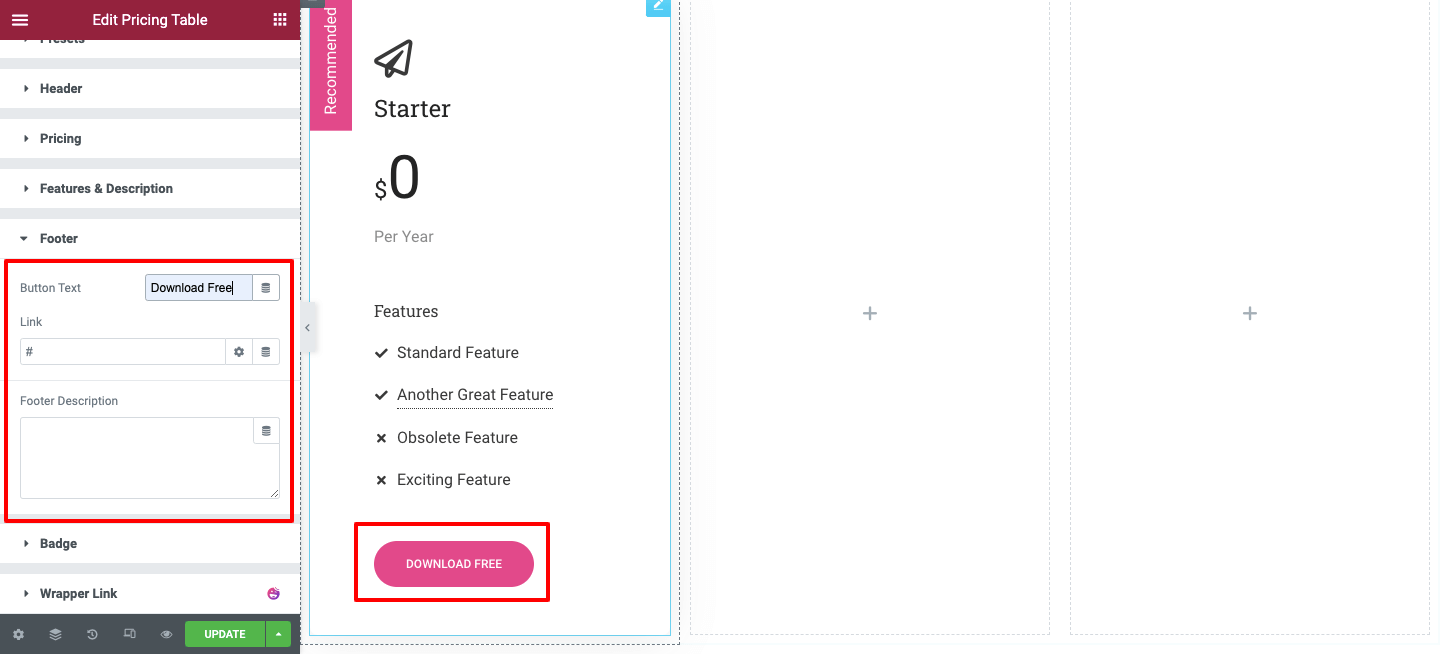
If you want to change the button content of the pricing table, you can do it here in the Footer section. You can add button text, custom links, and a footer description as well.
Badge
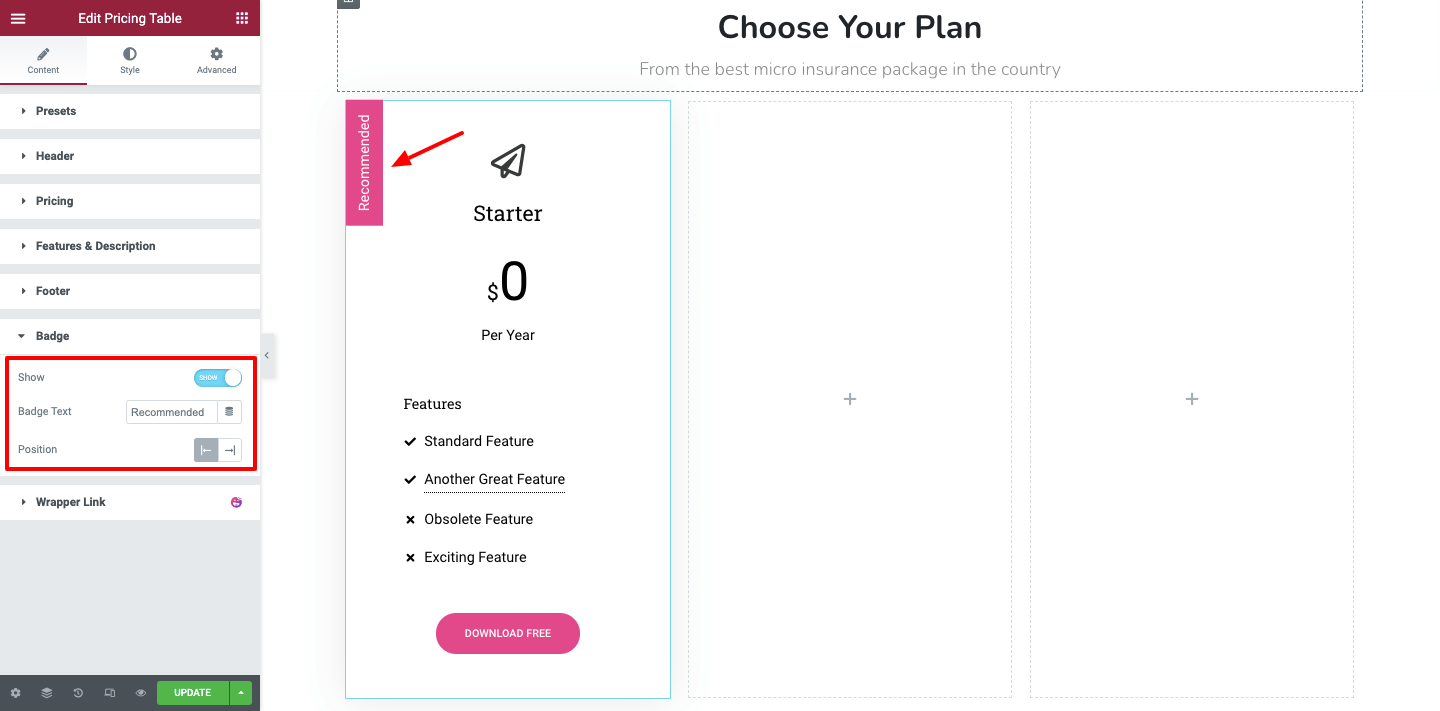
Want to display a badge to make a plan stand out? You can do that by showing and hiding the badge from the Badge option. You write the text of the badge and set its position as well.
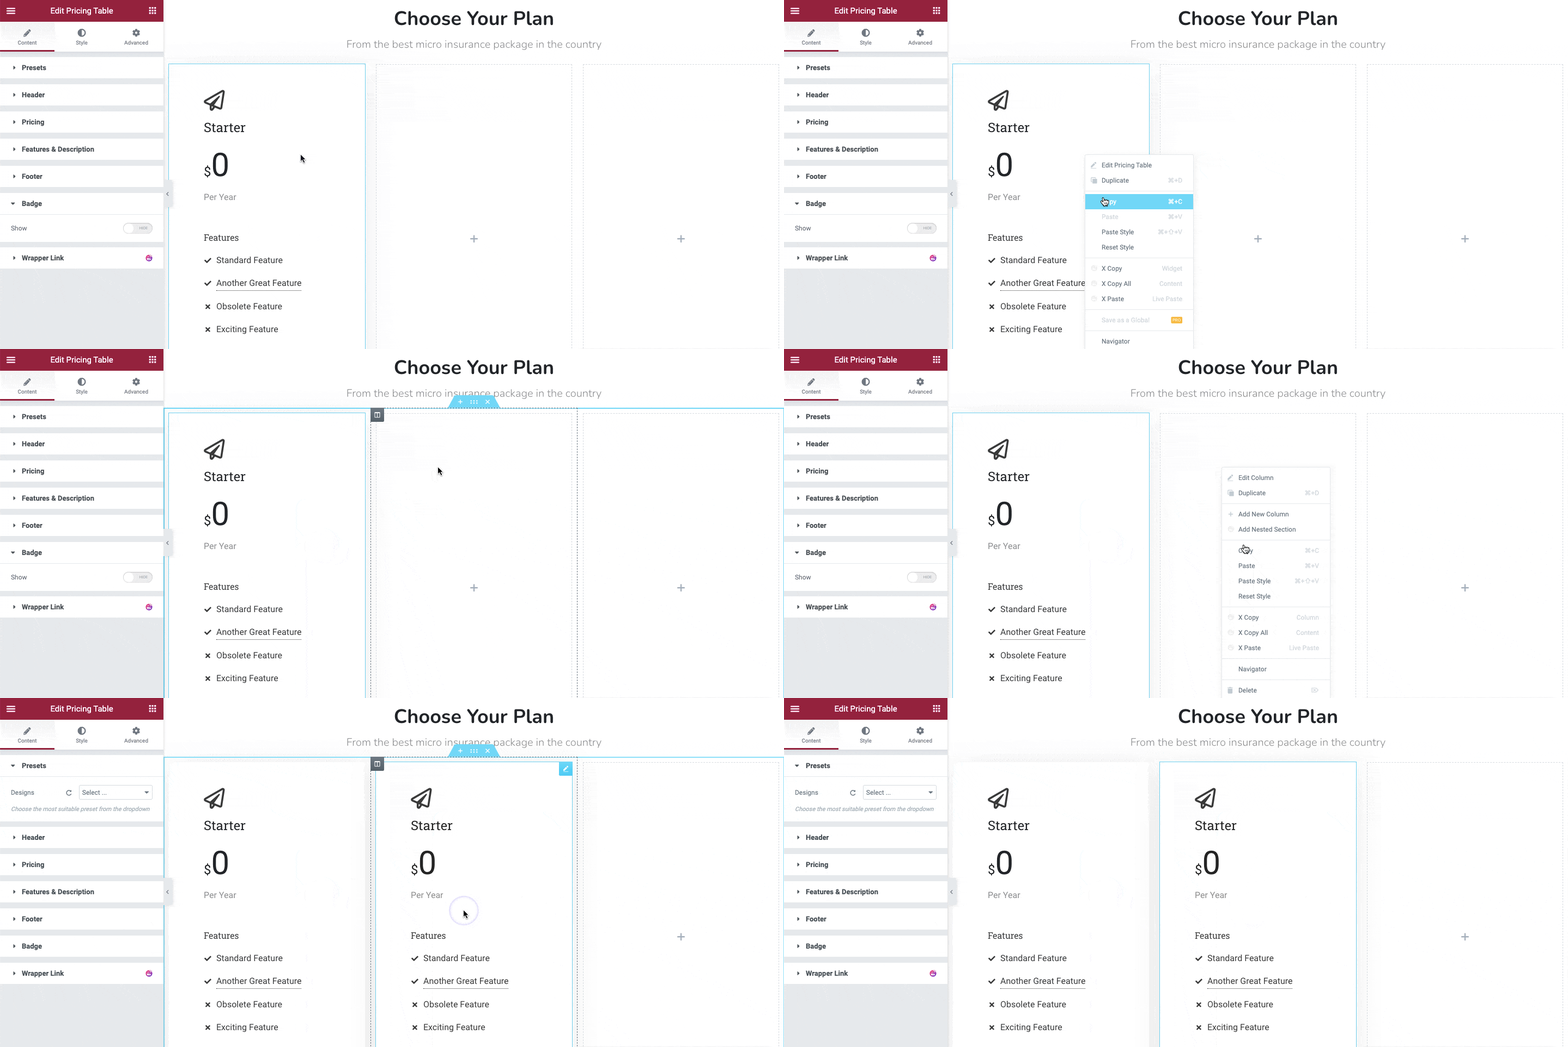
We have almost the same type of data on all the tables (plans), so we copied the entire table and pasted it on the next columns as well. If you have distinct content on every table, follow the above method again to craft that from scratch.
If you have similar content on each table, just like us, just right-click on the individual columns section and copy the design and simply paste it into the other column. You can follow the below image.
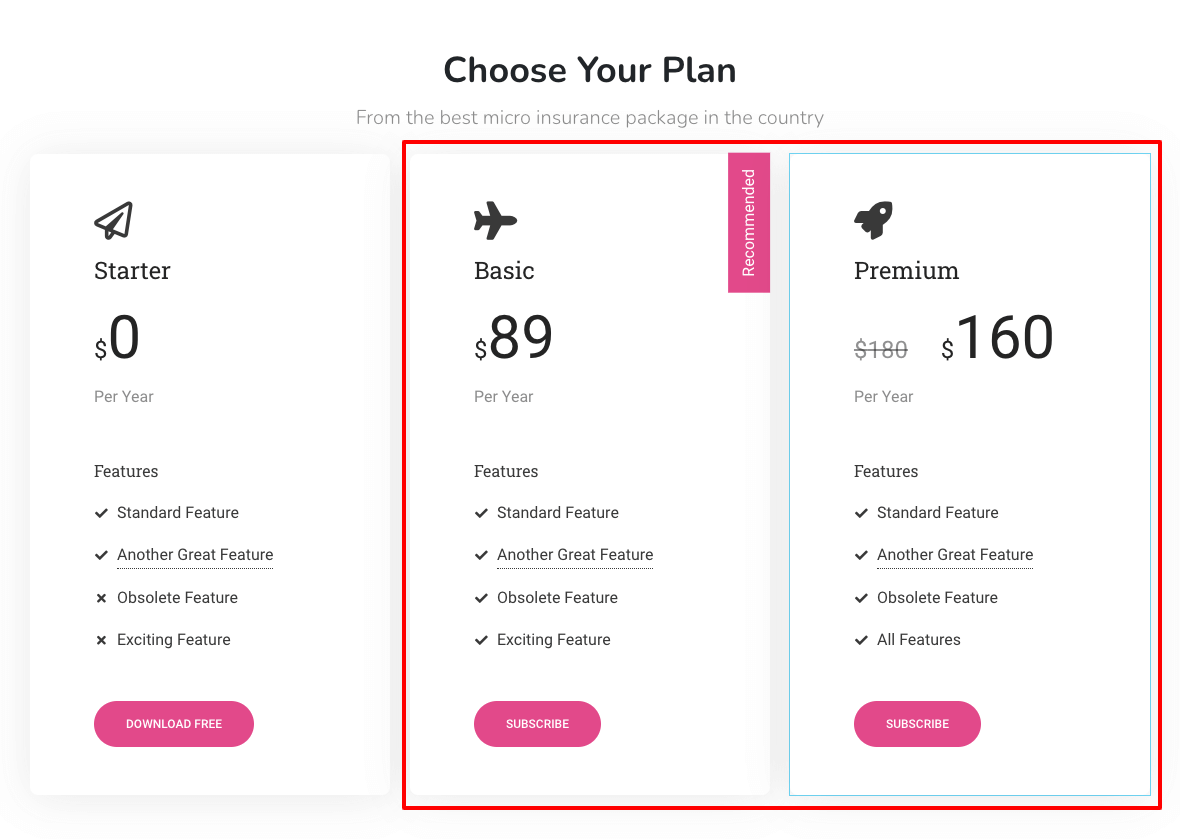
After adding the other two tables, here is how our entire table looks like.
Customizing the Pricing Table
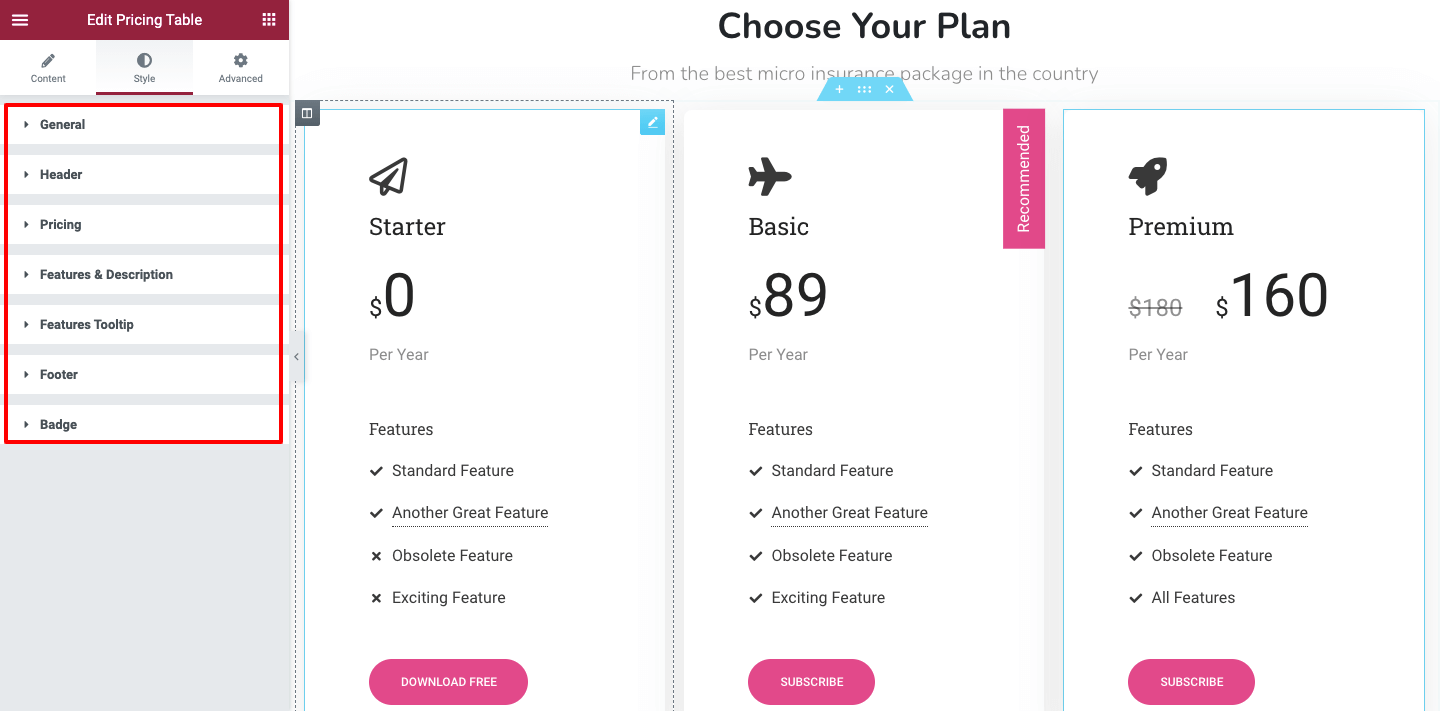
In the Style section, you’ll get all the necessary styling options to customize the design of your pricing table. These are the settings that will help you.
- General: The general section will help you to customize the general content of the table.
- Header: You can redesign the header content with this option.
- Pricing: The pricing area allow you to restyle the default pricing content.
- Features & Description: You can decorate the feature & description content in the area.
- Features Tooltip: You can edit the tooltip design in this area.
- Footer: Here, you can change the current style of the footer.
- Badge: You can style the badge in your own way.
Final Preview
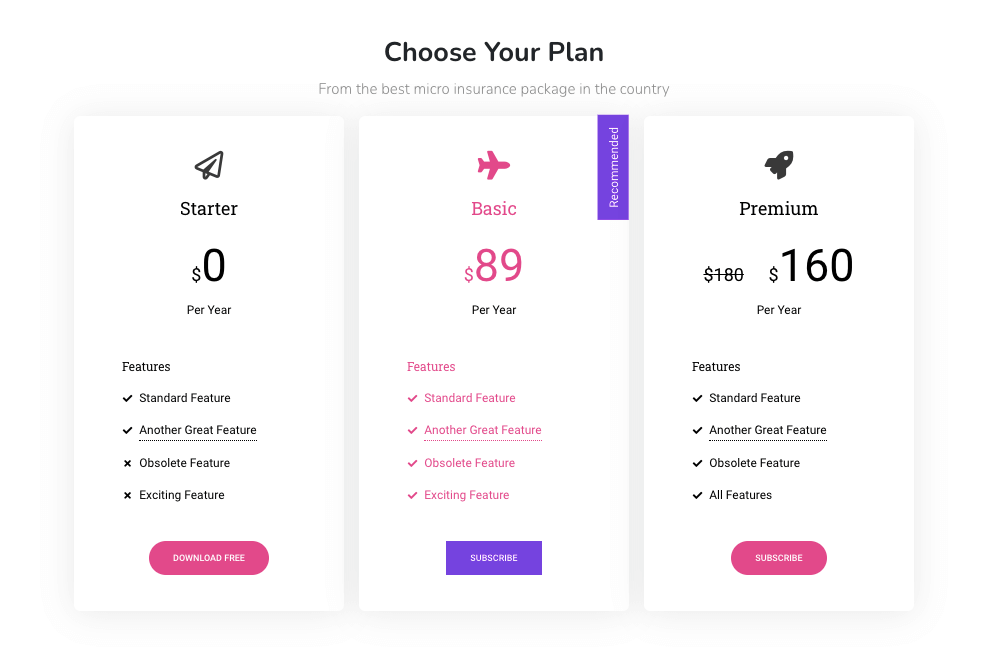
We’ve changed the essential styles of our pricing table and the final look of the table looks like the image below.
That’s all.
Second Way: Create Pricing Table To Your Site Using Happy Addons Premade Template Blocks
Up until now, we’ve shown you how you can create a pricing table from scratch. Here in this part of our blog, you’ll learn the other way of making pricing tables for your Elementor website.
If you are on a tight schedule and do not have enough time to design the stuff from scratch, you can use the handy prebuild pricing blocks.
Now we are going to show how can you use the premade Happy Addons’ pricing block to add a stunning pricing table to your website.
Let’s do it.
Find Happy Template
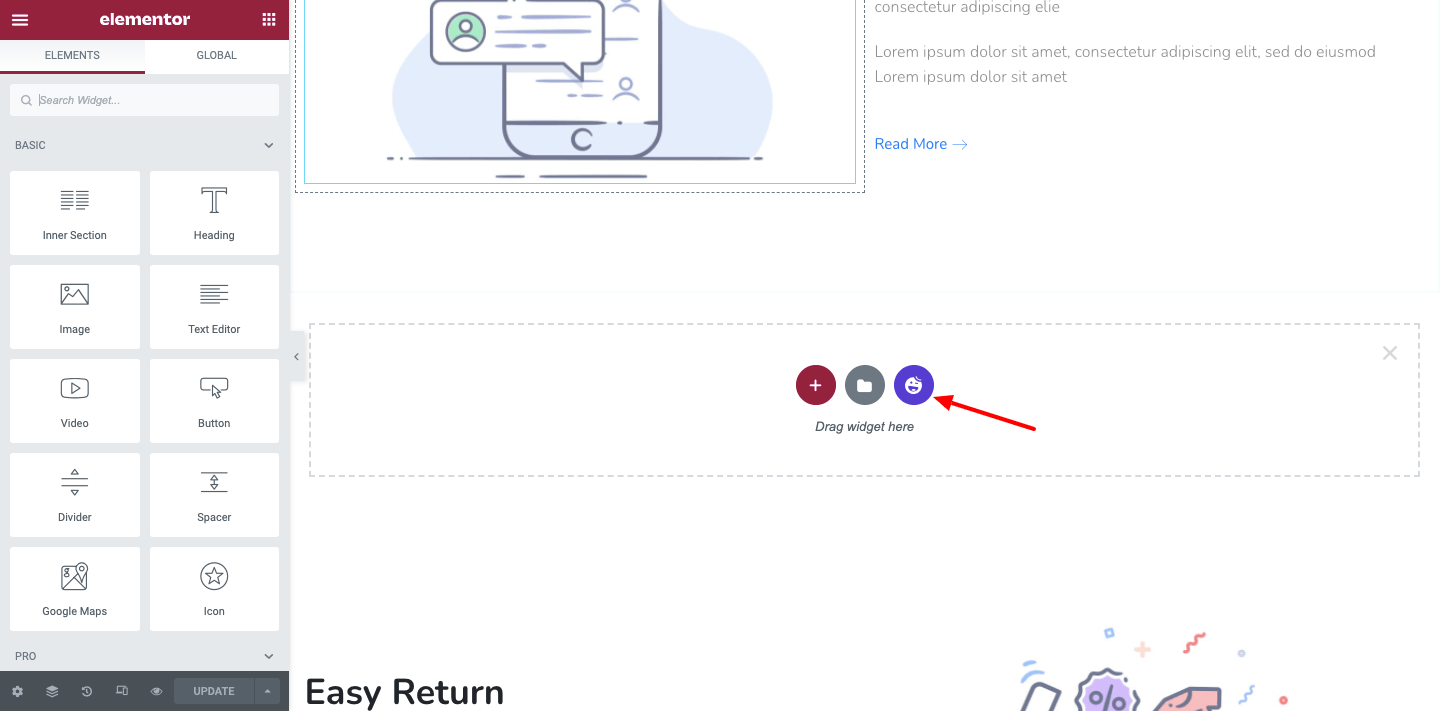
First, click on the Happy Template Icon from the Elementor canvas and open the Blocks & Templates area.
Insert Suitable Pricing Table Template
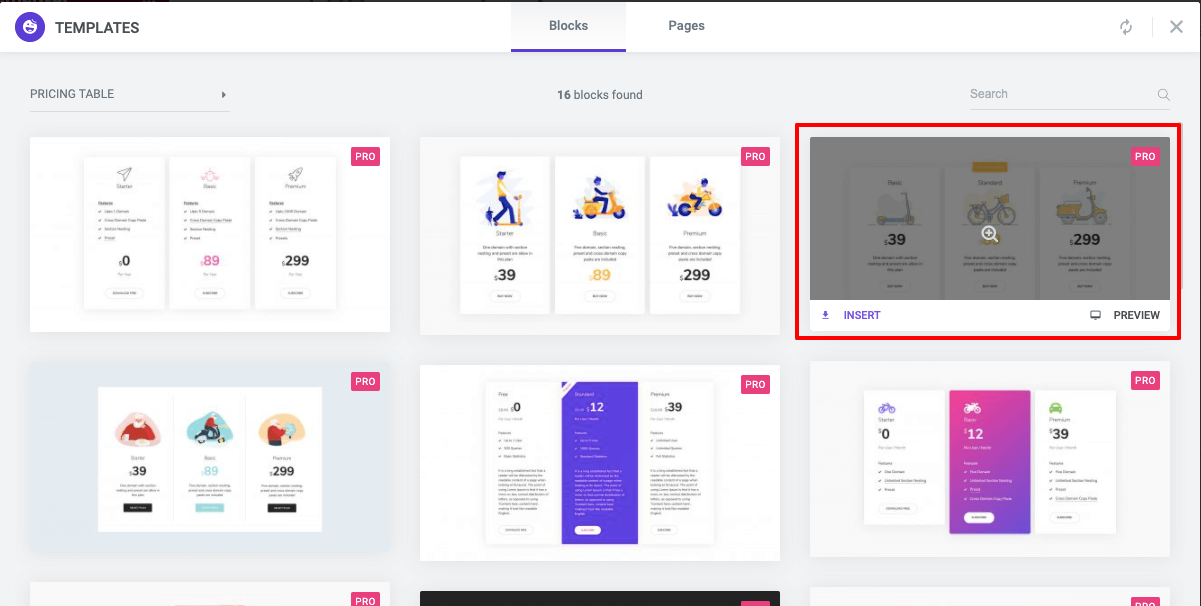
On the next screen, you’ll find all the Blocks. Select the Pricing Table blocks or you can search it using the search bar. Finally, choose the most suitable one and Install it on your website.
After that, just change the content according to your need!
That’s it. Your site is equipped with a beautiful pricing table.
You can also watch this video.
Are You Ready to Create a Pricing Table For Your Site
A simple and organized WordPress pricing table gives the customers a perfect picture of your pricing plan. It helps them to choose a suitable plan easily according to their needs.
In this blog, we’ve discussed how to create an Elementor pricing table with the power of the Happy Addons widget. Also, it shows how you can use the premade template blocks to design an engaging table.
If you have any queries regarding this tutorial, you can write that in the comment box below.
Like this article? We’ve written lots of useful tutorial blogs on Elementor, WordPress, and Happy Addons. You can join our newsletter to get all of these for FREE.

