

The success of any web design today largely depends on how effectively it visually communicates its messages and ideas to users. Image comparison slider is a powerful concept that can elevate your website’s visual storytelling power to the next level. You can easily make these sliders using a WordPress tool.
Elementor can help you in this regard. This powerful page builder plugin enables you to create stunning and captivating image comparison sliders on your website without any coding. In this blog post, we’ll cover a detailed tutorial explaining how to create an image comparison slider in Elementor.
Before that, we will briefly discuss what the Image Comparison Slider is and some of its special use cases.
What Is the Image Comparison Slider?
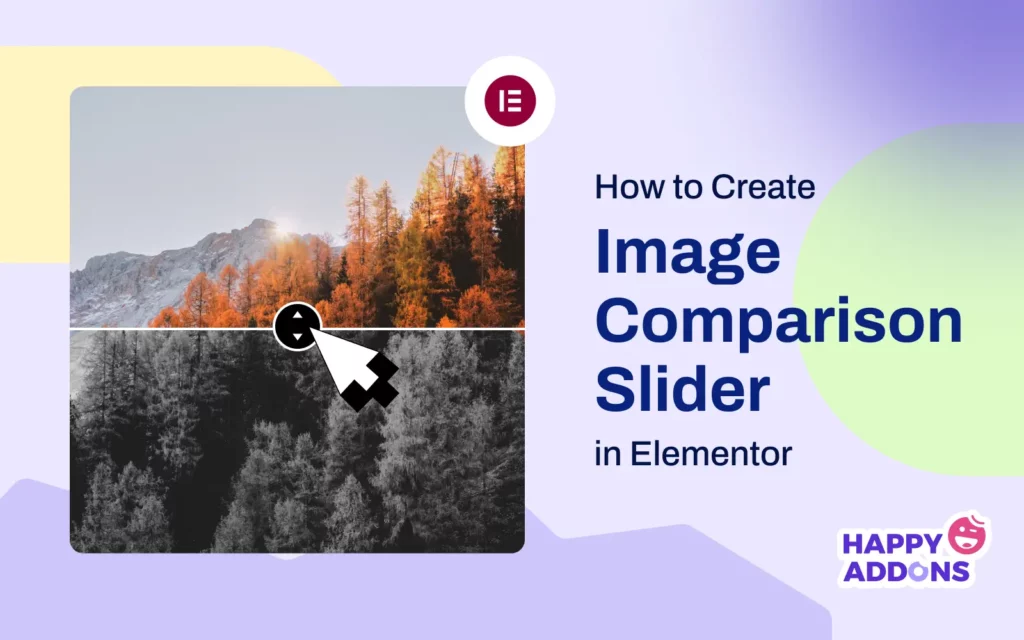
The Image Comparison Slider is a web element that allows users and visitors to view two images side-by-side and compare them with a divider. You can see the effect by sliding the divider back and forth. This web feature/element enables you to visually showcase the before-and-after scenarios of any product or information, highlighting their differences.
Some Special Use Cases of the Image Comparison Slider
Below, we have listed several special use cases where the Image Comparison Slider can enhance your visual storytelling. Take a quick look at them for inspiration.
- Before and After Visual Comparison
This is particularly useful in industries like fashion, fitness, beauty, design, home renovation, etc., where you can show the transformation resulting from a product or service.
- Highlight Photo Edit
If you are a photographer or graphic designer, you can showcase your editing skills by comparing edited and unedited photos.
- Results from Treatments and Makeovers
This feature is used in the beauty industry to display the results of facial & skin treatments, haircuts, makeovers, and cosmetic products used.
- Explain Feature Enhancement
Software developers can use this feature to demonstrate the changes made to the visual enhancement of any software, web application, theme, or mobile application.
- Display Historical Changes
In the field of architecture, you can visually tell how urban cities will look different after development. Besides, you can also exhibit how your surroundings have changed over time.
How to Create an Image Comparison Slider in Elementor: Step-by-Step Guide
Elementor is immensely popular in the market, with over 7 million active users, which is relentlessly increasing. If you have ever dreamed of designing your website on WordPress without any manual coding, you’ll surely fall in love with this page builder due to its feature-richness and user-friendliness.
However, Elementor itself doesn’t have the Image Comparison tool or feature. But don’t worry! HappyAddons, a powerful addon of Elementor, has a widget named ‘Image Compare,’ which you can use just like drinking your favorite juice. Let’s begin the tutorial.
Step 01: Install Elementor and HappyAddons on Your Site
At the beginning, make sure you have the following plugins installed and activated on your website.
You don’t need premium versions for this feature, as HappyAddons provides it for free.

Step 02: Open a Post/Page with Elementor
Now, open the post/page you want with Elementor to which you want to create an Image Comparison section. The Elementor Canvas will open up on your screen.

Step 03: Create a Section for the Image Comparison Widget on the Canvas
If you have already used Elementor, you know how to create a new section to add widgets. We are still showing it for the sake of new users.
Click the plus (+) icon on the Elementor Canvas.

Next, select a column structure according to the width of the Image Comparison section.

You can see a new section has been added to the canvas. We’ll add and create an image comparison section within this column.

Step 04: Drag and Drop the Image Comparison Widget to the Column
Type Image Compare into the search box on the top of the Elementor panel on the left side of the Elementor Canvas.

Now, drag and drop the Image Compare widget to the section you created just a while ago.

You can see the Image Compare widget has been added to the canvas. Next, we’ll add content to widget in the next step.

Note: If you ever experience 500 internal server errors, you can solve them by following this guide on how to fix 500 internal server errors.
Step 05: Add Images to the Widget
You need to add two images to the widget, one of which can be the previous or original version, and the other is the edited version.
Come to the Content Tab. Just below the tab, you’ll see the Images section. You can add two images, one for before and the other for after. Add images right away.

We have added two images to the widget. One is slightly low-quality, and the other is top-notch.

Hover your cursor on the widget. The labels will be visible. You can change the label names using the pointed option in the image below. Do it if you want.

Step 06: Customize Settings for the Image Compare Widget
Expand the Settings section under the Content tab. You’ll get four options: visibility ratio, orientation, hide overlay, and move handle. You can do the following things with them.
- Visibility Ratio – By increasing or decreasing the visibility ratio, you can reposition the divider between images of the widgets.
- Orientation – Show the divider, whether horizontally or vertically.
- Hide Overlay – Display or hide the overlay effect.
- Move Handle – You can control how users will explore before and after images through this option.

Step 07: Stylize the Image Compare Widget
Go to the Styles tab of the Image Compare widget. You’ll get options to customize the handle and label elements.

The Handle option will let you customize the appearance of the handle in between the two images on the screen. Things you can customize here are the handle bar, handle arrow, box height, border type, border width, and border radius.

Next, expand the Label section. From this section, you can customize the label padding, position, border type, border radius, color, background color, box shadow, and typography.

Step 08: Preview the Image Compare Widget
Come to the preview mode of the page. Drag the widget’s handle left and right to see if it works. In the video clip below, you can see our widget is working nicely.
Thus, you can create an image comparison slider on the Elementor website just like a pro. Explore this guide on how to add tooltip in Elementor to take your site’s navigation to a new height.
FAQ on Image Comparison Slider in Elementor
So far, we have described the tutorial and theoretical parts of today’s discussion. We will now answer some questions that people usually ask online related to today’s topic.
What types of images can be used in an image comparison slider?
The Elementor Image Compare Slider supports various image formats, including JPEG, PNG, WebP, and GIF.
Is the image compare widgets mobile-friendly?
Yes, all the Elementor widgets are mobile-friendly. You can manually optimize the layout of the widget separately for different screen sizes.
Does the Image Compare widget improve user engagement?
Yes, the Image Compare widget can improve user engagement by offering an interactive experience to explore differences between images.
Is there a free plugin for creating image comparison sliders?
Yes, just install the free versions of the Elementor and HappyAddons plugins. You’ll get the Image Compare widget for free in the HappyAddons plugin.
Are there any SEO benefits in image comparison sliders?
Although the image comparison slider doesn’t directly offer any SEO benefit, it can effectively enhance user engagement which may indirectly boost your SEO score.
Closing Up!
We hope you have enjoyed this tutorial. Using this widget, you can now effectively showcase before-and-after scenarios of your products or any kind of stories and developments. But there are some best practices you must keep in mind to ensure optimal performance and user experiences.
First, always use high-quality images that are appropriately sized and optimized. Compress them before uploading so they don’t impact your site’s loading speed. Finally, before publishing the widget, check it’s perfectly well-structured for mobile and tablet devices.


