The website header is the area where users first interact with your site. It is mainly used for website navigation so visitors get a clear direction during visiting different pages. In an addition, you can use this place for branding, adding CTA button, and keeping much necessary information.
By default, WordPress themes provide a global design format for a header. But if you want to make a custom header, you may edit the core theme files. Which is very time-consuming and difficult for a non-techy user.
What could be the easiest solution?
Elementor is the popular page builder plugin that makes your website designing tasks easier than ever with its drag & drop features. Using Elementor, you can create & customize a header very efficiently.
In this blog, we are going to show you a step-by-step guide on how to edit header in Elementor.
Today you’ll learn how to:
- Edit existing website header with Elementor
- Create headers using premade Elementor header templates
- Design Elementor header from scratch using useful widgets
End of the guide, you’ll get a bonus point that will take your website design capability to the next level. So don’t miss it.
How to Edit Existing Website Header With Elementor

It’s time to show you how to edit the current header of our Elementor website. Here, we use the Elementor free & pro widgets to design our header.
So you need to install these two plugins.
- Elementor (Free)
- Elementor Pro
First, take a look at our current website header. You notice that we have added our website logo and a nav menu on the header.
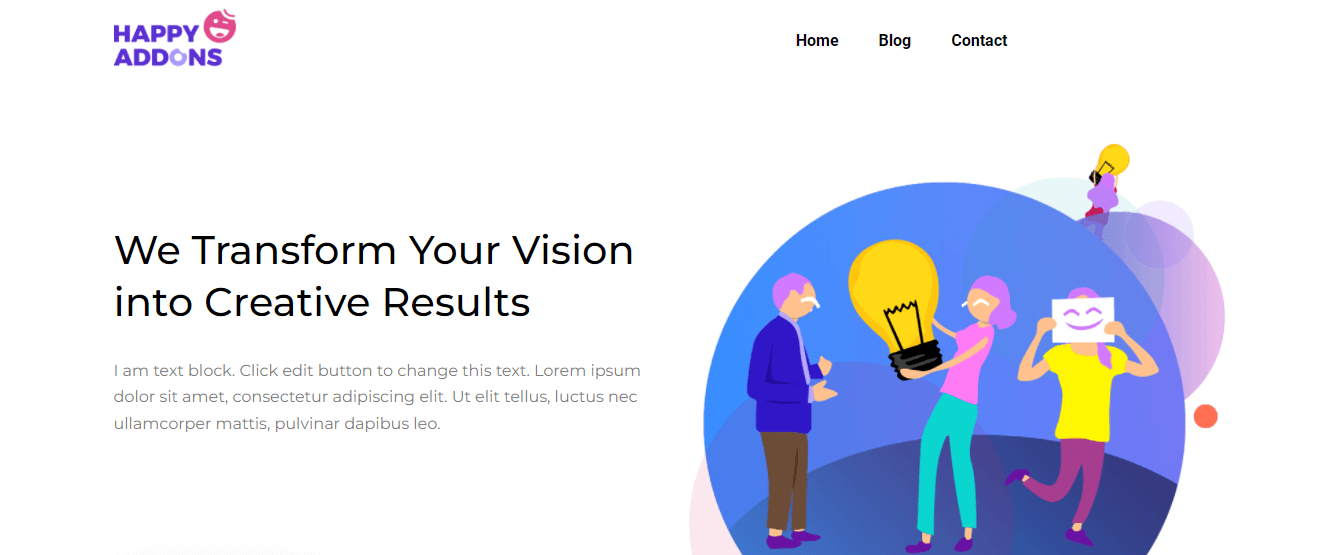
It looks like a very common header so we have decided to edit it. Now, we are going to add a Button to the current header. Also, design a top header to display a Search Form, our Social Channels, and our office Address.
It requires only 5 steps to get the desired look-
- Step 1: Add a Button
- Step 2: Add & Customize Search Form
- Step 3: Add & Customize Social Icon
- Step 4: Add Map Icon
- Step 5: Add & Customize Heading
Step 1: Add a Button
For adding the button, we need to add A New Column to the right side of the nav menu. You check this below image to know how to add a new column in Elementor.
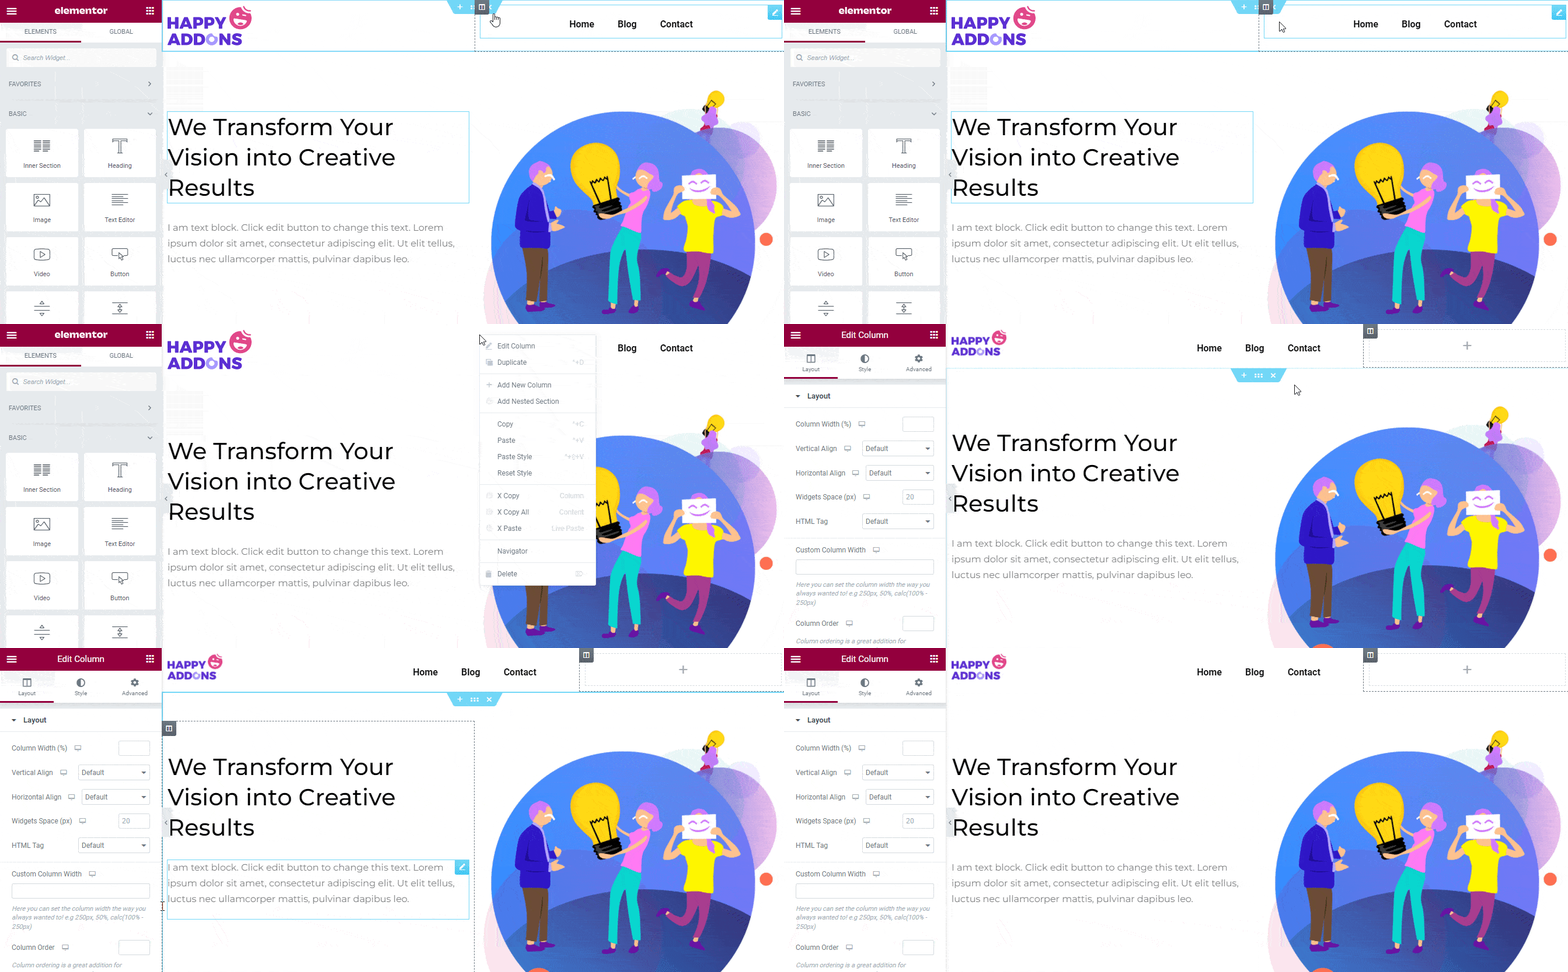
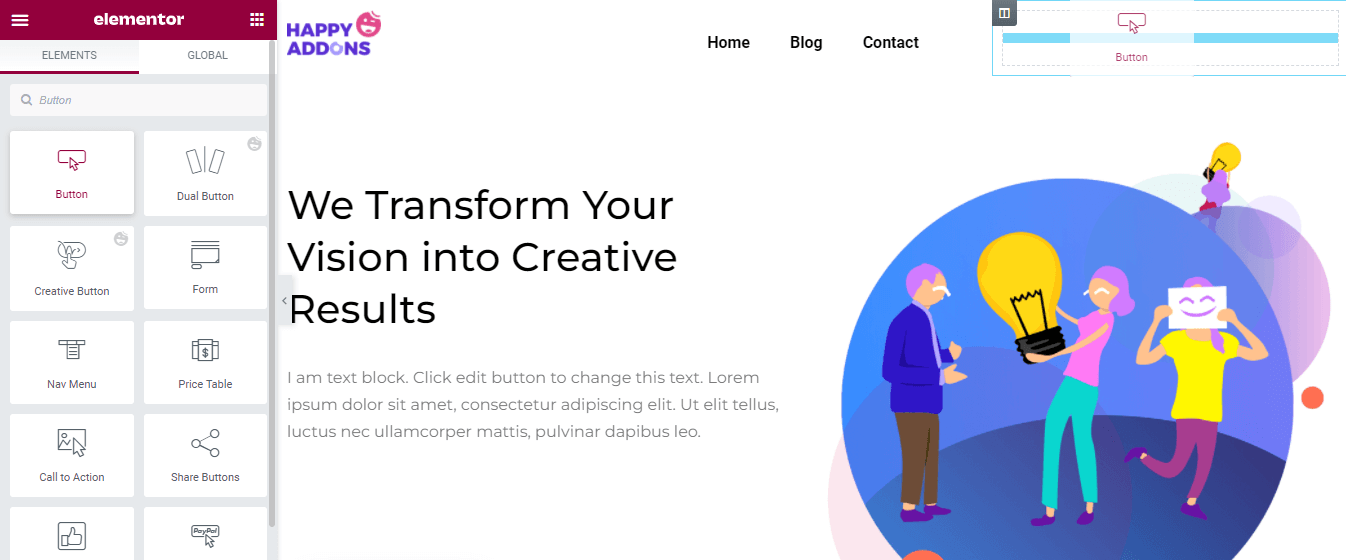
Now, find the Button widget from Elementor widgets galley. Then drag & drop it into the new column.
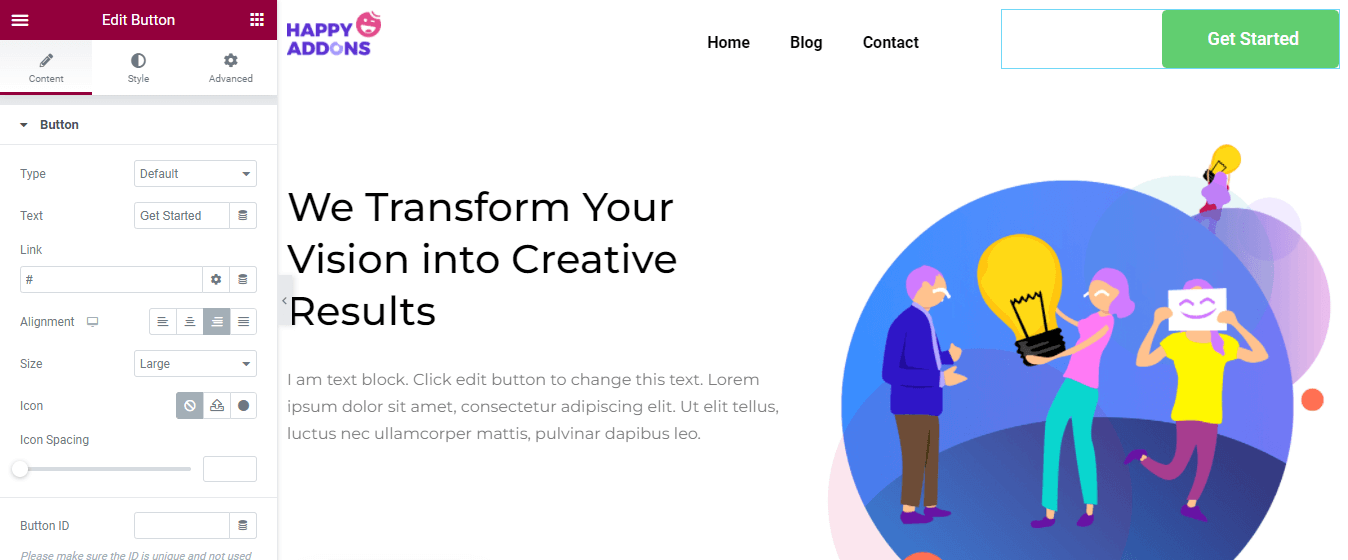
In the Content area, you’ll get all the necessary options to add the button content. here, you can set the button Type like Default, Info, Success, Warning, and Danger. You are able to write the button Text, insert Link, manage the button Alignment, and Size.
Also, you can add an Icon and control the Icon Spacing based on need. However, you can add a Button Id that will help you to add custom code to the button.
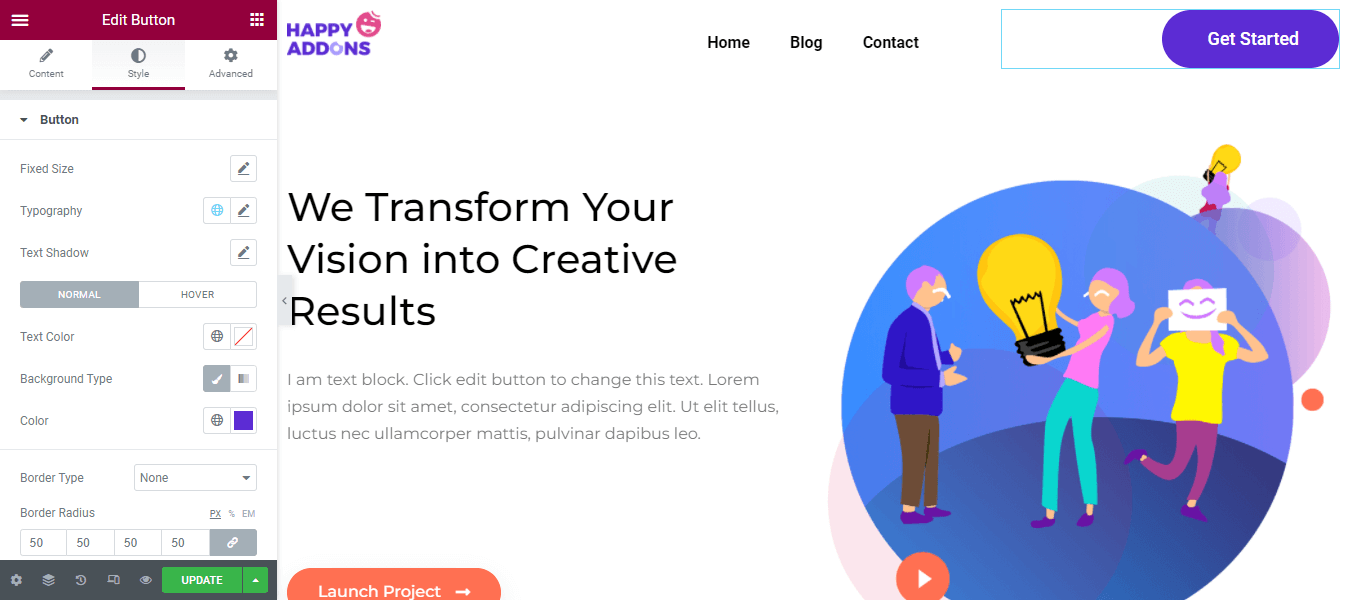
For customizing the button default style, you can go to the Style area. Here, you can change the button design using the below styling options.
- Fixed Size
- Typography
- Text Shadow
- Text Color
- Background Type
- Border Type
- Border Radius
- Box Shadow
- Padding
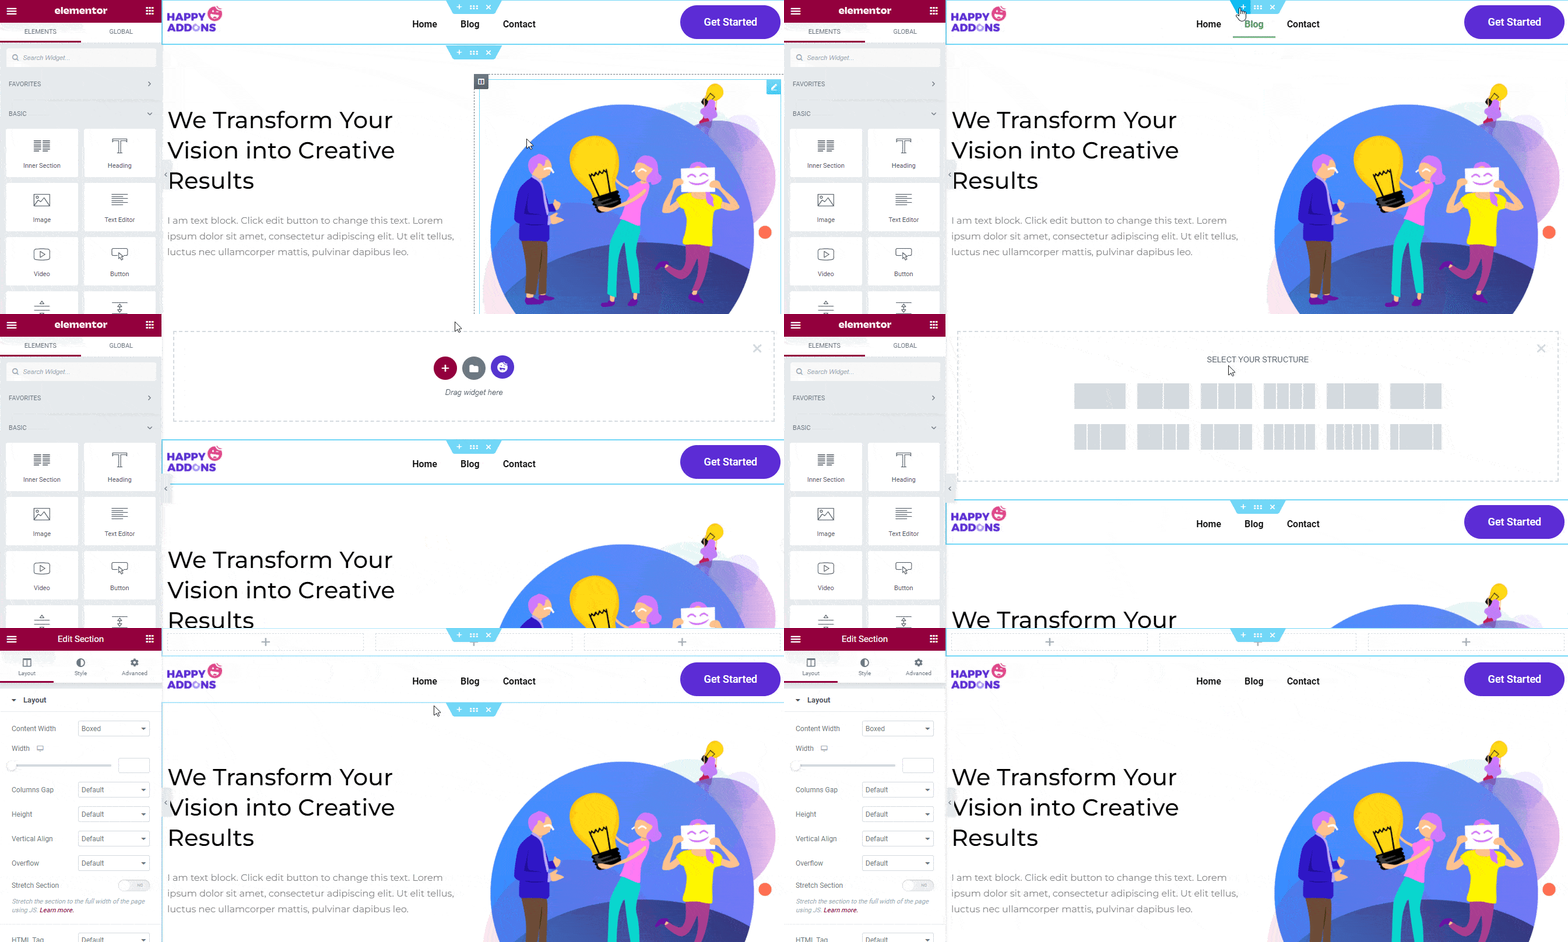
It’s time to add our top header. To do this, we need to add a new section along with three columns on the top of the header. Let’s see how to add a new section in Elementor.
Step 2: Add & Customize Search Form
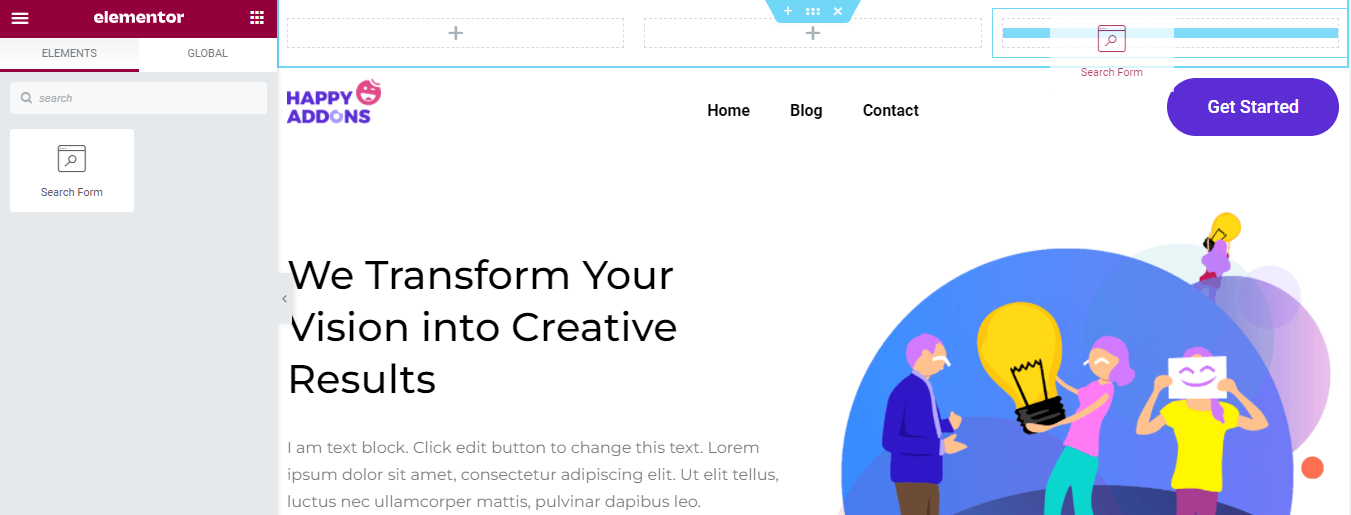
After successfully adding the new section, you are gonna add the Search Form widget into the right column.
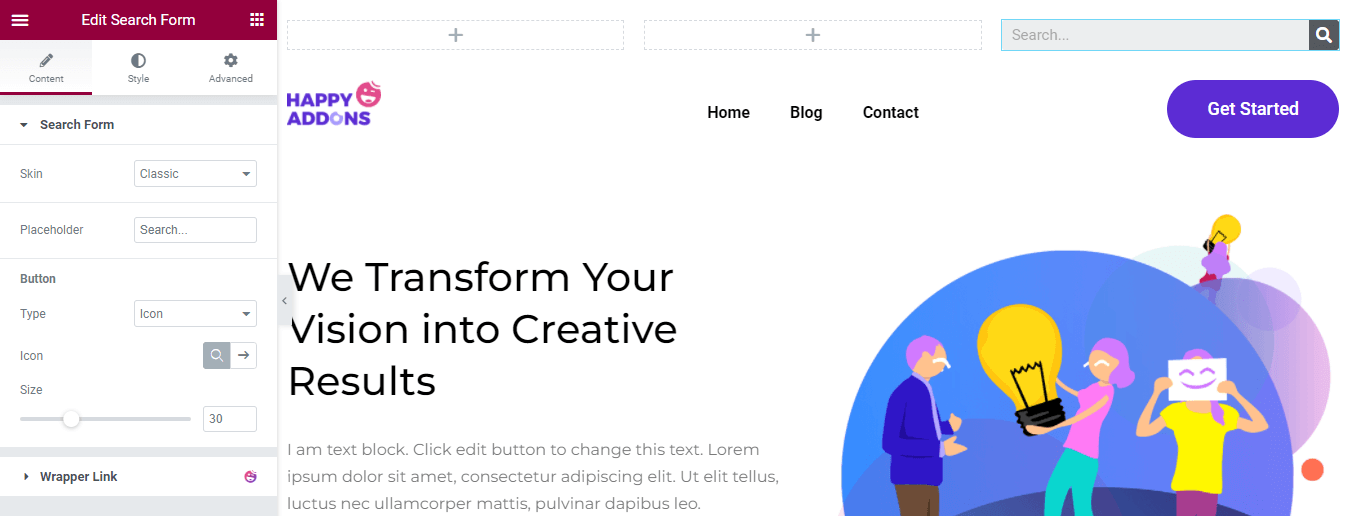
You can change the default search form content by going to the Content section. You can select the search form skin like Classic, Minimal, and Full Screen. You are able to write the Placeholder. Also, set the Button Type Icon or Text and Icon Type Search & Arrow. However, you can manage the Icon Size here in the content area.
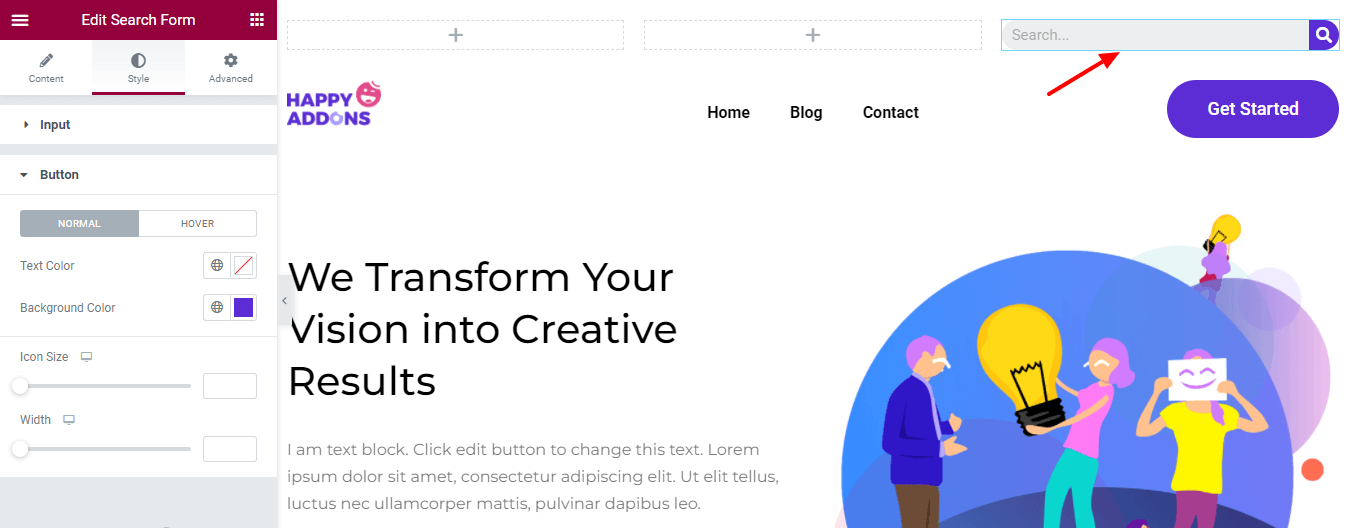
In the Style area, you can change the search form Input style and also customize the Button Text Color, Background Color, Icon Size, and Width.
Step 3: Add & Customize Social Icon
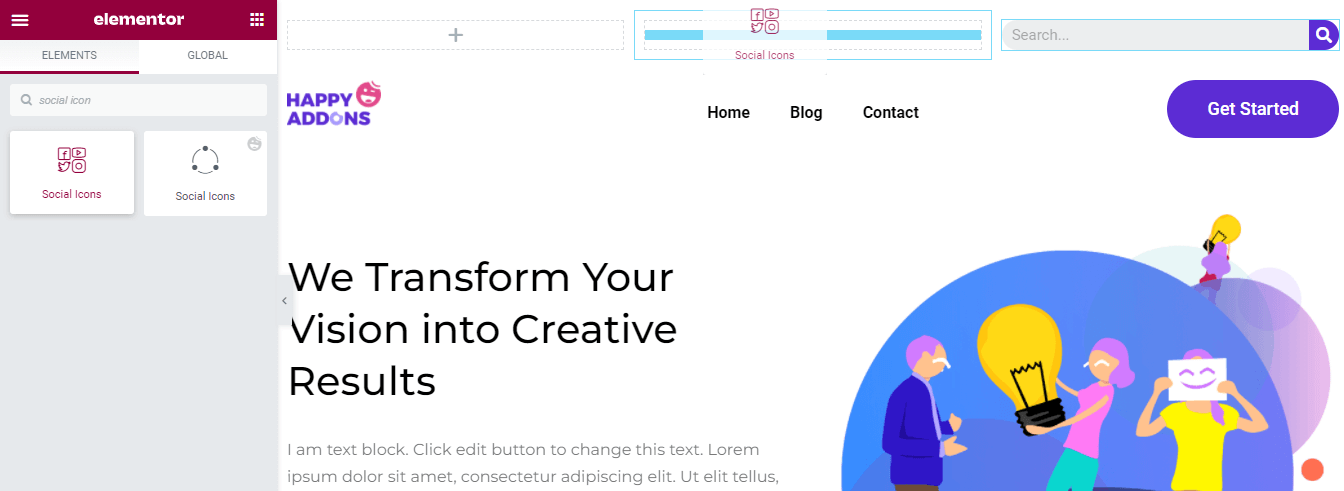
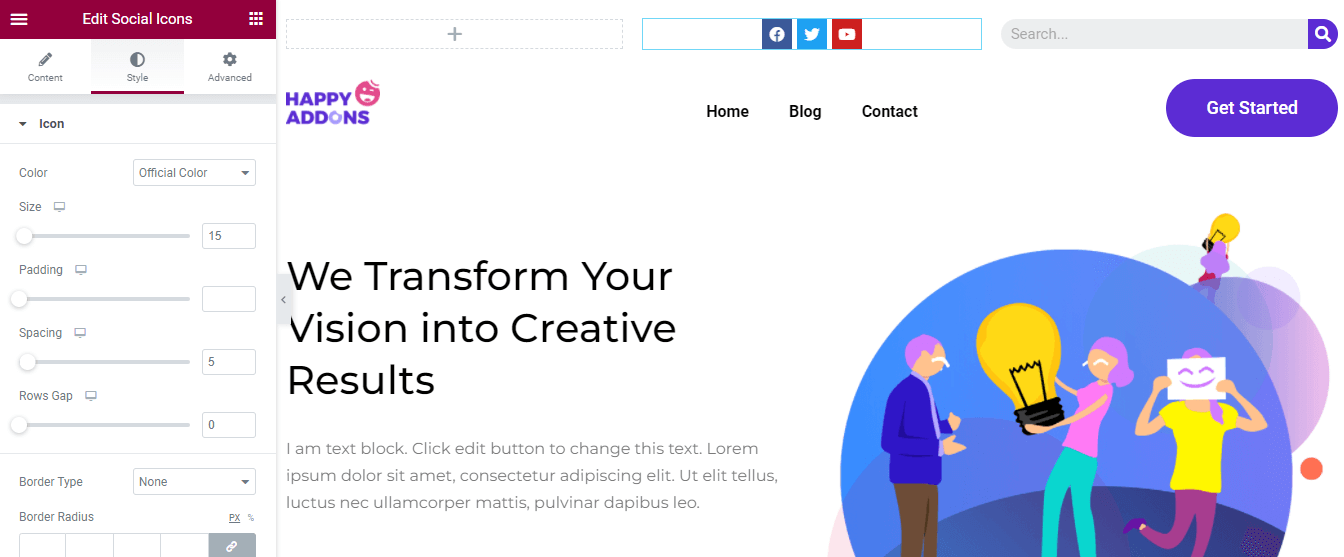
We want to display our social channels to the top header. So we’ve added the Elementor Social Icons widget into the middle column.
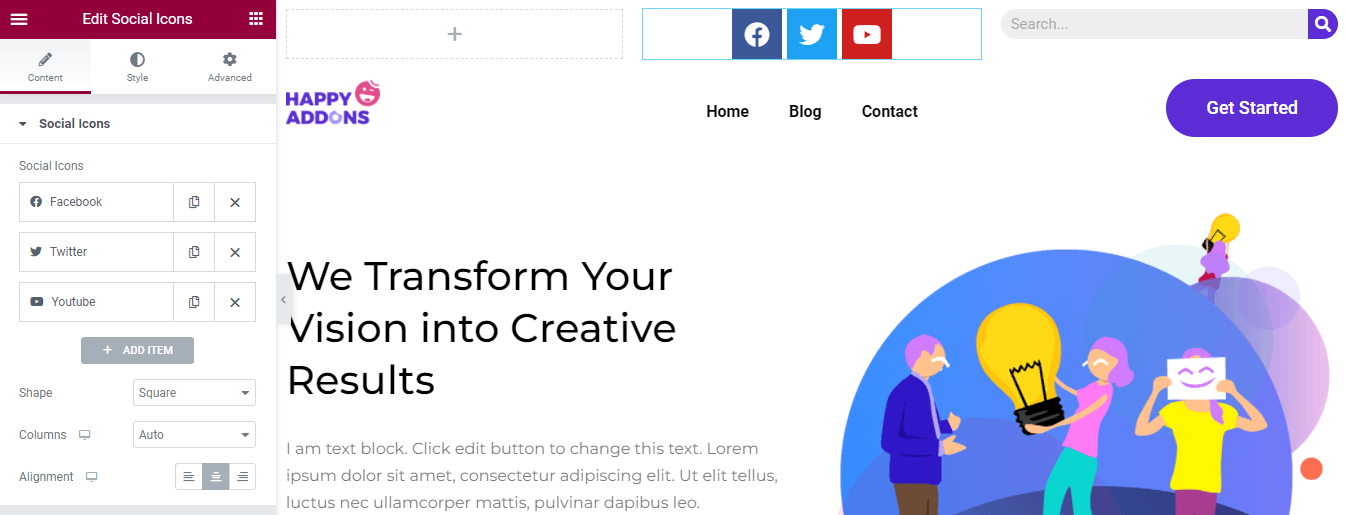
You can efficiently add social accounts by clicking the + ADD ITEM button. You can Duplicate and Remove an Item according to your need. Also, choose your custom Shape like Rounded, Square, and Circle. And manage the Columns and set the Alignment.
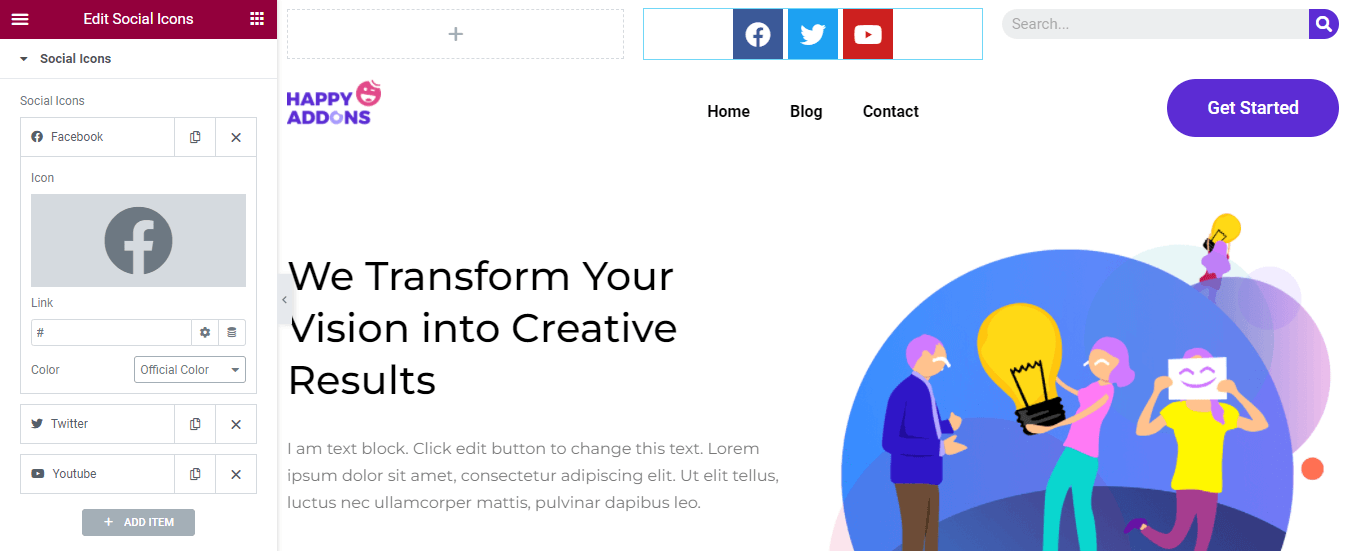
To add an Item, content, you need to open an Item first. Then you can add your social Icon, insert a Link, and define the Color.
The Style area allows you to customize the Icon Color, Size, Padding, Spacing, Rows Gap, Border Type, and Border Radius. Here, you also choose your Icon Hover Animation for giving a vibrant look to your Social Icons.
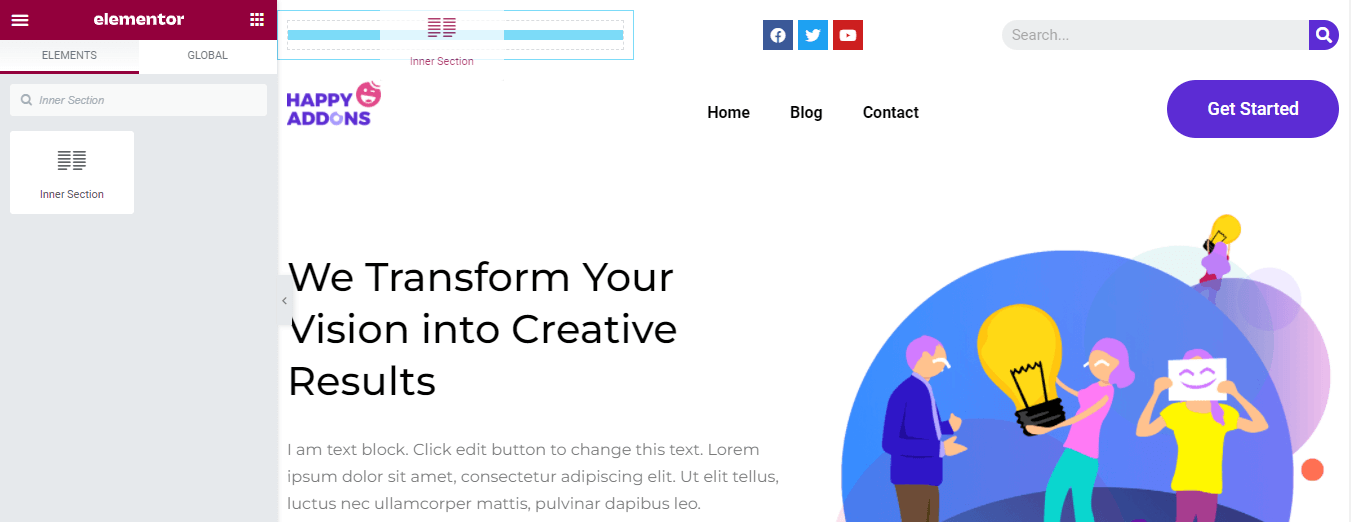
It’s time to add our office Address to the top header. We want to add location Man Icon and a Heading. That’s why you need to add an Inner Section into the left column of the top header. You can find the widget from the left side Elementor widgets panel and add it to the column.
Step 4: Add Map Icon
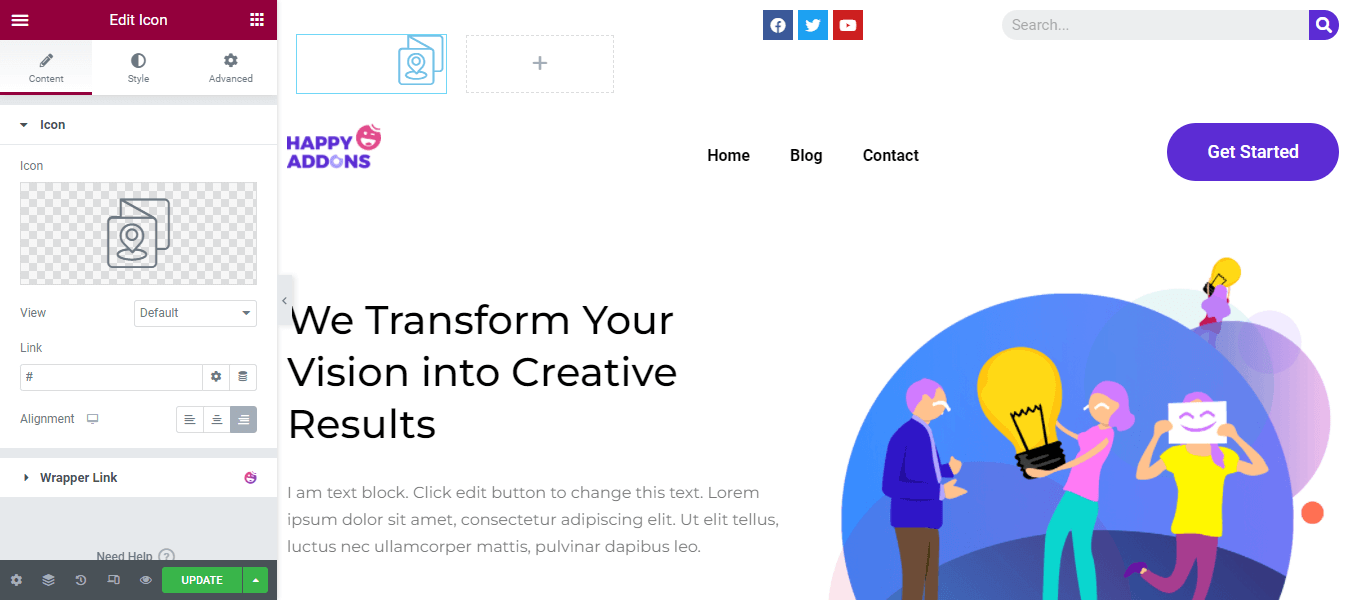
Now we’ve got two columns in the left side parent column of the top header. First, we’ve added the Icon widget. Then we have added a Map Icon and set its Alignment.
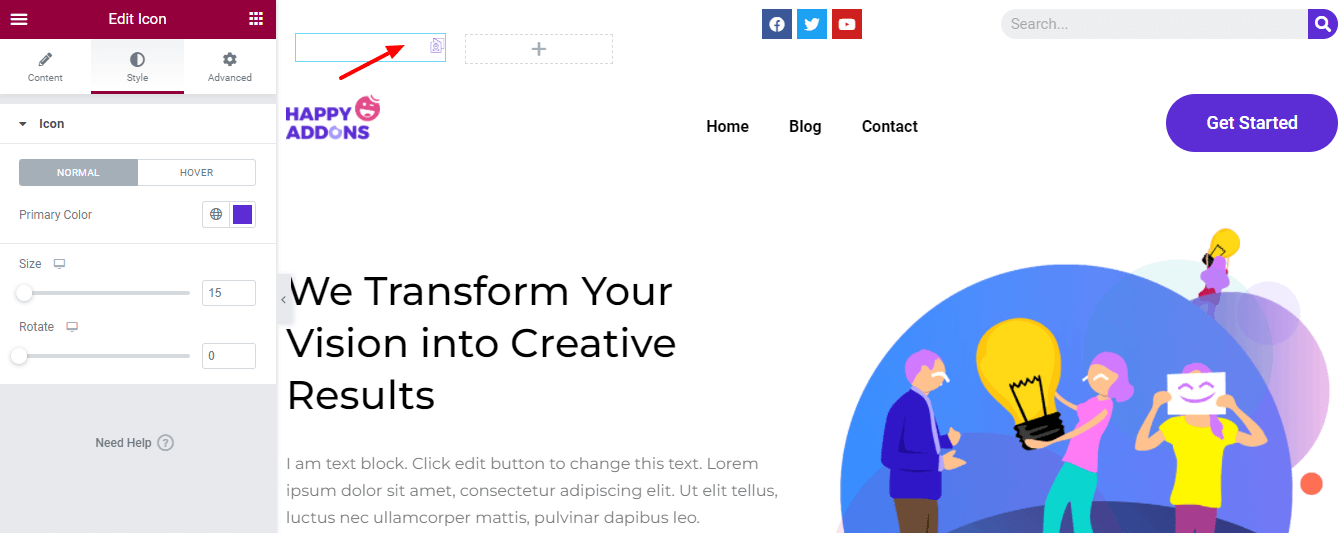
We changed the Icon Primary Color and Size by going to the Style area. Here, you are able to set the Icon Rotate value.
Step 5: Add & Customize Heading
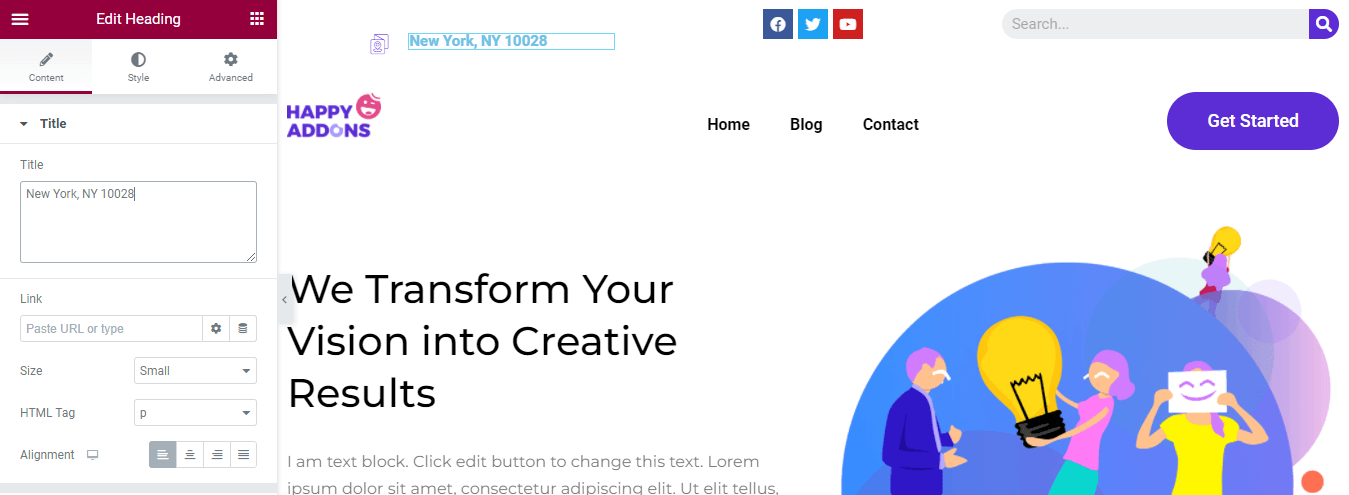
For adding the address, we’ve added the Heading widget. Using the Content section, you can add your Title, insert a Link based on your need. Also, set the heading Size, HTML Tag, and Alignment in your own style.
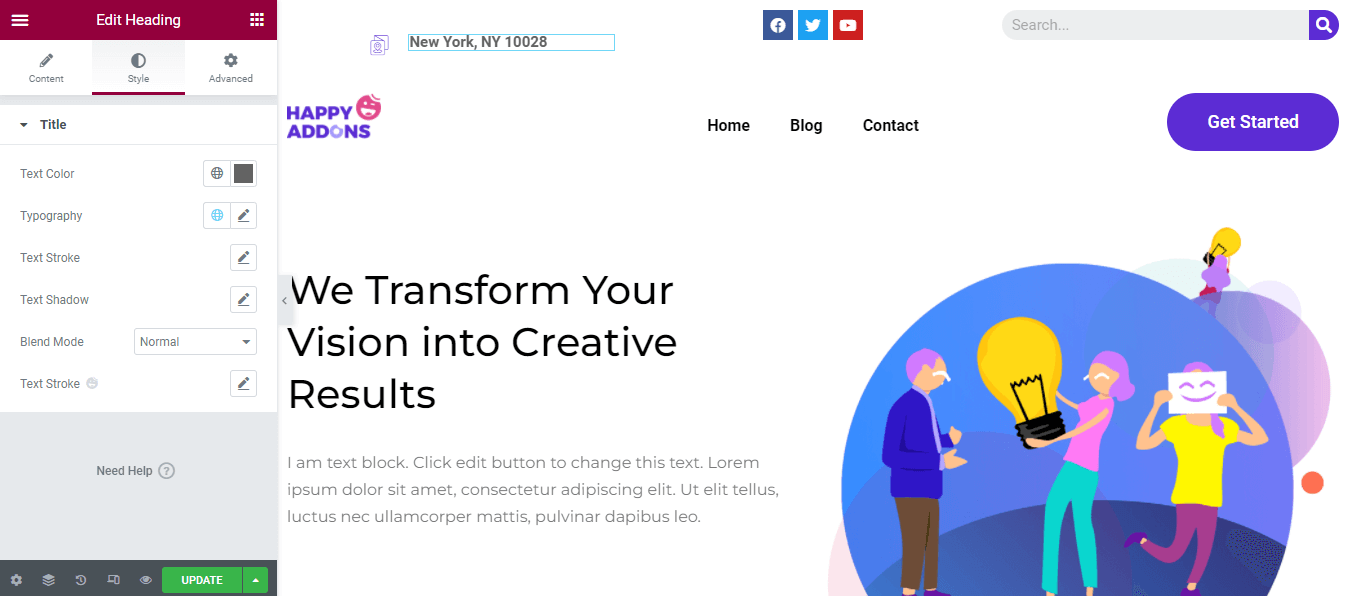
You can also customize the heading using the default styling options like Text Color, Typography, Text Stroke, Text Shadow, and Blend Mode.
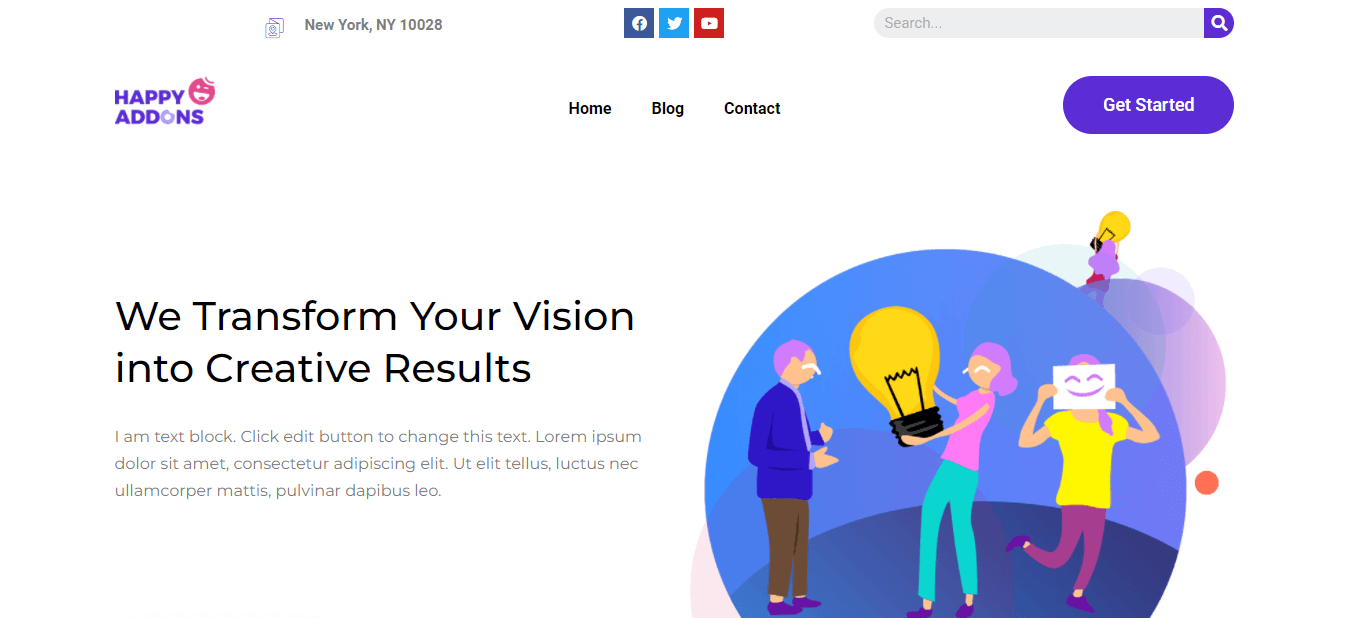
Final Preview of the Current Header
After customizing the header, this is the new look of our header.
If you want to create a custom Elementor header in your own way, you should follow the below guide. You can design a custom Elementor using the two ways. You can choose the premade Elementor heard block or create it from scratch using the Elementor widgets. Let’s see.
Create Headers Using Elementor Header Templates

To create a header using the Elementor’s Theme Builder, you need to Install both the Elementor (Free & Pro) to your website.
Follow these below steps and create your custom header.
- Navigate Template->Theme Builder->Header.
- Click Add New button or the Add New Header button.
- Choose the Template Type->Header and write the name of your template.
- Click the Create Template button to save the template.
- On the next page, you’ll get Elementor Library with premade Blocks & Pages.
- Select a right Header Block and Install it on your website.
That’s it.
Design & Customize Elementor Header From Scratch Using Elementor Widget

If you are a regular Elementor user then you can use the Elementor widgets for making your custom header. Elementor provides all the necessary widgets in its free version that you need to design your header. Basically, a common header has a Site Logo, a Nav Menu, and a Search Form.
You can follow this step-by-step guide and learn how to create and customize the Elementor header using Elementor widgets.
In order to follow modern web design you can create a sticky header for your website. It will be in the same place on the screen while the user scrolls down the webpage. Check this guide on how to create a sticky header in Elementor.
Bonus: Use Happy Addons’ Happy Mega Menu Widget To Create Large-Scale Menus Like Adidas, Dribbble, and Puma
You have an eCommerce or business website and need to add lots of pages to the menu. However, the default Elementor nav menu does not give you the option to create a larger menu according to your needs. And you are looking for a solution to get rid of it.
To solve your problem, Happy Addons’ one of the best & fast-loading Elementor addons has recently launched a new ‘ Happy Mega Menu‘ widget. With this exclusive widget, you can create big-sized Menus like Adidas, Dribbble, weDevs, InVision, Puma, and more.
Try the Happy Mega Menu widget to make your navigation menu in minutes.
You can also check out complete documentation of Happy Addons’ Happy Mega Menu widget and learn how to use it the right way.
Are You Ready To Edit Your Elementor Header
Elementor gives you all the flexibility to design and customize your website header. Using Elementor, you can not only create a new header from scratch but also edit your site’s current header.
In the above guide, we’ve covered how to edit the header in Elementor the right way. We have discussed what should do to make a custom Elementor header. Lastly, we have also shared a bonus point on how the Happy addons’ Happy Mega Menu widget will help you to build a mega menu for your website with ease.
If you find tutorial useful, share it on your social channels. Don’t forget to join our newsletter to get more handy guides regarding WordPress and Elementor.
Subscribe to our newsletter
Get latest news & updates on Elementor




2 Responses
Hi
I have a question.
for example I’m using Zox News Theme and I don’t like the theme header. is it possible for me to use elementor to change only header of that theme without building the other pages and footers etc. only the header
Hello Idighekere,
I have checked the Zox theme; they don’t support Elementor. In that case, it will be tough to manage all the things with this theme. You can contact the theme author to bring support for elementor.
Regards,
Gobinda
Team HappyAddons