With the new Happy Addons Pro ‘Happy Mega Menu‘ widget, you can effortlessly build and customize your WordPress website’s mega menu in minutes.
This exclusive widget also allows you to add custom icons, badges, and default WordPress menu on your website and help to make them more attractive for your users.
Let’s see how this Happy Menu widget works.
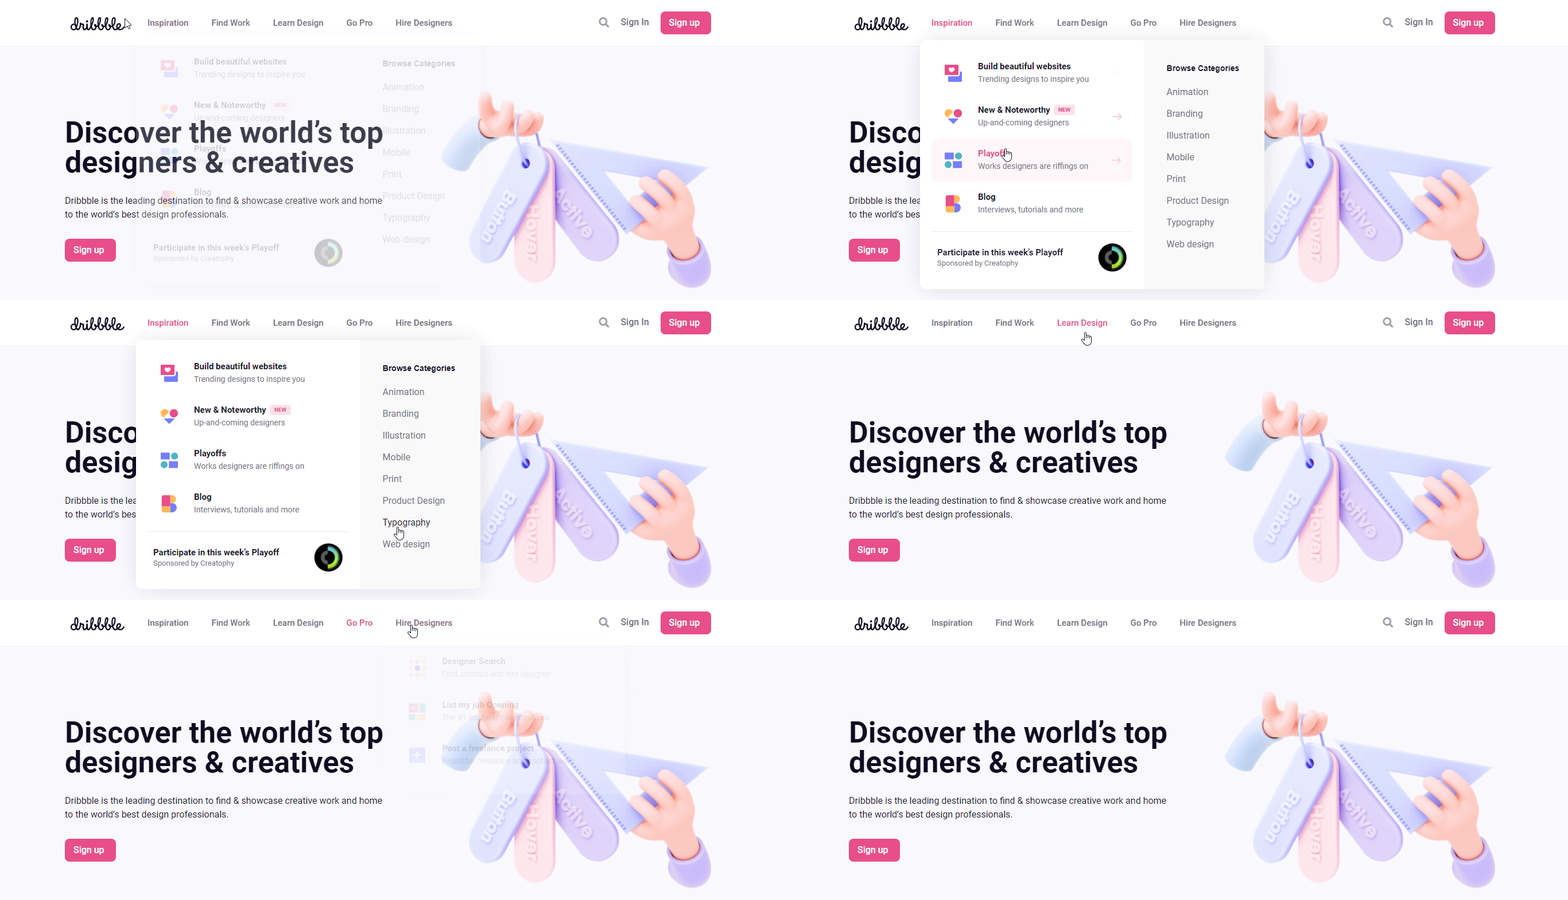
You can also watch this video tutorial where we’ve shown how to create a Dribbble like mega menu using the Happy Mega Menu widget.
Pre-requisites
- Elementor
- Happy Addons (Free)
- Happy Addons Pro
How To Use Happy Mega Menu Widget of Happy Addons Pro
In the following four simple steps, we’ll show you how to use the Happy Menu widgets with ease.
Step 1: Menu Selection and Understand Happy Menu Setting
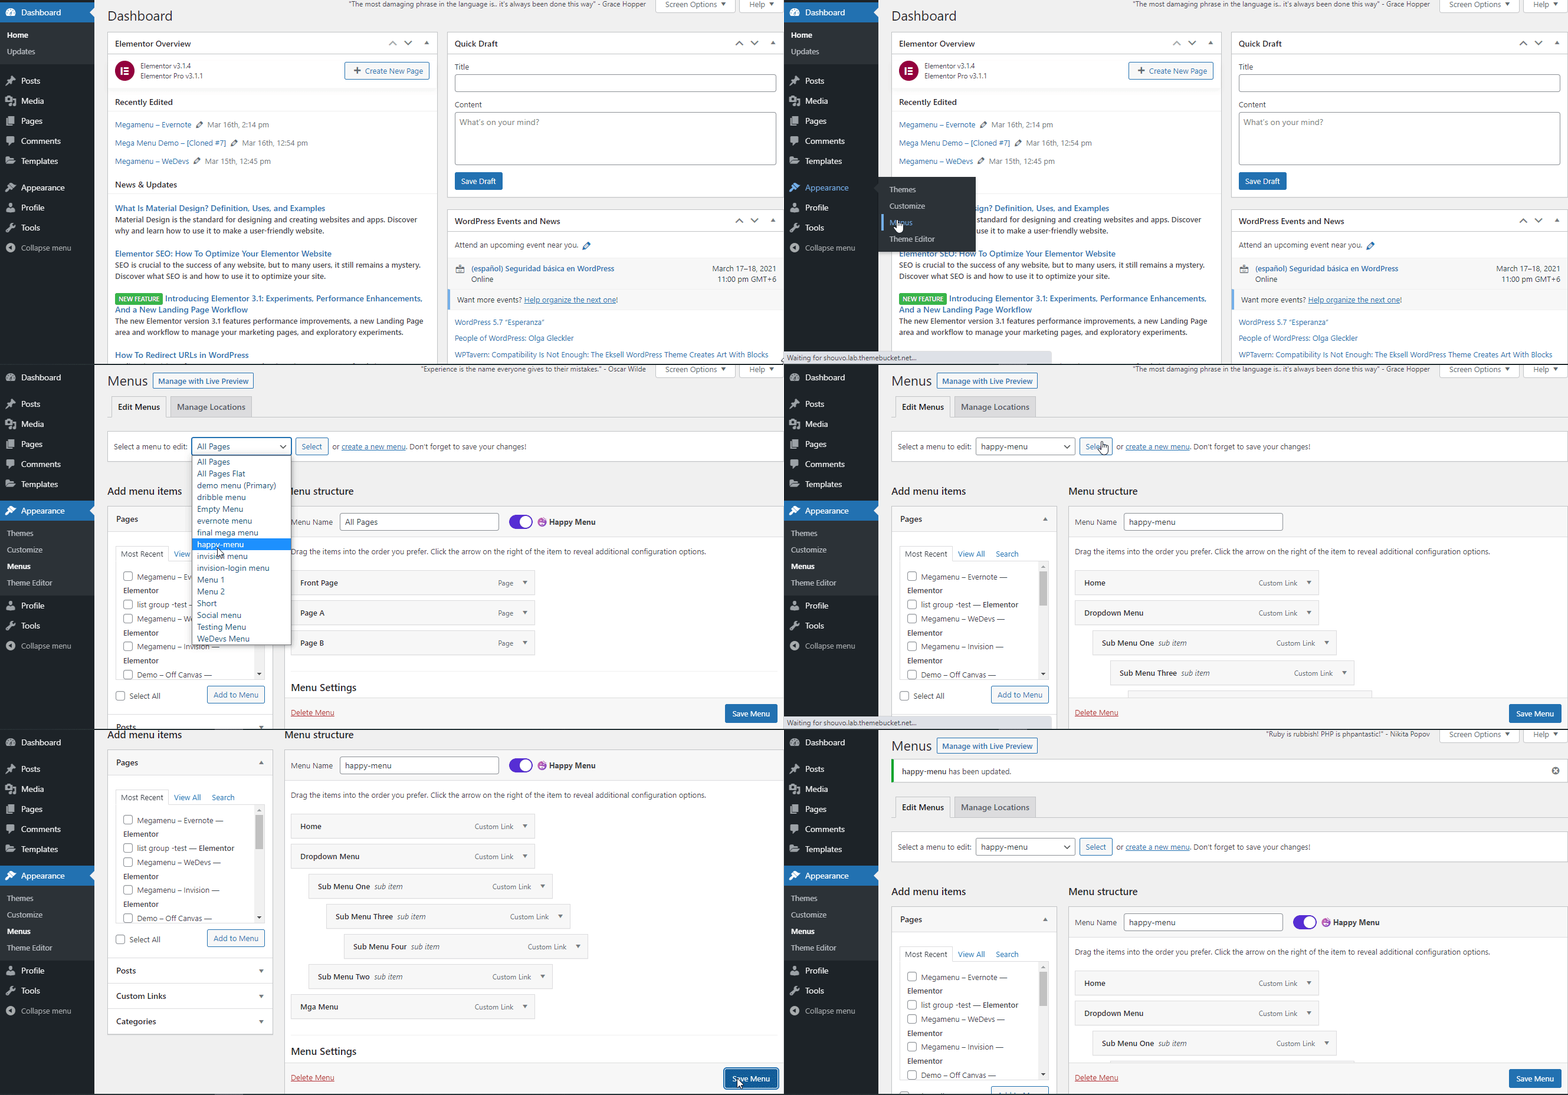
To use the Happy Menu widget, first, you have to log in to your WordPress Dashboard and go to Appearance–>Menu. After that, you need to create a menu. Here we already created some menus.
Next, your job is to select the menu that you want to build a mega menu. Then enable Happy Menu and click the menu item that you want to customize.
On the next screen, you’ll get the Happy Menu setting.
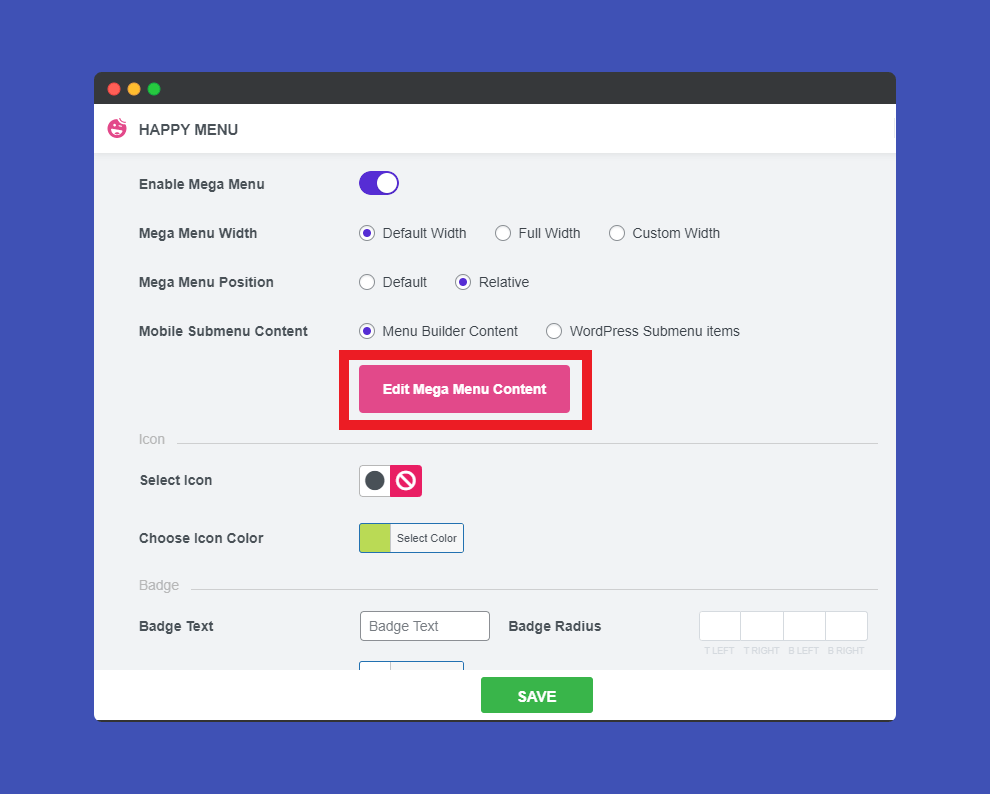
- Enable Mega Menu
- Mega Menu Width
- Mega Menu Position
- Mobile Submenu Content
- Icon
- Badge
Before you work on a mega menu, you have to enable the Mega Menu first.
Here, you can set the different Mega menu Width, define the Mega Menu Position, and manage the Mobiles Submenu Content.
Even you also can add a custom Icon from the new Happy Addons Icon Library. And attach a Badge to your menu.
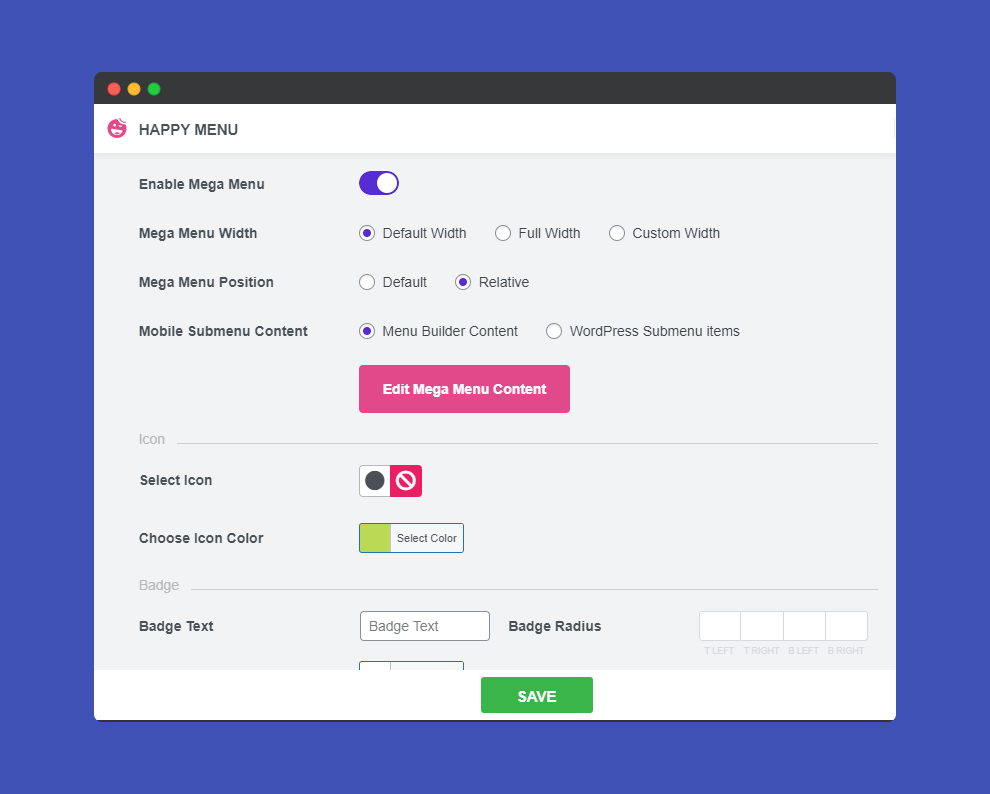
Note: If you select the ‘Default‘ Mega Menu Position, you have to select the Full Width of your Mega Menu Widget. And if you choose the ‘Relative‘ Mega Menu Position the menu item will display down before the menu.
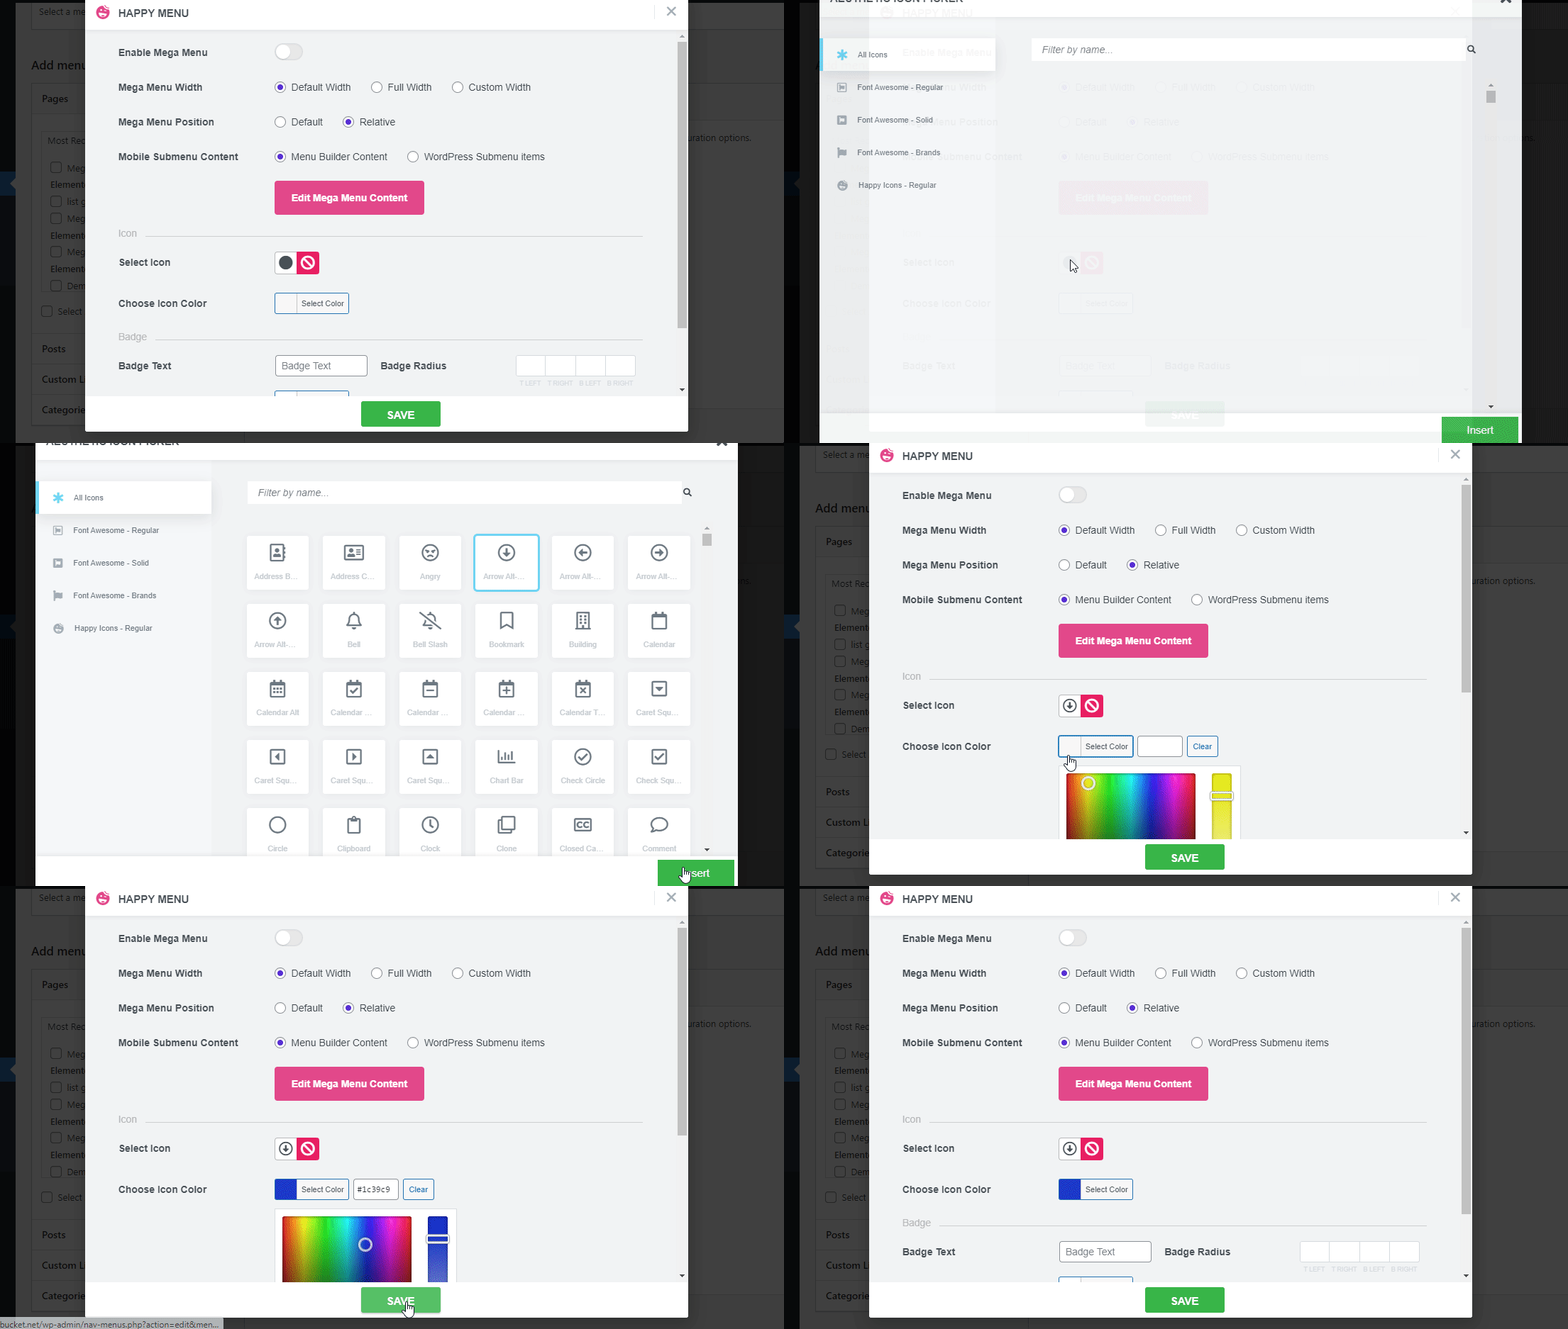
To add an Icon to your menu, you must click the Select Icon and pick the suitable one. After that, you can choose the Icon Color here.
Happy Menu also allows you to add custom Badge to the menu. You can change the Badge Text, Text Color, Badge Background, and Badge Radius. Here you also see the current preview of your badge while editing.
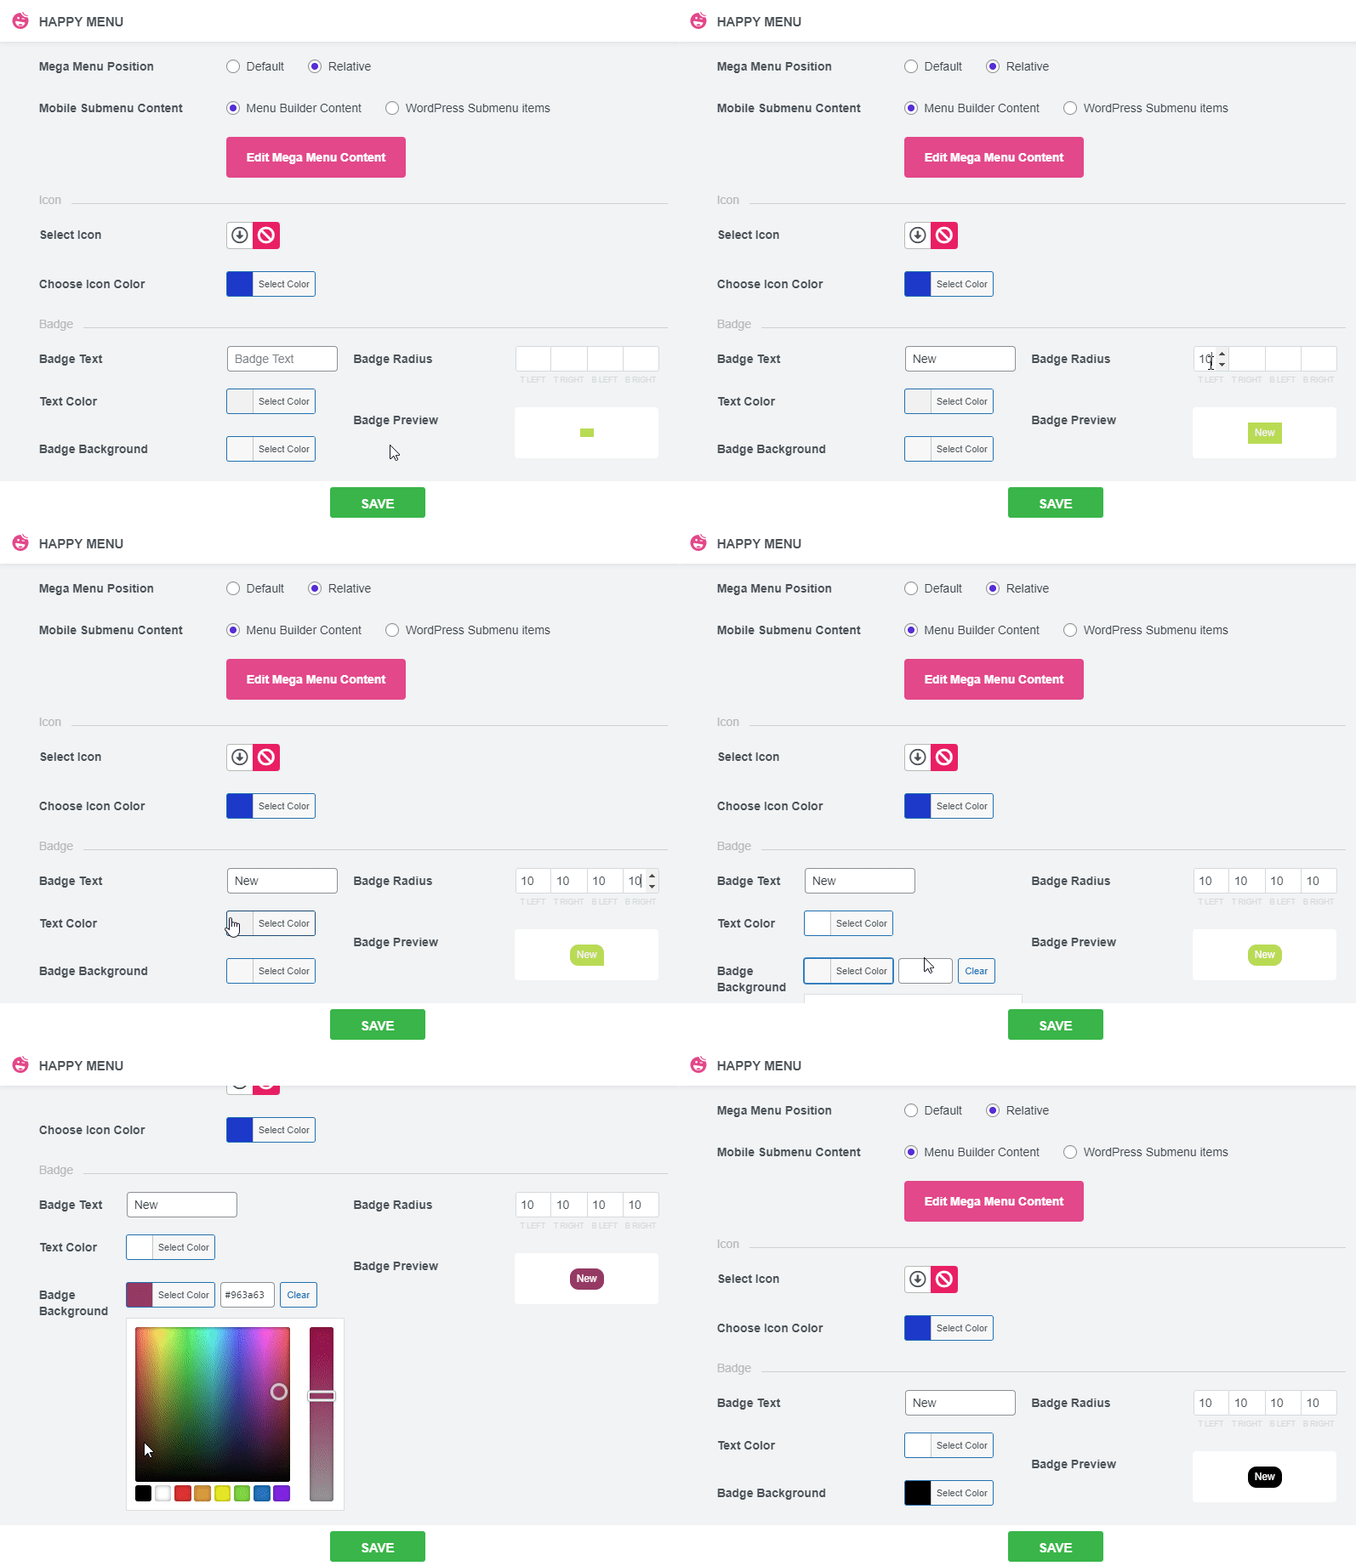
Note: It not necessary to have a mega menu while adding Icon and Badge. You can also add Icon and Badge to your default WordPress menu. Another thing that we clarify for you is that you don’t require Elementor Pro for making a mega menu.
After finishing the mega menu setting, you should click the Edit Mega Menu Content for further menu customization.
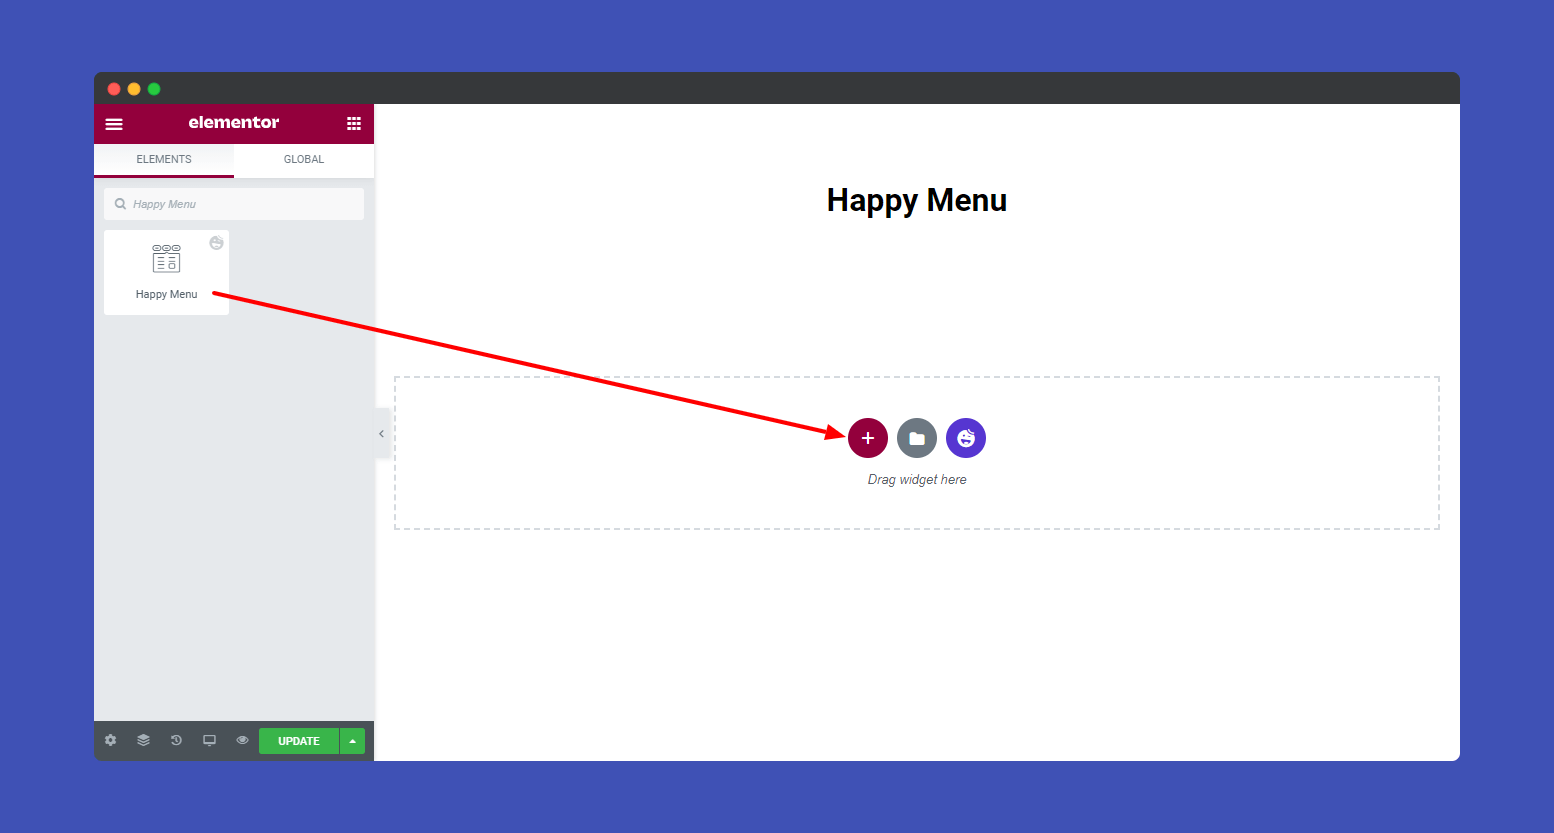
On the following screen, your page will open on the Elementor Editor for designing the menu.
First, look for the Happy Menu widget in the left side menu. Then drag and drop it onto the selected area.
Step 2: Customize Happy Menu Content
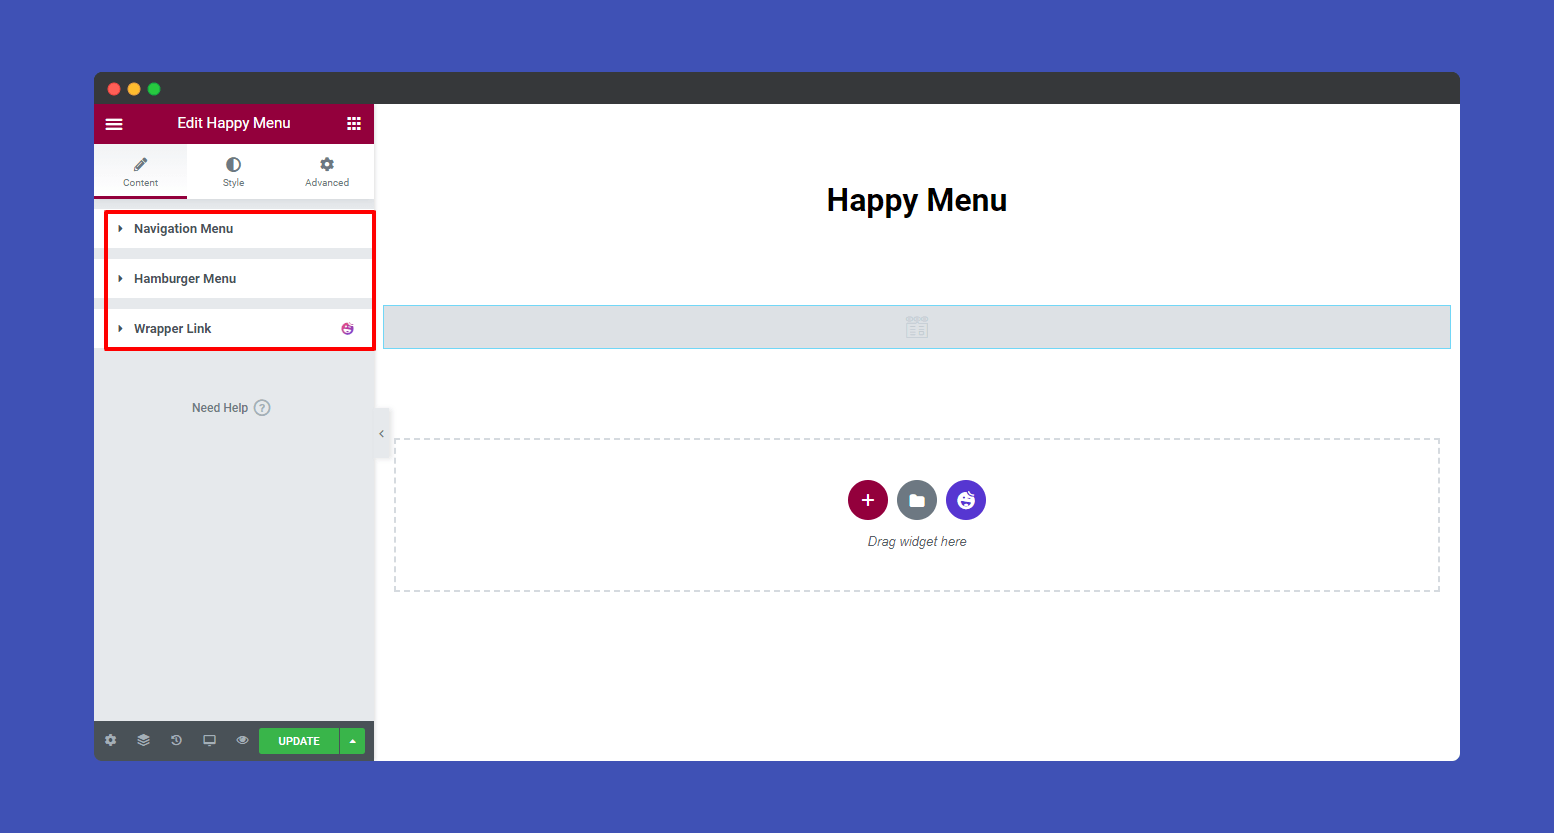
In the Content tab, you’ll find the setting of Happy Menu content such as..
- Navigation Menu
- Hamburger Menu
- Wrapper Link
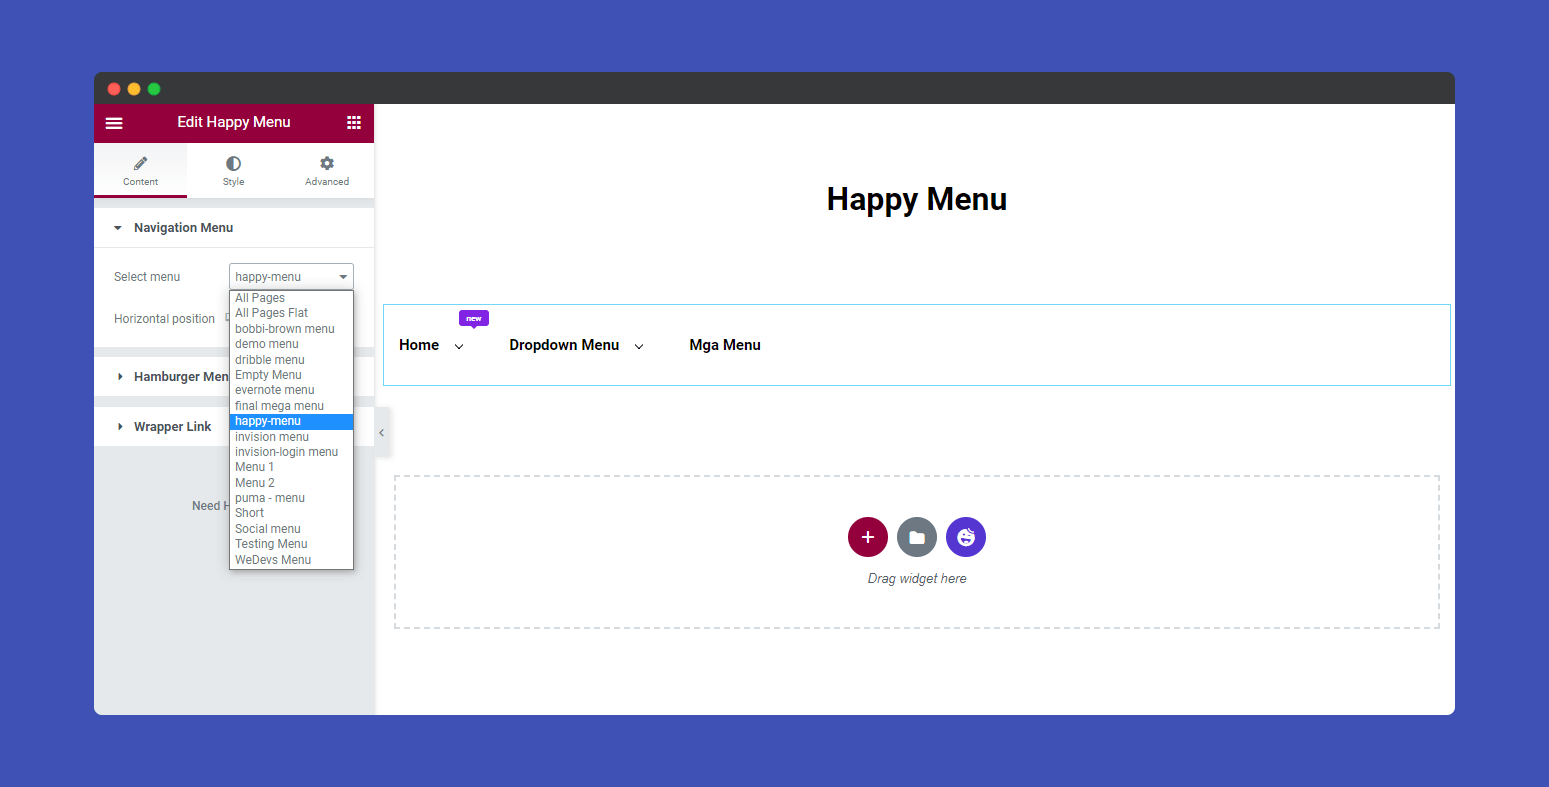
Here, you must select the menu from the Navigation Menu–>Select Menu dropdown option.
Then set the Horizontal position of your selected menu here.
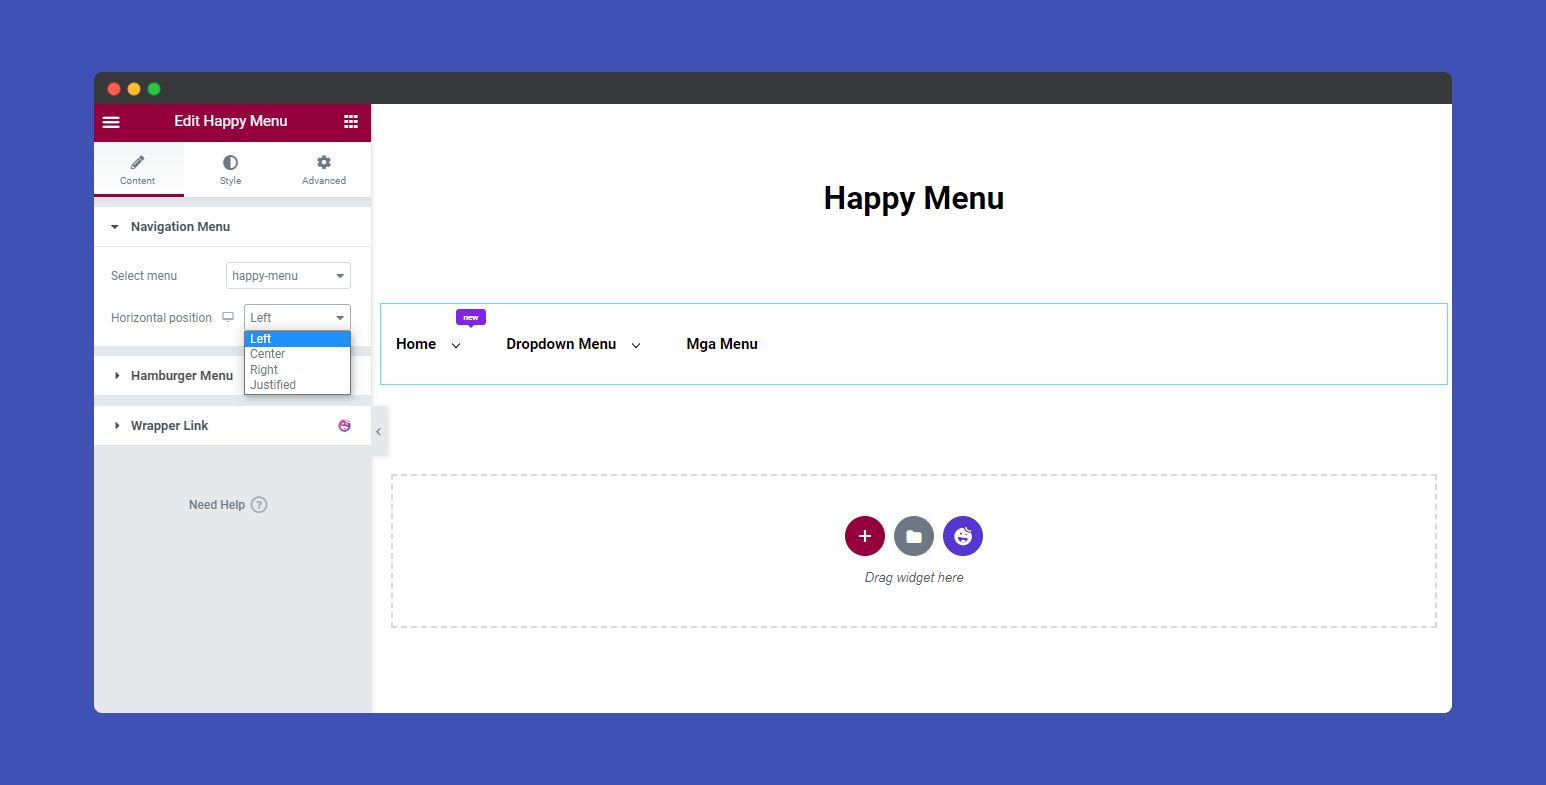
Remember, the Hamburger Menu is called the mobile menu. In the Hamburger Menu, you can edit the following Mobile Menu setting.
- Menu Logo
- Logo link
- Open Icon (Optional)
- Close Icon (Optional)
- Submenu Click Area
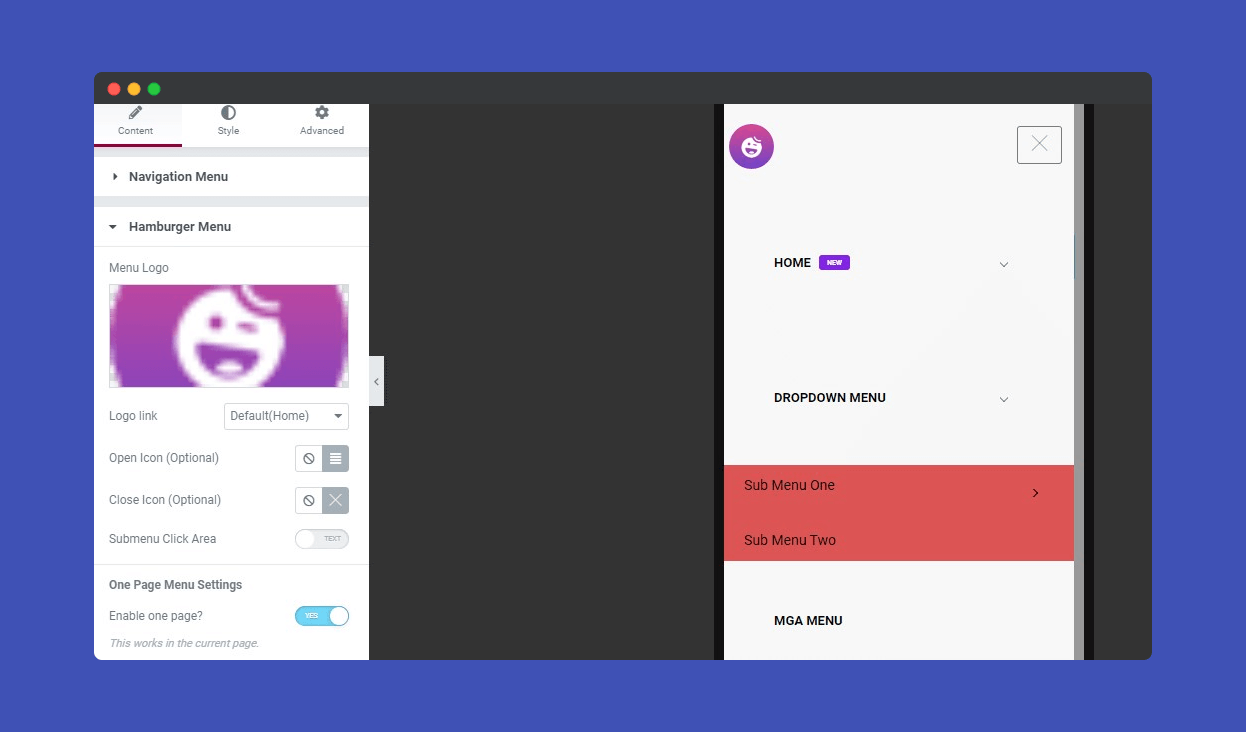
Note: One Page Menu Setting may disable and enable in the Hamburger Menu. In the mobile version, you may show the default WordPress submenu.
Step 3: Design the Menu in Your Own Style
In the Style tab, you’ll find different style settings of Happy Menu. Like..
- Menu Wrapper
- Menu Item
- Submenu Item
- Submenu Panel
- Hamburger
- Mobile Menu Logo
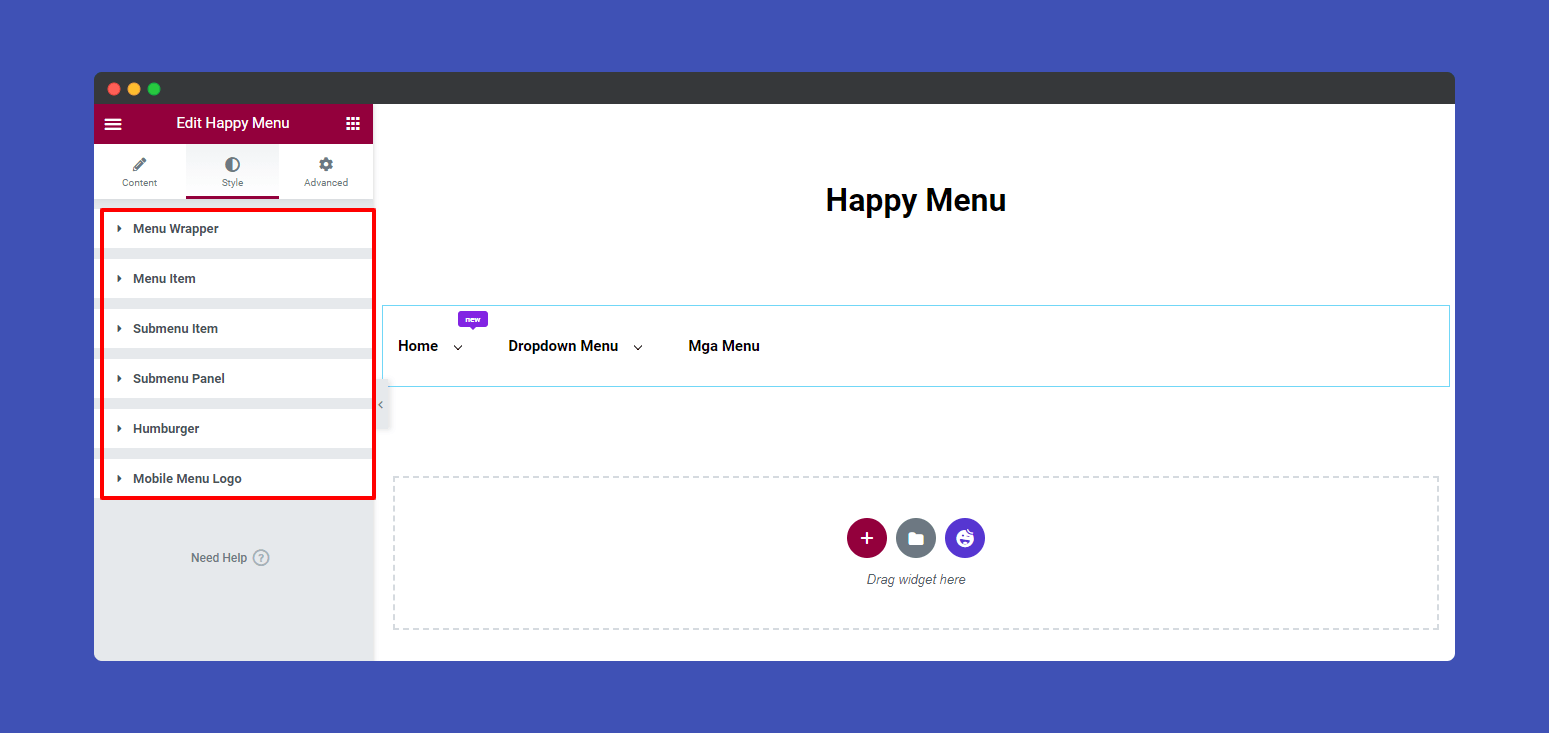
In the Style–>Menu Wrapper, you’ll get the option for editing the Height, Background Type, Color, Image, Menu Border Radius, and Menu Icon Spacing of the wrapper.
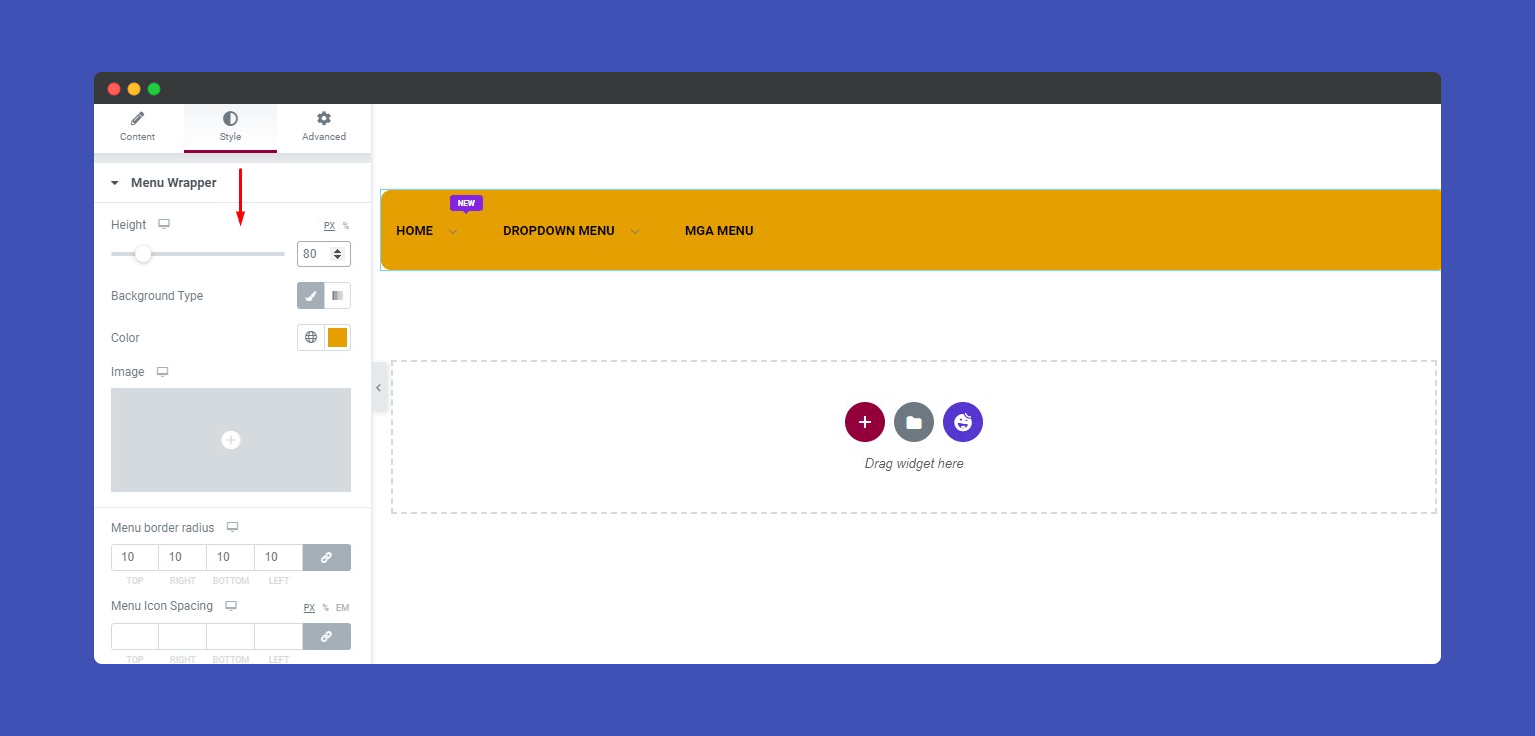
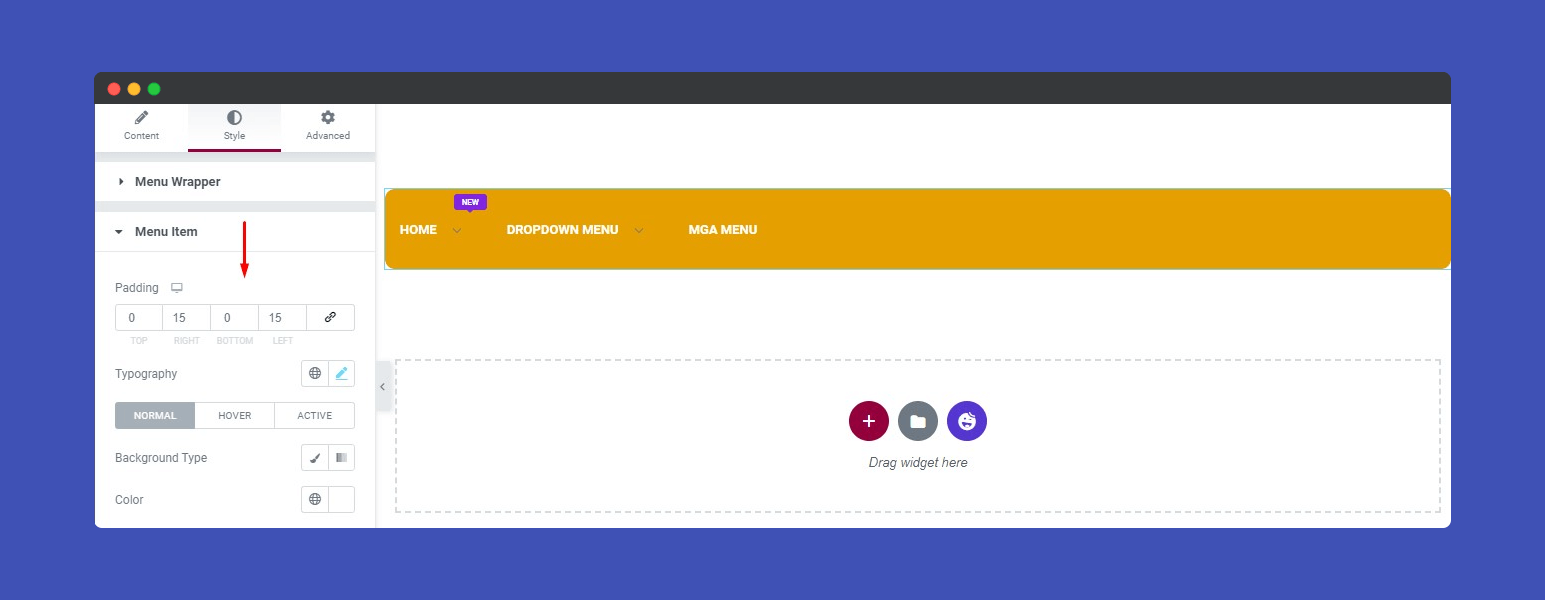
You also edit Padding, Icon Position, Icon Spacing, Typography, Background Type, and Color of the Menu Item.
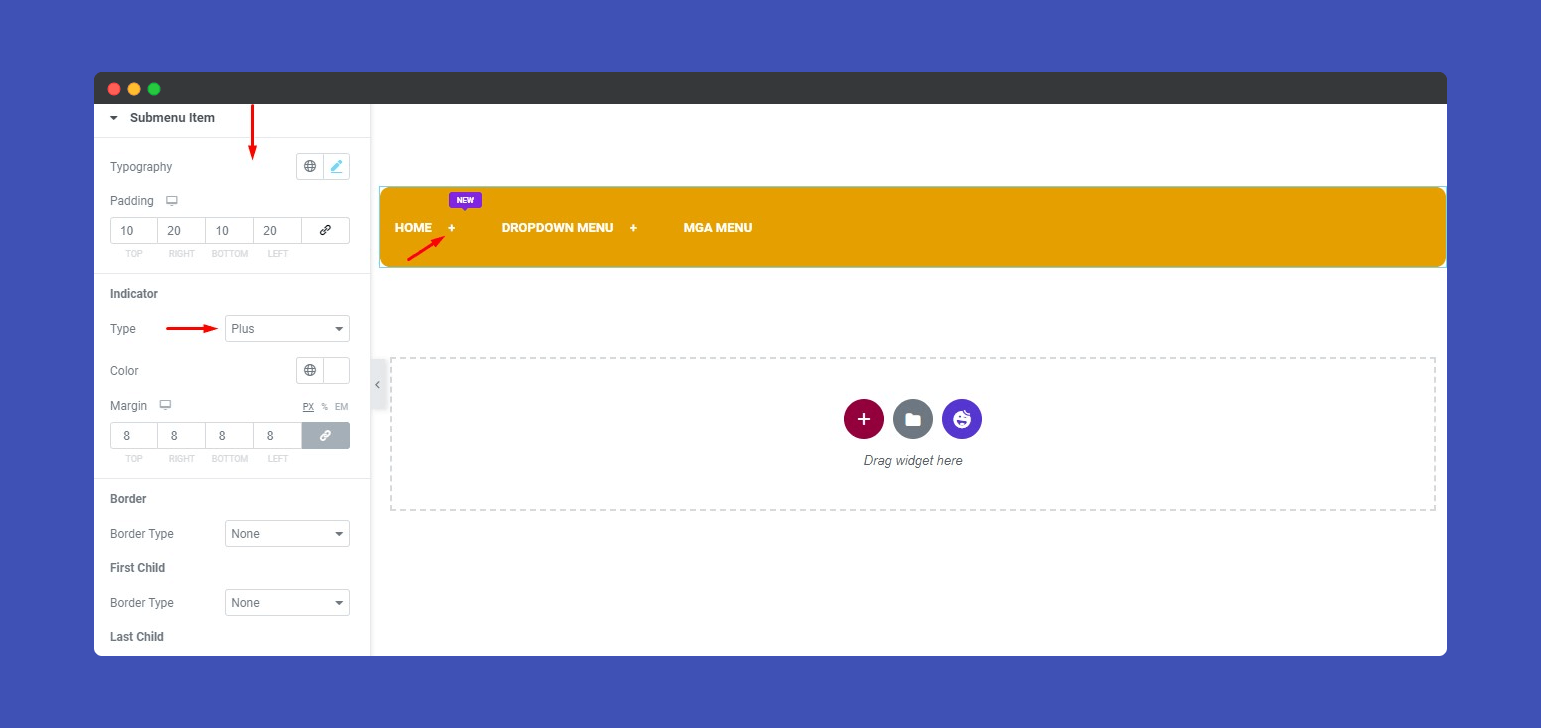
If you want to change the submenu item setting, you should visit the Style–>Submenu Item and make the necessary changes.
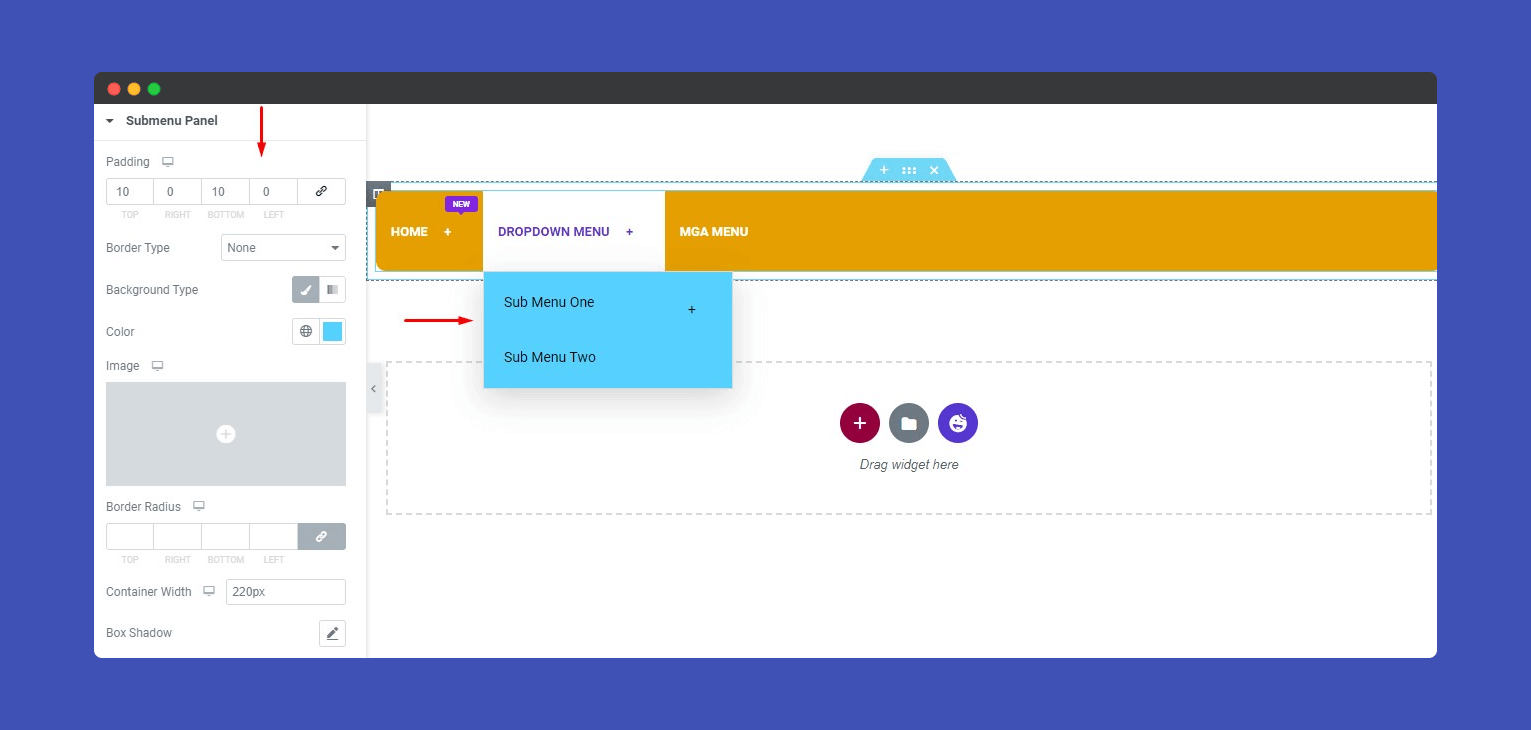
In the Style–>Submenu Panel, you will get lots of option to customize the panel setting like Padding, Border Type, Background Type, Color, Image, Border Radius, Container Width, and Box Shadow.
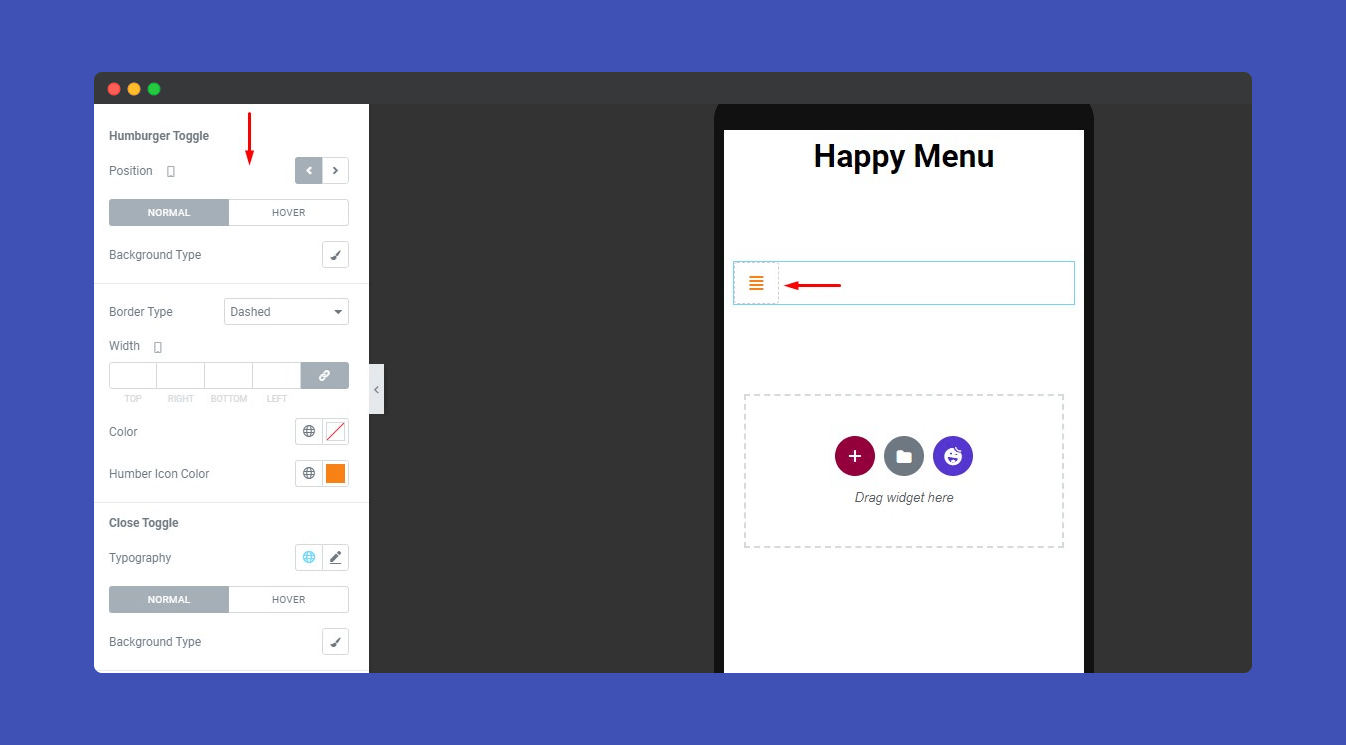
Go to Style–>Hamburger and find the style option of Hamburger Toggle and Close Toggle. And change the Background Type, Border Type, Color, Humber Icon Color, and more of the Toggle.
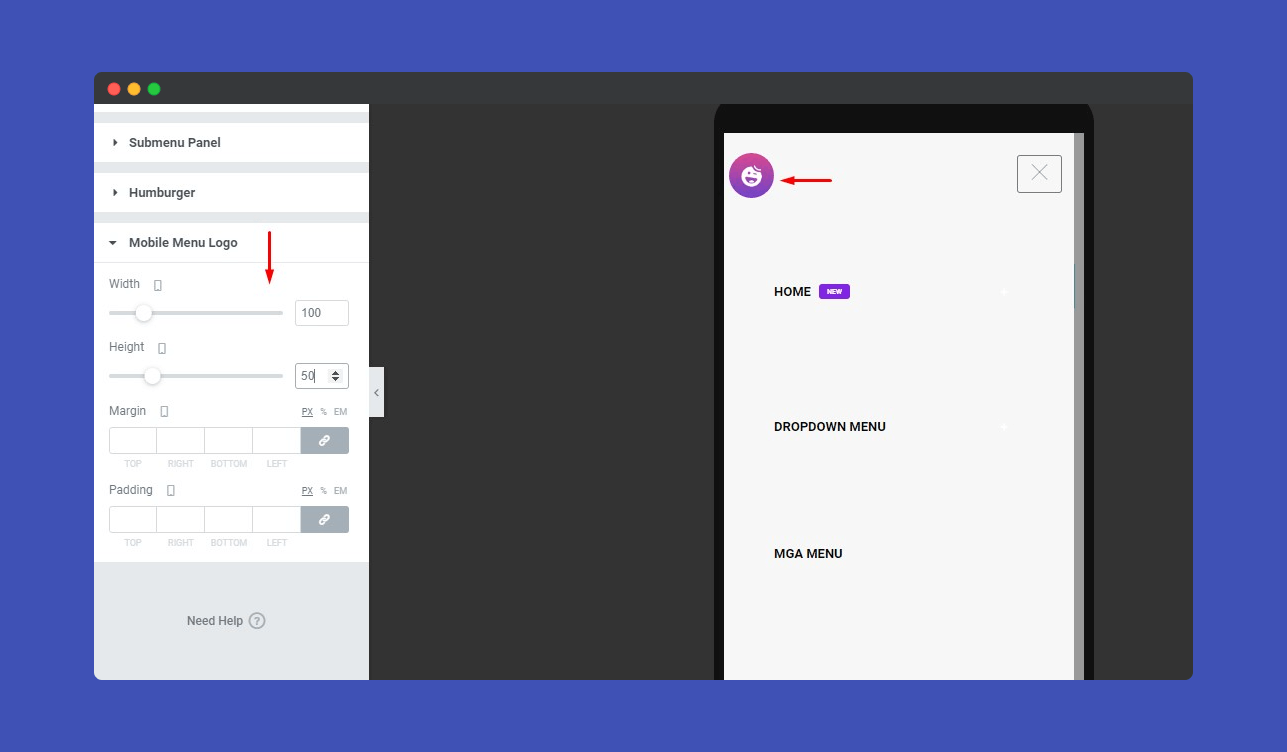
You can also resize the Width, Height, Margin, and Padding of the Mobile Menu Logo.
Step 4: Find More Happy Menu Advanced Setting
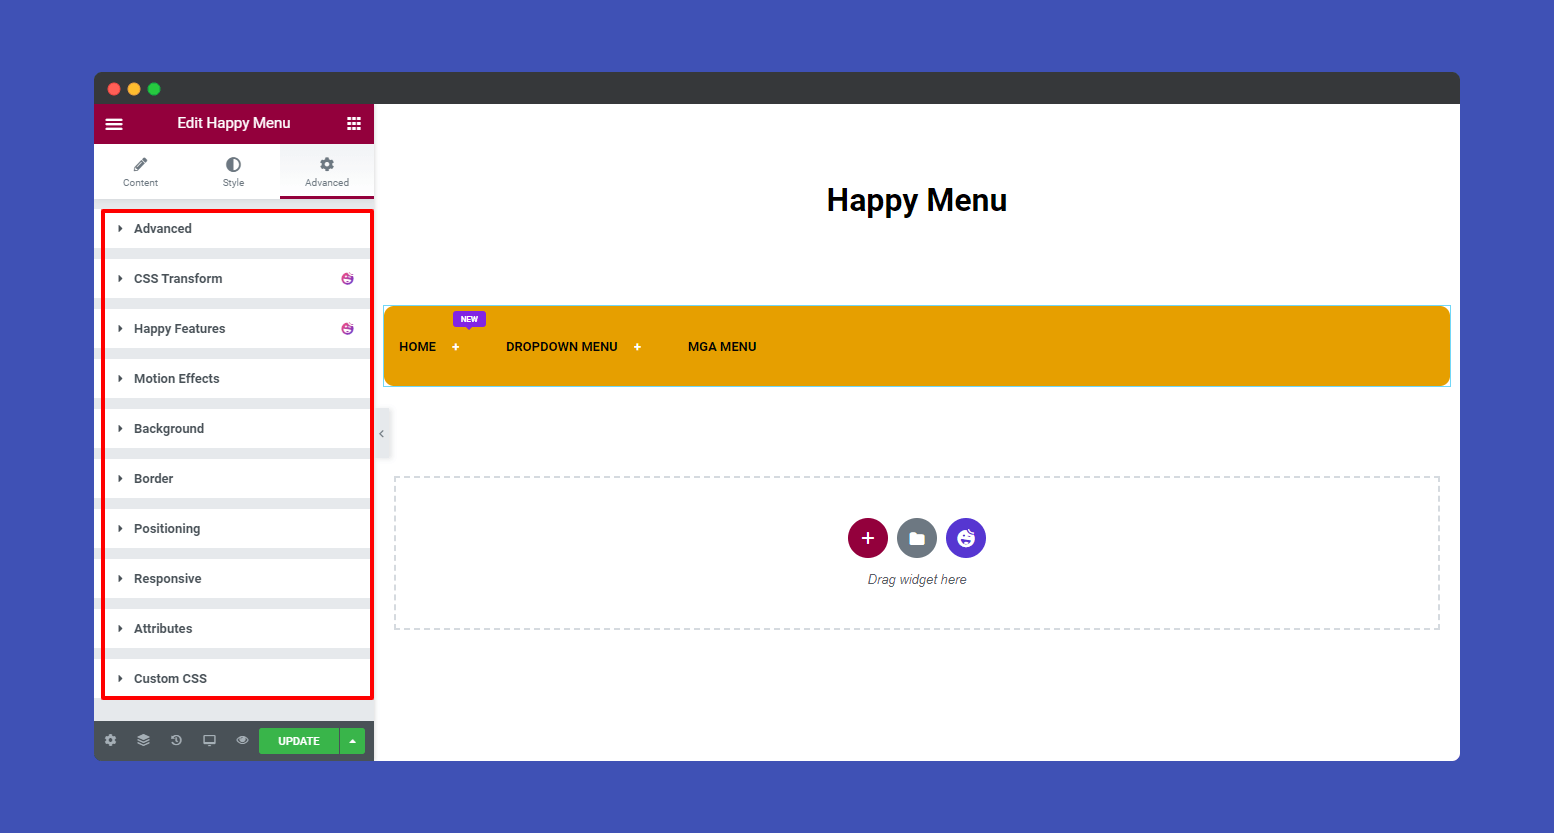
If you want to add motion effects, happy effects, background, or make it responsive and more intriguing, click on ‘Advanced‘ to explore those options. the ‘Advanced‘ is a default feature of Elementor.
Give a read to this Document to know more about advanced features & functions.
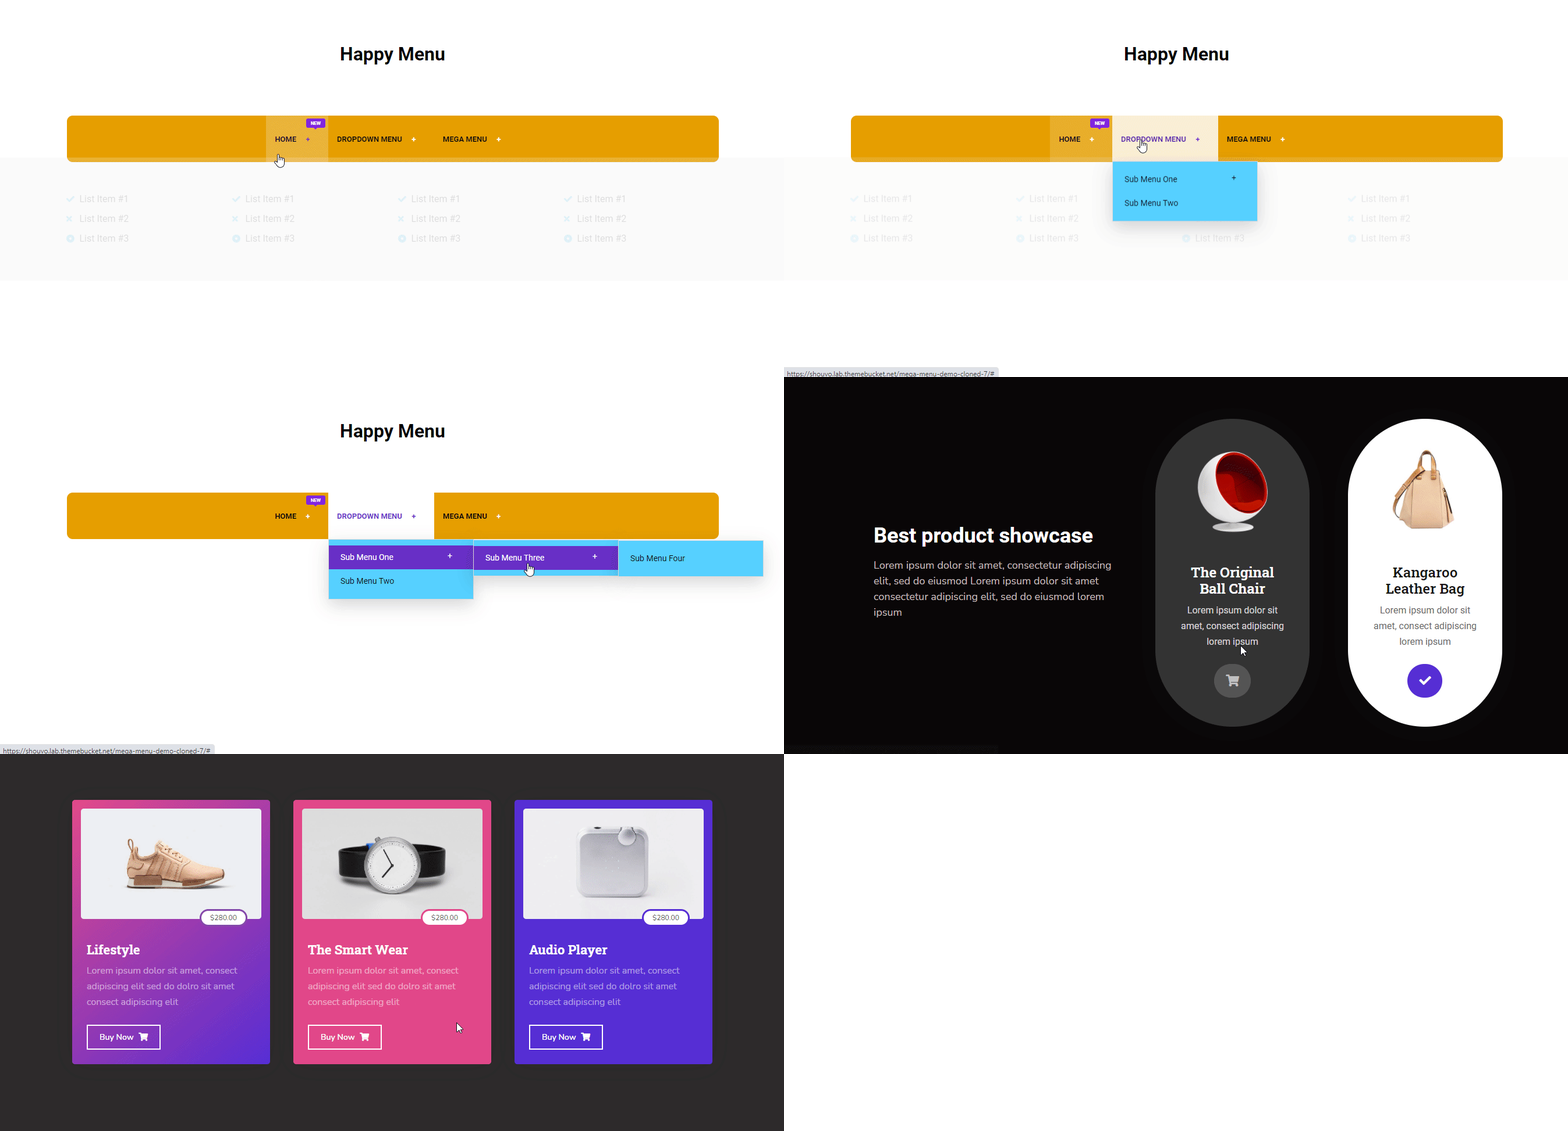
Here is the final preview of Happy Mega Menu widget.
That’s it.
Example of Some Mega Menu That You Can Build Using Happy Mega Menu
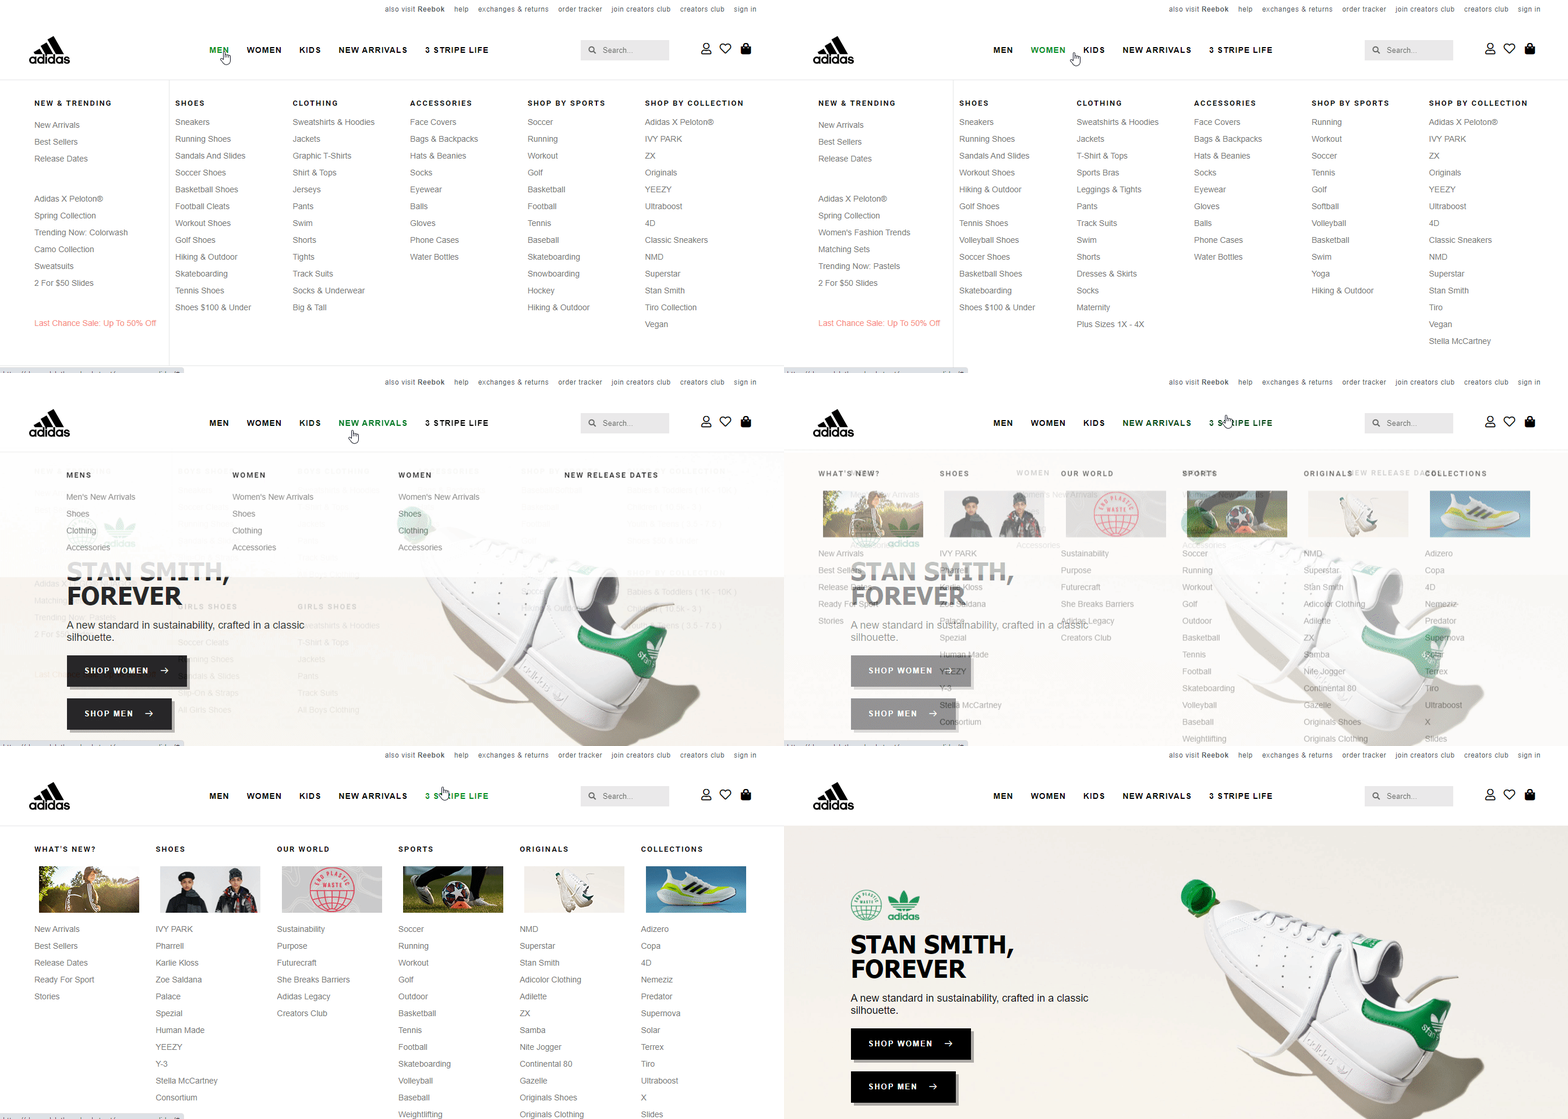
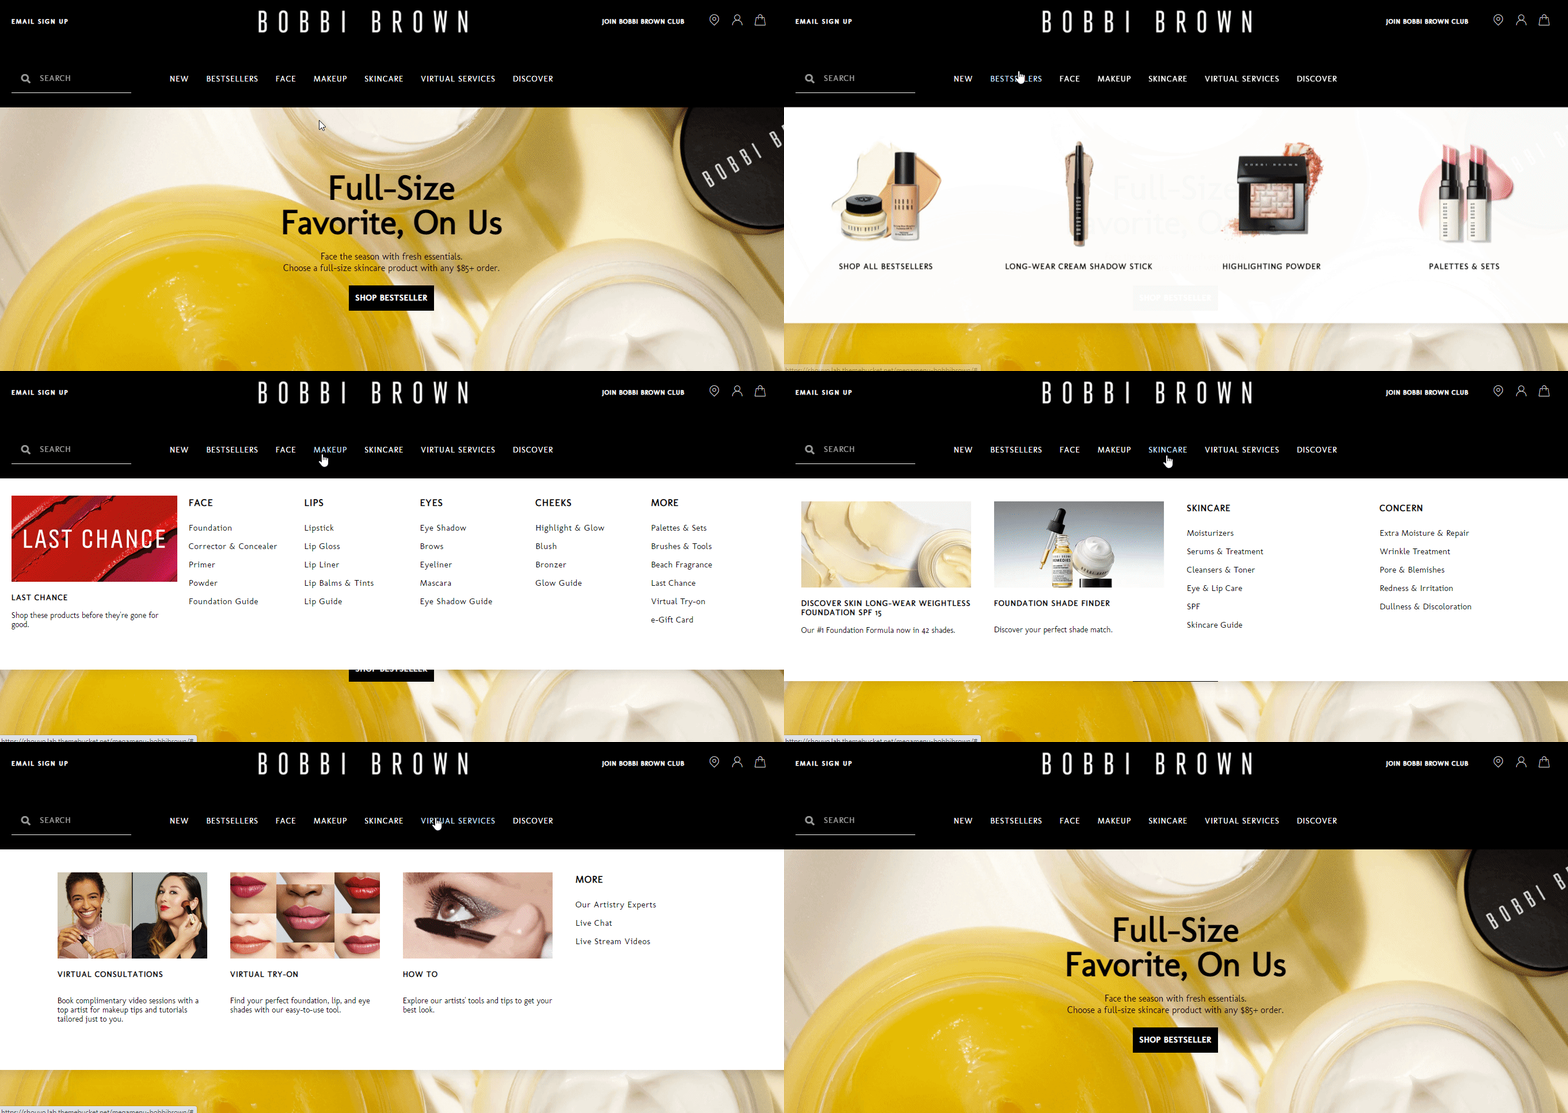
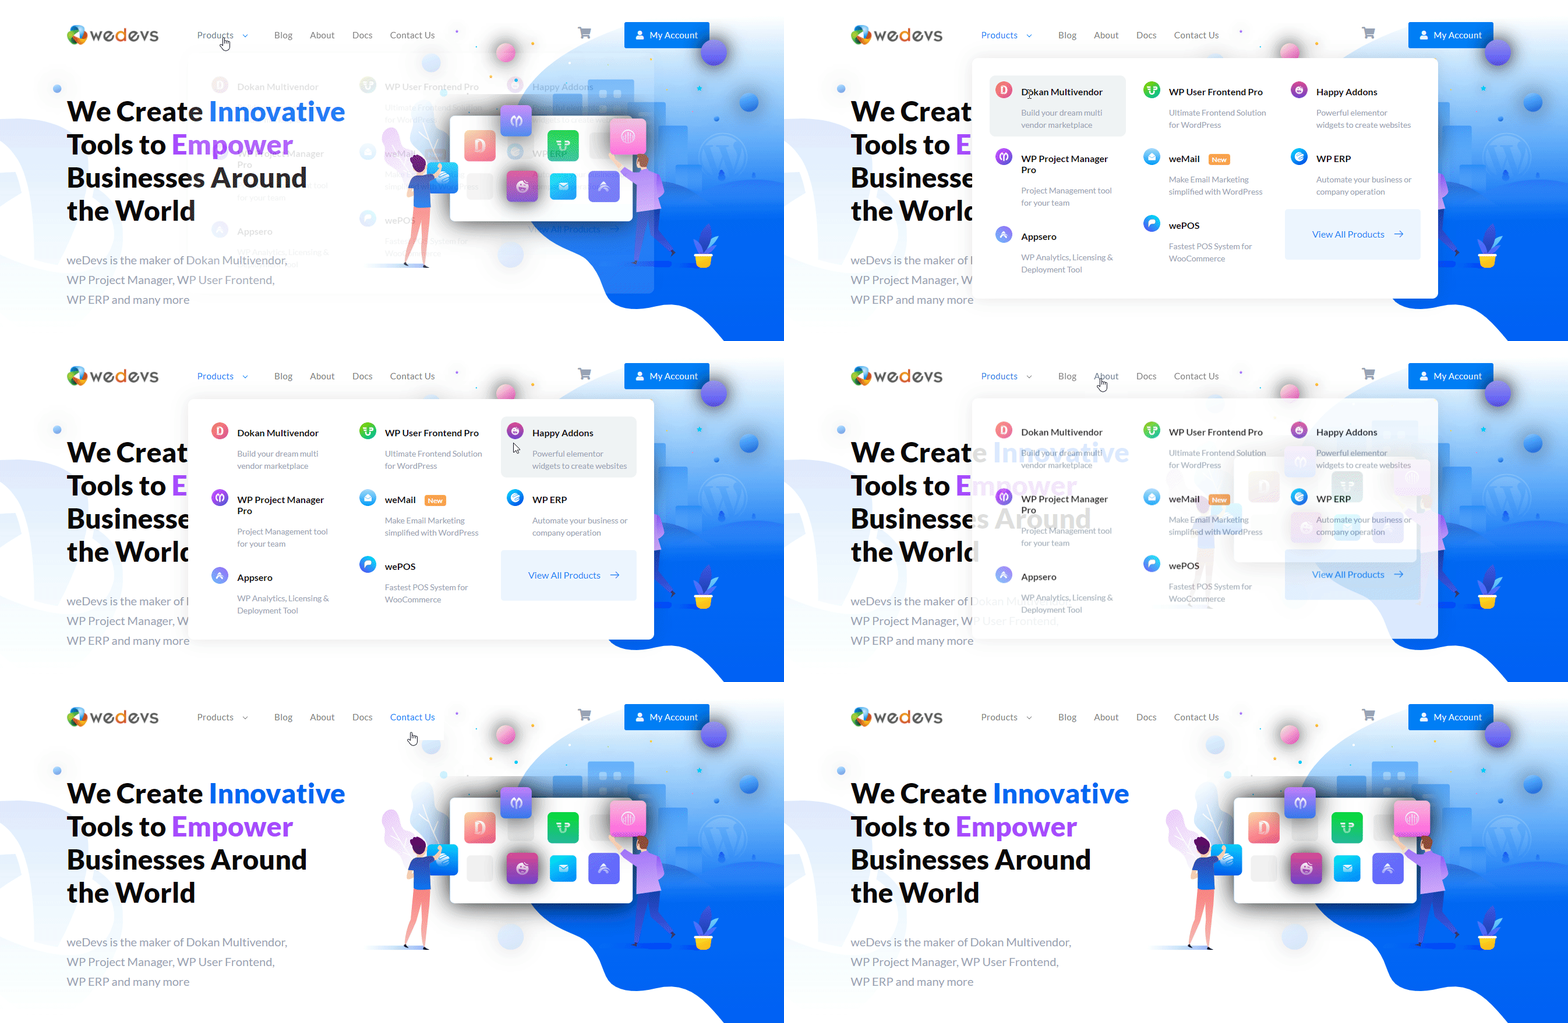
Let’s see some popular website mega menu that you can easily build using Happy Mega Menu.
Adidas
Puma
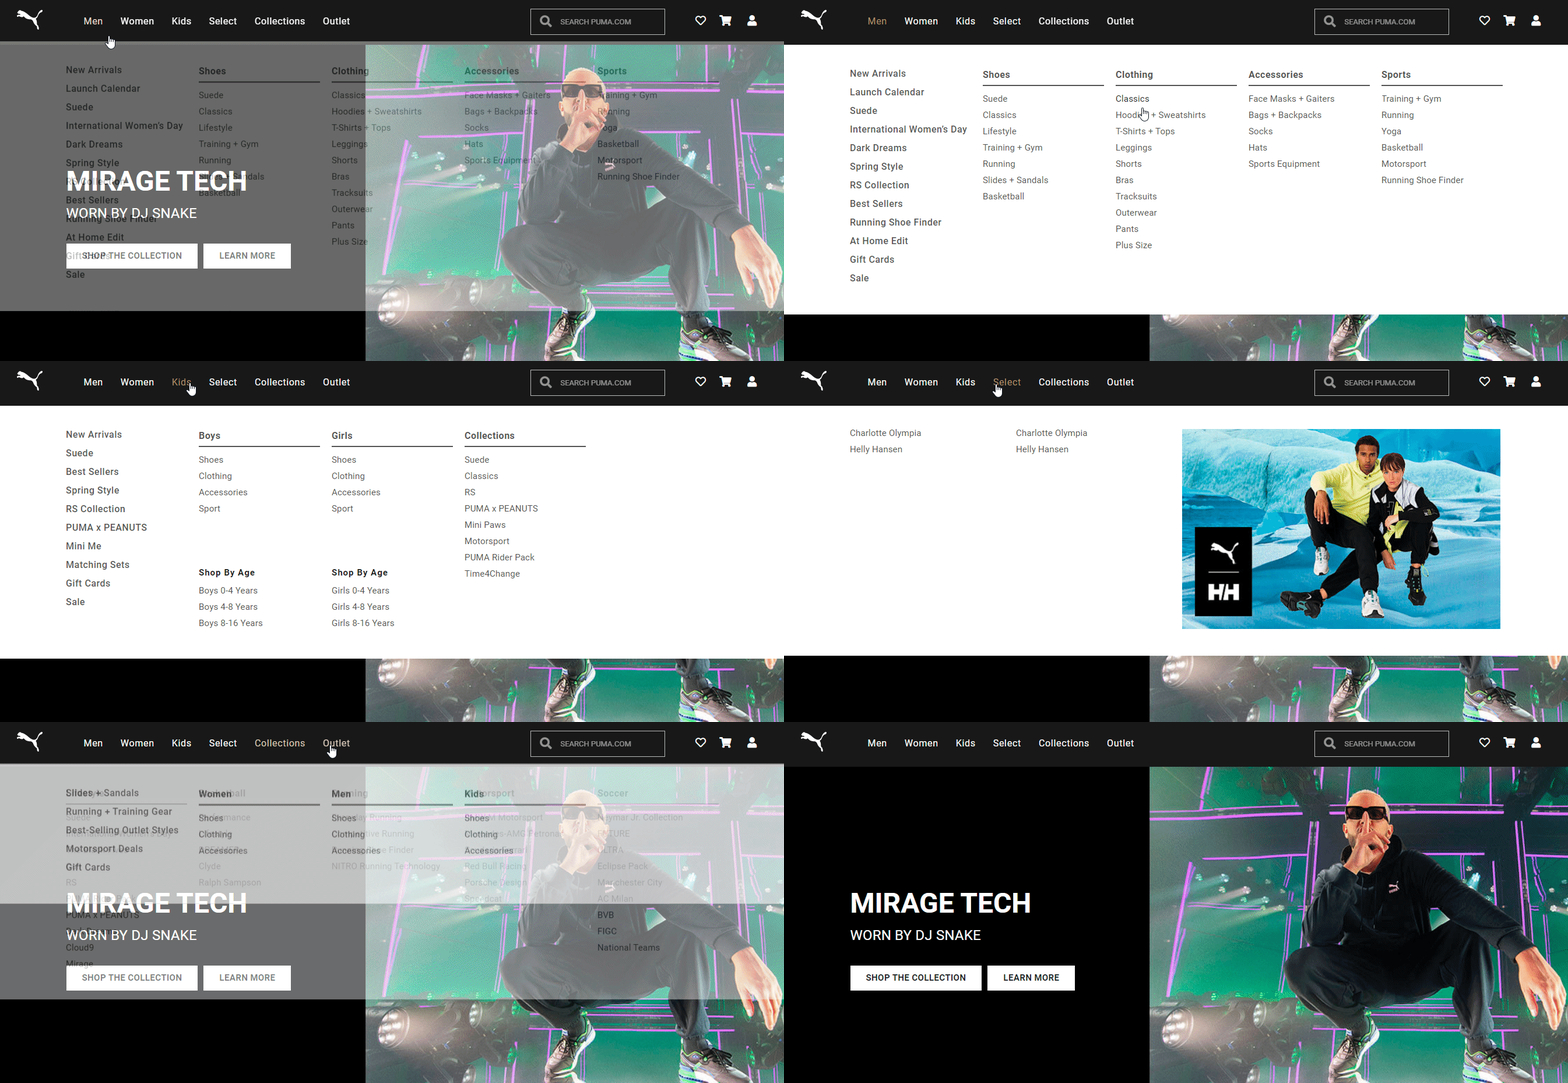
Bobbi Brown
Dribbble
weDevs
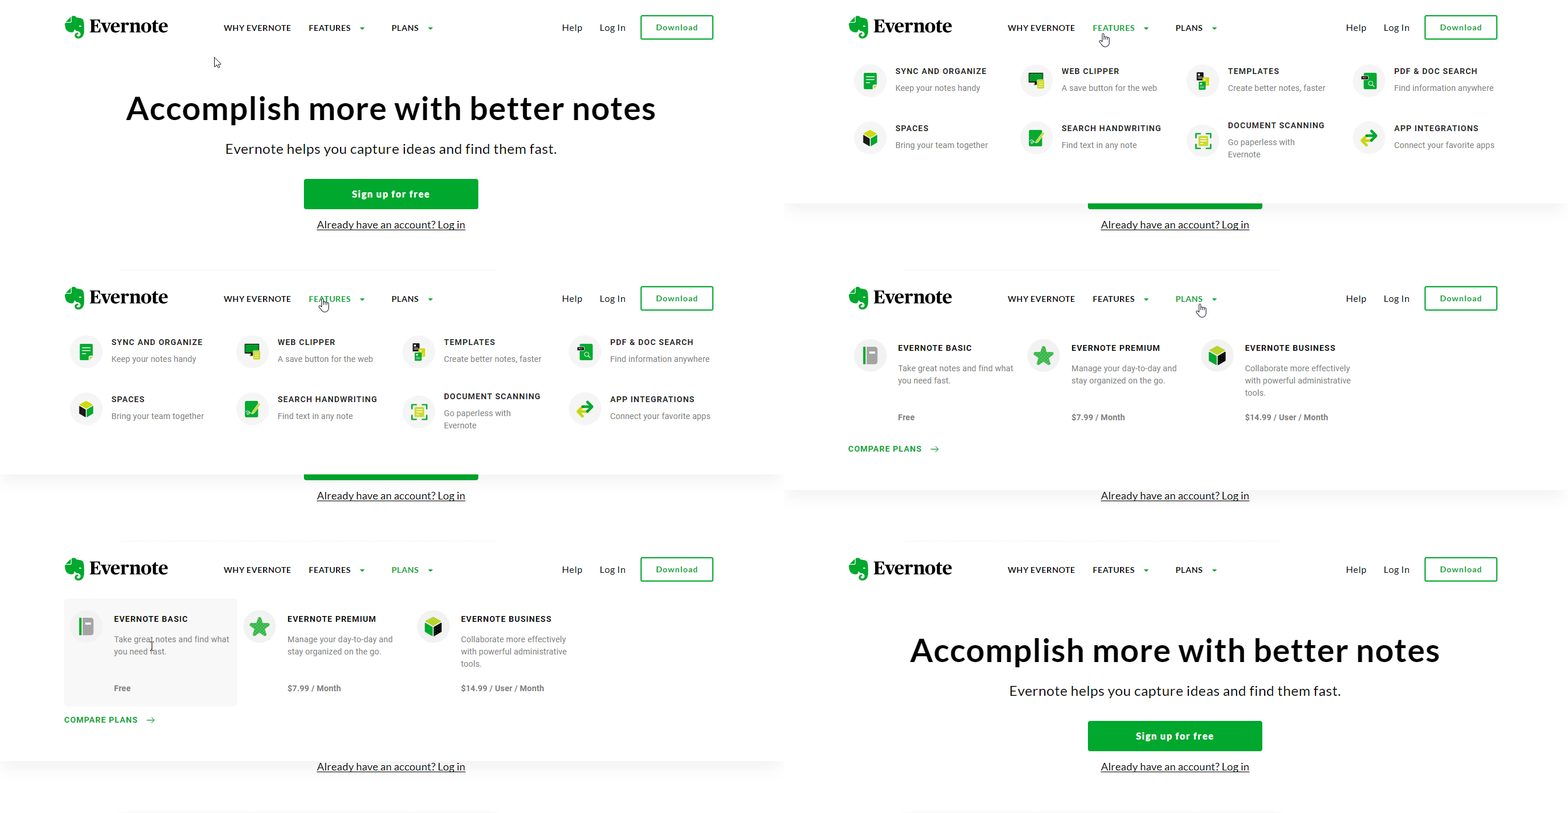
Evernote
Invision

You can also check out this video to see how Happy Menu work.
