Want to add an elegant-looking form on your Elementor website and need a perfect solution for that? Your time of searching is finally over!
Your favorite Happy Elementor Addons recently launched free Form Widgets which allow you to add a form on different pages or sections of your website effortlessly. Its integration with 7 popular form builders means that you can add forms from any of them and stylize using Happy Addons. This indicates just one thing, and one thing only.
With Happy Addons form widgets, you will get “Tons of style and customization scopes”.
In this tutorial, we have shown you how to use Happy Addons Form Widgets inside your Elementor-designed webpage, you will also learn how you can customize their design, just the way you want.
But before that, let’s understand why the form widgets are necessary for your website.
Happy Addons Form Widgets at a Glance
Happy Addons is one of the best Elementor addons that helped more than 1,00,000+ WordPress users to build their website. It comes with tons of essential features and widgets to customize your website posts, pages, WooCommerce products, forms, and more.
As you might have already known, Elementor offers a default form widget to display forms on the website. But it doesn’t have enough features to customize a form with your extensive design and style.
That is where Happy Addons comes in. Happy Addons form widgets lets you integrate forms from 7 of the most popular form builders on WordPress. Each of the widgets comes with various layouts that will help make your forms more user-friendly and well-designed.
The 7 form plugins that Happy Addons Form Widget supports, are –
- Contact Form 7
- Ninja Forms
- weForms
- Caldera Forms
- WPForms
- Gravity Forms
- Fluent Forms
How to Use Happy Addons Form Widgets in Your Elementor Website
Using the Happy Addons Form Widget, you can easily customize and display a form on your Elementor website, in a couple of minutes.
At the very least, you need three plugins to do that. They are –
- Elementor (Free)
- Happy Elementor Addons (Free)
- WPForms (Free)
Here, we use one of the popular form plugins WPForms.
Let’s configure a contact form.
First, install and activate the necessary plugins that we mentioned in the list above.
Step 1: Create a Sample Form
After installing WPForms plugin, you have to create your first form.
To do this, Go to WPForms–> Add New
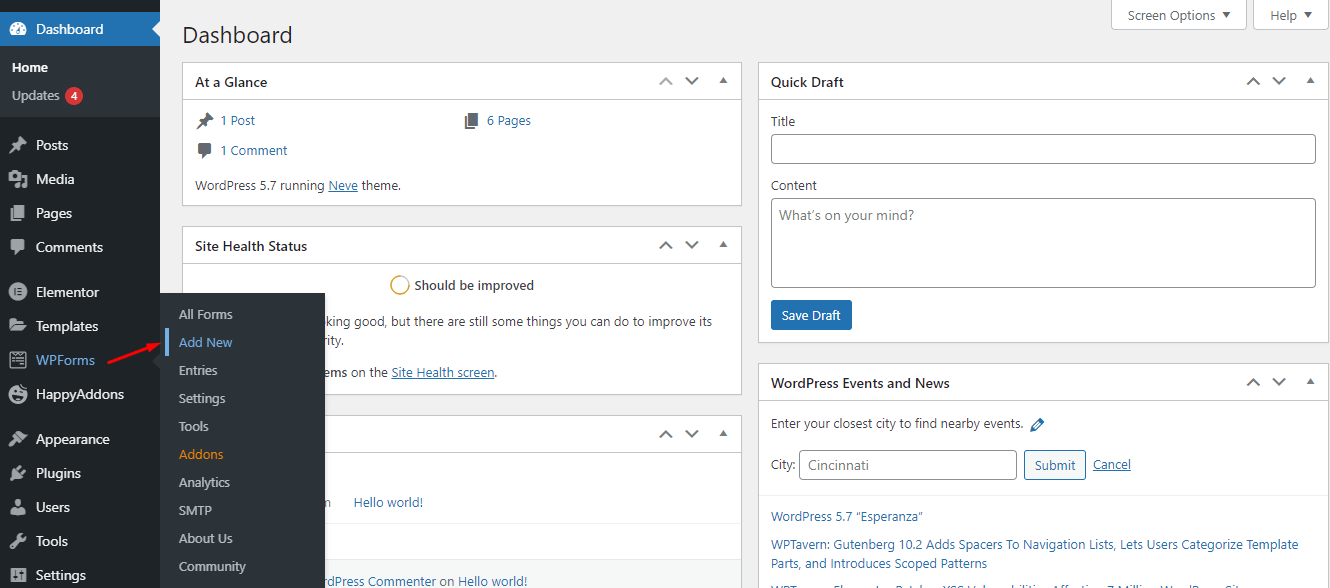
In the next page, you will get the option to create your form.
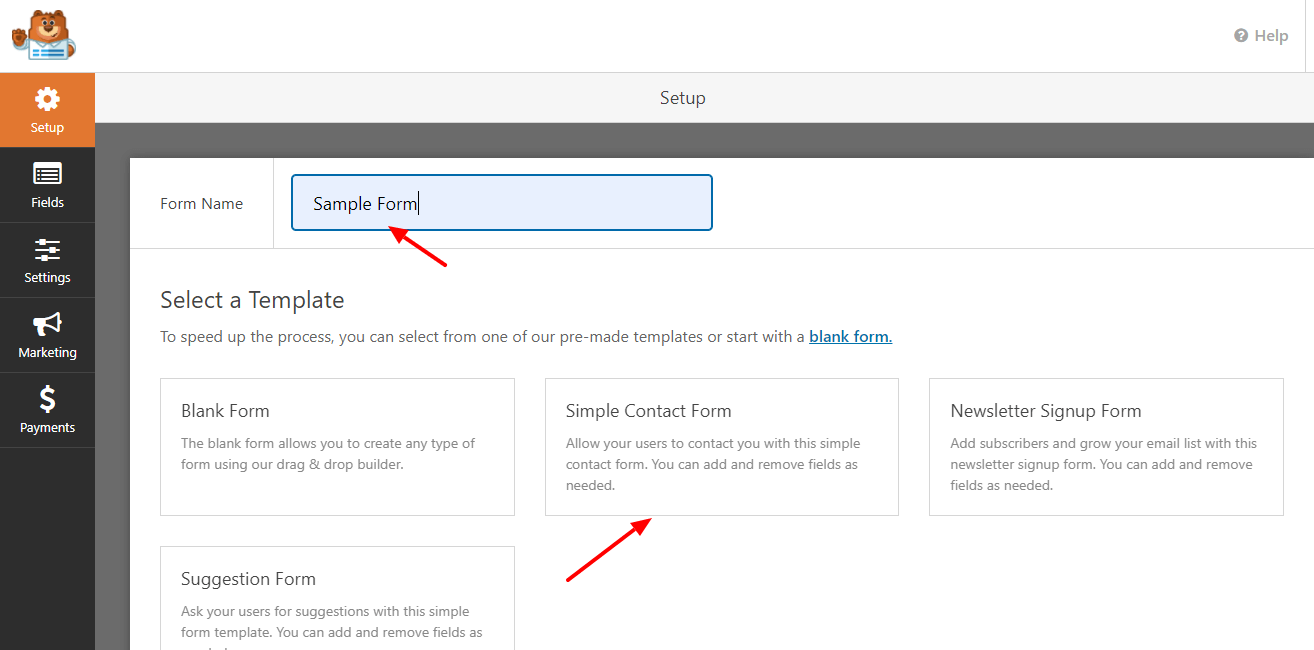
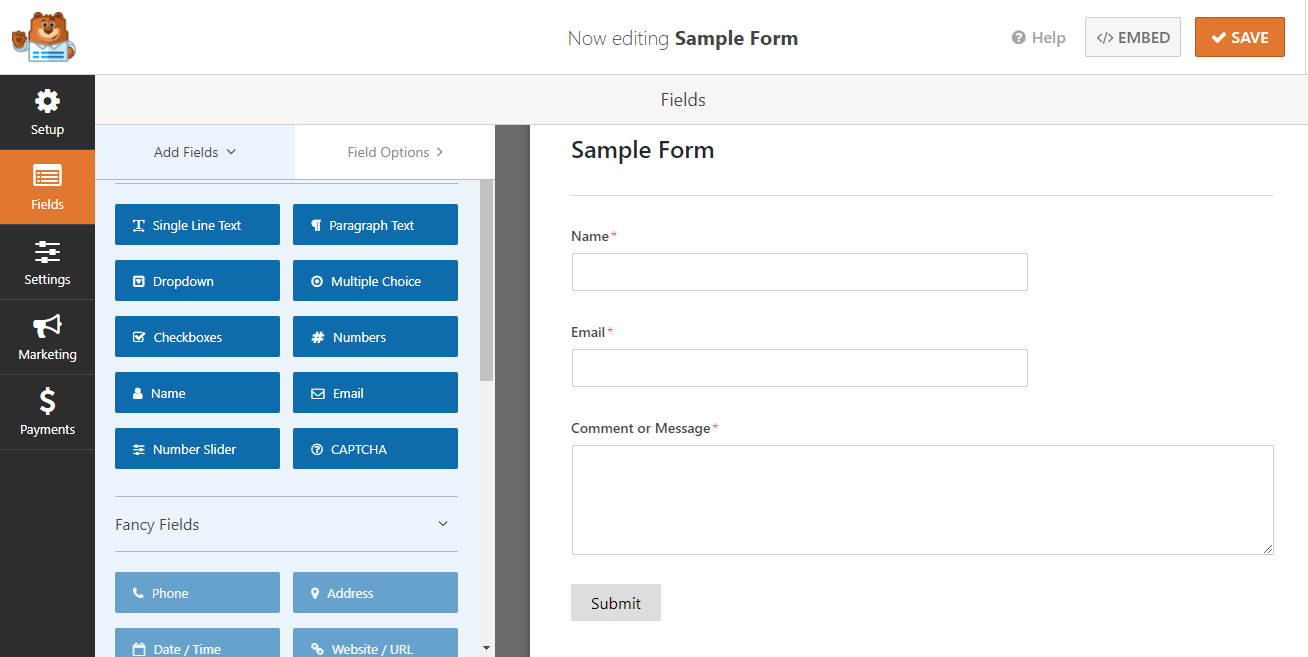
Then you can edit your form according to your requirement and add many fields. Here we add three fields Name, Email, and Message.
After finishing the form edit, you must click the Save button.
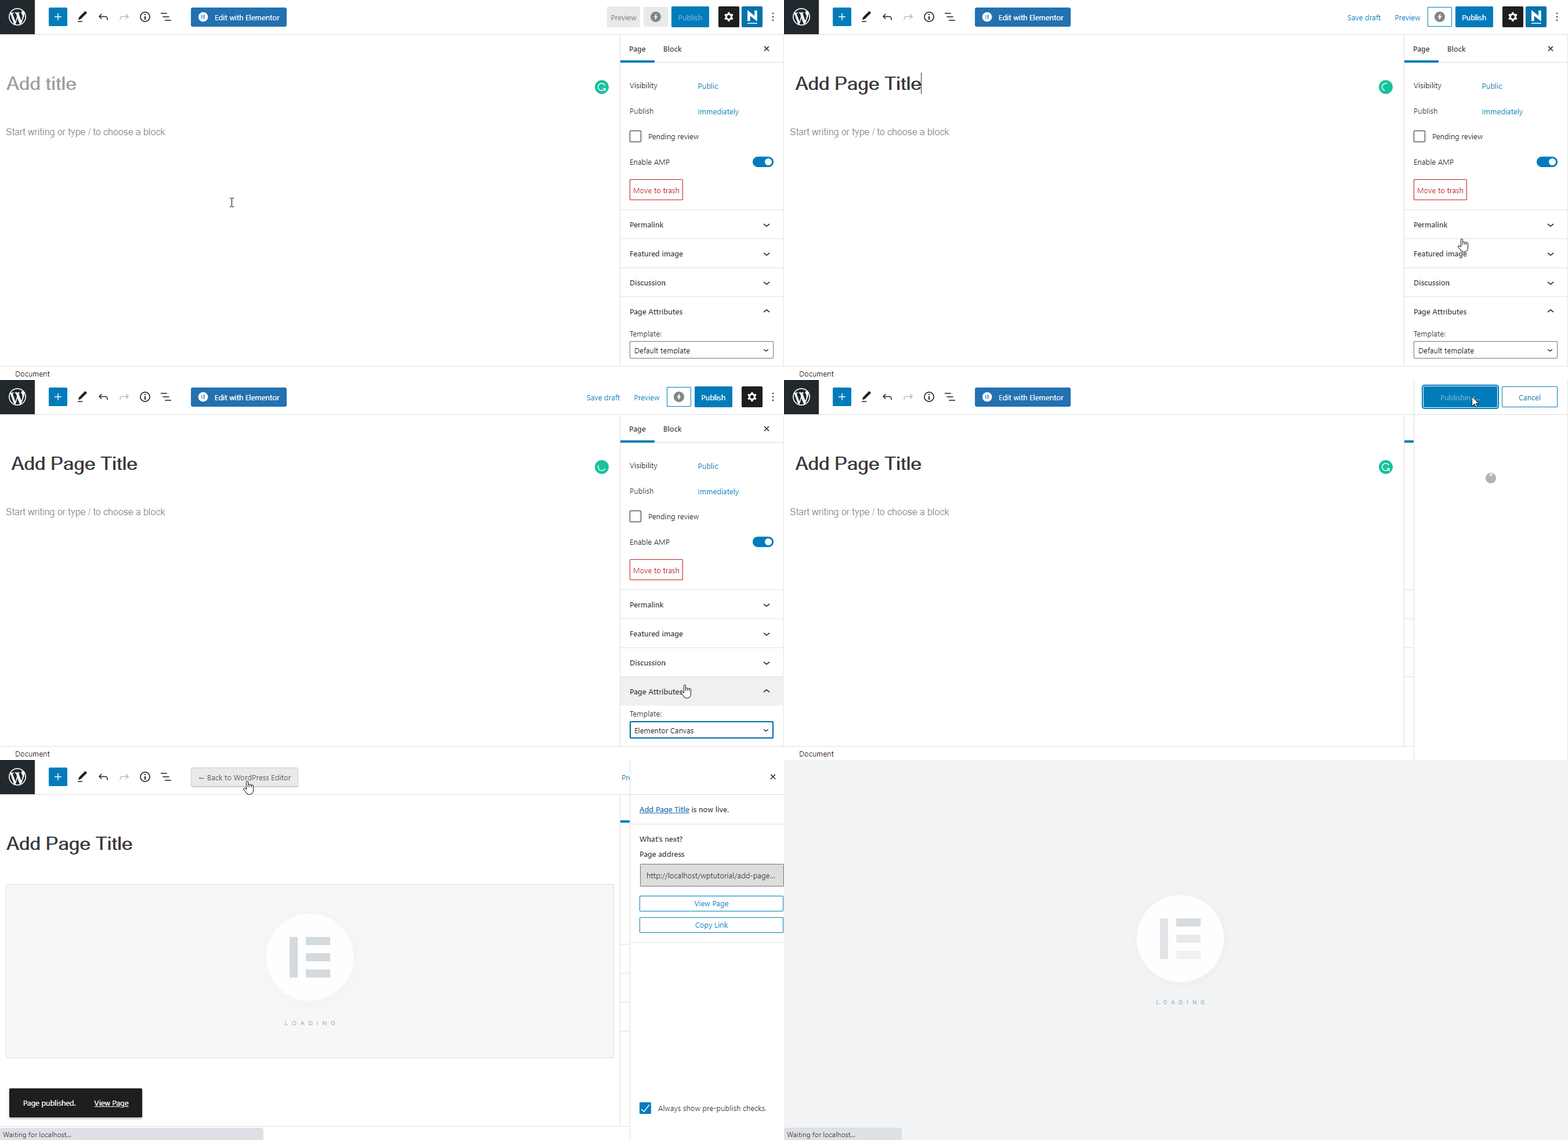
Then, you need to create a page to configure your form. You can also set the form on your contact page.
Step2: Create a Page For Form Integration
First click the Pages–>Add New.

In the next screen, you’ll see the option to add your page title.
Step 3: Add WPForms
To design the contact page, we’ve used WPForm’s premade contact page design. We’ve copied the design using the Happy Addons Pro ‘Live Copy‘ feature.
The predesign is used in two rows for designing the contact page.
In the left section, we’ll add WPForm widgets. And in the right section, we’ve already inserted an image and added a background color of the section.
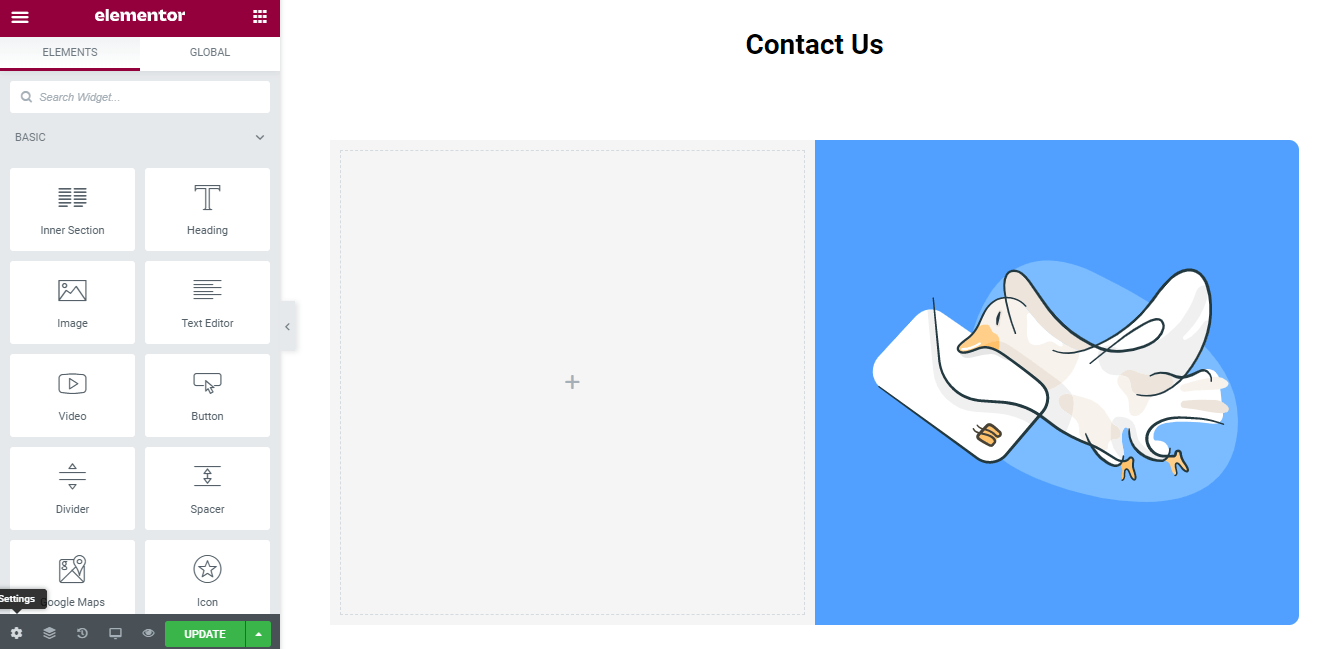
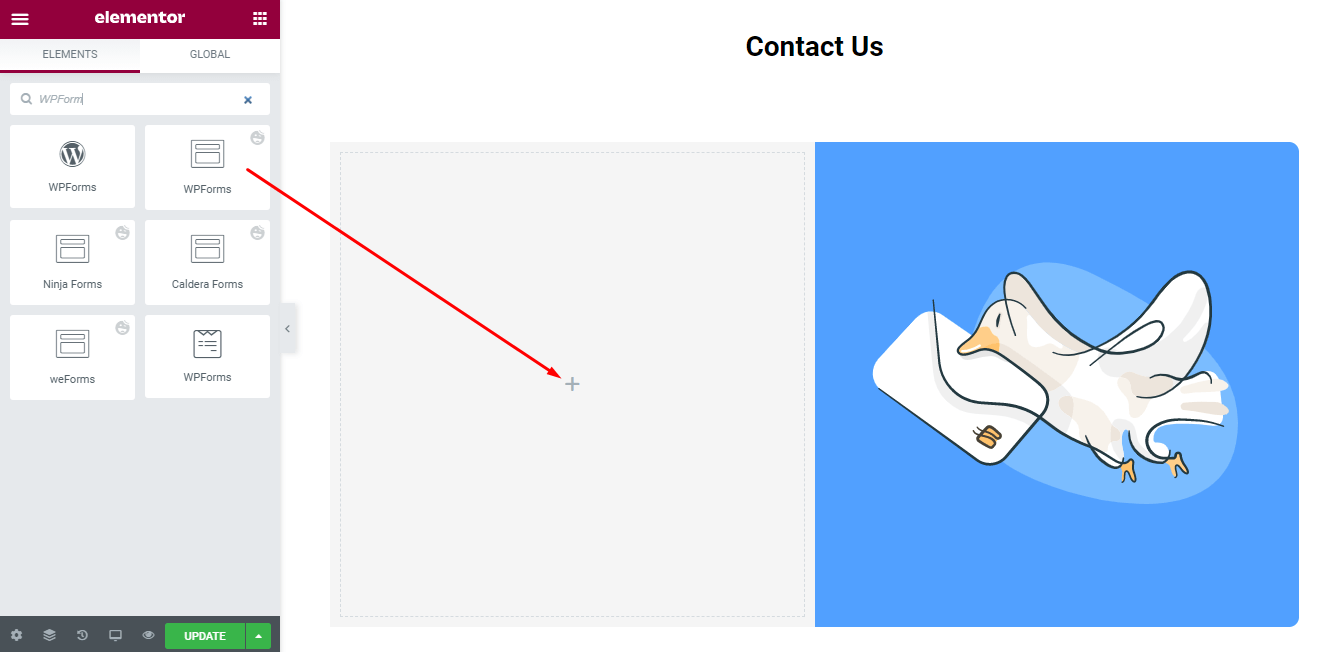
Now, find the WPForms widget in the search bar, and select the widget from the left side menu. Then drag and drop it onto the selected area.
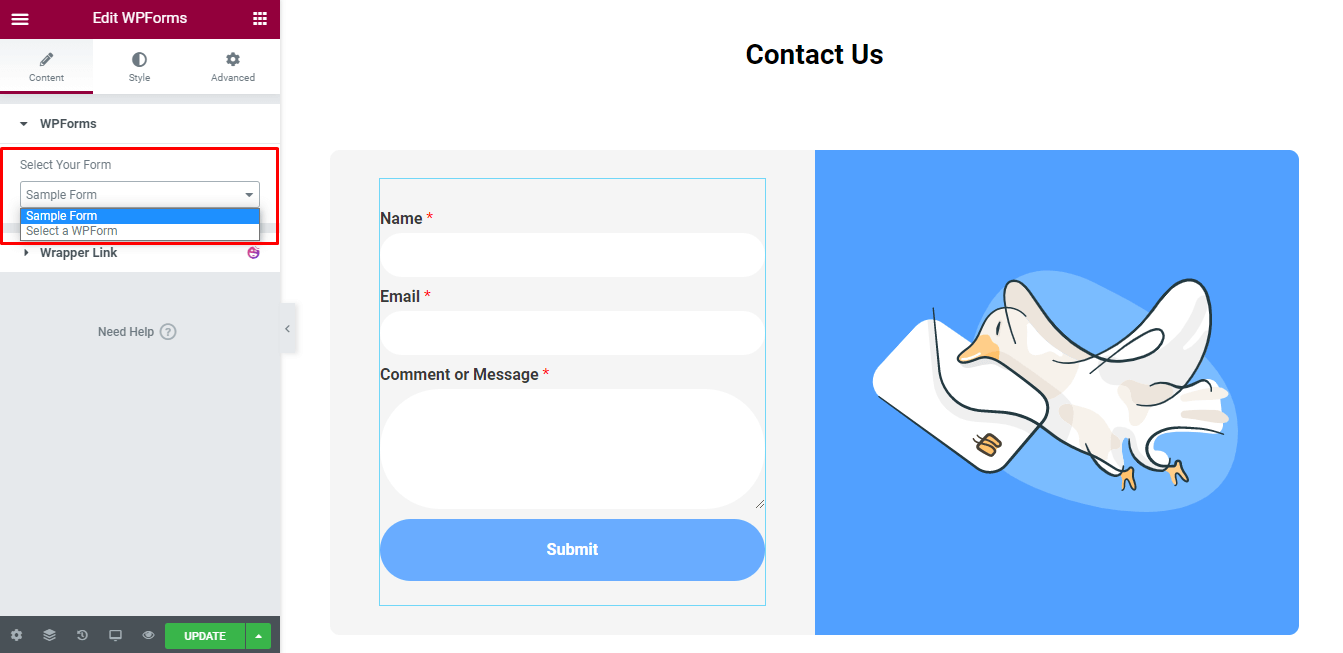
Then we select the form name from the drop down that we’ve created earlier.
Step 4: Style The Form Using Happy Addons
Now you can easily redesign the contact form if you want.
Here we show you.
Design The Heading
First, we add Happy Gradient Heading from the left sidebar menu.
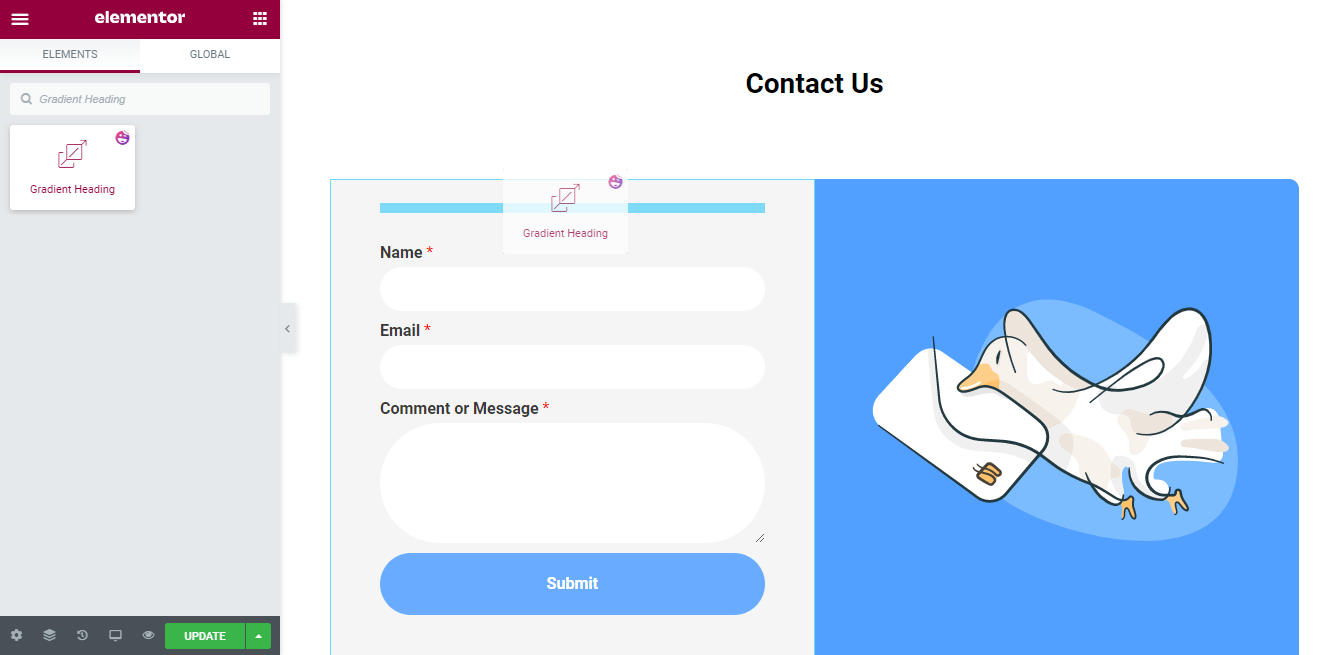
Then you can customize the Happy Gradient Heading in your own style. You can select Presets–>Design and also edit the Title.
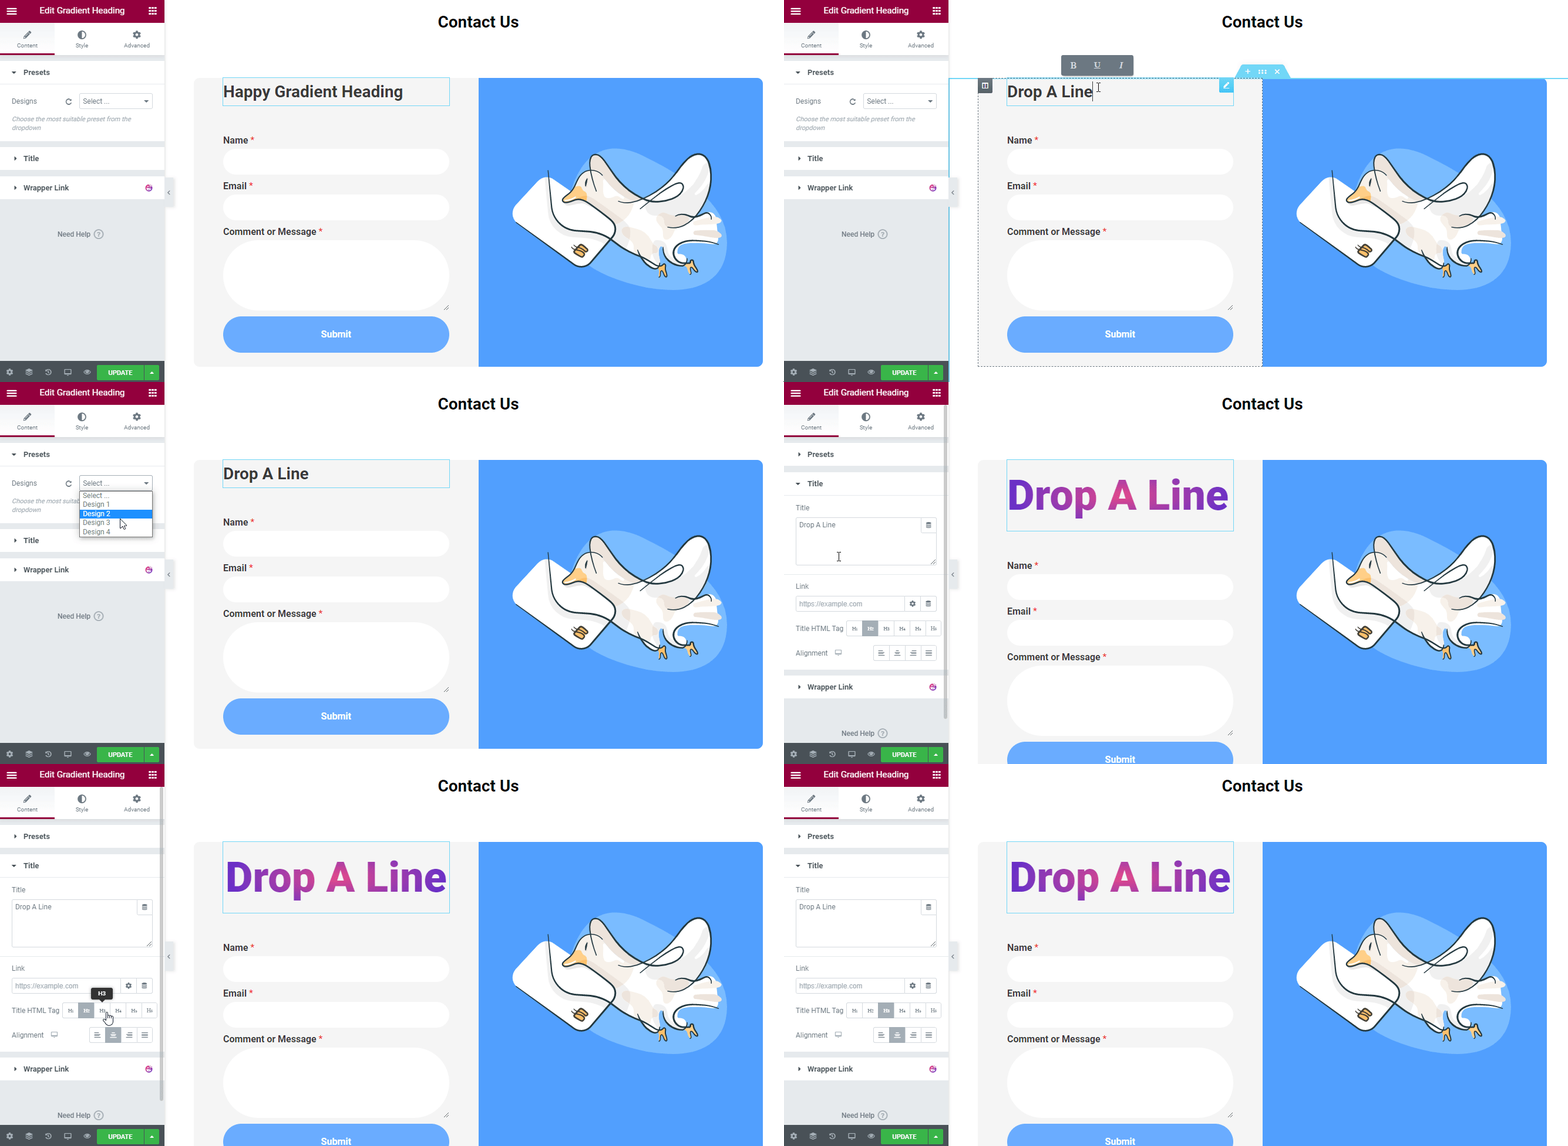
After designing the heading, we’ll change the form style.
Design The Form
To redesign the form, you have to go Style. Here, you’ll get the form styling option like Form Fields, Form Fields Label, and Submit Button.
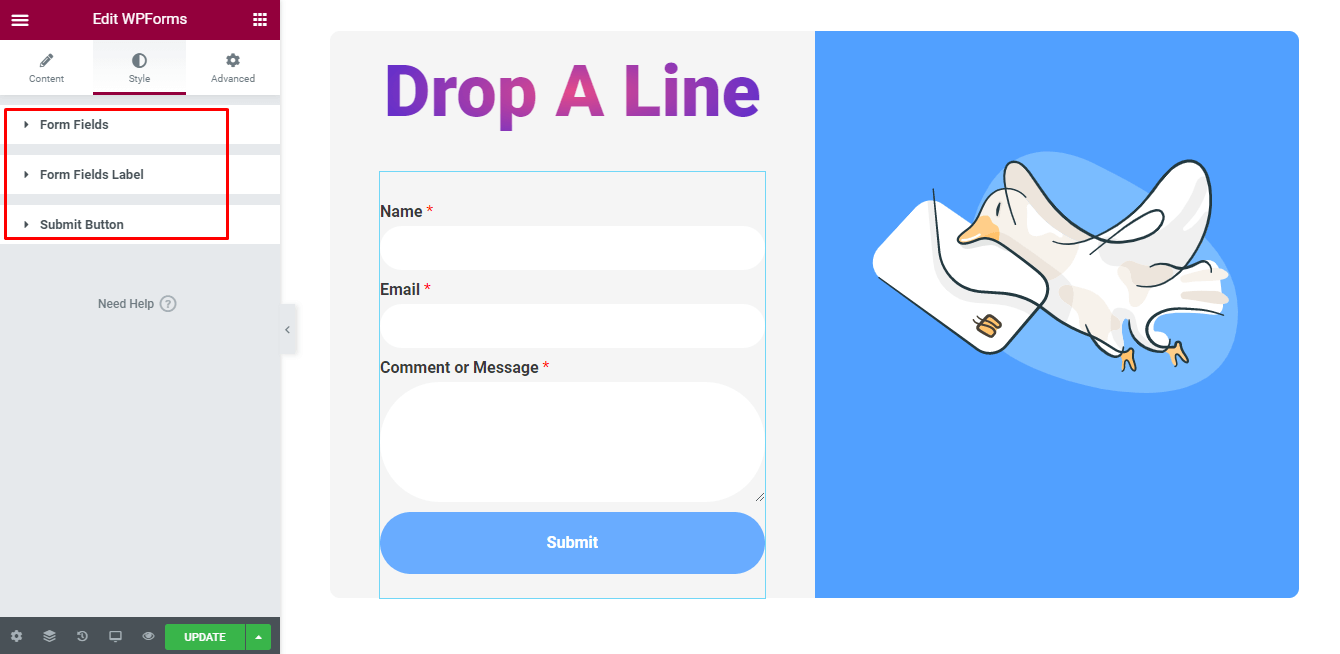
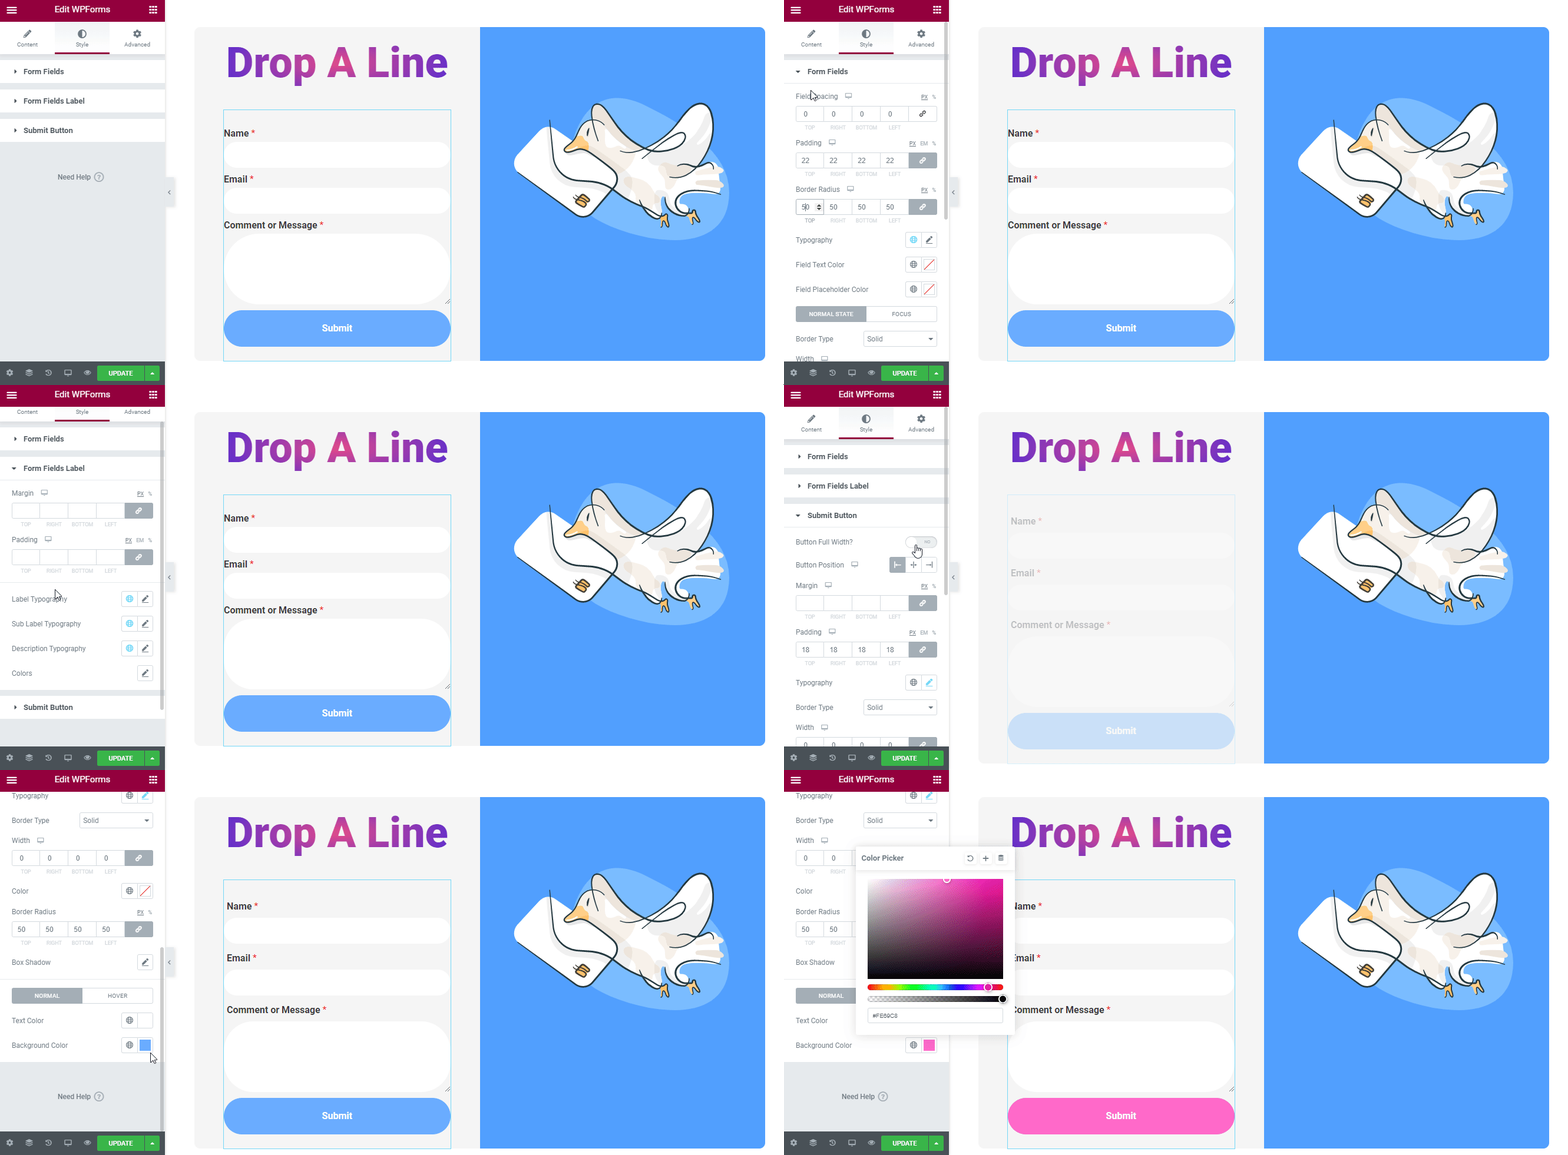
Form Fields: In the form Field setting, you will change the Field Spacing, Padding, Border Radius, Typography. Field Text Color, Field Placeholder Color, Border Type, and more.
Fields Label: Fields Label also allows you to edit the Margin, Padding, Label Typography, Sub Label Typography, Description Typography, and Colors.
Submit Button: If you need, you will also customize the submit button by changing the Button Full Width, Button Width, Margin, Padding, Typography, Border, Color, Border Radius, Box Shadow, Text Color, and Background Color of the button.
Let’s customize the form a bit.
Final Preview
Here is the final preview of our contact page.
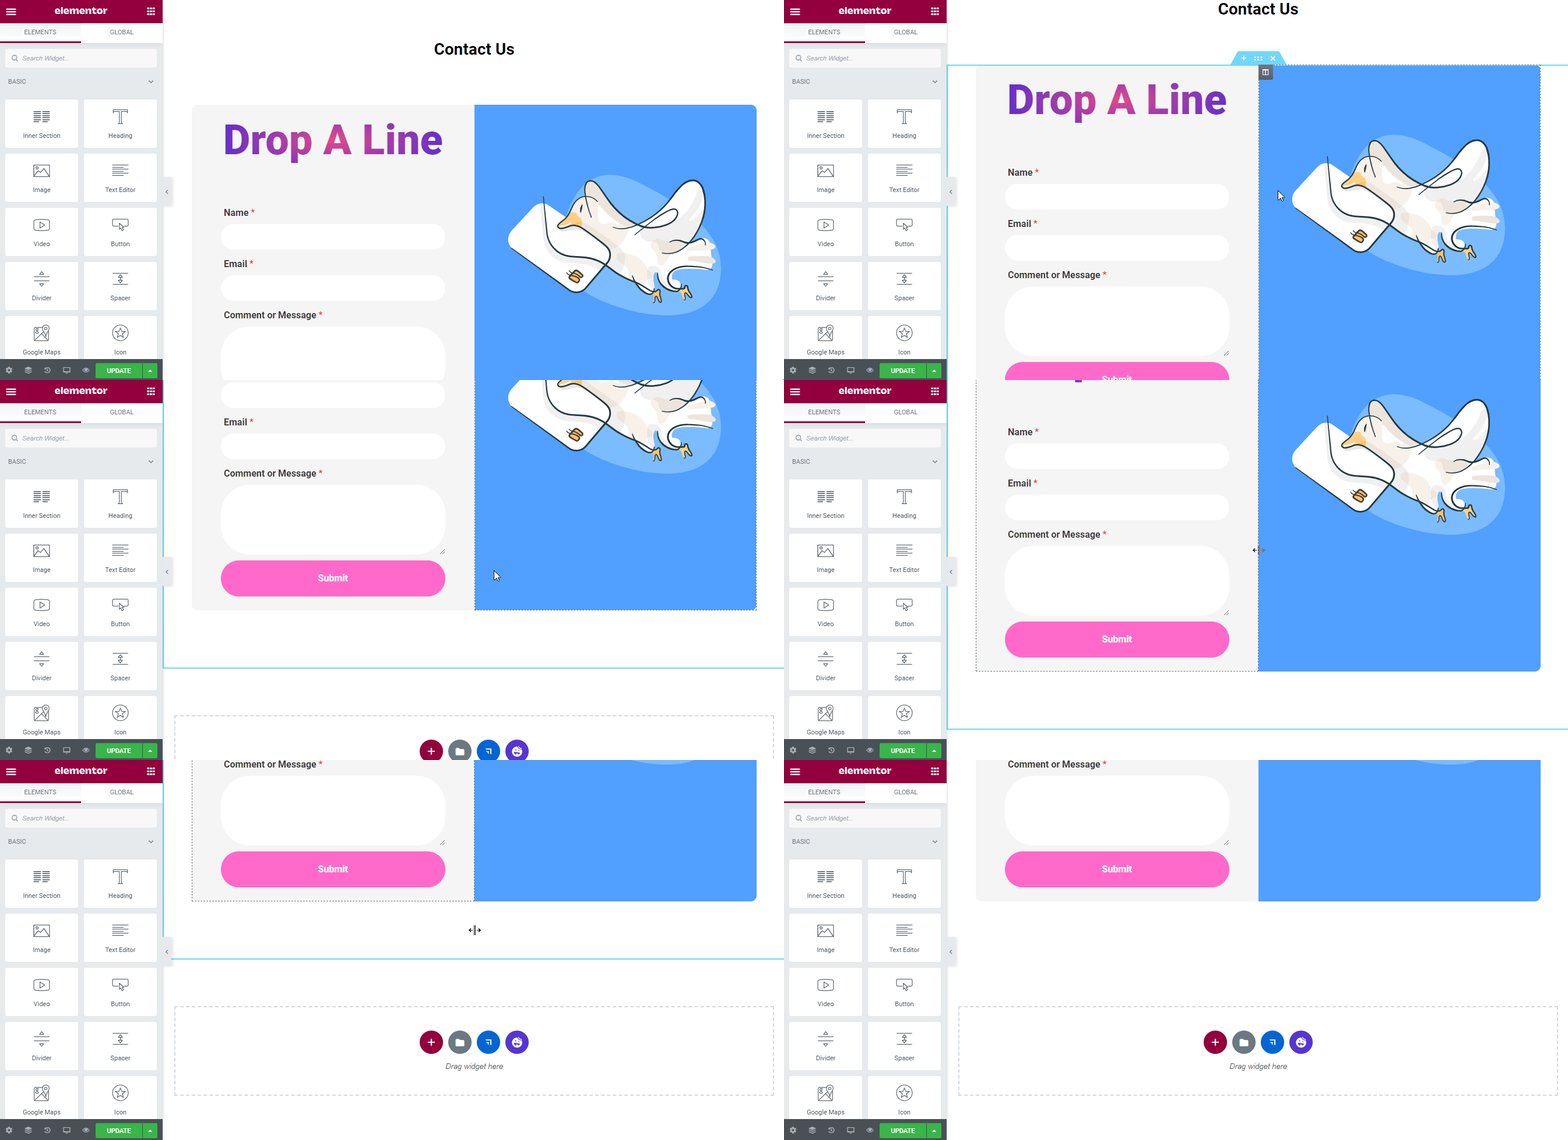
You can also see this handy video tutorial.
Check out the full WPForm documentation.
Form Widgets: What They Are and Why do You Need Them?
What is the purpose of having a form on a Web page?
A form is used for various purposes on a website. You can receive your messages using a form and communicate with your users. It also helps to build trust with your customers. Therefore, it can increase the website’s trustworthiness and allow your website users to better communicate with you. So what do form widgets do?
Form widgets lets you display forms on your Elementor website easily.
Here are some key takeaways that clearly show the importance of having a form on a website –
- Reduce spam emails
- Receive messages when it suits you
- Keep track of inquiries
- Generate more leads
- Make your email marketing list
- Offer customer support
- Get user-sent messages
Happy Addons form widgets can help you do all of them through the intuitive form widget integration process. Let’s know more about Happy Addons form widget.
Conclusion
In this blog, we’ve covered everything you need to know about Happy Addons Form Widgets. We’ve also shown you how to set a form using the Happy Addons WPForm Widget. You can do the same for the other 6 form plugins, in the same way.
On the same note, here’s how you can create an Elementor Contact form.
If you still have any queries regarding how you can add and customize forms on your Elementor website, you can comment down. And do share the post on your social channels and help your friends to learn.




2 Responses
The video is much too fast. I felt quite dizzy watching it. After seven viewings I’m not much wiser.
So sorry, Elizabeth, for the issue. I’ve informed the video team about recreating the video. Allow us time. Meanwhile, you can share your points and what you are looking for! I will try my best to help you.
Thanks and regards,
Gobinda
Team HappyAddons.