The increasing availability of the internet and digital devices has made it challenging for website owners to control who can view their content. Implementing age verification has become a handy way to counter this problem.
It serves as a protective barrier that verifies age requirements for users to get access to particular content. If you’re an Elementor-based WordPress user, you can enable this feature on your site for free.
This article will present a step-by-step guide on how to add age verification to WordPress with Elementor. Before that, we’ll cover some theoretical discussion. Get started!
What is Age Verification on a Website?
Age verification is the process of checking and confirming the age of users before allowing access to age-restricted products, content, and services. For example, alcohol, tobacco, firearms, ammunition, medicinal prescriptions, gambling, gaming networks, etc.
Lack of control in verifying ages can have severe consequences. If you sell the above-mentioned products and services to minors (below 18 years) without age verification, you may face legal compliances and punishments.
These tremendous pressures may kill your business in the end. This is why having the age verification feature is a must on many websites. Explore how to build an online store within minutes.
When Do You Need Age Verification on Your Website?
Although age verification is a useful feature, it’s not mandatory on all sites. Because there are many sites where all types of visitors can explore freely. This feature is required only on the sites where age-restricted content and products are published. Below are some use cases when you need the age verification feature on your site.
a. Selling Age-Restricted Products and Services
We’ve already mentioned several products and services above. You must verify customers’ ages before selling them. You can also include certain chemicals, betting, casinos, streaming services, investment platforms, cryptocurrencies, and auction sites on the list.
b. Collecting Personal Information About Users Under Certain Ages
When collecting personal information about users, especially under particular ages, you must verify their ages to comply with privacy laws and regulations. For example, according to the Children’s Online Privacy Protection Act (COPPA) in the United States, one must ensure consent from children under 13 years old before collecting their personal information.
c. Hosting Forums or Communities with Age Restrictions
Suppose your website hosts any online forum or community that is reserved for particular ages people. In that case, the age verification feature is mandatory to validate interested people belong to particular age groups.
d. Creating Gaming Sites or Events
There are some online games and events that are not suitable for minor-aged users due to extreme displays of violence and loud noises. The age verification feature plays an immense role in limiting their access to such gaming sites and events.
e. Providing Access to Age-Restricted Content
If your website hosts and publishes age-restricted content like movies, TV shows, podcasts, and explicit material, age verification is a must to ensure that only the right-aged people have access to view the content. This helps minors from not watching the harmful content.
How to Add Age Verification to WordPress Websites
If you are already an Elementor user, we don’t need to introduce you to the plugin. But hopefully, you also know that there is a handful of addons online for the plugin now. Each of them comes with some additional features and widgets that aren’t available in Elementor.
HappyAddons is one of them. The addon has 130+ widgets and 20+ features designed to power up your Elementor site further. It has an Age Gate widget by which you can integrate the age verification feature on your site. We’ll explain to you the process in this article.
Before that, install and activate the following plugins on your site.
Once you have the plugins ready, start following the steps explained below.
Step 01: Open Your Desired Page with Elementor
Hope you already know how to open a page with Elementor. If not, open a page on WordPress. You’ll see the Edit with Elementor button on top if you have the above-mentioned plugins installed and activated on your site. Click the button.
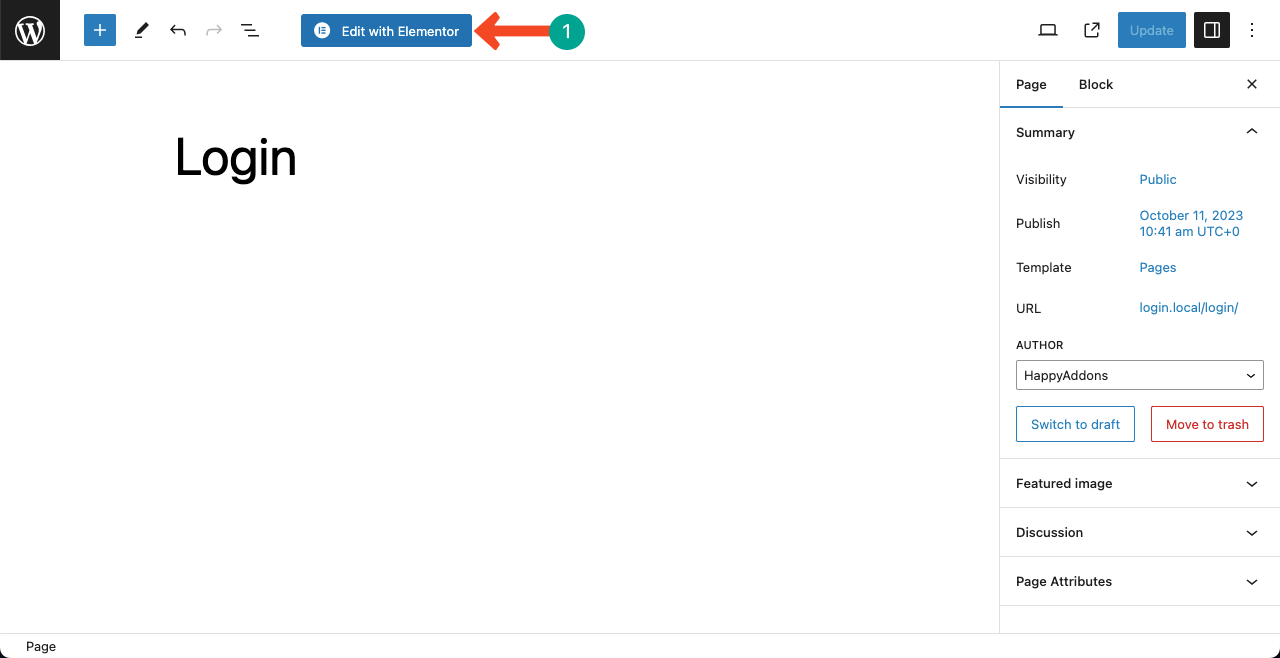
HappyAddons offers you a good collection of free block and page templates to help you design web pages quickly. We have imported a template on the page to explain the process.
Once the page is opened, click the Settings icon on the bottom-left corner. Open the dropdown list next to Page Layout. Select the option Elementor Full Width.

Step 02: Create a Section for Adding the Age Gate Widget
Decide on a suitable place for adding the Age Gate widget. Click the Plus (+) sign on the particular place and select a flexbox structure to create a section.
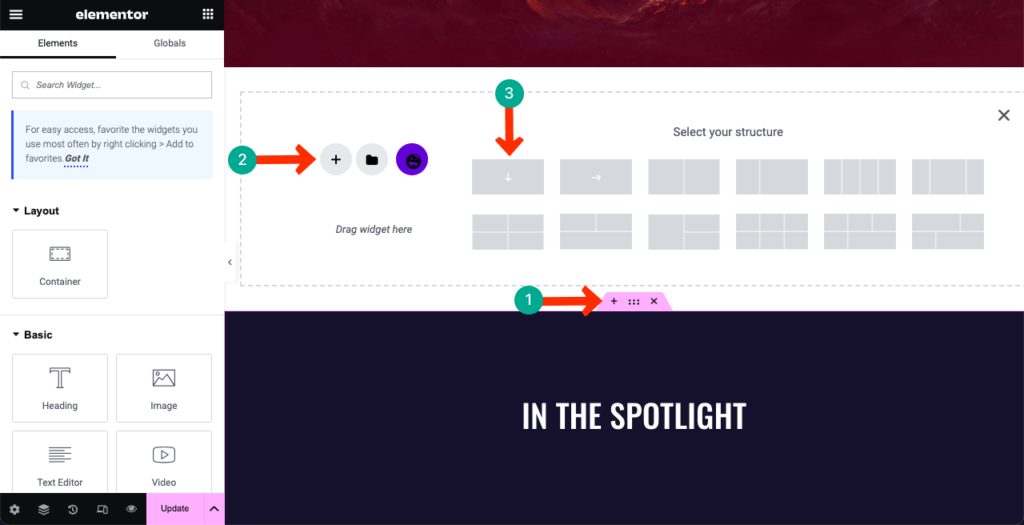
Step 03: Drag and Drop the Age Gate Widget on the Section
Type Age Gate in the search box on the Elementor panel. When the widget appears below, drag and drop it to the section you created just a while ago.
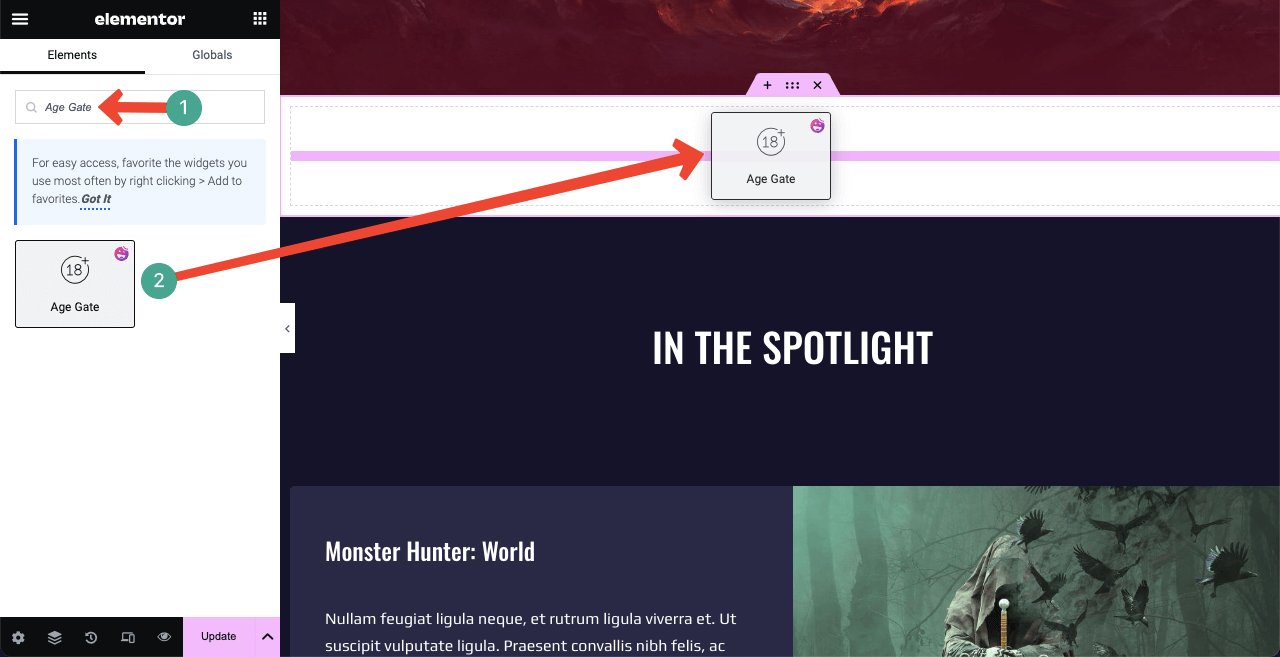
Step 04: Configure the Age Gate Widget Content
You’ll find several elements under the Content tab. They are Age Gate Style, Header, Form Body, Footer, Others Option, and Wrapper Link. Check below what you can do with them.
# Age Gate
The Age Gate Style lets you choose from three styles: Confirm Age, Confirm Date of Birth, and Confirm by Yes/No.
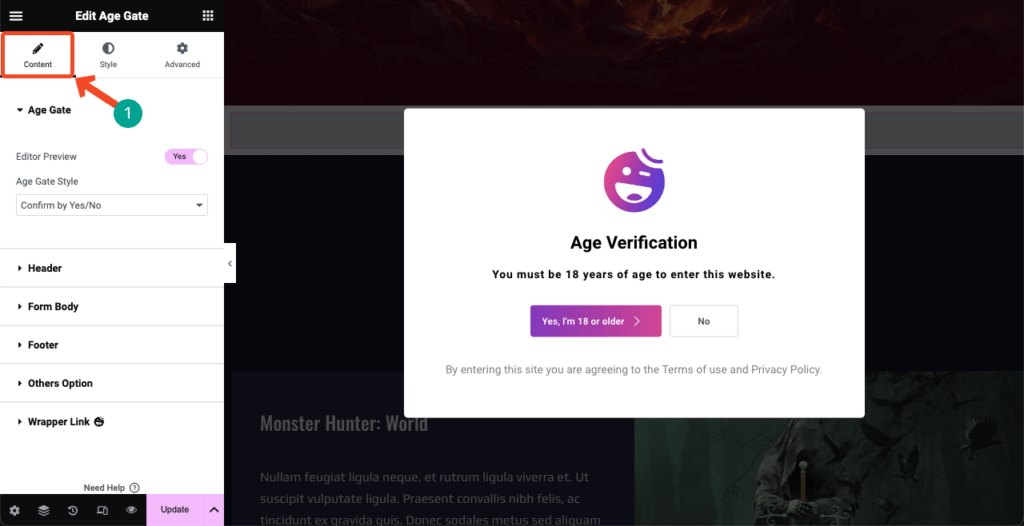
# Header
Expand the Header section. You’ll get options to add a header image, title, and description to the Age Gate widget. You can see the HappyAddons logo and some default texts on the widget. Customize them as you wish with new content.
Note: A standout feature of Elementor is that the plugin is currently AI-powered. Its AI feature can generate texts, copies, and images. Click the three-star icons on the left sidebar and see the magic. Visit this article to learn more about Elementor AI.
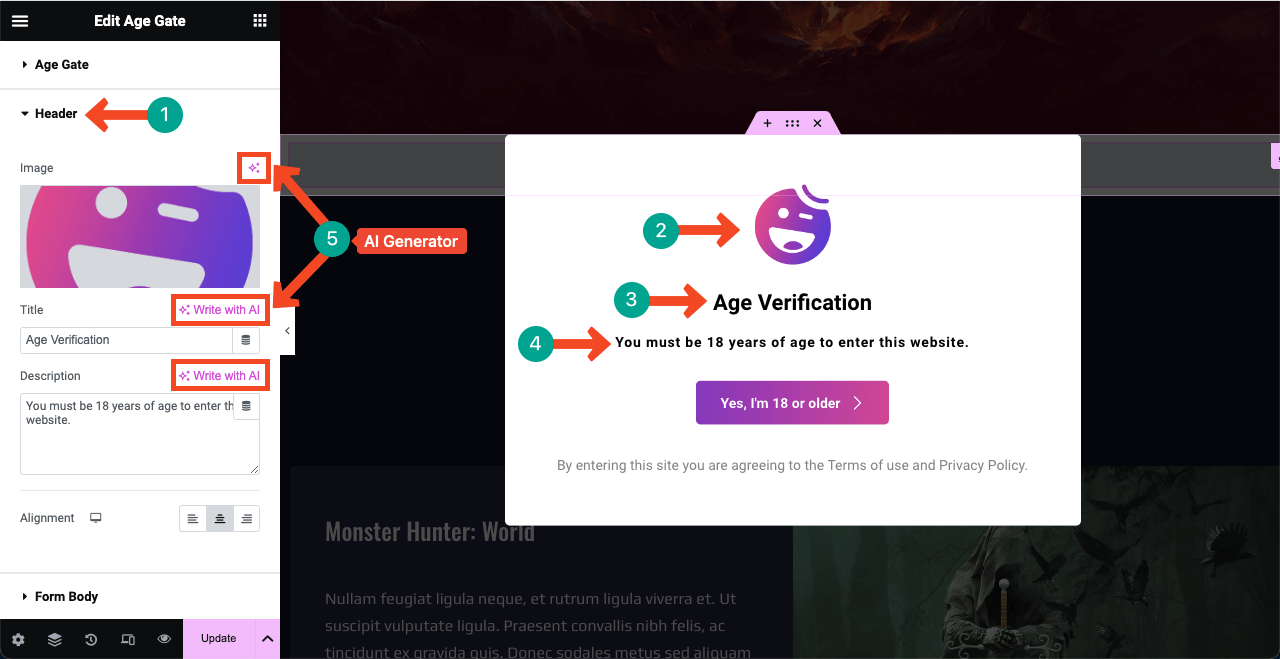
See the image below. We have added a new logo by changing the default one.
# Form Body
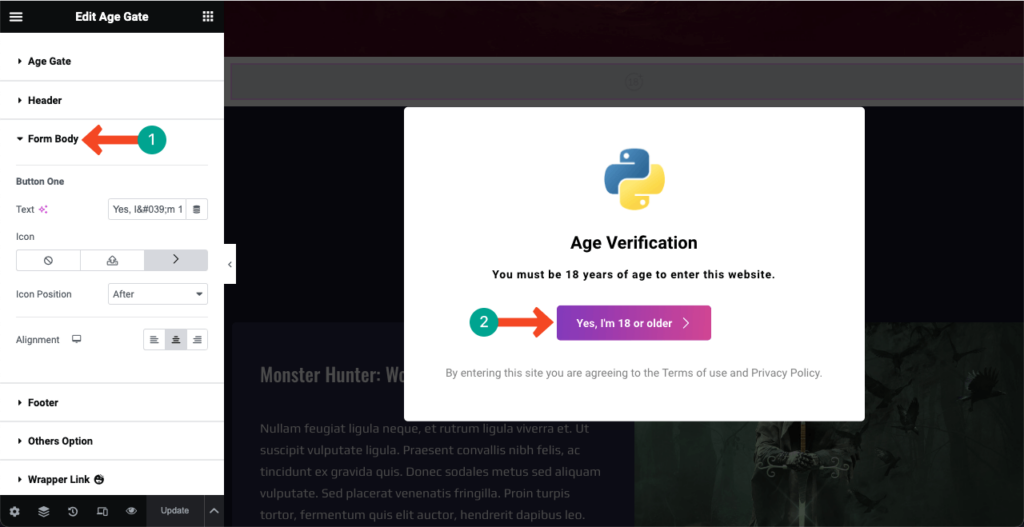
You can see a button on the Age Verification form. The Form Body section lets you customize text, icon, alignment, and icon position on the form. Again, you can use the AI feature next to Text to curate the button copy.
# Footer
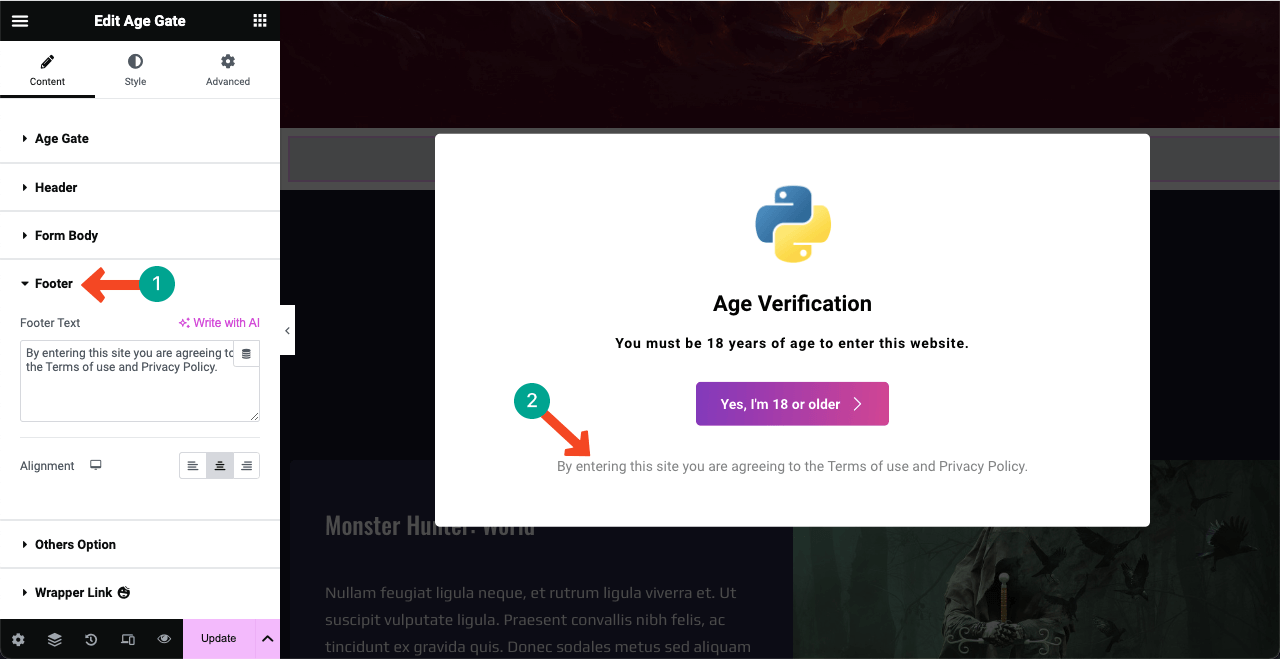
See the footer text on the Age Verification form. The Footer section on the Elementor panel will allow you to customize the copy and its alignment. Use the AI again to generate new copy ideas.
# Others Option
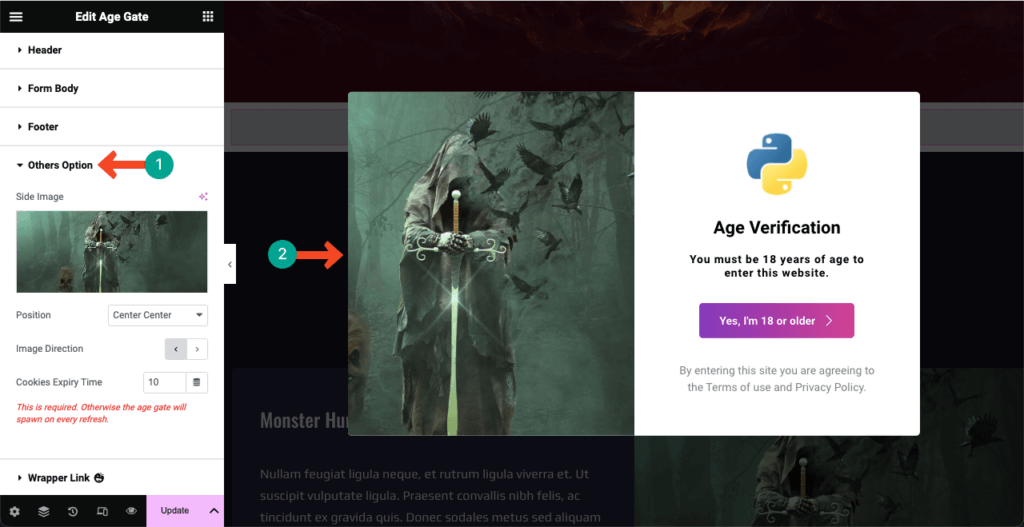
Adding a side image next to the Age Verification form can make the entire design more captivating and eye-hooking. Make sure the image is relevant to the content of your website. You may display the image on the right or left side.
# Wrapper Link
The Wrapper Link allows you to add any page, post, or website link to the Age Verification form. After the link is added, the form will take users to the specific destination once someone clicks it.
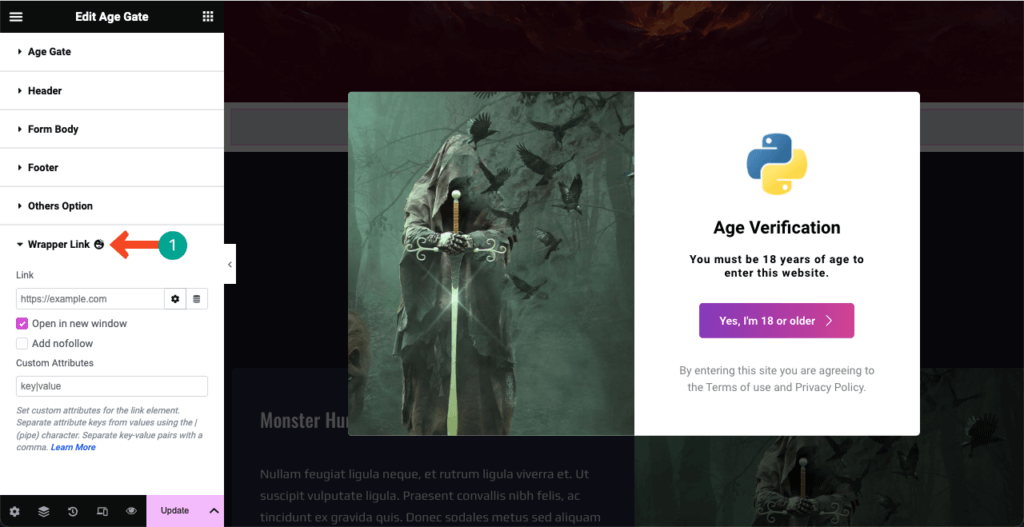
Step 05: Stylize the Age Verification Form
It’s time to stylize the content you have added to the Age Verification form. Come to the Style tab on the Elementor panel. You’ll find four options on the tab. You can customize the Box, Header, Button One, and Footer from the tab.
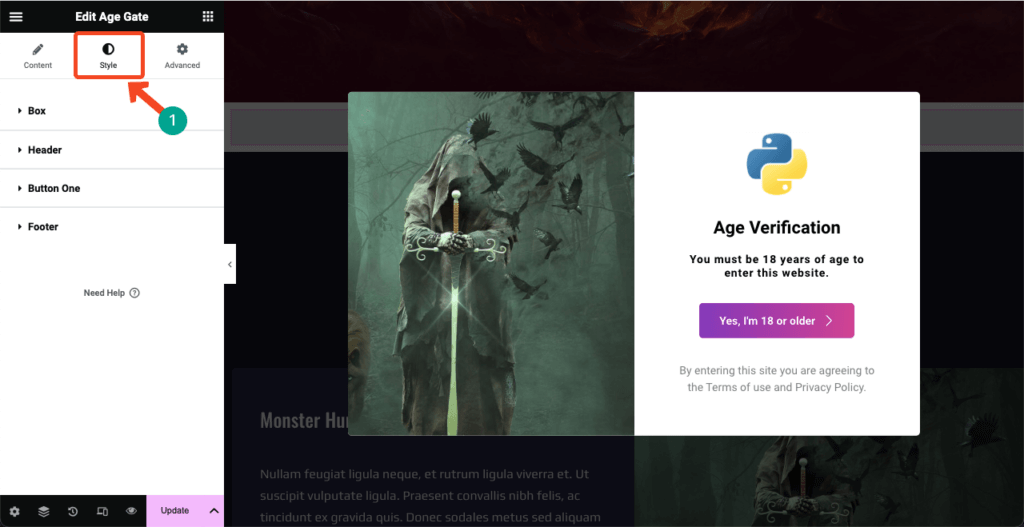
# Box
Expand the Box section under the tab by clicking it. You’ll get the necessary options to expand the height and width of the form. You can also update the background type/color/image, border type, border radius, overlay, and more.
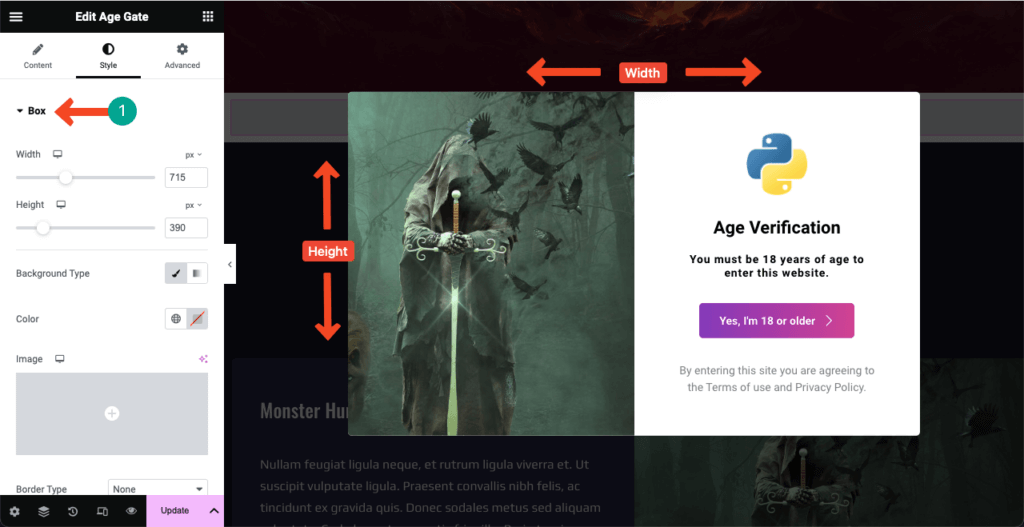
# Header
Come to the Header section. From here, you can resize the Age Verification form logo, change the typography of the text content, and colorize the header title and description.
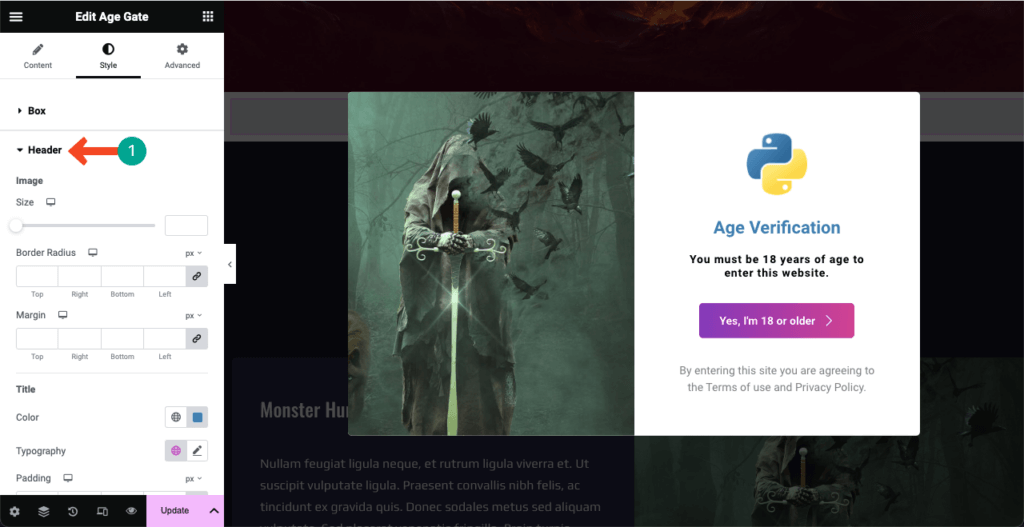
# Button One
You can change the button size, color, hover effect, shadow, padding, margin, icon size, border radius, and text typography from the Button One section on the tab. Make the changes as necessary.
See the image below. We have changed the button color on the Age Verification form.

# Footer
This is the last one in the Style tab. You can change the footer text typography, its color, padding, and margin from section as you wish.

Step 06: Make the Age Verification Form Mobile Responsive
Over 50% of web visitors today for most websites come from tablets and mobile devices. So, if your website has content that is equally useful for mobile users, you must optimize the Age Verification form for tablet and mobile devices.
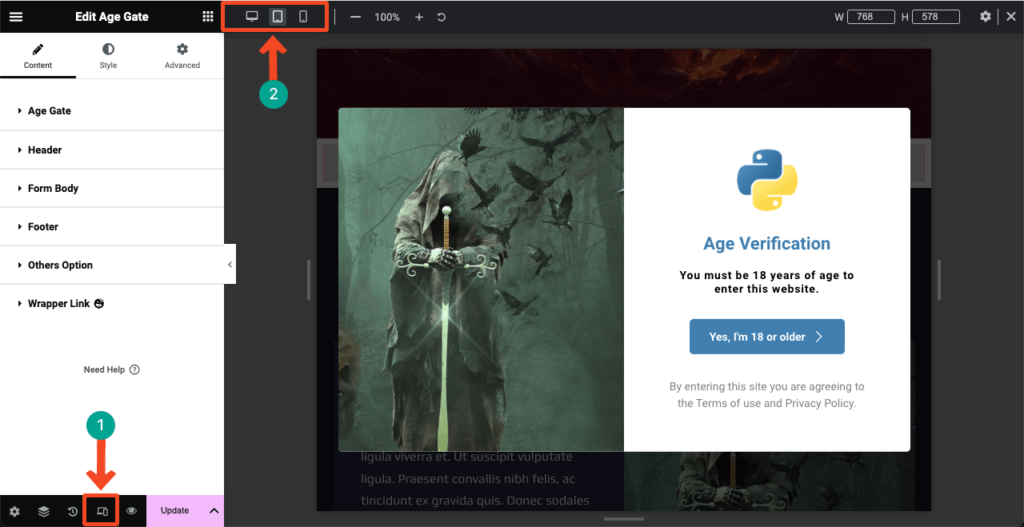
Click the Responsive Mode icon on the footer of the Elementor panel. A new option with different view modes will open up on the top of the Elementor canvas. You’ll be able to see how your form looks on different screen layouts by switching between the view modes.
By resizing and changing the alignments of elements on the form, you can make the Age Verification form highly responsive for different screen sizes.
Step 07: Publish the Age Verification Form
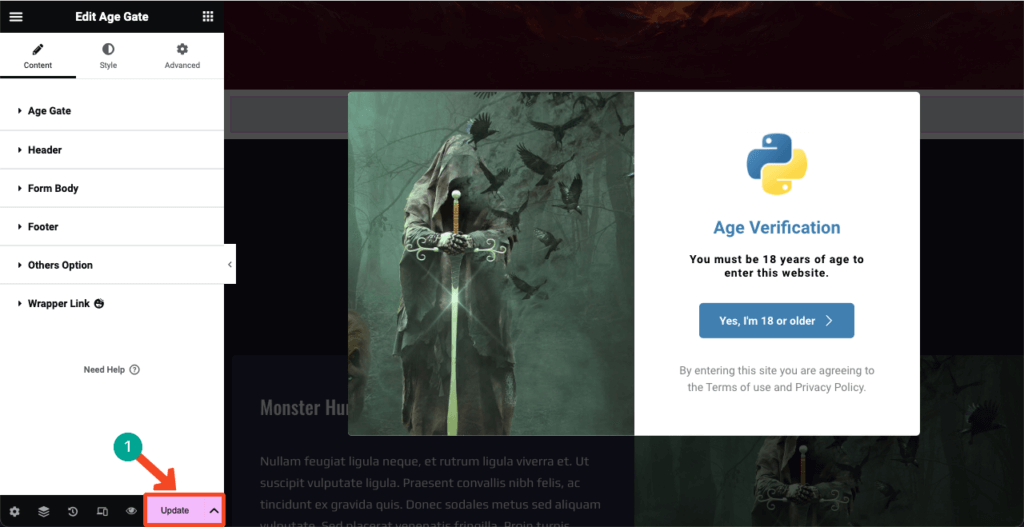
Once your design is done and the form is ready to go live, hit the Publish/Update button from the bottom-right corner of the Elementor panel.
No worries if you ever want to make any changes after the form. Just come back to the Elementor canvas again, do the necessary modifications, and press the Update button.
Thus, you can easily integrate the Age Verification feature into your Elementor-based WordPress site. Here’s the documentation link of Age Gate to learn more about the widget. Try HappyAddons by clicking the button below.
FAQ on How to Add Age Verification to WordPress
Hope you have enjoyed the tutorial. We’ll now answer some most frequently asked questions that we commonly come across in Google, Quora, and other popular social platforms on today’s topic.
-
Are there any legal requirements for age verification on websites?
In most countries, there isn’t any hard and fast rule to verify the ages of users on websites. But while selling certain products and services, like alcohol, tobacco, cannabis, gambling, and betting, you need to verify user ages to comply with the particular product licensing laws.
-
What are the features to look for in an age verification plugin for WordPress?
1. Ease of use
2. Compatibility with other plugins
3. Customization options
4. Minimum age settings
5. Cookie expiration -
Is there a free age verification plugin for WordPress?
Yes, there are many free age verification plugins on WordPress.org. Many contact forms plugins also include this feature. But if your website is already built on Elementor, we recommend you try HappyAddons.
This is an Elementor addon with many essential features and widgets. You’ll get a widget named Age Gate, by which you can integrate the age verification feature on your WordPress site.
-
What are the different methods of age verification that can be used on WordPress?
You may ask users to Confirm Age, Confirm Date of Birth, and Confirm by Yes/No. All these methods can be implemented using the Age Gate widget of the HappyAddons plugin.
-
How can I set different age restrictions for different types of content on WordPress?
First, create separate pages on your website for different types of products or content. Then, create separate age verification forms for each page. Thus, you can do this.
Final Words
Hope you all have realized how easy it is to integrate age verification into WordPress websites after reading this article. Yet, many web owners are dealing with sensitive products and content that aren’t integrating this feature into their websites, which is frustrating.
Those who have finished reading this article, share this article with your social platforms and acquaintances so other people can also integrate age verification on their website with this simple guide. Thanks for your time. Happy reading!

