
Elementor Global Padding is a built-in design control feature that helps you manage consistent spacing across your entire website. In simple words, it defines the default inner space between an element’s content and its border. Whether it’s a section, column, or widget, Elementor applies this padding to maintain even and balanced layouts.
So, instead of adjusting spacing for every individual block or section, you can set one global padding that keeps your design uniform everywhere. This feature becomes especially useful when you want your website to look neat and well-aligned without spending extra time on manual spacing.
By using global padding, you can keep a consistent design system throughout your pages. In this blog post, we’ll cover a step-by-step guide on how to add and configure Elementor Global Padding. Hope you’ll enjoy it. Let’s get started!
How Elementor Global Padding Helps Create Better Page Layouts
Elementor Global Padding plays a key role in maintaining balance and symmetry across your website layout. It helps control the inner spacing of sections, columns, and widgets. It makes your content look more organized and professional. Take a look at some use cases of this feature below.
 1")
a. Maintaining Consistent Spacing Across Pages
Global padding helps you set a default spacing for all sections and widgets on your website. This keeps your entire site uniform, even if you add new pages or blocks later. Check how to create a dynamic web page in Elementor.
b. Improving Readability and Visual Flow
Proper padding gives your text and images breathing space. It prevents elements from looking cramped, making your content easier to read and more pleasant to view.
c. Creating a Balanced Layout for Different Devices
With global padding, you can set spacing that automatically adjusts for desktop, tablet, and mobile screens. This ensures your website looks well-balanced on all devices without needing separate manual tweaks.
4. Avoiding Overlapping or Cluttered Elements
Padding helps prevent elements like text, buttons, or images from touching each other or the edges of a section. It keeps your design neat and clutter-free. Here’s a guide on how to create a one-page website in Elementor.
5. Speeding Up the Design Process
Instead of setting padding for every section one by one, you can define it globally once. This saves a lot of time and helps maintain design consistency throughout the site.
6. Enhancing the Professional Look of the Website
Even small spacing details can make a big difference in how polished your site looks. Global padding ensures that your content blocks are evenly spaced and visually appealing, giving your design a more professional finish.
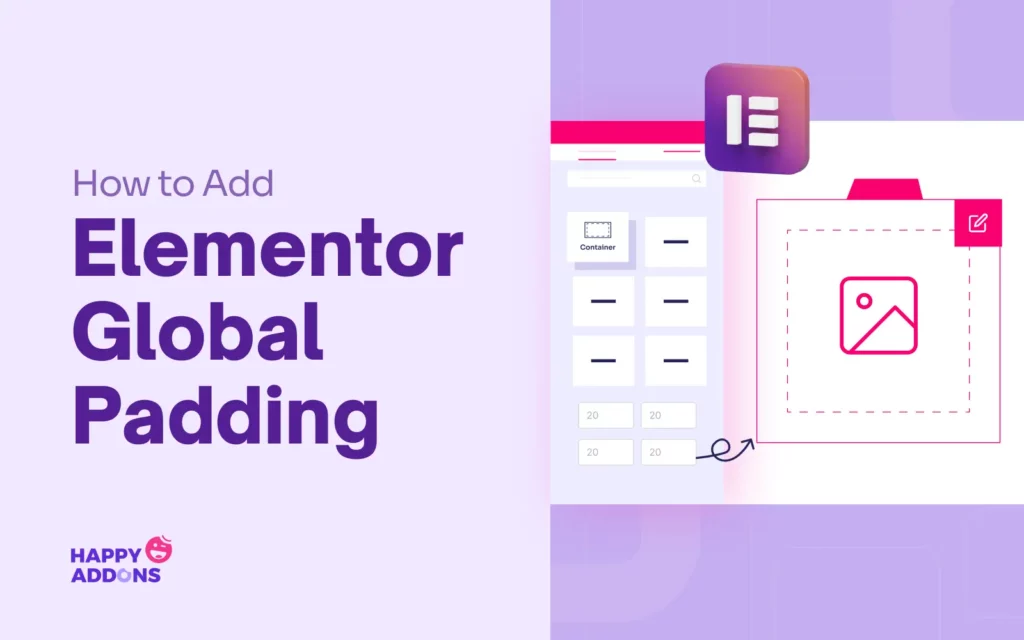
How to Add Elementor Global Padding: Step-by-Step Guide
 2")
Global Padding is managed from the Site Settings option under the Layout section. Before we begin the process, there is a prerequisite you must complete. Global Padding is a premium feature of the plugin. So, to get started with the process, you must have the premium plugin.
Prerequisite
Once these plugins are ready on your site, start following the tutorial as explained below.
Step 01: Go to Elementor Editor
Hope you know how to access the Elementor Editor. To do this, open a post or page with Elementor.
 3")
Step 02: Open Site Settings
In the Elementor editor, locate the top toolbar. Click the Site Settings icon in the top-left corner. It looks like a gear or hamburger menu. This will open the Site Settings panel on the left.
 4")
Step 03: Navigate to Layout Settings
Once the Site Settings panel is opened, come to the Layout option by scrolling the panel bar. Here, you’ll find options for global layout controls, including container settings.
 5")
Step 04: Adjust Container Padding
Come to the Container Padding section. This controls the default space between the container’s border and its inner content.
Enter values for top, bottom, left, and right padding (e.g., 20px for all sides). But if you want to add different values for different sides, unlink the connection and then place a value for the side you wish.
When everything is done, click the Save Changes button.
 6")
Explore this tutorial on how to create a coming soon page in Elementor.
Step 05: Add Some Containers to Check the Global Padding
Now, create some containers and add content. For this tutorial, we have added images to the containers. You can see that a padding (gap) has automatically been added between the borders and the image inside.
 7")
Thus, you can create and add Elementor global padding to your WordPress website.
Bonus for Beginners: How Global Padding Differs from Margin in Elementor
Many users get confused between padding and margin in Elementor, but they control two different types of spacing.
Padding is the inner space inside an element – the gap between the content and the element’s border. When you increase padding, it pushes the content inward, creating more room inside that element.
 8")
Margin, on the other hand, is the outer space outside an element – the distance between one element and another. When you adjust the margin, you’re changing how far the element stays from the next one. For instance, adding a bottom margin to a section creates extra space before the next section begins.
- Padding = inner space between content and border
- Margin = outer space between elements
See this guide on how to create a black friday and cyber monday page in Elementor.
When to Use Margin Instead of Padding
Sometimes, using margin instead of padding is the better choice for keeping your Elementor layout clean and well-spaced. While padding adds space inside an element, margin helps manage the space between different elements on your page.
 9")
1. Creating Space Between Sections
When you want to separate two sections or blocks on a page, use a margin. It adds clear space between them without affecting the inner spacing of each section.
2. Adjusting Vertical or Horizontal Gaps
Margin is perfect for controlling vertical or horizontal gaps between elements like images, buttons, or headings. It ensures the layout flows smoothly without extra space inside the element.
3. Preventing Overlaps in Responsive Design
If elements look too close or start overlapping on smaller screens, increasing the margin can fix it without changing the element’s internal layout.
4. Aligning Elements with Equal Spacing
Using consistent margin values across widgets or sections keeps your layout evenly spaced and visually balanced.
5. Creating Breathing Room Between Containers
When two containers or columns sit side by side, margin helps maintain a neat gap between them, improving readability and visual separation.
Final Takeaways!
Elementor Global Padding is a small but powerful feature that helps you keep your website design consistent, clean, and visually balanced. When you understand how it works and how it differs from margin, you can easily control the spacing of every element on your page.
It also saves you a lot of time by applying the same spacing rules site-wide. So, instead of adjusting every section manually, you can set global padding once and focus more on your content and design creativity. To get the best results, always keep a few best practices in mind.
Use moderate padding values – not too tight or too wide – to maintain readability and flow. Preview your pages on different devices to make sure the spacing looks good everywhere. Combine global padding with proper margin use to create a layout that feels natural and well-structured.