The website footer is an area that appears at the bottom of the page, below the website’s content. This section of the webpage typically contains the website logo, navigation menu, subscription form, map, links to social networks, and contact information for a company or organization. Footers can vary significantly in size, content, and style depending on their purpose and the type of website they are present on.
If you are using Elementor for designing your website, you can easily create your website footer in minutes with its handy widgets or premade footer blocks. Besides, you have many customization options to display useful information for your visitors.
In this blog, we’ll show you how to edit a footer in Elementor following two easy ways. Also, we are going to share a bonus part. Don’t miss it if you want to use free footer blocks for your website.
Let’s dive into the guide.
2 Different Methods to Edit Footer in Elementor
The header and the footer are common website elements that every website has. You can easily design and customize your website header using Elementor. But here we are focusing on how you can design a footer with Elementor.
If you want to design a custom header with Elementor, you can follow the below handy tutorials.
- How To Design A Custom Elementor Header In 2 Minutes
- How To Edit Your WordPress Header With Elementor
In this section, we are going to show you how to edit the footer in 2 possible ways using Elementor.
Method 1: Edit Footer Using Elementor Widgets
Method 2: Edit Footer Using Elementor Theme Builder
Choose a method that suits you.
Let’s get started:
Method 1: Edit Footer Using Elementor Widgets
Here, you’ll learn how to design and customize a footer from scratch using the Elementor widgets.
Step 1: Set Footer Structure
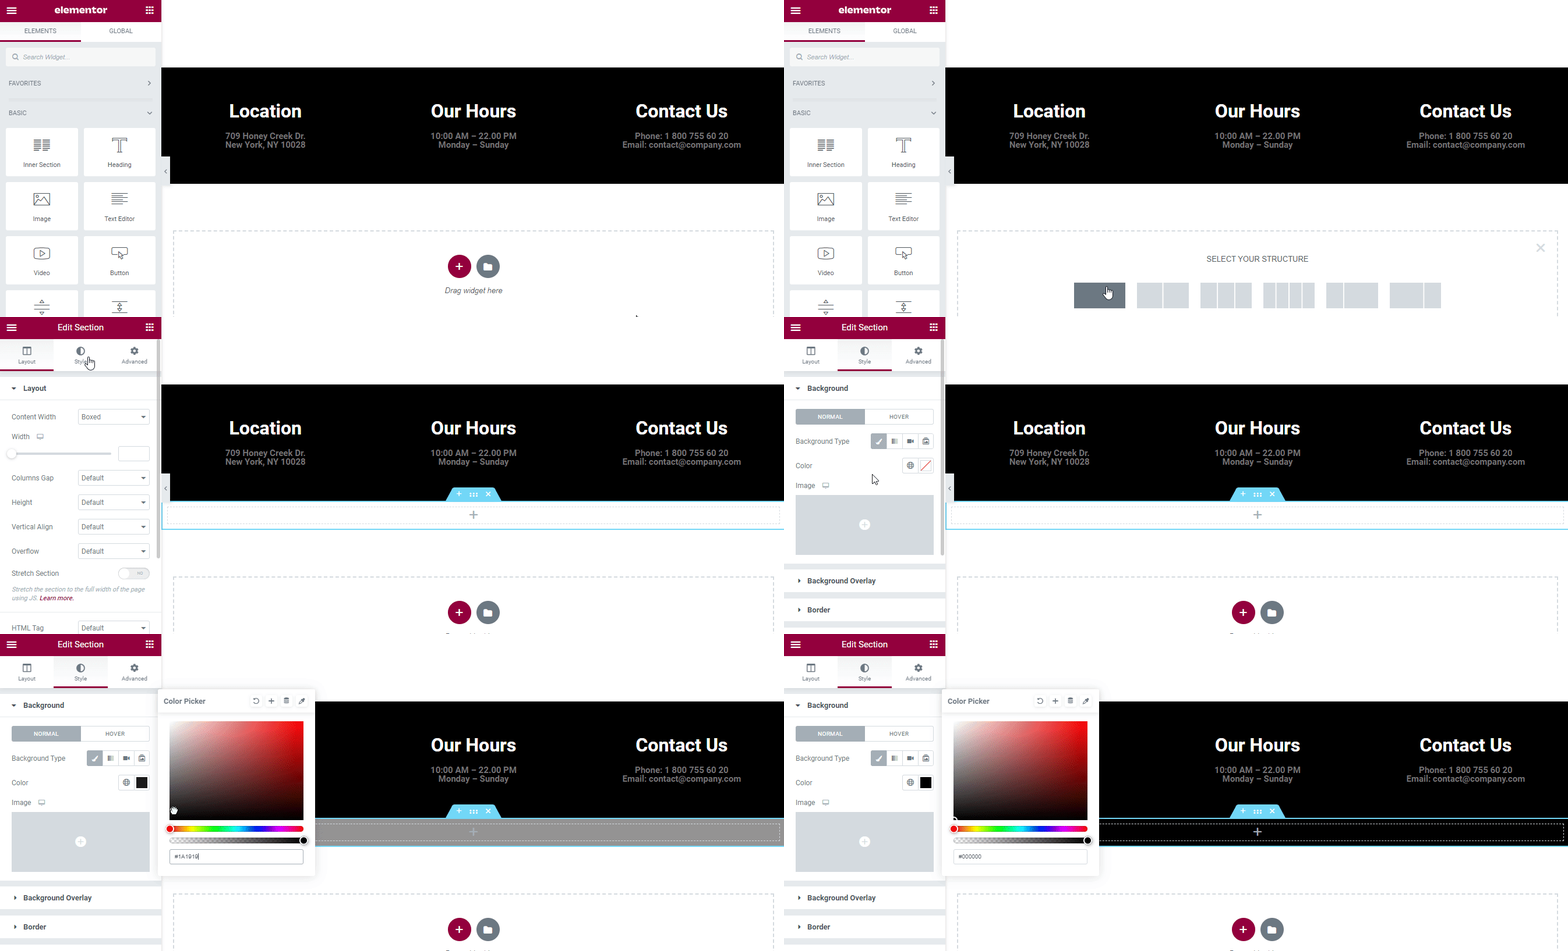
First, we need to add a structure to design our footer. You can do it by clicking the (+) icon. Follow the below image. here, we’ve added three columns.
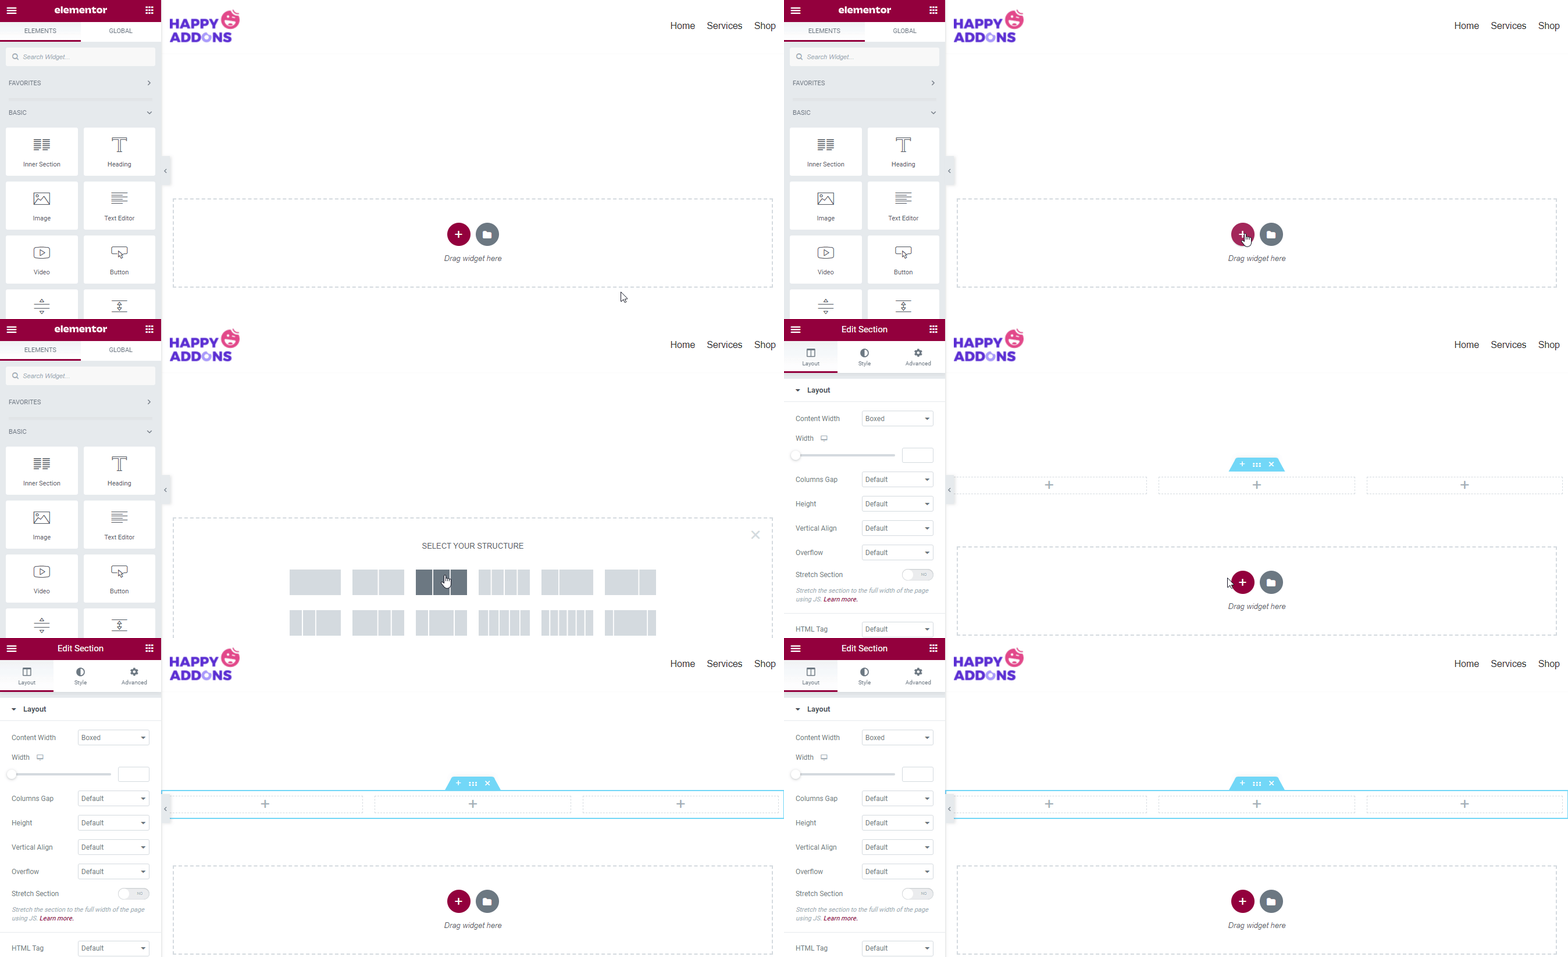
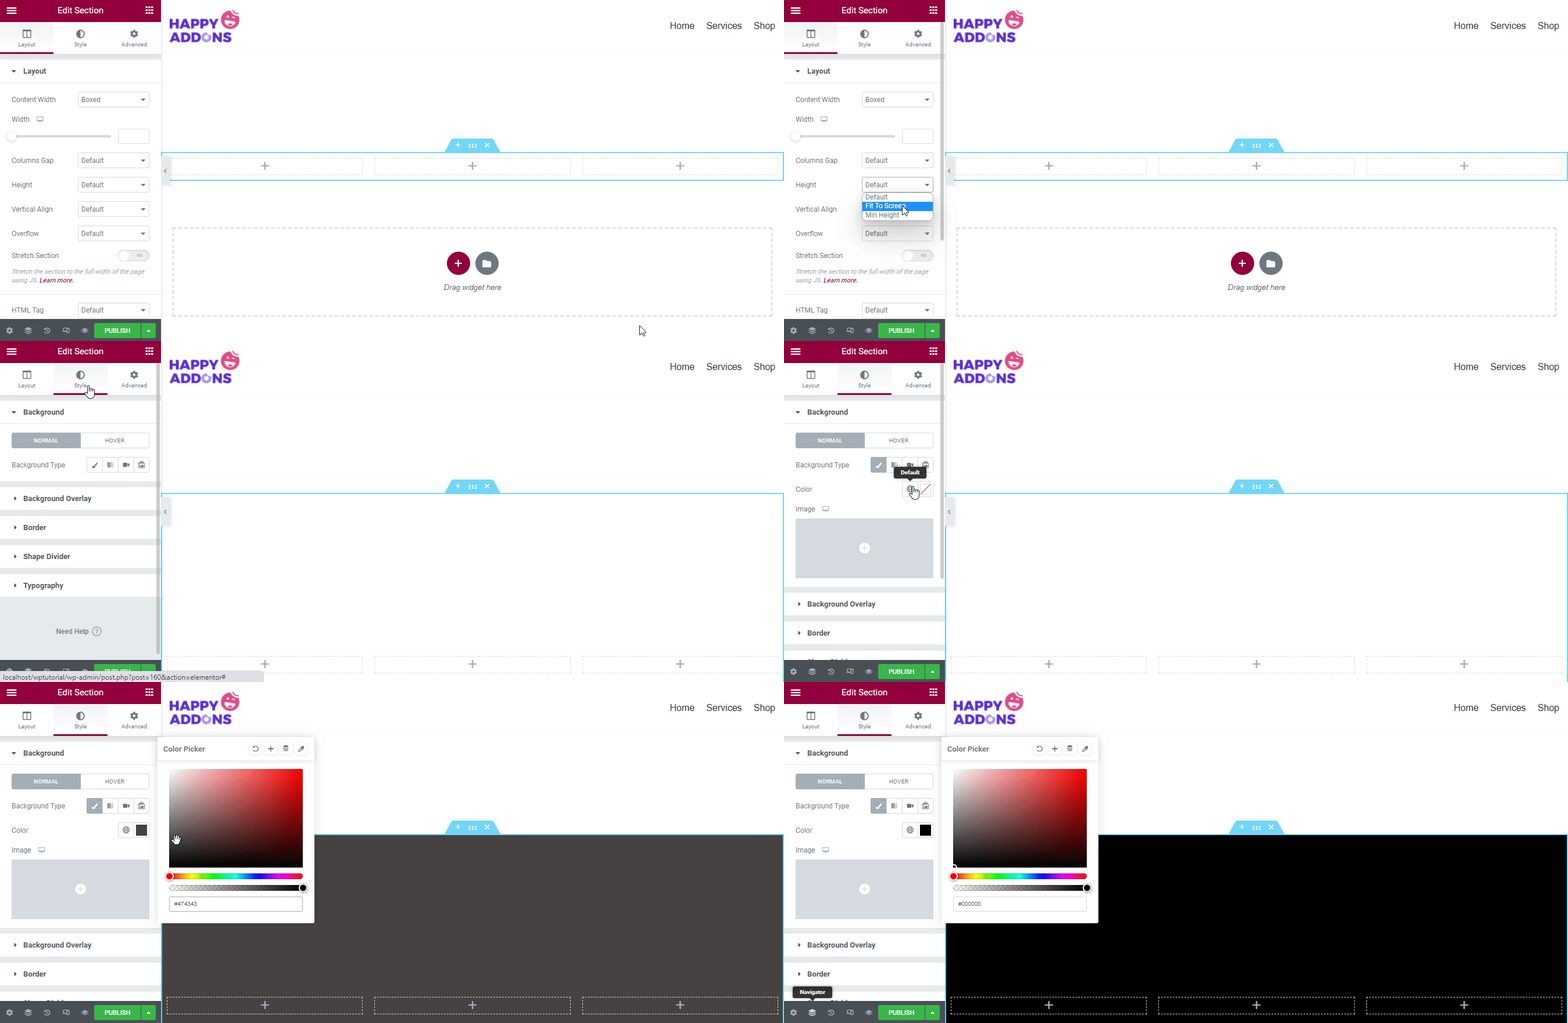
After adding the footer structure, it’s time to change the section Layout and add a Background Color.
Step 2: Add Heading Widget
We are planning to add three different contents to the three different columns. Let’s add.
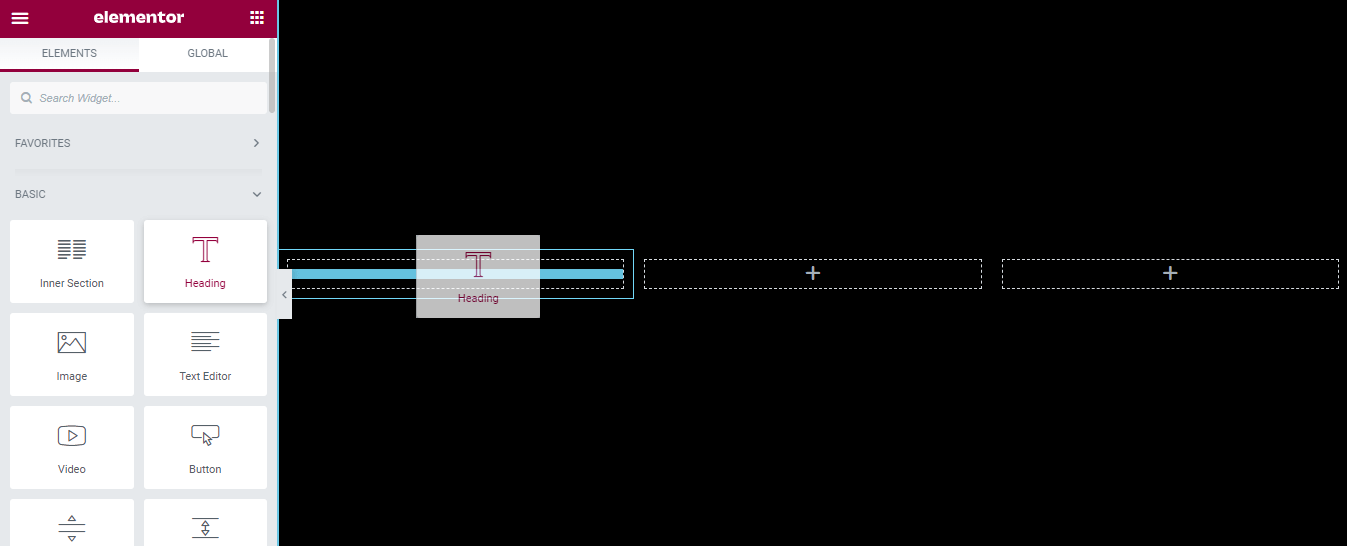
First, find the Heading widget from the Elementor widget gallery. Then drag & drop the widget into the left-side column.
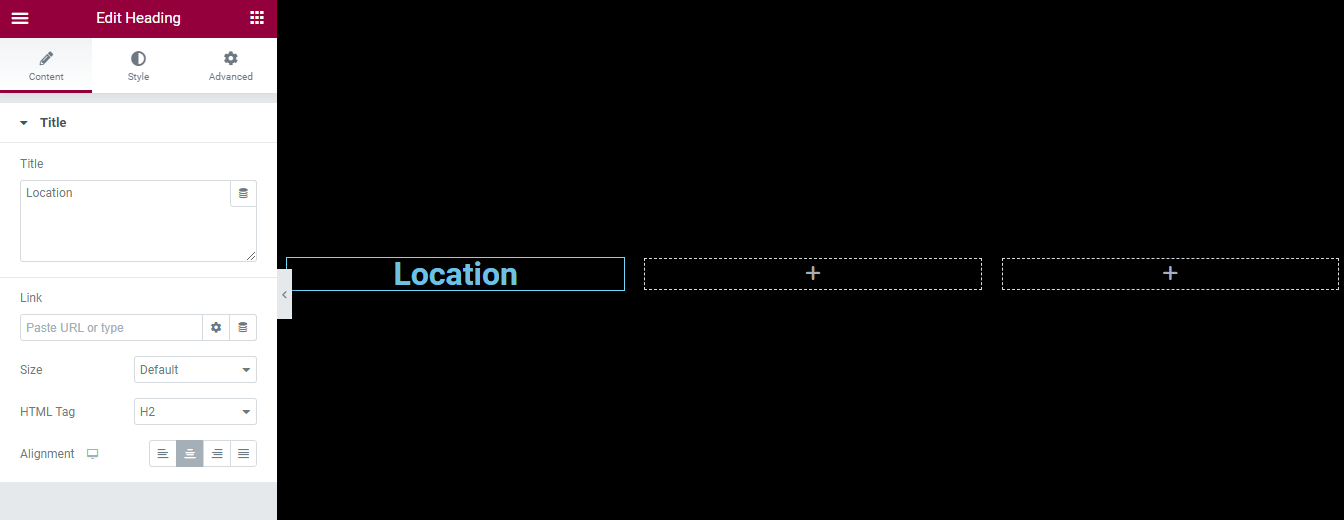
In the Content area, you can manage the heading content. Here, you can manage the Title, Link, Size, HTML Tag, and Alignment of the heading.
You are able to customize the heading design by going to the Style section. You can change the Text Color, Typography, Text Stroke, Text Shadow, and Blend Mode of the heading.
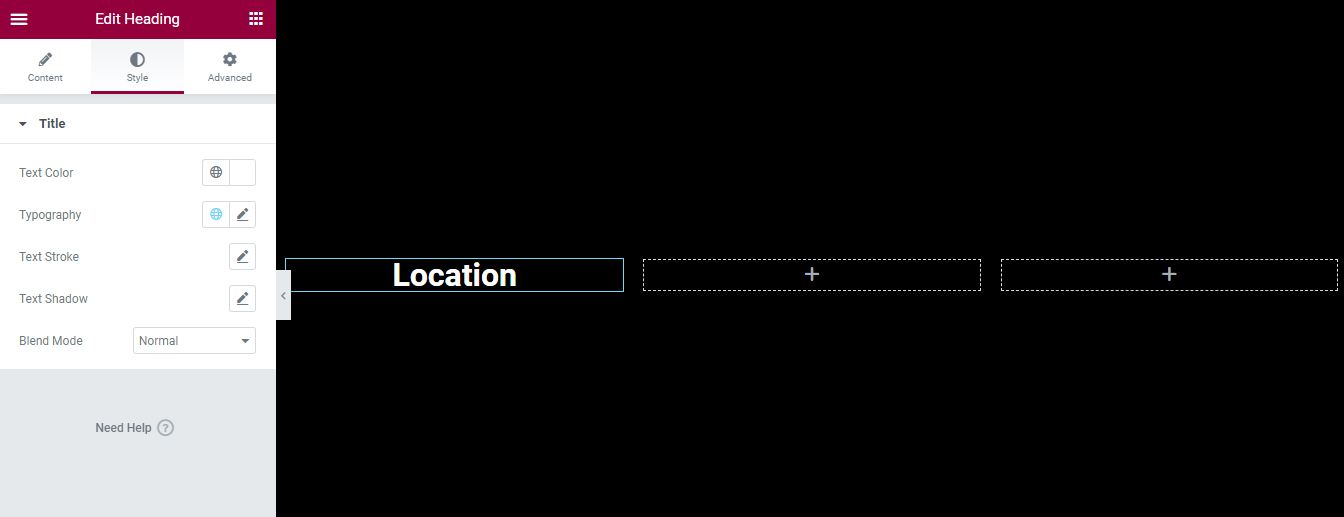
We’ve also added another heading under the ‘Location‘ heading to write the company address following the above process. Similarly, you can manage and style the heading in your own way.
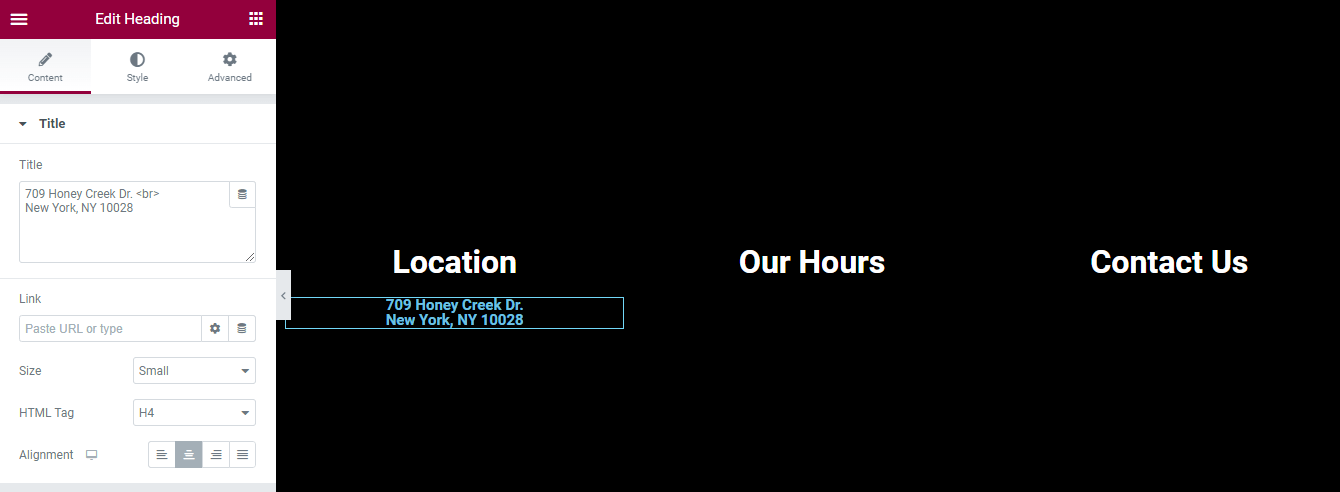
We’ve also added content to the other two columns. Here is the current look of the footer.

Step 3: Add Another Section
We want to add our social icons to the footer area. We’ve added another section and set its Layout & style. You can follow the below image to learn the process.
Step 4: Add Social Icons Widget
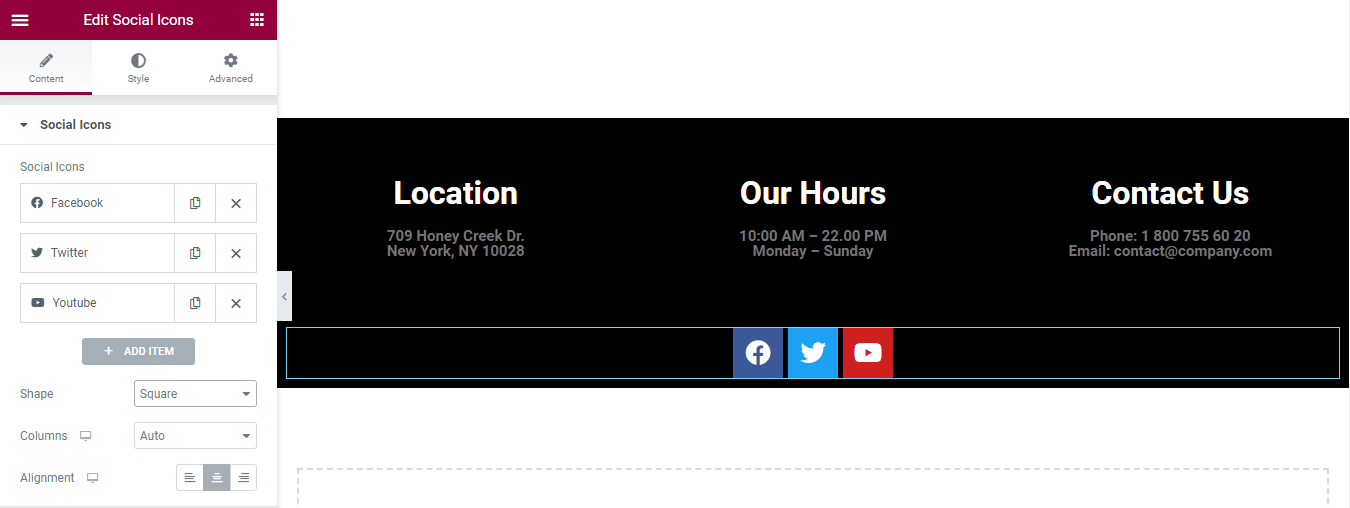
Find the Social Icons widget first. Then drag & drop the widget into the section.
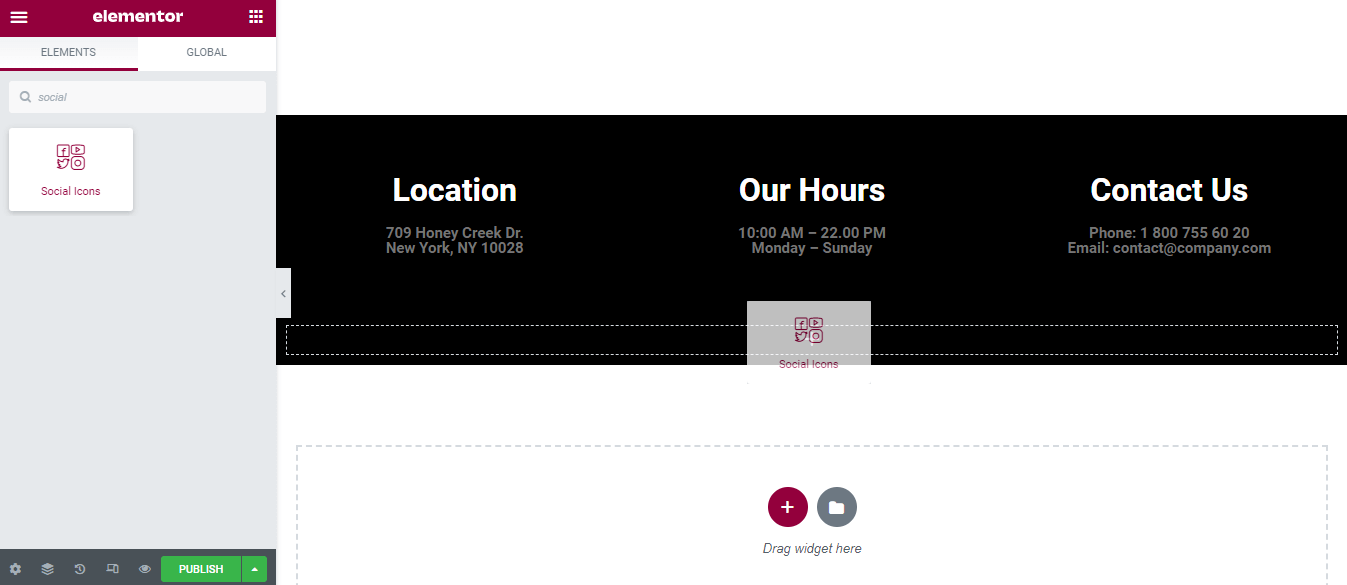
In the Content area, you can manage your social icons content. Here, you can add or remove an Item, and set the Shape, Column, and Alignment of the social icon.
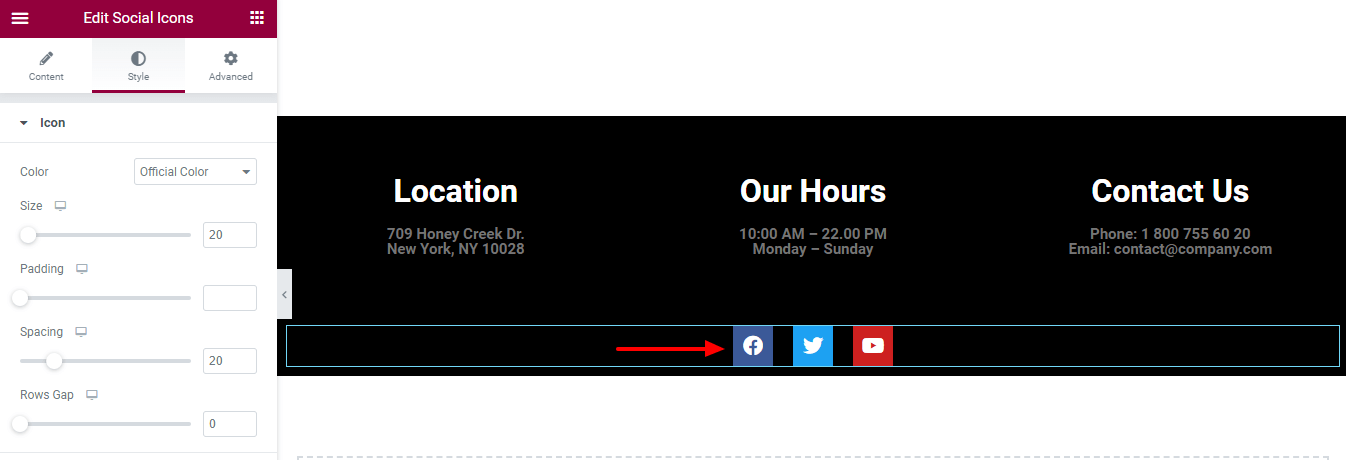
Go to the Style section to customize the icons in your own style.
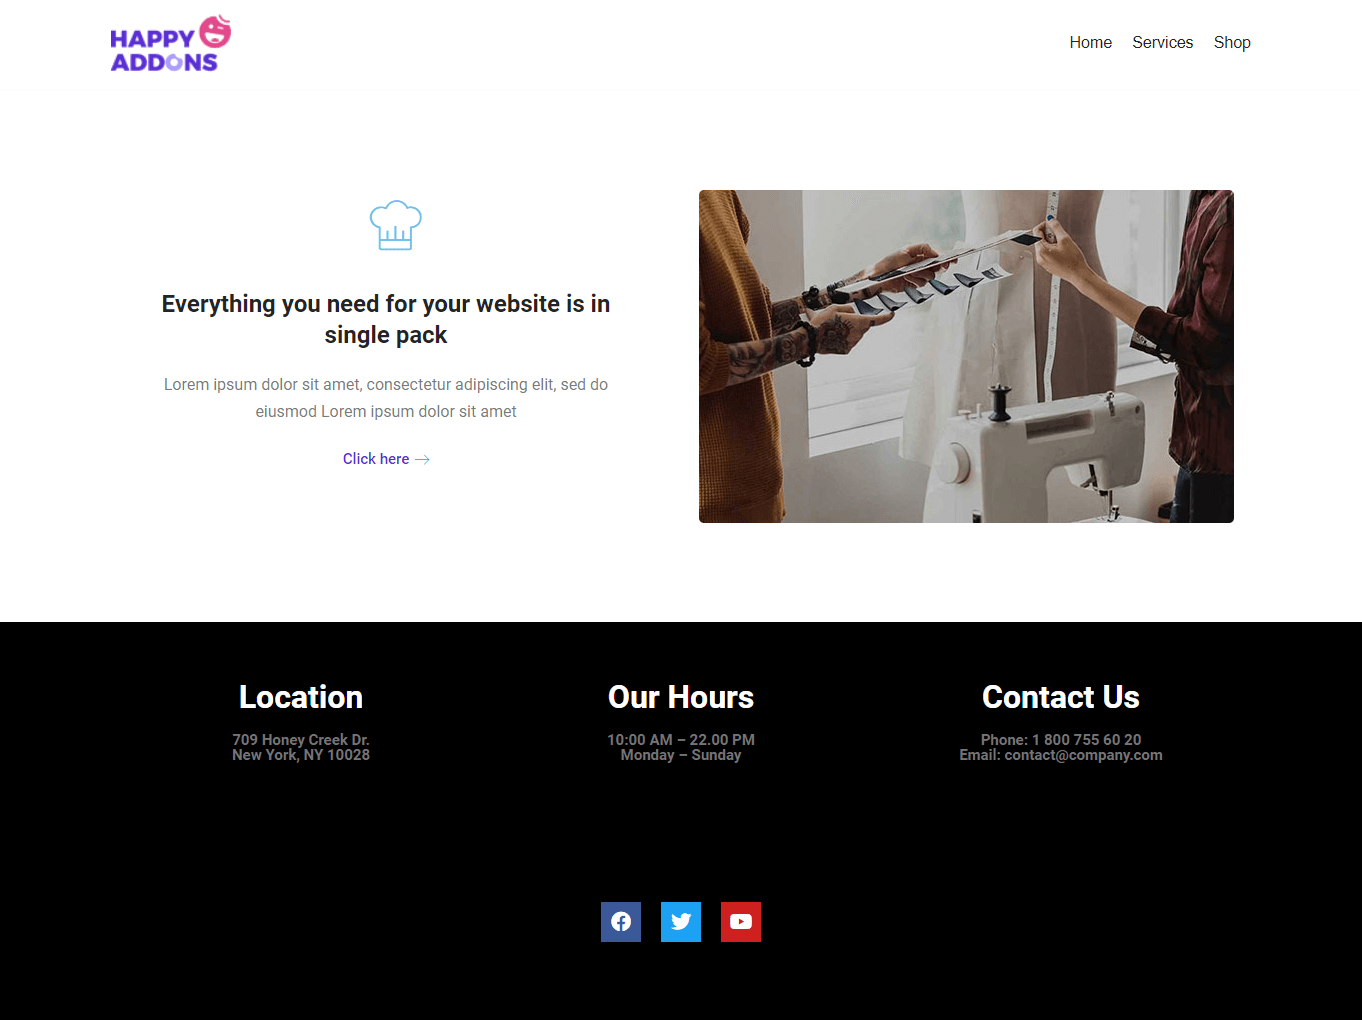
Final Preview
We’ve added some content to the page. Let’s have a look at the current design of the footer.
Method 2: Edit Footer Using Elementor Theme Builder
At this moment, you’ve learned how to design and customize a footer using Elementor widgets. Now we are going to demonstrate how to use Elementor Theme Builder to create a footer. Make sure that you’ve installed and activated the Elementor pro version.
Let’s dive into it.
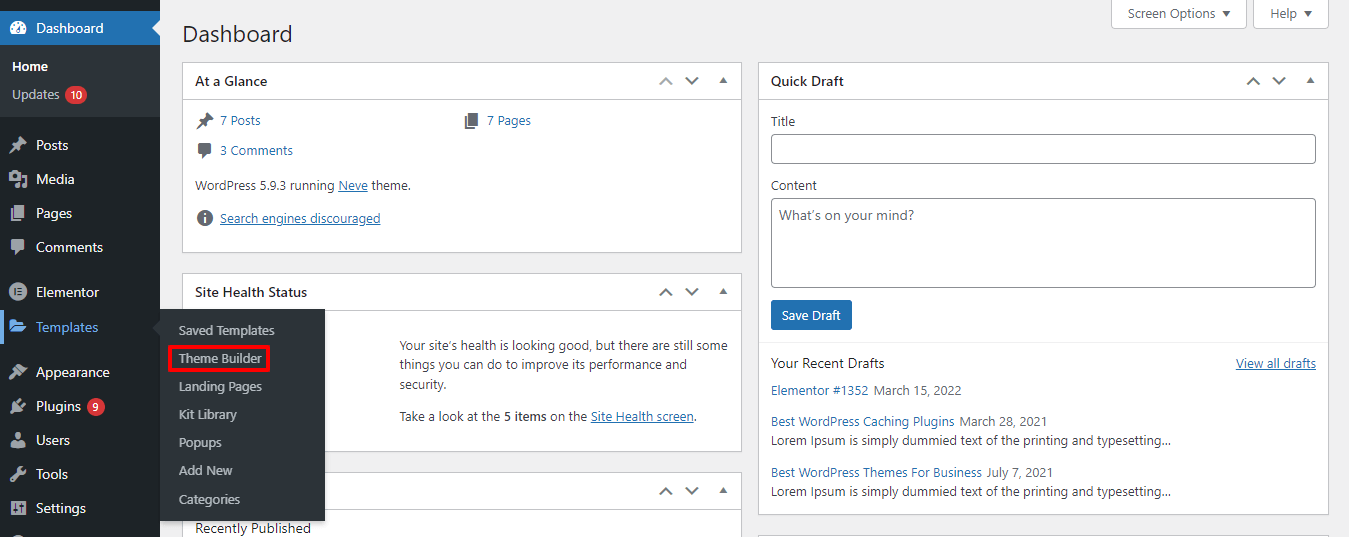
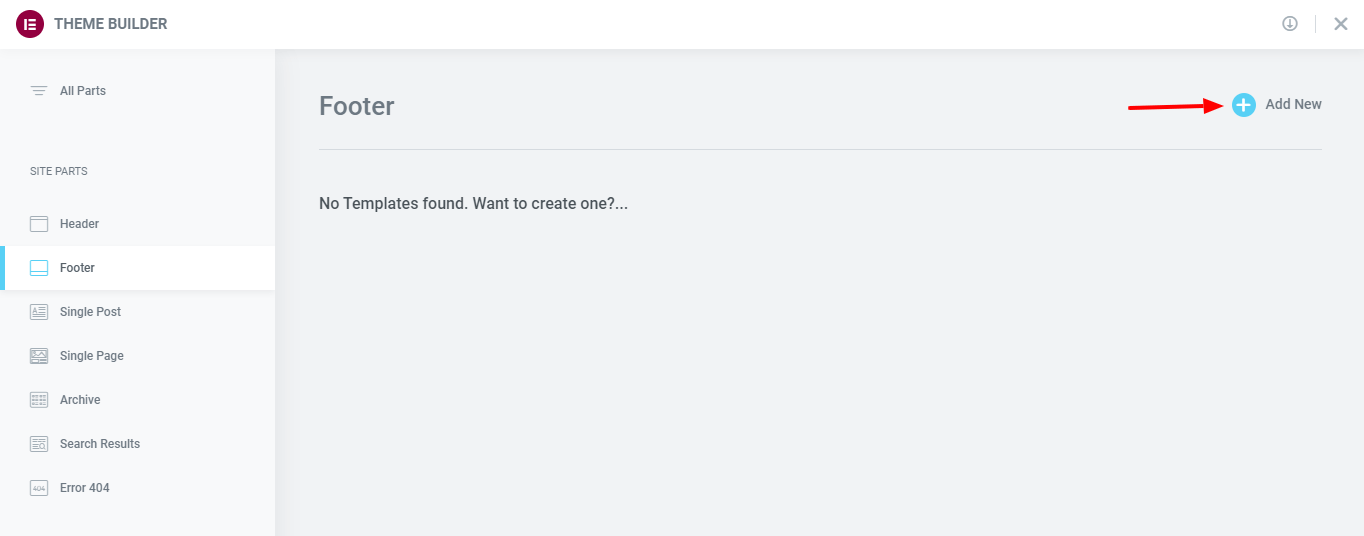
First, go to the Templates->Theme Builder area.
After that, you’ll get the option to add your footer. Here, you need to select the Site Parts->Footer from the left sidebar. Then click on the Add New button.
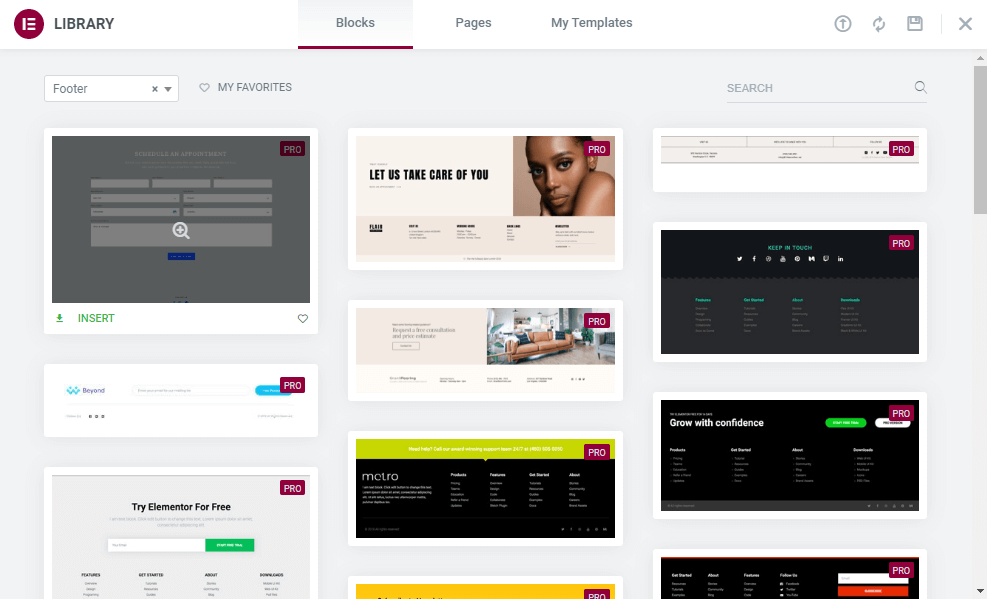
On the following popup, you’ll get all the Footer Blocks. Choose the suitable one and click on the Install button to install the block on your website.
That’s it.
Also, learn How To Design A Custom Elementor Header.
Bonus: Use Happy Addons Free Footer Blocks to Your Website
Happy Addons is one of the popular, fast-growing Elementor addons that come with pre-built templates and blocks for designing your website. With Happy Addons, you can easily add a footer to your website with its free blocks.
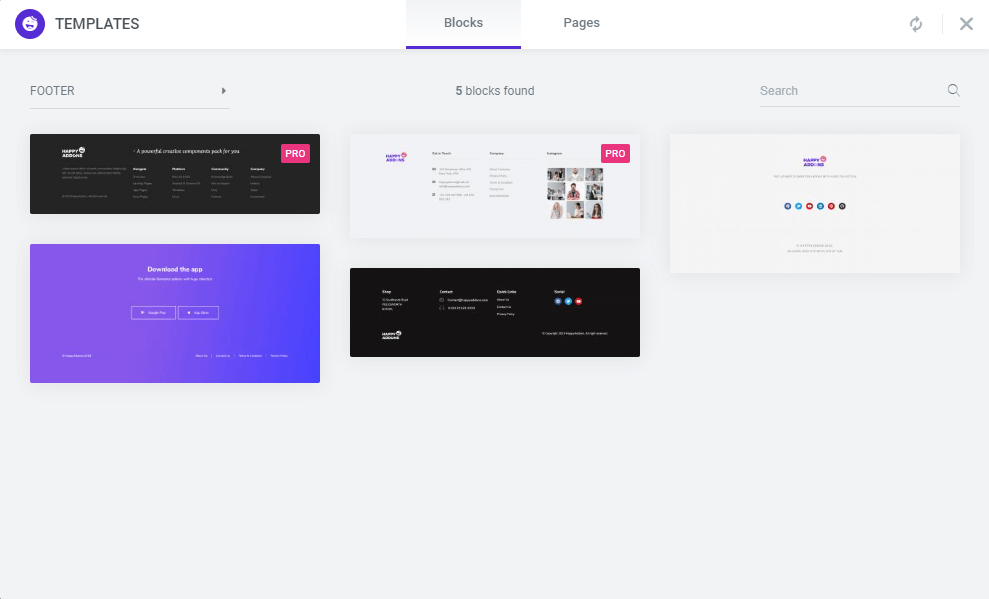
Read this handy article and learn how to use Happy Addons’ Template Library the right way.
FAQs on How to Edit Footer in Elementor
Still, you may have questions in your mind. In this section, we’ve answered some common questions regarding the Elementor footer.
1. How do I add a footer in an Elementor?
You can add a footer to your Elementor-powered website in two possible ways.
Method 1: Add Footer Using Elementor Widgets From Scratch
Method 1: Add Footer Using Elementor Theme Builder
2. How do I change the Elementor footer?
First, go to the Template->Theme Builder. Second, select the Footer label in the left sidebar to find your footer details. Finally, click on the Edit link to change or edit the specific footer.
3. Is Elementor offer free footer blocks?
No. You can get the ready-made footer blocks only in the Elementor Pro version.
Are You Ready to Design Your Website Footer
In this tutorial blog, we’ve shown how you can design and edit your website footer using Elementor. We’ve also introduced Happy Addons’ free footer blocks.
Apart from that, we’ve answered some common questions on the Elementor footer. If you are still stuck and need more help, you can ask your query in the comment box below.
If you like this blog share it on your social channels. Don’t forget to subscribe to our newsletter. It’s free.
Subscribe to our newsletter
Get latest news & updates on Elementor

