Adding a map to your website can help your visitors find your business or event locations easily. If your business has more than one location, you may want to show all of them on the same map. This is where using multiple pins on a Google Map could become helpful.
If your website is built with Elementor, you won’t have to take much hassle in adding multiple pins on your Google Map. Instead, you can easily add as many as you want. The process is quite simple, even for beginners.
In this post, we’ll cover a detailed tutorial on how to make a Google Map with multiple pins in WordPress with Elementor. But before that, we’ll cover a few words on why and when you should use Google Maps with multiple pins on your WordPress websites.
Why Use Google Maps with Multiple Pins on Your WordPress Site
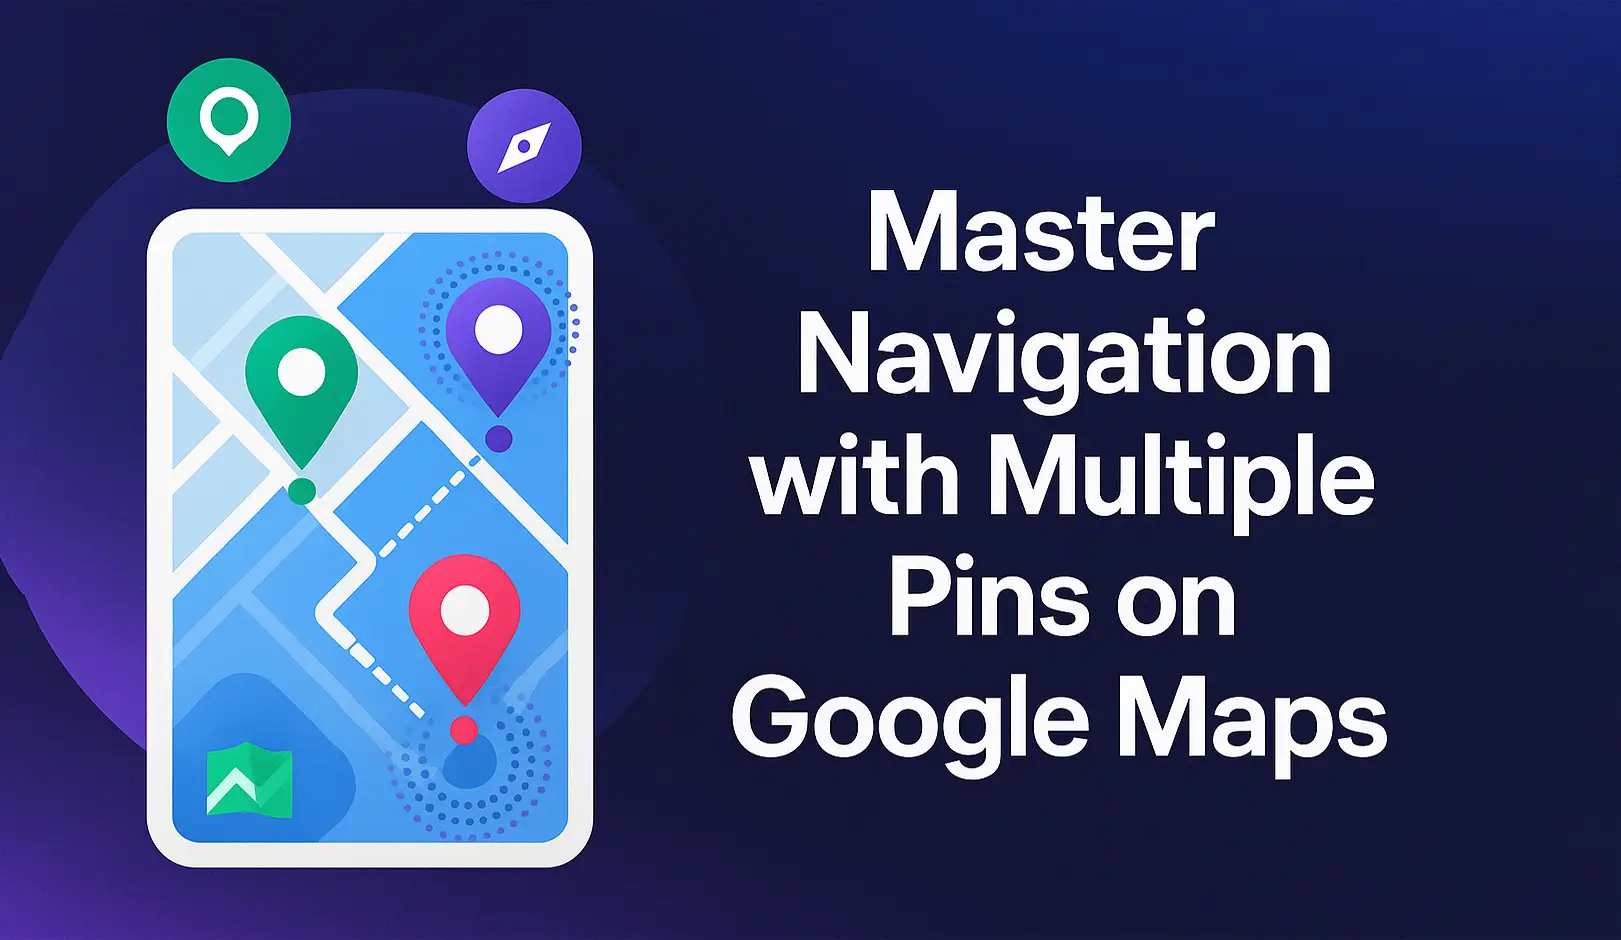
Using Google Maps with multiple pins can improve your website in many ways. It’s not just about showing locations. It can help users build trust and make your site more useful because they can easily find your shops. Here are some top reasons why you should consider it.
1. Show All Your Locations in One Place
If your business has several branches, stores, or offices, multiple pins can help you display them all on a single map. This makes it easier for visitors to see every location at a glance without switching between different maps or pages.
2. Help Users Find the Nearest Spot
When users see all the locations on one map, they can quickly find the one that’s closest to them. This can improve their experience and help them take action faster, like visiting your store or booking an appointment.
3. Save Time for Visitors
Instead of listing each address one by one in plain text, you can show them visually with pins. This saves time for both you and your visitors. It also makes your site look more professional and modern.
4. Boost Local SEO with Location Data
Google Maps can help with your website’s local SEO. When you add real addresses to your map, it tells search engines about your business locations. This may help your site appear in local search results. Explore how to improve local SEO with HappyAddons.

5. Make Your Site More Interactive
A map with multiple pins looks more interactive and dynamic than just plain text. Visitors can zoom in, click on pins, and explore the map. This makes your site more engaging and user-friendly.
6. Perfect for Service-Based or Multi-Branch Businesses
If you run a chain of restaurants, clinics, stores, or delivery points, multiple pins help explain your reach clearly. As already said above, this builds trust and helps users choose the nearest spot.
Prerequisites for Making a Google Map with Multiple Pins with Elementor
Let’s make one thing clear at the beginning. Elementor does have a built-in widget called Google Map. But its features are very limited. You can’t add multiple pins to the map using this default widget. So, to do that, you’ll need an additional addon.
One great option is HappyAddons. It offers a widget called Advanced Google Maps, which allows you to easily create and add multiple pins to your map without any hassle.
So, in total, you need the following tools on your site for this tutorial.
HappyAddons Pro is required because the Advanced Google Map is a premium widget of the plugin. Once they are installed and activated on your site, start following the tutorial as mentioned below. Explore all the other widgets of HappyAddons.
How to Make a Google Map with Multiple Pins in WordPress: Step-by-Step Tutorial
In this section, we’ll explain step-by-step how to make a Google Map with multiple pins in WordPress with Elementor and HappyAddons plugins. We’ll decorate this section with necessary screenshots as well, so you can understand the full process. Keep reading!
Step 01: Open a Page and Find the Advanced Google Map Widget
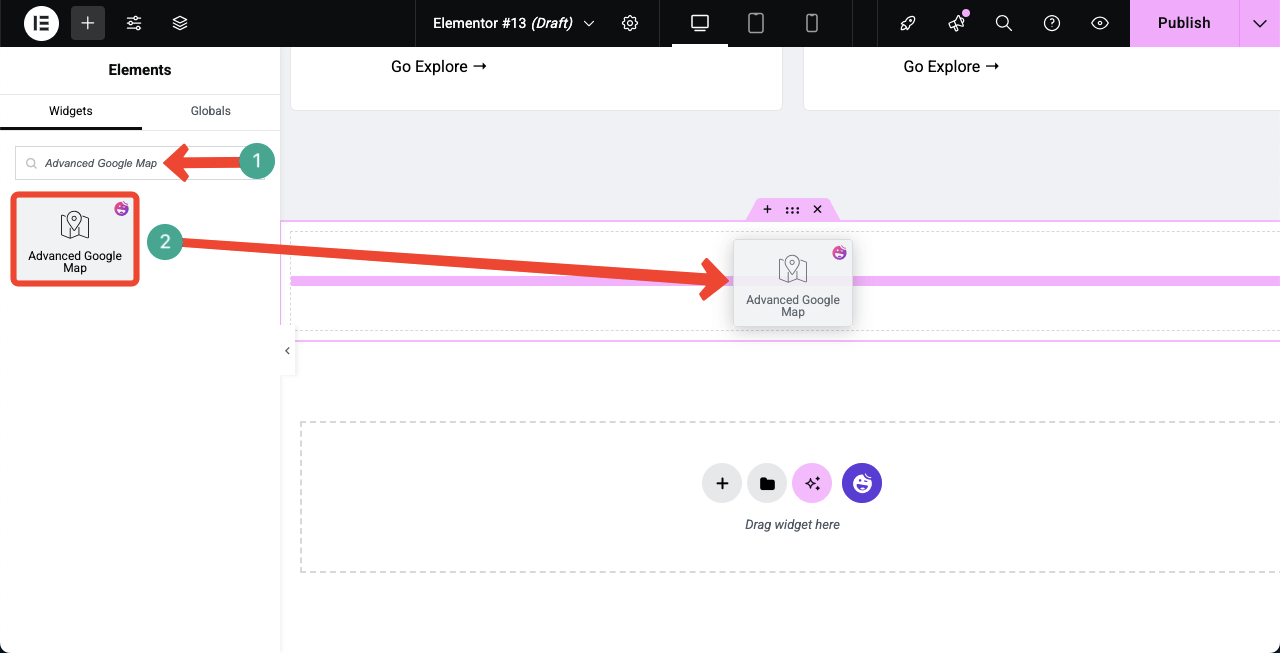
Open the post or page where you want to create the Google Map with multiple pins. Find the Advance Google Map widget on the Elementor panel. Drag and drop it on the Elementor Canvas.
Step 02: Get Google API Key
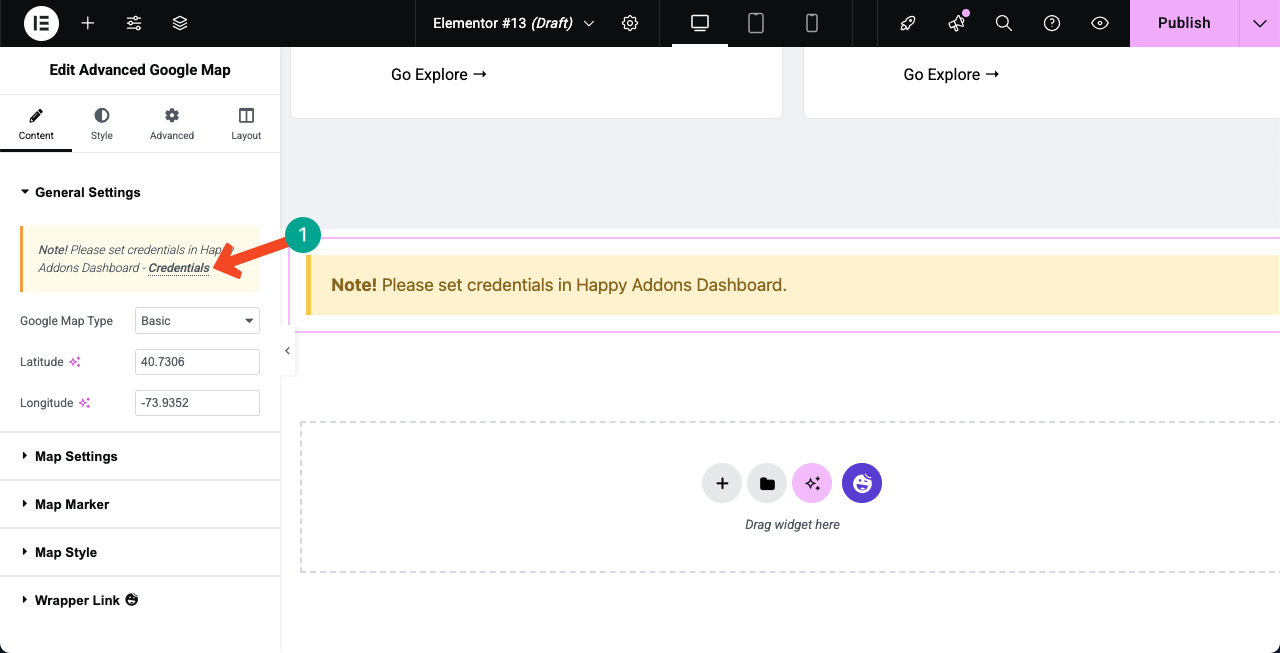
After the widget is added to the canvas, you’ll be asked to configure credentials for displaying the Google Map. To begin this, click the Credentials option under the General Settings section on the panel.
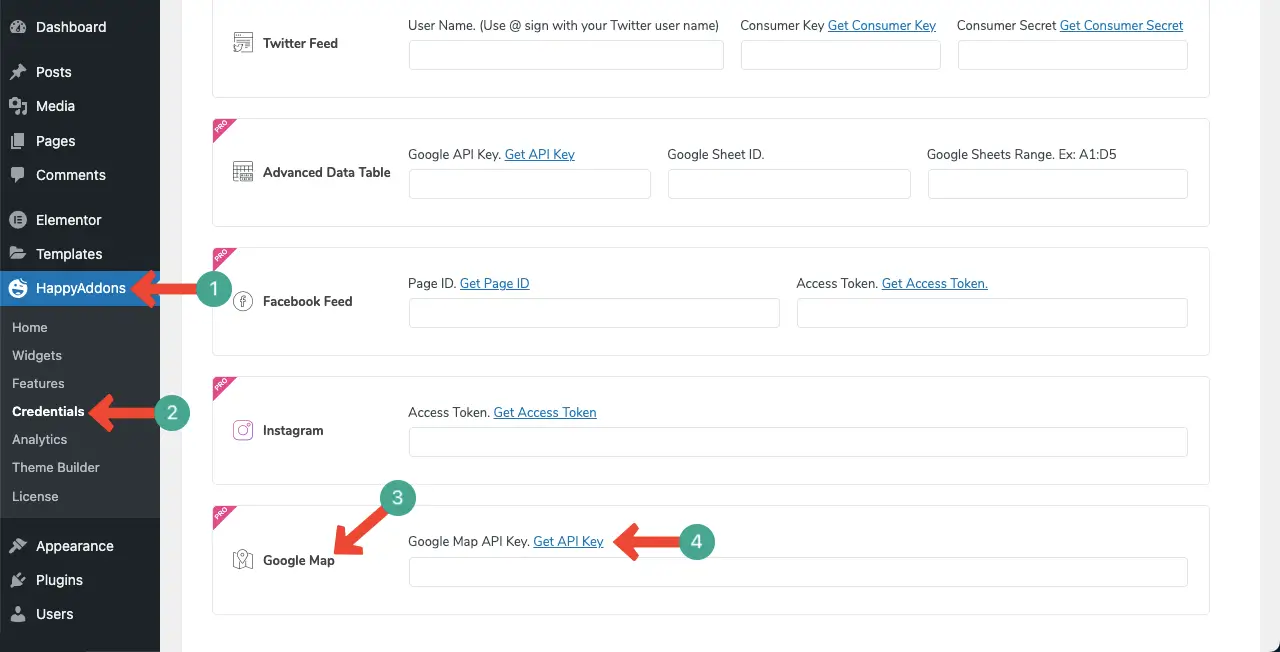
You’ll be taken to the Credentials section of HappyAddons in the backend of the website. Find Google Map option. Then, hit the Get API Key option.
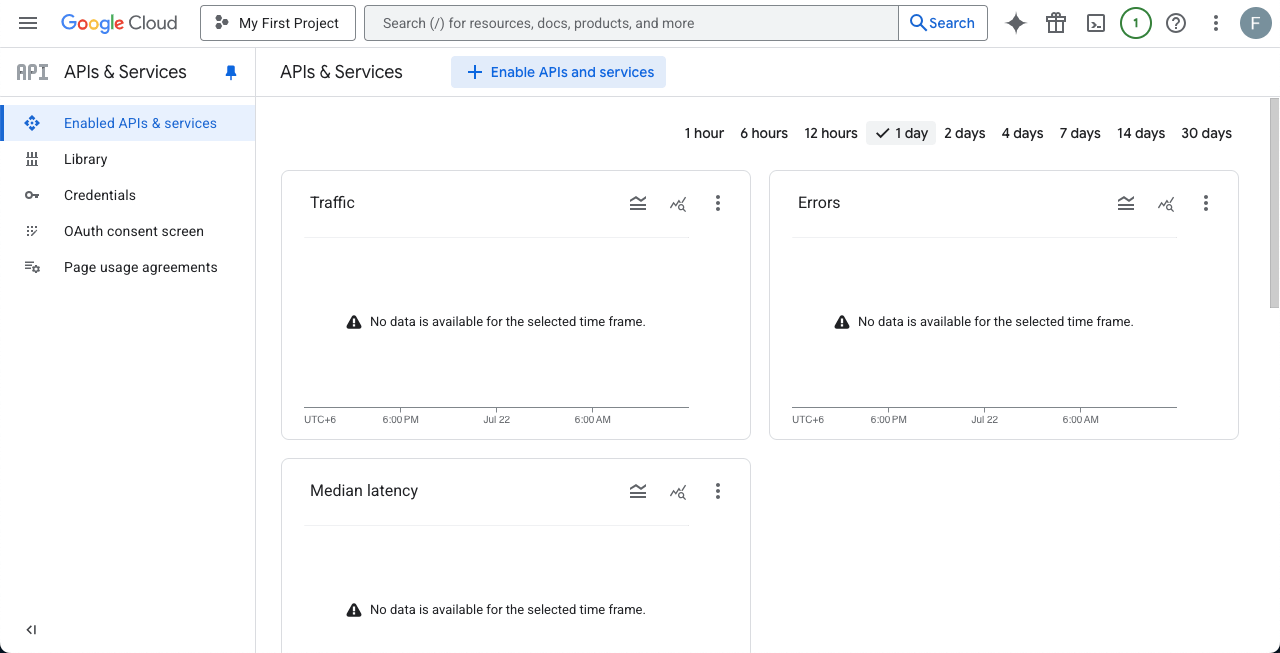
You will come to the Google Cloud page.
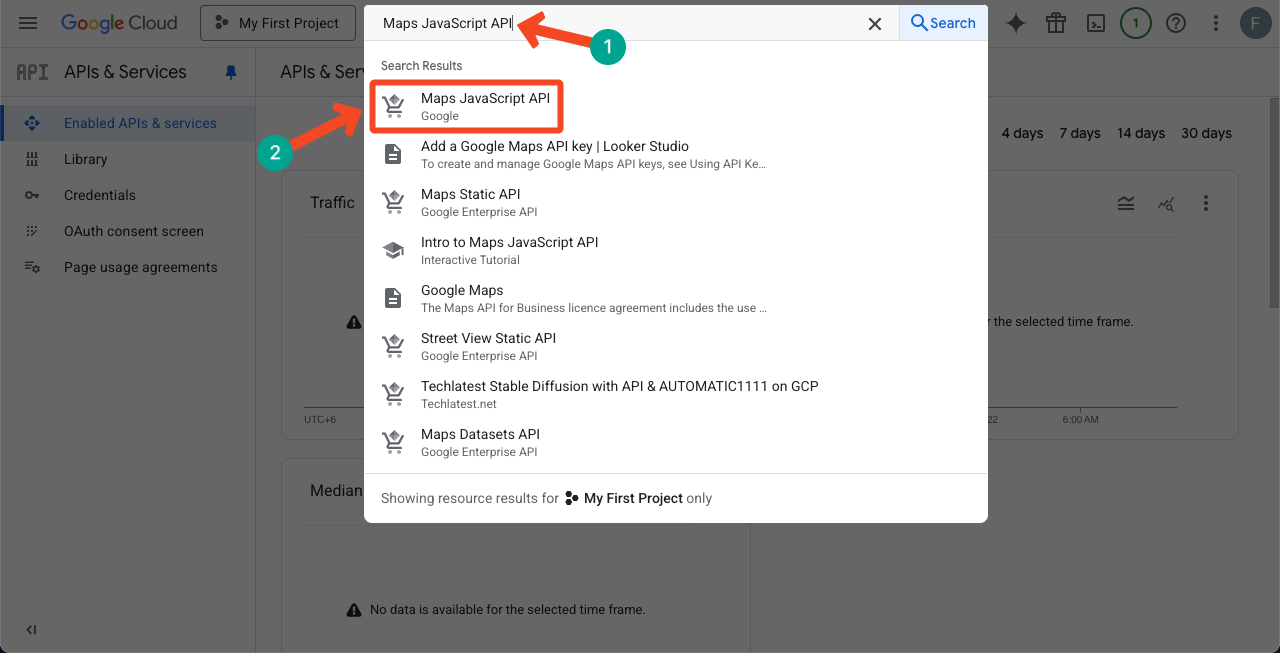
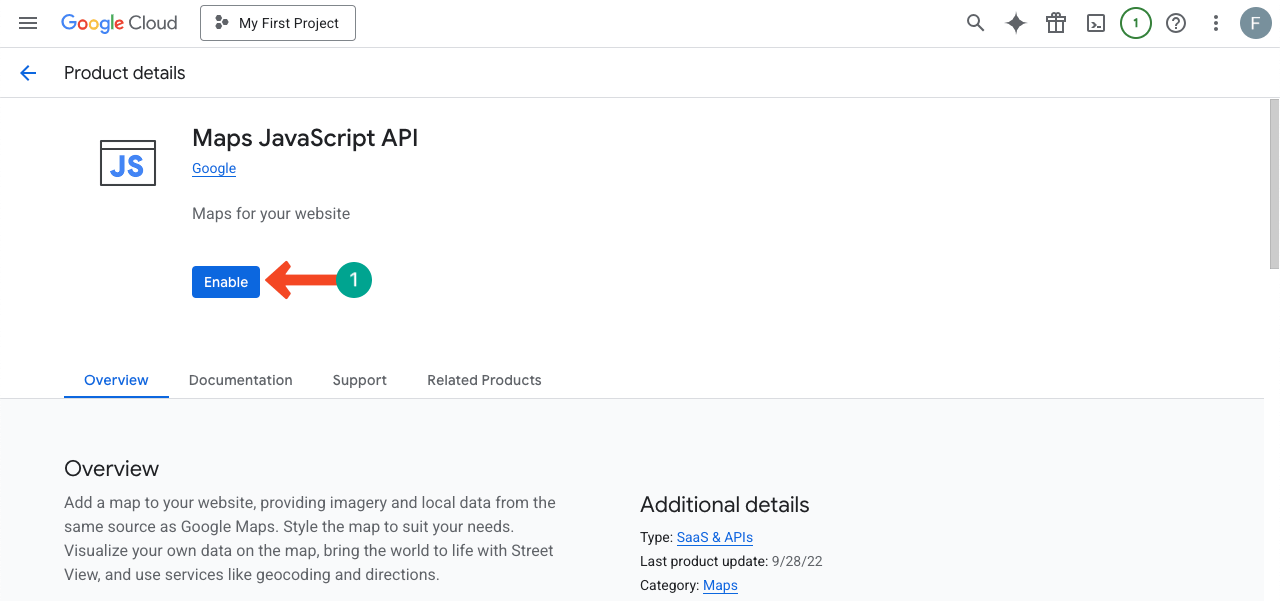
Now, you have to find ‘Maps JavaScript API’. For this, type Maps JavaScript API in the search box. Once the option appears, click it.
After coming to the Maps JavaScript API page, enable the option.
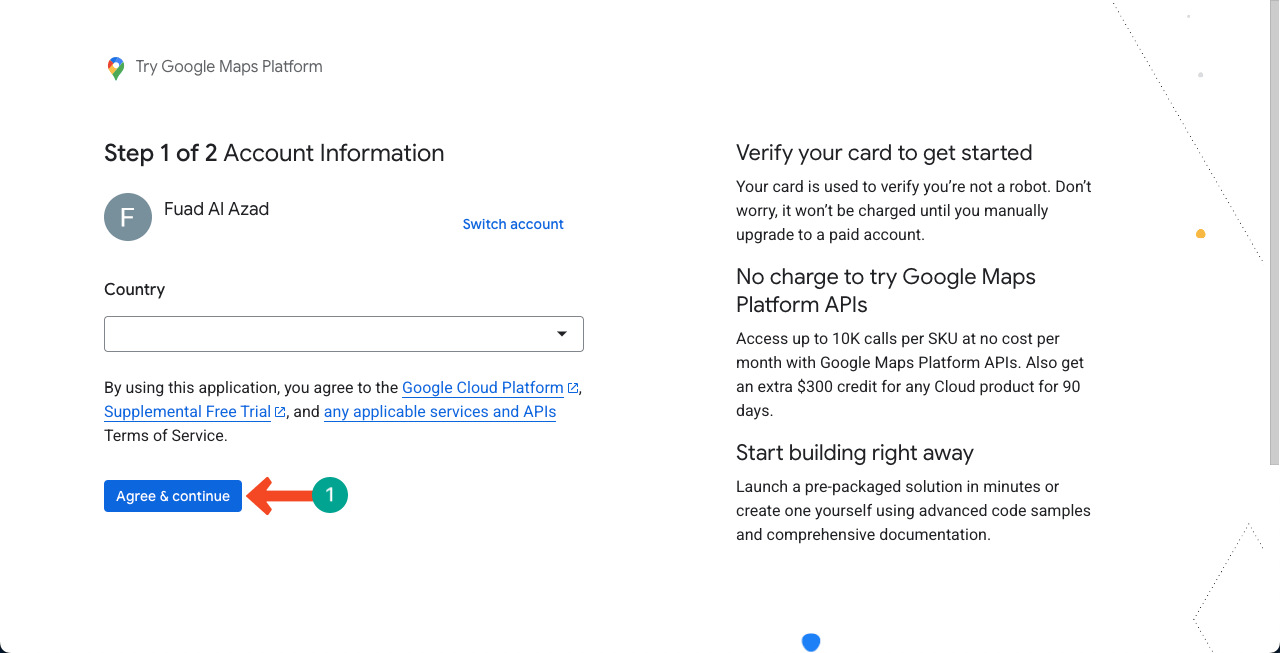
Press the Agree & continue button. Before that, you may select your country. We have blurred it for our case.
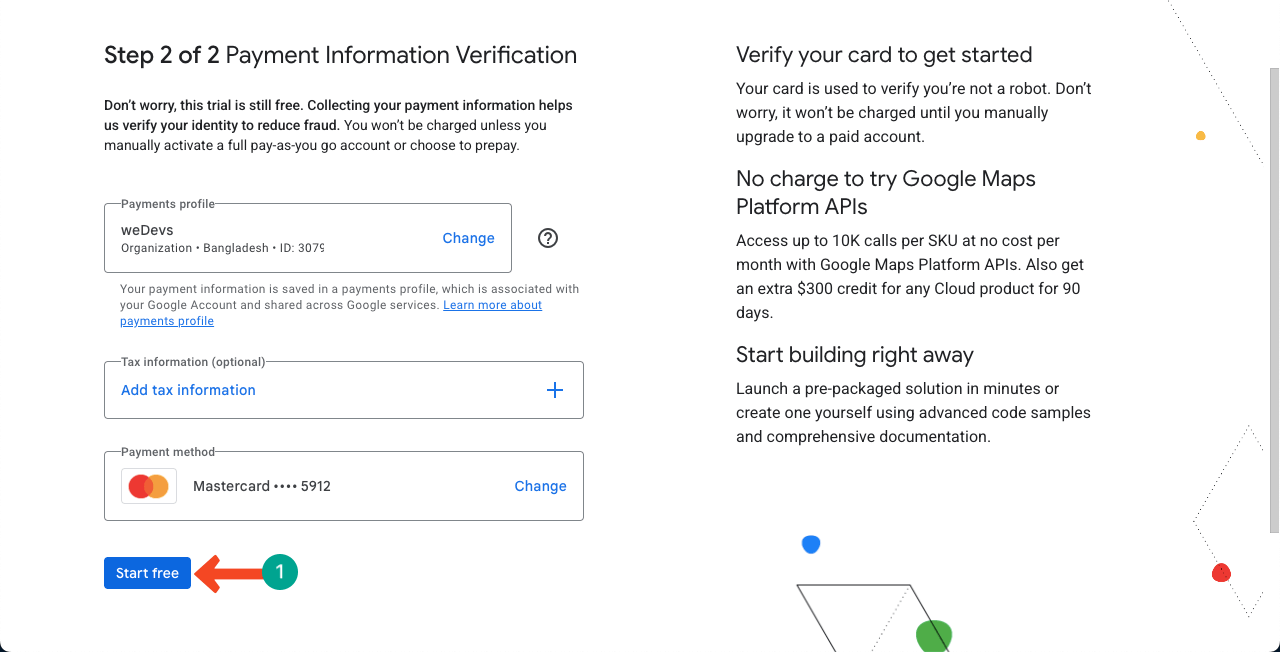
Google API Key isn’t technically free. You have to complete your billing information to get the API.
Note (how it’s free): Although it’s not technically free, you’ll receive tokens equivalent to $200 per month at no cost. With this token, your Google Map can be loaded or viewed up to 28,000 times. Only if this view/load limit is crossed will your card be charged.
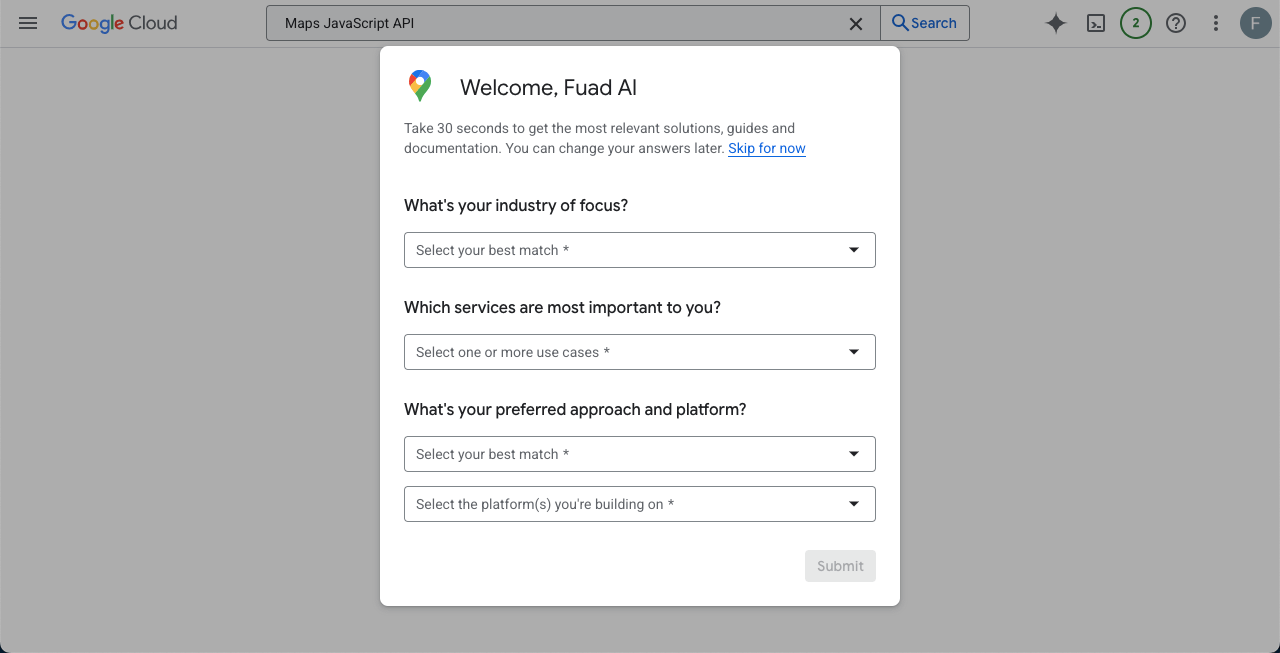
After that, you’ll be provided with a popup. You have to give some information about your business where this map will be used. Once done, click the Submit button at the bottom-right corner of the popup.
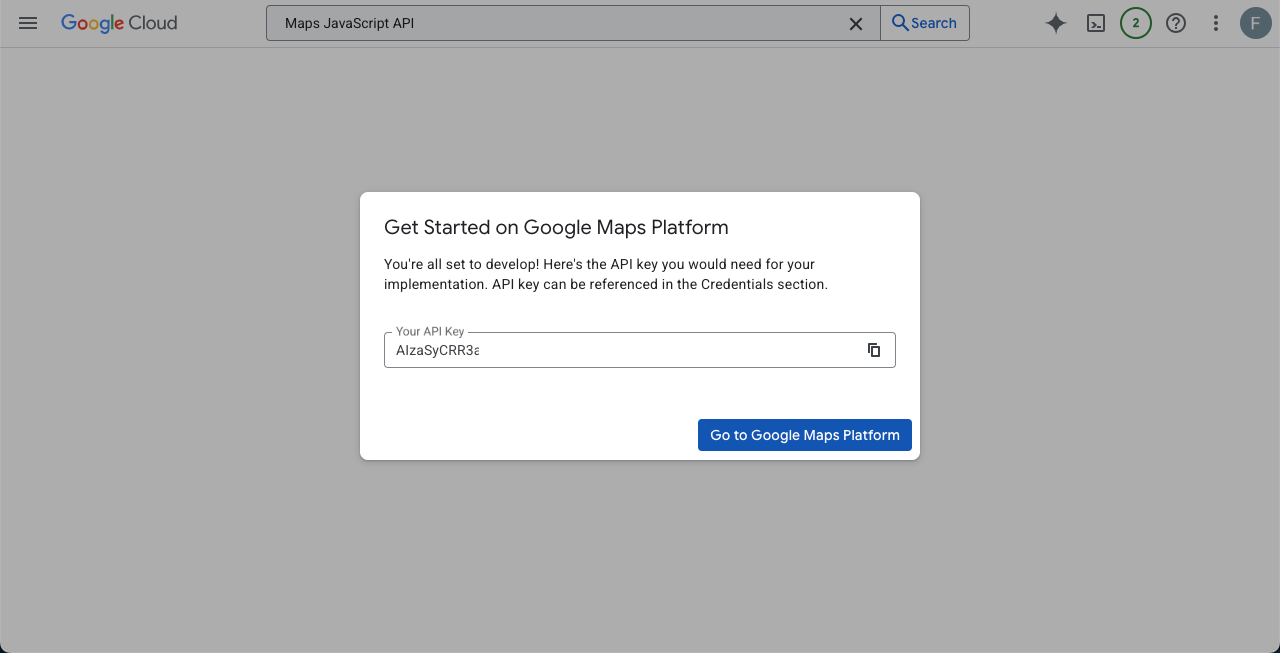
The Google Map API key will instantly appear on your screen with a new popup. Copy the API key.
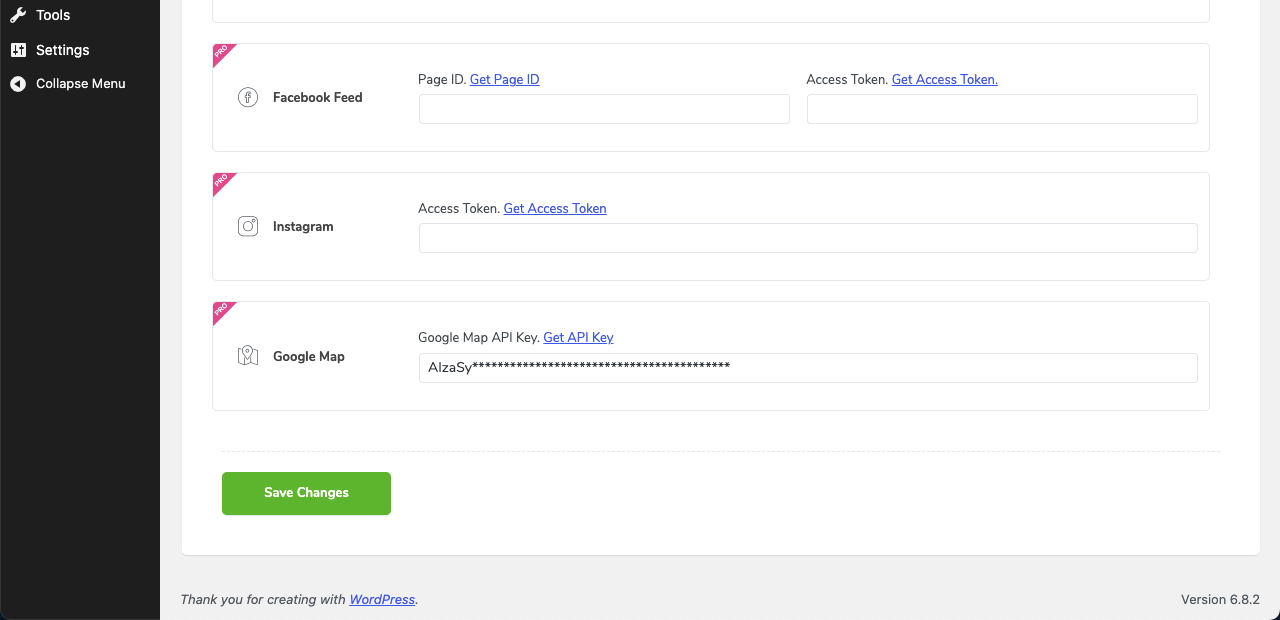
Get back to the HappyAddons Google API key option and paste your code there. Hit the Save Changes button in the end.
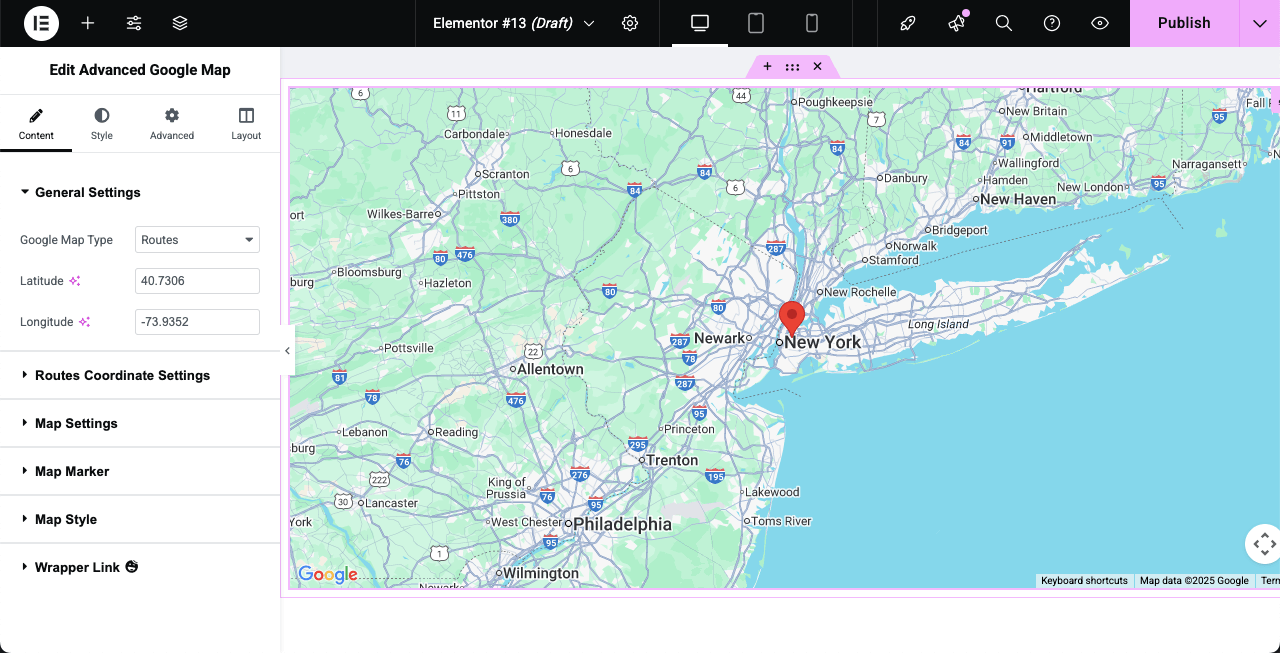
Now, come to your Elementor canvas and refresh/reload it. The Google Map will appear on the canvas.
Check how to create a timeline in WordPress with Elementor.
Step 03: Add Multiple Pins to the Map
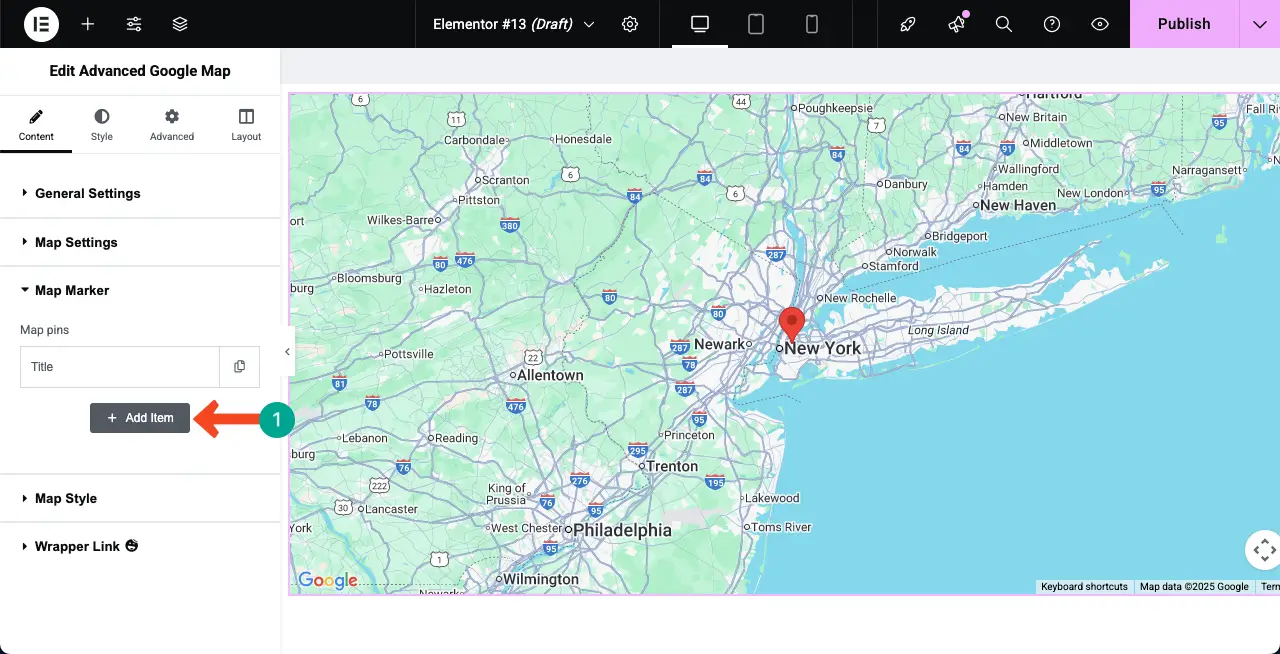
By default, only one pin is displayed on the map. To add and display more pins to the map, expand the Map Marker section on the panel.
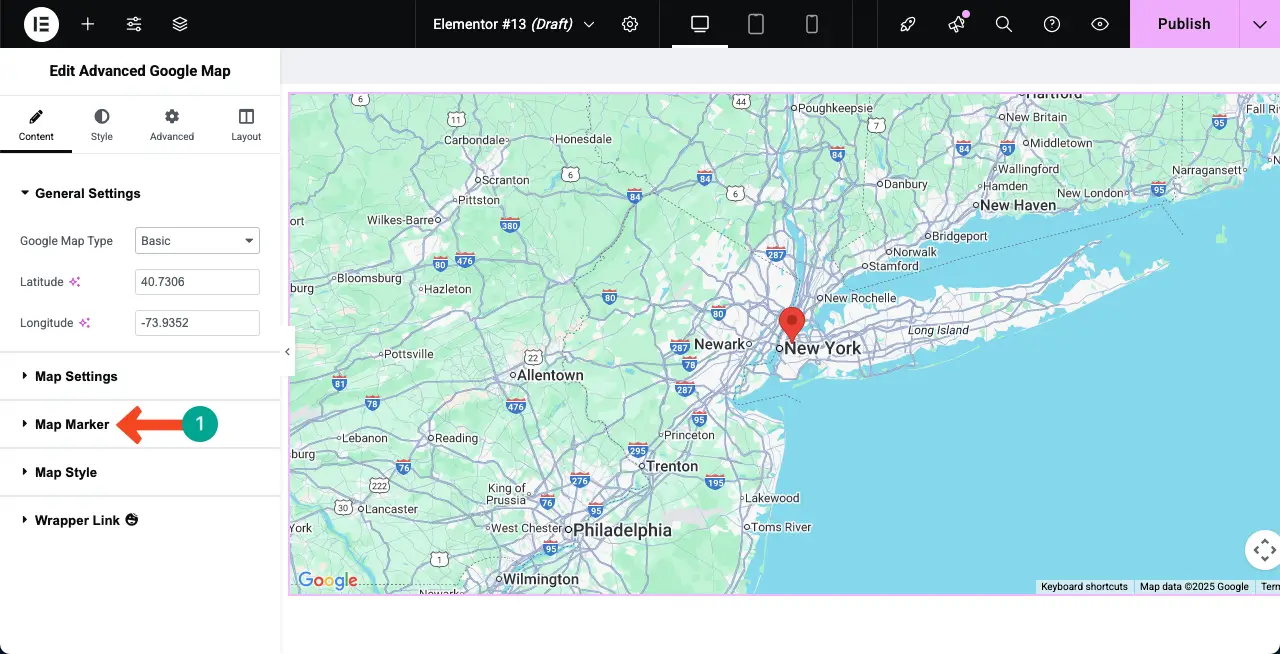
After the Map Marker section is expanded, you can add as many pins as you want by clicking the + Add Item button.
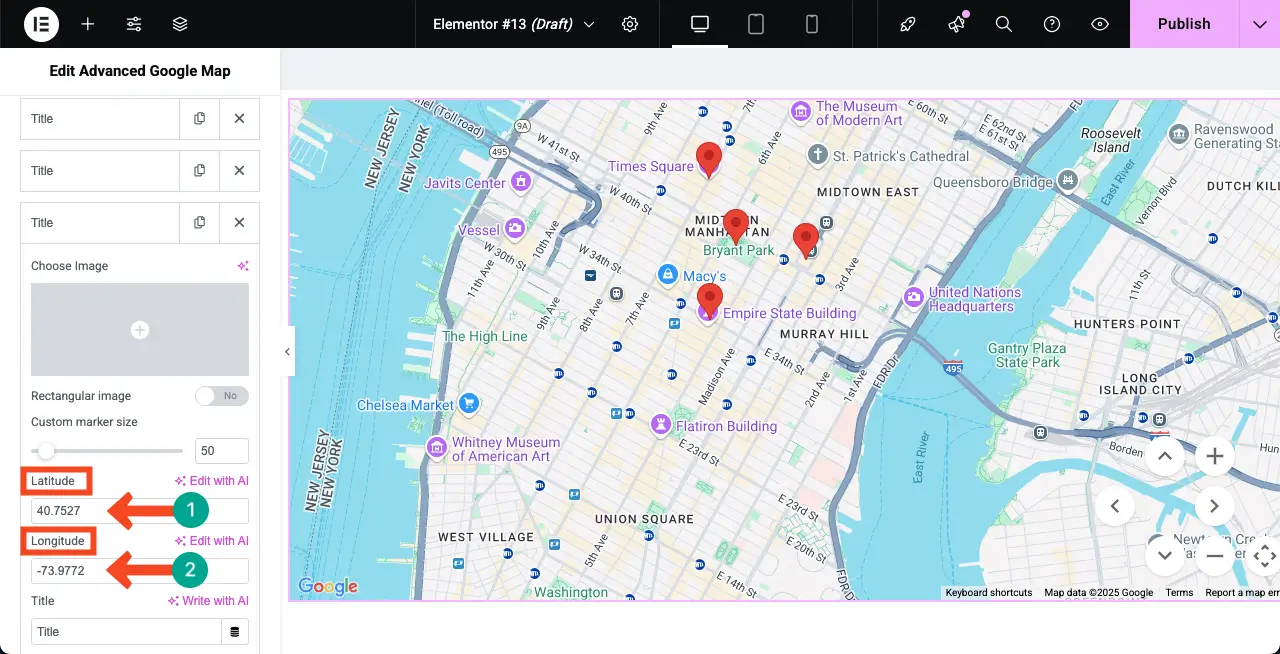
Now, by placing values for Latitude and Longitude, you can precisely set pins accurately for each place.
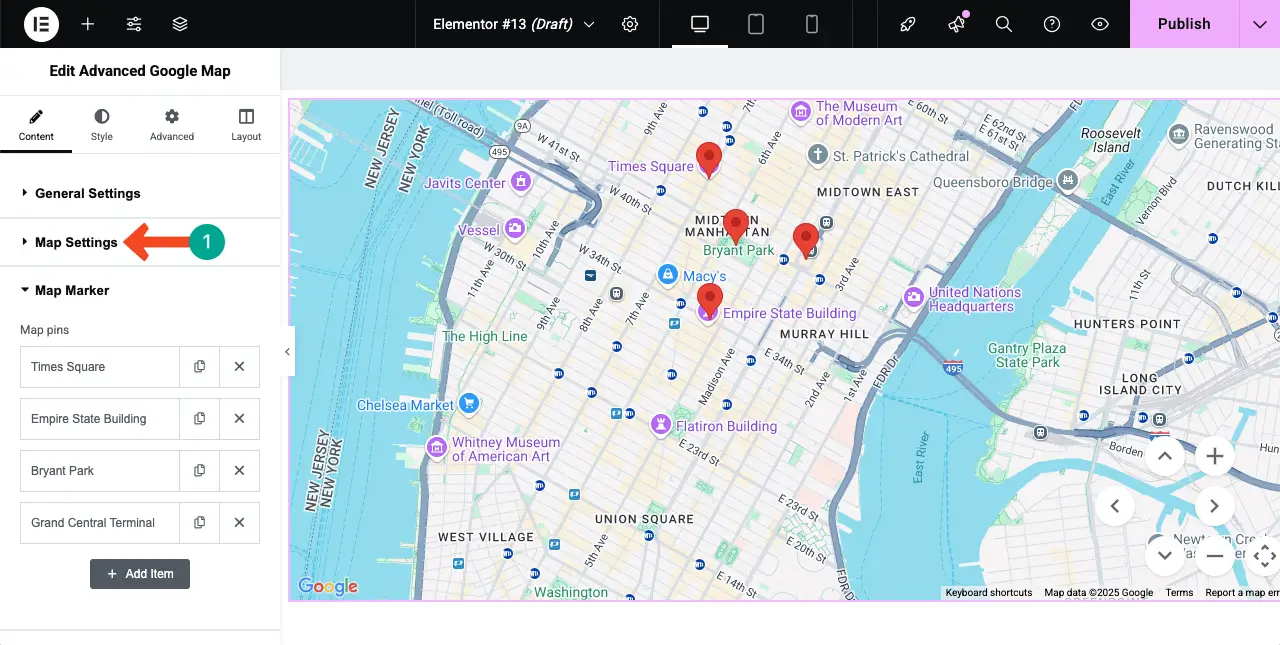
Step 04: Configure Map Settings
In the same way, expand the Map Settings section.
You will find lots of options under this section.
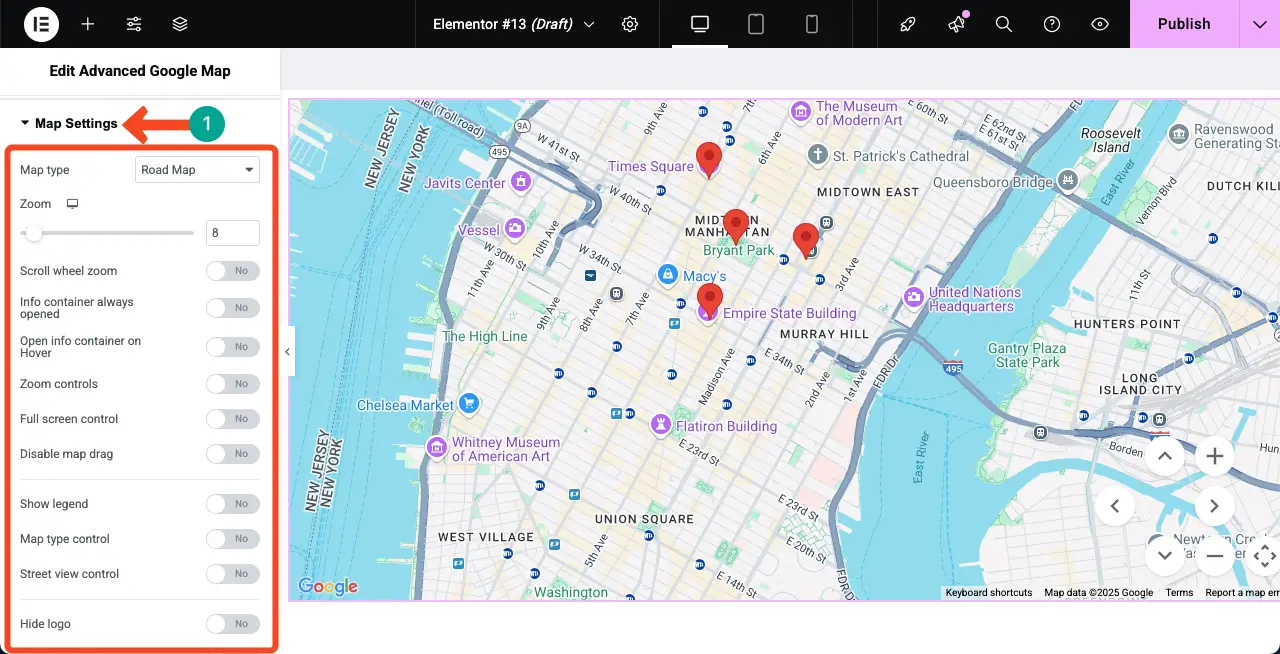
Now, you kindly explore each option by toggling on and off to see how they work so you can finally stay with the ones that suit the design needs.
Learn how to create an auto-scrolling image gallery in WordPress.
Step 05: Stylize the Advanced Google Map Widget
When all the settings and content parts are done, come to the Style tab. From here, you can customize the height, width, border type, border radius, and more options.
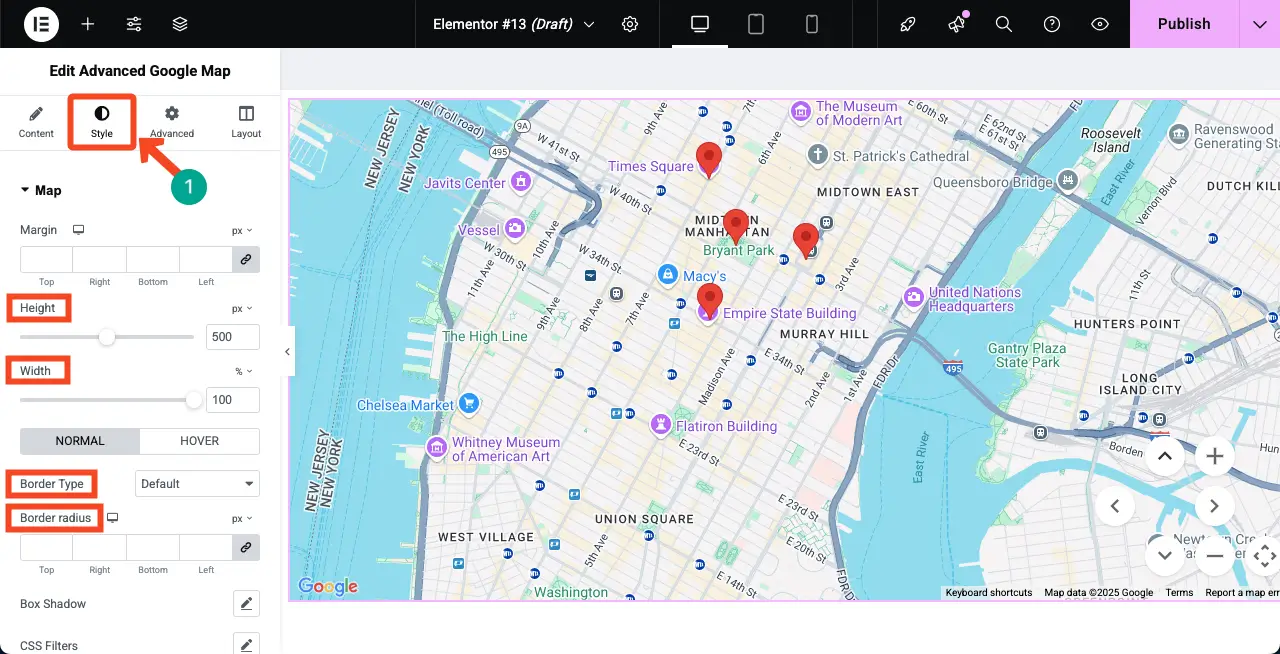
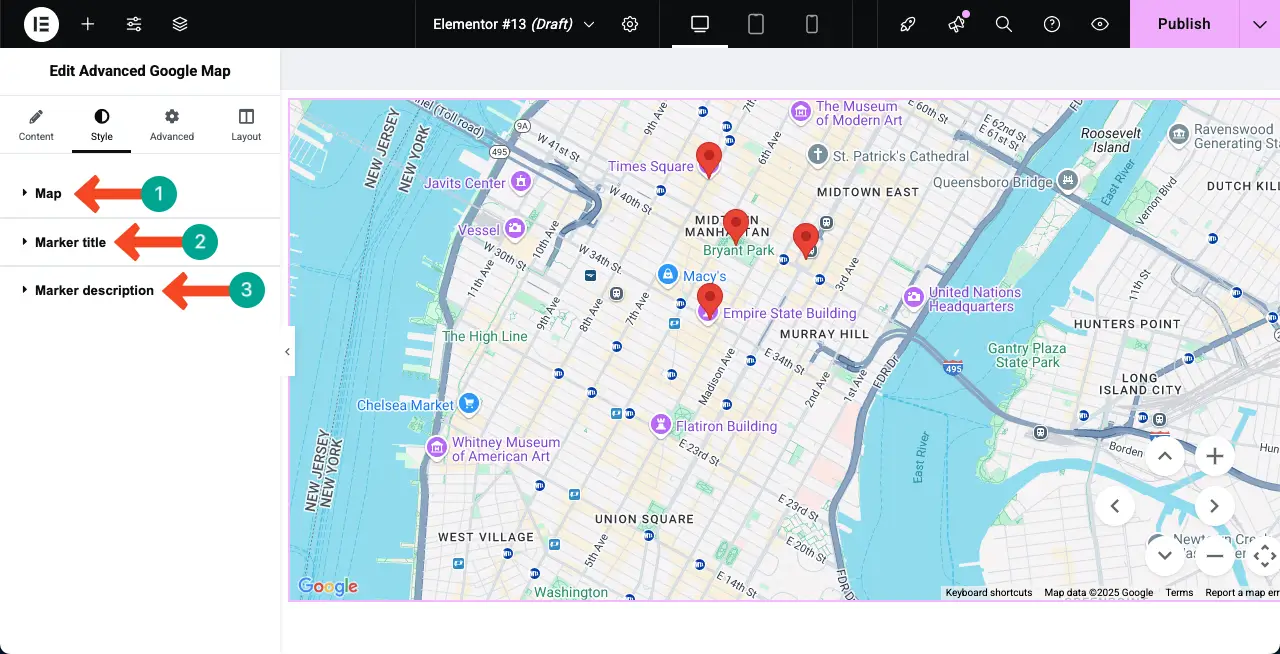
In the same way, expand other options as well and do the necessary customizations as you want to change the appearance of the pins.
Step 06: Preview the Design
When the design is done, before publishing it online, preview it to see if any correction or modification is required. You can see that the widget is working fine on our end in the video clip attached below.
Thus, you can make a Google Map with multiple pins in WordPress with Elementor.
Advanced Tips for Google Map with Multiple Pins
Once you’ve added multiple pins to your Google Map, there are more things you can do to make the map work better for your visitors and your website. These advanced tips will help you make your map look more professional, improve user experience, and even support your local SEO efforts.
1. Use Custom Images Instead of Icons
Instead of the default red pin, try using custom icons or images for each location. HappyAddons allows you to do this from Content Tab > Map Marker section. Custom images and icons can make your map more visually clear and attractive.
2. Zoom and Center Settings
Adjust the zoom level and center of your map to show all pins properly. If some pins are far apart, make sure the zoom level is wide enough so that all of them are visible when the map loads. This gives users a full overview without needing to move the map manually.
3. Make It Mobile-Friendly
Always check how your map looks on mobile devices. Make sure it loads fast, pins are clickable, and info boxes are readable on small screens. A map that works well on both desktop and mobile will keep more users happy.
4. Embed Maps on Contact or Location Pages
Don’t just leave your map on one page. You can reuse the same map by embedding it on other pages like ‘Contact Us’, ‘Our Locations’, or ‘Visit Us’ pages. This helps users find the right place wherever they are on your site.
Learn how to create a dynamic web page in WordPress with Elementor.
Conclusion
Making a Google Map with Multiple Pins might be a simple step or part in your web design, but it can have a long-lasting impression. Not only can it help visitors find your locations but also boost the local SEO score and make your website look more professional.
With the help of Elementor and HappyAddons plugins, you can add them easily to your website without much hassle. It’s so simple that even beginners can do this just by following the tutorial covered above. If you still have any questions unanswered, let us know through the comment box below.
We will get back to you very soon with viable replies. Thanks for being with us till the end. Let us know which topic you want us to cover in the next post.

