Looking to improve the user experience of your site by adding a parallax effect? You have come to the right place. We’ll guide you through the whole process to add this unique yet cool feature to your WordPress site.
You might have seen a lot of web pages that make great use of parallax scrolling, where the background moves at a slower speed than the foreground elements to convey depth. Well, this effect is not uncommon. You will find the parallax effects on all kinds of websites.
Parallax allows you to dynamically reveal details of your product/services as the user goes through the narrative you created for them.
Elementor
Apart from helping you to achieve a marvelous website’s design, the parallax feature can facilitate in multiple ways. Such as:
- Improves user experience
- Reduces bounce rates
- Increases user engagement
However, manually adding this feature requires a lot of time & effort, you will need programming skills as well. But if you have a WordPress site then you don’t need to worry. Because page builders like Elementor will help you add parallax effect on your website without the help of any coding or any professional.
So, in today’s tutorial, we explain what parallax effects are, why you should be using them, and how to create a parallax effect using Elementor.
Let’s get started with the basics. Shall we?
What Is a Parallax Effect?
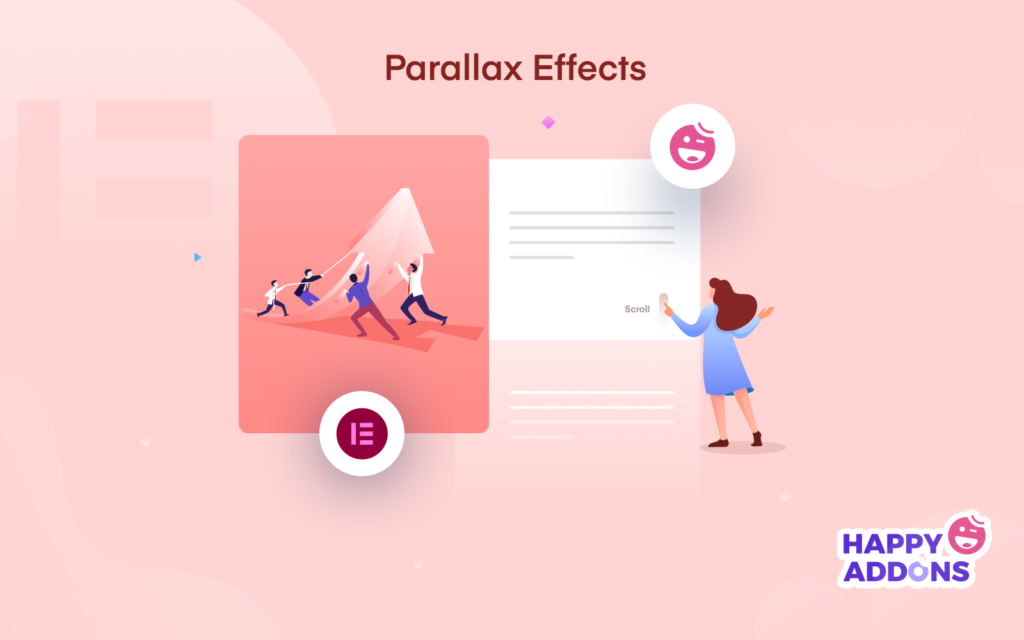
The parallax effect is a stylish design pattern that is widely used on different websites to make it more attractive & eye-soothing. The basic formation of this design pattern is a scrolling effect. This means the background images move a bit slower than the main content. At that time, it gives an illusion 3D feel on a 2D surface.
The parallax on a website is a slow video-style design that gives a dose of nostalgia – which ties in perfectly with the movie
Web Designer Depot
Once it has only been applied on a particular website such as the gaming website. But now you can notice this design pattern in almost all types of websites including portfolio and travel websites. For its uniqueness and easy implementation, people are now willing to add this premium layout to their websites.
As said above, it’s a hard & time-consuming fact for the general users as it requires coding knowledge. But open-source platforms like – WordPress have made this possible for everybody to create beautiful page designs. For sure, it will make website navigation more interactive & interesting for your users.
You can also implement the parallax effect on,
- Landing pages
- Selling pages
- Business websites
- Travel websites
- Personal portfolio websites, etc.
Important Note: Parallax scrolling is bad for a website when it’s implemented wrongly
This is why you need to choose catchy website templates. So it will help your website to get a great structure.
Learn more about the most useful website design templates here
Types of Parallax Effects in Elementor
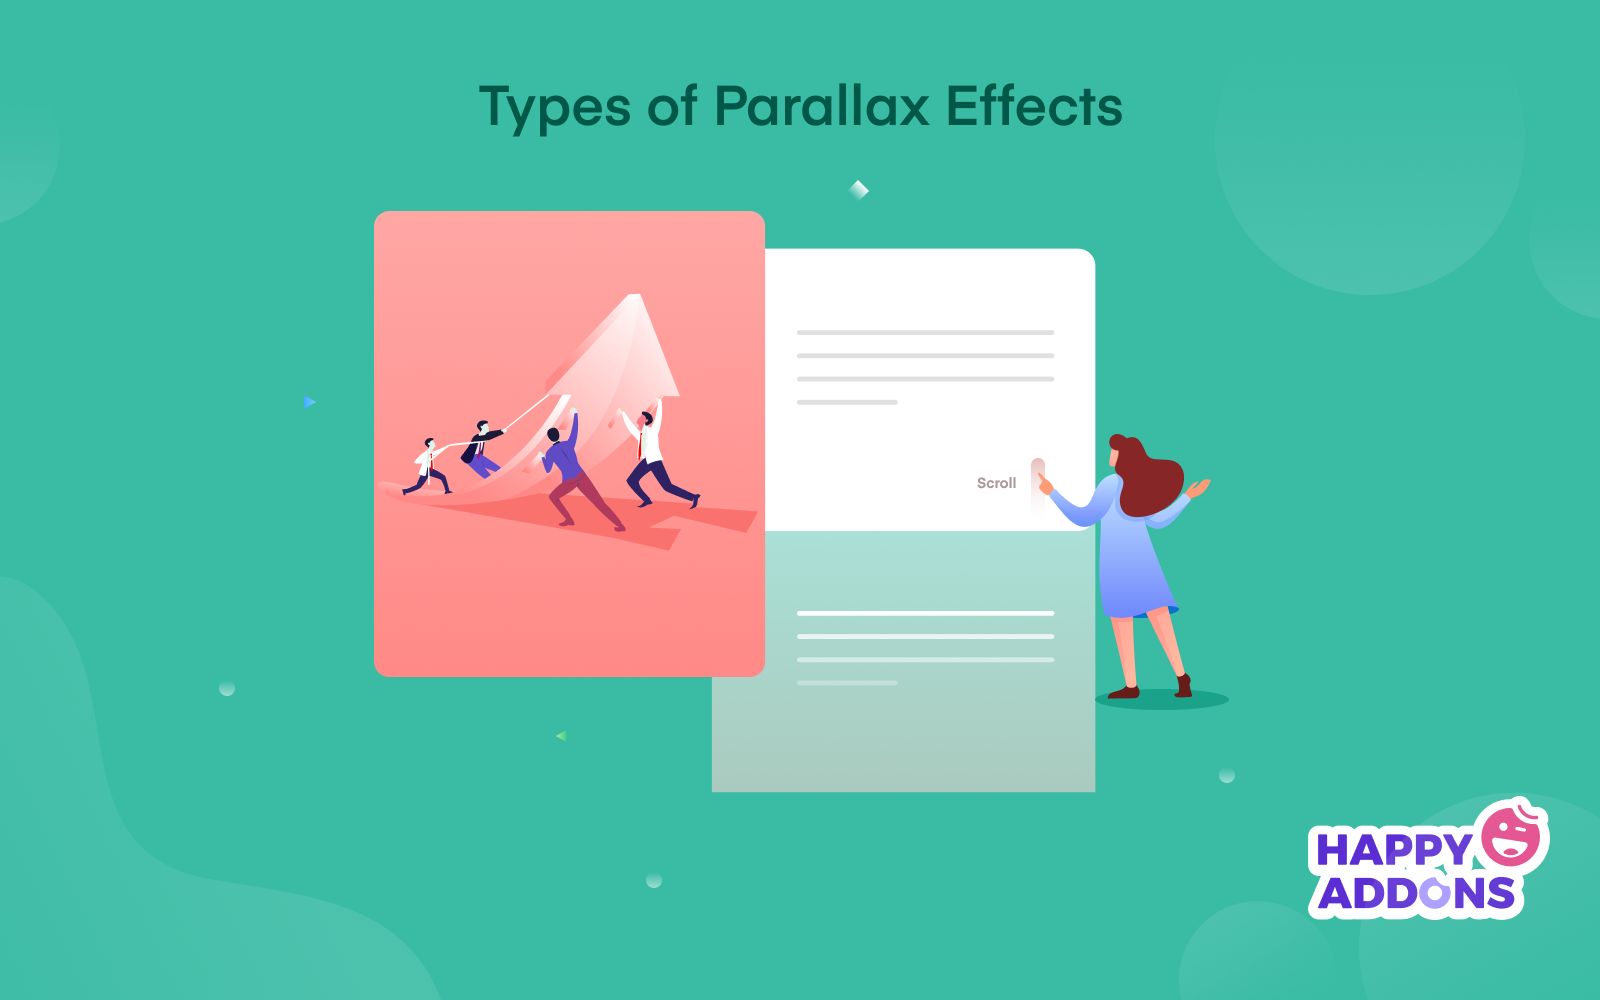
Generally, you can see two types of parallax design patterns. Parallax scrolling effect and mouse effect. But you can mix up these patterns to obtain more models based on your website type.
01. Parallax scrolling, operates based on scrolling through the page
02. Mouse effect, works at the time you move the mouse
Let’s see what other parallax design types you can produce within your website:
- Background scroll
- Vertical scroll
- Horizontal scroll
- Mouse track
- Blur effect
- Rotate effect
- Mouse effect
Mouse Track
The mouse track effect is a fade-out transition. The more you move from the upper portion to the down, automatic navigation will show up. It seems very interesting & engaging. Surely, it will improve the user experience of your website. You can implement this design to reveal a new topic for users, or just surprise them with – what is the next!

Rotate Effect
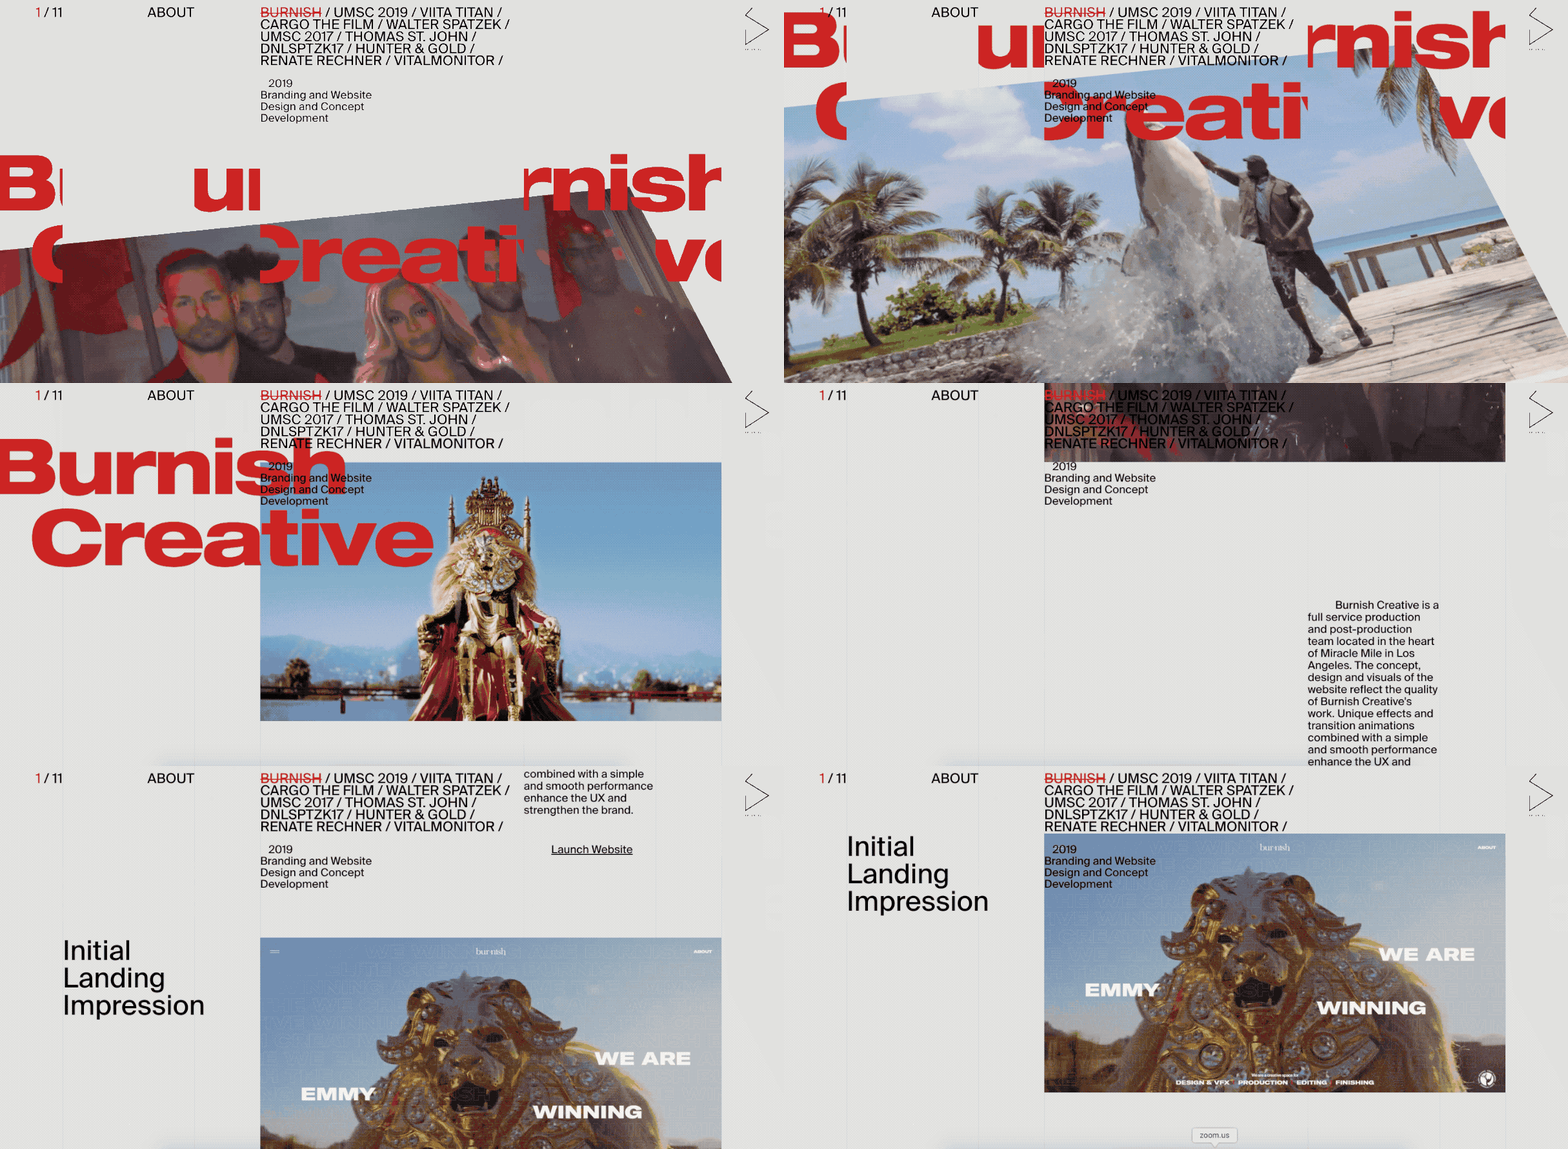
Rotate effect means to add a motion to the elements. So while users navigate the page or scroll down the page, the elements will rotate clockwise or anti-clockwise.
It can be a good effect to add to your website. You can make your users feel like they are watching a video while scrolling your website.
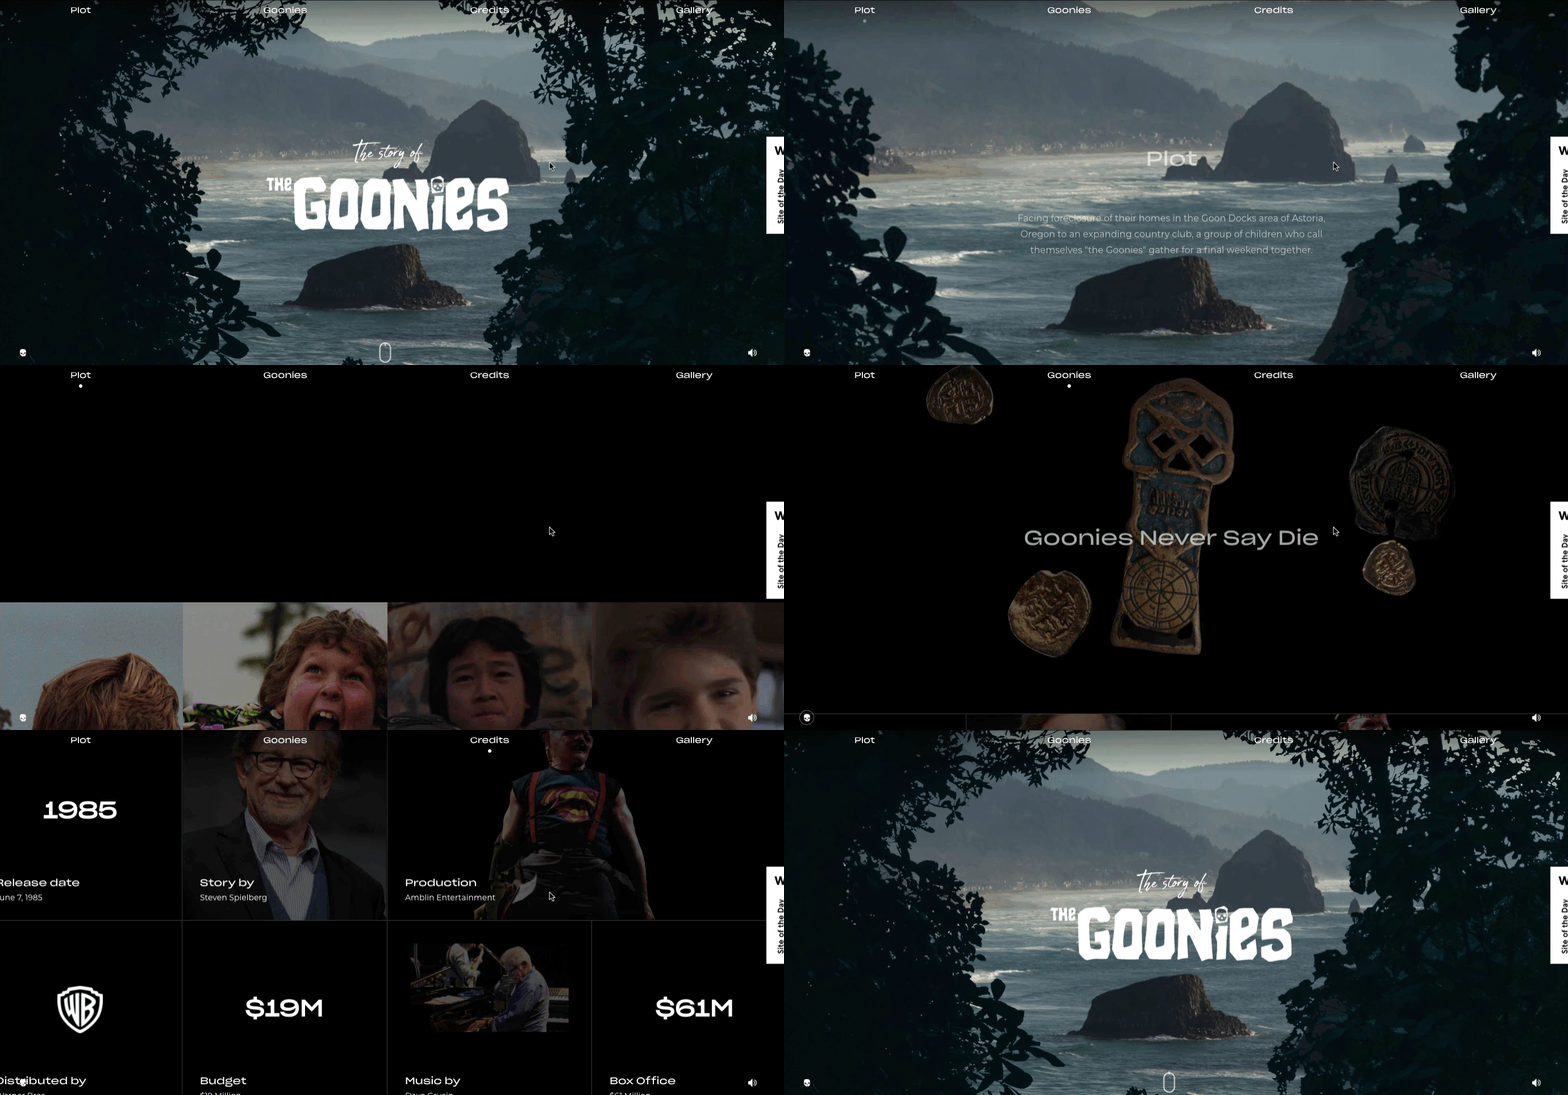
Background Scroll
One of the oldest design patterns is the background scroll effect. It’s a great way to start with this design. You can see the images are changing one by one while you scroll down to the page. Also, you’ll get a story while you scroll top to bottom. If you have a single-page website, this design could be awesome for you.
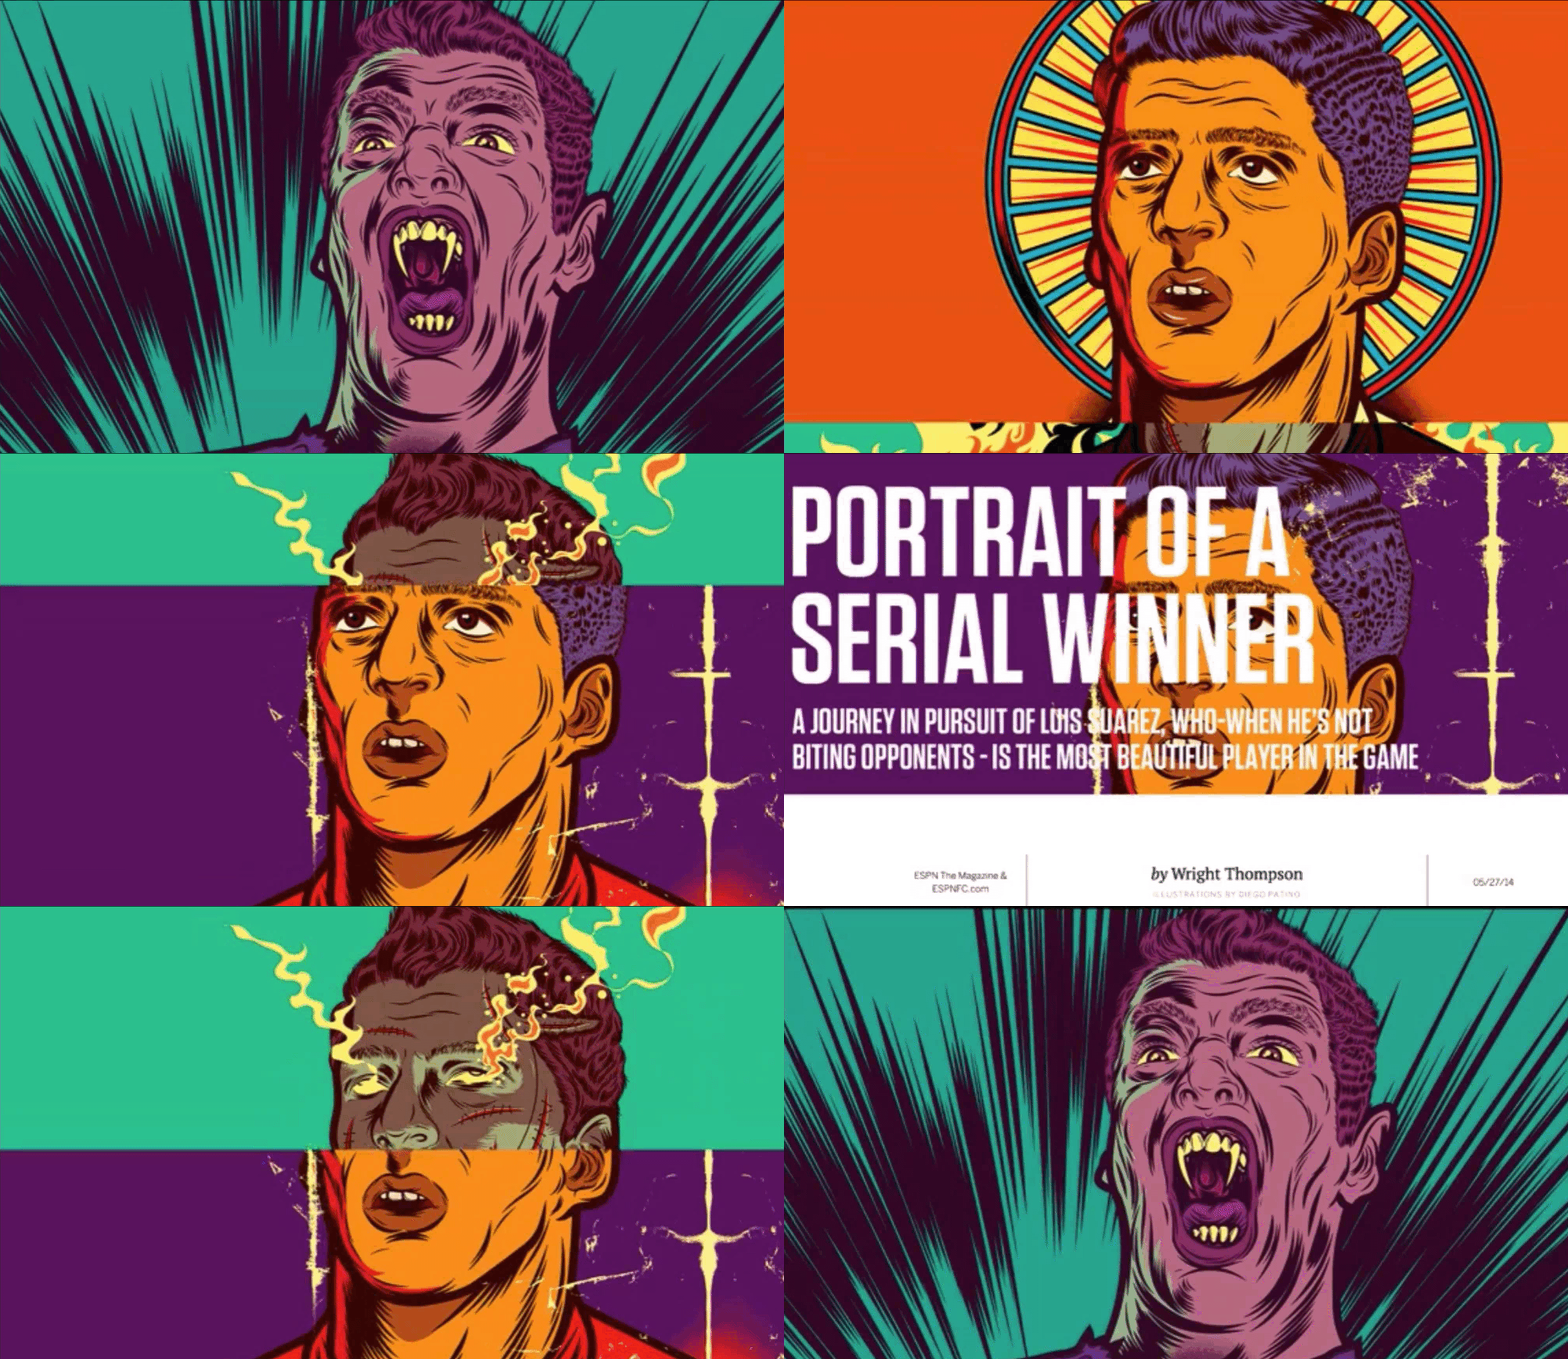
Vertical Scroll
The vertical parallax scroll effect is more attractive and engaging than the background scroll effect. You can let your users feel that elements are floating when they navigate the website. It includes different speeds with multiple layers in the same direction.
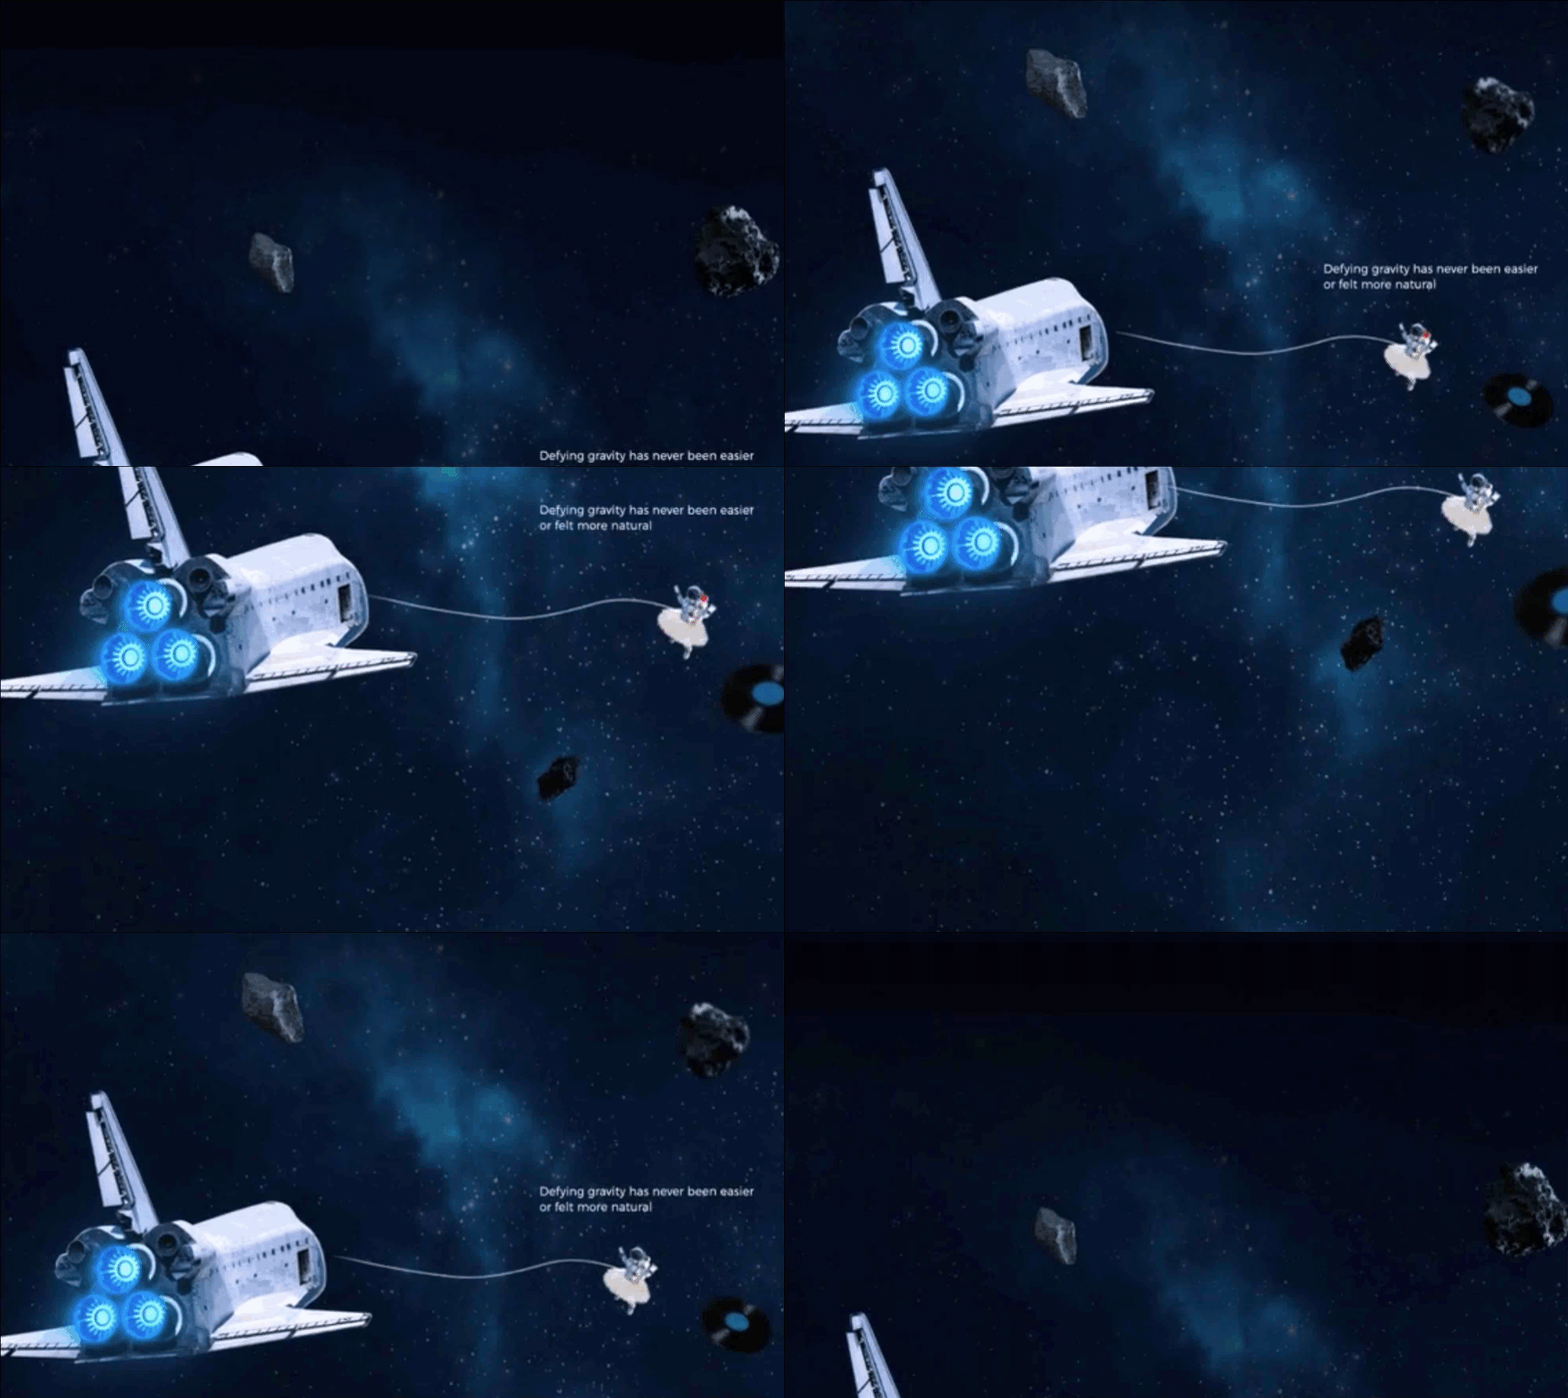
Horizontal Scroll
What’s the first thought after watching the horizontal scroll effect? Obviously, you just feel like you’re in the space. Right?
Exactly, it can easily spice up your dull and boring design into a masterpiece.
Let’s say you created a mock-up for a project, but it’s a bit dull and you want to spice it up. Flying a shuttle into the middle of the screen using a horizontal scroll should definitely do the trick. As you can see the effect are working alongside the more you go from top to the bottom.
Blur Effect
Like the above effects, it also works in the same way. But the difference is – a blurry effect just shows when you scroll down. Oppositely, when you scroll up it again shows up the blurry text.
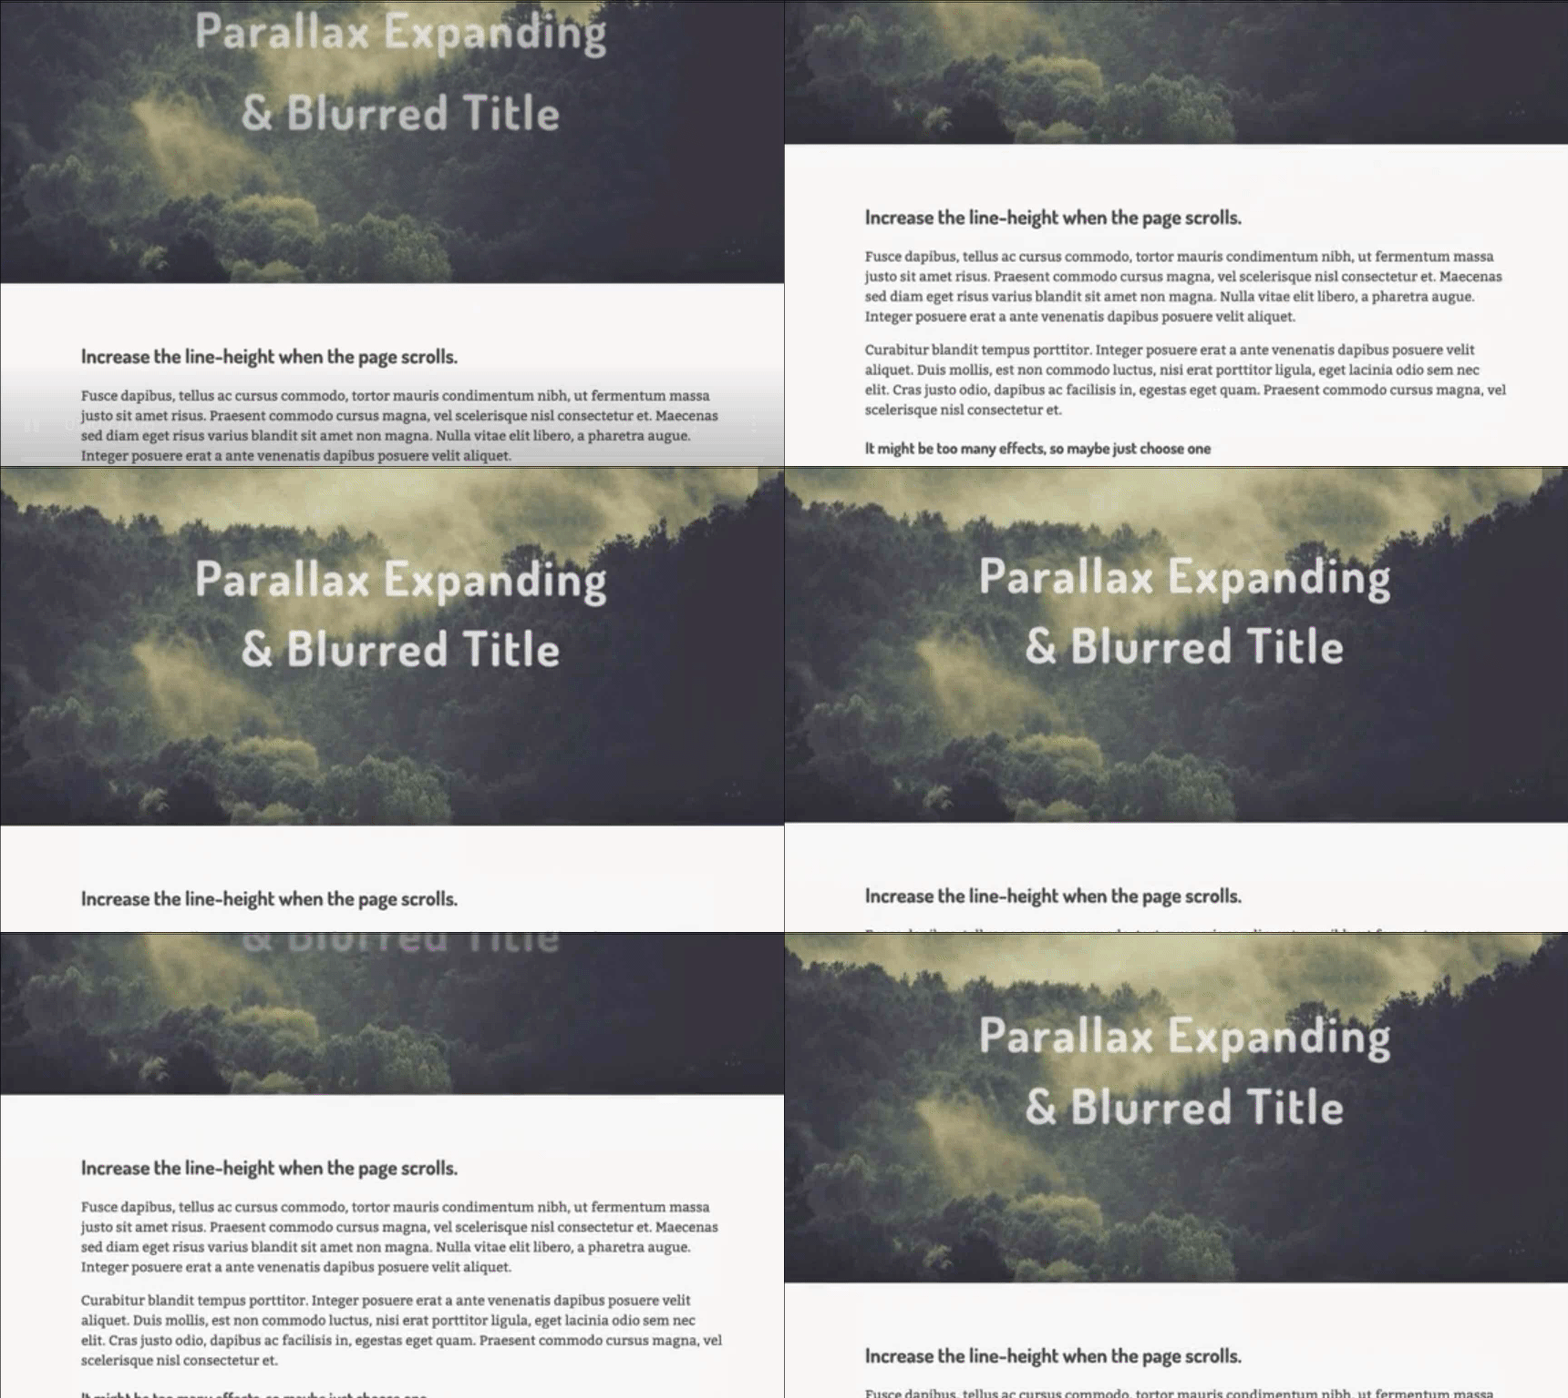
Mouse Effect
Last but not the least, we have a parallax mouse effect to talk about. It looks very simple and cool. Once you move the mouse pointer, the whole window will move along. Also, you will feel like you’re in the spaceship. So you can implement this design pattern on your site. But we recommend you add it to a specific portion.
Such as about page, portfolio section, or query page. This way you can grab their attention to stay more on your website.
Though there are so many parallax effects you can notice on many websites. But we just picked up some of the most popular effects that you can apply on your website.
To make your website more engaging and attention-grabbing with a great design, click here
Now, we will show you how to add parallax effect,
- On website elements using Elementor
- On the website background using Happy Elementor Addons.
How to Create a Parallax Effect Using Elementor
Considering the above design types, let’s see how to create a parallax effect using Elementor. Every design pattern has its individual purpose. So depending on your business & website category, pick the best one that matches your website color combination.
Requirements to Create a Parallax Design with Elementor
Add a Page & Edit with Elementor
You have two ways to add parallax effect with Elementor. Either you can add this feature on an existing page, or just create a separate page and then work on it.
Let’s create a page. You can ignore this if you have already created a page.
To do that navigate to WordPress Dashboard> Pages> Add a new page> Edit with Elementor.

Once you get in there, add some media files on this page if not done previously.

Add Motion Effects
Under the advanced section, you’ll find Motion. It has also two sub-sections. Scroll effect and Mouse Effect. Apart from these, you can use sticky elements, animation, add animation duration, and animation delay.

Select any of your design sections and then click on the Advanced section to add these features. In this case, we select the heading. After that click on the Editable Icon on the right side of the screen.
And then tap on the Advanced> Motion effects.

Toggle the Scrolling Effect. And you can see other parallax effects are available for you to use. Do the same thing one by one and apply the design to the section.
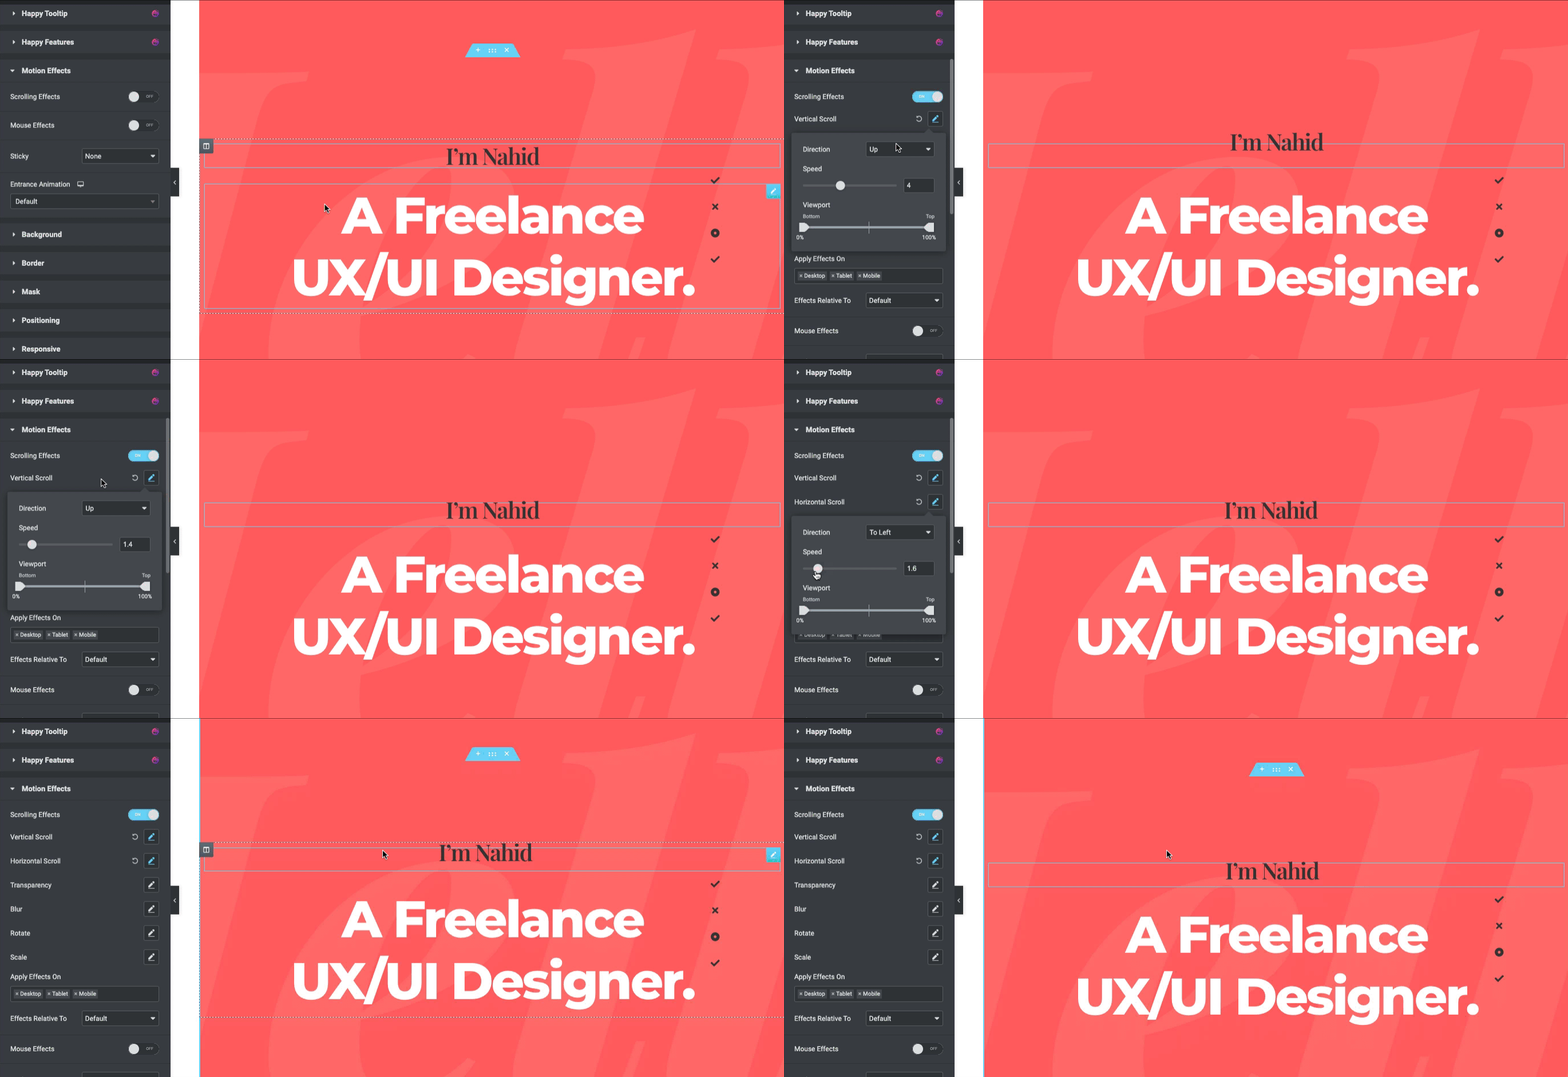
Let’s see what else you can apply with Scroll Effect.
- Vertical scroll
- Horizontal scroll
- Transparency
- Blur
- Rotate
- Scale
Vertical scroll
To apply the design, first of all, click any of the design sections. And then navigate to Advanced> Motion Effect> Toggle the Scrolling effects on> Tap on the vertical scroll button.

Note: To enter and edit your desired section, you need to select that option. Otherwise, it won’t work properly.
Once you click the penlike button, you can set the scroll effect. Such as you can change its direction to up and down, adjust the scrolling speed of the elements, optimize the viewpoint.
You can also see your design progress next to the right screen.

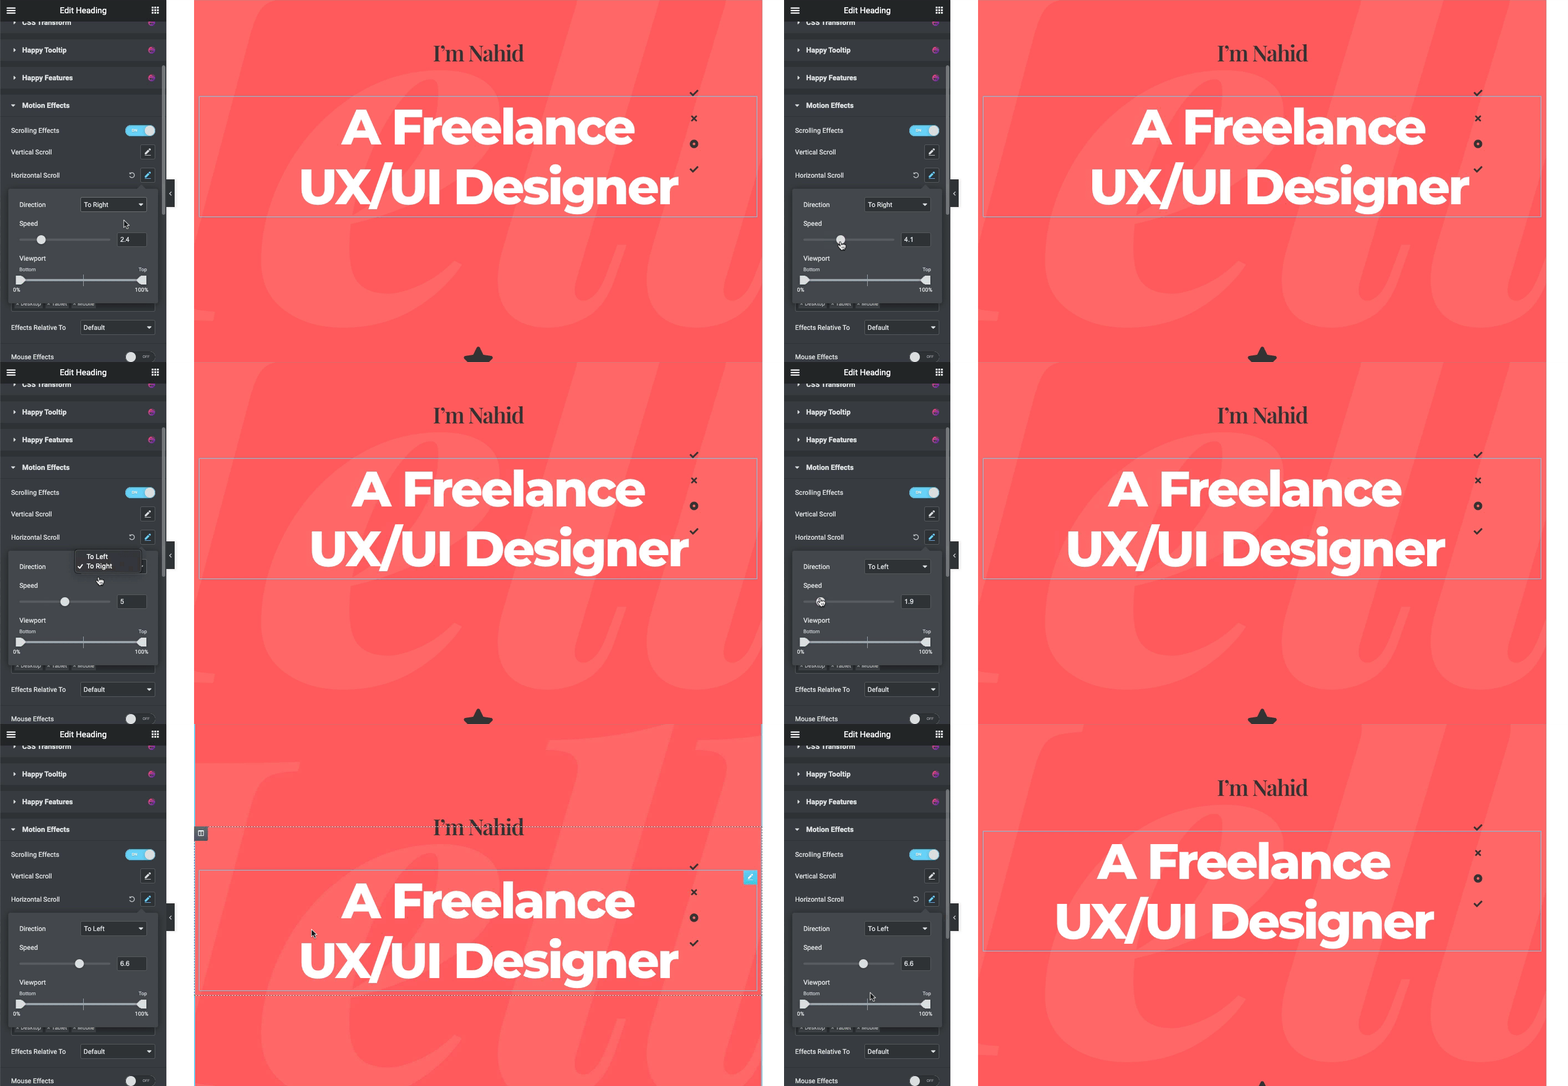
Horizontal scroll Effect
Like the vertical scroll effect, you can now do the same thing for the horizontal scroll. Just select your design section and navigate to Advanced> Motions> Scroll effect> Horizontal Effect.
Transparency Effect
Let’s see how the transparency effect works on your website. To do that, again tap on the transparent option and adjust the settings.
Here you can use four types of transparency effects. Also, you can adjust the level from 1 to 10.

Blur Effect
Again, pick one of your design sections. In our case, we’ve picked up the About Me Section. Following a similar way, click on the Edit option and head to the advanced settings to find out the Motion Effect.
Then find the Blur effect and click on it. You’ll find four effects to be applied to your design. Also, you can adapt to the blue level.

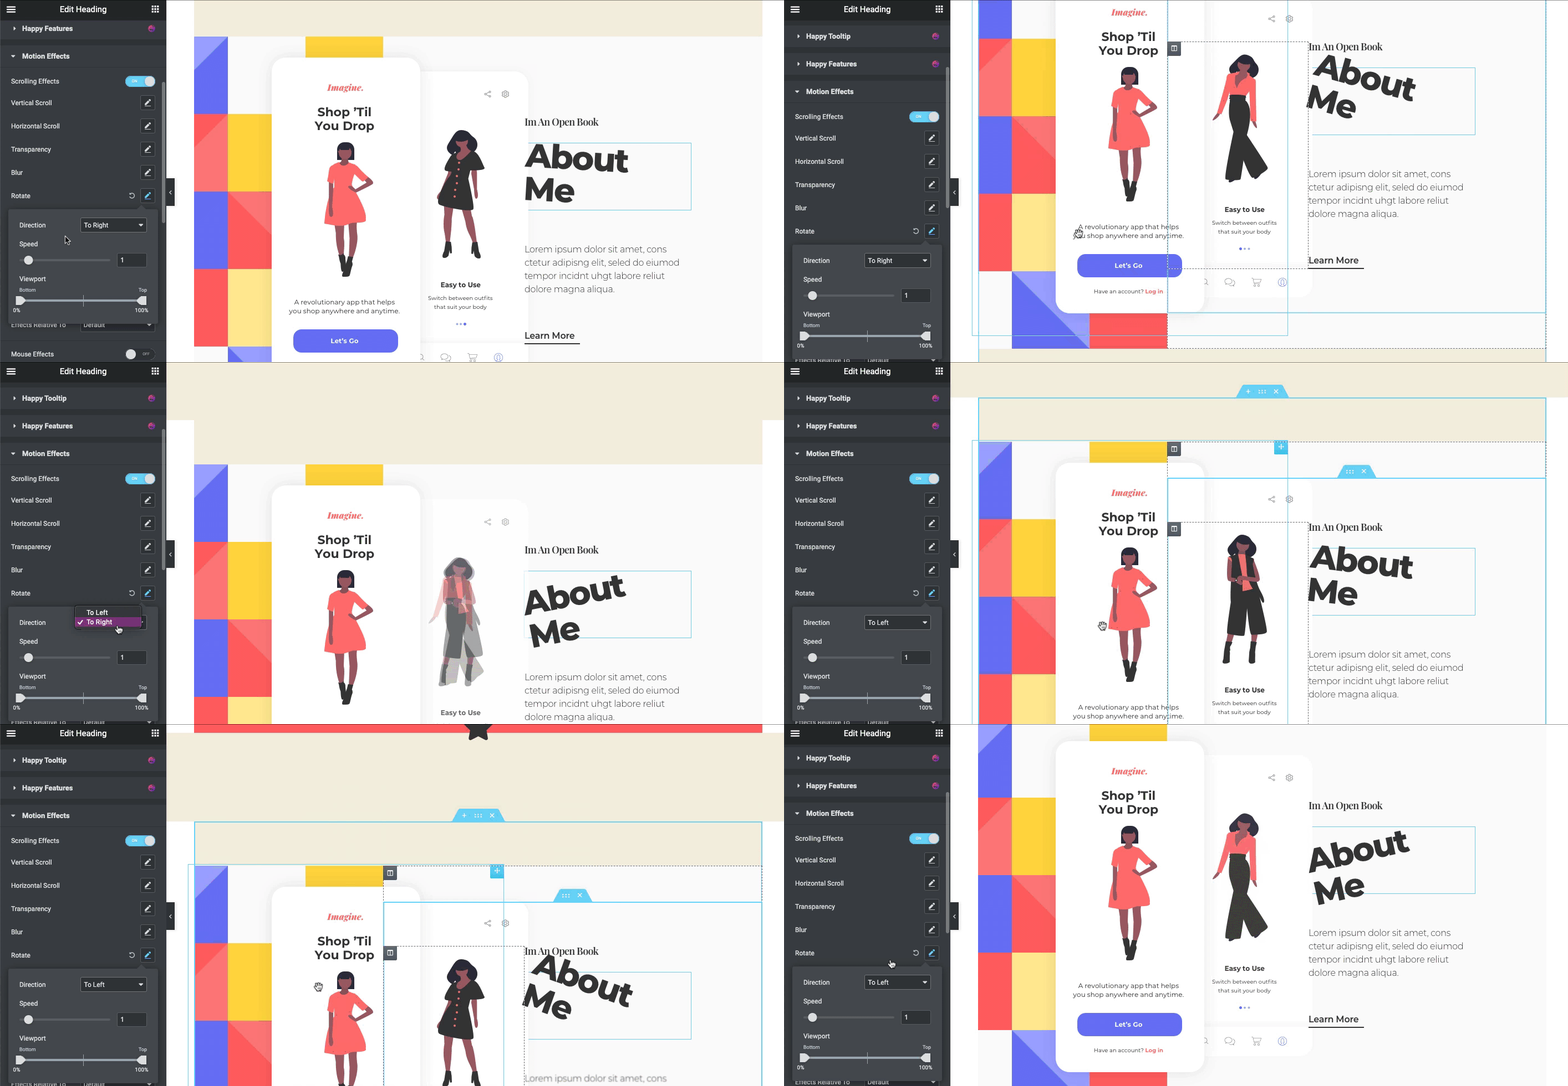
Rotate Effect
Now it’s time to show how does rotate effect works. Like the same way, just choose any of your design sections and adjust the advanced design options to obtain rotate effect on your design.
Scale effect
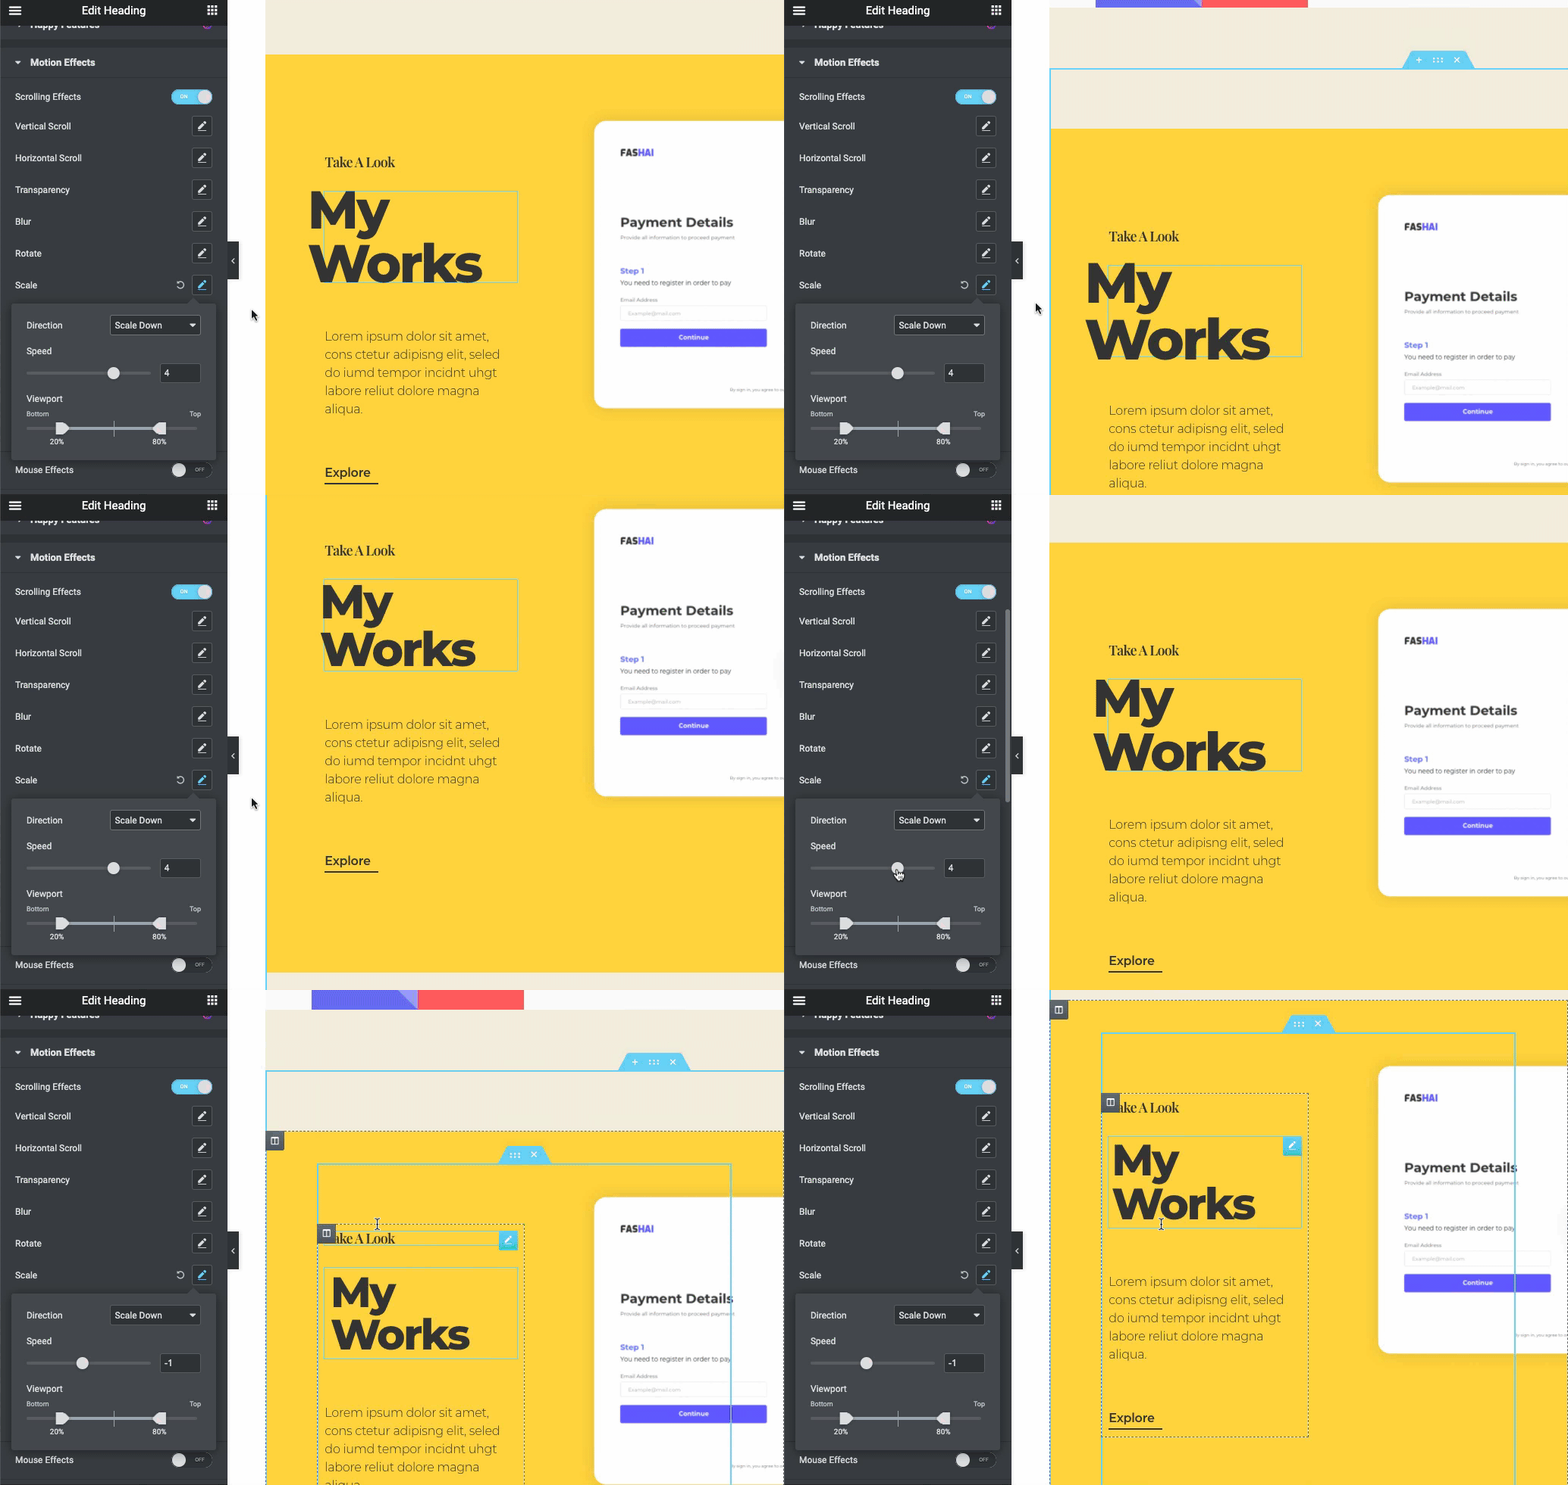
Applying this effect it will automatically zoom out and in the way, you scroll the page down or up. So, you can set how it will represent itself. You can change its direction in four ways. Also, you can change the feature speed based on the direction.

Once you’re done with it, it will look like the following one
Mouse effects
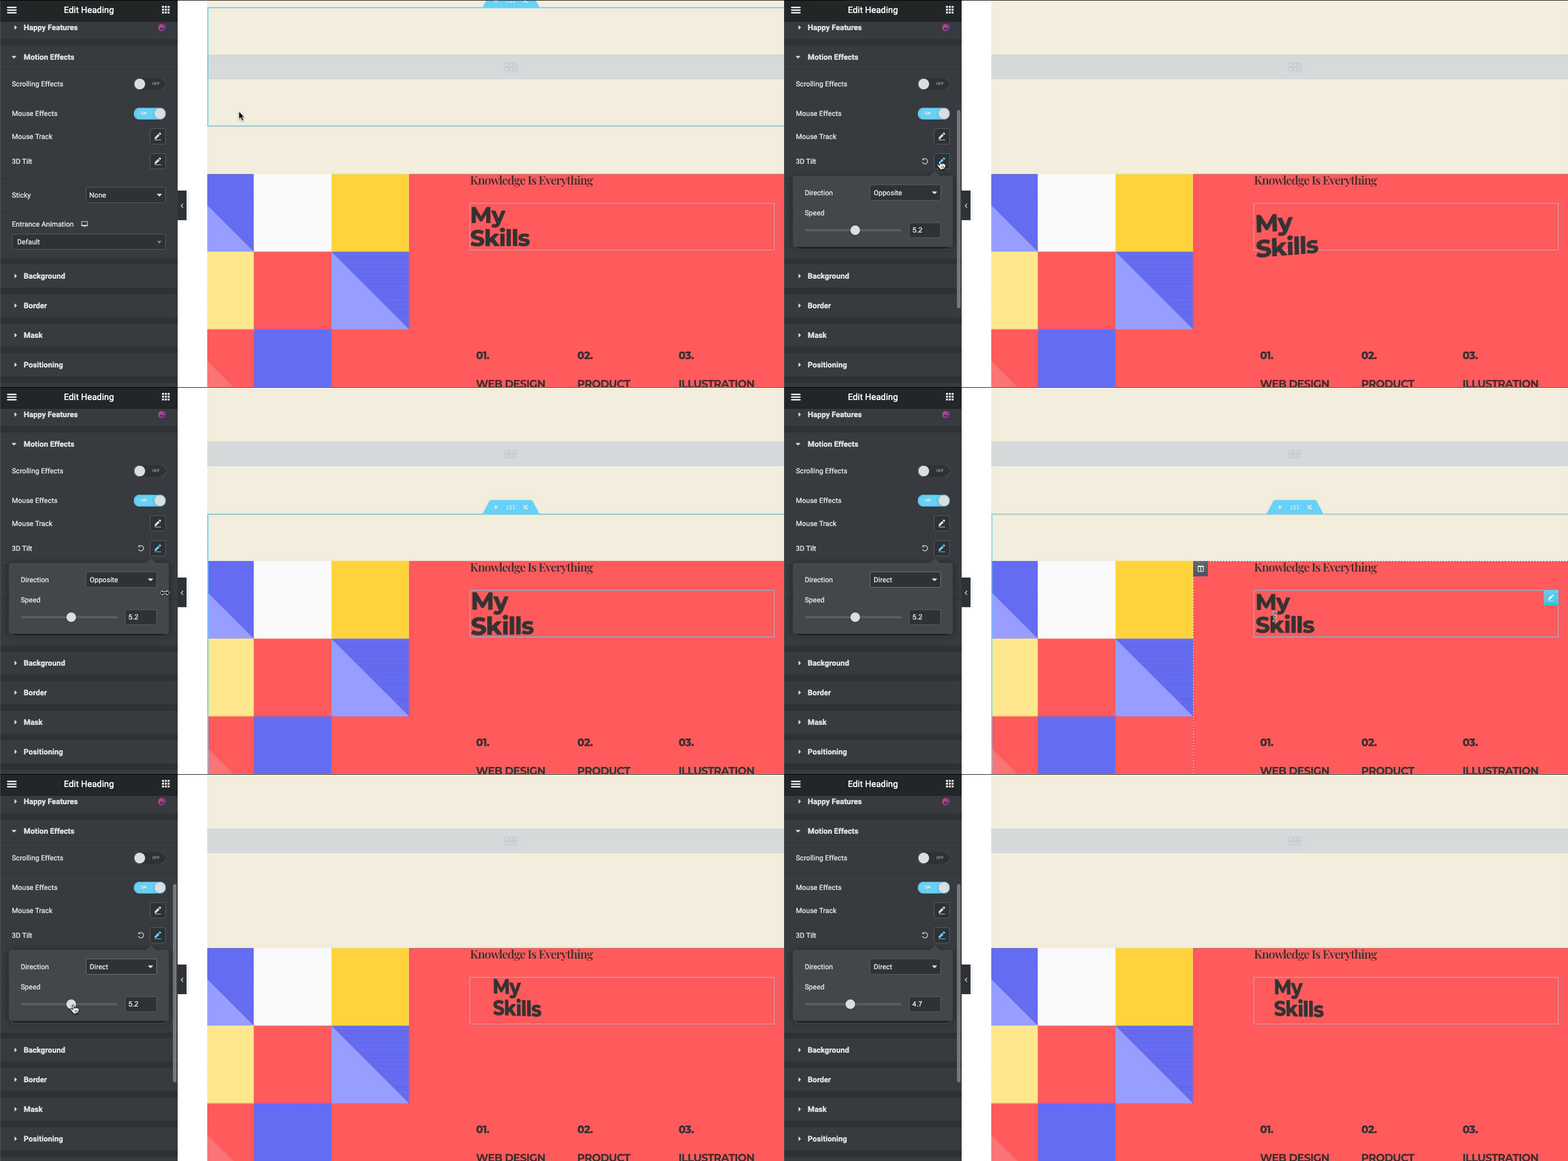
It includes two types of effects; mouse track and 3D tilt.
While applying the mouse track, you can either direct it with your mouse direction or opposite the direction.
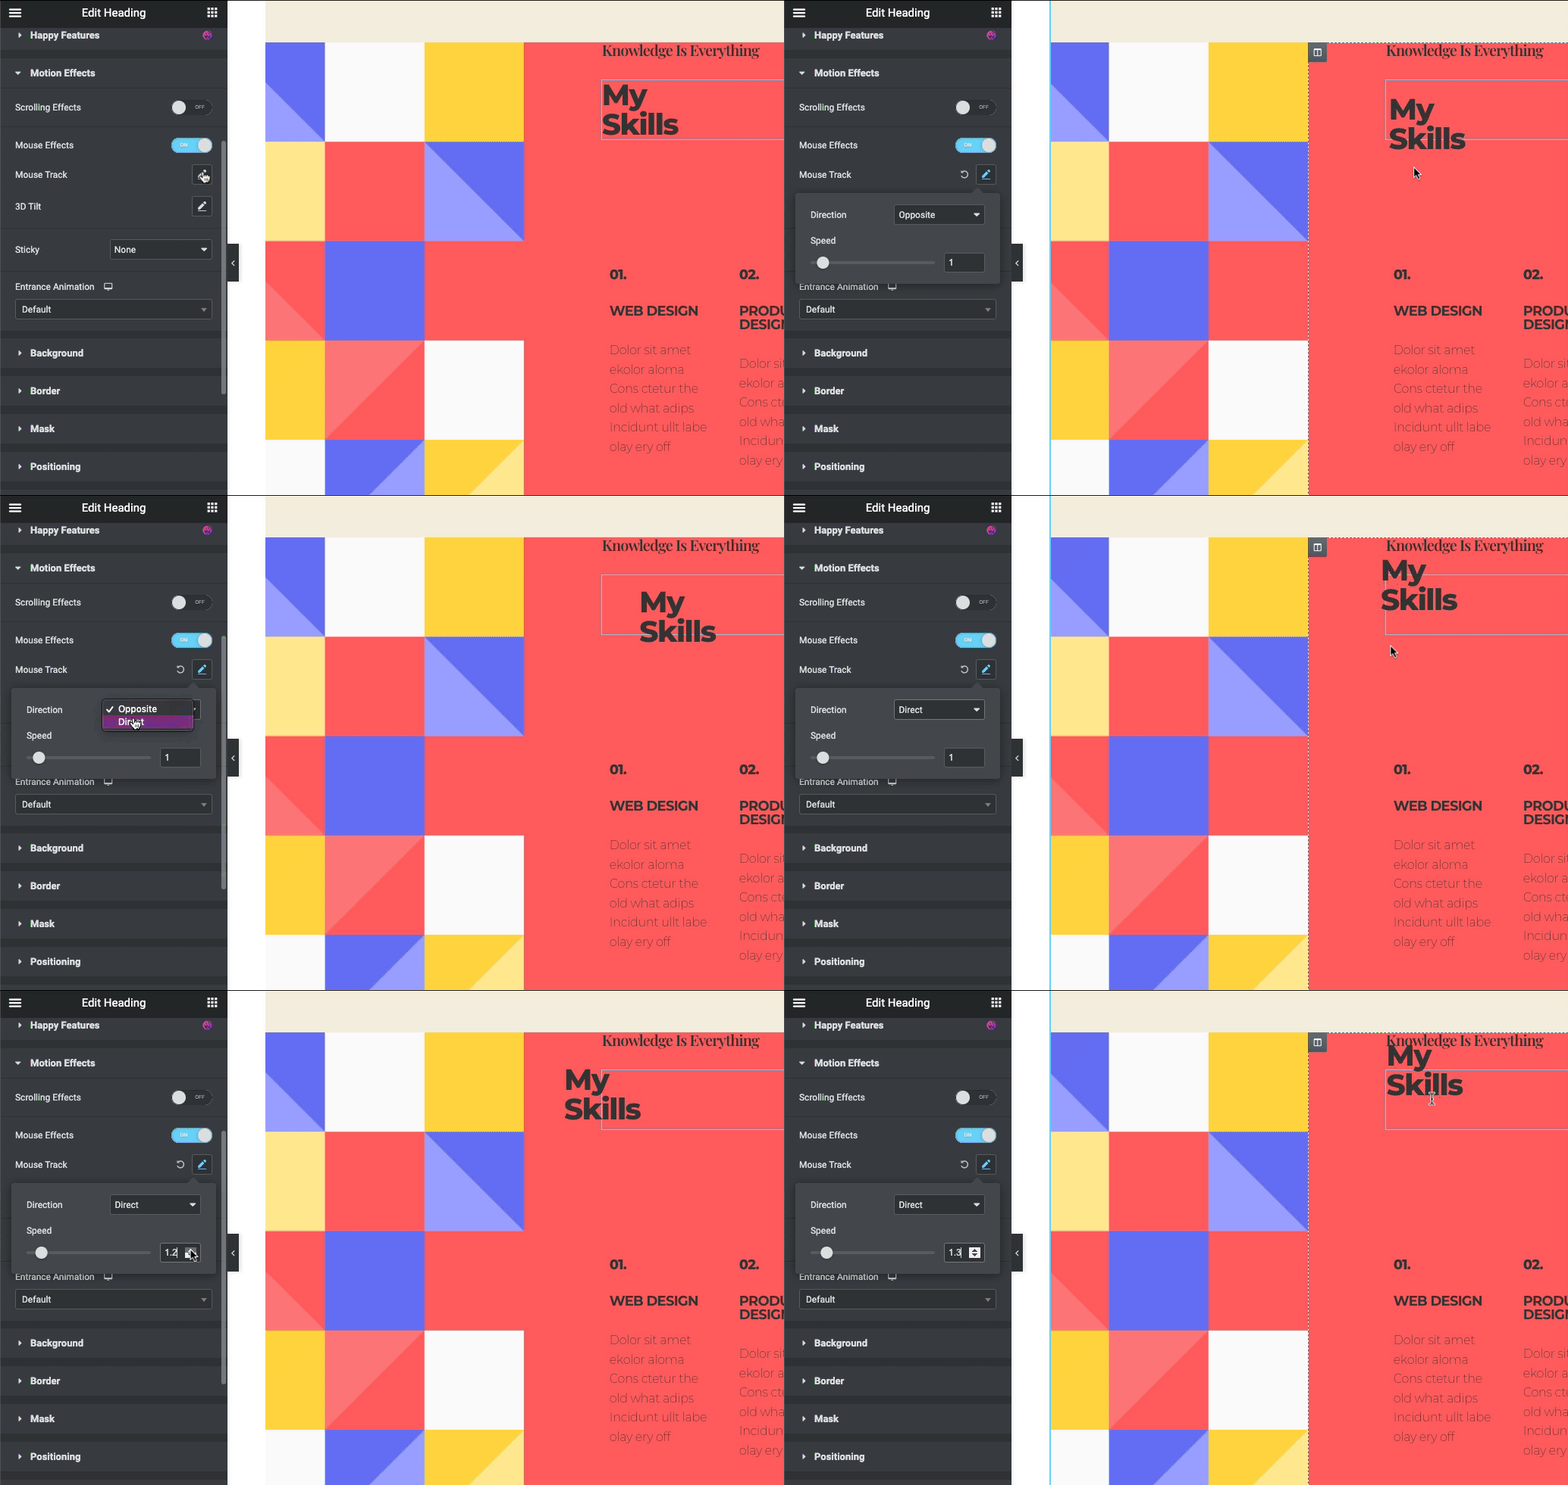
Next up, for the 3D tilt, tap on it, and do the same thing that you did for the Mouse Track.
Apply Animation
The good news is, you can apply different types of animations to your design to make it more appealing and lucrative. For instance, you must notice a button named Animation. Click on it and you will find different types of animations.

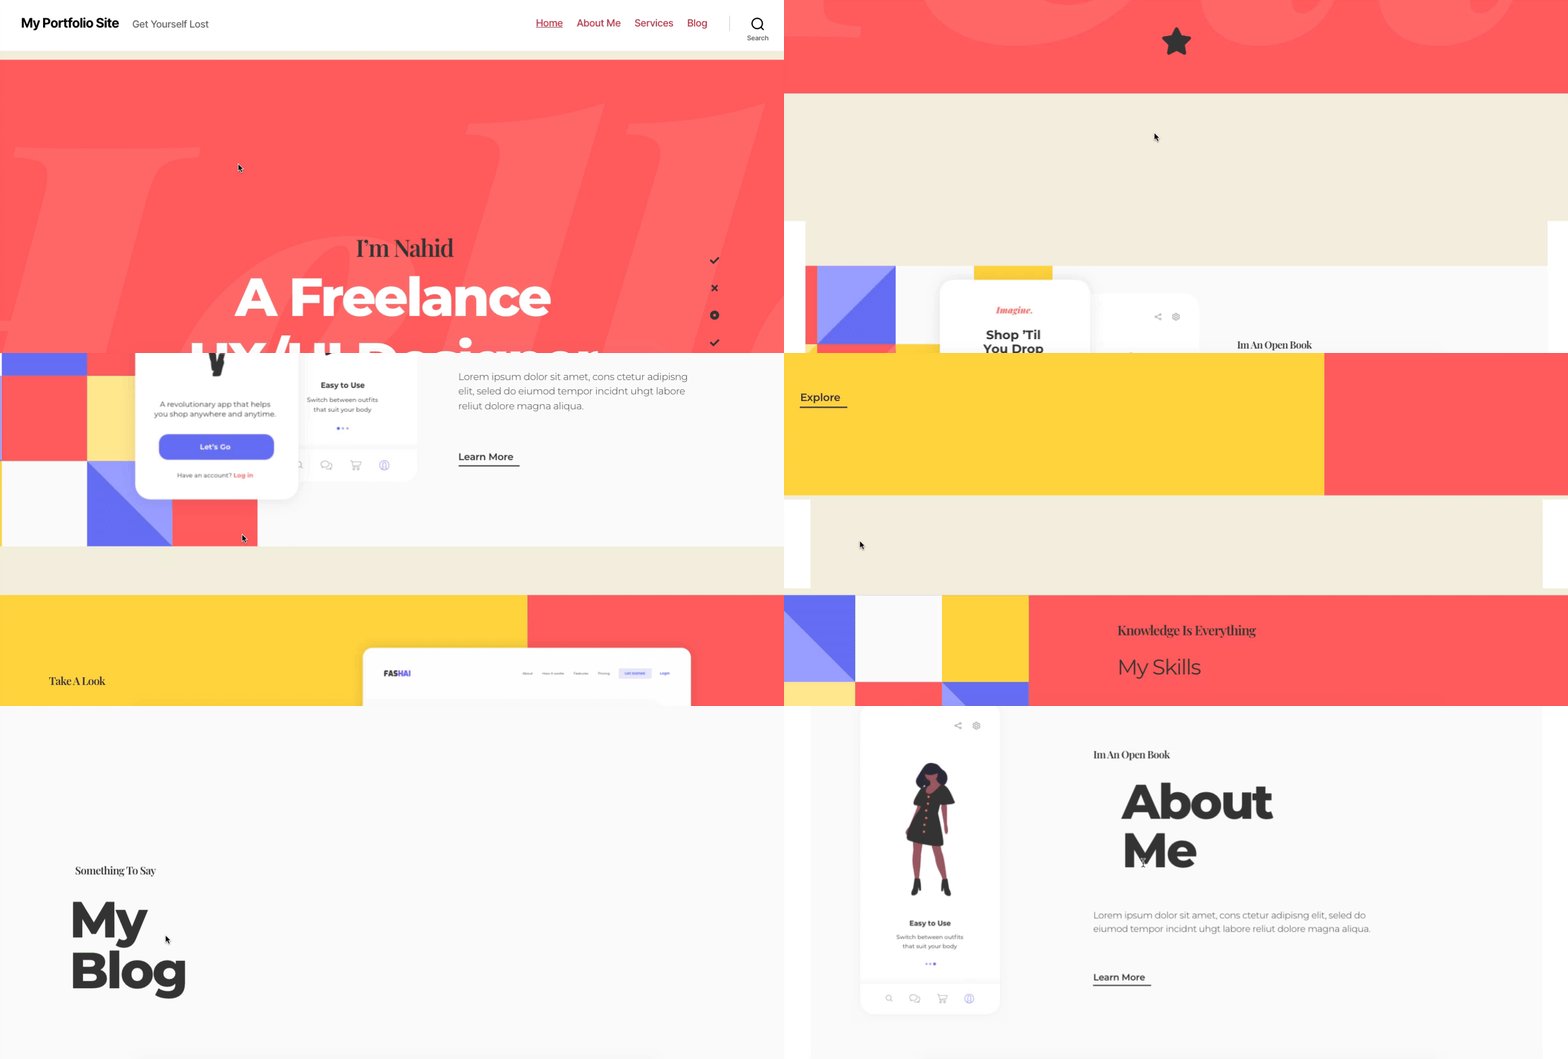
Final Preview
After initiating the design, your final design looks like the below one. Depending on the template structure, we have added this type of parallax design. So you need to explore all the options by yourself. After that, you may create something different that we show here.
Want to get a detailed tutorial to apply parallax design on your site, here is how you can do that by the below guide!
Happy Addons Parallax Block Will Help You Add Parallax Effect on Website Background
We’re happy to say that Happy Addons, one of the popular addons of Elementor, has now included a set of parallax designs that are ready-made for you. If you’re not able to add the designs by yourself, then you can take help from Happy Addons. You just need to copy-paste the design presets to your site and get your job done.
To get your initial design with Happy Addons, you need to have the following plugins installed on your website:
Once you’re done, then again navigate to the page where you’re designing your page. And there you’ll find our Happy Addons icon. So click there!

Once you get in there, tap on the filter button. And there it is! Click on the Parallax for further use.

Here you will find a mixture of both free and premium designs. So if you purchase the premium version, you can use them.

Now just select the design pattern you love and click on the insert button to get started!

After you insert the design on your page, the parallax effect will jump into action automatically!
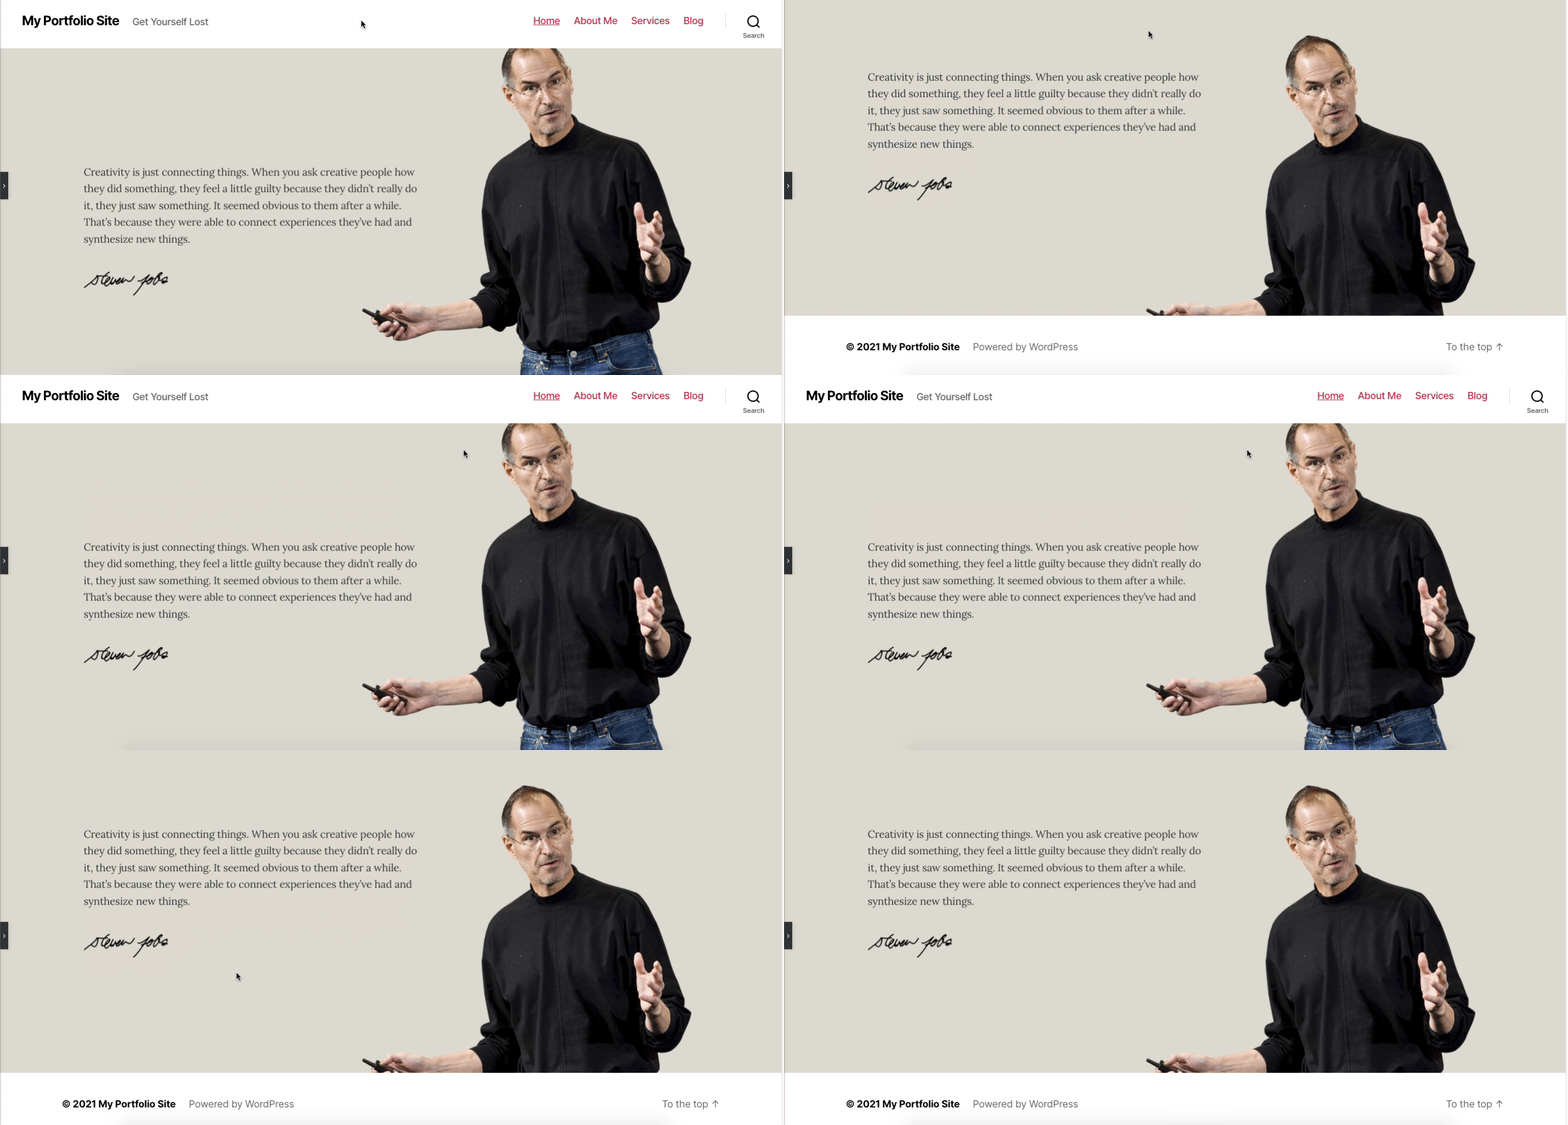
You can also add other designs in the same way.
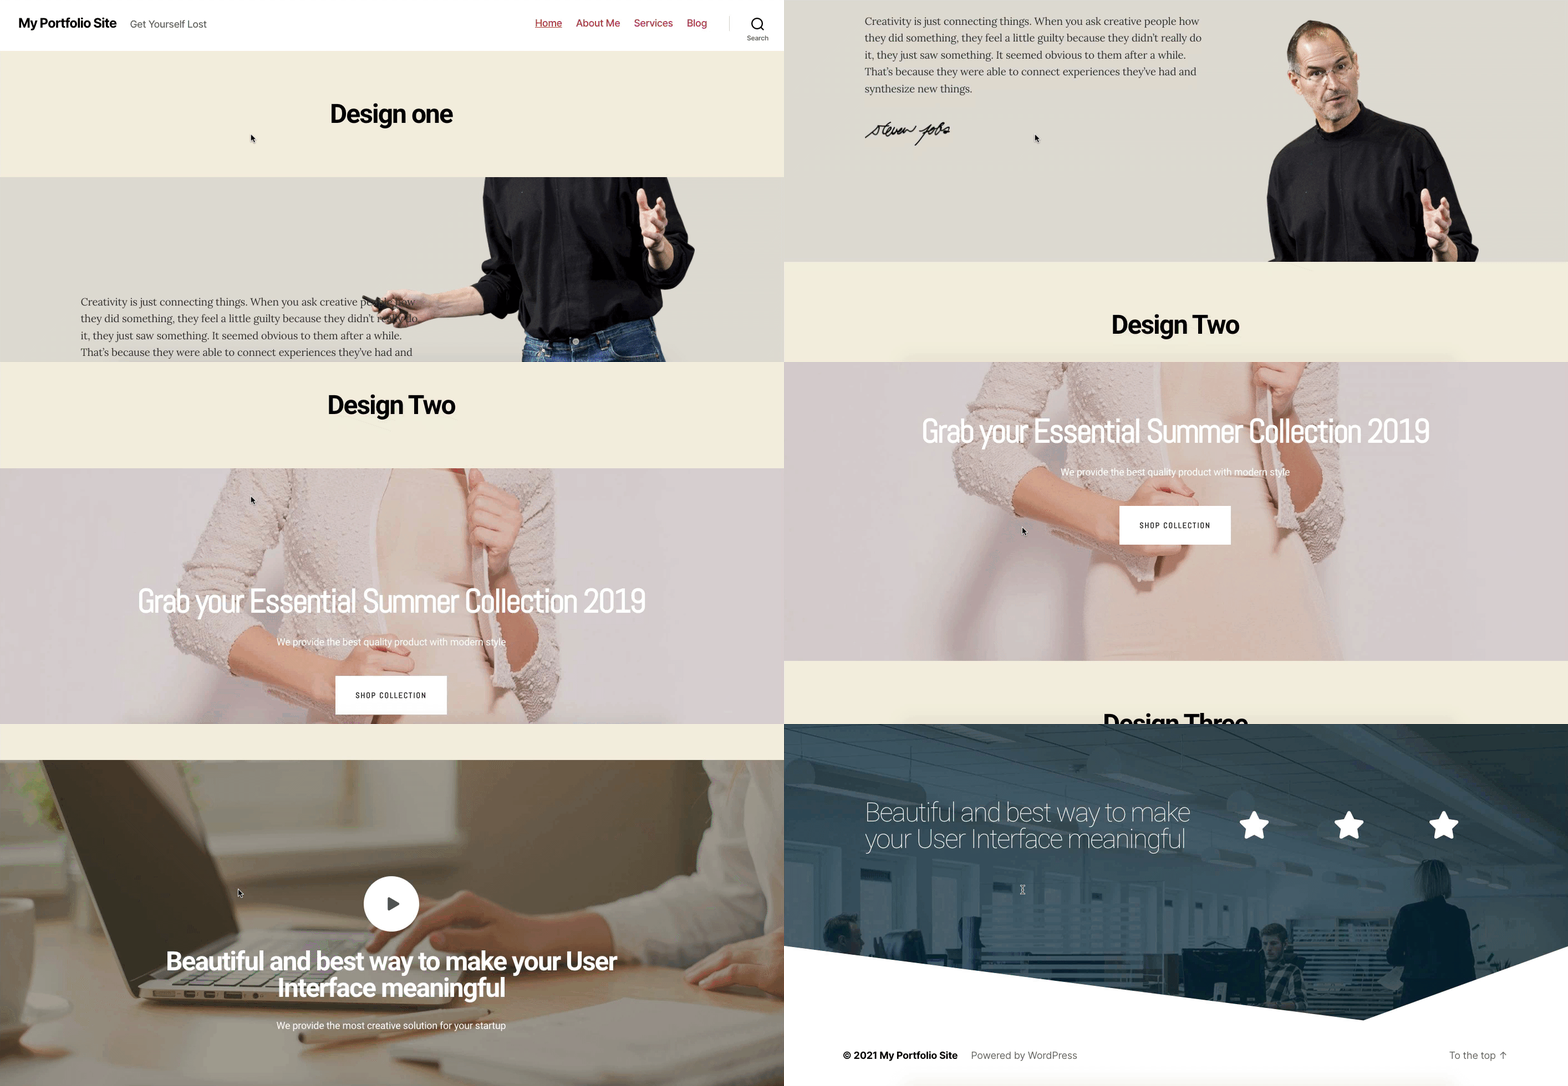
This is how you can utilize Happy Addons to add pre-built parallax designs to create a parallax effect to your Elementor website.
Loved using Happy Addons? You can check more features of Happy Addons to create a full-fledged WordPress website.
Some FAQs About Parallax Effect
How do I create a parallax effect in WordPress?
Ans: You can do it in multiple ways. If you’re using a WordPress site, you can do it by installing WordPress Parallax Plugins like – Elementor.
For that, you can follow the below steps:
01. Download a Parallax Plugin.
02. Select An Image.
03. Enable Parallax and Select Parallax Type.
04. Toggle the ‘Mouse Parallax’ Feature.
05. Upload Image to Your WordPress Media Library.
06. Add HTML into Page/Post.
07. Add CSS to Your Theme.
How do I add a motion effect in Elementor?
Ans: Go to the Advanced tab, and then open the Motion Effects control. Want to animate a certain background image? Go to the Style tab, and under Background> Image, you will see the Scrolling and Mouse Effects. Motion Effects include two sets of unique features: Scrolling Effects and Mouse Effects
What are the scrolling effects of Elementor?
Ans: The Vertical Scroll scrolling effect is a classic parallax effect. A vertical scroll makes the element move at a different speed than the page while scrolling, in the direction and speed of your choosing.
Do I need Elementor Pro for scrolling effects?
Ans: The scrolling effect is one of the Elementor Pro features. In other words, you need to use Elementor Pro to use the feature. Below is an example before the Horizontal Scroll effect is applied. And here is the example after the Horizontal Scroll is applied.
How to add a sticky effect on an element?
Ans: To apply a sticky scrolling effect, navigate to Advanced > Scrolling Effect > Sticky, and select the top option. After that, it will stick to the top of the page.
Learn What happens if Elementor pro expires
Conclusion
Manually adding parallax effects to a website design is a daunting task, especially for beginners. Plus, there are no such dedicated WordPress themes that automatically offer parallax effects. So in this case Elementor could be your ultimate choice for its user-friendly and drag-and-drop facilities. Plus, Happy Add-ons’ built-in features will brush up your design experience to the next level.
We hope that this tutorial helps you to modify your website’s outlook, produce top-notch layouts, and create astounding landing pages.
It doesn’t matter if you are a freelancer, a small business, or a whole corporation — anybody can add parallax effects to their website now.
Just follow our steps and start creating some splendid parallax effects on your website.
You can share your valuable feedback and suggestions through our comment section below. We’re happy to hear your voice and respond in real-time!

