Looking for some easy solutions to build long-term relationships with your audience? If yes, then you must add a contact form to your website.
Although WordPress has made the entire process effortless for its users. The Elementor users, on the other hand, get one step forward in this sector. With the Elementor Contact Form widget, you can include and personalize any type of contact form to your website in no time. It includes all the required fields and features as well so that visitors can easily interact with your website.
Today we will show you how to create a form in a few steps using the Elementor Contact Form widget.
So, let’s jump together!
How to Create a Contact Form with Elementor (7 Easy Steps)
Before starting, we must mention that it’s a Pro feature of Elementor. So, it will work if you are using Elementor Pro and it costs around 49$.
Meanwhile, if you are new to Elementor, check out this beginner’s guide to make your journey smoother.
Step 1: Add the Elementor Contact Form Widget to Your Desired Page
Firstly, find the Form widget from the ocean of Elementor Widgets. Now open the page where you need a contact form to communicate with your subscribers or leads.
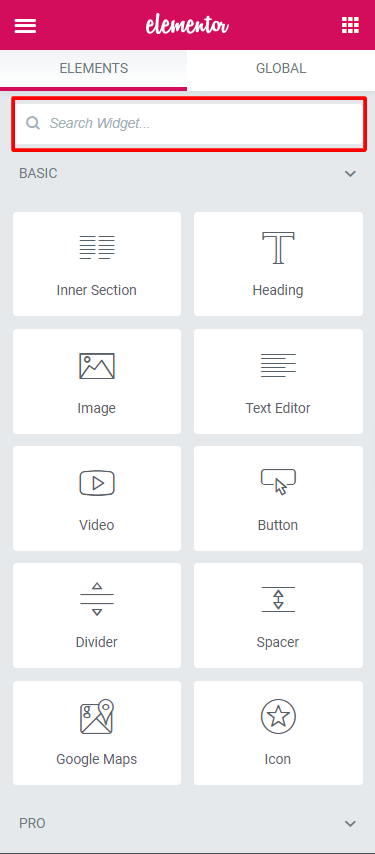
As you have the drag-and-drop option, it’s so easy to add a widget on any page in Elementor.
To not make you confused, we are describing the process thoroughly. Please check the GIF below.
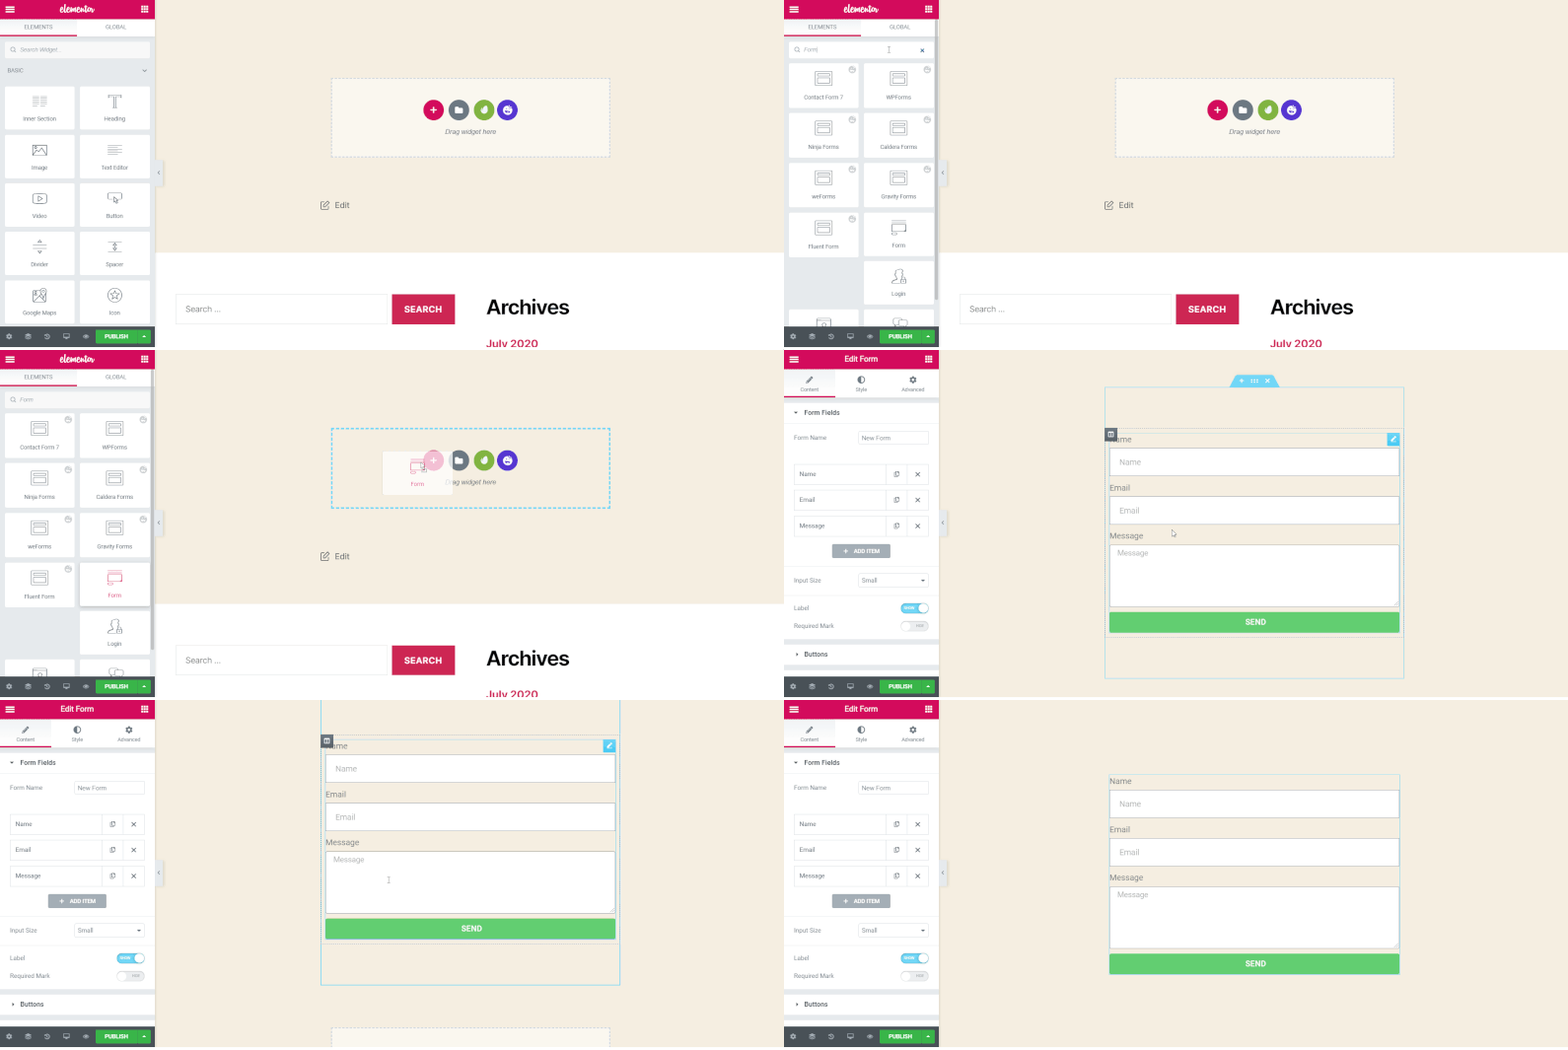
Step 2: Customize Your Elementor Contact Form Fields
You have already seen that Elementor pre-populates your form. It has included the essential fields that any contact form must have.
- Name
- Message
After getting these 3 fields by default, now it’s time to customize them according to your requirements.
For that, you have to check out the Content section of the Form settings.
Here, you will introduce Form Field. And it includes-
Form Name: Name of the form.
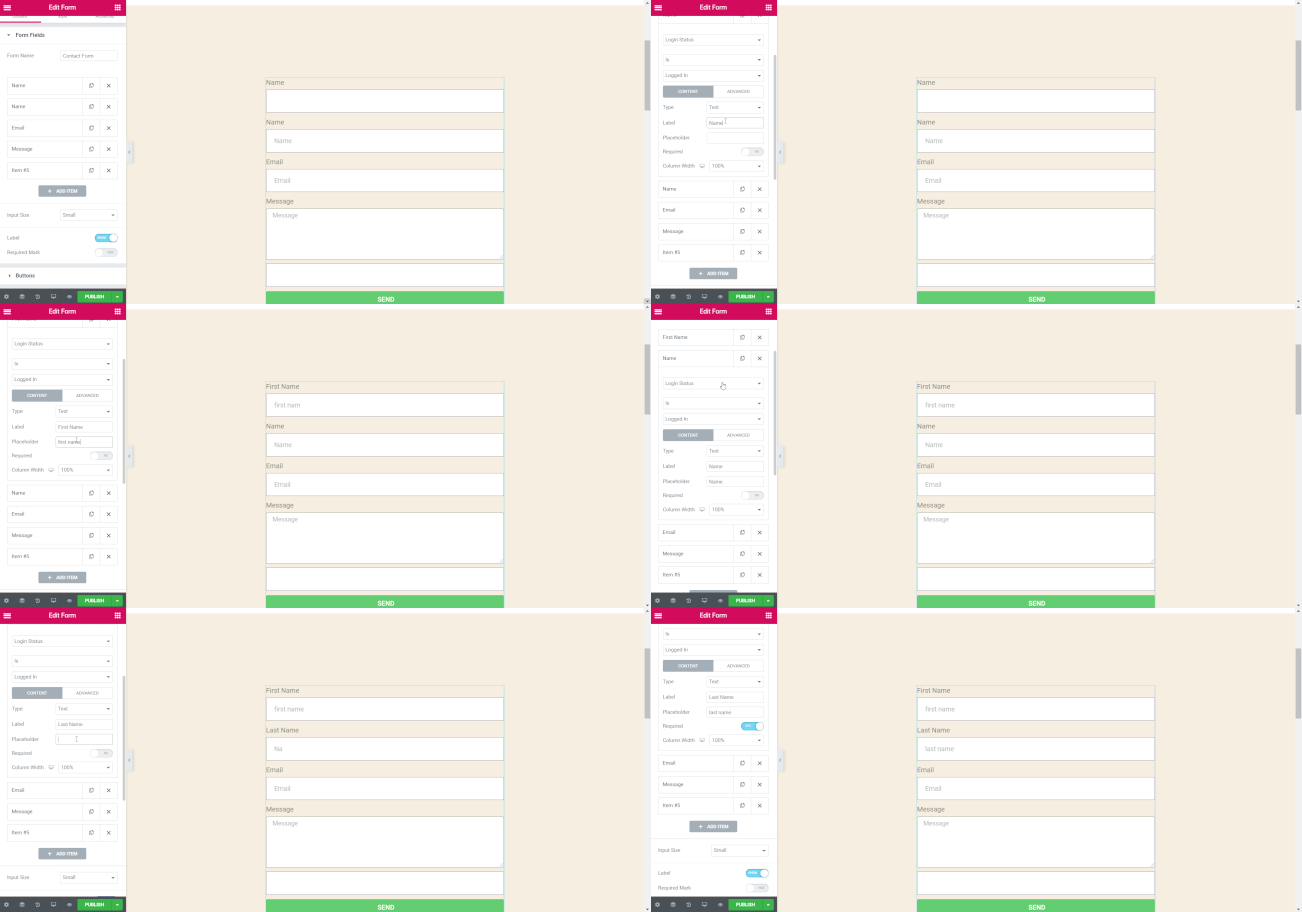
Form Fields: In this field, you can add as many fields as you want. Moreover, there are options for duplicating and deleting. To view the settings of each field, just click on them. The items you will get here are-
Type: Select any type of field. There are a bunch of options-
- Text
- Textarea
- URL
- Tel
- Radio
- Select
- Checkbox
- Acceptance
- Number
- Date
- Time
- File Upload
- Password
- HTML
- Hidden
- reCAPTCHA
- reCAPTCHA V3
- Honeypot
Label: It is the name of the field that will be displayed on the form. Plus, it will show on the email you get from the customer or leads.
Placeholder: It is the frontend display name of that field.
Required: You can switch on or off a field as a Required field. It means the user must fill out the section before submitting the form.
Column Width: In this part, you can set the width of the field.
Advanced Tab
There are not so many options in this tab. But the existing ones are more complicated if you don’t get them.
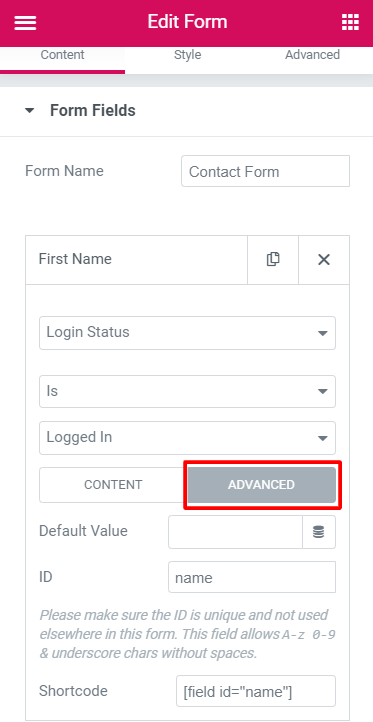
- Default Value: It is different from the placeholder and the default value of the field. If you haven’t added any value, this value will send in the submission.
- ID: It saves the field’s data, and you don’t need to modify it.
- Shortcode: If you want to retrieve the field on another page, this code will help you. Otherwise, you don’t have to use it.
Step 3: Design the Submit Button
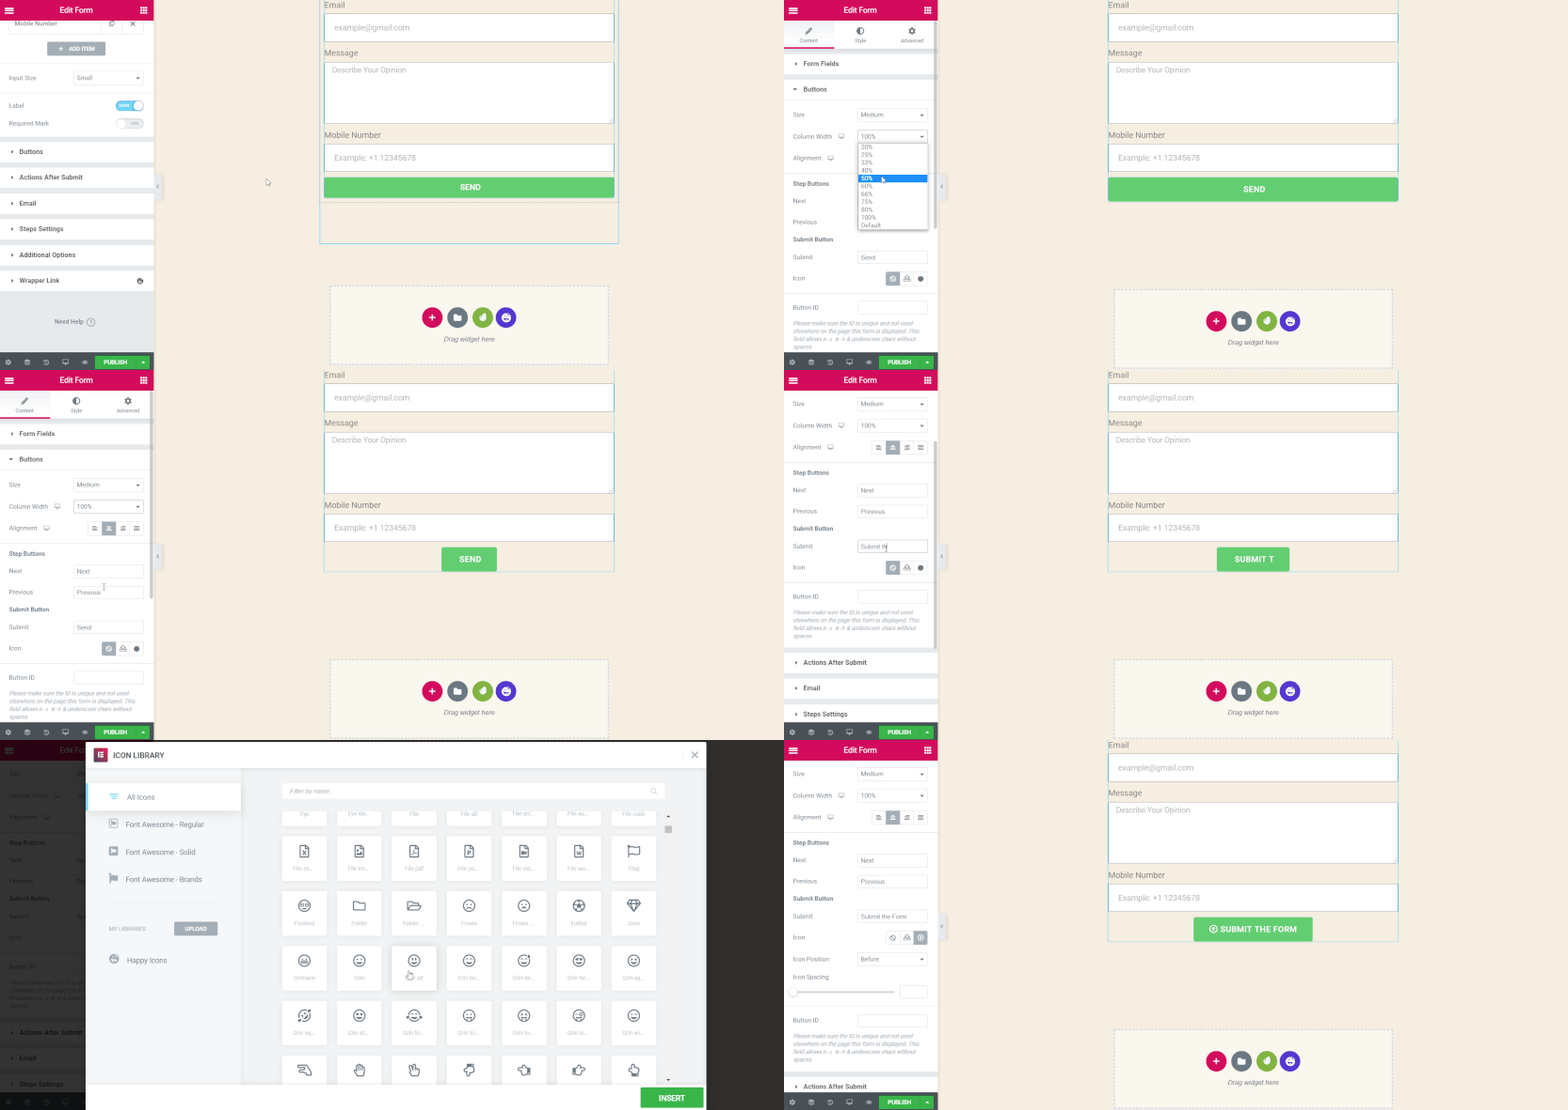
Here, you can customize your Submit Button on your own terms.
- Size: In this section, you can set the size of the Submit Button.
- Column Width: Customize the width for the button
- Alignment: Set the alignment
- Icon: Add an icon from the icon library
- Text of Button: Choose the text displayed on the Submit Button
- Button ID: It’s optional, and gives a unique ID to the button for further use.
You may also like to read: How To Build A Sports Website With Elementor
Step 4: Configure the Actions After Submit
When someone designs the Elementor contact form, he/ she has a common question. And, that is- Why does nothing happen after submitting the form? Well, let’s find out the answer.
You have set the Elementor Form very well. No issue with that. But, my friend, if you don’t set up the section of Actions After Submit, you won’t get any reaction.
With Elementor forms of action, you will get excellent options. Combining with 3rd-party services will be a lot easier. Like-
- Drip
- Hubspot
- Mailchimp
- Slack
- Convertkit, etc
Working with these services is effortless because they are built-in integrations of Elementor. Moreover, you can connect with Zapier, via the Webhook action as well. The fun fact is, Zapier can connect to more than 1000 services. So, it will assist you by acting as a bridge between the services and form.
Right now, Elementor Forms Actions add-
- Email2
- Mailchimp
- Redirect
- Webhook
- Drip
- ActiveCampaign
- GetResponse
- Convertkit
- MailerLite
- Slack
- Discord
- Popup
So, click on the Actions After Submit option of your form. Now, click on the Add Action field and you will get all the above options. Choose what you need.
Suppose you have chosen the Email action. It will include a tab for Email and it is used to show the results to the admin user of the website.
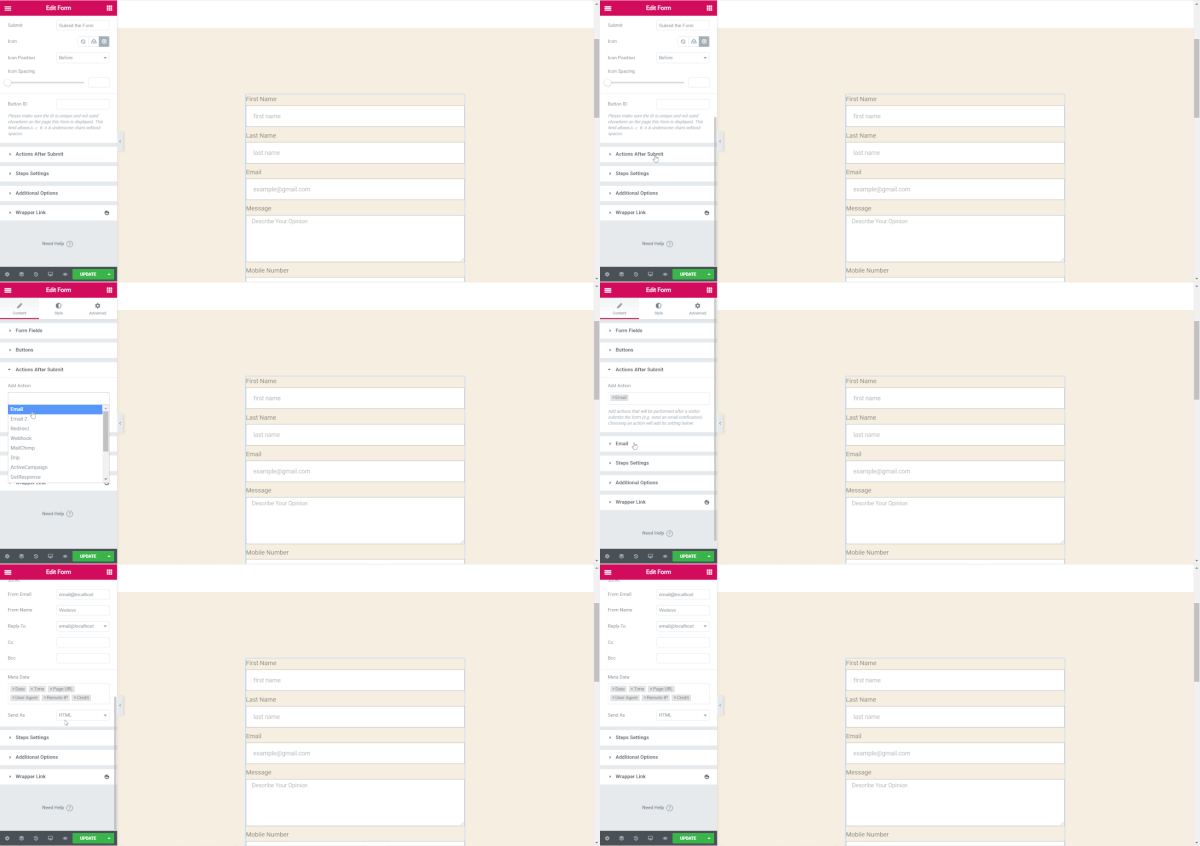
To send an email to the form user or who submitted the form, you have to select the Email2 option.
In Email, you will get options like-
- To
- Email Subject
- Email Content
- From Email
- From Name
- Reply-To
- CC
- BC
- Meta Data
- Send As
Set the conditions and customize your form action that it can work seamlessly with your website.
Check out these common frequent ask questions that people asked on Elementor.
Step 5: Customize Elementor Contact Form Messaging
The Elementor forms editor is always there to customize your form according to your needs. When something happens with the form, like- error or successfully submitting, there should be a message to the user.
Here, you are able to customize that message. This is an advanced feature of the Elementor contact form.
So, click on Additional Options and make the Custom Messages No to Yes.
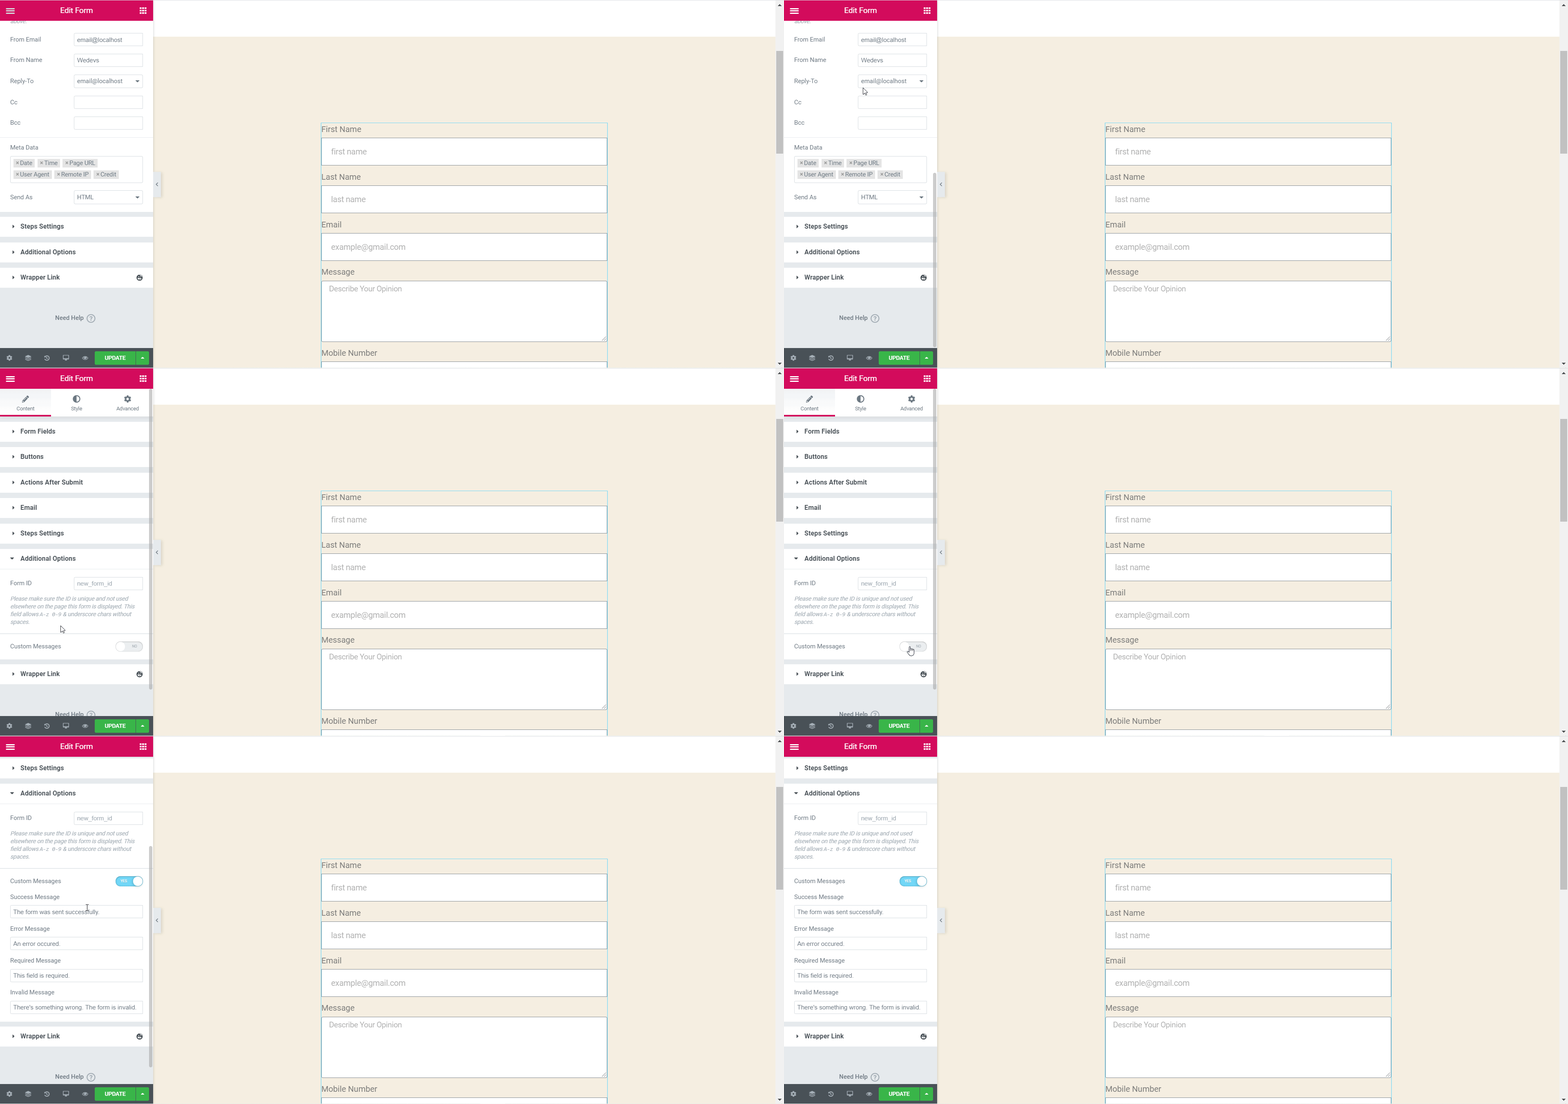
Now, you can edit four different messages.
- Success Message: This message will show to the user who has successfully completed and submitted the form.
- Error Message: Shows to the form user if any unknown error occurs while submitting the form.
- Required Message: Shows when a form field is required, but the user hasn’t filled it and submitted the form.
- Invalid Message: Shows when the user has added any invalid mobile number or email address
Step 6: Customize the Style of Your Elementor Contact Form
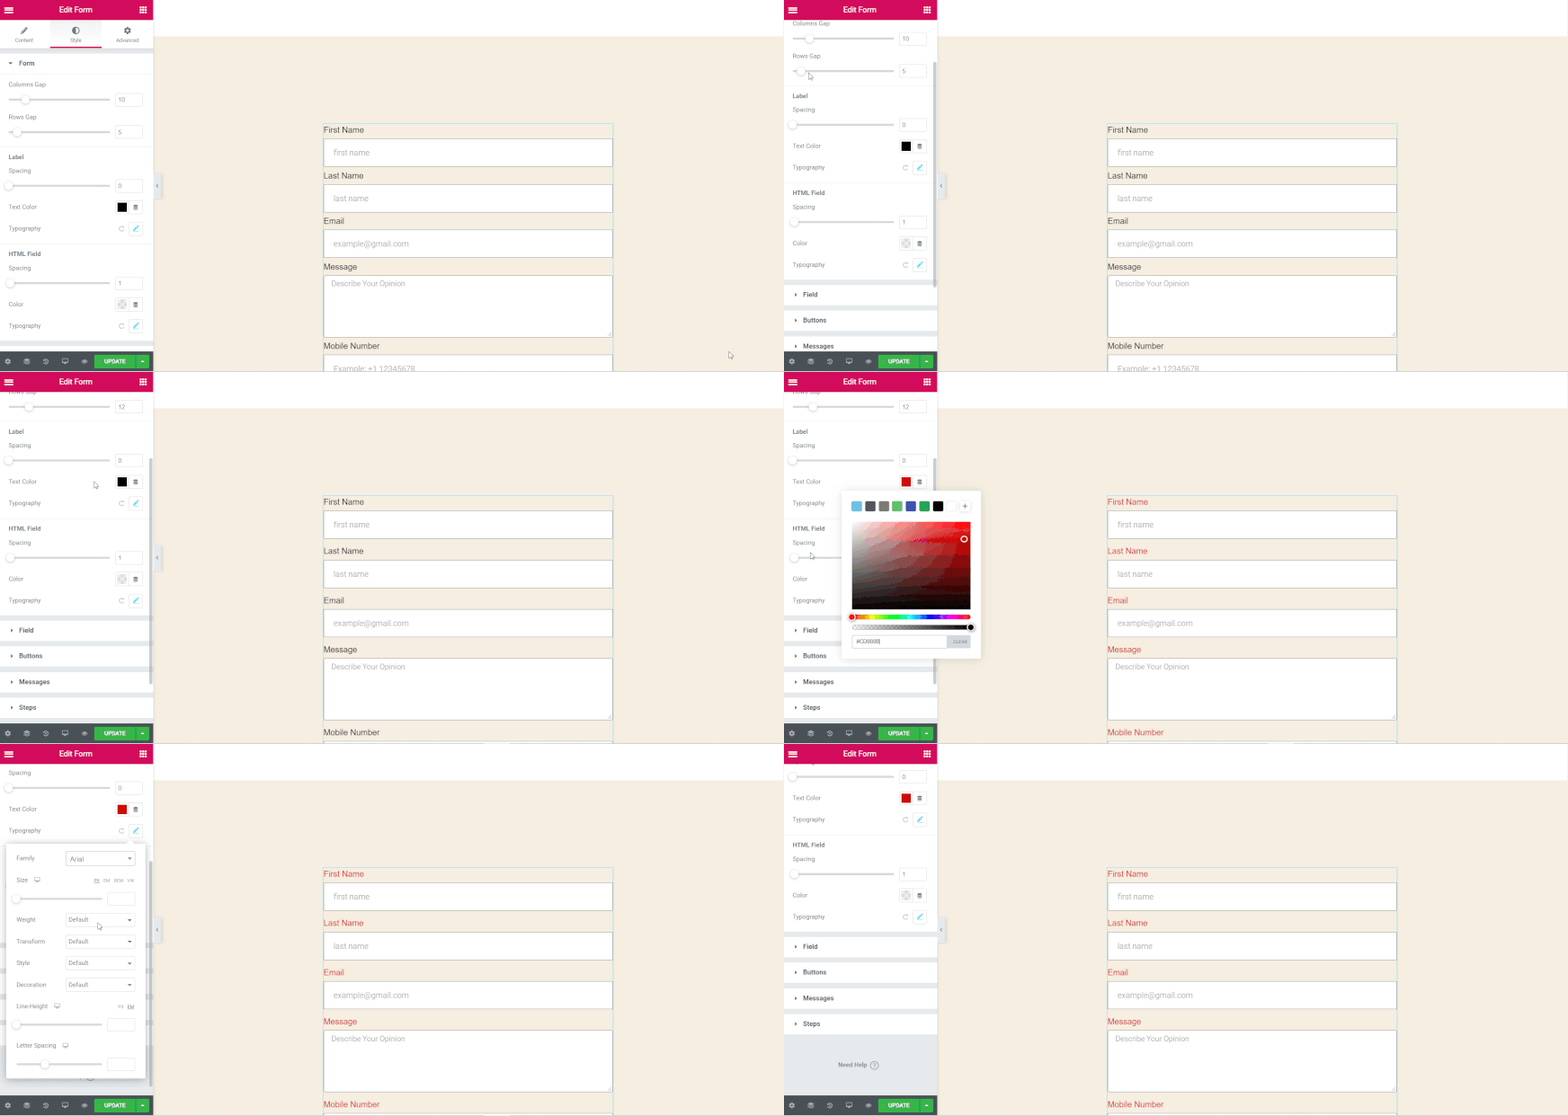
You should provide a bland look of your form that matches your website. If it doesn’t match, think how boring it would be. Fortunately, there are custom styling options in Elementor. It’s way easy.
Click on the Style tab. There will be a wide range of settings and options to change the entire style of your contact form.
Step 7: Publish the Elementor Contact Form
You have set up everything very well. Now, it’s time to release your form for your site users. Click on the Update button at the bottom of the form set, shown in the image below.

Congratulations! you have done it successfully. It will now show on this page live, and you can collect more leads and subscribers.
Let’s have a look at the final view of the contact form.
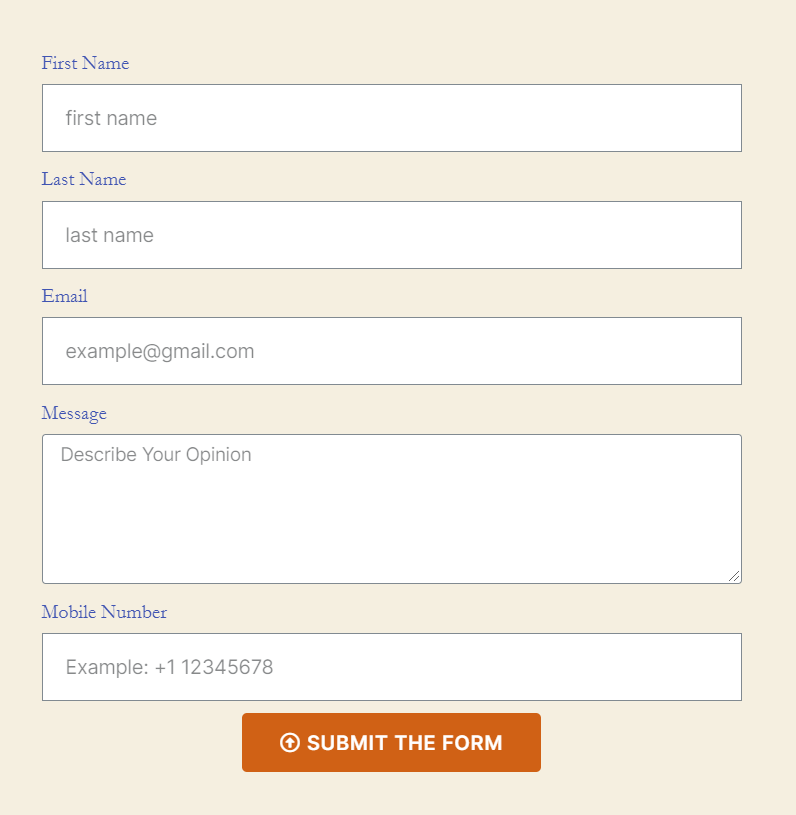
Check out..
How To Personalize Your Form Design In Elementor Using Happy Form Widgets For FREE!
Final Thoughts on the Elementor Contact Form
Phew! We hope this tutorial has clarified all your confusion. Actually, creating and designing your contact form depends on your requirements and choice.
Don’t forget to match the form with your page view. Otherwise, it will look odd to the audience.
We are suggesting you definitely customize the Actions After Submit and Additional Options part of the form. If you don’t edit these sections, you won’t get any reflection on your work, which is totally disappointing.
Also, let us know if you face any difficulties in creating the Elementor Contact Form in the comment section below.
Have you tried HappyAddons to create a brand-new website within a few minutes? Well, check out the features of these Elementor add-ons to give your website a gorgeous look.



4 Responses
great put up, verty informative. I ponder why the other specialists of this sector do not notice this.
You must continue your writing. I’m sure, you’ve a huge readers’ base already!
Thank you for your appreciation.