

The primary task you need to do after setting up a new WordPress site is creating a page. Creating a new page in WordPress is a straightforward process. But a clear and effective tutorial can make it even easier. This article will explain to you how to create a new page on WordPress with a step-by-step guide.
WordPress pages refer to a post-type containing static content. These pages hold the information on websites that are least likely to change.
There are various types of WordPress pages – product landing page, home page, about page, contact page, blog page, services page, etc. In this tutorial, we’ll show you how to create a new page on WordPress. You’ll also know the following things.
- What is a WordPress Page
- How to Add a New Page in WordPress
- The Use of Gutenberg Content Blocks To Add Page Content
- How to Publish & Schedule Your WordPress Page
- How to Create a Custom Page in WordPress
- How to Create a Separate Page for Blog Posts in WordPress
Let’s get started:
What is a WordPress Page?
 1")
WordPress initially allowed users to create posts only. After the release of version 1.5, WordPress came up with a new post type named page. Since then, users have been using WordPress to create pages to publish static content different from blog posts.
WordPress Page vs WordPress Post
There are some significant differences between WordPress pages and posts. Take a look at them from the table below.
| Page | Post |
| Can be used as custom page templates | Can’t use posts as templates |
| Pages are displayed in a hierarchical order | Posts can’t be organized in a hierarchical order |
| You can’t share pages on social media | You can add a social share button to share your posts |
| Pages do not have taxonomies | Posts have Categories and Tags |
| You don’t get a comment option on a page | Users can comment on a post |
Hope you’ve got an idea of the differences between pages and posts. Let’s now explore how to add a new page in WordPress.
How to Add a New Page in WordPress
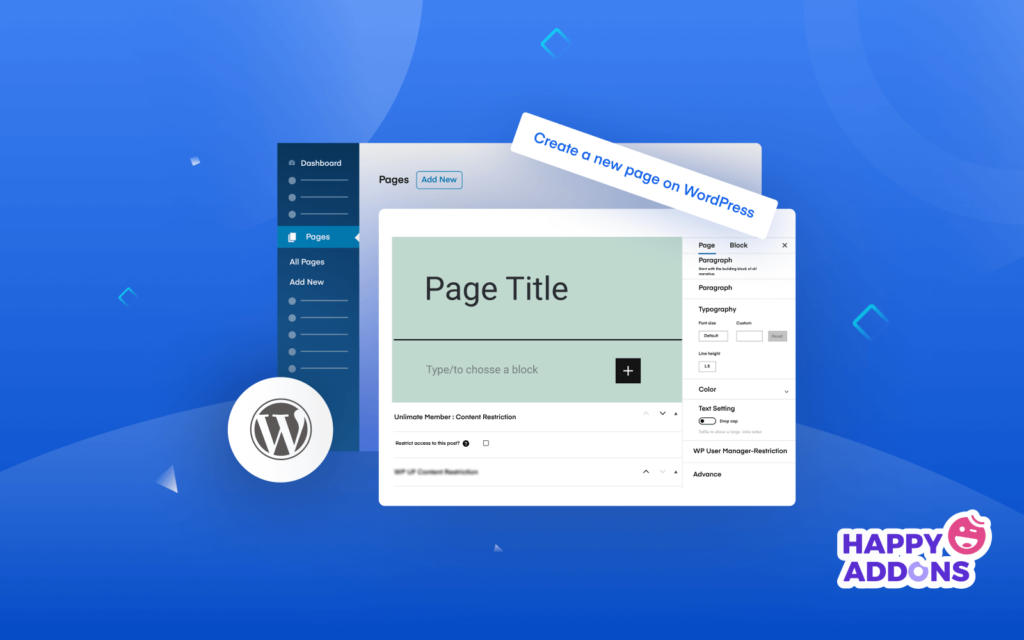
Get into the WordPress dashboard. Navigate to Pages > Add New. Once you click the Add New button, a page will be opened in its editor mode.
 2")
It will take a few seconds to open a new page. You’ll get an interface like the below image. Next, you have to add content to the page using the respective settings and options on it.
 3")
Basic Settings on a WordPress Page
There are numerous settings and options on the WordPress page editor. If you don’t know their usage, you’ll fail to create wonderful pages with the necessary content. We’ll now take you through some of the common settings of them so you get a clear picture.
In the image below, you can see the various options, settings, and elements of the WordPress page that we have marked with numerical figures. Now, according to that numerical figure, we will briefly discuss them in the following discussions.
 4")
- Page Title: You should write the Title of your page right after creating your page.
- Publish: To publish your page, you should click on the Publish button.
- Save Draft: You can draft your page by simply clicking the Save Draft option.
- Preview: You can preview your draft page using the Preview option.
- List View: By clicking this option, you can see the list of the content blocks you have used on this page.
- Details: With this setting, you can see the details page content in a short form, like a table of contents.
- Undo and Redo: You can also Undo and Redo your page content.
- Tools: Tools provide various interactions for selecting, navigating, and editing blocks. Toggle between selection and edit by pressing Escape and Enter.
- Toggle Block Inserter: Using this (+) icon, you can insert content blocks into your page.
- WordPress Icon: If you want to get the All Pages area, you need to click this WordPress Icon. Make sure that you have saved your current page before going back to the All Pages. Otherwise, your content won’t be saved.
You will find all the necessary page settings in the right sidebar of the page editor panel. They are Status and visibility, Permalink, Feature Image, Discussion, and Page Attributes. You can see these options in the image below. Let’s have a brief discussion about them in the following parts –
 5")
1. Status & Visibility
In the page Status & Visibility area, you can set your page visibility status as Public (visible to all public), Private (only admin & editor can see the page), and Password Protected (allow those people who have the password). You can also manage your page Publish Date and Author in this area.
 6")
Based on your need, you can activate the Pending Review option that allows your editor or admin to review the page before publishing. Also, you can delete the page using the Move To Trash button.
2. Permalink
In the Permalink setting, you can edit the Permalink or URL of your page. Also, you can visit the page using the View Page URL.
 7")
3. Feature Image
Most websites don’t tend to use feature images on pages. The Feature Image option is useful for posts. So, you may avoid this option in the case of your pages.
4. Discussion
The Discussion option allows you to enable/disable the comment section. But similar to the Feature Image option, the comment option isn’t used on pages. If you still wish to receive comments from users on your pages, you can enable this option by giving a tick mark to the checkbox.
 8")
5. Page Attributes
If you want to add your current page under a Parent Page, you need to go to the Page Attribute area. Here, you can select the suitable Parent from the page list. Set the Order of the page because a parent page may have many subpages.
 9")
How to Create a Landing Page on WordPress
A landing page is a standalone page that is designed for specific purposes like marketing, promotion, product selling, and else. This type of page is particularly different from other web pages and aims to direct users to take desired actions.
There are many ways you can create a landing page – whether using the Gutenberg editor or page builder plugins. We’ll give you a brief idea of how to create pages using these two tools –
1. How to Create a Landing Page Using the Gutenberg Editor
WordPress comes with a block editor named Gutenberg. It allows you to add content to your page using premade blocks. You’ll see a plus icon on the page after opening it. Pressing the Plus (+) icon will open up the Gutenberg editor. You will find 100+ default blocks in it.
Whichever block you need, find and click on it. The block will be added to the page. After that, you can type or add content to it. Most of the Gutenberg block offers you robust customization options, like color, typography, margin, padding, etc.
 10")
It’s not possible for us to talk about all the Gutenberg blocks in this article. Instead, we’re going to talk a bit about the most commonly used blocks in WordPress posts and pages.
Text Block
- Paragraph: Add a paragraph to your page or post with this block.
- Heading: There are H1, H2, H3, H4, H5, and H6 headings that you can use to add a heading.
- List: With this block, you can add an Order & Unordered List to your website.
- Quote: To insert a quote, you can use this block.
- Code: For adding a custom code snippet, you can use this handy content block.
- Preformatted: You are able to add long text in a single line with this block.
- Pullquote: It’s another way to insert a stylish quote.
- Table: You are able to add a table to your page or post with this effective block.
- Verse: It’s only used to add song lyrics or poems.
Media Block
- Image: You can add images to your website with this popular media block.
- Gallery: It allows you to create a photo gallery for your website.
- Audio: You are able to use this block to insert an audio clip to your web page.
- Cover: Using this stunning block, you can put a cover image on your page.
- File: You add a file uploading option on your website using this advanced content block.
- Media & Text: It allows you to add a media file like an image and text to decorate your website.
- Video: You are able to add a video from your media with this Gutenberg block.
Other Necessary Blocks
- Button: Using the button block, you can add a CTA button to your page.
- Column: Based on your need, you can add columns to your page.
- Group: You can display multiple blocks under a group using this content block.
- Shortcodes: This handy block allows you to insert shortcodes in a more organized way.
- Embed: You can blog posts, videos, and more with the block.
- Social Icons: You are able to display your social channels using the social icons block.
- Latest Posts: You can also showcase your last posts on your website with the Gutenberg block.
However, you’ll also get tons of useful blocks in the Design, Widgets, Theme, and Embed categories. Also, learn how to use Gutenberg WordPress Blocks.
2. How to Create a Landing Page Using Elementor
Elementor is one of the most popular and easiest page builder plugins to create landing pages. The plugin is equally popular among developers and normal no-code users. Take a look at how to install, activate, and use the plugin for page building.
Get into the WordPress dashboard. Navigate to Plugins > Add New. You’ll get the option to find the plugin for installing it.
 11")
Type Elementor in the search box on the top-right corner. Once the plugin appears below, click on the Install button. Activate it afterward.
 12")
Once the plugin is activated, you are ready to create custom landing pages using the plugin. Open a new page from Pages > Add New.
 13")
After that, you will get the following page. Here, you need to do.
- Write the page Title.
- Select the Template ‘Elementor Canvas‘.
- Click on the Publish button to publish the page.
- Finally, click the ‘Edit with Elementor‘ to design your custom webpage.
 14")
On the following page, you’ll get all the Elementor widgets that you can use to design your custom page.
 15")
How To Use Elementor (Step By Step Guide For Beginners
How to Schedule and Publish Your WordPress Page
Once the page is ready, you’ll surely want to publish it. WordPress allows you to schedule the page to be published automatically at your defined time. Here’s how to do it.
Click the Publish button on the top-right corner.
 16")
After that, you’ll get a notice “Are you ready to publish?“. If all are okay, click again the Publish button.
But if you want to Schedule the page, select a suitable publish date using the Calendar option.
 17")
Let’s take a look at the current look of our page.
 18")
So, we have shown you how to create and add a new page. But if you want, you can create a custom page with WordPress. We are going to show you that in the next section.
How to Set up a New Homepage and Blog Archive Page in WordPress
A homepage refers to the page where users land first after coming to the page using the domain address. You can set any page as the homepage. To do this, go to Settings > Reading.
 19")
Select the ”A Static Page” option.
You will be allowed to Homepage and Post Page from the option marked on the image. You can see in the image we have selected the Home and Blog pages, respectively.
 20")
How to Create a Subpage in WordPress
A subpage is also known as a child page in WordPress. It is hierarchically nested after a parent page. It helps you create and display structured content hierarchically in detail so users can easily find the information they are looking for.
Open a new page. Add necessary content to it. Go to the Page section on the right sidebar. Expand the option Page Attributes. Click on the search box with your cursor. The list of all parent pages you have published so far will appear there.
Select the page that you want to set as a parent page for the running page. Hit the Publish button at the end. Thus, you can create subpages on WordPress.
 21")
Are You Ready To Create a New WordPress Page?
Creating a WordPress page is no longer a big deal if you follow the above ways.
In this tutorial blog, we’ve discussed some essential topics such as What is a WordPress Page, How to add pages in WordPress, How to separate a page for blogs, how to create a custom page template, and more.
Now, it’s your time to create your WordPress page. Tell us in the comment section which method you will use to add your WordPress page.
If you like this tutorial blog, share it on your social channel. Don’t forget to join our newsletter to get more tutorial blogs regarding WordPress and Elementor.
Subscribe to our newsletter
Get latest news & updates on Elementor


