

Over the last 18 years, WordPress has undergone huge changes and advancements. But the biggest shift happened back in 2017 when they first introduced the new content editor Gutenberg to the world of WordPress users and developers.
Now, Gutenberg is supposed to be the future of WordPress and is also regarded as the default WordPress editor. This block editor transforms the process of creating and publishing content in WordPress. That means if you are a WordPress fan, you need a strong grip on Gutenberg.
To help you out, here we cover everything you need to know about Gutenberg WordPress Editor with step-by-step, easy guidelines.
Table of Contents
- An Introduction to the WordPress Gutenberg Editor
- How to Use the WordPress Gutenberg Editor (Step by Step Guide)
- How Does the Gutenberg Editor Interface Actually Work
- How Do I Enable Gutenberg Editor in WordPress
- Bonus Tip: Introducing Some Advanced Gutenberg Blocks in WordPress
- Let’s Start Over Gutenberg, Otherwise You Go Out of The Trend!
Without any further delay, let’s explore the things together.
An Introduction to the Gutenberg WordPress Editor

The Gutenberg Editor brings some significant changes in the way you edit in WordPress. It replaced the TinyMCE editor as the default WordPress editor when the 5.0 WordPress version was launched on December 6, 2018.
With Gutenberg blocks, you can easily add different types of content to your posts or pages and then rearrange the layout directly within the editor. It will enhance your entire editing experience to the next level.
The editor will endeavor to create a new page and post building experience that makes writing rich posts effortless, and has “blocks” to make it easy what today might take short codes, custom HTML, or “mystery meat” embed discovery.
Matt Mullenweg, co-founder of WordPress
Also, it allows you to create dynamic content by applying different styles and settings. At first, it seems complex to you if you have been using the classic editor for a long time. But gradually, as much you get habituated to it, you can feel its usefulness.
Nevertheless, it reduces the hassle of getting extra plugins and extensions. On top of these, this new WordPress editor has a ton of possibilities for everyone, including bloggers, writers, photographers, and businesses.
You can find the image below, where you’ll see the Gutenberg block editor.

If you want to get the most from this tool, you have to learn about the Gutenberg in details. In this ultimate Gutenberg user guide, we’ll focus on how a user can handle the Gutenberg editor more effectively.
You can quickly check out the complete story of WordPress Gutenberg Blocks.
Let’s dive into deep.
How to Use the WordPress Gutenberg Editor (Step-by-Step Guide)
The major change that Gutenberg brings in the WordPress editor is a block-based editing approach. A block can be anything like:
- A heading
- A paragraph of text
- An image
- An embedded video
- A quote
- A button and others
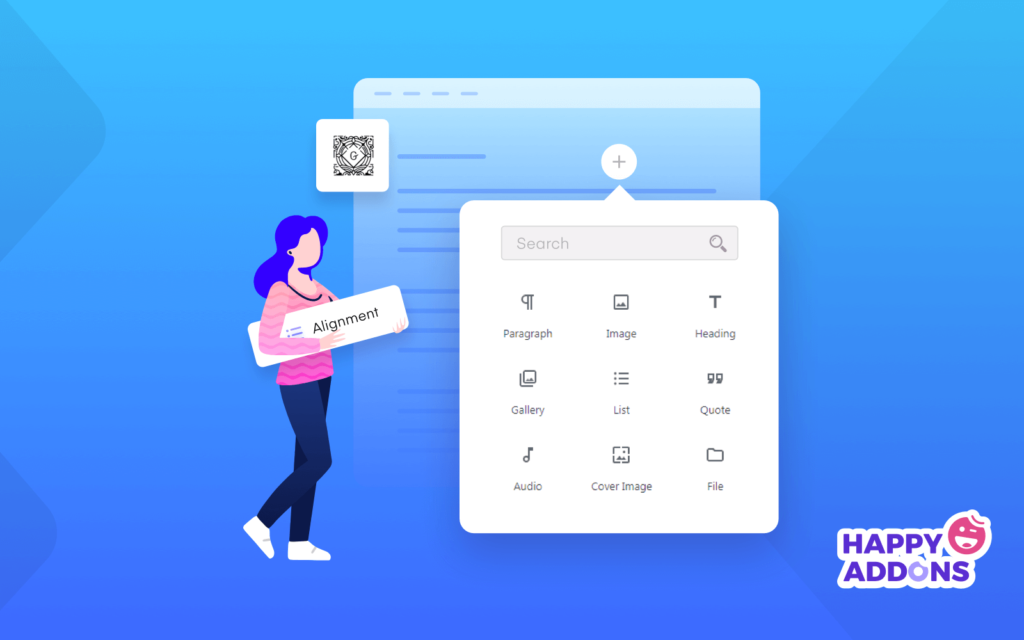
After clicking on the “+” button you will get a window including all available blocks. You can search for your required block from here and use it in your content:

Now, we’ll try to demonstrate how to use some popular blocks that people usually need while creating content.
1. Add Title to Your Post/Page
Every content has a title. So, you have to add a title to your post or page. In Gutenberg, you can add your title through this process.

2. Write Your Text Using Paragraph Block
To add a paragraph, you first need to add a paragraph block. Then, you just write your content on the block. Here is how it works.

Note: The sub-menu above the block lets you change the text alignment and text formatting of your block content. You can do further customization from the right menu of the editor.
3. Change the Color of Your Text
Sometimes, you need to change your text color. You can do it here.

4. Add A Heading Block
Like the paragraph, you can easily add your heading to your post content using the Heading block.

5. Add & Style Button Block
The button is one of the important elements of content. In Gutenberg, you can add your button very easily. Besides you also can insert multiple buttons in the same row.

Moreover, you can change the color of your button text or background, as we showed above.
6. Insert an Image Block
Let’s add an image to your content following this example.

7. Add Embed Videos to Your Content
Gutenberg also allows you to insert any type of embedded video in your post. Let’s see how you can use this Embed Videos block.

See how easy it is! Now, you can use the Gutenberg block editor following the above examples. You can also add other types of block content as well and customize them using the Gutenberg editor.
In addition, if you want to know more about the use of the Gutenberg editor you can find it here.
Let’s See How the Gutenberg Editor Interface Works

Gutenberg is a powerful block editor for WordPress that allows you to edit your post content very easily. Most importantly, it comes with tons of advanced blocks so you can easily build your web content effortlessly.
Using Gutenberg blocks is easy and fun. It just drags & drops the blocks that you need. Moreover, you don’t need to focus on coding knowledge.
In fact, whenever you want to edit something on the Gutenberg blocks, you get the full freedom to do whatever you want to do. For your concern, take a look at this blog to know about Gutenberg block editing.
Let’s see how you can use the Gutenberg editor & blocks with real-life examples.
1. Different Writing Modes
In the Gutenberg editor, you’ll find three different writing modes for helping your writing styles.
Top Toolbar: Top Toolbar helps to display all of your blocks in the same spot.

Spotlight Mode: Spotlight is completely different from the Top Toolbar mode. In fact, when you select this option, you can only edit a block that wants to edit. And the other block remains disabled.

Full-Screen Mode: It removes all of your dashboard’s left sidebars and allows you to work on the fullscreen mode.

2. Gutenberg Keyboard Shortcuts to Speed Up Your Workflow
There are lots of keyboard shortcuts in this editor. By using those shortcuts, you can also lightweight work and save more time.
- Ctrl + Alt Backspace delete the select block
- To insert a new block before the selected block(s)- Control + Alt + T
- To insert a new block after the selected block(s)- Ctrl + Alt + Y
- Display help – shift + Alt + H
- Save your changes – Ctrl + S
- Undo your last changes – Ctrl + Z
- Redo your last undo – Ctrl + Shift + Z
- Show or hide the settings sidebar Ctrl + Shift +,
- Go to the next part of the editor Ctrl + ’

3. Search Block from Library
Searching for a block is very easy in the current default WordPress editor. You can search for a particular block from the searchable index of the Gutenberg Block Library. You will get the window just by clicking on the “+” button.
4. Switch Between Visual Editor & Code Editor
In addition, sometimes, you need to switch between the visual editor and the code editor to make some changes. You do it right here.
5. Gutenberg Outlines Your Document
A content outline is a very important part of your content structure. You will find a little “i” in a circle in the top left corner of your editor. By clicking on this, you can see the complete structure of your blog at a glance.

6. Reusable Block Template
By using this, you are able to use the previous block design that you saved earlier. So, it saves you time a lot. Here is how you use it.
Get some useful tips about this block editor from here.
How to Enable Gutenberg Editor in WordPress

Here, we’ll discuss how users can enable the Gutenberg block editor in your WordPress dashboard. If you are using WordPress 5.0 and above, you won’t need to enable it separately. WordPress now comes with Gutenberg by default.
On the other hand, if you’re still using the classic editor and planning to shift to the Gutenberg editor. Then, you can easily install and activate the Gutenberg plugin like the other plugins activation process.
You can find the Gutenberg download link here.
Bonus: Introducing Some Advanced Gutenberg Blocks in WordPress

As we said, Gutenberg is all about lots of different useful blocks that we always use to design posts or pages. Here, we will cover some of those powerful blocks that you can use to give your blog an extra slick look.
Generally, Gutenberg separates their blocks into 7 several categories. You’ll find in the following lists:
- Most Used
- Common blocks
- Formatting
- Layout elements
- Widgets
- Embeds
- Reusable
Let’s focus on some useful blocks.
Quote: We often see the use of quotations in blogs or articles. In this new WordPress editor, you can use the “Quote” block to add a quotation. You can apply different styles to showcase your quote in an appealing way.
Shortcode: It is another essential block that you can use on your website page or post. With this shortcode block, you can easily add your desired affiliate banner, product image, and more.
Classic: Sometimes, you’ll need back your WordPress classic editor to edit your post content. Thanks to the Gutenberg for having this amazing block so that you can easily use your old editor.
Custom HTML: This block also helps you to add custom HTML code to your blog posts.
Furthermore, you can explore more Gutenberg blocks by using third party plugins.

Let’s Start Over Gutenberg and Get Ahead of Everyone!
The Gutenberg Editor is one of the major shifts in WordPress history. It may take some time to adjust to this completely new interface. But in the long run, it will make your hands more powerful to create amazing content.
Hopefully, this ultimate Gutenberg WordPress editor guide will help you learn many useful aspects of this amazing block editor. Thus, you can deal with this block editor seamlessly.
So, what do you think about the Gutenberg editor so far? Do you find it useful or not? Share your experience or queries regarding the Gutenberg WordPress editor by placing a comment below.


8 Responses
This is a really informative article with lots of great ideas. Could you please tell me what software you use to run your incredibly fast website? I also want to create a simple website for my business, but I need help with the domain and hosting. Asphostportal reportedly has a good reputation. Are there any other choices available, and if so, what would you suggest?
Hello Martina, thanks sharing your thoughts, we have already prepared a blog on best hosing providers for Elementor, here it is https://happyaddons.com/best-hosting-plan-for-wordpress-and-elementor/
Regards,
Gobinda,
Team HappyAddons.