

Great checkout pages impact highly on your conversion rate. If you have a WooCommerce store or planning to start one, you must provide a comfortable checkout process to customers.
According to Digital Marketing Institutes, checkout optimization can boost conversions by 35.62%. Regardless of the quality of a product, customers may leave your website if you fail to deliver a seamless checkout experience.
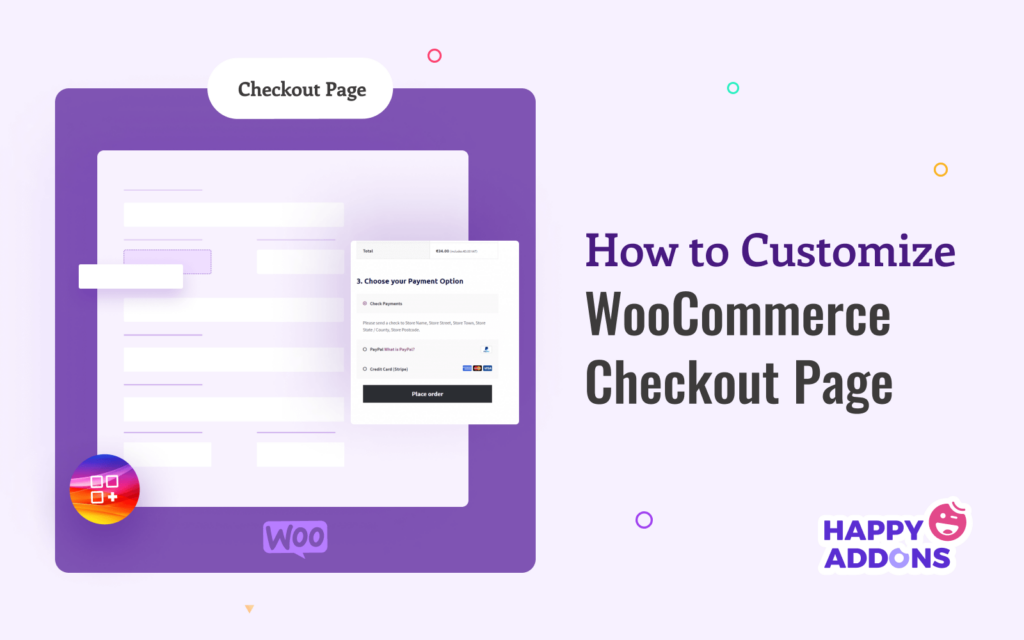
But don’t get worried. In the following blog, you will see a step-by-step tutorial on how to customize WooCommerce checkout pages with aesthetics, plus some industry best practices. The good thing is that you won’t need any coding experience to follow this guide. Let’s start reading.
Table of Contents
- Why Should You Customize Your WooCommerce Checkout Page?
- How to Customize WooCommerce Checkout Page with Elementor and HappyAddons
- Bonus – 7 Best Practices to Increase Conversions on Checkout Pages
- FAQs on How to Customize WooCommerce Checkout Page
- Final Takeaways on How to Customize WooCommerce Checkout Page
Why Should You Customize Your WooCommerce Checkout Page?

Using the WooCommerce plugin, you can create eCommerce websites of almost any kind. With the plugin installed, your website will automatically generate a default checkout page. But the default checkout page is so simple that it can’t help you offer trendy experiences to the customers.
This is why customizing WooCommerce checkout has been so important. Unless your checkout page is easy to use and hard to navigate, customers are more likely to abandon your website and never return. Below are some key reasons why you should customize your WooCommerce checkout page.
a. Remove Unnecessary Fields
Most customers won’t take it friendly if you ask for too much personal information on the checkout page. Because nobody loves to share unnecessary personal information with others, include only those fields (name, email, phone number, address, etc.) that are mandatory for the checkout process.
b. Add Multiple Payment Options
The checkout abandonment rate can incredibly go high if customers don’t find their preferred payment options. You must try to add payment methods on your WooCommerce checkout page as much as possible. Like cash on delivery, bank check, debit & credit cards, mobile pay, and electronic money transfers.
c. Change Page Design And Layout
Grid layout is a great way to display numerous web content within the shortest possible space. The two-column grid is currently the most popular style in designing the WooCommerce checkout page. By customizing the WooCommerce checkout page, you can bring more variation to the grid system.

d. Display Additional Information
If you have any special message for customers that you want them to read, you can show it on the checkout page. For example, you may notify them about upcoming offers, discounts on particular products, promo codes for new users, etc.
e. Make It Responsive on All Devices
Unless you make your checkout page perfectly responsive for all devices, you will miss out on many potential customers. Customizing the checkout page can make it look good on all devices- desktops, laptops, tablets, and smartphones.
How to Customize WooCommerce Checkout Page with Elementor and HappyAddons
Customizing the WooCommerce checkout page is super easy today. Elementor is a drag-and-drop page builder by which you can create any kind of web page you want. Besides, if you ever need to customize other web sections like the cart page, product page, header, footer, and else, you can do that using this plugin.
HappyAddons is a powerful add-on of Elementor which can further power up the functionalities of your eCommerce site. Here we’ll use these plugins to demonstrate how to edit WooCommerce checkout pages.
Pre-requisites to Customize WooCommerce Checkout Page
Make sure these plugins are installed and properly configured on your website. Then, start following the steps demonstrated below.
Step 01: Create a Checkout Page
Once you install the WooCommerce plugin, you will get a default WooCommerce checkout page in the page section. You can open it with Elementor to customize the checkout page.

But if you want, you can create a new page, link it as the default WooCommerce checkout page, and then customize it with Elementor. Watch the video below on how to create a new WooCommerce checkout page and set it as default.
The best practice is you create a new checkout page and then customize it with Elementor. Next, open the new checkout page on Elementor canvas by the following video.
Step 02: Drag and Drop the WC Checkout Widget
Type WC Checkout on the Elementor widget search bar. You will get the widget appearing below. Drag and drop it on your selected section of the Elementor canvas.

Right after you place the widget, all the necessary fields required for a checkout page will appear on the canvas. Next, you have to modify these fields as you want using the options available on the Elementor panel.

Step 03: Select a Layout for the Checkout Page
Select a layout style from the General section. There are two layouts in the general section: One Column and Two Columns.

If you choose the Two Column layout, you will get some additional options (Stack-On, Columns Gap, and Column Width) to customize the WooCommerce page. Check out the video below to explore how the Two Column layout works.
Step 04: Stylize the Checkout Page
In the Style section, you will get eleven more options to design the checkout page. Below is the list of the options you will find there.
- Sections
- Inputs
- Coupon Bar
- Coupon Box
- Headings
- Billing Details
- Additional Information
- Review order
- Payment Method
- Privacy Policy
- Button

Using these options you can change the background color, field color, label typography, input typography, and typography color. Let’s explore what you can do with these options.
- Sections
From the Section option, you can edit the space between sections, change their background color, and add shadows to the field boxes.
- Inputs
The Input section allows you to customize the height, color, spacing, typography, and box shadows of the fields on your checkout page.
- Coupon Bar
You can change the color, typography, and coupon link from the Coupon Bar.
- Coupon Box
Coupon Box lets you change the input text typography, box color, typography of the button, and button color.
- Heading
From the heading option, you can change the color and typography of the main headings of the checkout page.
- Billing Details
Billing Details will allow you to change the input text color, field color, background color, label typography, and more.
- Additional Information
If you want to keep a note for the buyers, this section will allow you to do that. You can use this option to customize the text area, input text style, box-shadow, spacing, hover style, etc.
- Review Order
The Review Order option allows customers to see the summary of the products they are going to order. From here, you can change the typography, background typography, color, text color, spacing, and more.
- Payment Method
You can edit the label font style, color, typography, background color, and message box of your payment box from the Payment Method option.
- Privacy Policy
You will get the Privacy Policy below the payment method box on your checkout page. Using this option, you can customize the text color, typography, link hover color, and link color of the section.
- Button
In the end, you may want to customize the order placing Button on your checkout page. The Button option will allow you to change the button text, typography, color, background color, and more.
For additional guidance, please visit this documentation on how to customize checkout pages in WooCommerce using this HappyAddons widget. If you still face any problems in customizing your checkout page using the widget, we request you let us know through the comment section. One of our team members will reply to you soon.
Step 05: Make the Checkout Page Mobile Responsive
According to numerous statistics, around 50% to 60% of eCommerce sales today are generated from mobile devices. So, you must make sure your WooCommerce checkout page is perfectly optimized for mobile devices.
Just click on the Responsive Mode button from the footer of the Elementor panel. It will open up an option above the Elementor canvas from where you can view your page on different screen sizes and apply modifications. Watch the video below.
Don’t worry, if you change something for the mobile or table view, it won’t make any changes on the desktop view. Changes will be applied to that particular device.
Now, preview the WooCommerce checkout page below that we have created using this widget.

Bonus – 7 Best Practices to Increase Conversions on Checkout Pages
According to XP2 Dynamic Yields, over 70% of eCommerce products are abandoned from the shopping cart for why online stores lose around $18 billion each year. A key reason behind that is that most eCommerce websites fail to offer customers top-notch user experiences.
If you have an eCommerce site or are planning to start a new one, apply the following practices on your checkout page to improve your conversion rate.
1. Give Names to the Checkout Fields
Labeling the fields of the WooCommerce checkout page makes it easy for customers to know where to go and what to do. It will speed up the checkout process and save valuable time for the customers.
2. Add Explanatory Tooltips
A tooltip is a snippet of text that pop-ups whenever someone hovers his cursor on particular web elements. It allows you to add additional information to the checkout page without using much space. Tooltip is a free feature of HappyAddons. Read out how to add tooltips to your web sections.
3. Offer Enticing Promos and Discounts
Offers and discounts have the power to increase your product sales overnight. According to a recent statistic from Statista, around 90% of USA people use a coupon or discount code throughout the year. Try to apply promos and discounts to increase your sales like the below.
- Percentage Off
- Bye One Get One (BOGO)
- Free Shipping
- Gift Card
- Loyalty Score Coupon
4. Let Users Update the Product Quantity
Buyers may change their minds anytime they want. They may want to alter the product quantity even before clicking the pay button. You must have the option on your checkout page so that customers can change the product quantity. Otherwise, they have to visit the cart page, resulting in a bad user experience.
5. Show Security and Trust Badge
Showing security and trust badge(s) will reassure customers that it’s a legitimate site to purchase products. It will make customers feel confident to share personal information like debit/credit card numbers, phone numbers, email addresses, etc.

6. Show the Return and Refund Period
From Shopify, over 20% of online products are returned to the retailer for many reasons. This is why customers care a lot about the return and refund policy before buying online. You must also clarify the return and refund period on the checkout page alongside the product and cart pages.
7. Upsell Related Products
Upselling is a sales technique that encourages customers to buy more products or services than they initially planned to. By showing related products on the checkout page, you can convince customers to buy more of these items and make them feel their importance. You can offer these items at a discounted rate for further upsell.
8. Offer Unique Benefits for the Existing Users
Offering exciting offers to existing customers to convince them to buy more is a great marketing approach for any eCommerce organization. It will make them feel they are more valued than the non-registered users. Using the Conditional Display feature of HappyAddons, you can offer coupons and promo codes to your registered users.
FAQs on How to Customize WooCommerce Checkout Page
If you yet have any questions unanswered throughout this article, this section might answer them. Here we will cover some most frequently asked questions regarding how to customize the WooCommerce checkout page.
-
What is the WooCommerce checkout page?
The WooCommerce checkout page is the last landing page where customers provide all the necessary information, such as payment information, billing address, promo code, etc., to buy a product.
-
What should a WooCommerce checkout page contain?
You must include the following sections on the WooCommerce checkout page mandatorily.
1) Billing details
2) Shipping address
3) Order Summary
4) Payment methods
5) Registration form link (for new users only) -
What is WooCommerce multi-page checkout?
WooCommerce multi-page checkout is an approach where a buyer has to visit multiple pages to complete the purchase.
-
What is one-page WooCommerce checkout?
In one-page WooCommerce checkout, buyers don’t need to visit multiple pages to make a purchase. They can complete everything on one page to make an order online. Since it saves lots of time and gives a better experience to the buyers, one-page WooCommerce checkout has been so effective for conversion.
-
How to reduce the eCommerce shopping cart abandonment rate?
You can reduce the eCommerce shopping cart abandonment rate in the following ways.
1) Offer guest checkout option.
2) Provide multiple delivery options.
3) Don’t charge unnecessary excessive prices.
4) Make sure the return and refund options.
5) Include a free shipping option there.
6) Ensure 24/7 customer service.
7) Email customers to remind them about the cart items. -
What is WooCommerce guest checkout?
In WooCommerce, guest checkout buyers make a purchase from the online store without logging into an account or saving any information (username, password, shipping address, etc.) in the database. There are many who don’t love to share their personal information with eCommerce sites. WooCommerce guest checkout is the best option for them.
Final Takeaways on How to Customize WooCommerce Checkout Page
Customizing the WooCommerce checkout page is important to ensure a positive shopping experience for the buyers. This is the last page where potential customers land to purchase their desired products. So, keeping this simple, easy, and eye-catchy is a must for the success of any eCommerce business.
In this guide, we have explained the easiest way of customizing the WooCommerce checkout page. By following these tips, we hope you can now create a checkout page for your WooCommerce store even if you have no prior experience.
If you still have any problems, leave us a comment below, and we will be happy to help! Besides, follow our Facebook and Twitter channels to get regular updates.
Subscribe to our newsletter
Get latest news & updates on Elementor
[yikes-mailchimp form=”1″]


