

Can you recall when the last time you stayed at a site for minutes, though the design of that site didn’t impress you? It’s tough, we know! Because we usually leave a site that doesn’t attract us, and it takes an eternity to load the design.
There is a saying that.
You only have one chance to make a first impression
So, as a website owner, it’s our first and foremost priority to make a design that creates the first impression to the visitors.
Here comes the Happy Particle to play its role. With its different particle effects, you can make your design stand out from crowds. Cool effects make the site memorable for the visitor, and they are more likely to come back. So you should try Happy Particle Effects to make stunning web pages.
And to assist you in using Happy Particles with your Elementor site, here we are with this tutorial guide. Let’s dive in!
Say “HI” to The Latest Feature of Happy Addons- Happy Particle

If you have ever come across the Happy Addons, then you already know how fast Happy Addons is growing. When we are talking about its growth, you will be glad to know that it has already touched the 200K active installations milestone.
Apart from this, it has many more super exciting achievements in the running year and with more futuristic plans we are heading to next. Having said that, the release of the Happy Particle is a part of our plan to add more feathers to the Happy Addons’ crown.
We have launched Happy Particle with the goal of bringing extra happiness to your clients and site visitors as it will create a wow effect on your website.
Initially, you’ll get three completely different effects with Happy Particle. Last but not least, you will be able to make a whole different effect with your creativity by mixing up some particles. We named it Custom Particle.
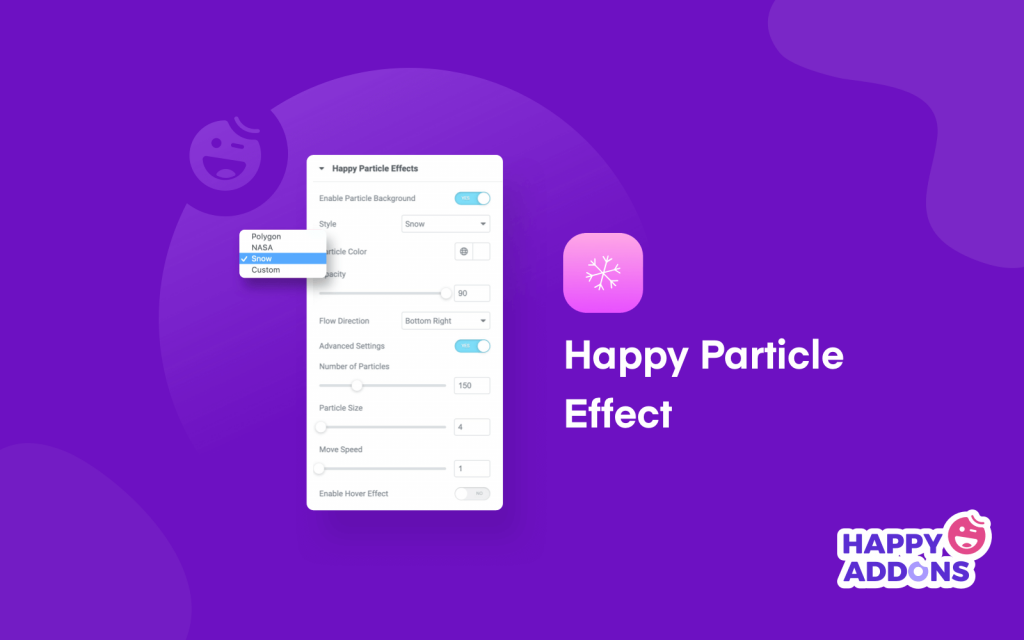
1. Snow Fall Effect

If you want to add some visually soothing particle effects to the background of your website, you can use the Snow Fall effect. It will allow you to set the number of Particles, the size of your particles, the speed of the Particle movements, and the flexibility to add the Hover Effect to your Particle effect.
2. Polygon Effect

The polygon effect creates magic in the background of your website. The Polygon name says all how it will perform with your design. All the points will be added with one another to make your design mesmerizing with a dynamic scenario.
3. NASA Effect

If you want to add some eye-catching floating effects to your website background, you can use the NASA effect. Like the other two effects, here you can also set the number of Particles, the size of your particles, and the speed of the Particle movements.
4. Custom Effect
Apart from these three-particle effects, we have one more effect, and that is the custom effect. If you want to create a particle effect with your own creativity, you can do that using the custom effect. After creating the particle, download the JSON file, and the Happy Particle will allow you to add that code to your design to get your job done.
How to Use Happy Particle to Make Your Site More Visually Attractive
We do love to visit the site that attracts us. And nowadays attracting people a bit challenging. Every day, we visit a lot of sites and forget every site unless it has something different to catch us.
Here, Happy Particle does the trick. With its wall-breaking design elements, it makes a difference to other websites. Using Happy Particle is an easy task.
Now, let me show you how you can design your Elementor site using Happy Particle.
You’re here, which means you already have your own WordPress site. Because using this particle, you need three things:
Do make sure that you have successfully installed & activated Elementor & Happy Addons. Now follow the below steps.
Step 01: Create a New Page or Select an Existing Page
You can either create a new page or select an existing page to apply the Happy Particle effect. To create a new page,
- Go to ‘Page’ > ‘Add New’

You will get a new page.
- Put a page name
- Save draft or publish it
- Finally, press the “Edit with Elementor” button.

You’ll get a fresh page to design.
Step 02: Design the Page
- Select the single-column

- Click on the section option of the Elementor editing page.
- Set Height “Fit to Screen”.
- Turn “Yes” the Stretch Section.

- Press the plus sign to add a widget.
- Drag a widget to the editor. For instance, we’re here adding the Heading widget.

- Now edit the heading as per your design skill from styling options.

Step 03: Apply Polygon Effect
- Click on the section option of the Elementor editing page again.
- Go to the Style tab.
- Enable the Happy Particle Background. Make it Yes.

- Choose a style (Polygon) from the drop-down list.
- You can change the color of the particle.
- You can also change the number of particles, particle size, and moving speed by enabling the Advanced Settings.

Step 04: Apply Snow Fall Effect
- Drag an image widget to the editor.
- Upload an image and then customize it from the style tabs.

- Go to the Happy Particle Effects and turn Yes the Enable Particle Background.
- Choose Snow from the style tab.
- You can also change the particle number, size, color, speed, and other things from this section.

Step 05: Apply NASA Effect
- Drag a widget (whichever you want) to the editor. Here, we have used a countdown widget.
- Apply the NASA effect from the styling section.

Voila! You have added the NASA effect to your design.
Step 06: Design Custom Particle
You can design your own custom particles. All you need to do is select the Custom option from the Style section.
- Visit this custom effect maker site to create custom particles.

- Download the json file and copy the code. Now, paste the code on the marked area.

Congratulations! You have completed exploring the Happy Particle effects and created a design with these effects. Do you want to take a look at the final version of your design?
Okay! Let me show you.

Let Happy Particle Make Your Design Stand Out
Using Happy Particle is as easy as pie. Choose a style from the Happy Particle effects and apply it to your existing or newly created designs. It will create an extra wow to your design for certain. That’s all you need to get back visitors onboard.
After reading this blog, if you still face any trouble designing your site or if it bloats your site or whatsoever, you can follow our detailed documentation.
Okay! Now, let me know which effect you love the most. Or is there anything that you want to suggest to our R&D team? Let us know your feedback through the comment box below.


