Nowadays, owners from small to large businesses are focusing on showcasing their products, services, and perspectives globally using online platforms or websites. Because they understand the value of having professional websites to provide different online services and also reach more customers virtually.
More than 56% of businesses all around the world using professional websites
Entrepreneur.com
And you’ll get benefits and stand out over your competitors if you own a professional website with a unique look. Professional websites, for example, blogging sites, educational sites, portfolio sites, project-type websites, sci-fiction websites, car rental websites, etc. You can choose the one that suits the best from these professional websites examples.
However, if you’re looking to build a website with a professional look, then this article is for you. Regardless of the importance of a website, today we will show you how you can easily create a professional website.
Let’s get started.
How Elementor Helps to Build Professional Websites with Ease

We mentioned earlier the importance of professional websites and how they can help you reach more customers. Now we’ll talk about the most popular page builder, Elementor, for all WordPress users.
Before the invention of Elementor, designing a website was a heck. But Elementor makes this path easy and simple. And people of all ages can utilize this magnificent plugin for their websites. Using ‘Elementor’ ultimate addons you can easily customize your website and also give a professional look within a few minutes. Let’s know how it will facilitate you in terms of designing a professional website.
- Drag & drop editor
- 90+ widgets to implement
- Built-in 300+ templates
- Responsive editing
- Pop-up builder
- Theme builder
- And WooCommerce builder
So these features of the Elementor are 100% capable enough to customize any type of WordPress website design requirements. Again, to quicken the strength of the Elementor, you may need a solution that will help you to create more beautiful things. Yes, we’re talking about HappyAddons. In the next part, we’ll talk about this unique, super fast, and easy addon.
Introducing HappyAddons

HappyAddons is a unique Elementor Addon. It might be the best addon package for Elementor — Adam Preiser Founder of WP Crafter
We have already mentioned ‘Happy Addons’ several times previously. And it’s the compact solution, having the ultimate free widgets collection for Elementor to take your website design up to the mark. Like other Elementor addons, the Happy Addons are not different as they come with powerful widgets.
Let’s add the following key features to the fore.
- Preset
- Floating effect
- CSS Transform
- Cross-domain copy-paste
- Live copy
- Section nesting
- Background overlay
- Happy clone
- And more
So these are prominent features you’ll get with Happy Addons. And using these, you can effortlessly empower Elementor with ease.
How to Create a Professional Website Using Happy Addons
Professional websites are very high in conversion. So you should design your professional website with much care. Otherwise, there is a high chance of losing potential customers, increasing the bounce rate and also affecting your ranking factor. The reason is your customers want something different and unique from you. And that’s why you should emphasize your website look.
Anyways, now we’ll be showing how you can construct a professional website step by step using Happy Addons. But before jumping to the tutorial, let’s know the requirements that you need for this tutorial:
Requirements
Be sure that you have these requirements.
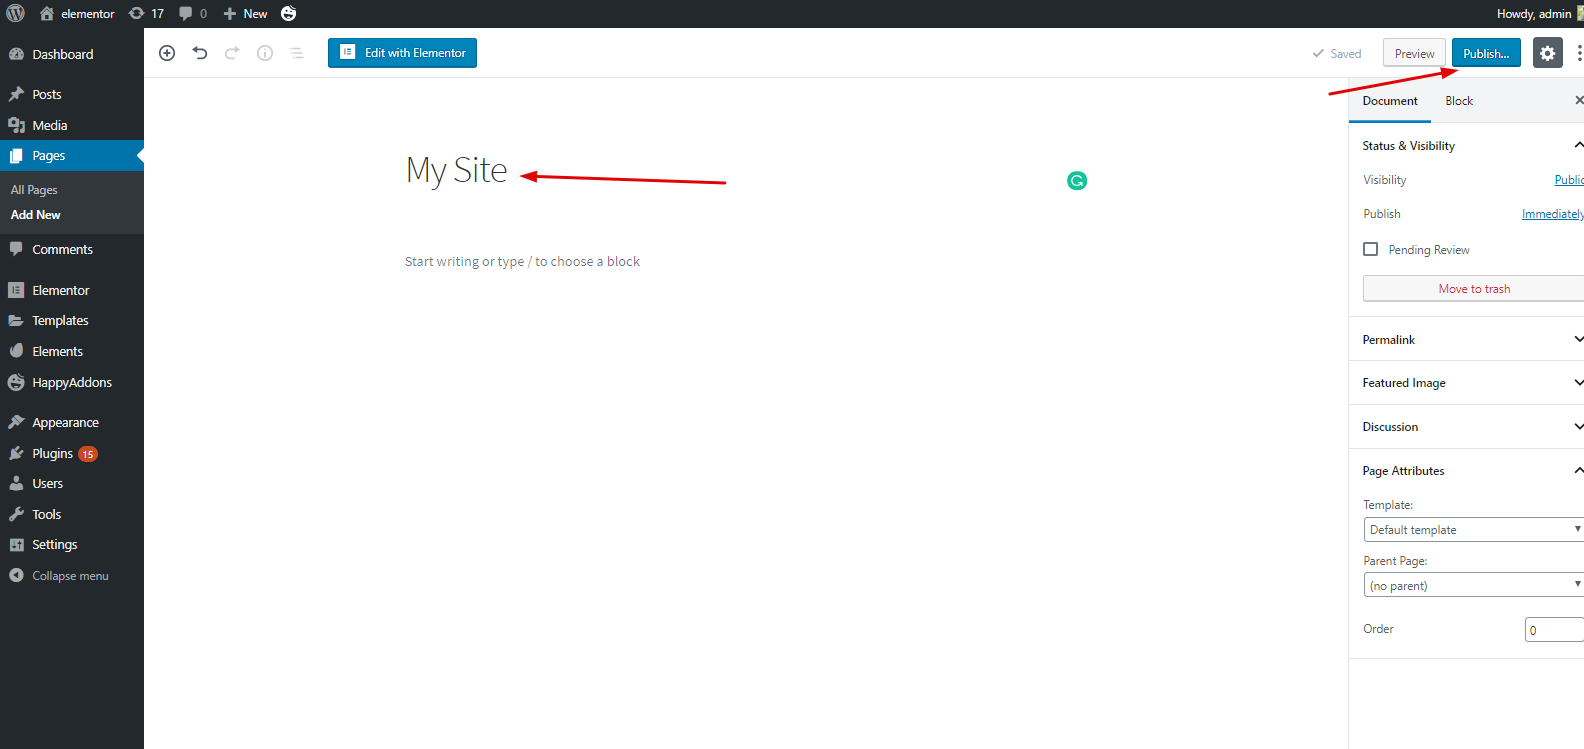
Step 1: Add a New Page
This is the most common step. Because adding a webpage is a very easy task, and you can do it in a second. However, we’ll show you how you can add it.
To do that, navigate to WP Admin > Dashboard > Pages > Add a new page > Title > Click on edit with Elementor canvas > Publish
Step 2: Add a Header or Footer
A website’s header or footer part is the most crucial part. For example, you can showcase your social icons, provide valuable links, or a login-registration option for easy navigation. In the same vein, you can also do the same thing for the footer part. That’s why you should know how to create a header for a WordPress site.
Step 3: Adding Templates or Themes
After adding a header option, you can customize the rest of the part step by step, or you can directly insert a template. Then, you can customize it gradually.
To do that, click on the ‘Folder Like’ button. Then, you’ll see ‘Elementor’ library, where you can use blocks, templates, and separate pages. From here, you can choose anyone.
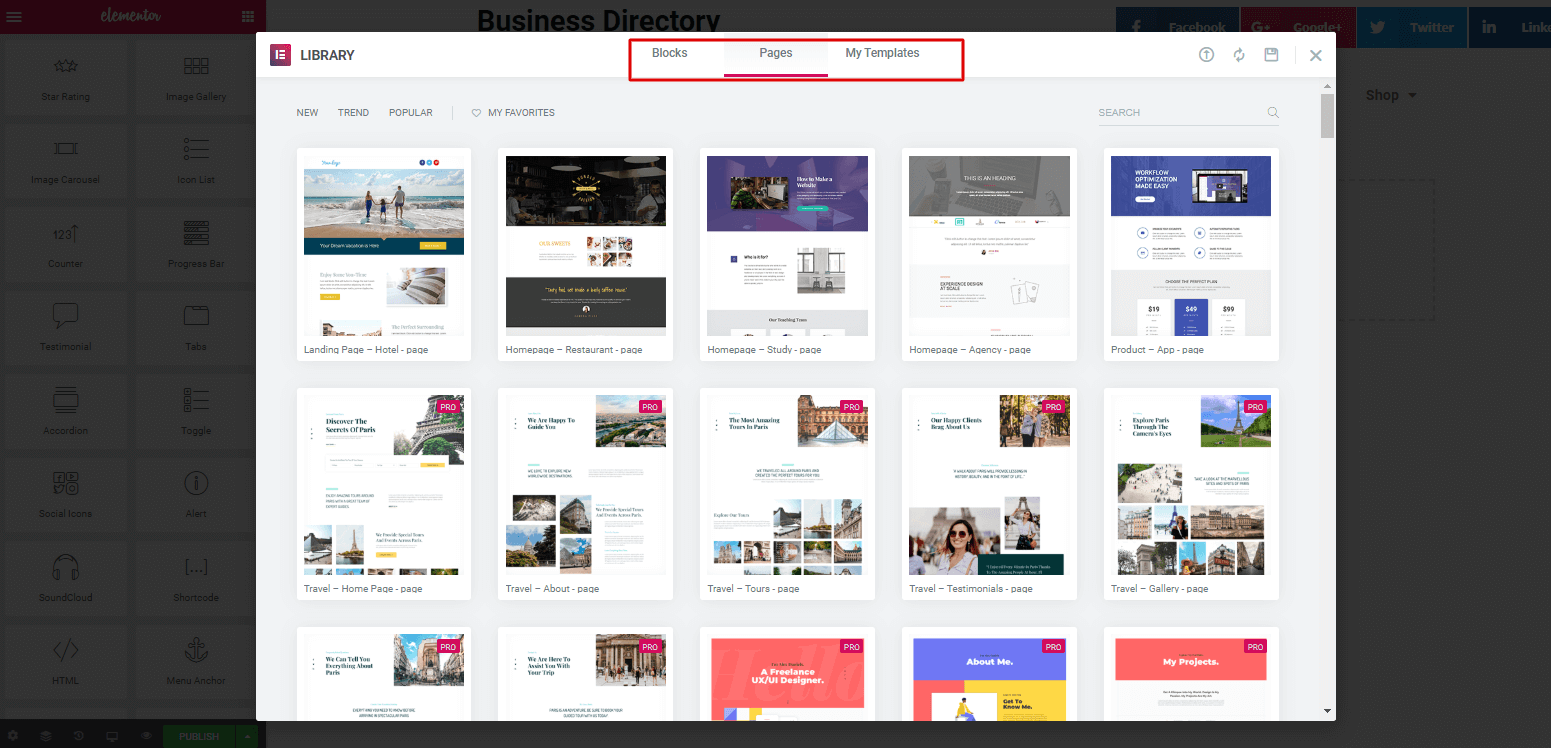
In that case, we chose the marked one. But you have to think about what type of template you want. As we’re talking about a professional website, you should choose something related to professionalism.
However, we chose a ‘Professional Agency Template’. But in your case, you choose anyone from here.

Step 4: Customizing Template and Using Happy Addons Widgets
So, after selecting the template, it’ll directly appear on the screen. And you can easily customize the page.
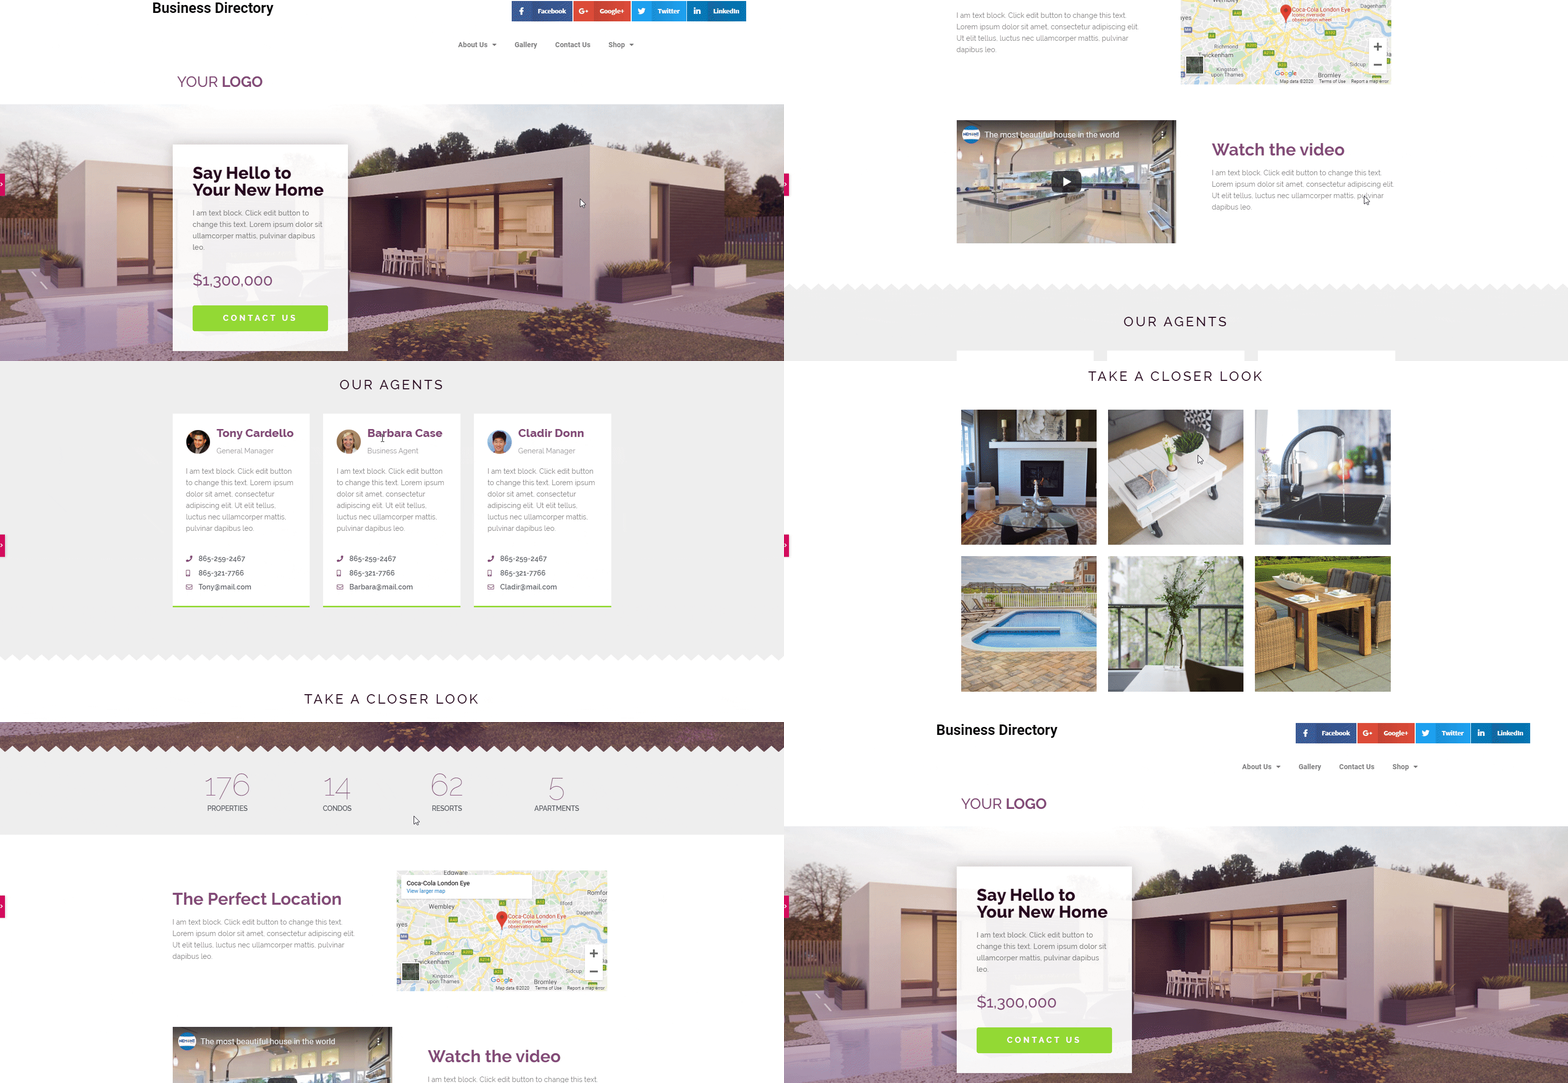
Now, you can edit or customize each and every section using Happy Addons Widgets. Or if you want to do more with happy addons then you have to upgrade to the premium version.
Here we’ll show how you can customize each and every section to give your website a professional look.
Step 5: Adding Button Wiget of Happy Addons
We’ll change this green button with the ‘Happy Addons Dual Button Widget‘. You can get this widget is the free version.
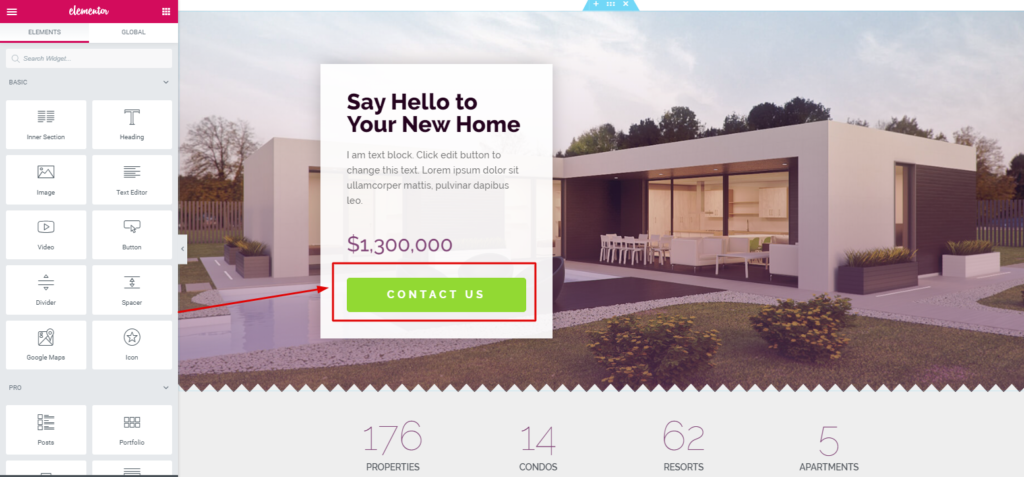
So, all you have to do is just select the widget from the left sidebar and drag it to the selected area.
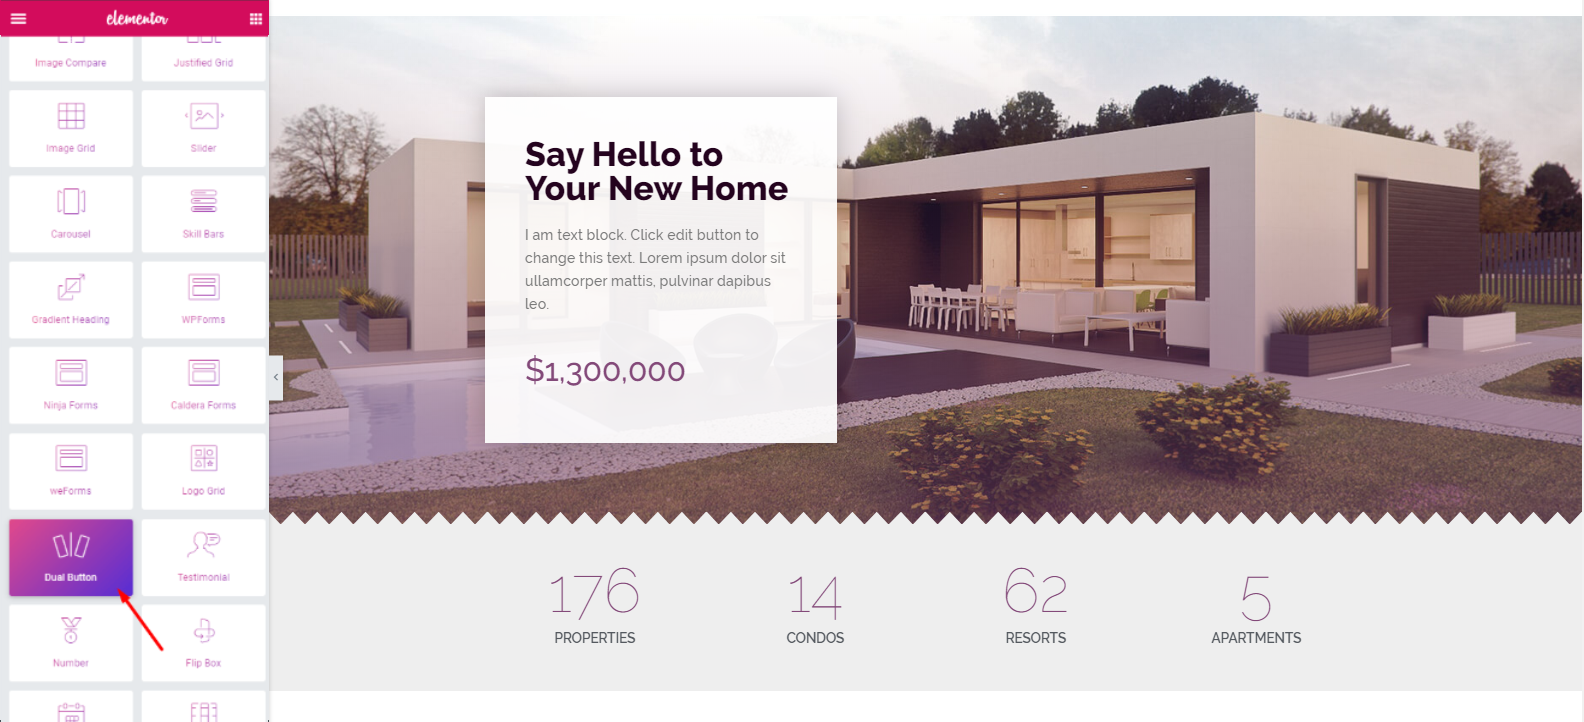
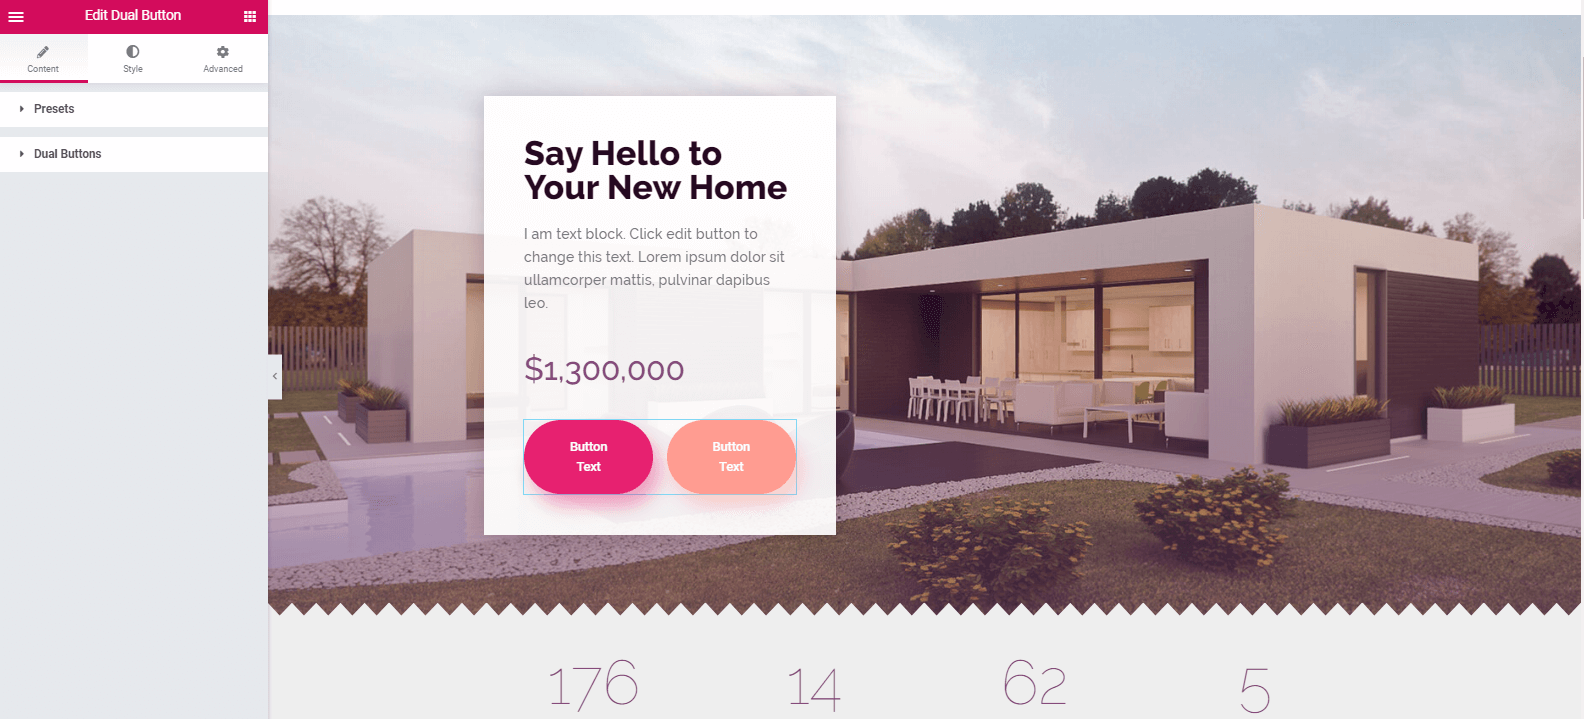
Then, just customize it according to your design. Here you’ll get ‘Preset‘ and ‘Dual Buttons’. Learn More about ‘how preset works and how to utilize it‘.
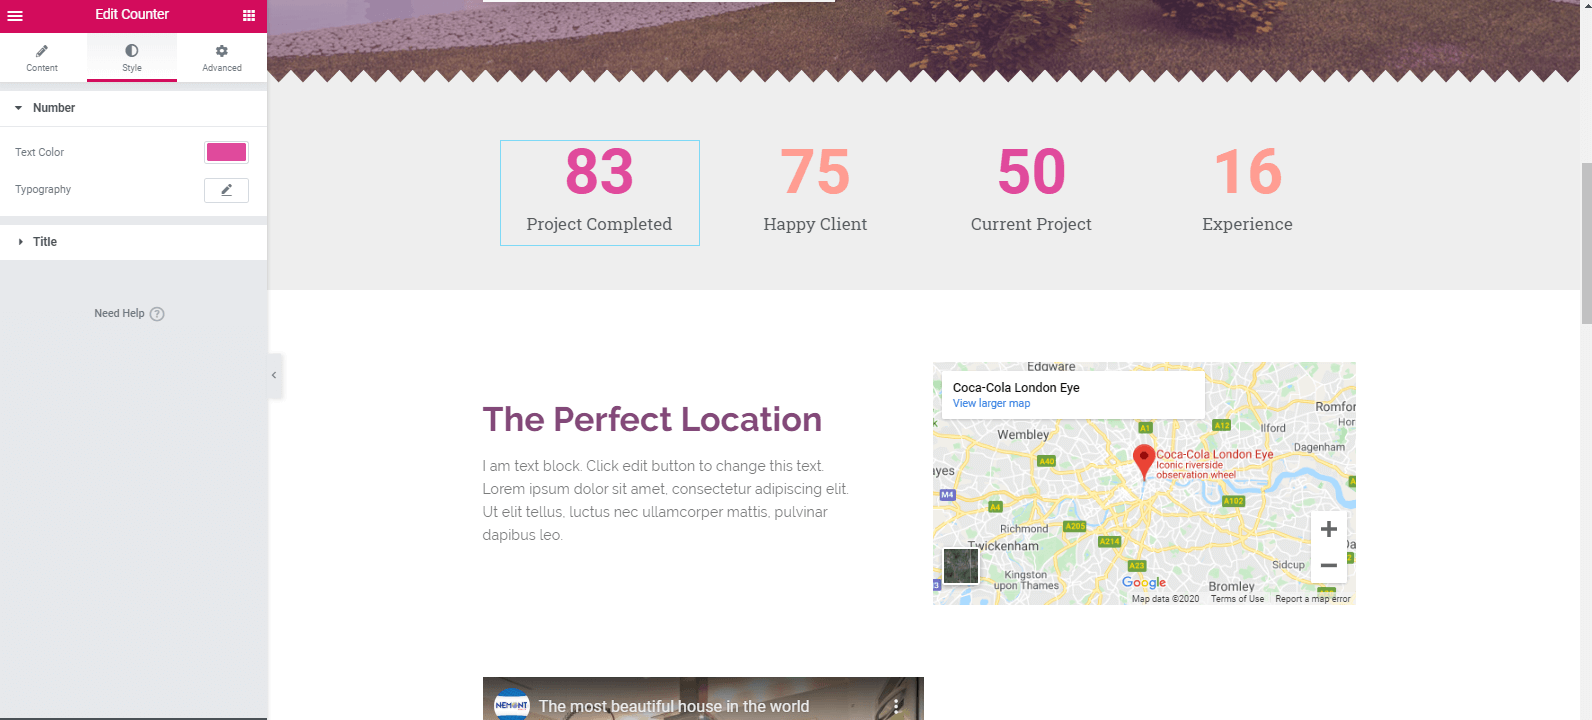
Step 6: Adding the ‘Counter Widget’
Search ‘Counter Widget’ from the widget gallery. Then drag it to the marked area like in the previous process. So after editing the ‘Counter Widget’ you’ll get a view like the following one:
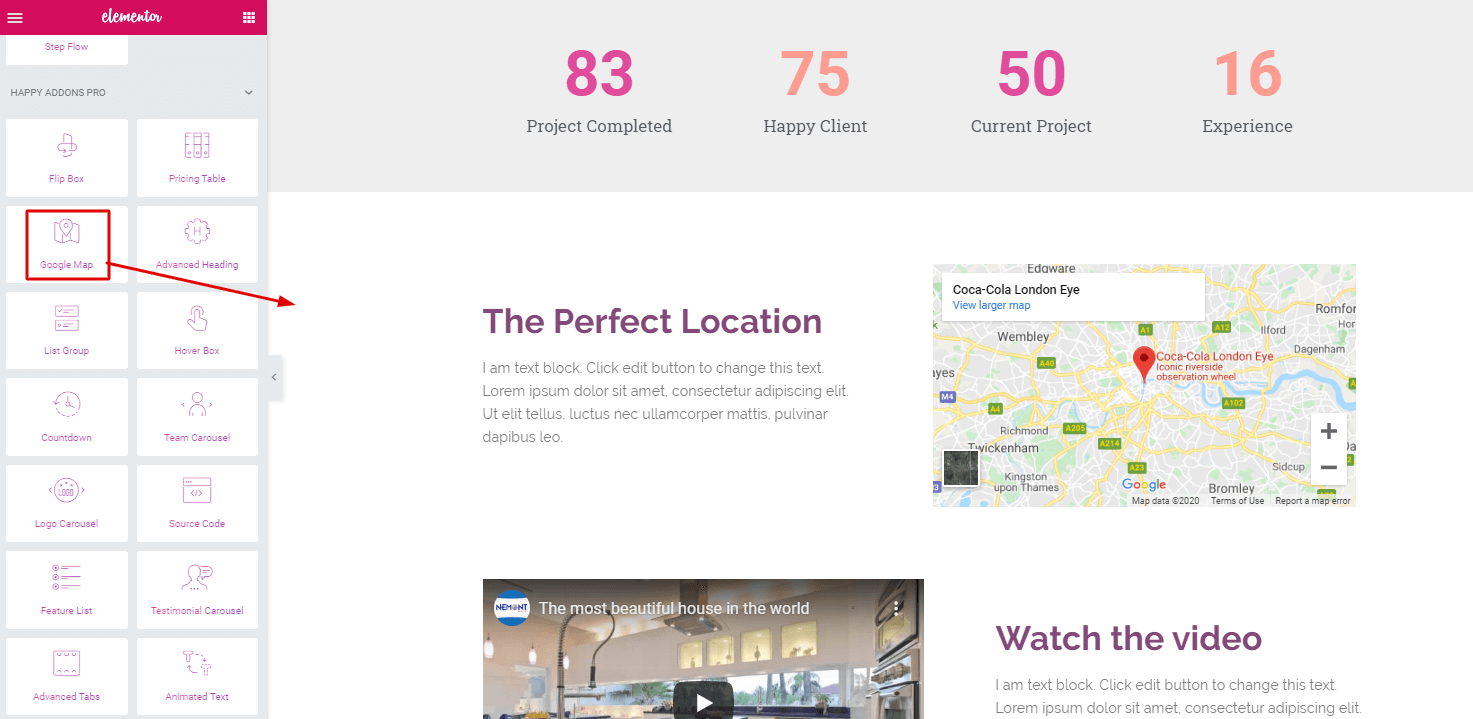
Step 7: Adding Google Map Widget
This widget is a pro feature of Happy Addons. So, after upgrading to Happy Addons Pro, you’ll get this widget to use. Drag this widget to the desired area like the previous process. And then customize it. Next, you can add a video. To do this, you have to select the video widget and just drag it to the area that you want.
Step 8: Adding Testimonial
‘Testimonial widget‘ is also a pro feature of Happy Addons. You can add this widget in the same way you have added other widgets. After adding the widget, you’ll get the option to edit.
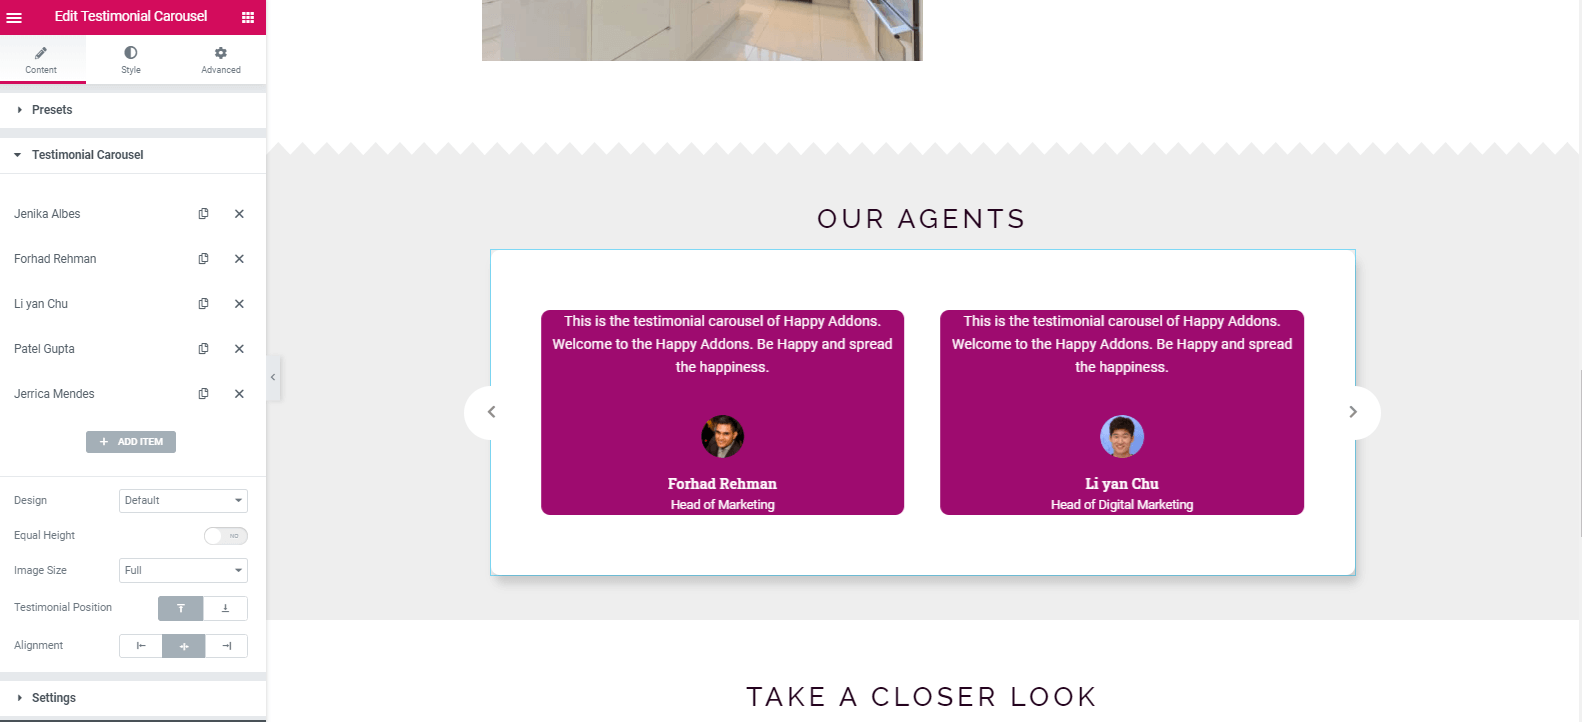
Step 9: Using Live Copy Paste Feature
This is the unique feature of Happy Addons. Because you can use this feature only by copying the demo and pasting it into your canvas. This will ease your trouble in choosing widgets one by one. Okay, let’s watch it.
Step 10: Adding Contact Form
Having a contact form on the website is another important thing. So you can add it with ease. All you have to do is go to the ‘Happy Addons Contact Form‘, and then just select the form you want. In this case, we chose ‘weForms’.
So after adding weForms as the contact form, you’ll able to customize it.
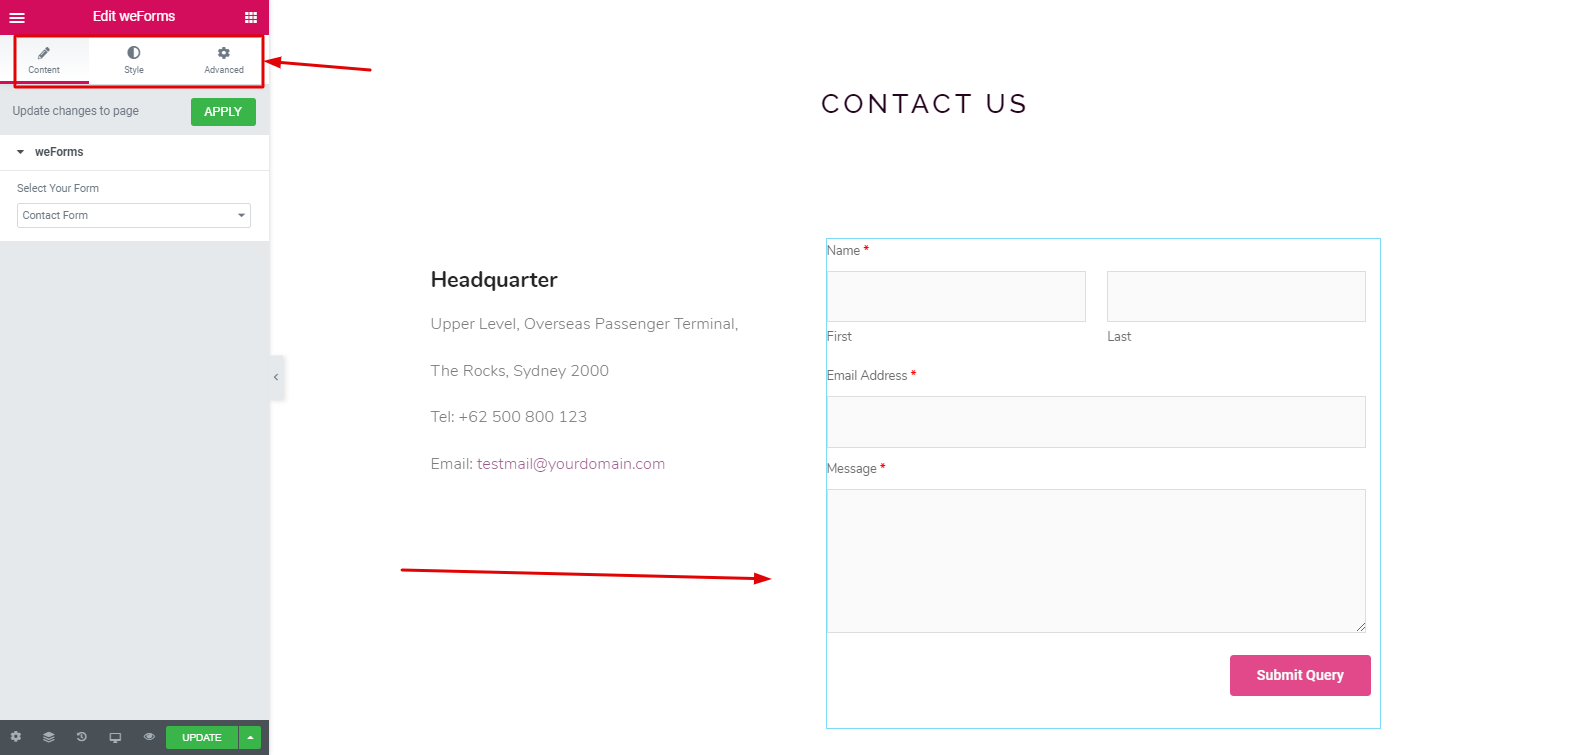
Watch the video to learn how to use the ‘Contact Form‘.
Step 11: Adding Footer
Adding a footer is also an easy step. You may find different options to add a footer. But for instance, we’ve utilized the ‘Feature Widget‘ of Happy Addons.
After utilizing it, you’ll get all the options to customize.

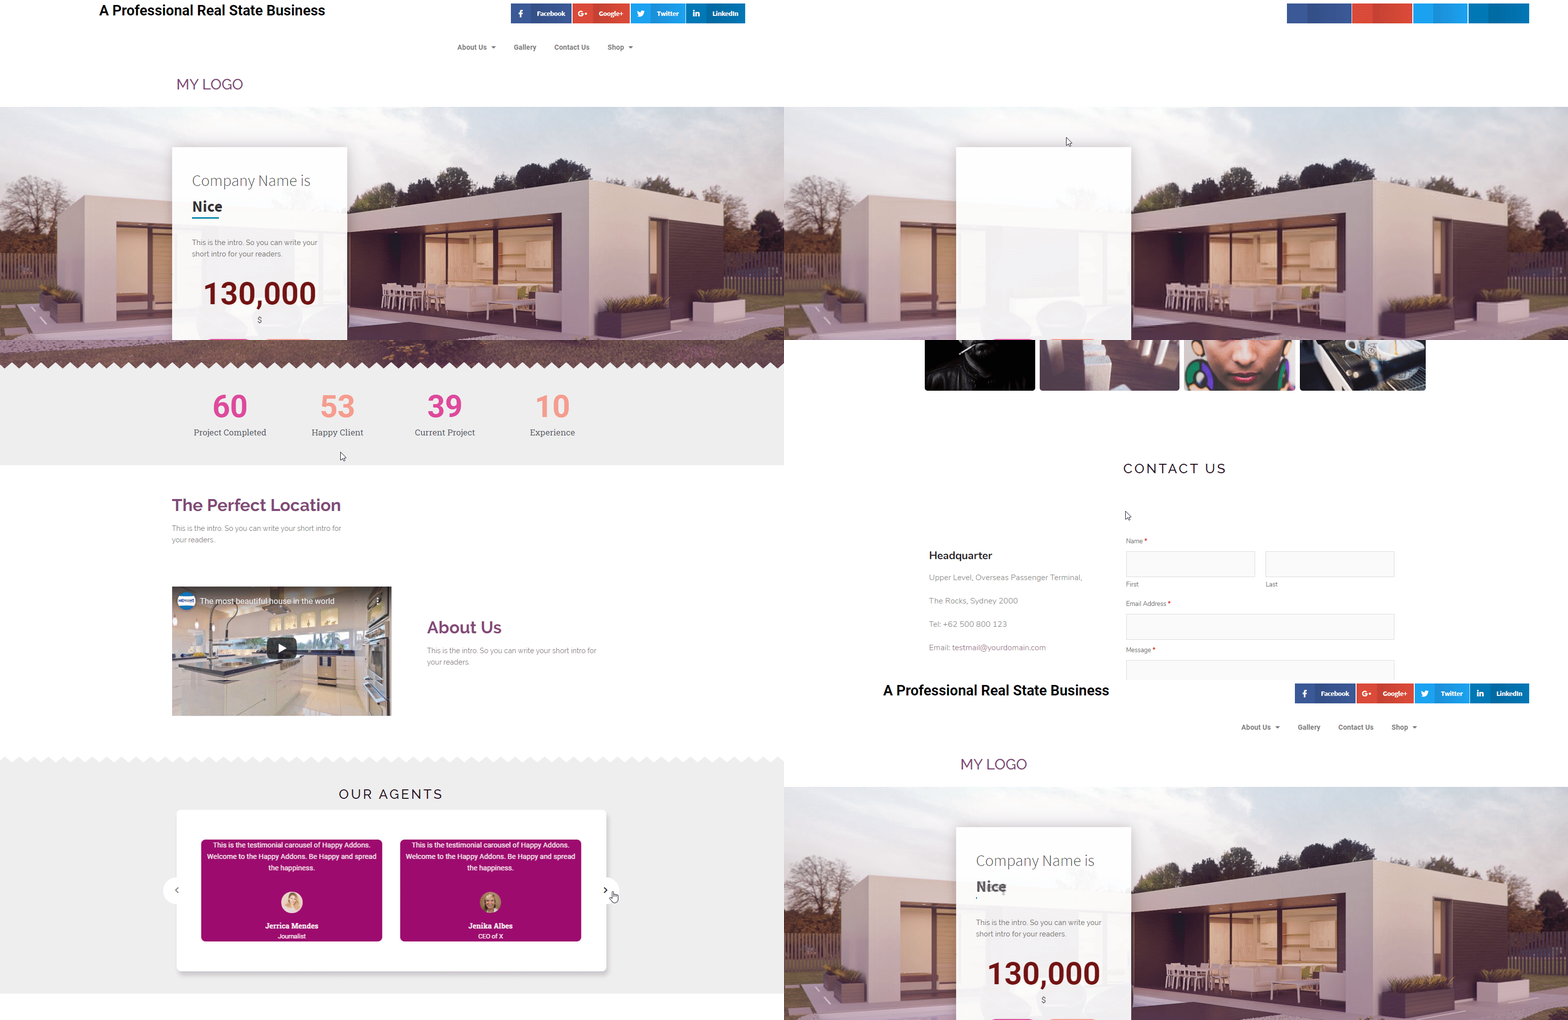
So after following all the steps, see the following screenshot
Live Preview
Also Read: How To Create a Website For Free: 5 Steps Tutorial for Beginners
Wrapping Up
This is how creating your own professional website is easier than you might think. In fact, the possibilities of Elementor accompanied by Happy Addons are endless.
Moreover, regular updates will keep your designs completely bug-free.
Finally, if you have already designed your websites with Elementor and Happy Addons, don’t hesitate to share the link below.





2 Responses