If you run a WordPress site, chances are you publish different types of blog posts. Some may be tutorials, others news updates, product reviews, or personal stories. But when everything is mixed together, it can be hard for your readers to find what they are looking for on the archive page.
That’s where categories come in. Categories in WordPress let you organize your blog posts into different sections. For example, a travel blog can have categories like ‘Asia,’ ‘Europe,’ and ‘Tips.’ An online store blog may use categories such as ‘Product Guides,’ ‘Customer Stories,’ and ‘Updates.’
By grouping your content, you make it easier for visitors to browse through your site and read only the posts that interest them. In this blog post, we’ll cover a detailed guide on how to display blog posts by categories in WordPress using the Elementor plugin.
Why Elementor?

Elementor is one of the most popular page builders for WordPress, with 10+ million active installations. Because it gives you full design freedom without writing a single line of code. With its drag-and-drop editor, you can easily create custom layouts and place your blog posts exactly where you want.
So, if you are a no-code user looking for the easiest solution to create complex web layouts, Elementor should be at the top of your list. Another big reason to use Elementor is its wide range of widgets and flexibility. You can use widgets like Post Grid, Post List, or Archive Posts to display blog posts by categories in different styles.
This flexibility means you can highlight specific categories on your homepage, create category-based landing pages, or design a fully custom blog archive, all without touching code. This is why we’ll use the Elementor plugin to explain the process in this tutorial.
How to Display Blog Posts by Categories in WordPress: Step-by-Step Guide
People usually display blog posts by categories on the archive page. There are multiple ways you can do this. But for this, you need the following plugins on your site:
Once these plugins are ready on your site, let’s explore the process below.
Method One: Creating Category Menus
We’ll need the following widgets for this method. With the Posts widget, we will create the post grid. After that, with the Nav Menu, we’ll create the category menu. This will enable users to explore posts by switching categories.
- Posts
- WordPress Menu
Step 01: Open an Archive Page from the Theme Builder
As mentioned earlier, people typically enjoy displaying their blog posts by category on the archive page. And you need the theme builder to create the archive page.
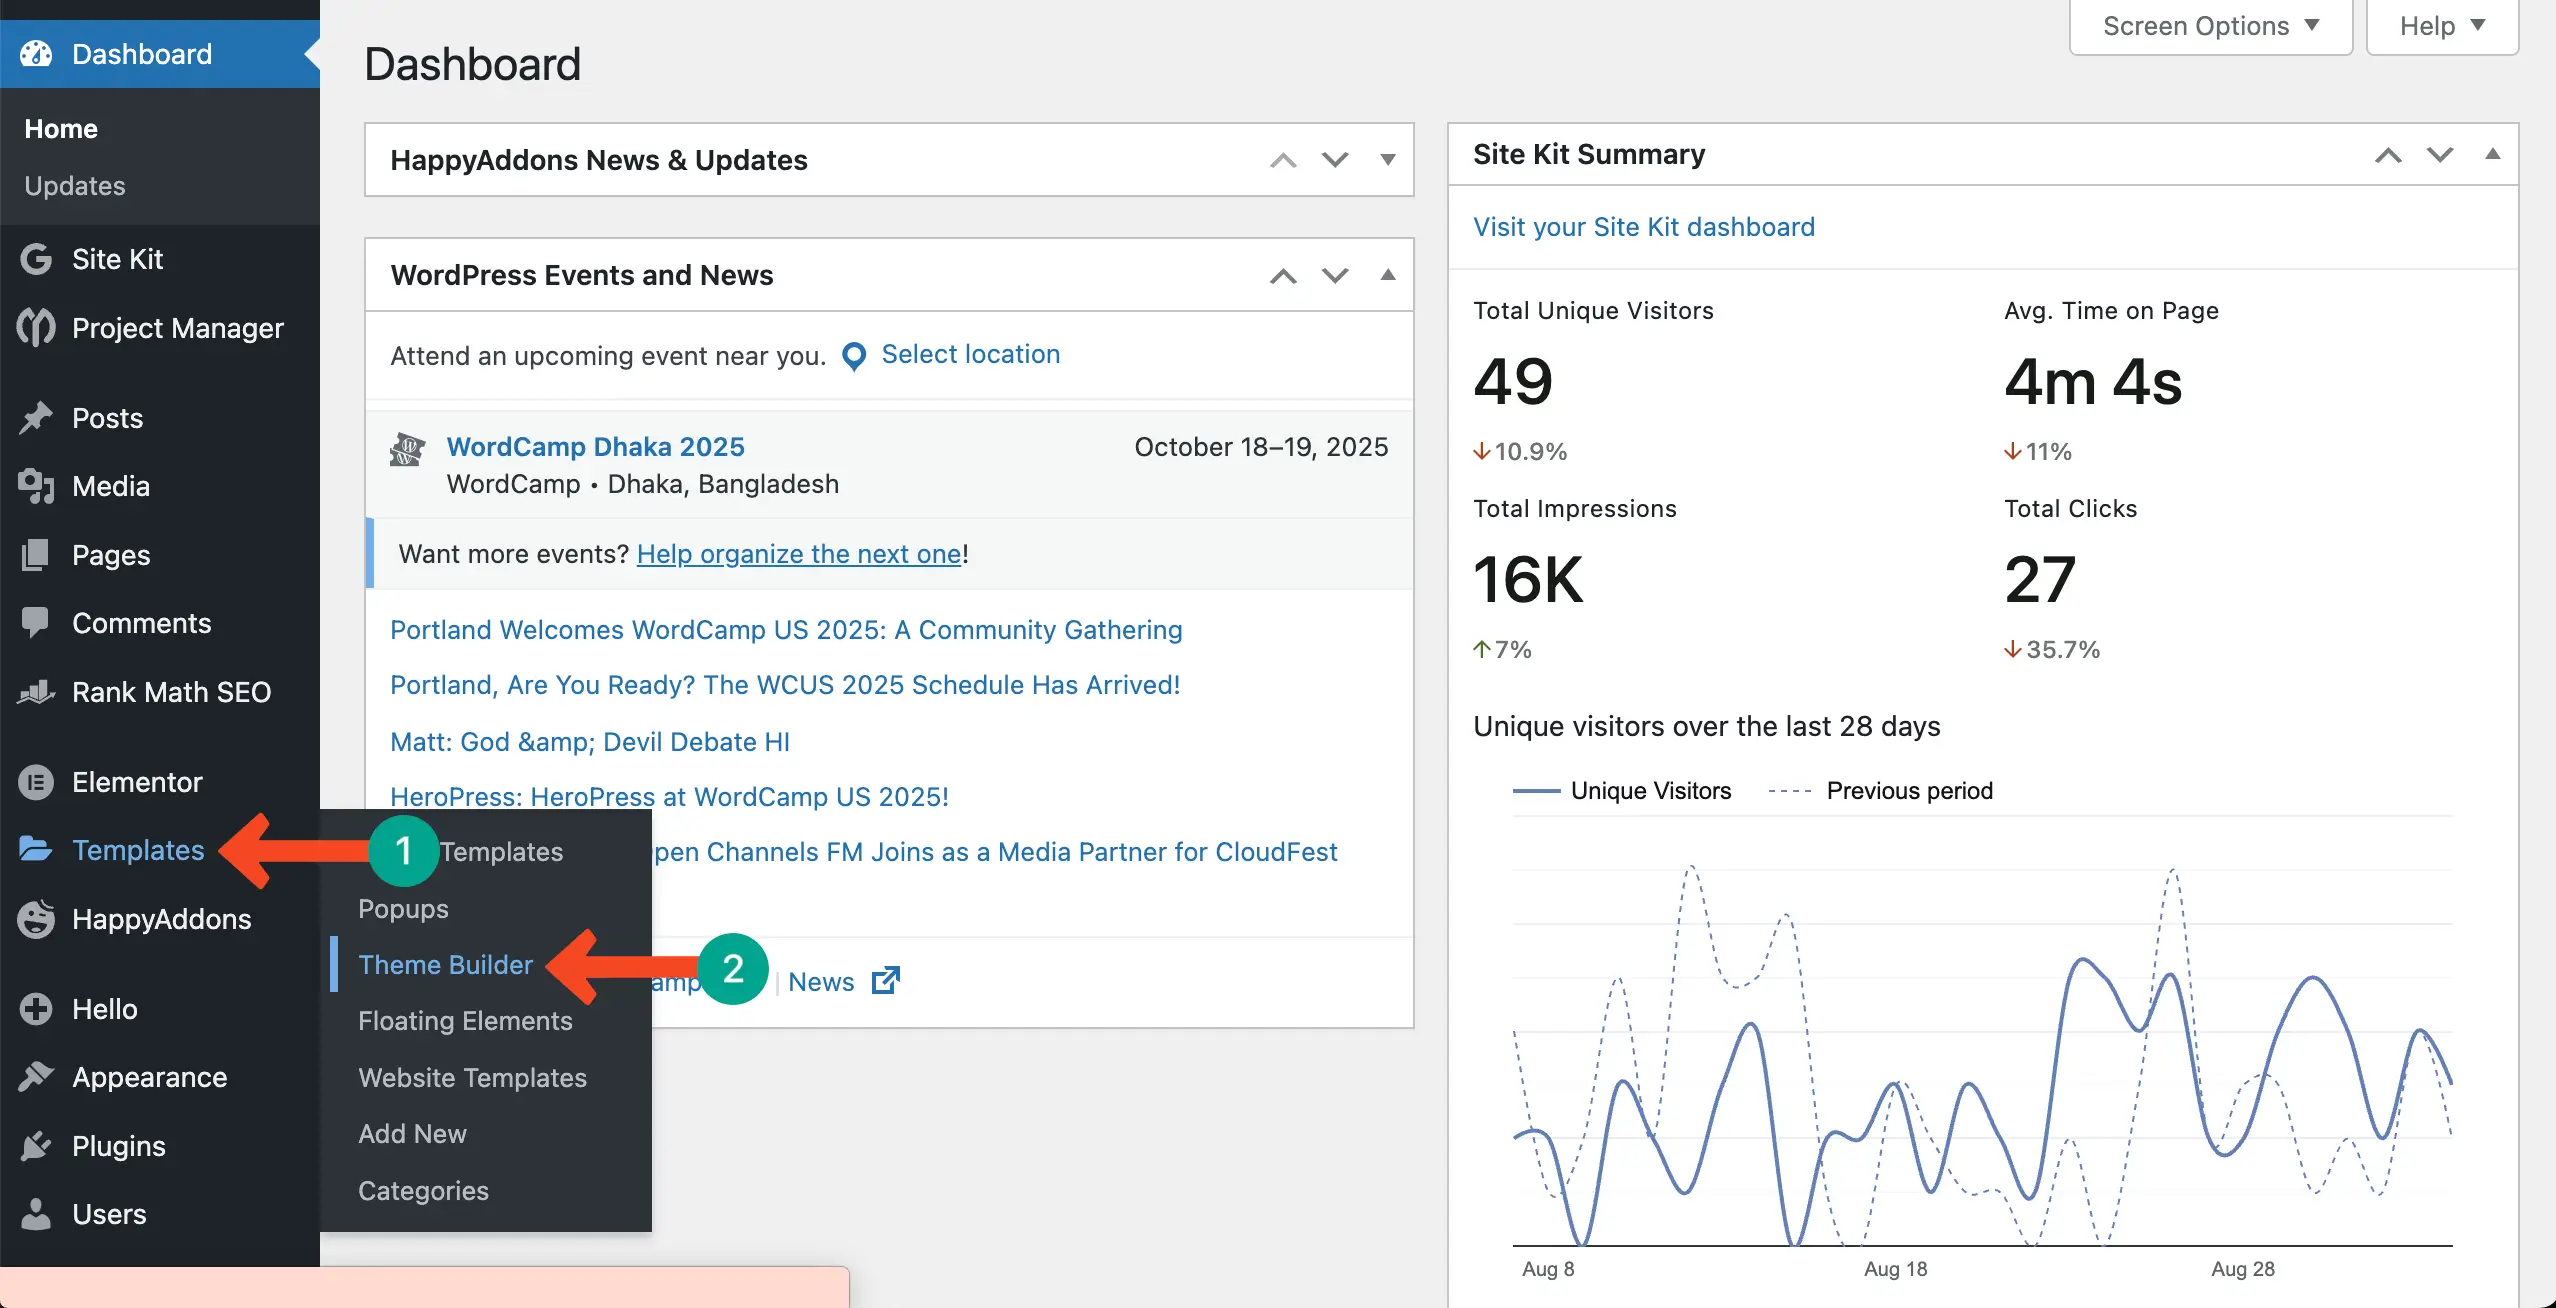
Hope you already know how to open the theme builder. Navigate to Templates > Theme Builder.
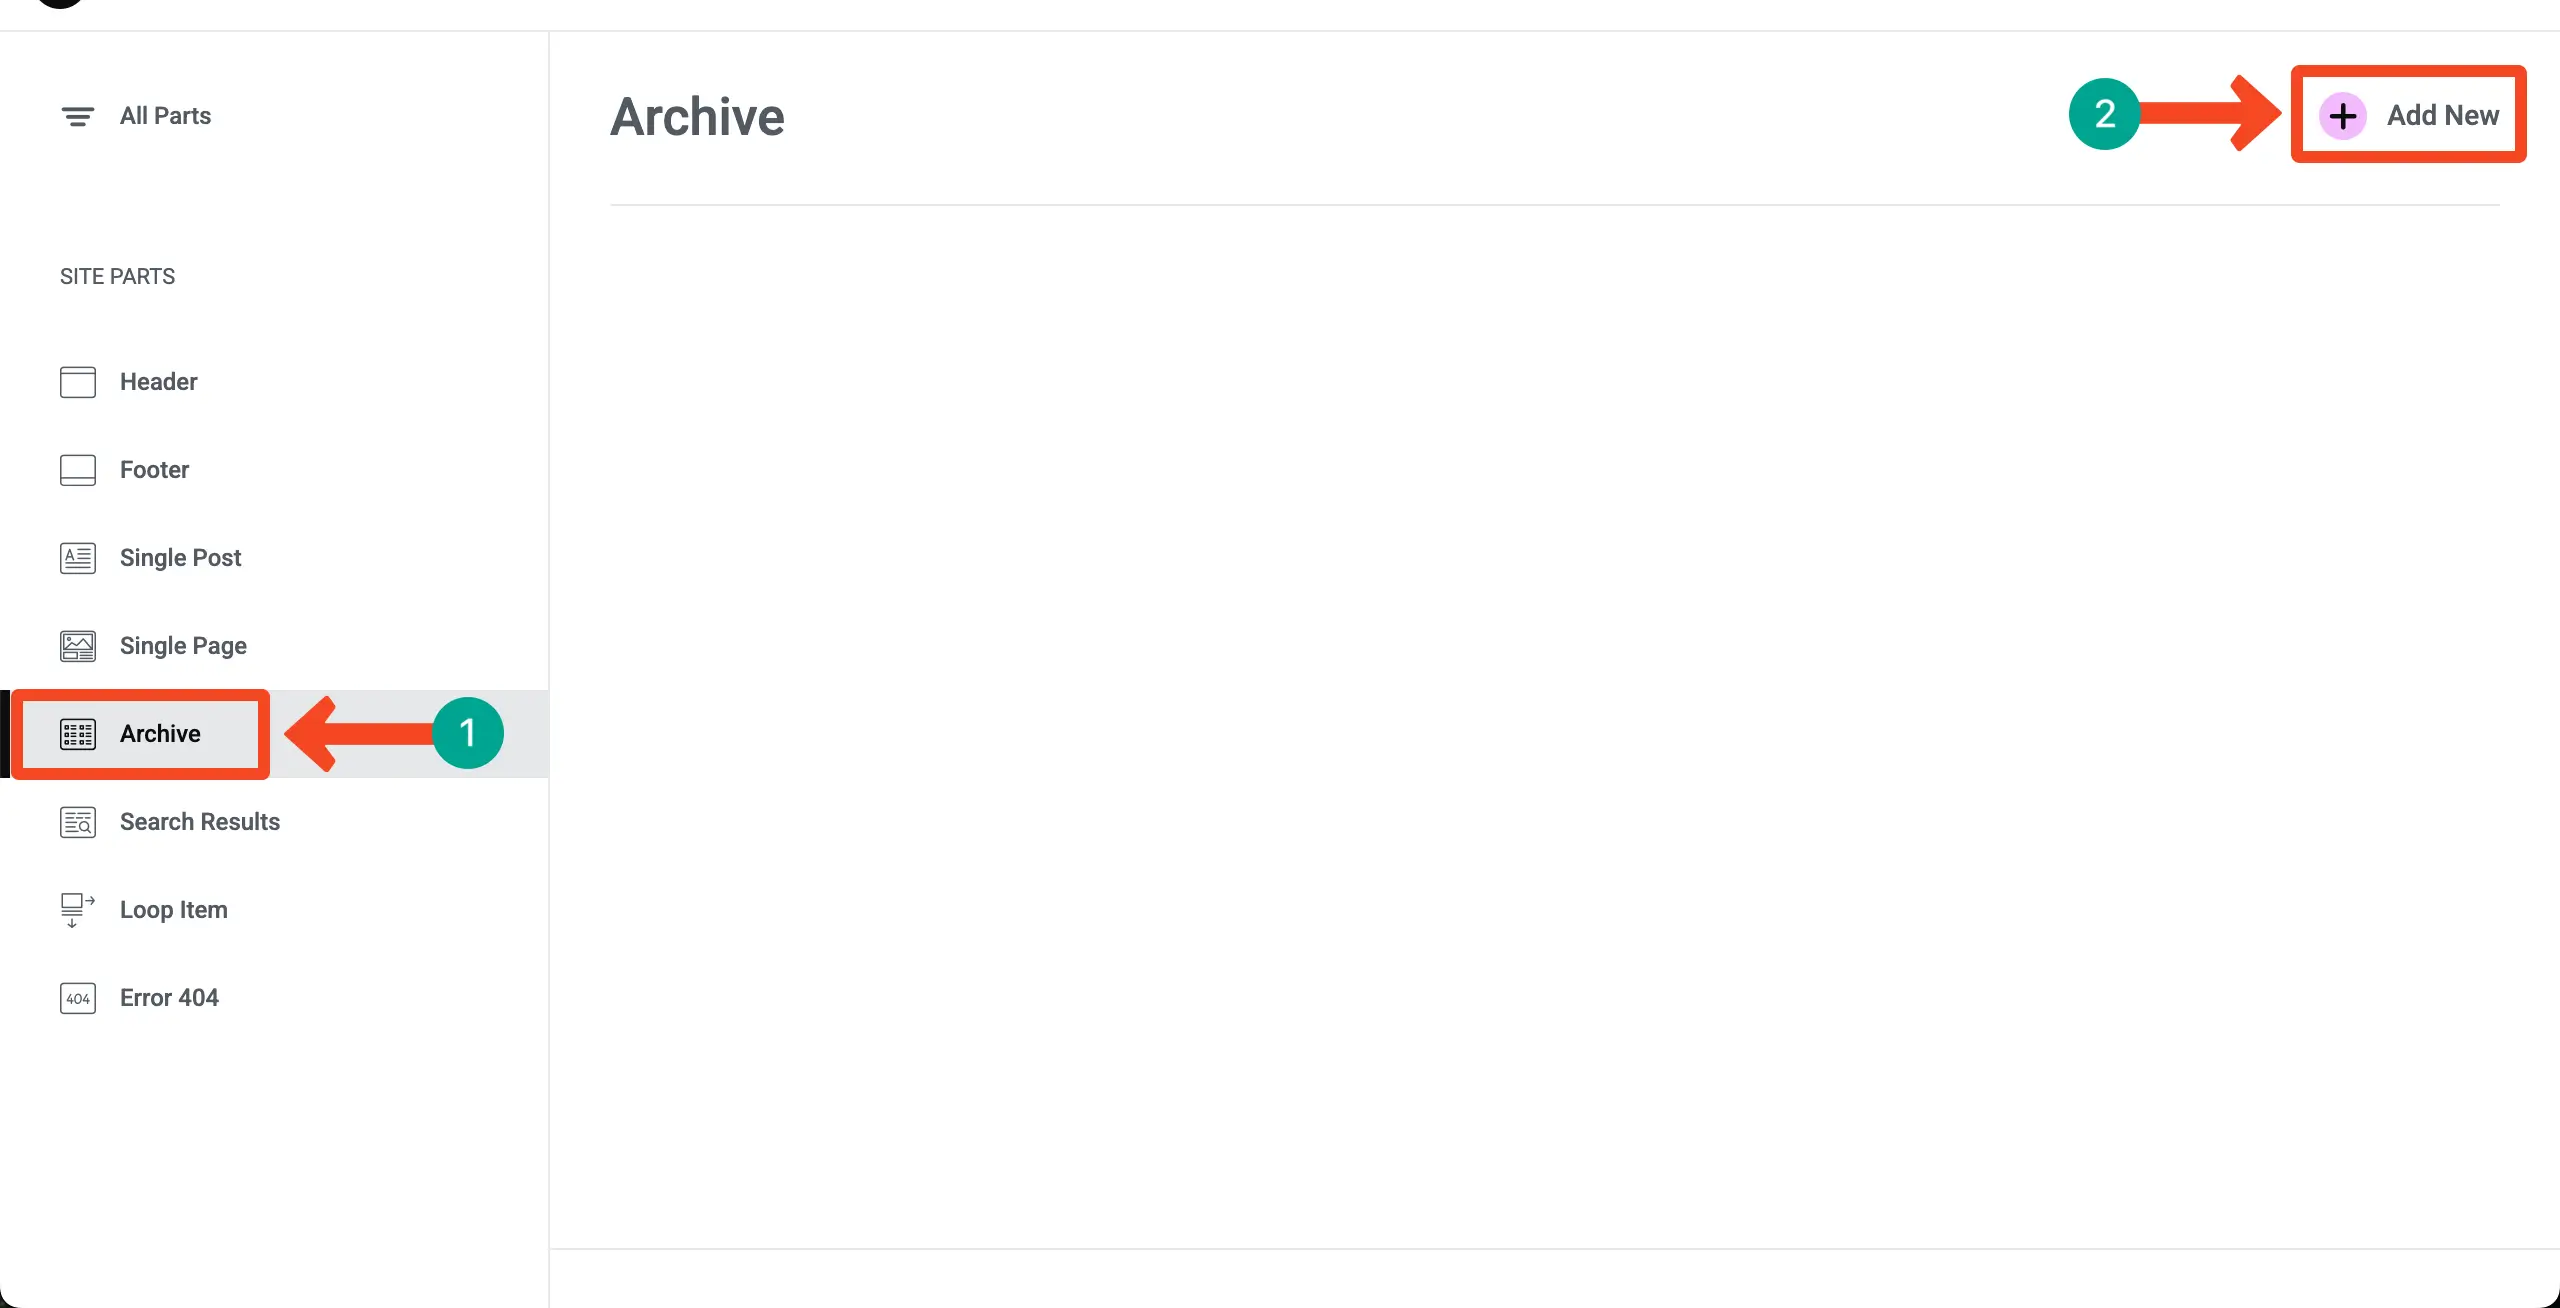
Come to the Archive option. Click the + Add New button to create an archive page.
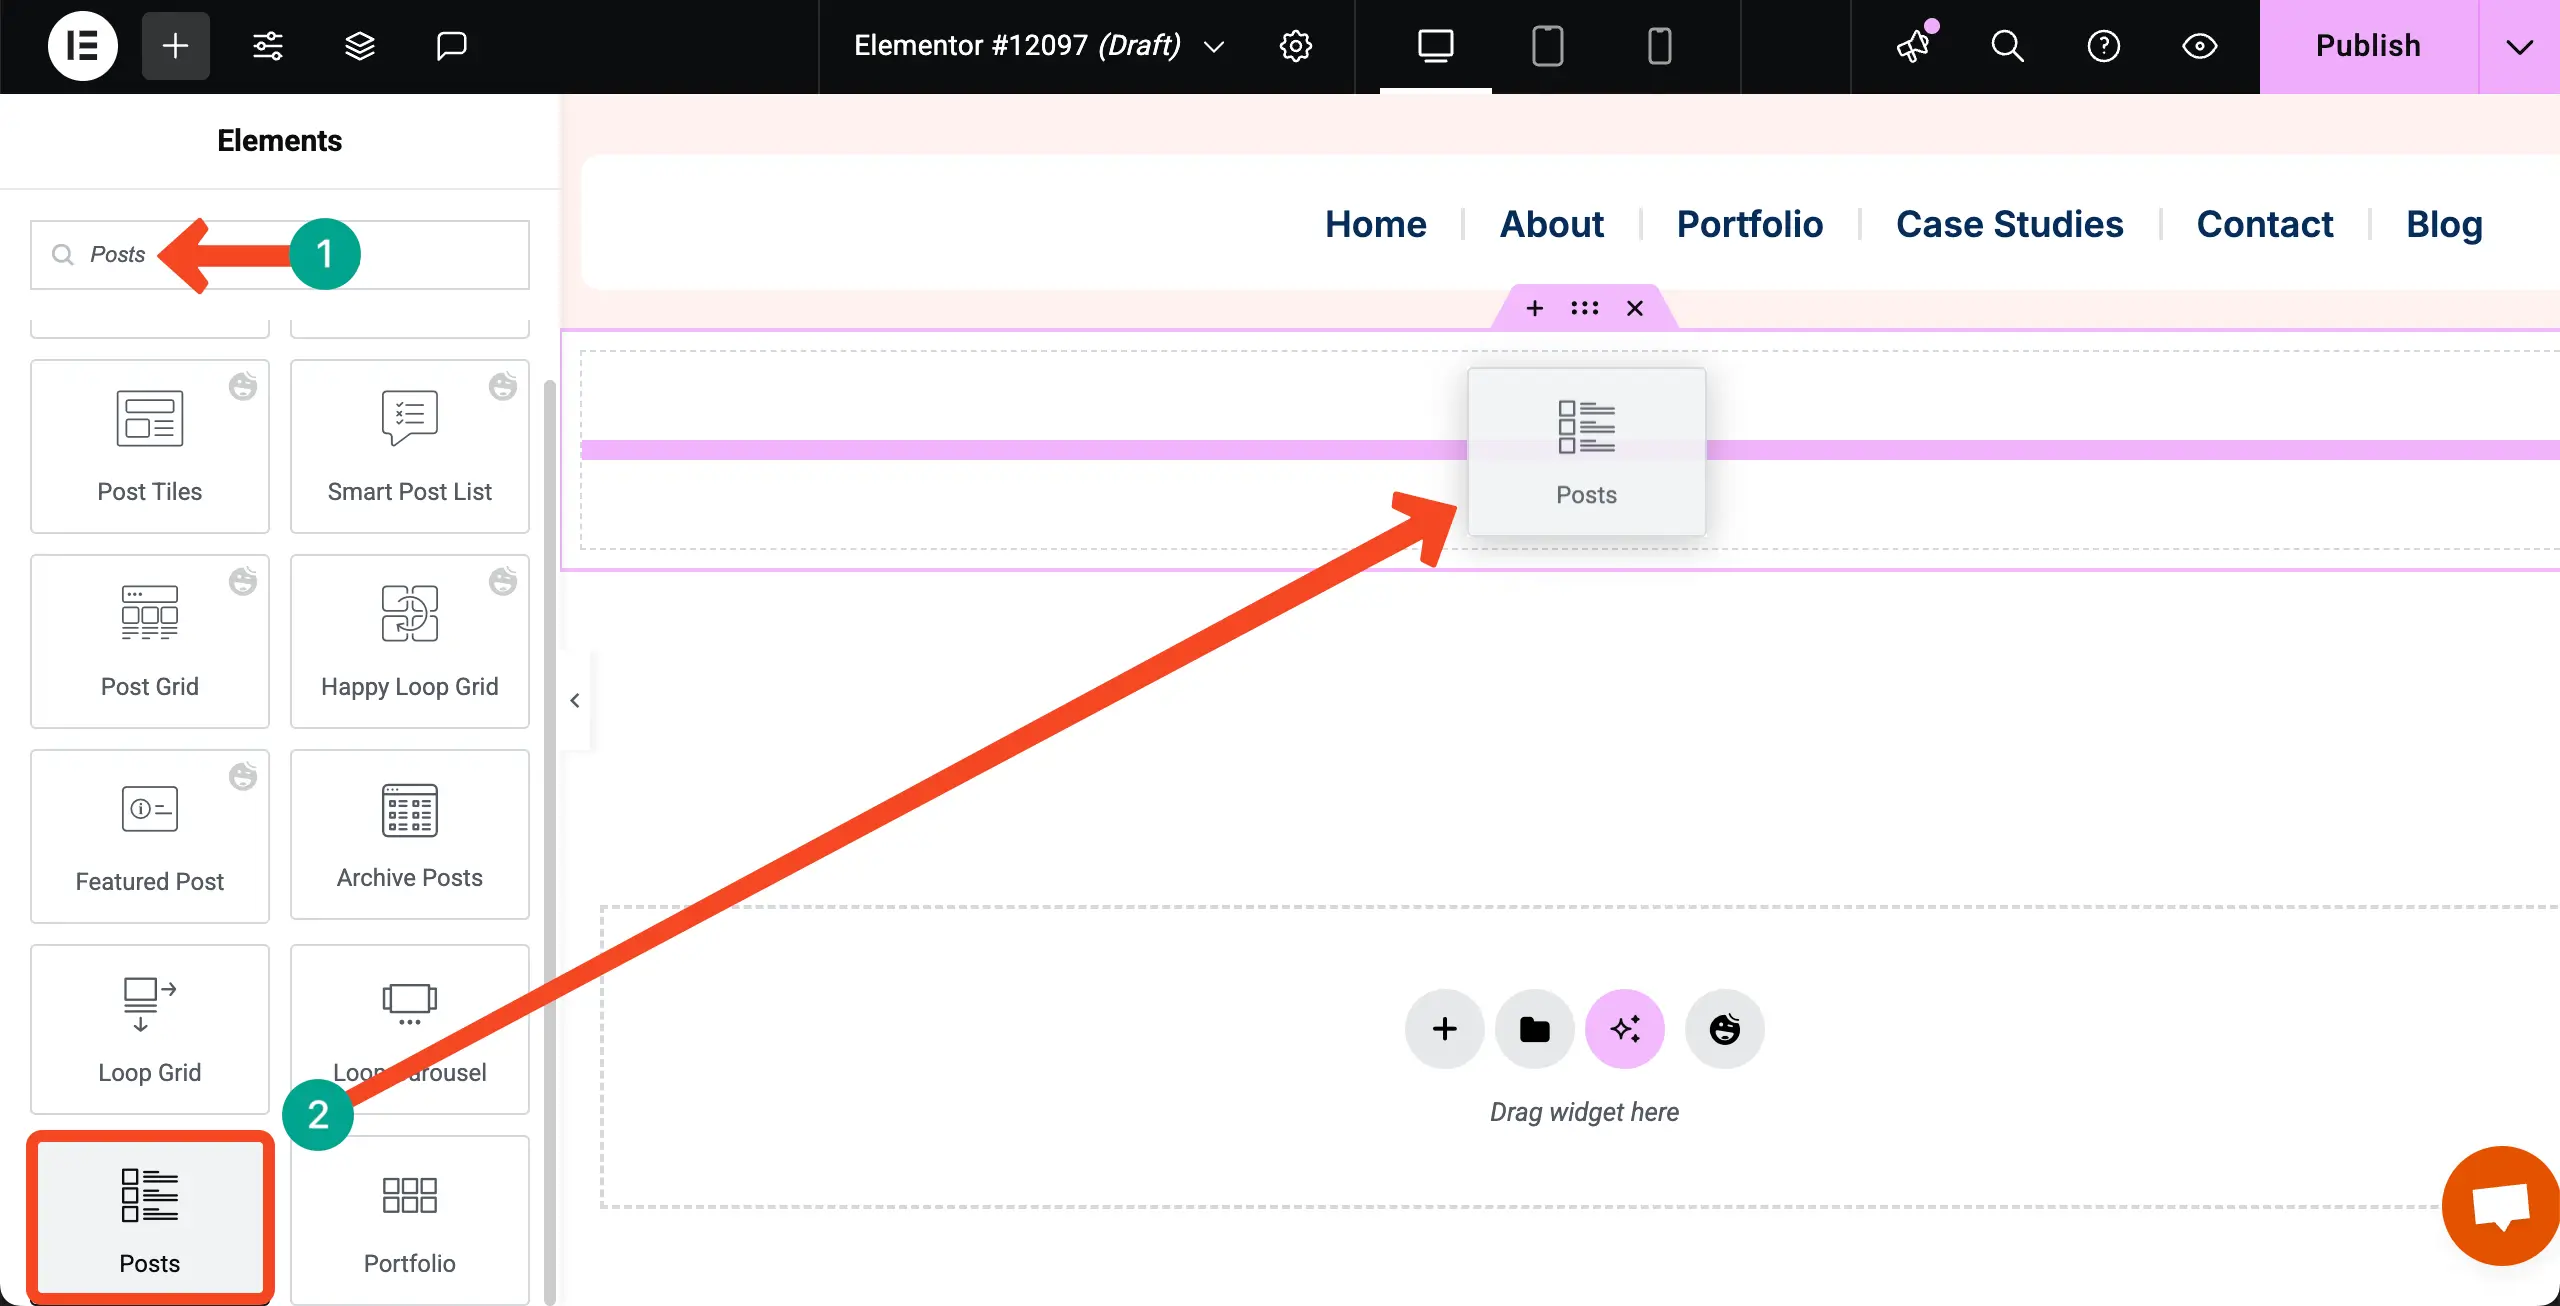
Step 02: Drag and Drop the Posts Widget to Your Container
Find the Posts widget. Drag and drop it on your desired container on the Elementor canvas.
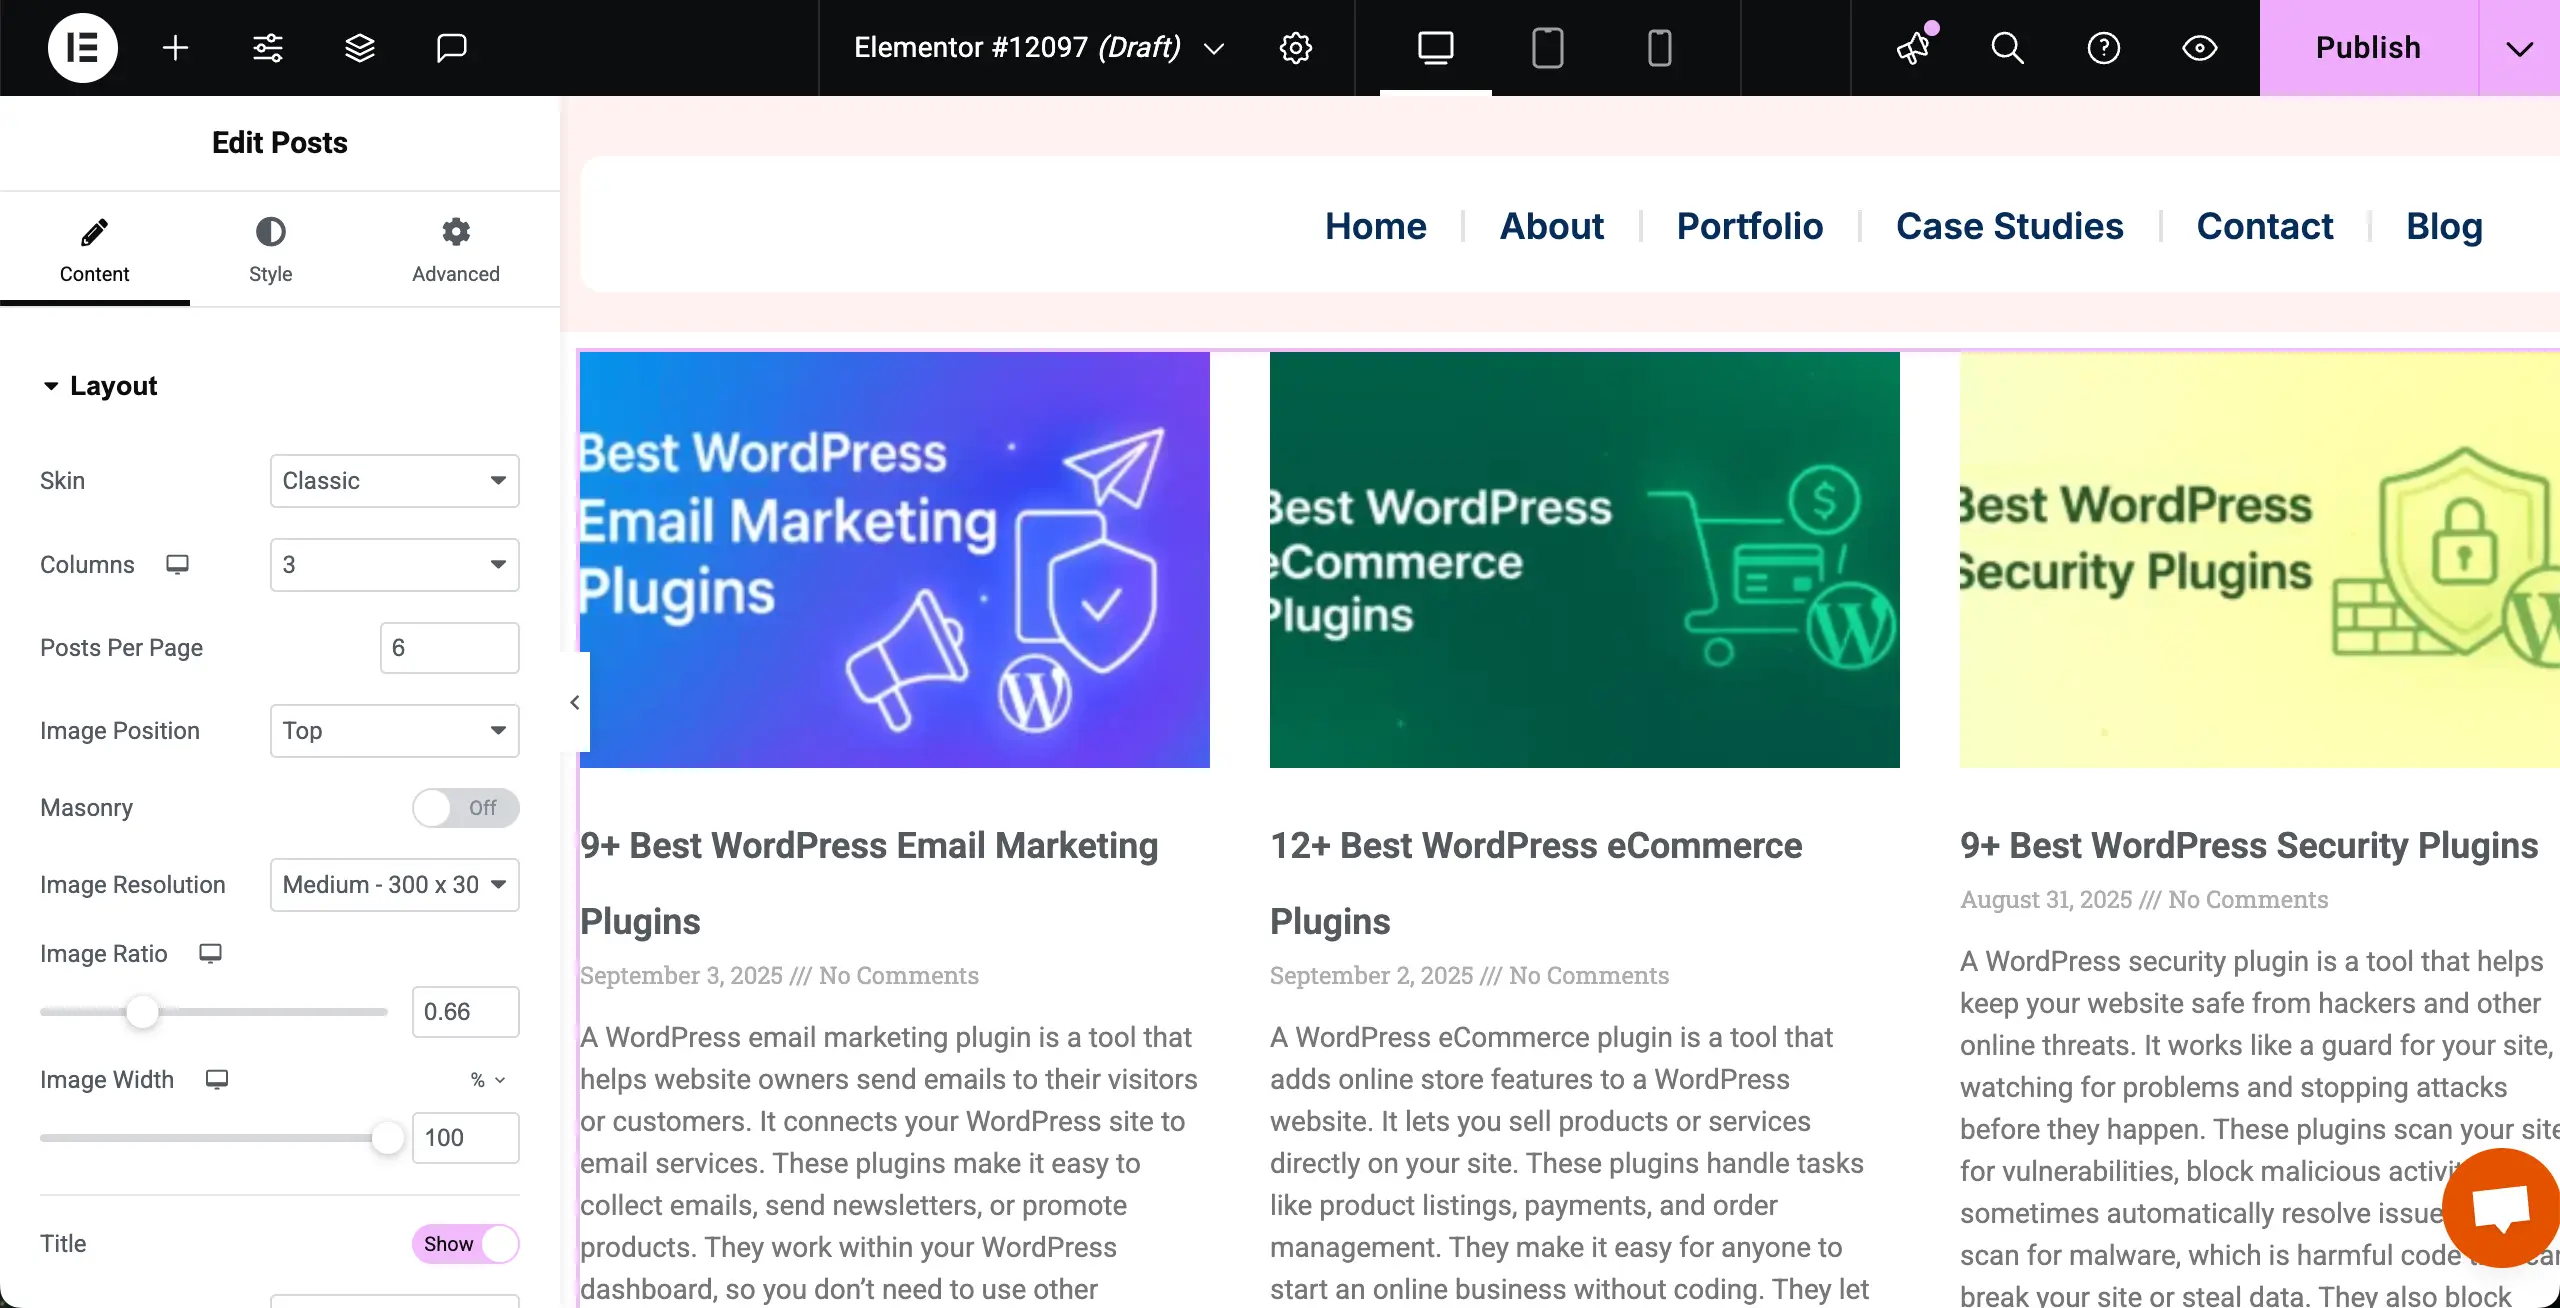
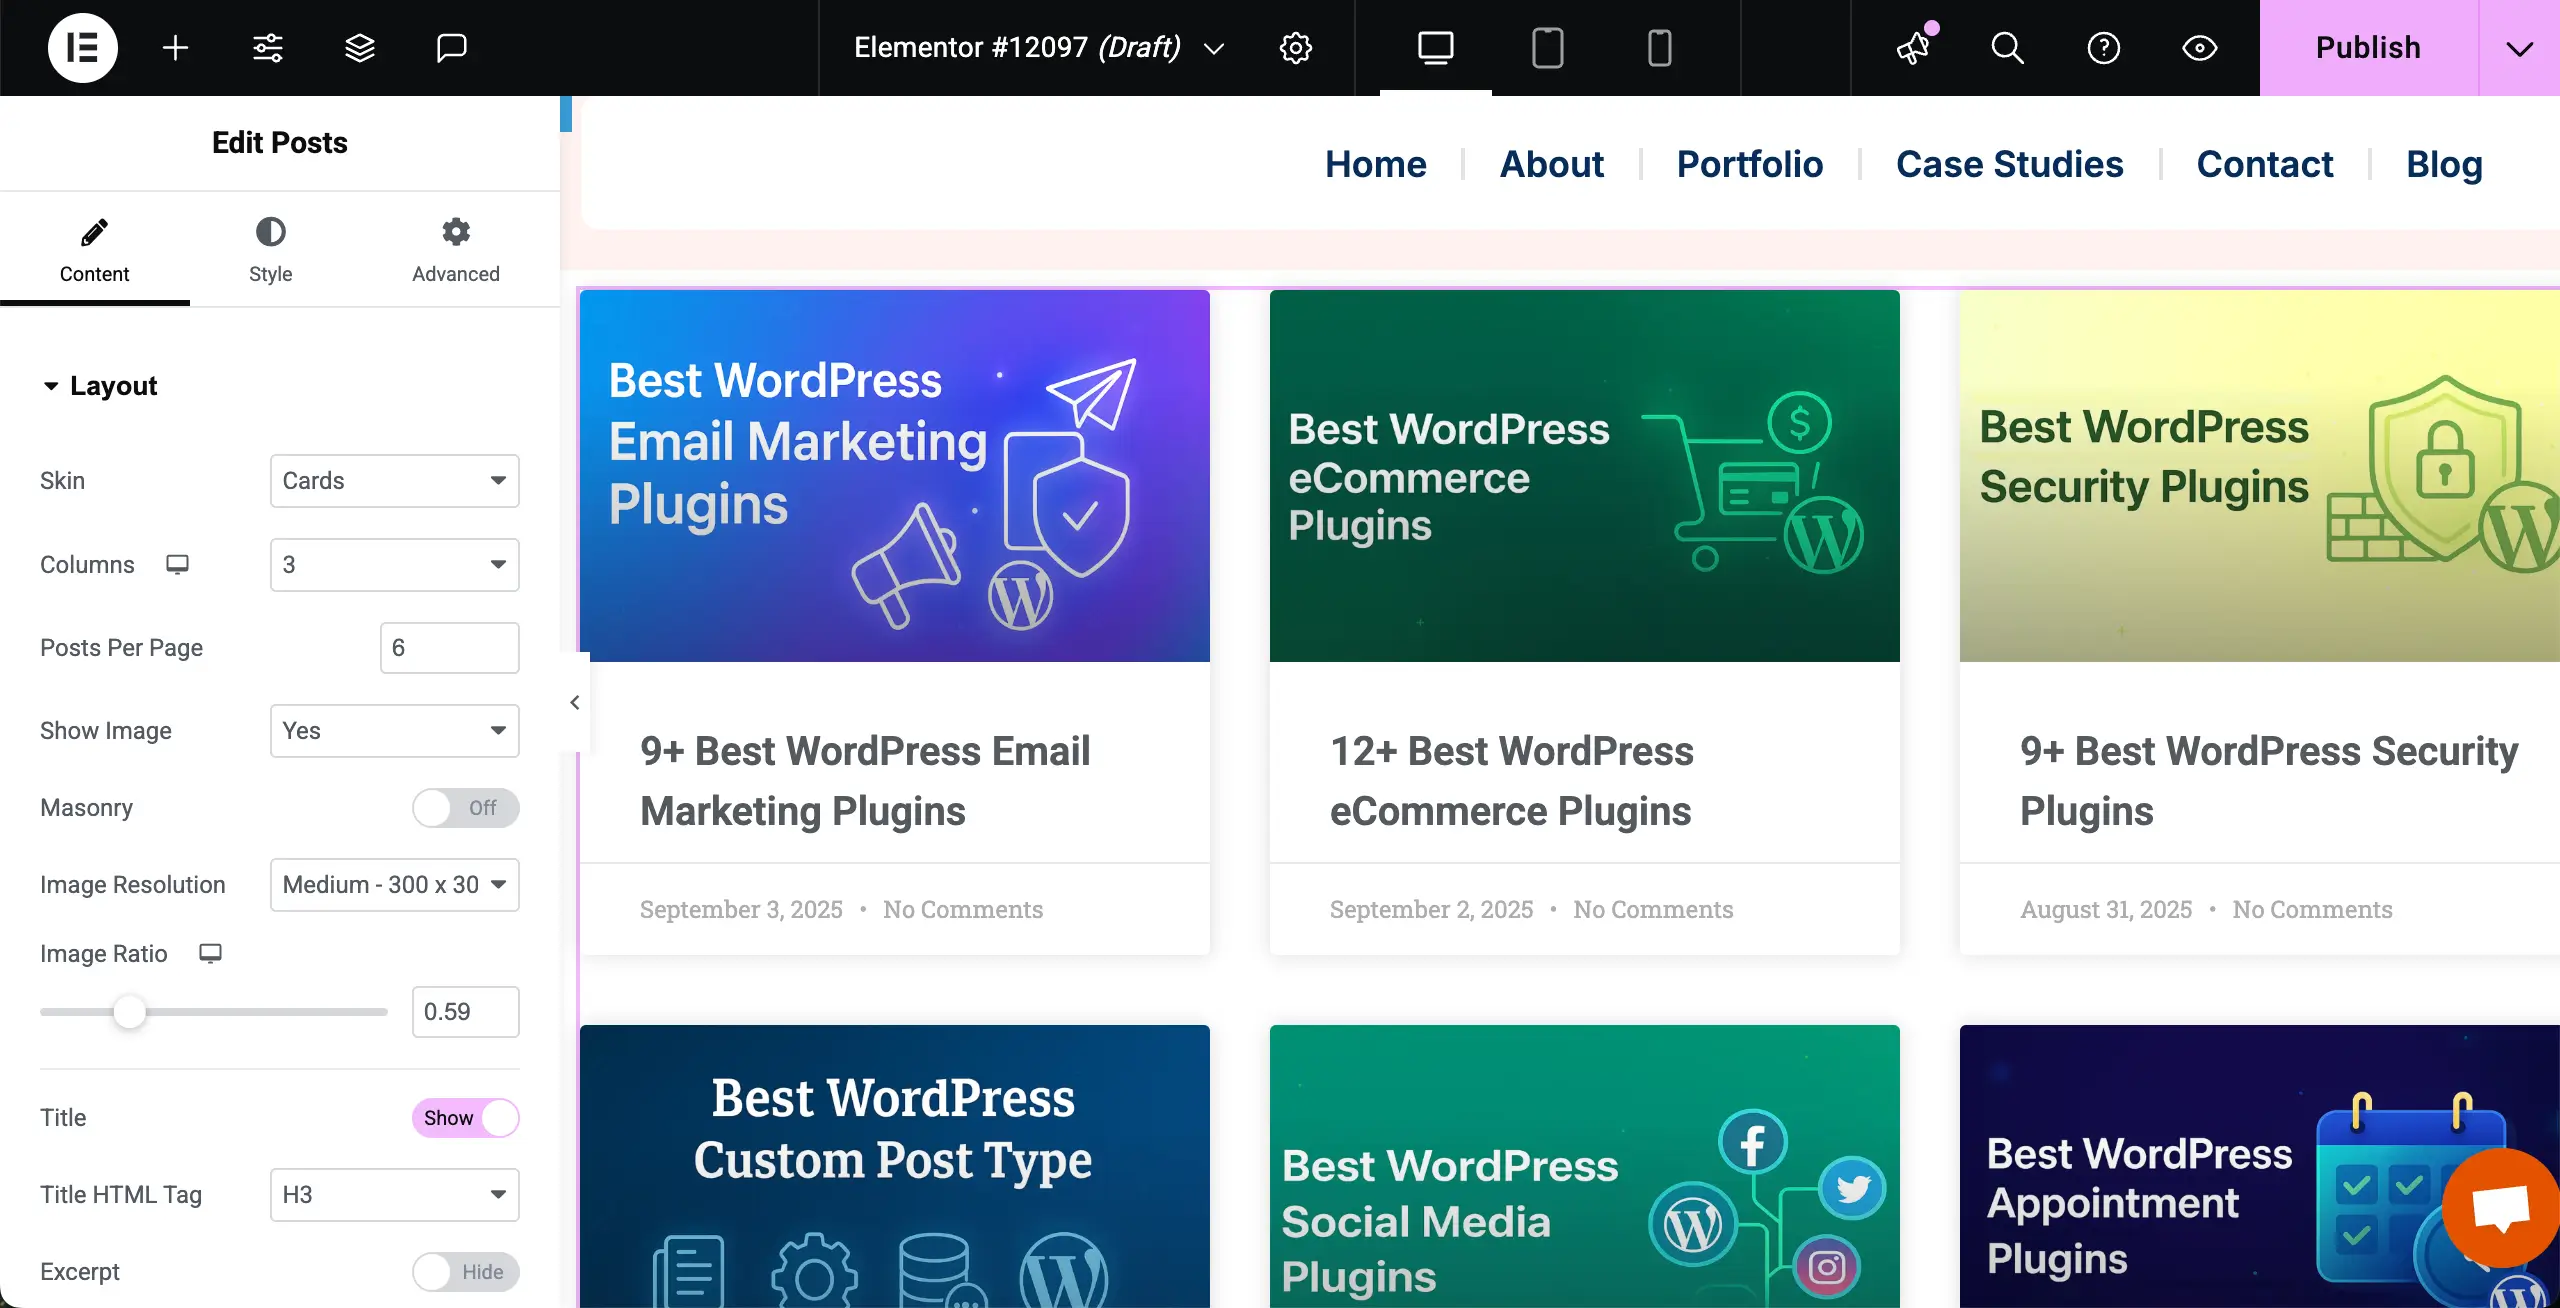
Once the Posts widget is added, the blog posts will be displayed with default layouts.
Step 03: Stylize the Posts Widget
Now, customize and stylize the Posts layout so it looks good as you want. We have changed its skin, typography, spacing, and many other options.
Step 04: Create a Category Menu
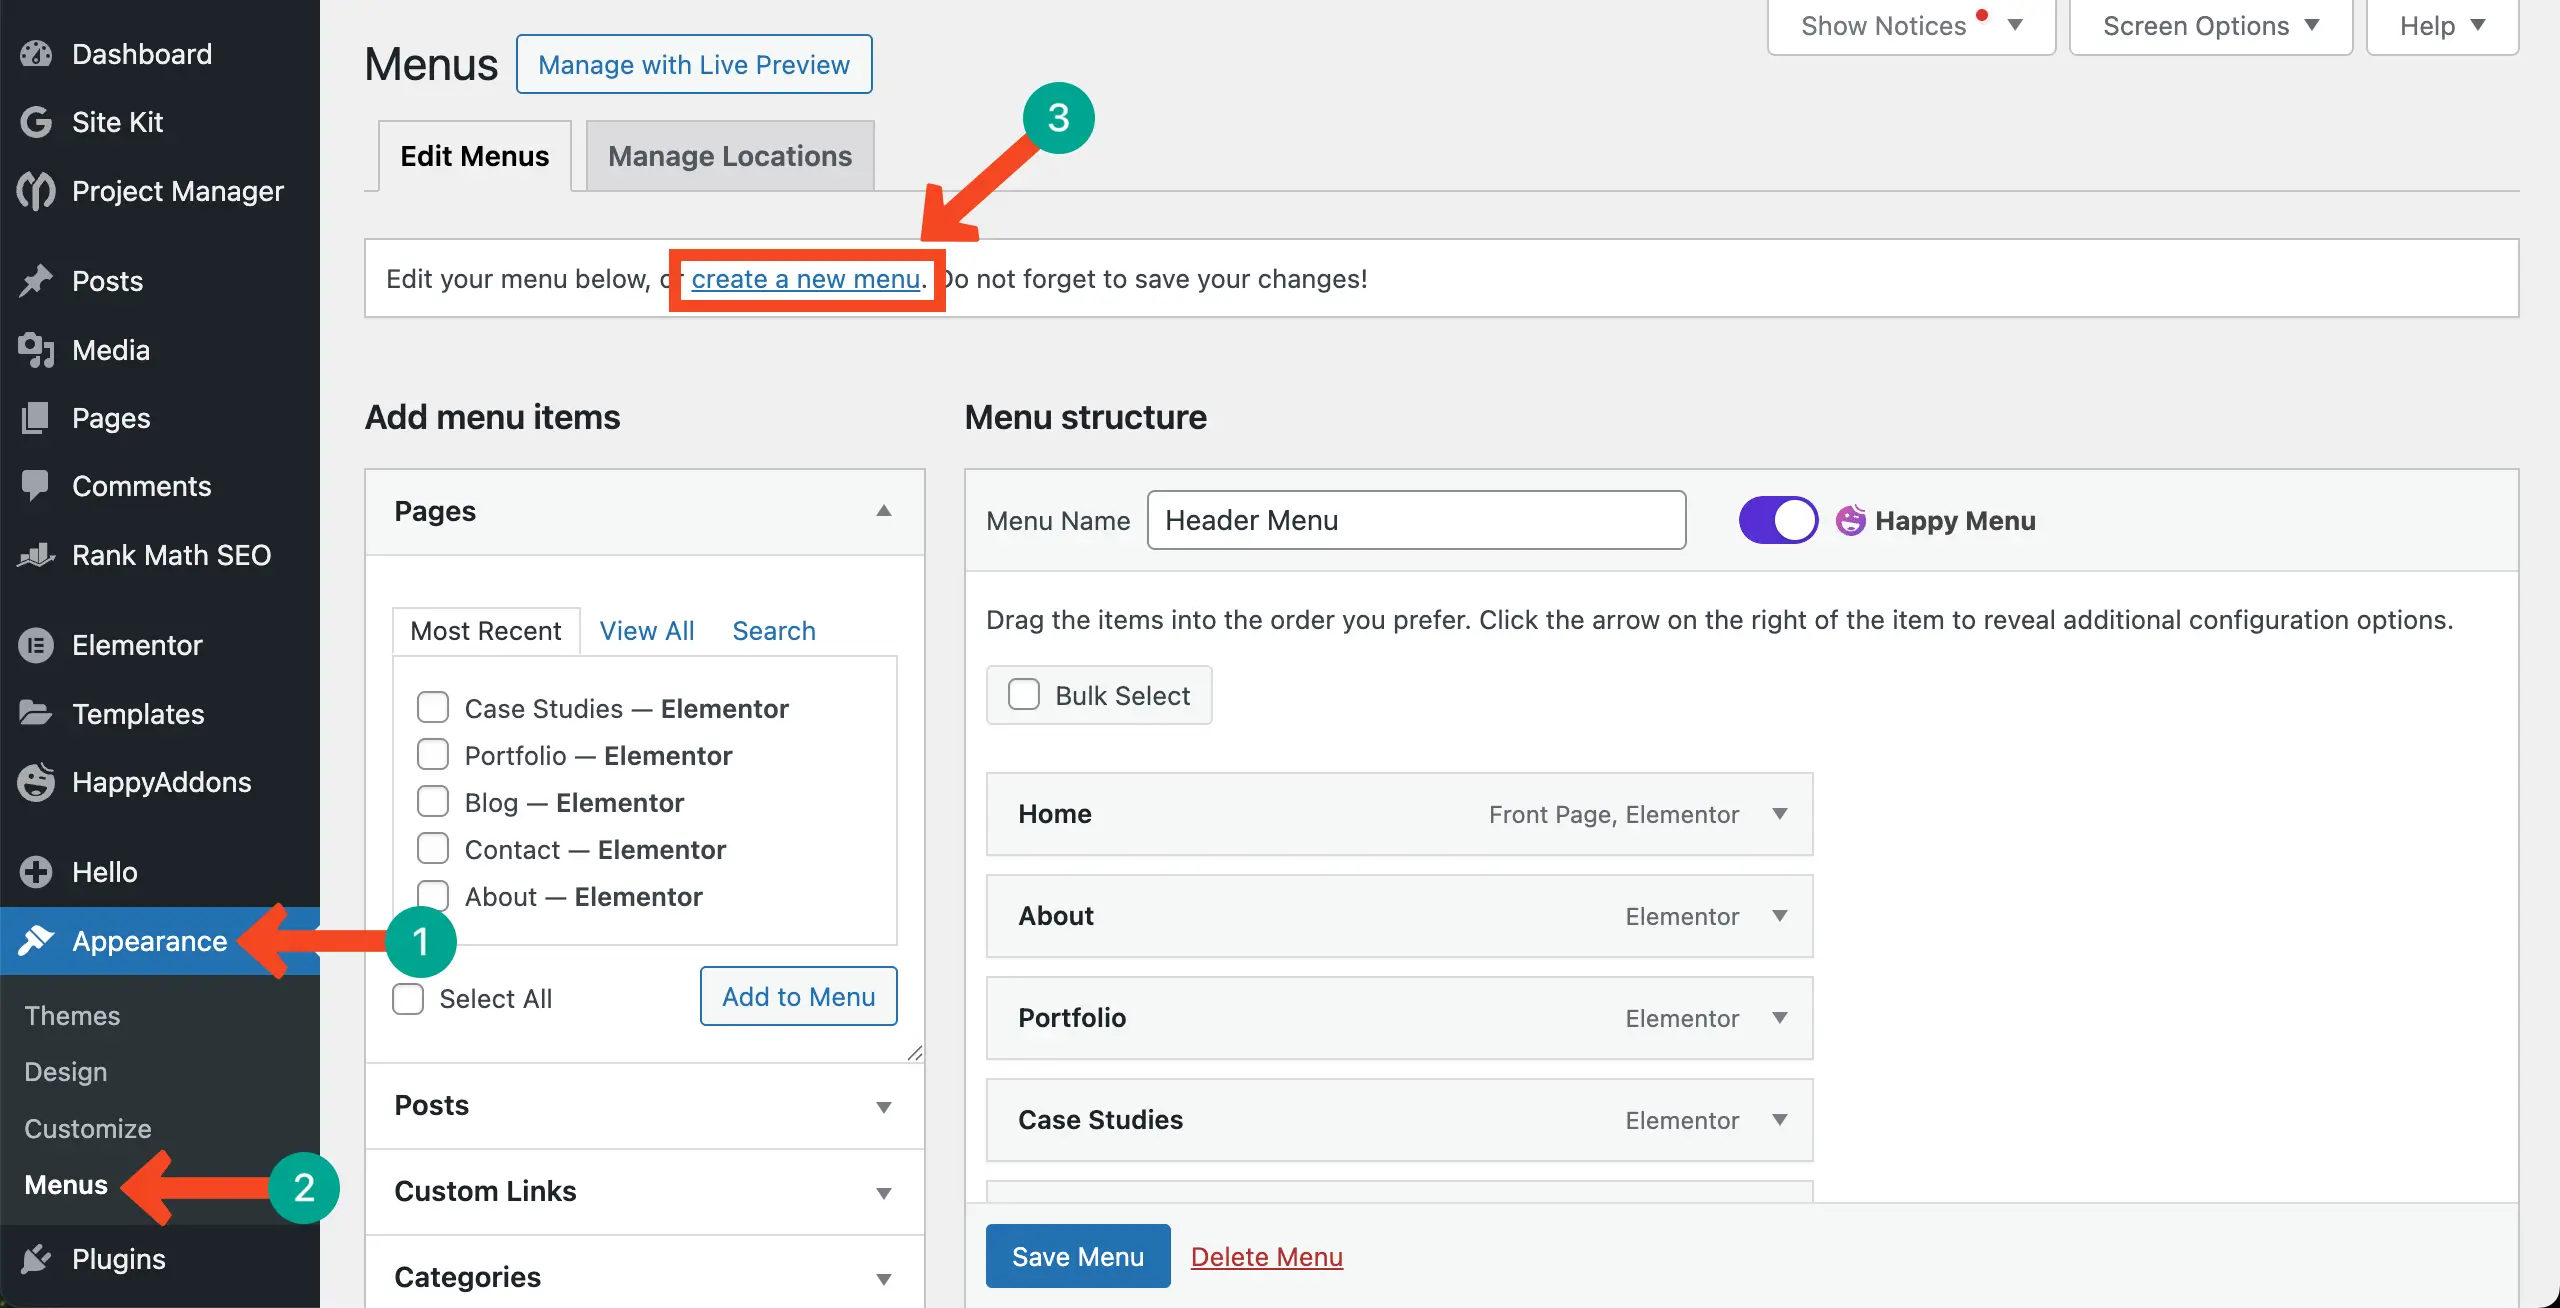
Go to your WordPress dashboard. Navigate to Appearance > Menus. No worries if you already have a menu there.
In this case, you have to create a new menu. Click the create a new menu option.
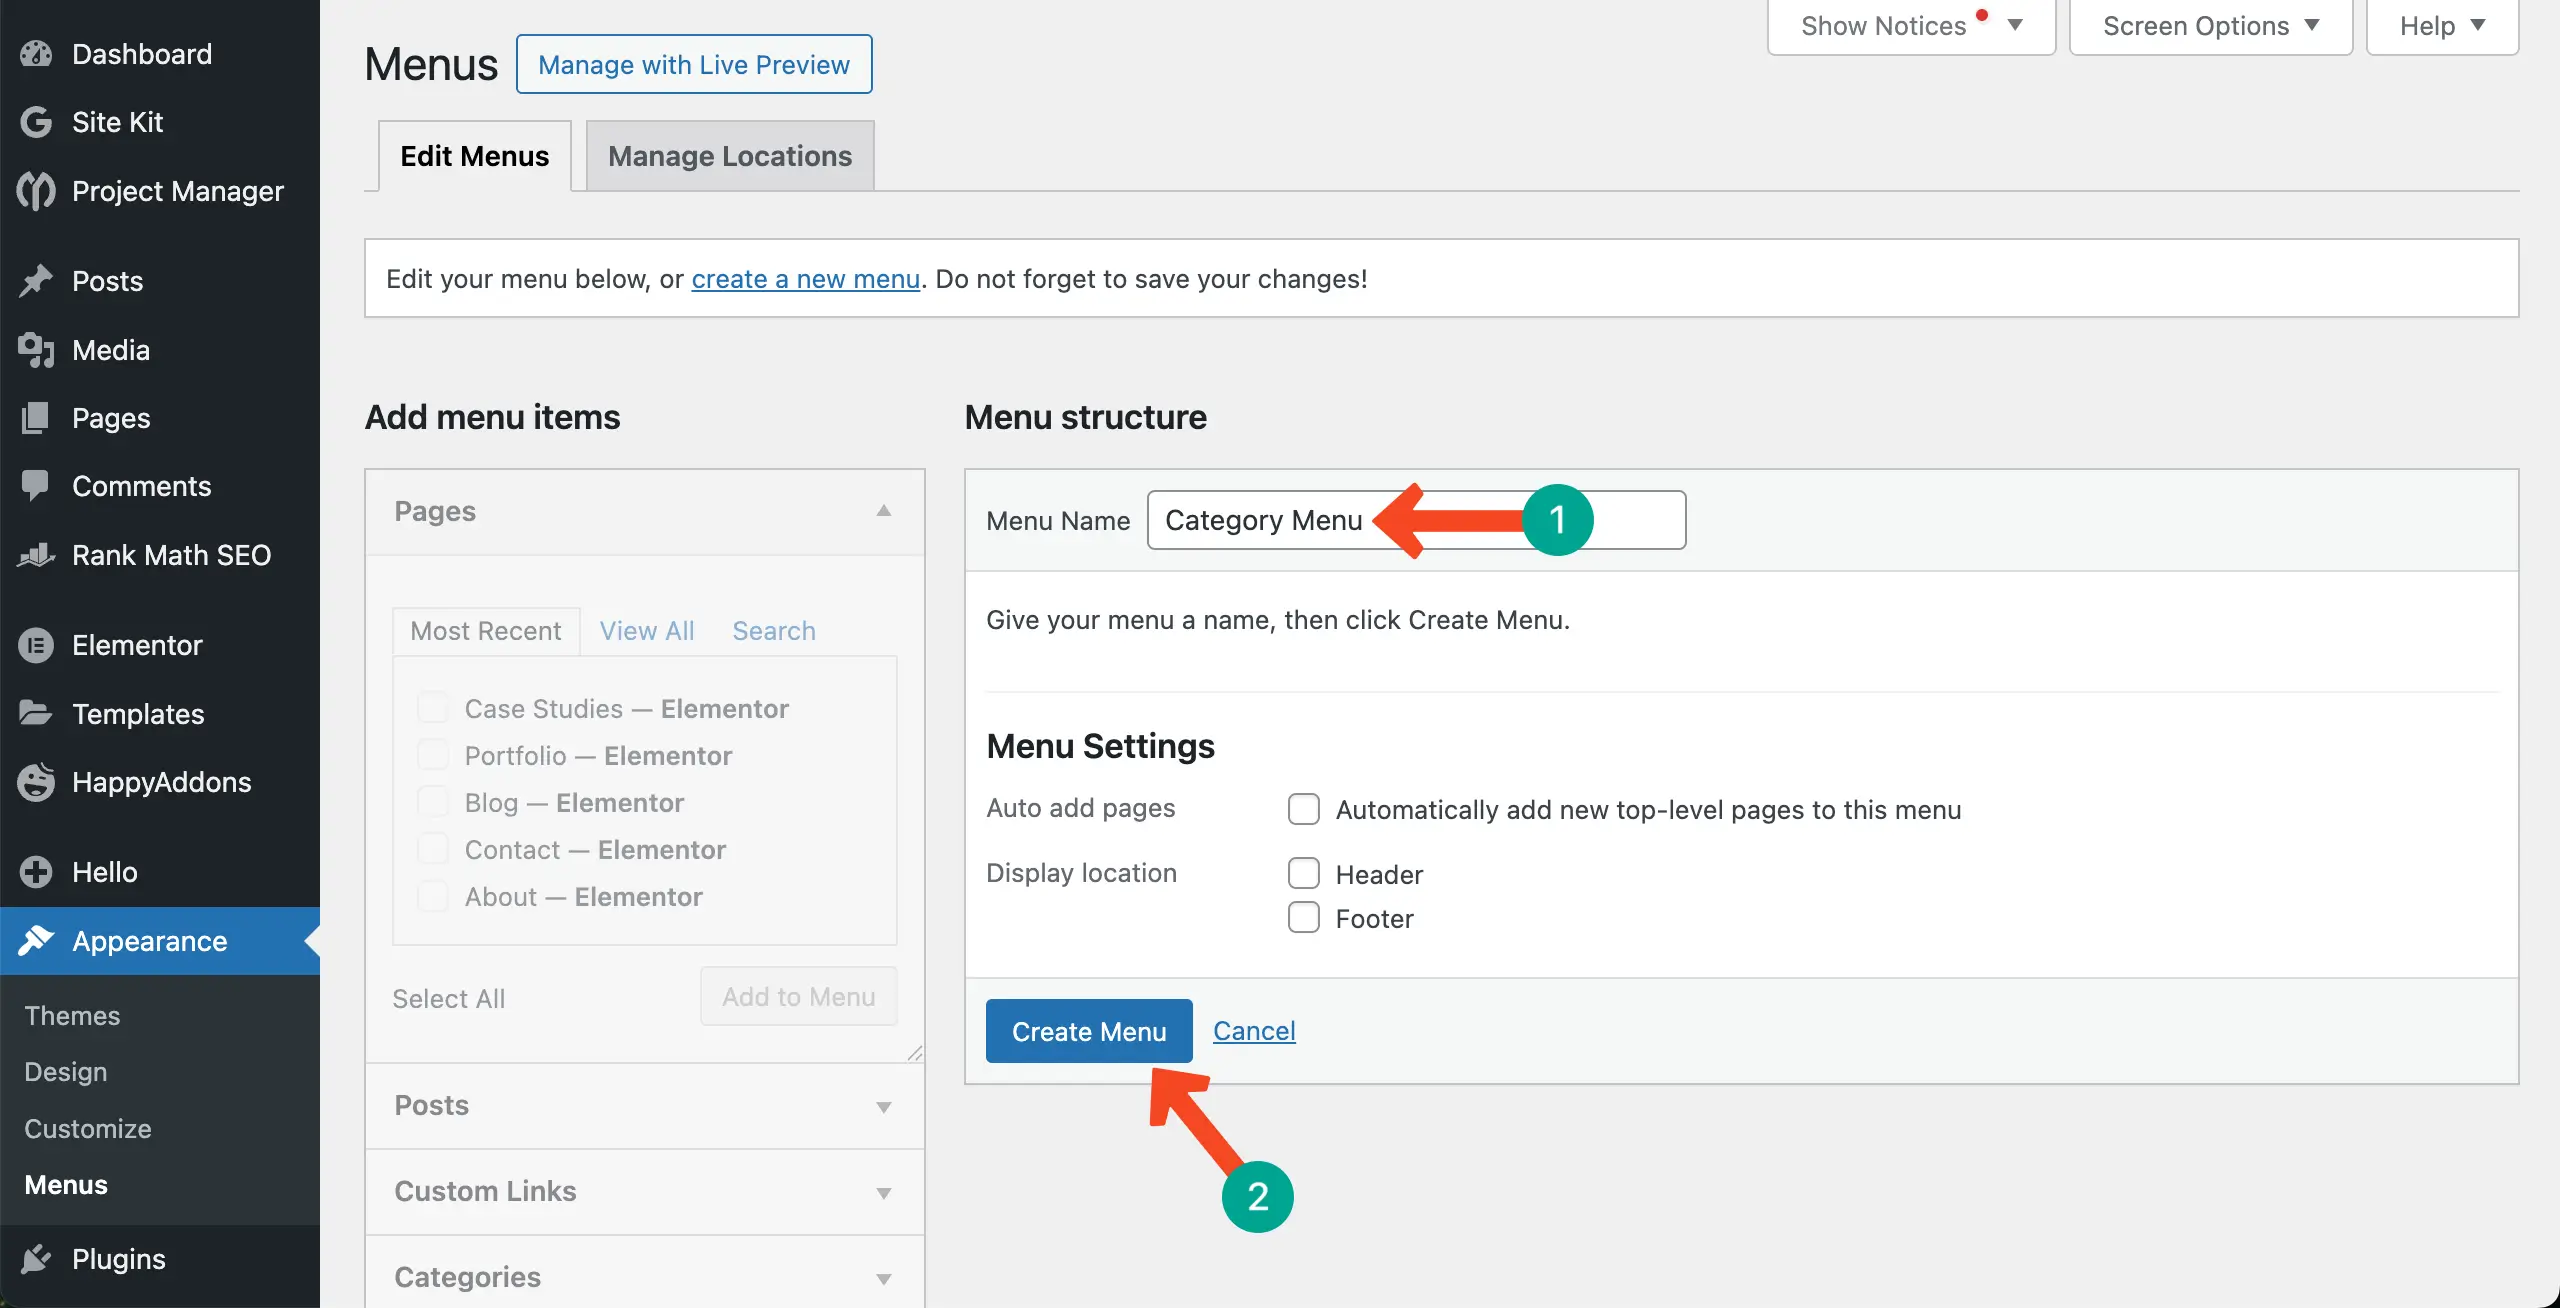
Write a name for the menu. Then, hit the Create Menu button.
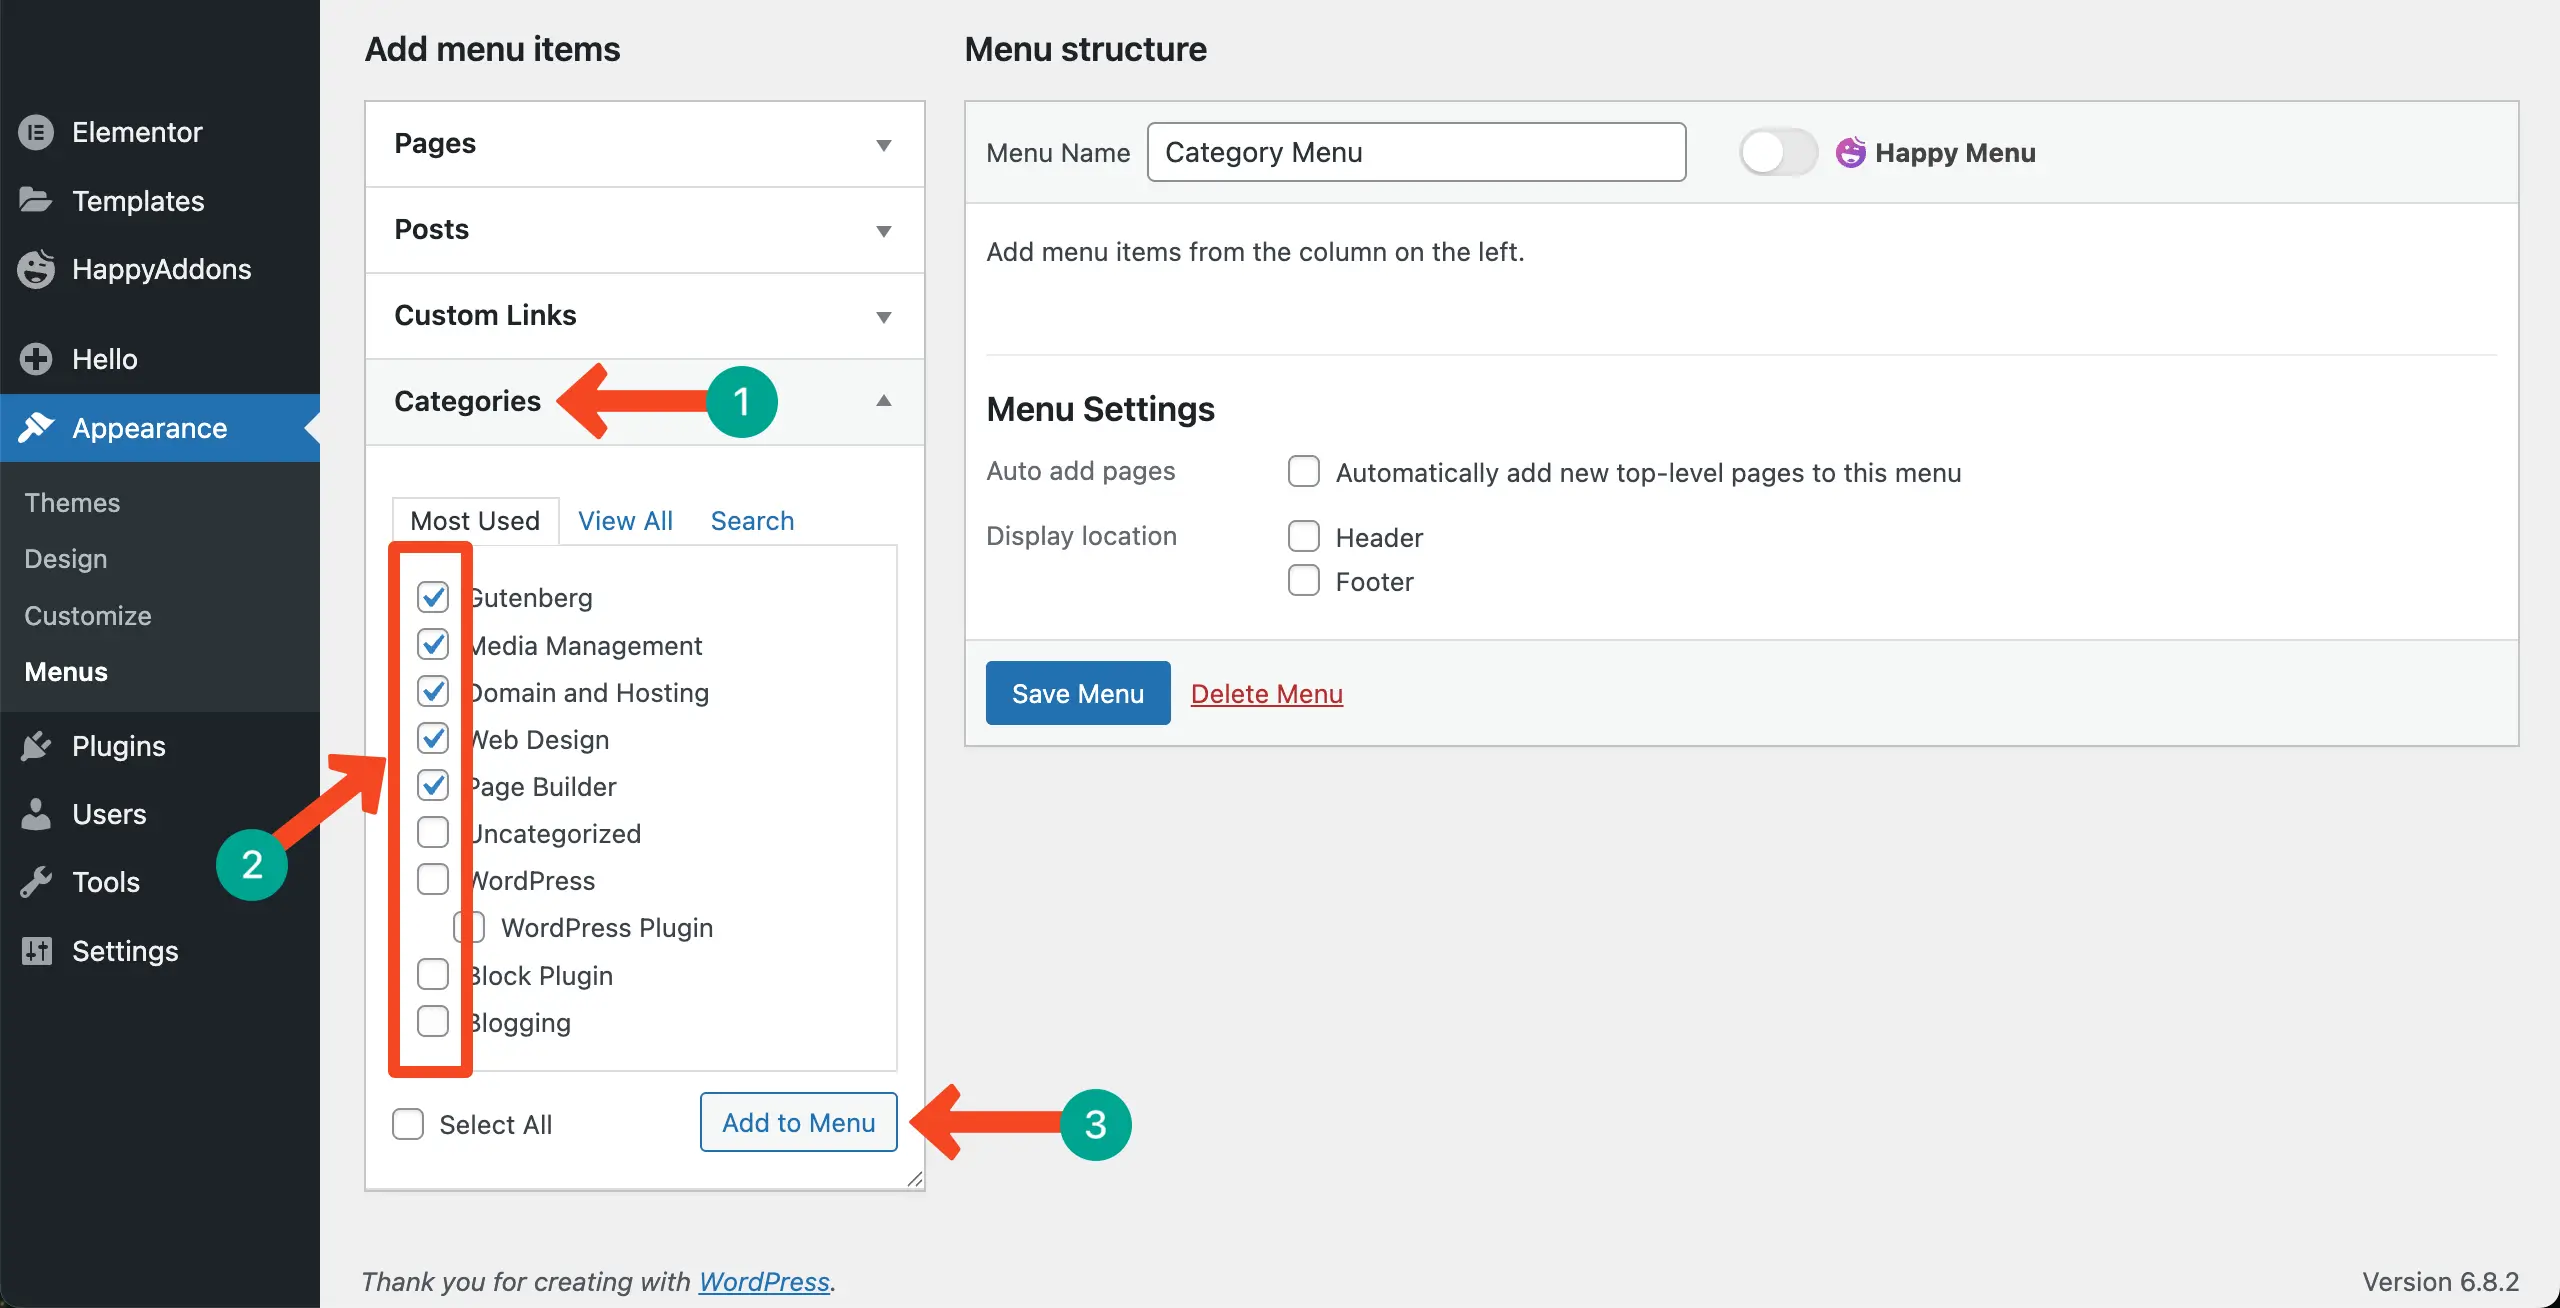
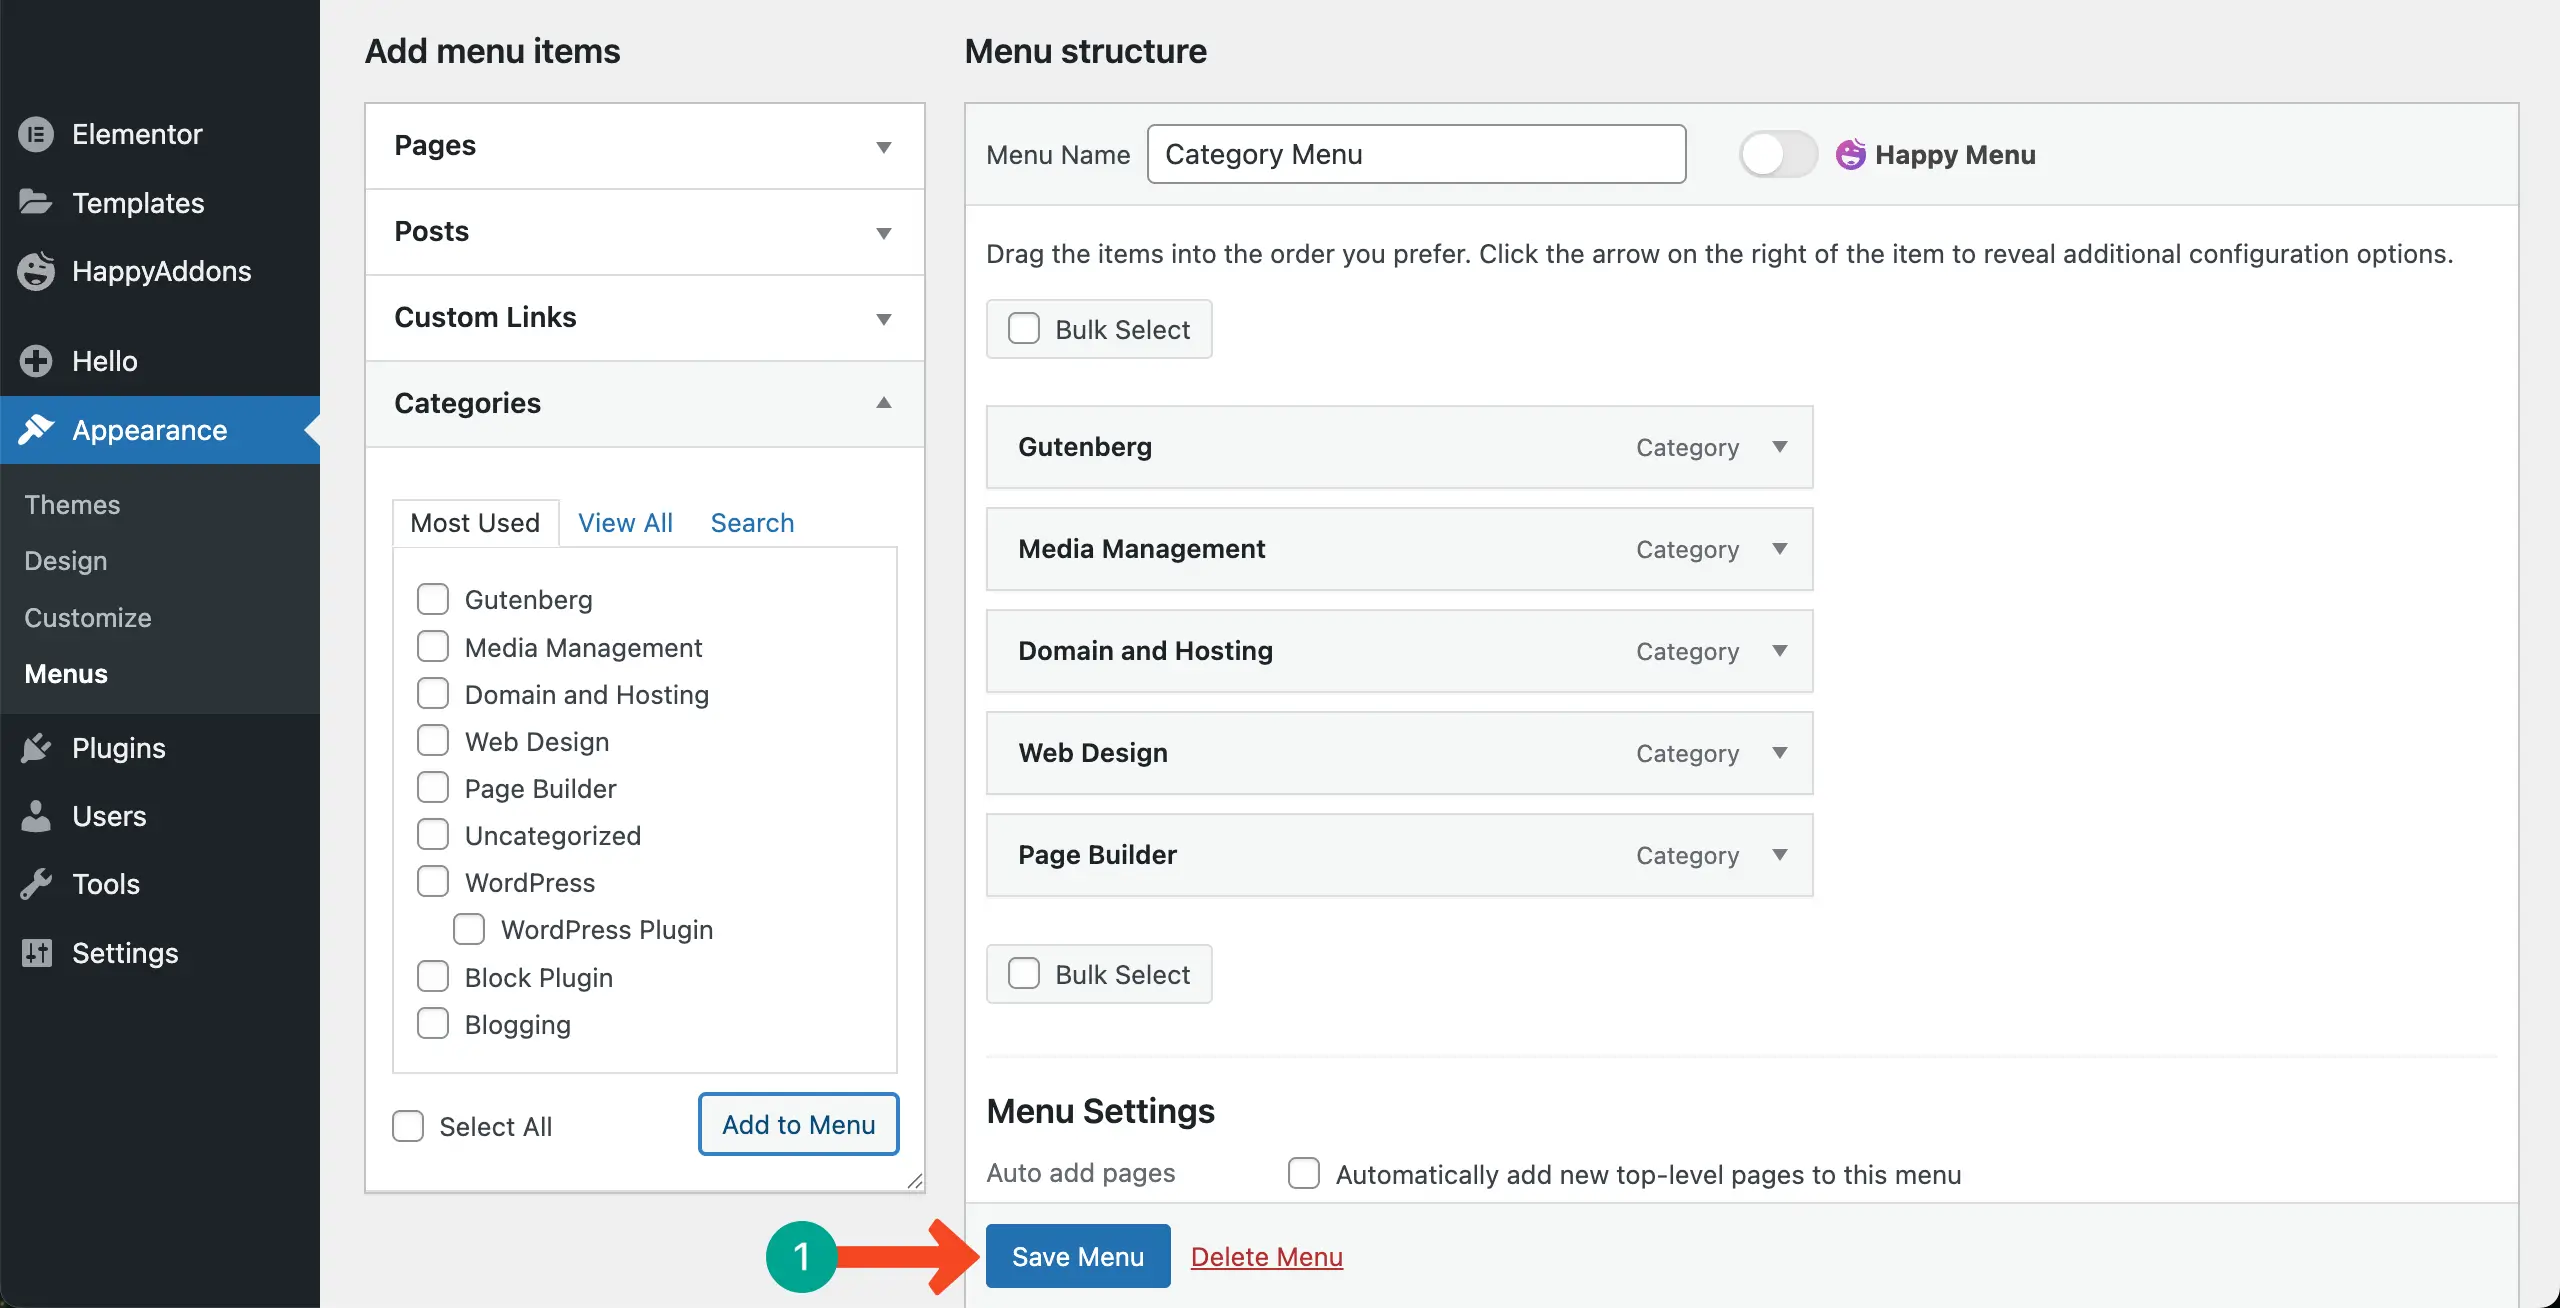
Select the categories you want to display on the menu. After that, hit the Add to Menu button.
You’ll see the categories have moved to the right side. You may rearrange their position/hierarchy by dragging. Once done, click the Save Menu button to preserve all the changes.
Step 05: Display the Category Menu Over the Posts Widget
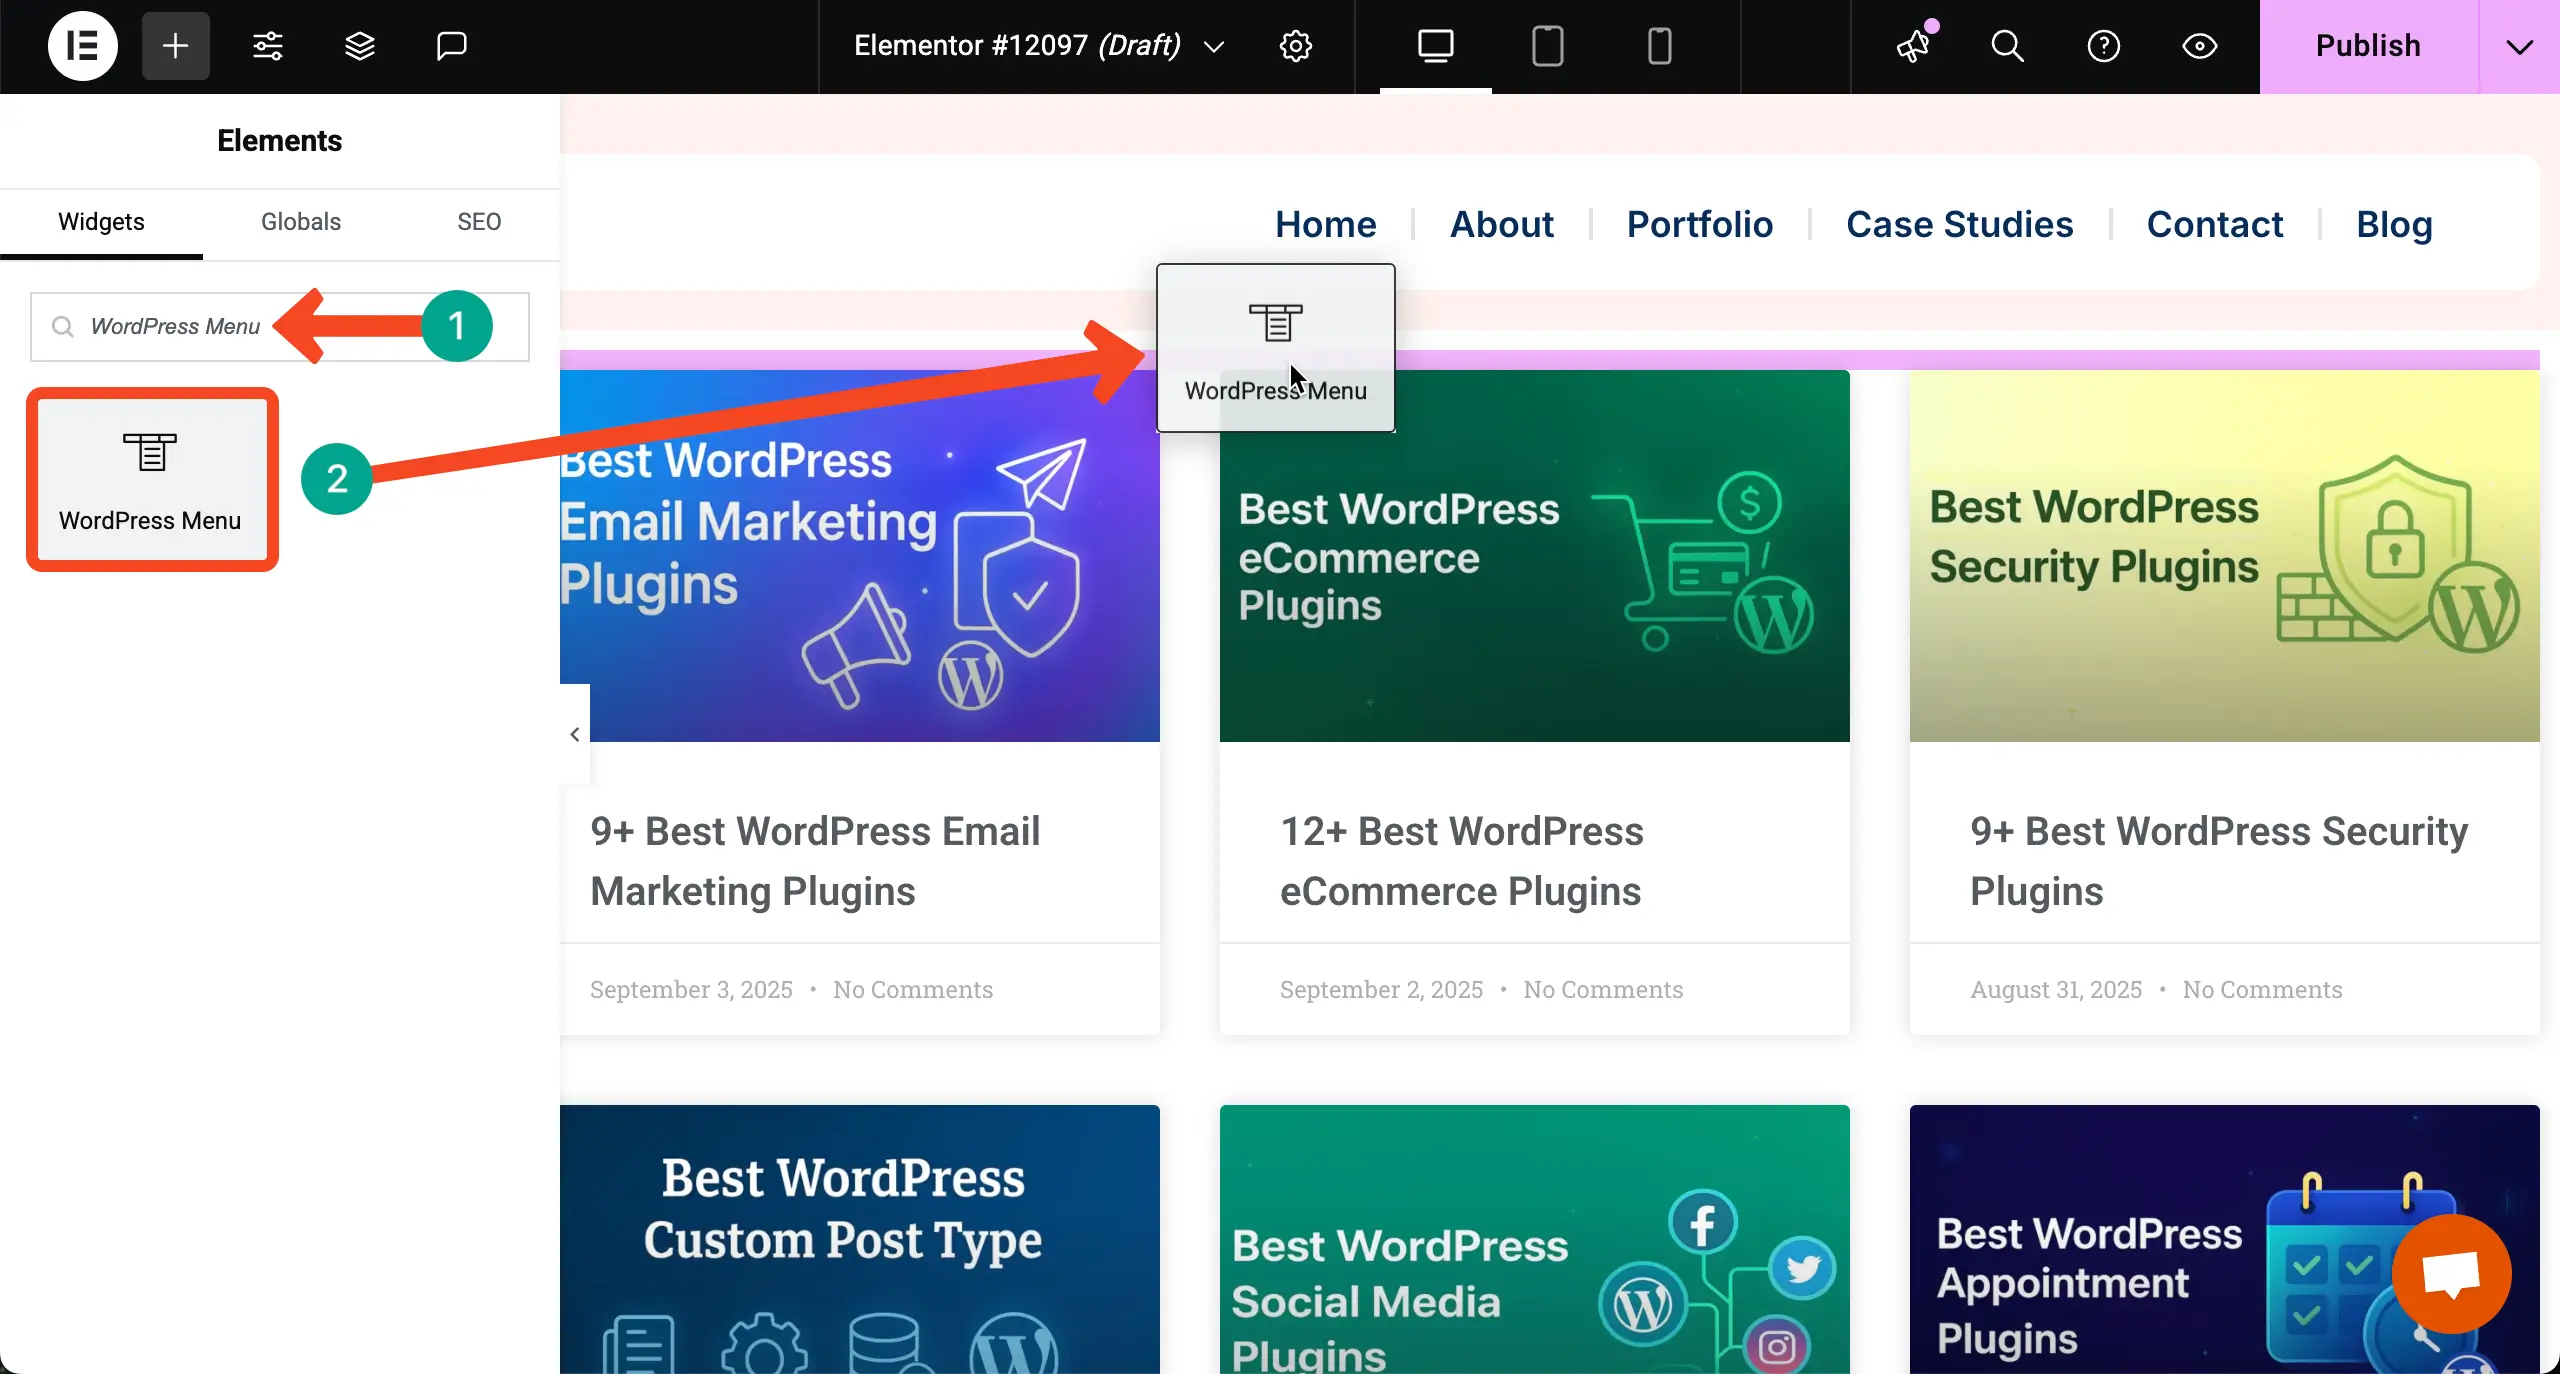
Come to the page you are editing with Elementor. Find the WordPress Menu widget. Drag-and-drop it over the Posts widget.
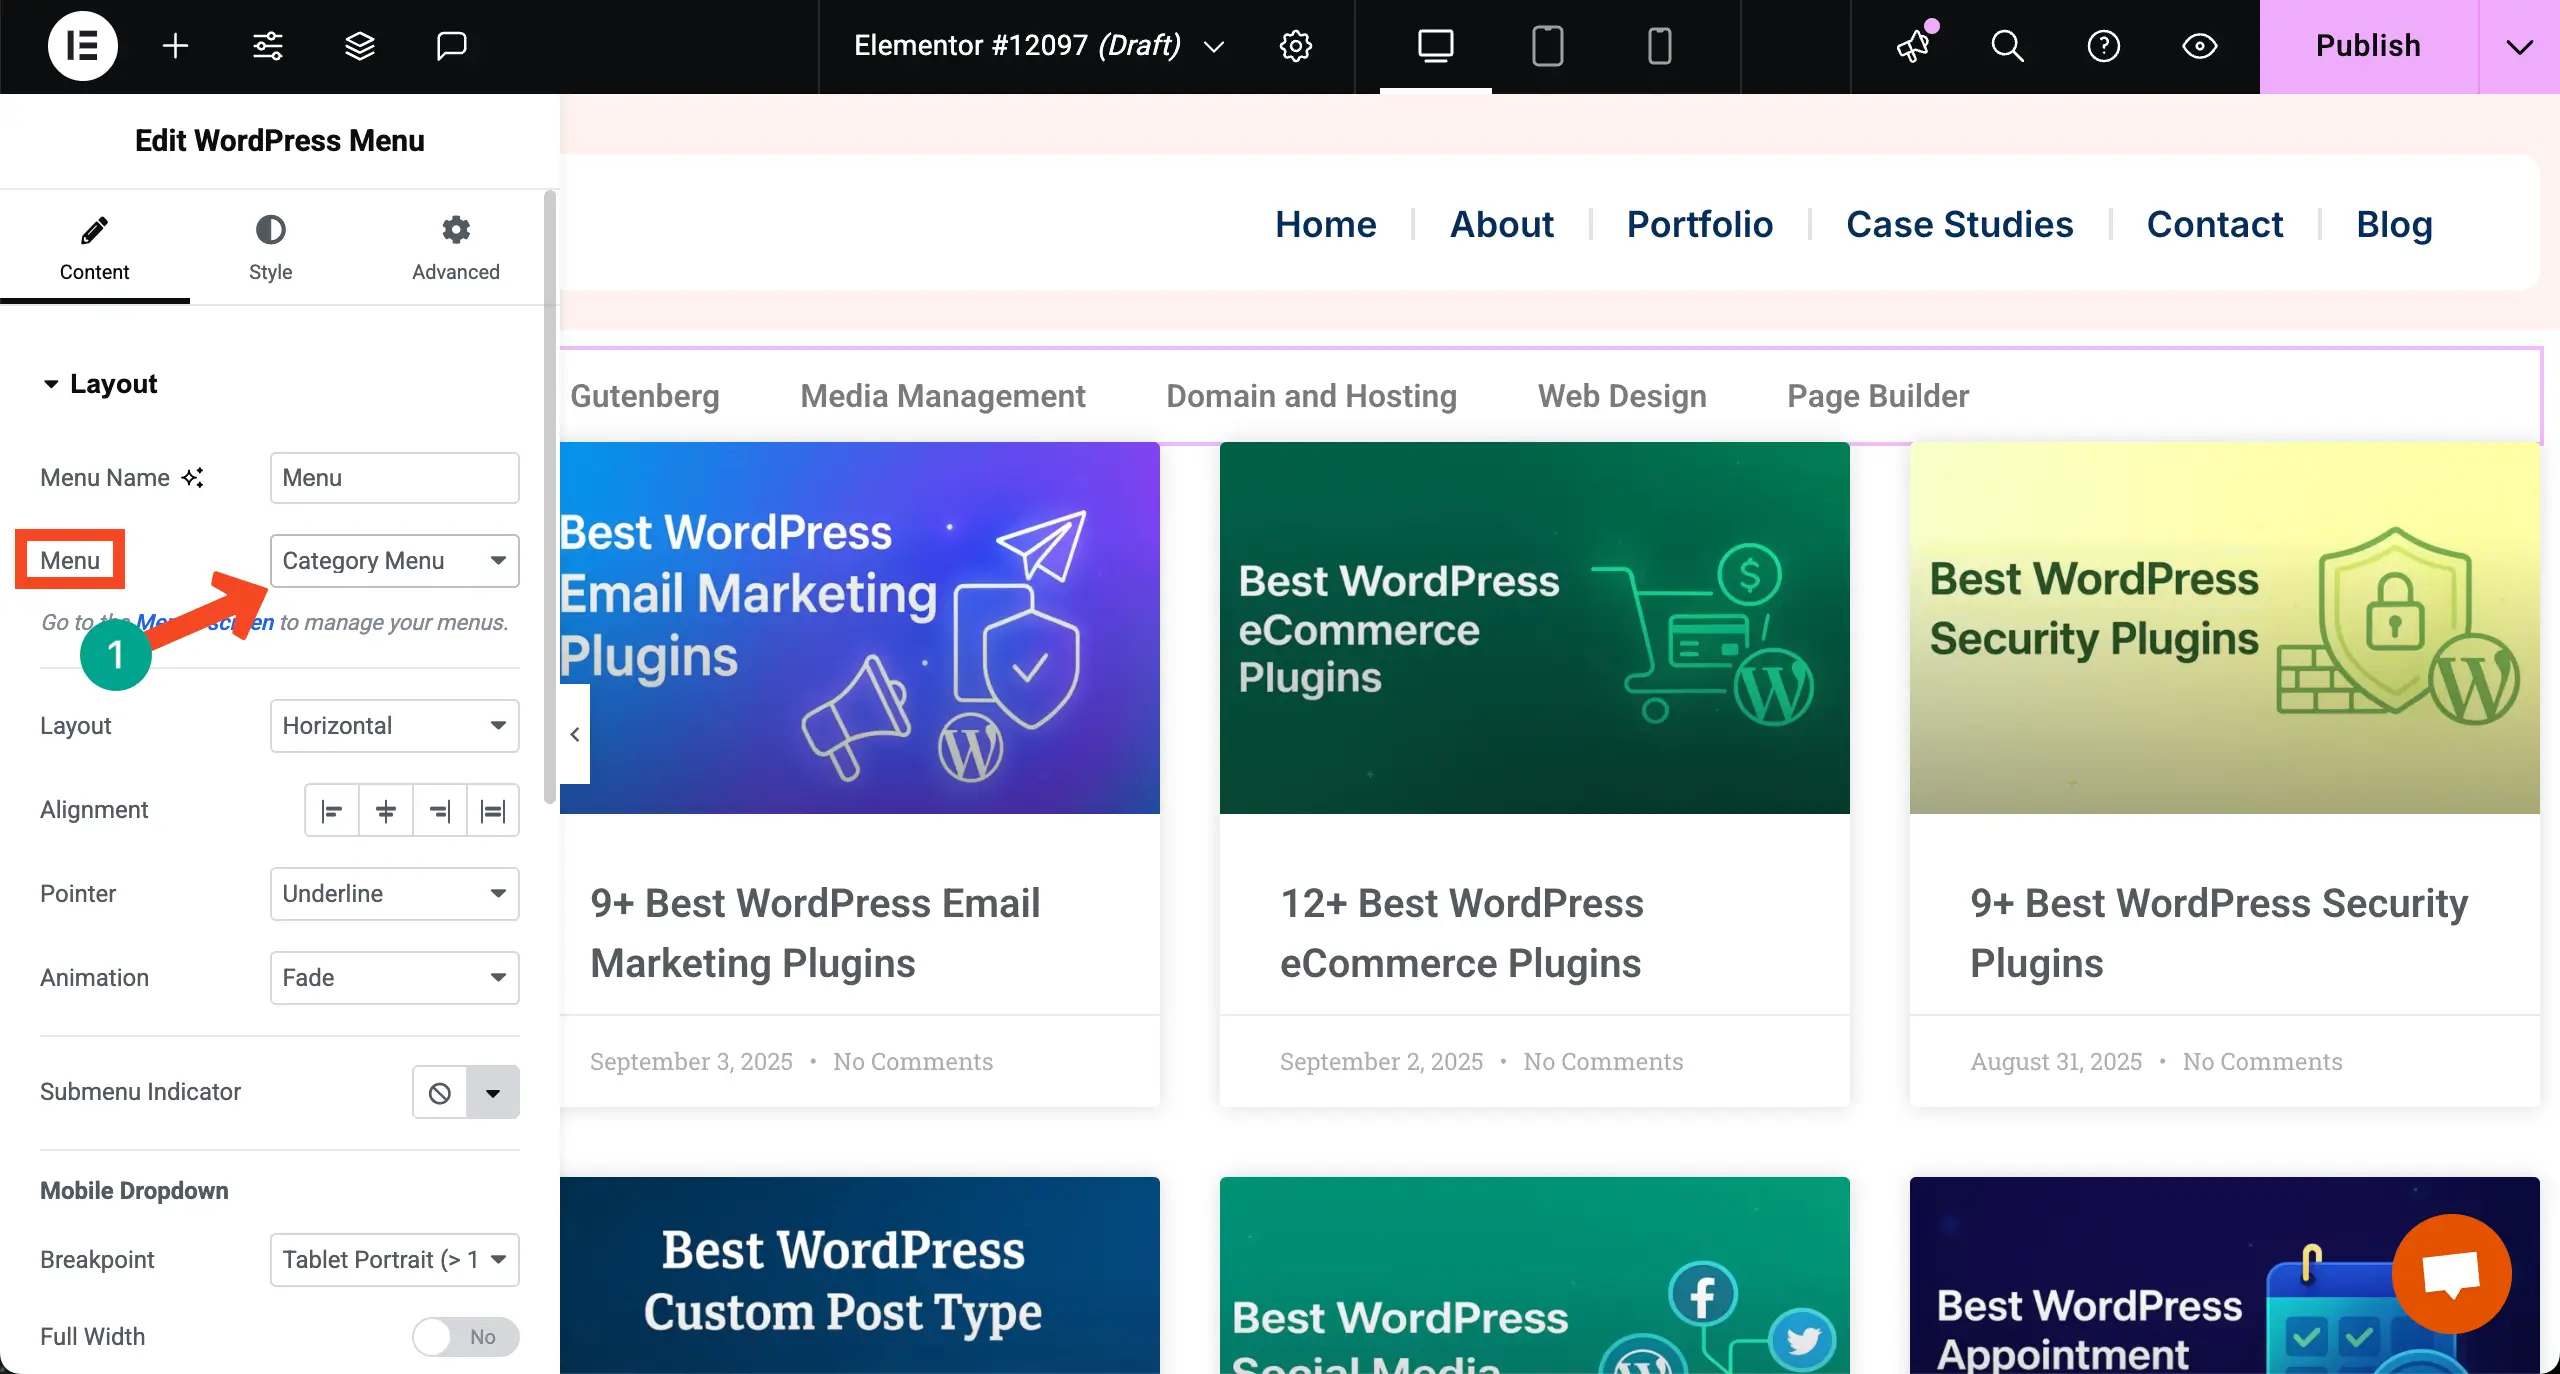
Next to the Menu option, choose the category menu you created on the backend just a while ago. Just select the name you used to save the menu.
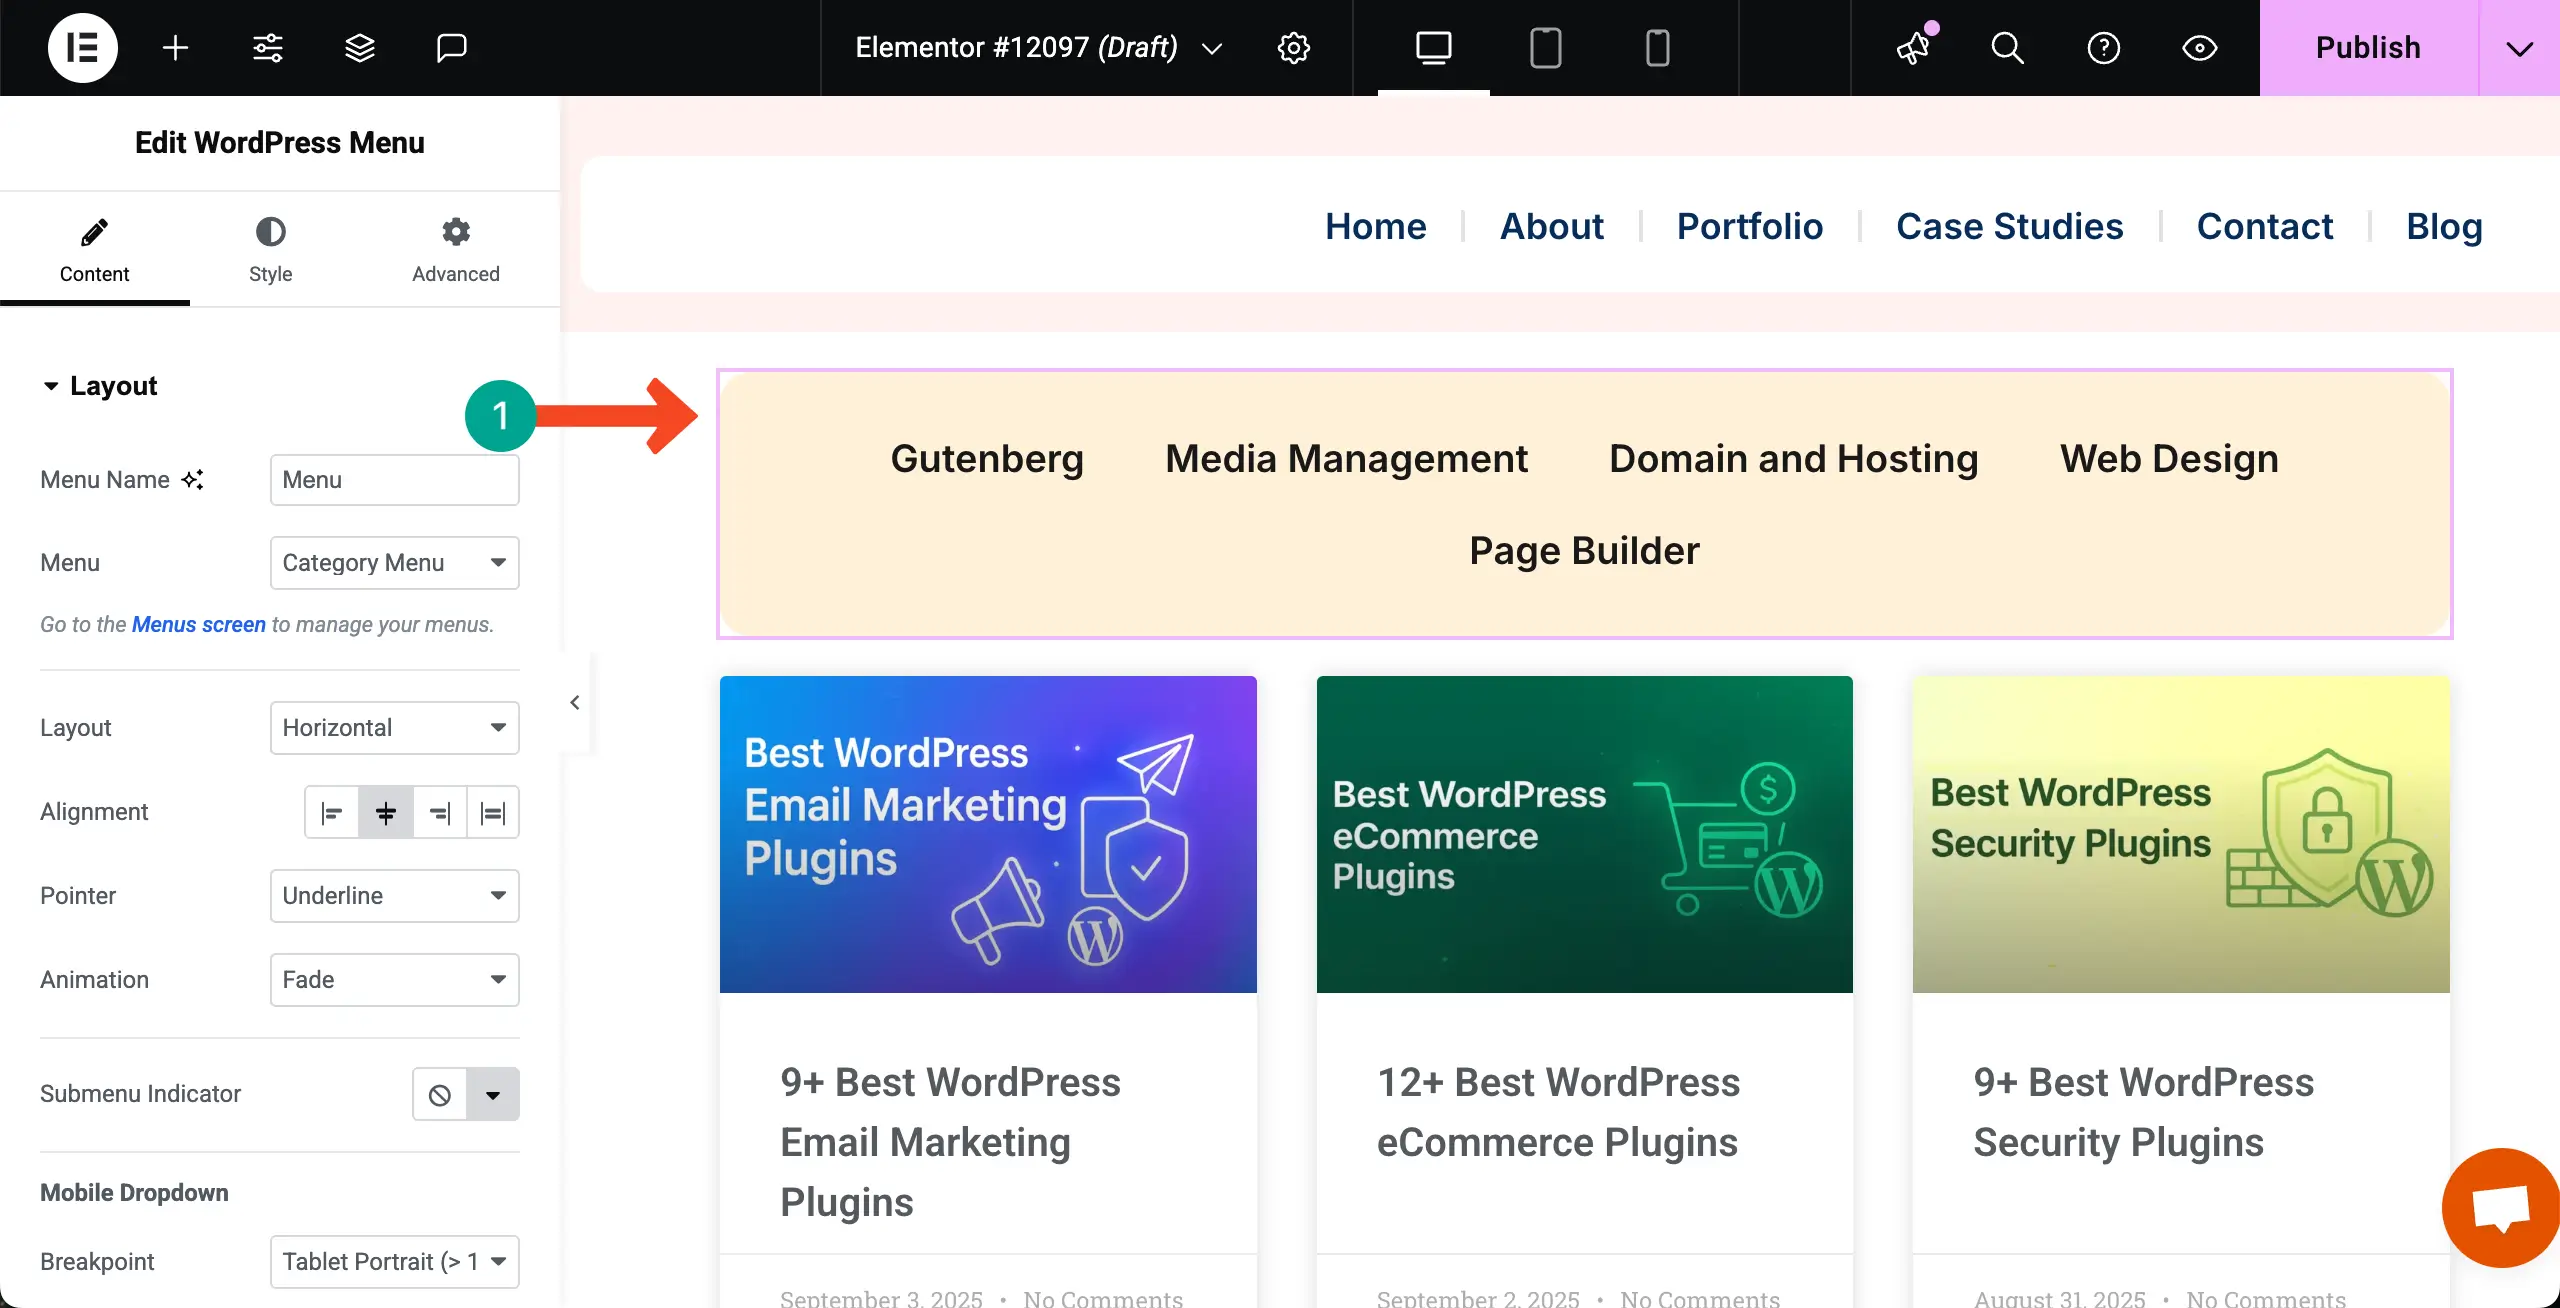
The category menu will appear on top of the Posts widget right away.
Step 06: Stylize the Category Menu
From the Content and Style tabs, design the category menu that looks good and is aligned with the brand appeal of your site.
Step 07: Set Query Settings
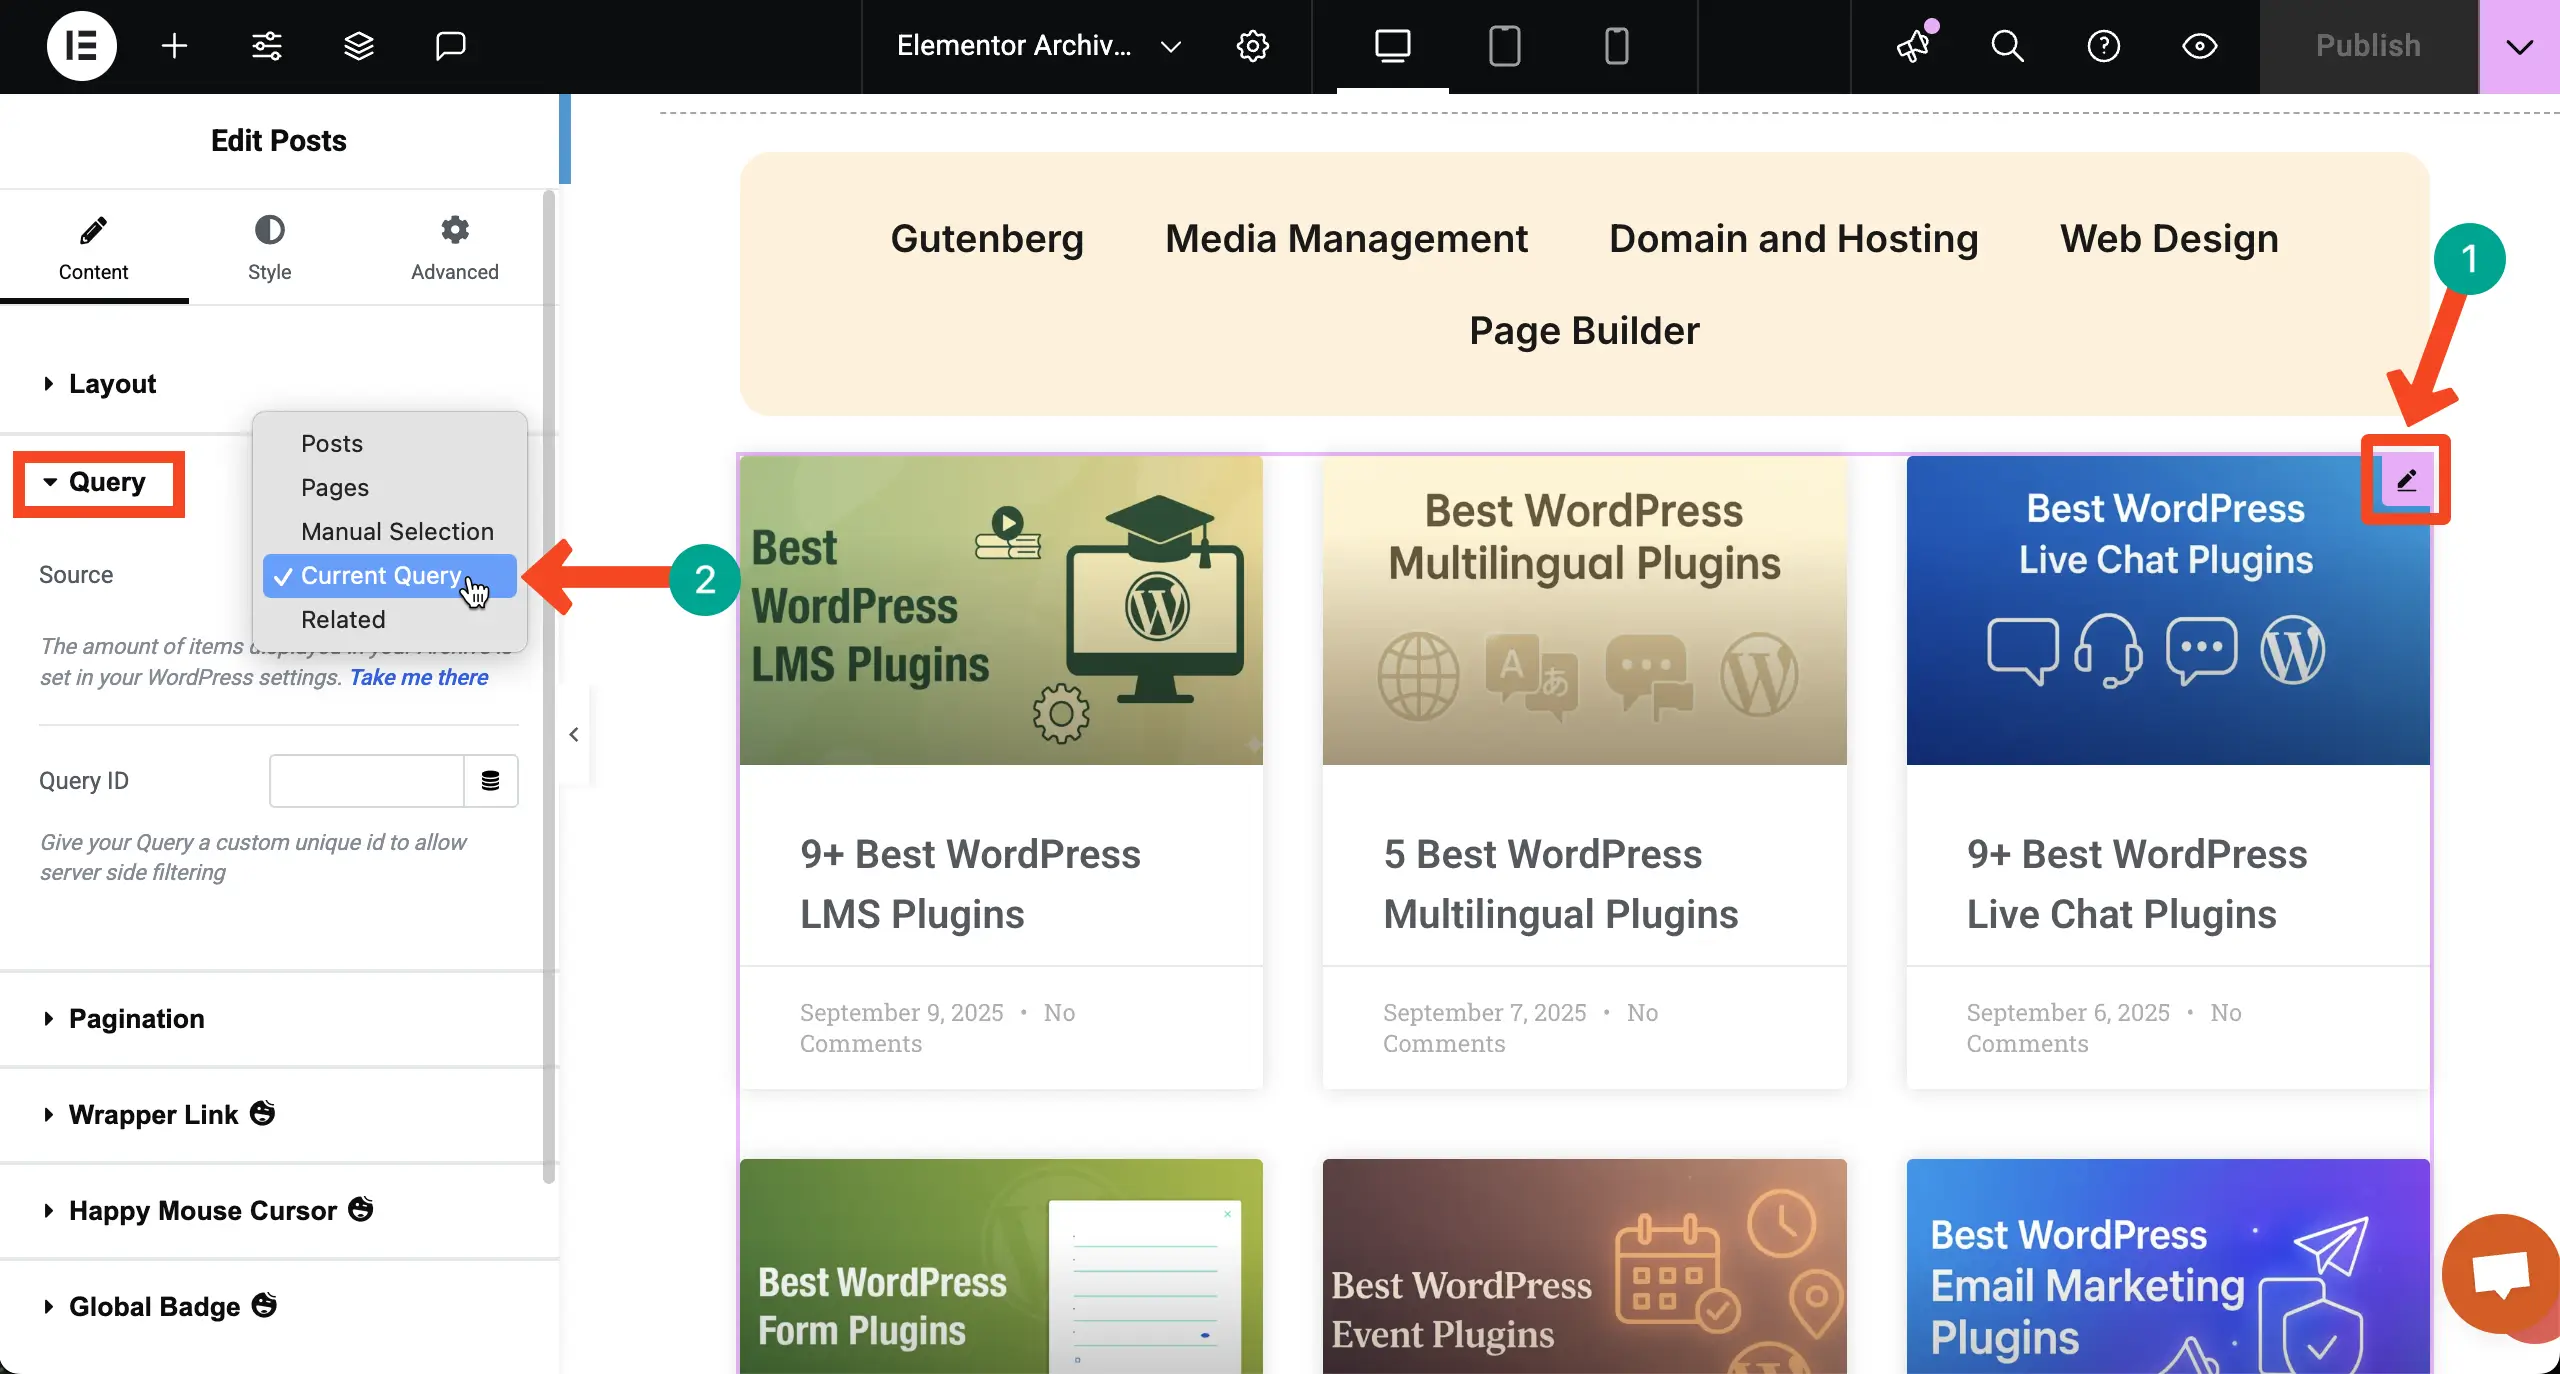
It’s time to link the Posts widget to the category menu. To do this, select the Posts widget, expand the Query section, and choose the Current Query option.
Now, if you click the category options, the blog posts will change accordingly.
Step 08: Set Conditions
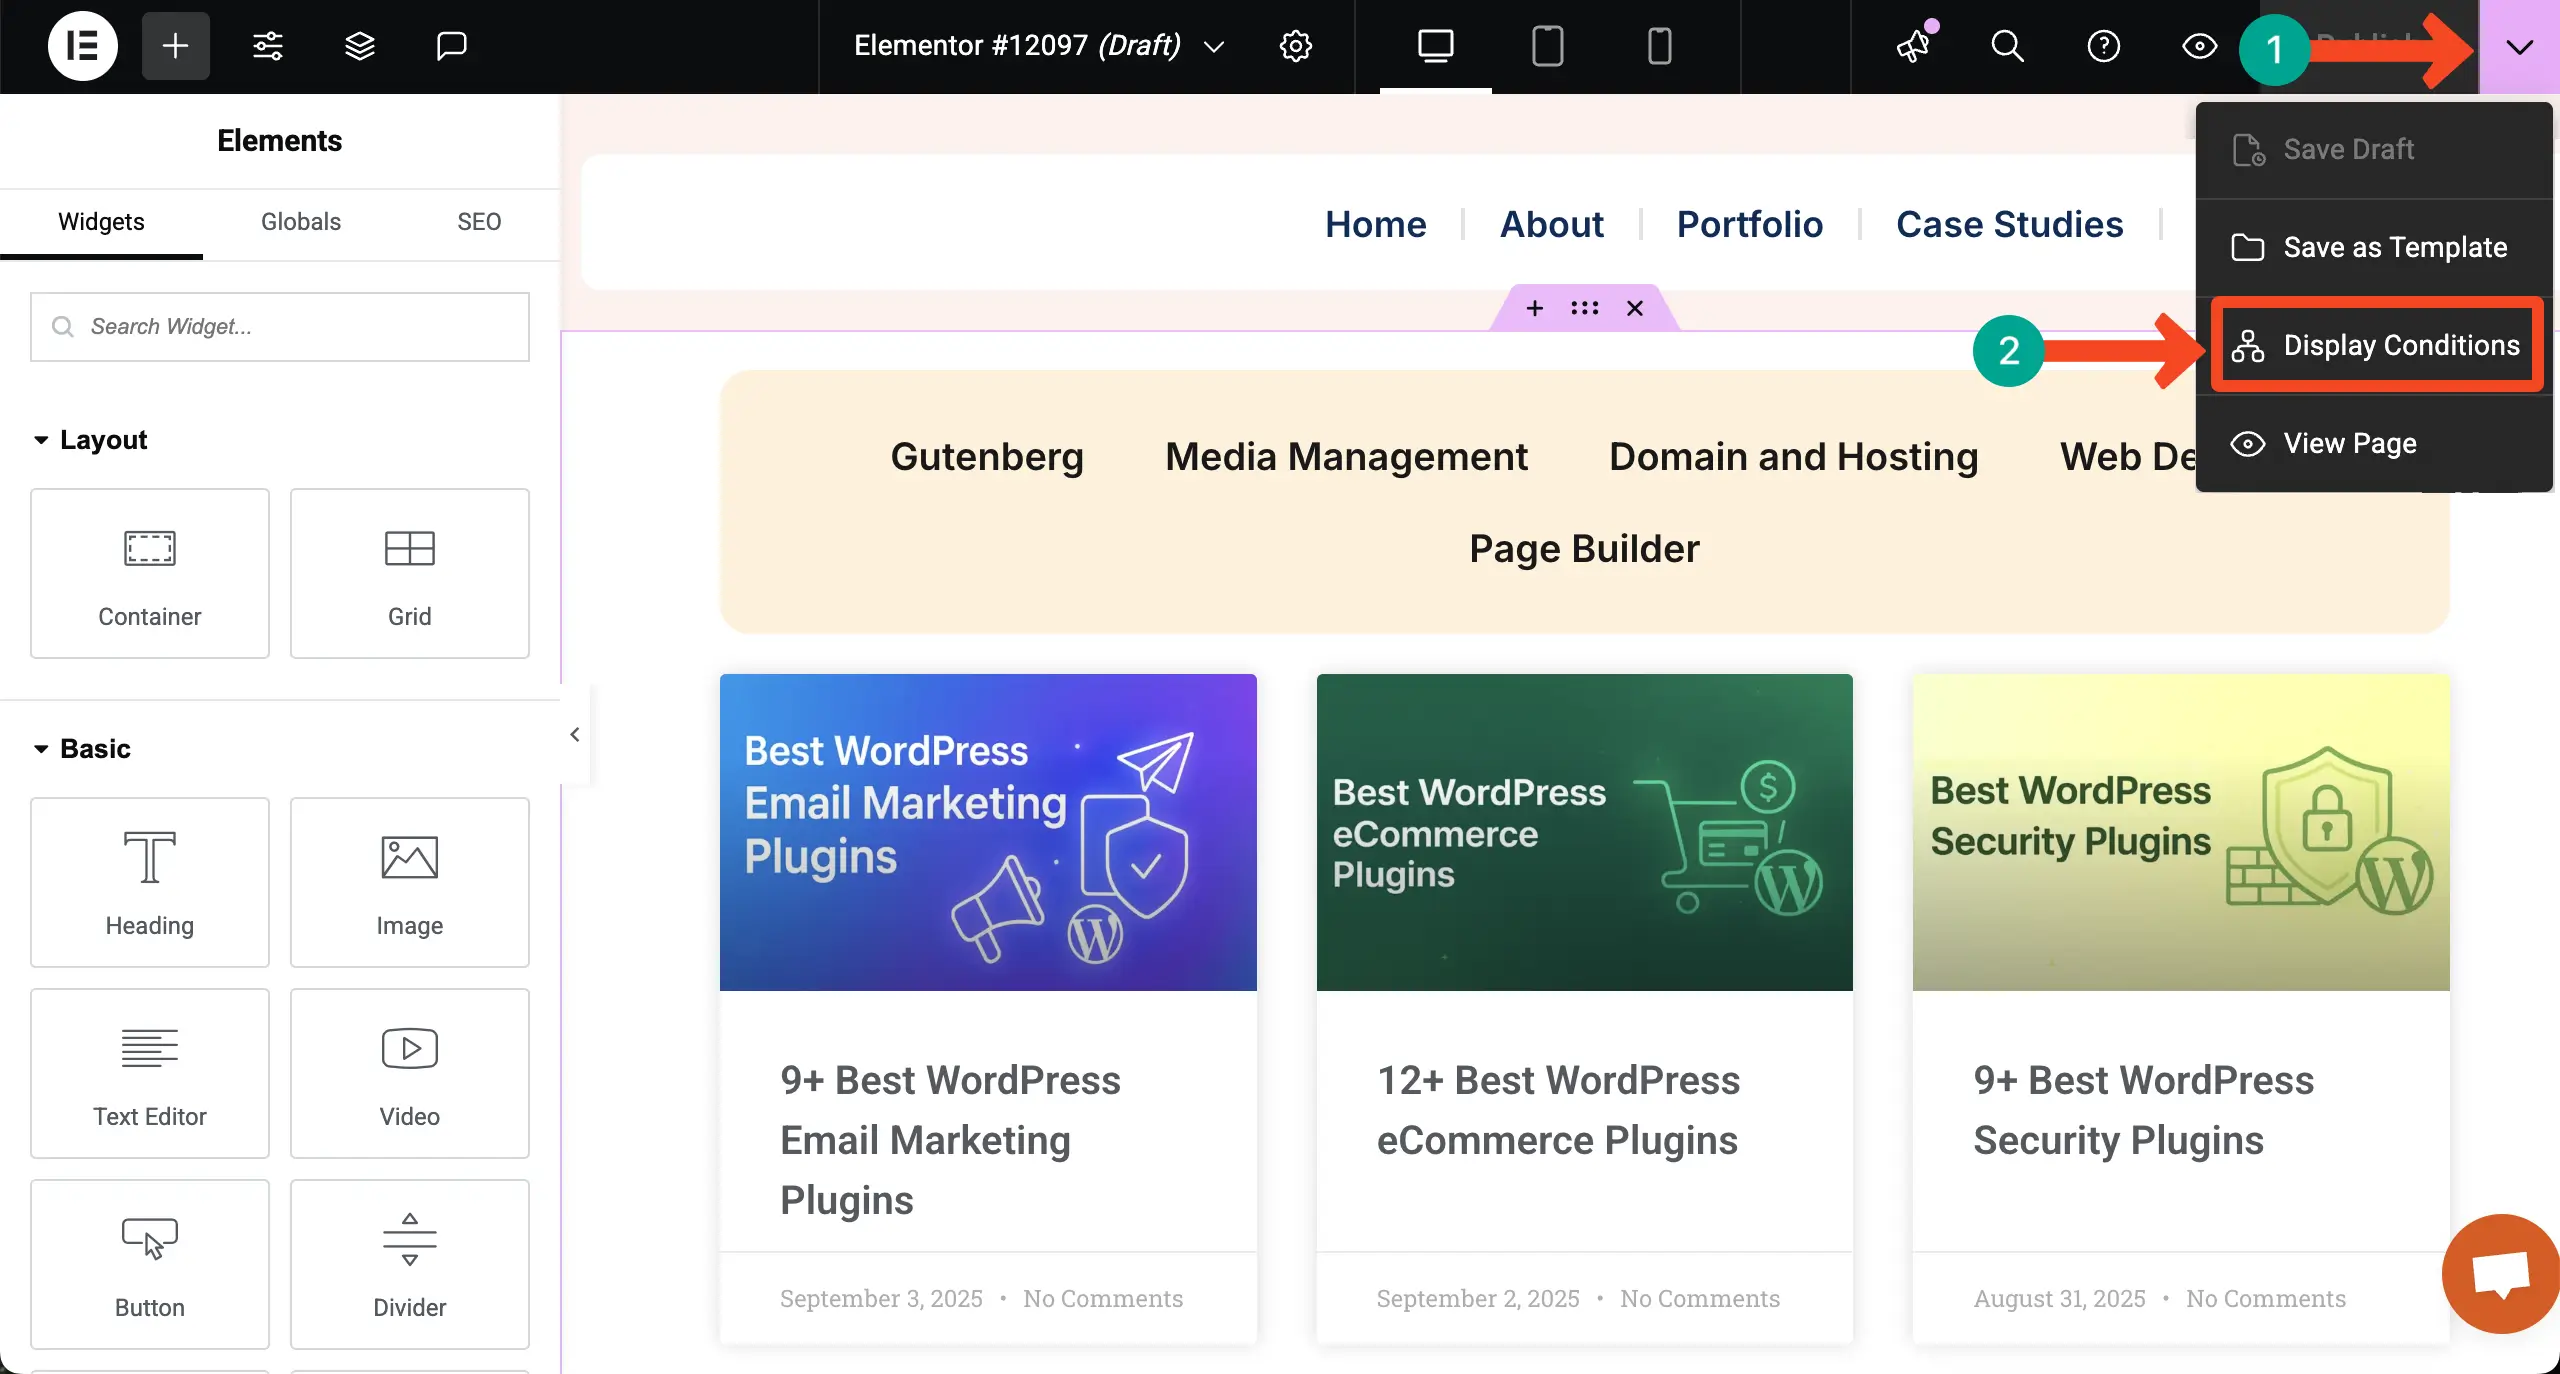
Click the dropdown arrow icon next to the Publish button. Hit the Display Conditions option from the list.
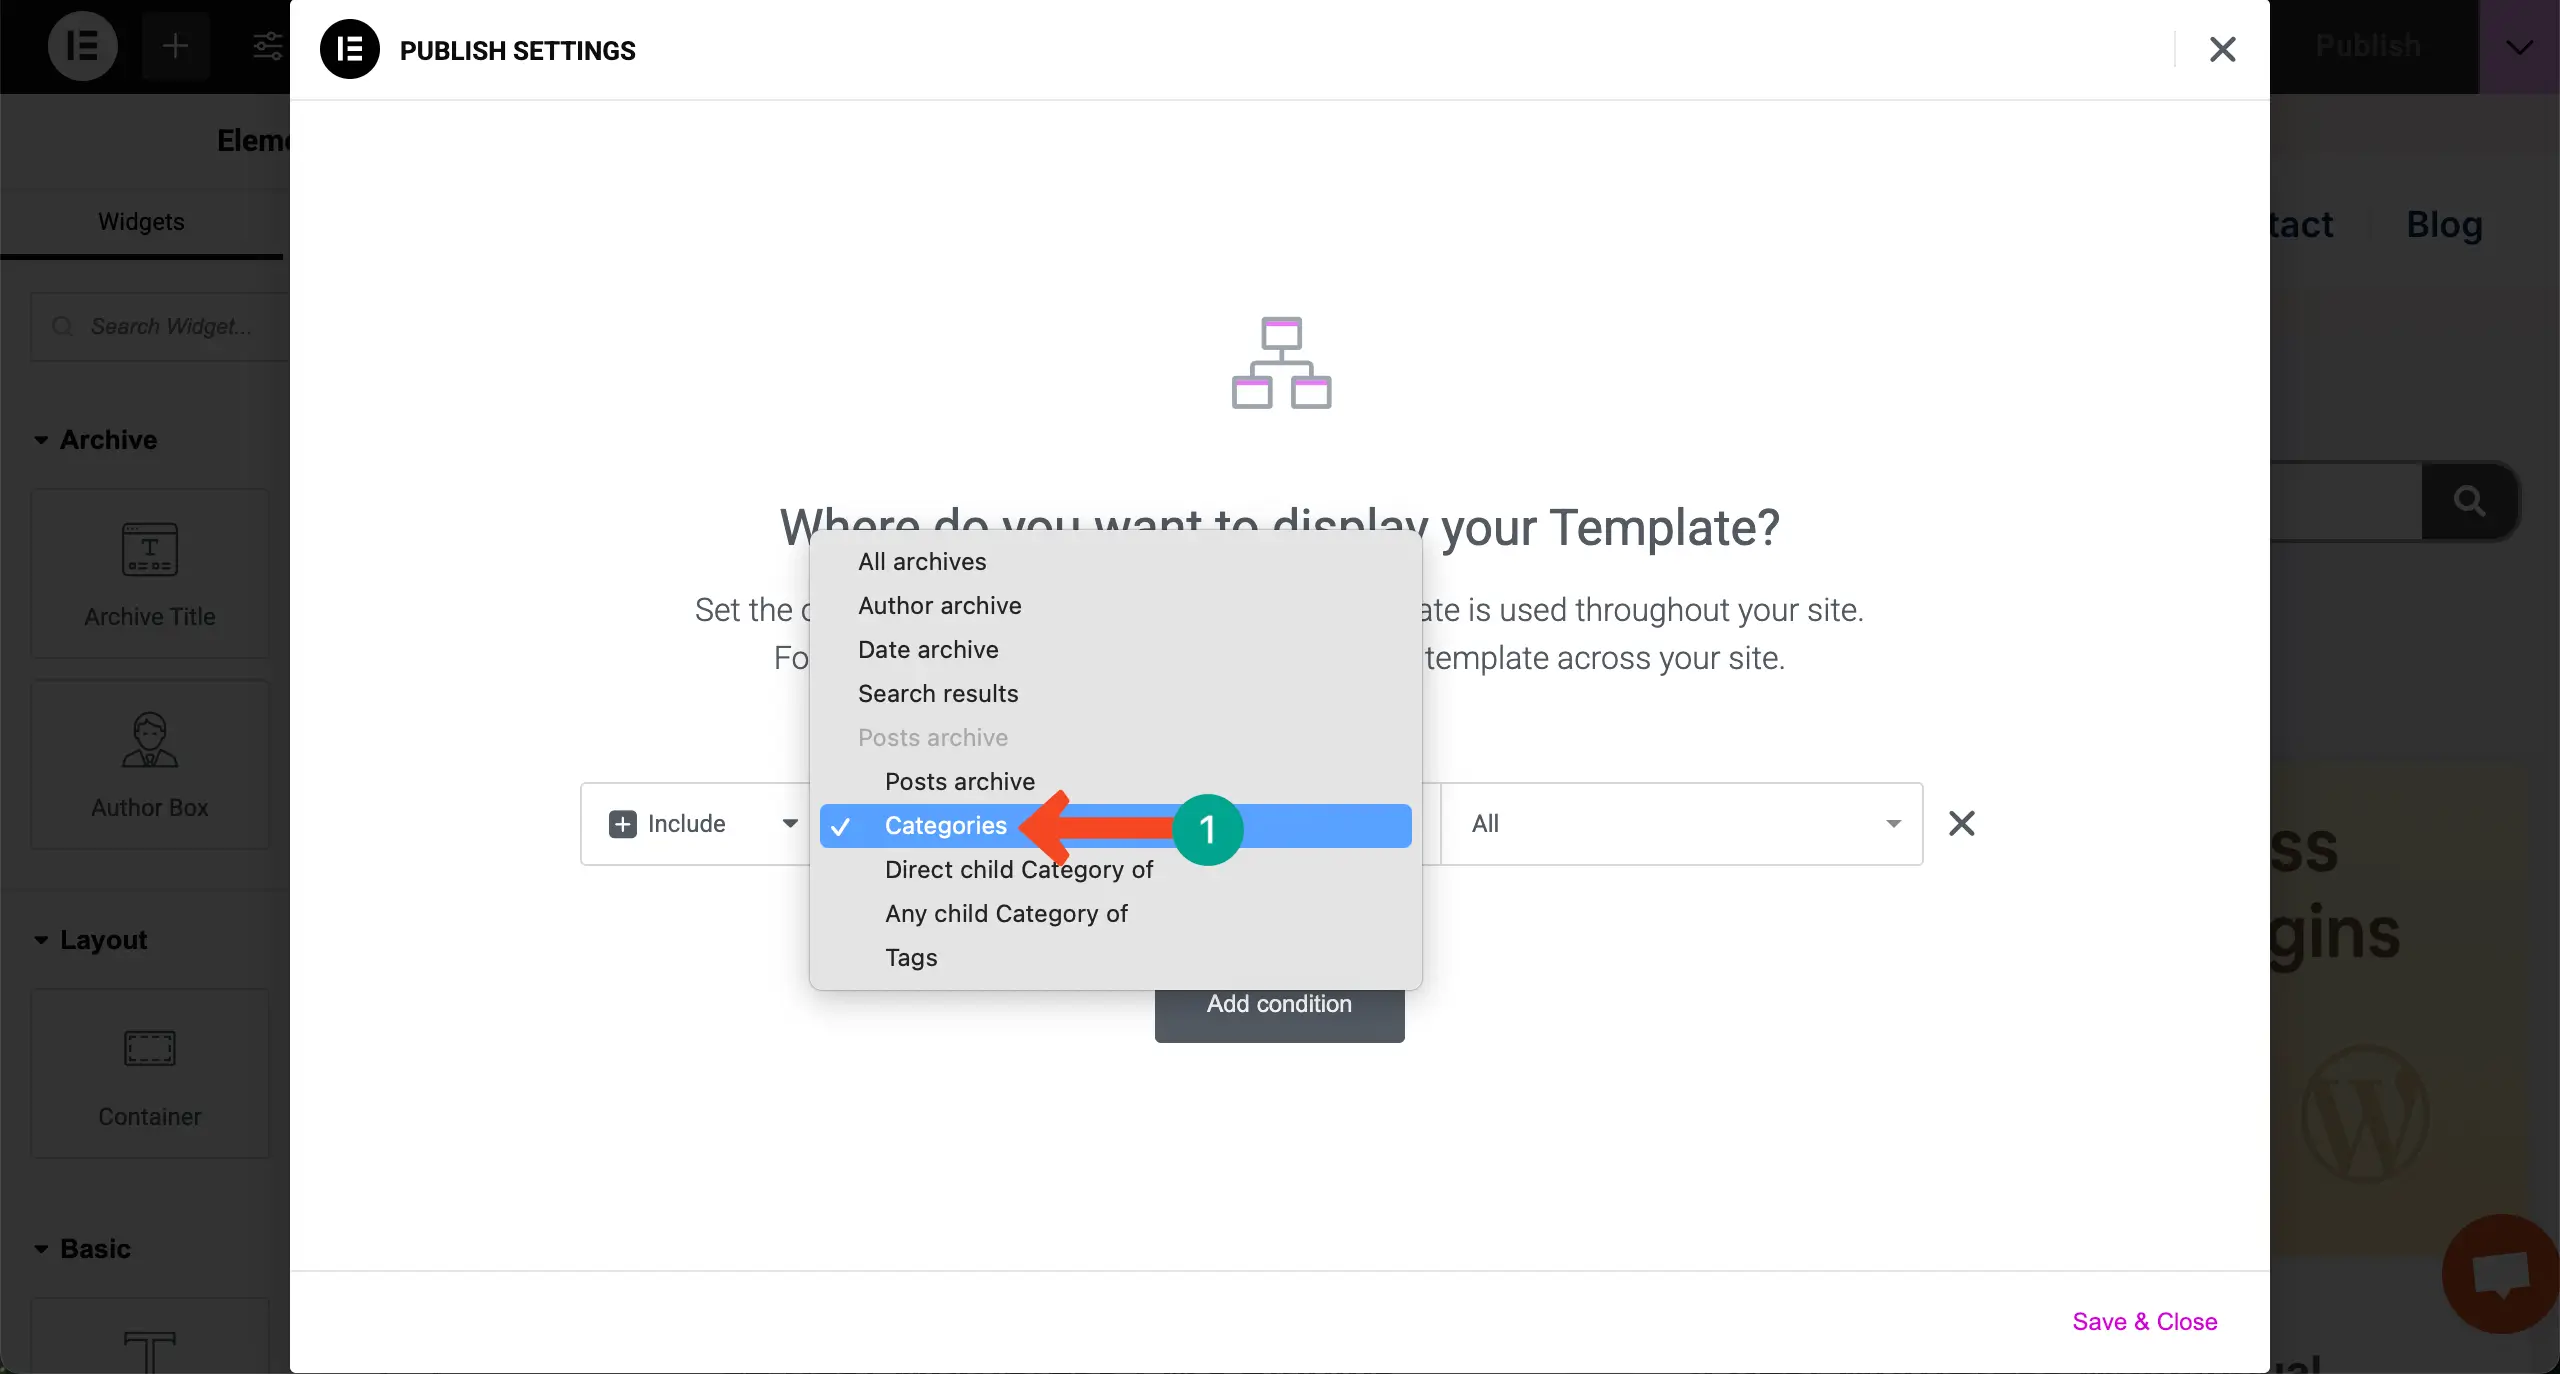
Select Categories as the search results condition.
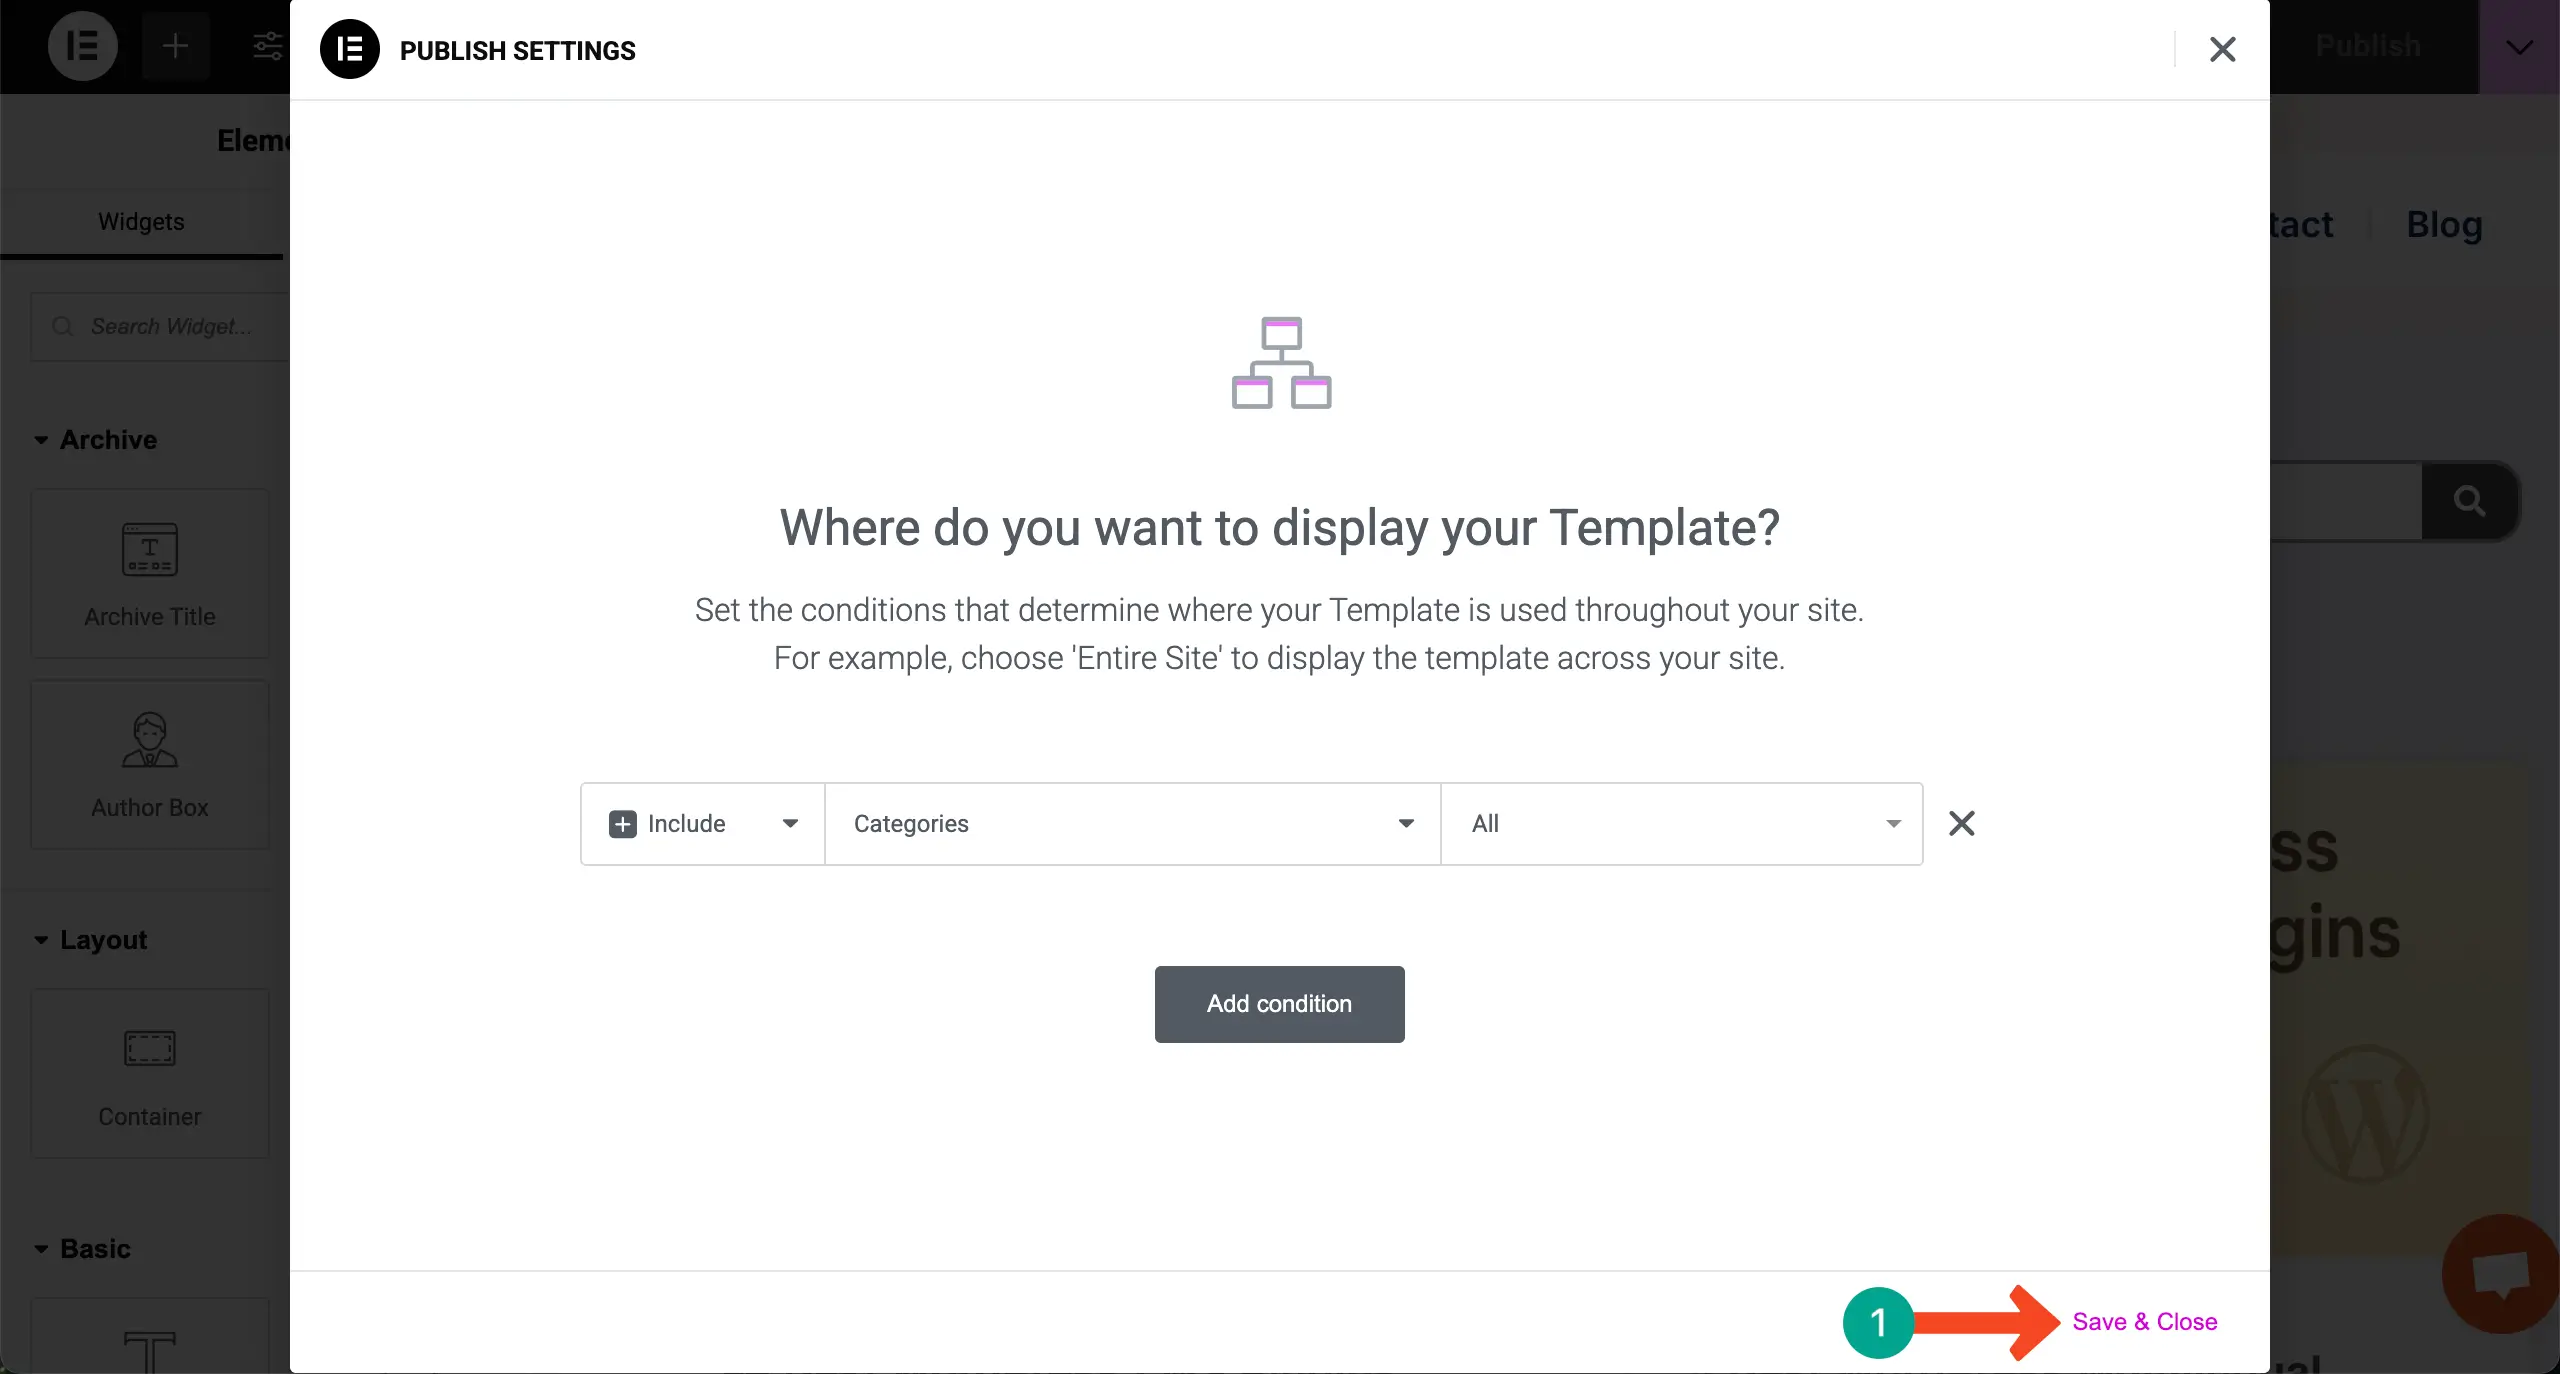
Save the condition.
Step 09: Preview Posts by Categories
Come to the preview page. Click on the category menu items one by one. You’ll see the posts are changing accordingly.
Thus, you can create and display blog posts by categories on WordPress using the Elementor plugin.
Method Two: Using the Taxonomy List
Elementor has the Taxonomy List widget, by which you can add categories on top of your post archive, and let users explore posts by categories. Check the process below.
Step 01: Open an Archive Page from the Theme Builder
Hope you already know the process, as we have shown it just a while ago. Log in to your WordPress Dashboard. Then, navigate to Templates > Theme Builder.

Go to the Archive option and open a page by clicking the + Add New button.

Step 02: Drag and Drop the Archive Posts Widget
Find the Archive Posts widget. Drag and drop it on your Elementor Canvas.
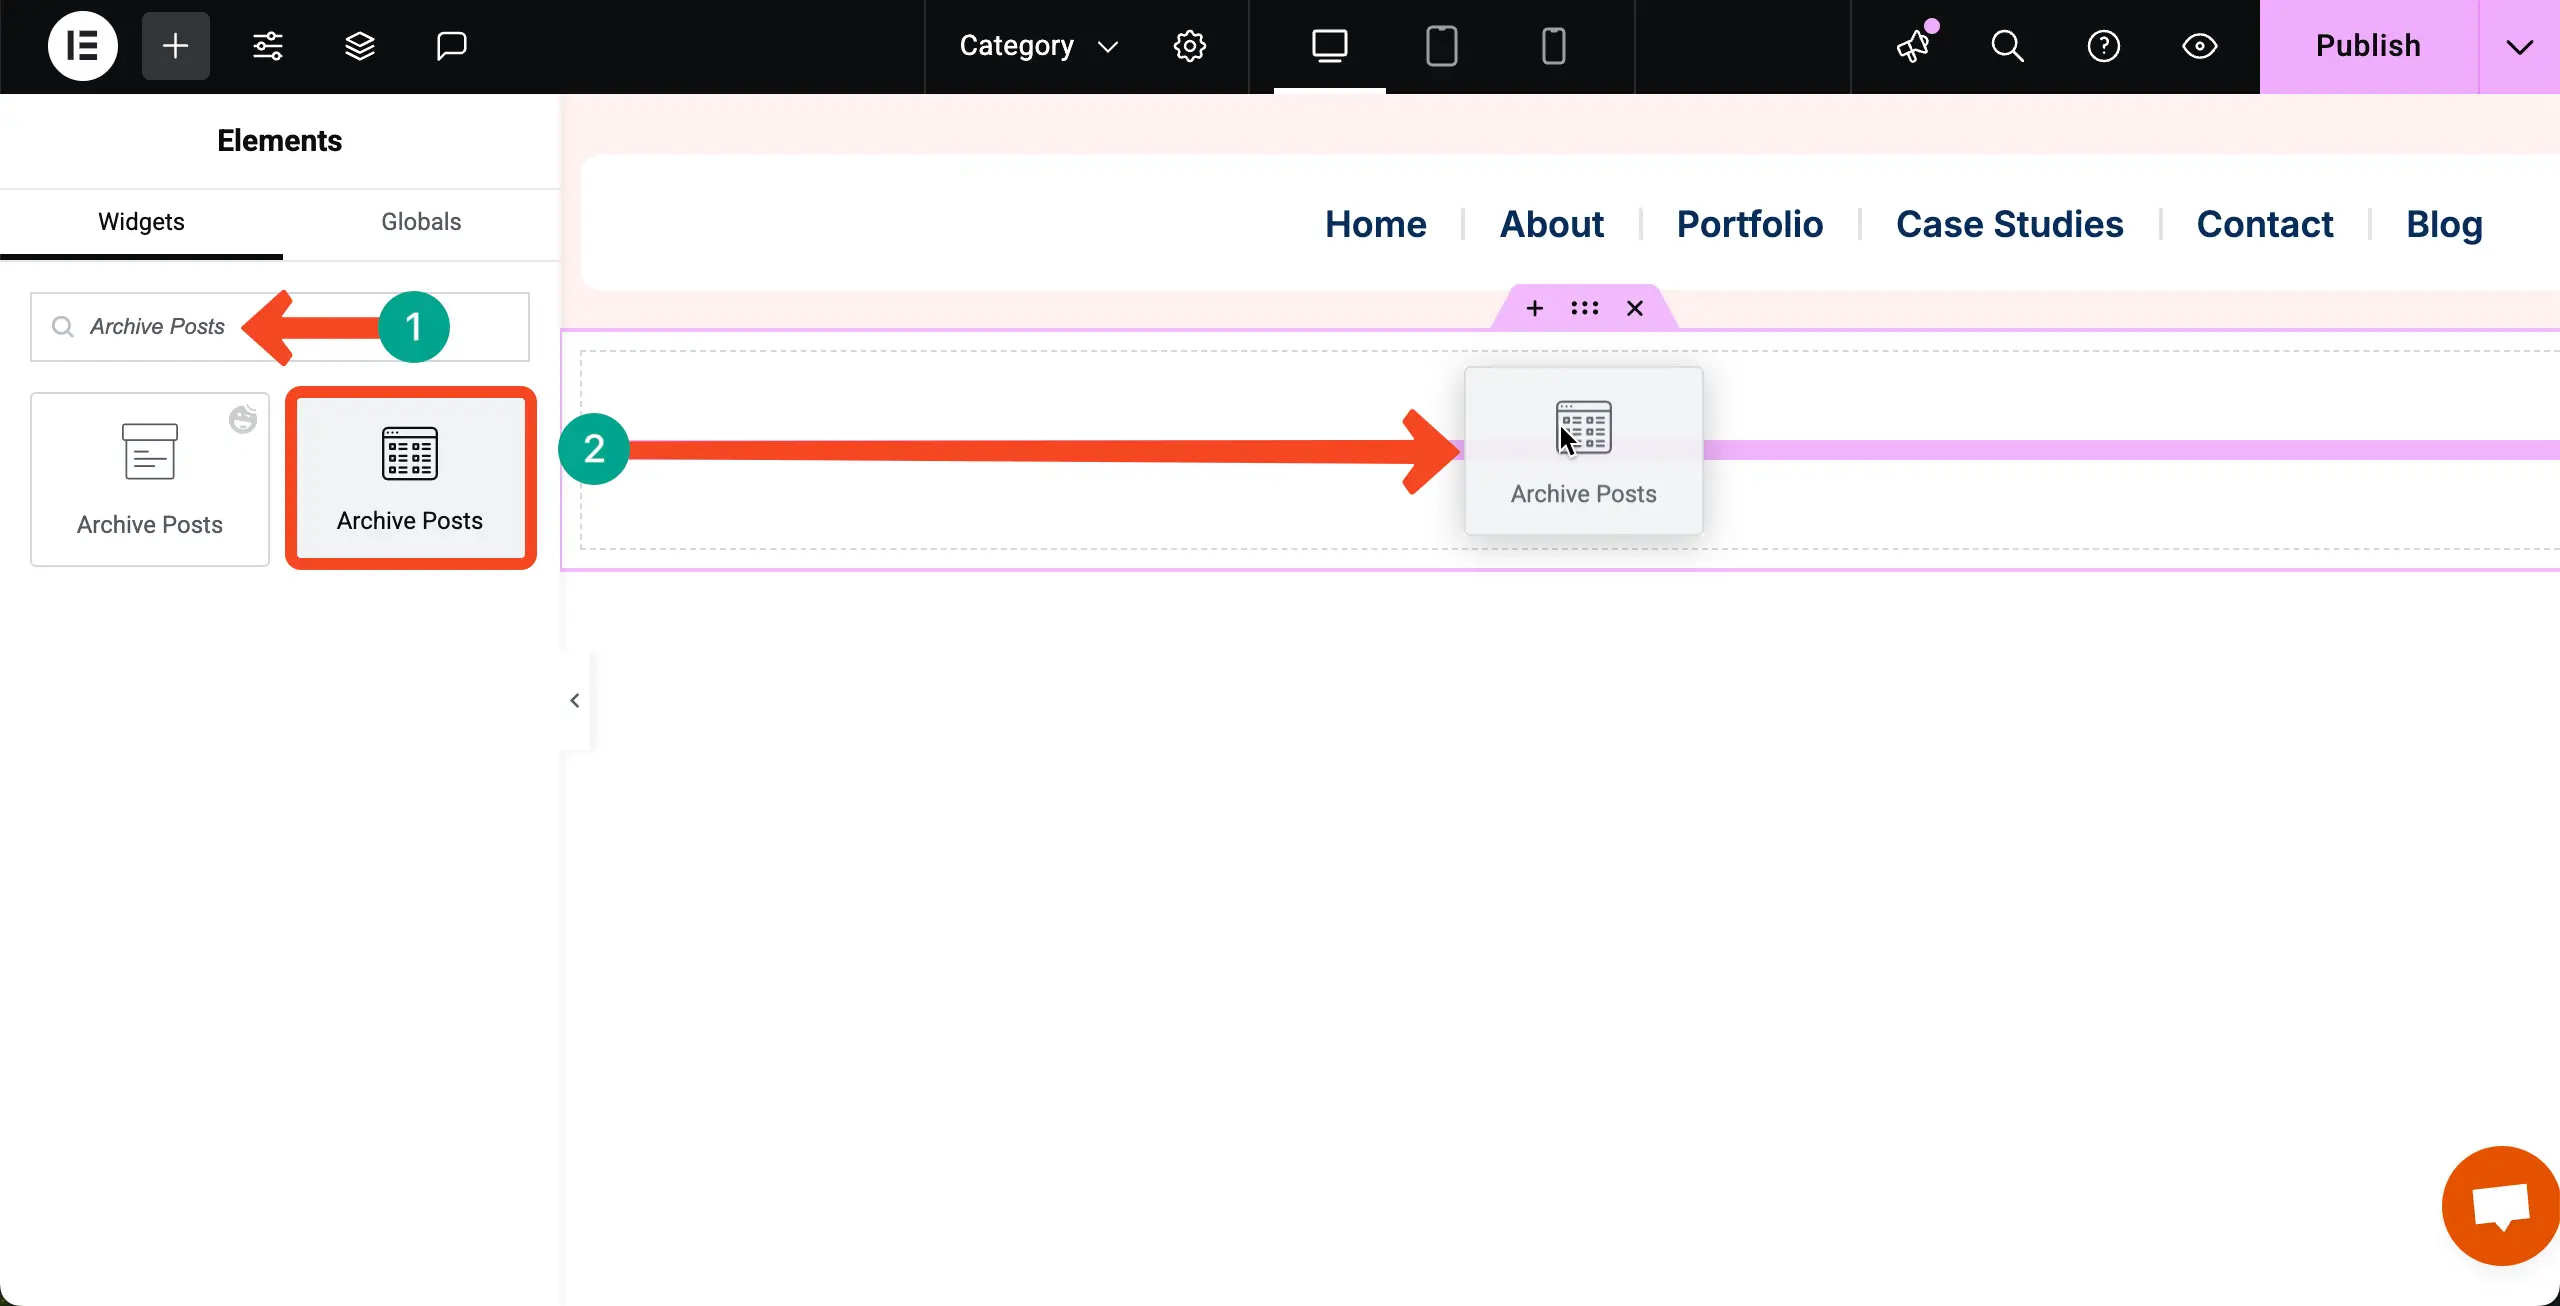
You’ll see that all your posts have been displayed on the canvas.

Now, stylize the Archive Posts widget in such a way that looks good to you. We have created a two-column archive post section.
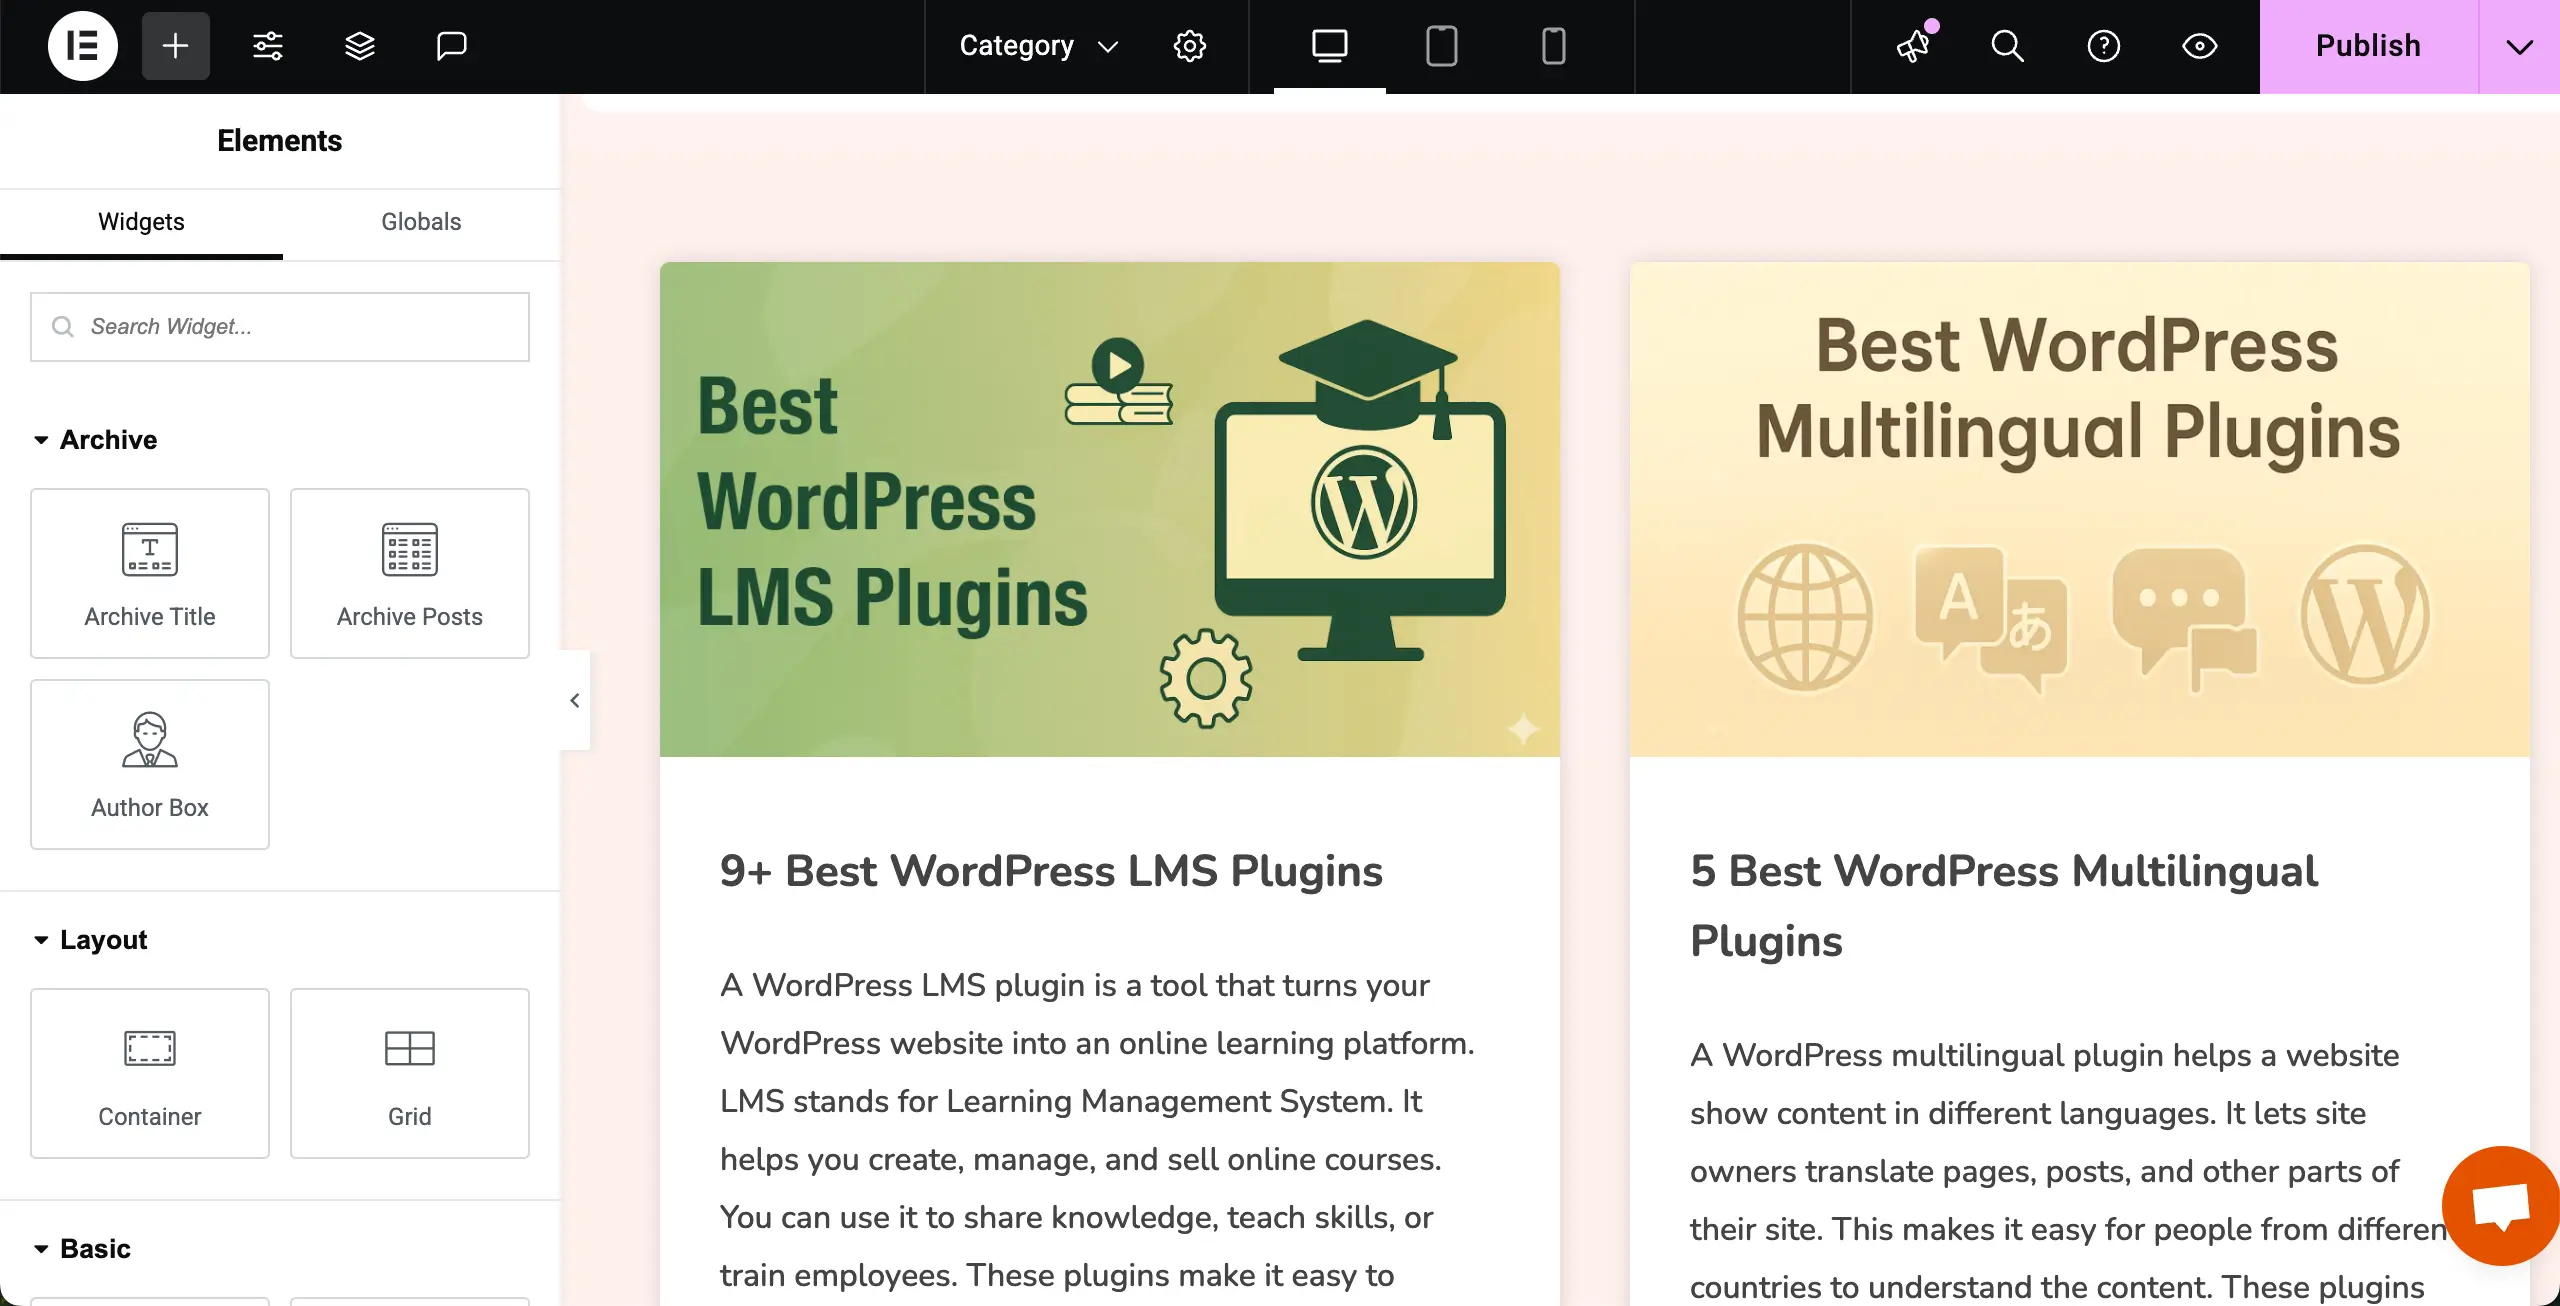
Step 03: Add the Taxonomy List Widget
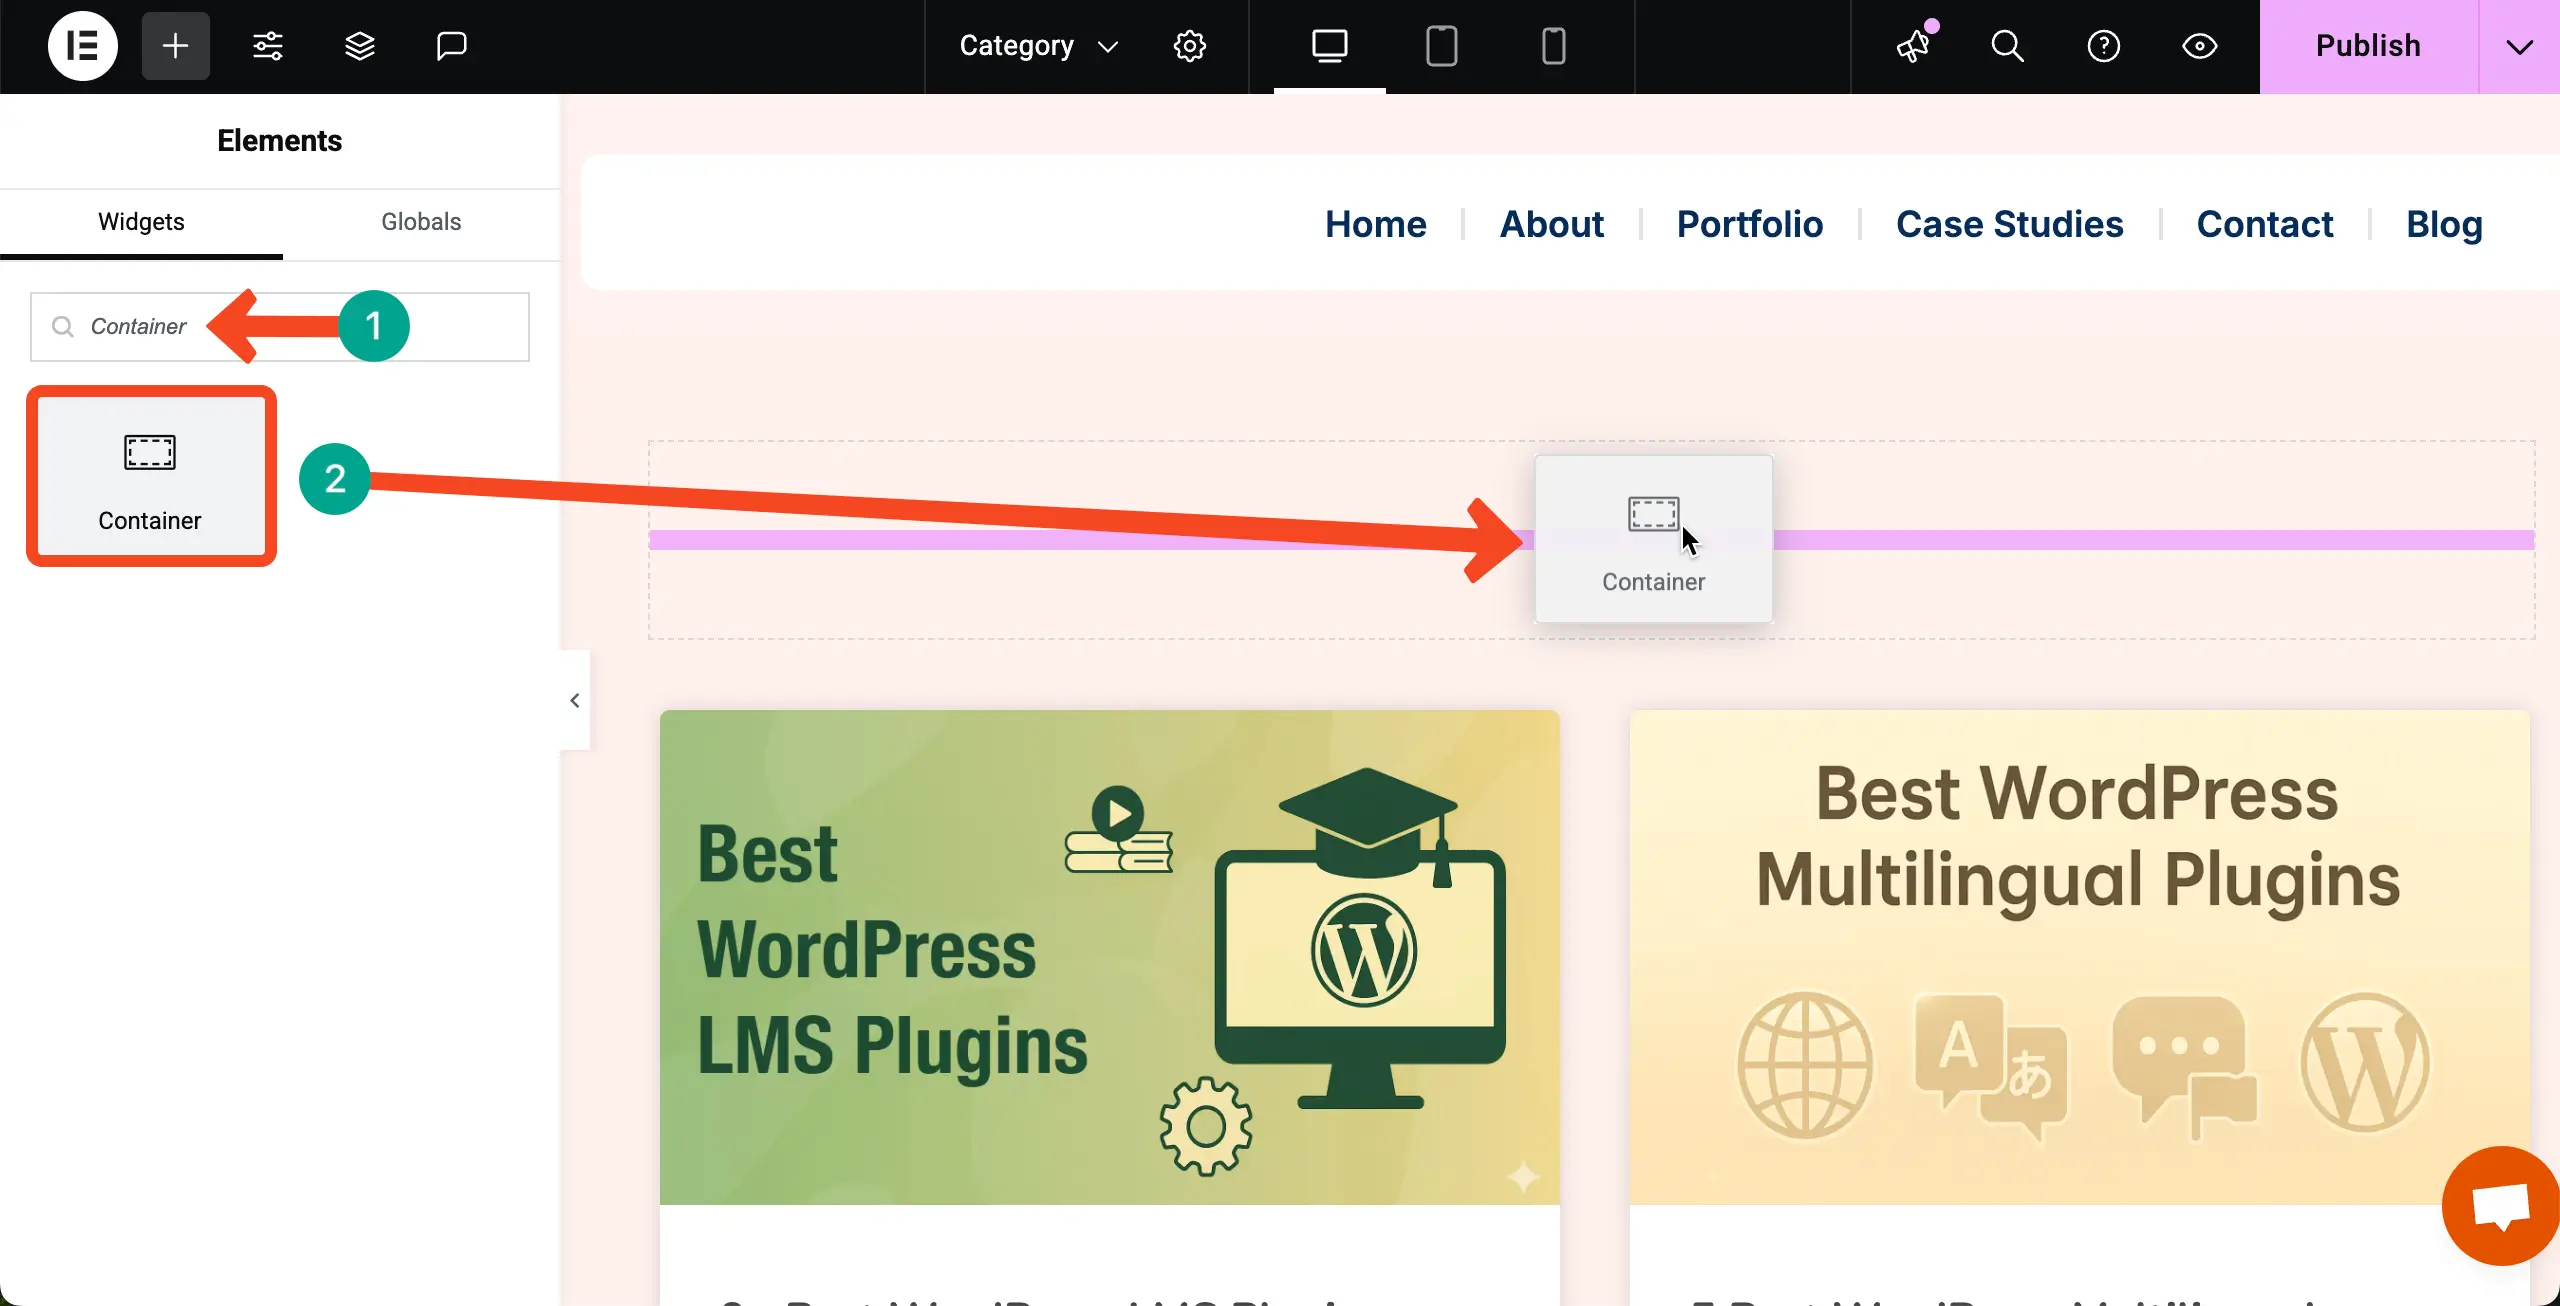
Before placing the Taxonomy List widget, place a Container on top of the Archive Posts. Because the Container will make it easy to manage and stylize the Taxonomy List widget.
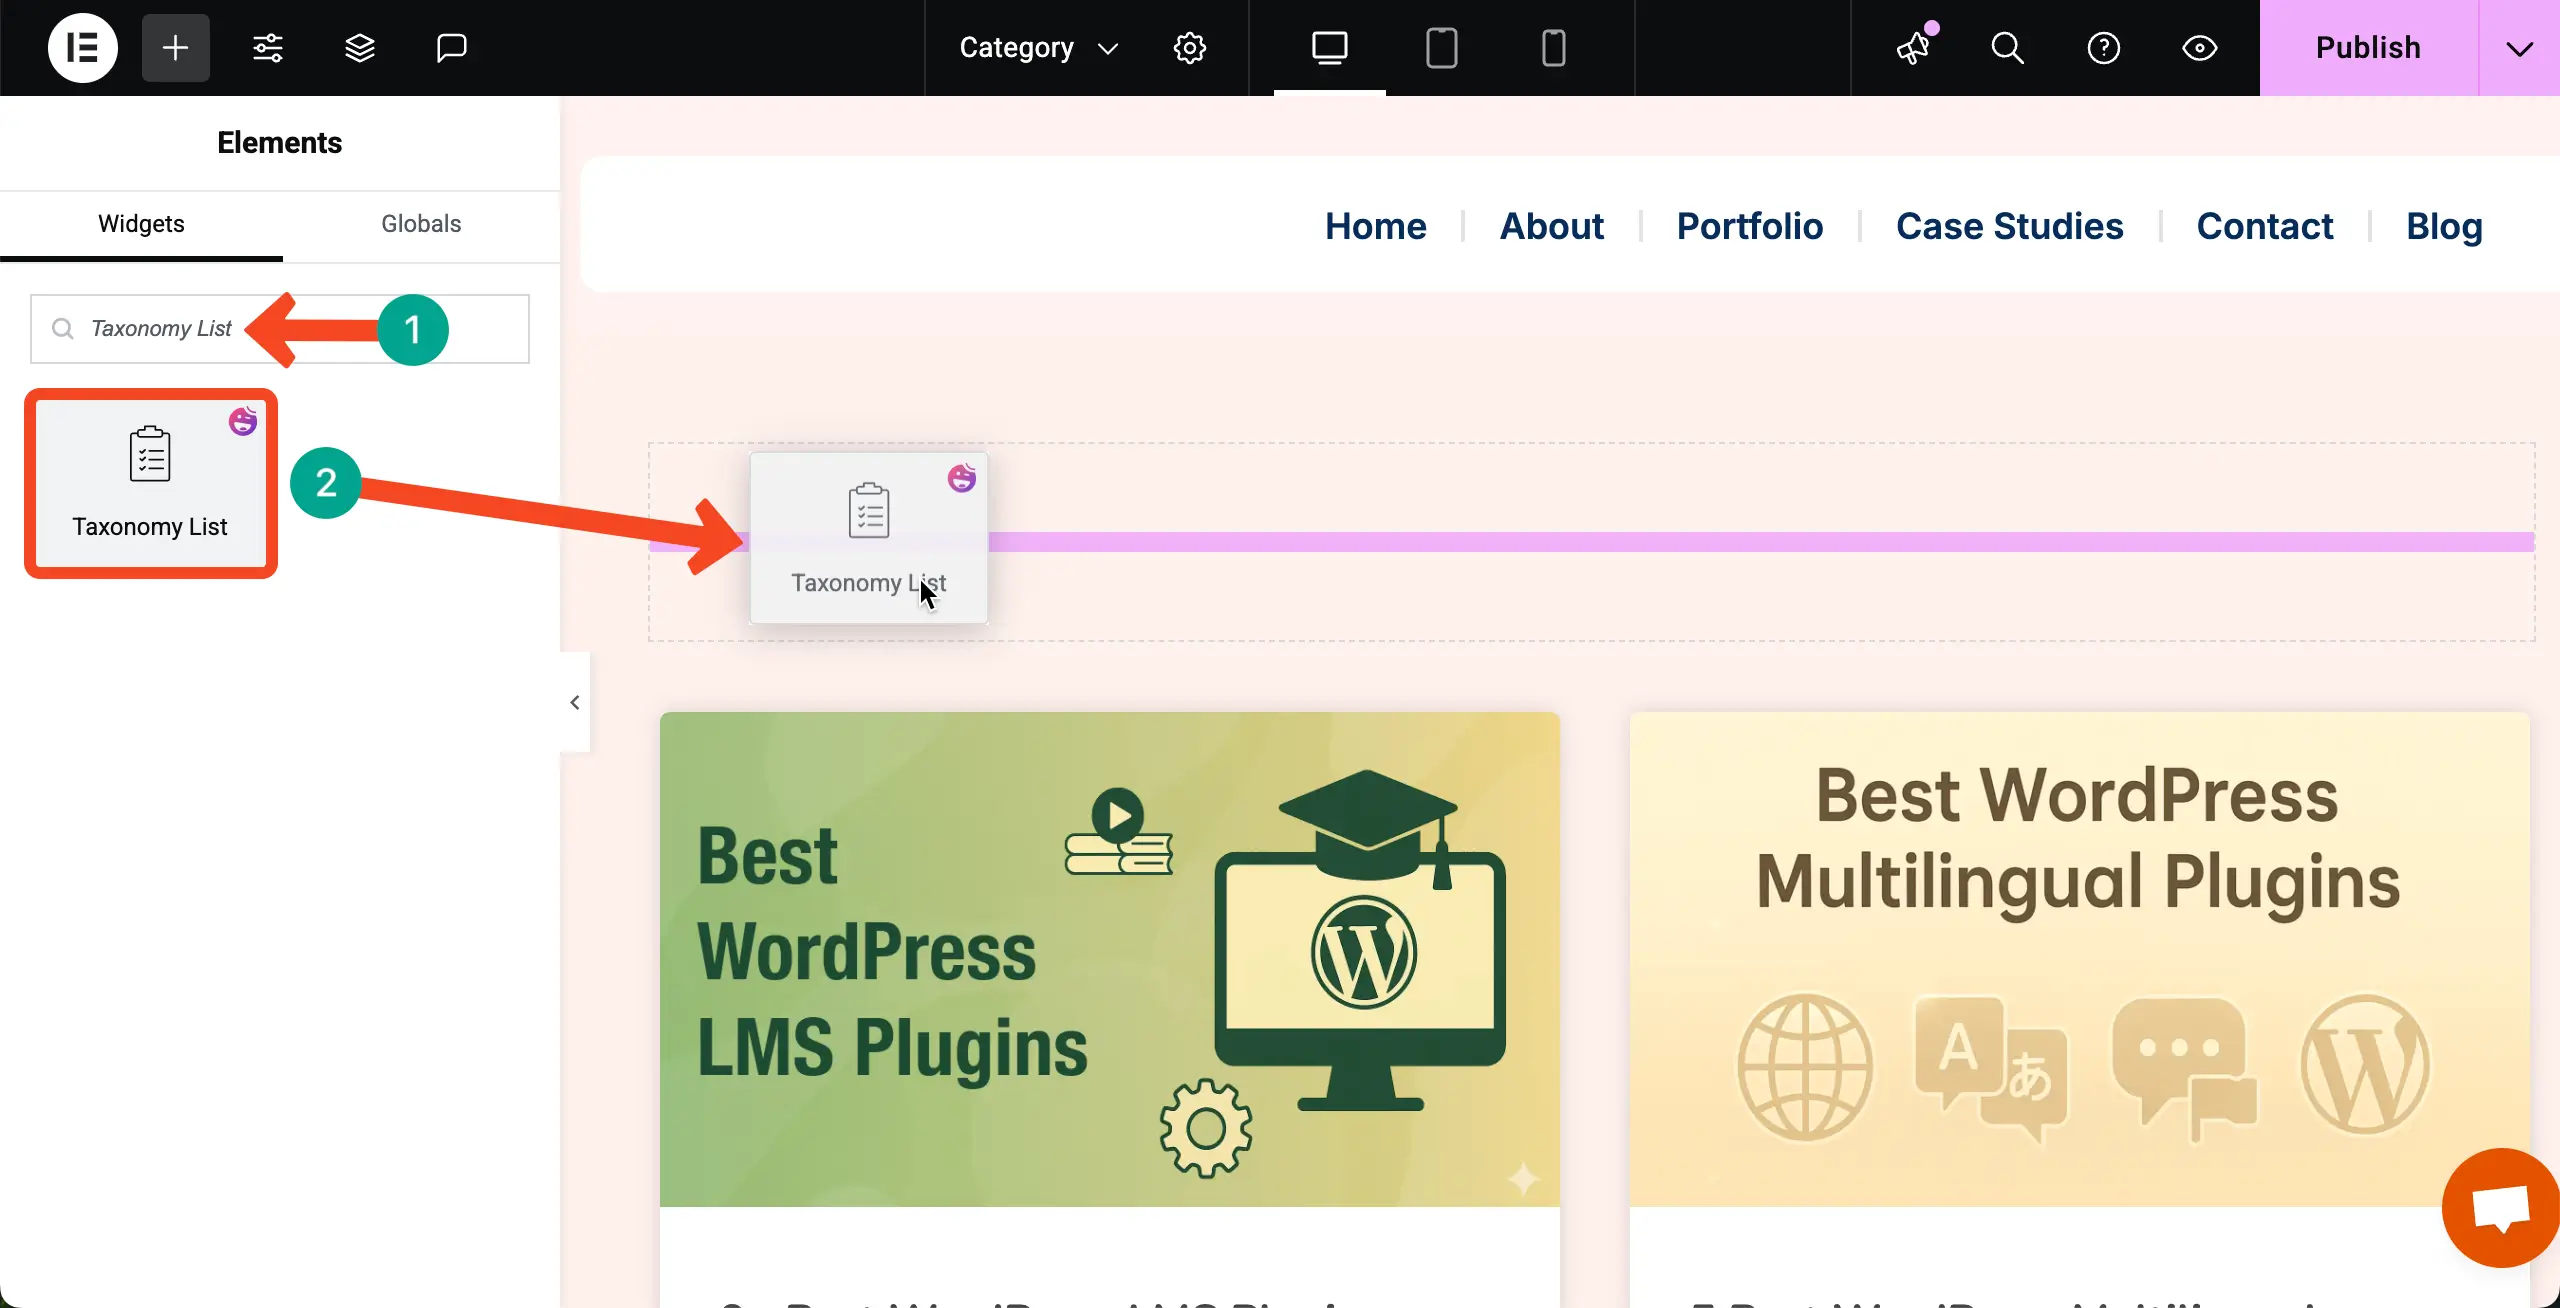
Once the container is added, find the Taxonomy List widget and place it over the container.
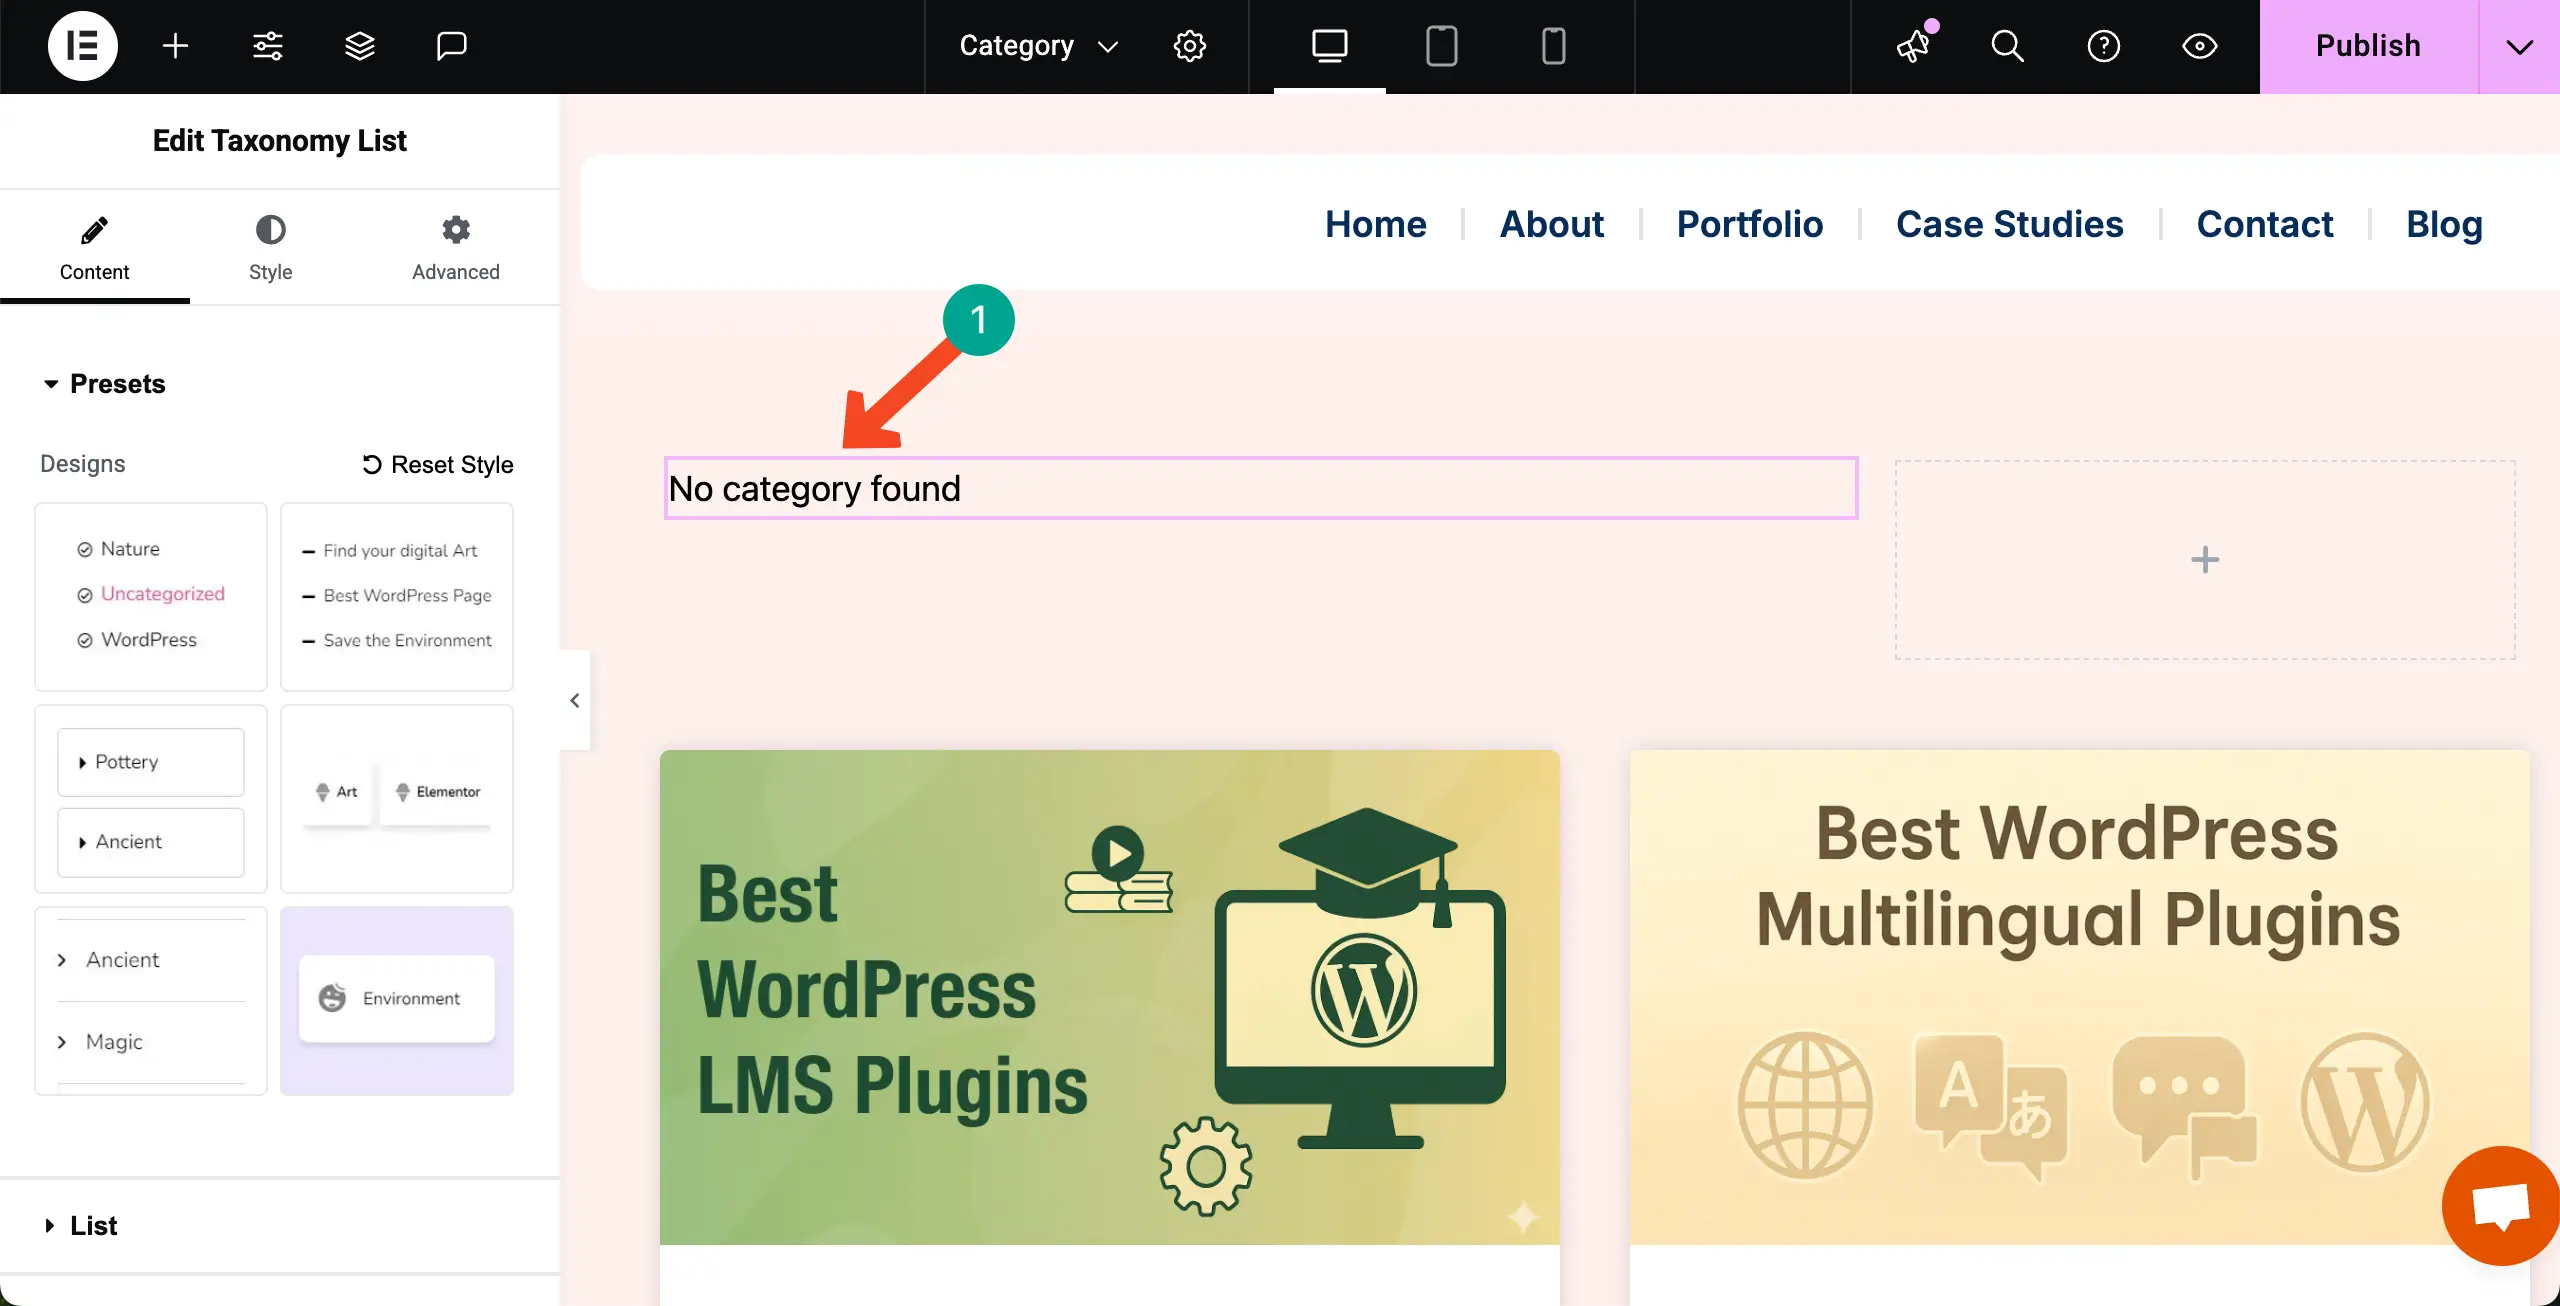
After the Taxonomy List widget is added, you’ll see the section like this. Now, you have to add categories.
Step 04: Add Categories
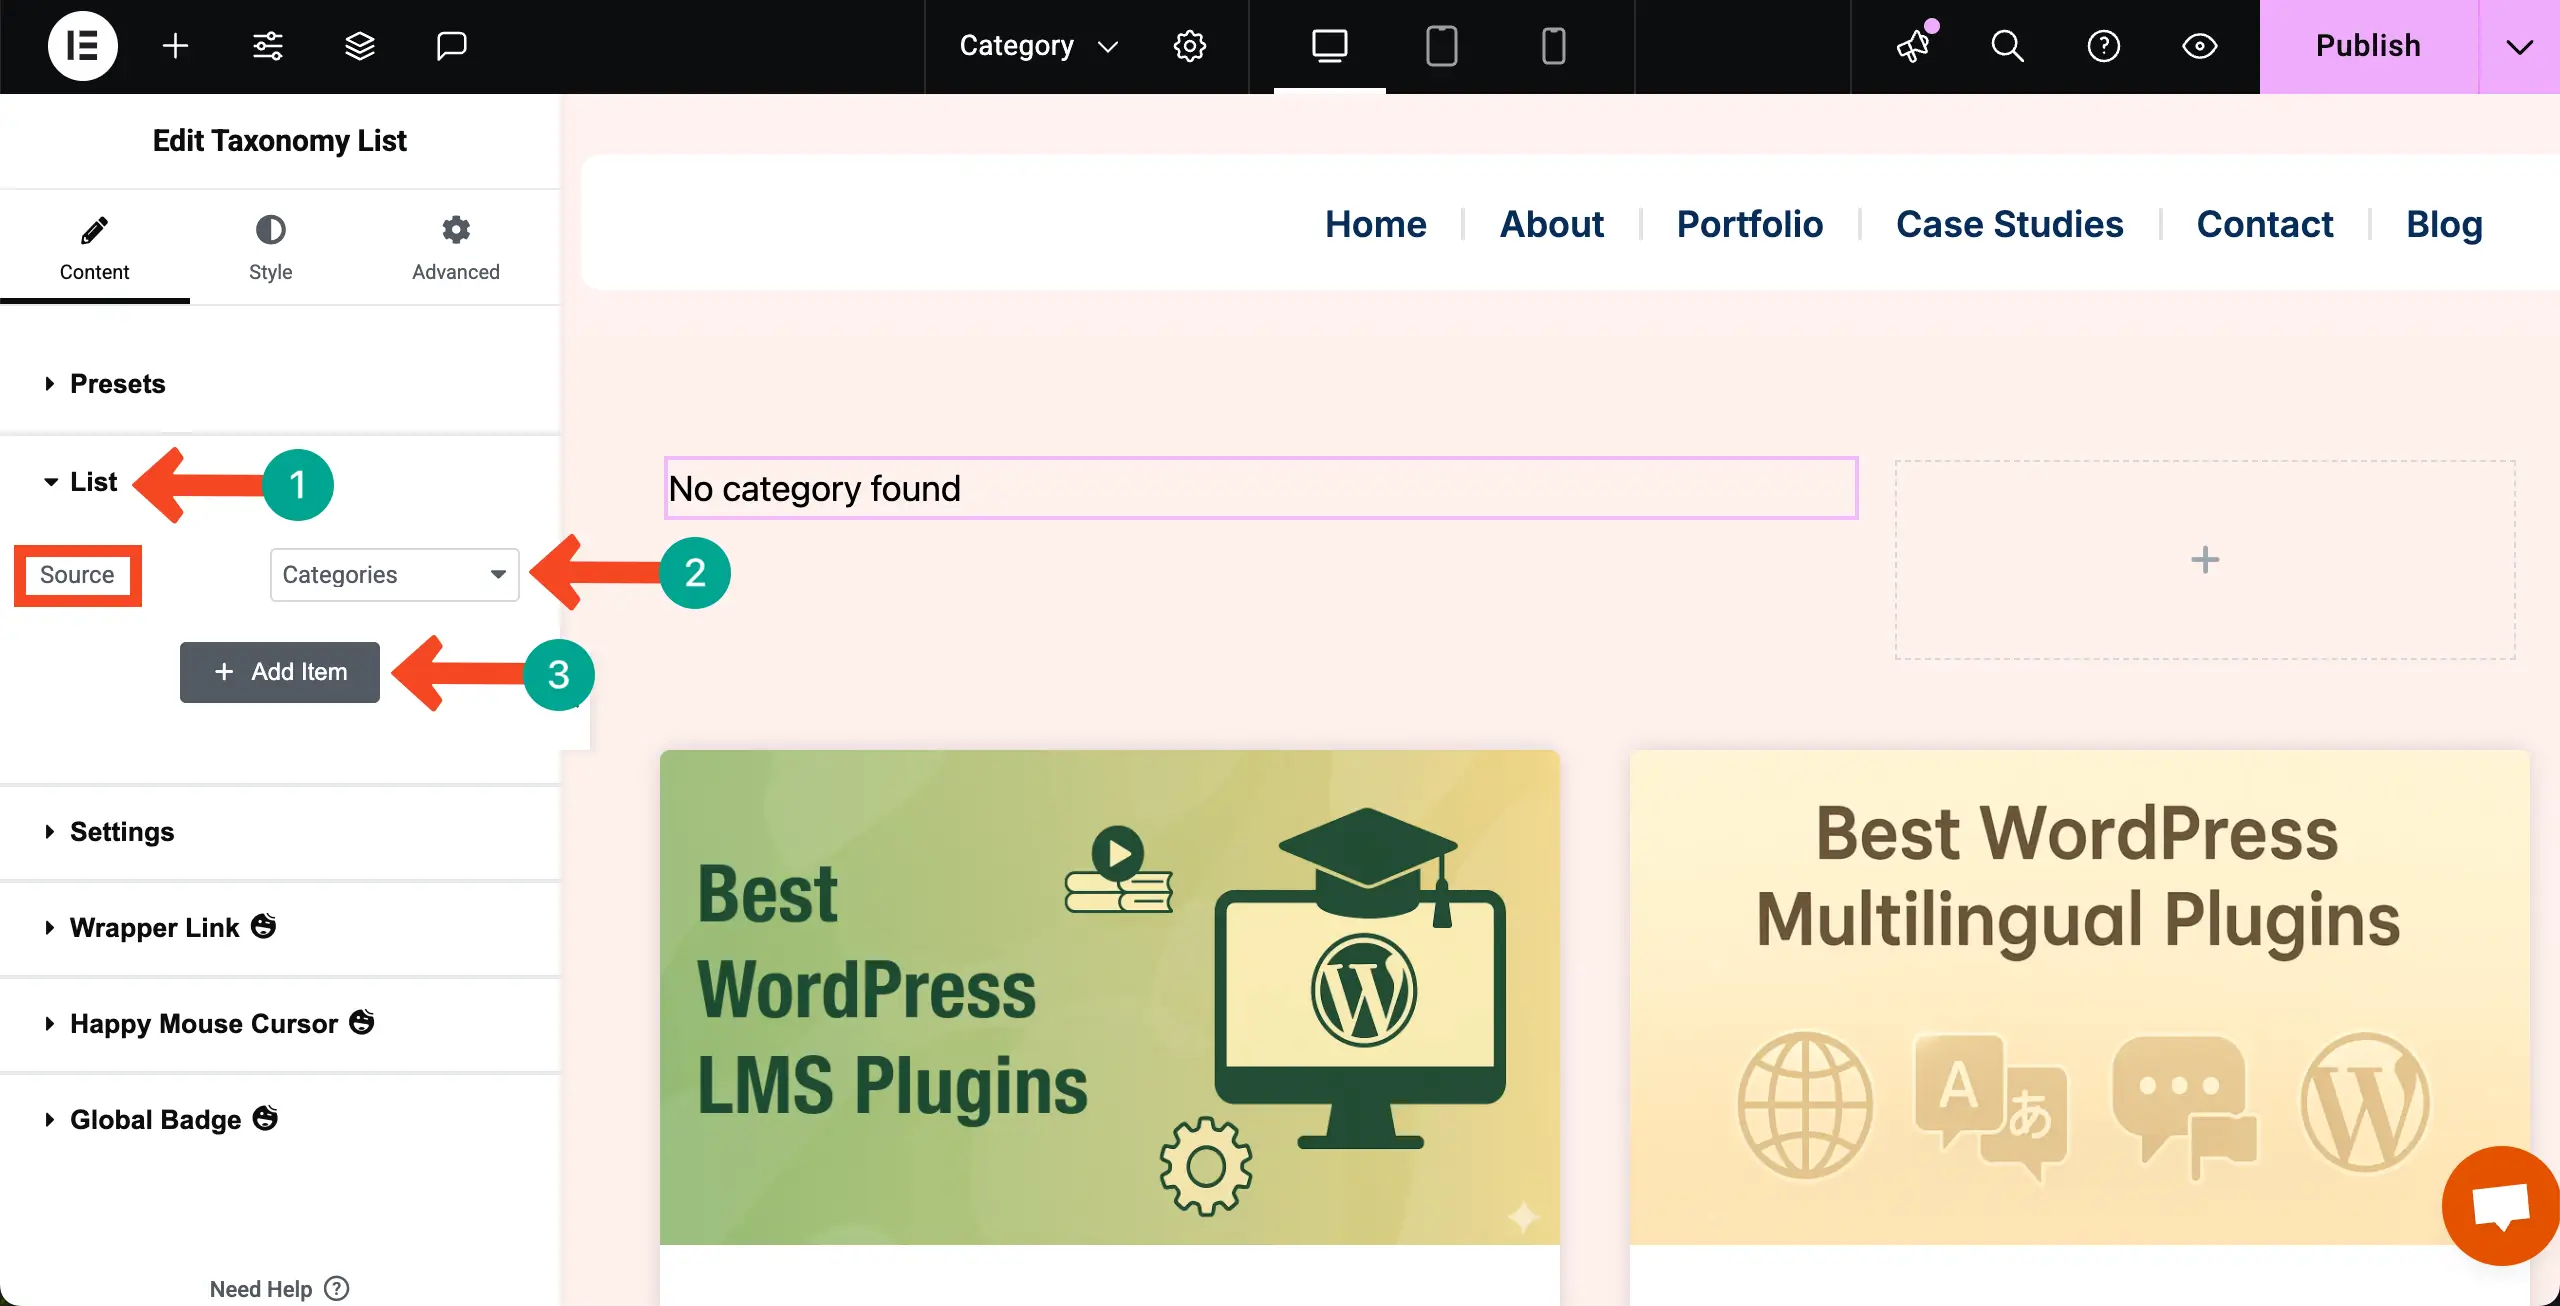
Adding Categories is very simple. Navigate to Content Tab > List. Next to the Source option, you’ll get a dropdown list. From there, select Categories.
After that, click the + Add Item. This will open up the space for you to add as many categories as you want.
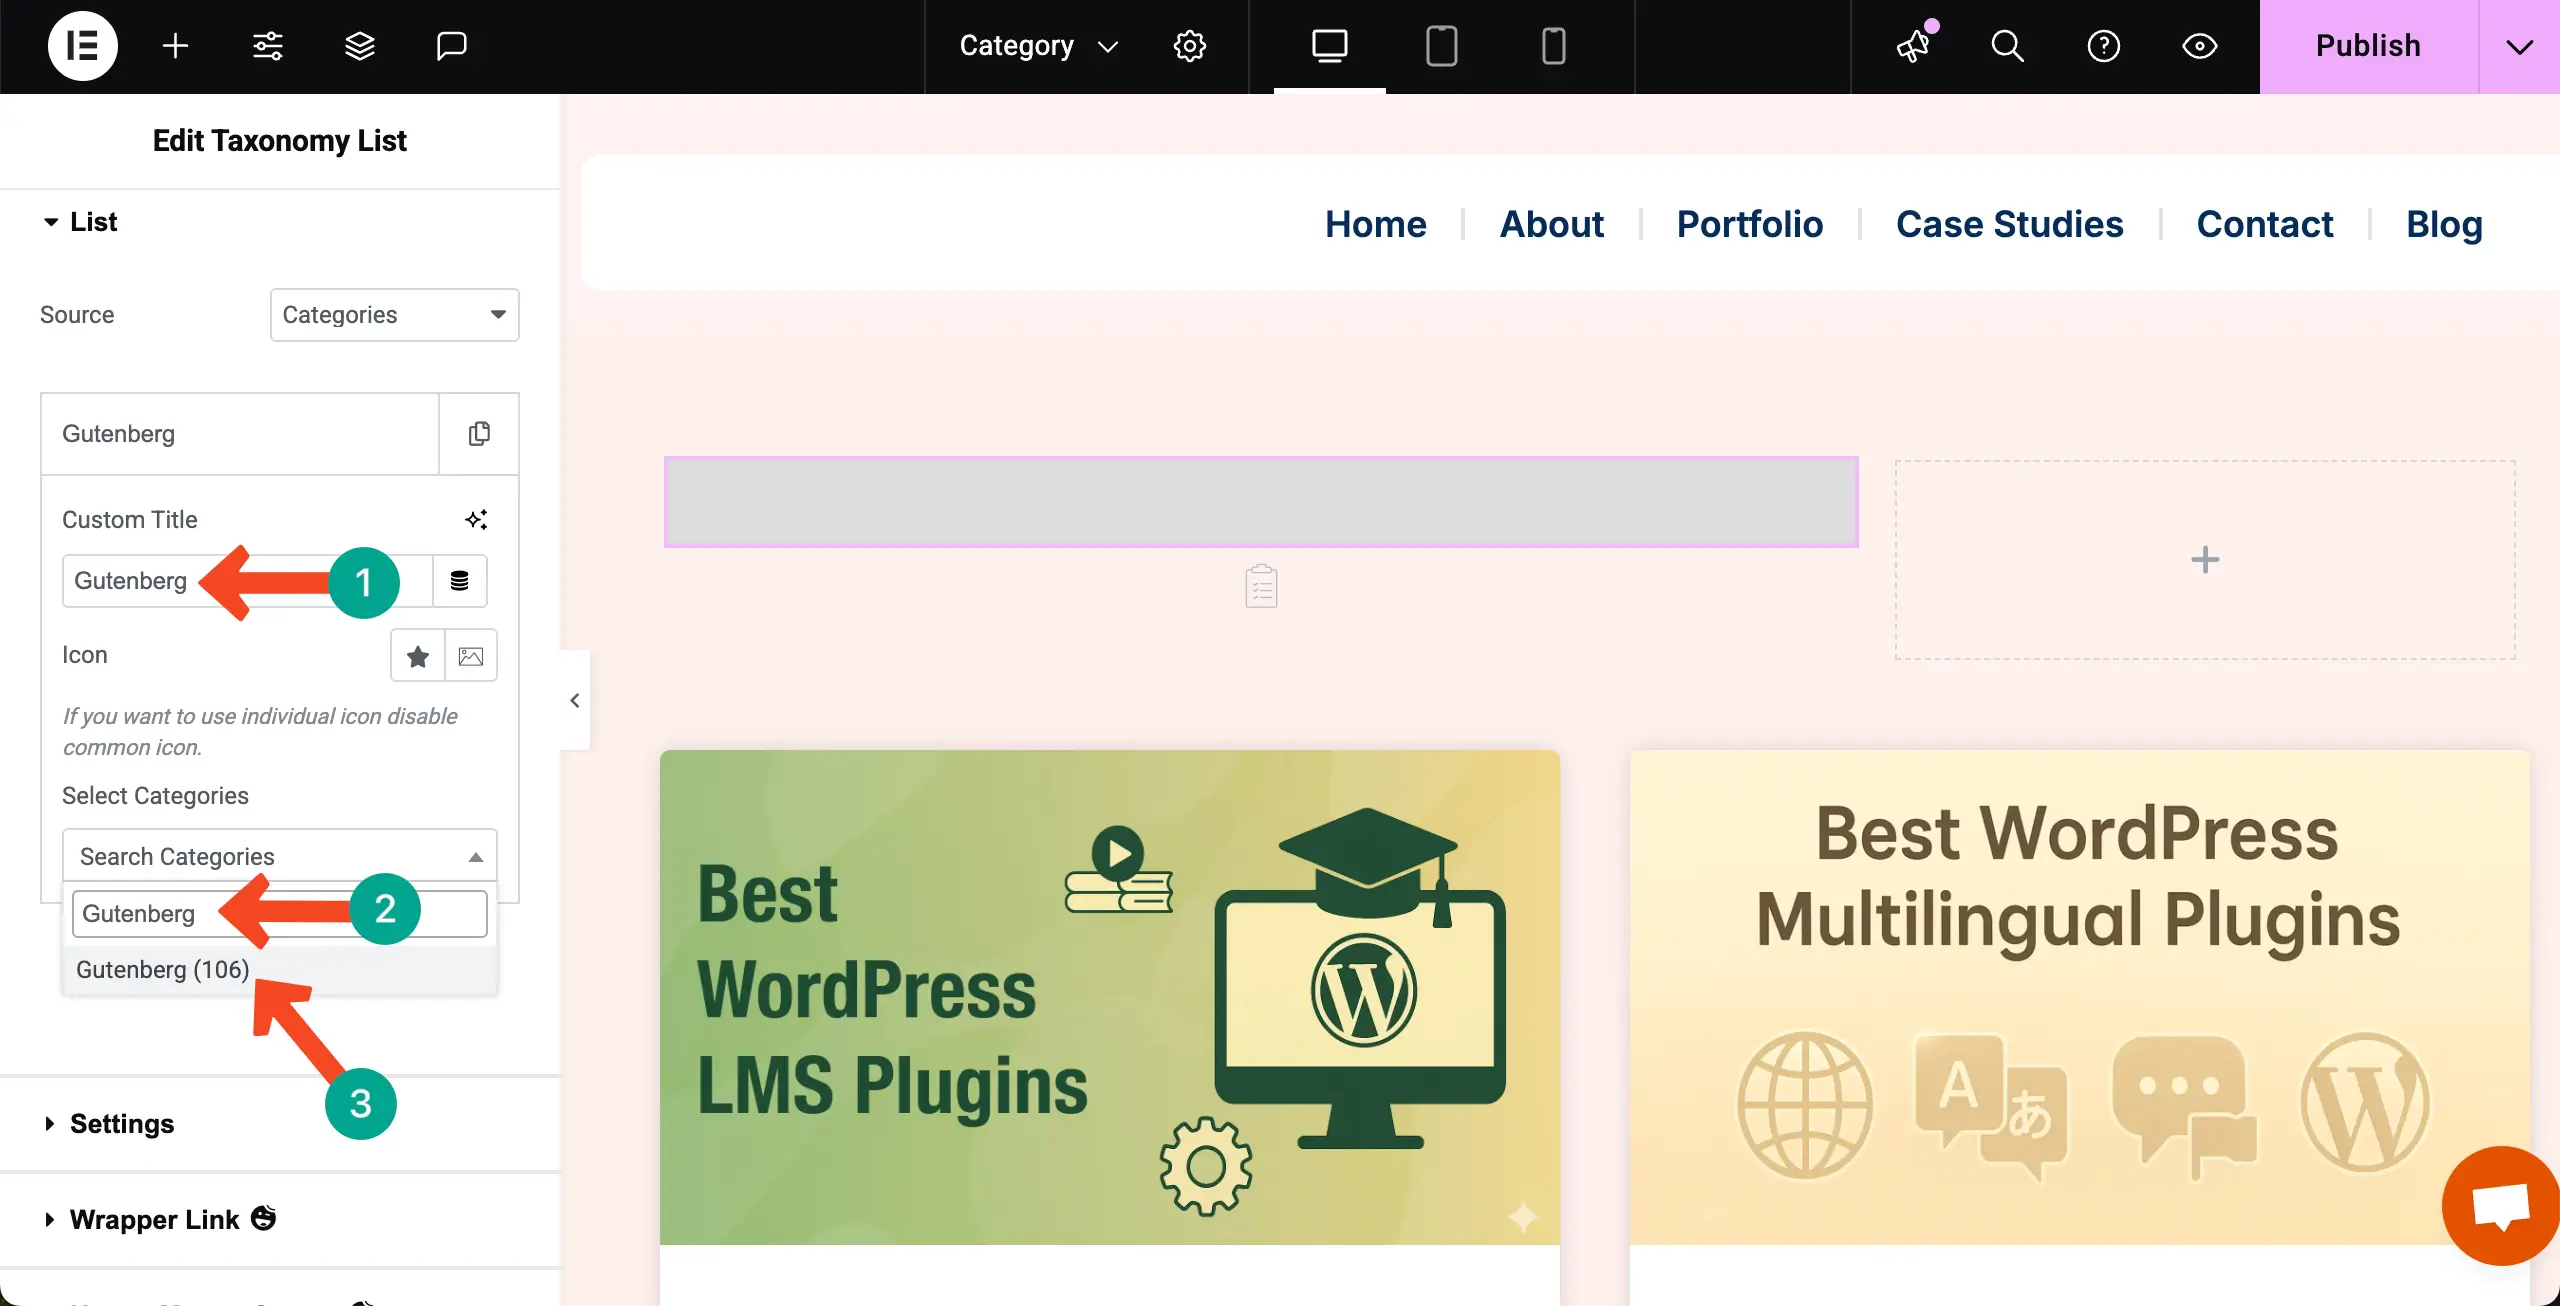
Write a name for the category. Then, from the Select Categories search box, type the category you want. For example, we have typed Gutenberg to get and select the category.
Note: Make sure that you have already saved the category in the backend while creating blog posts. Otherwise, you won’t get them in the select categories search box.
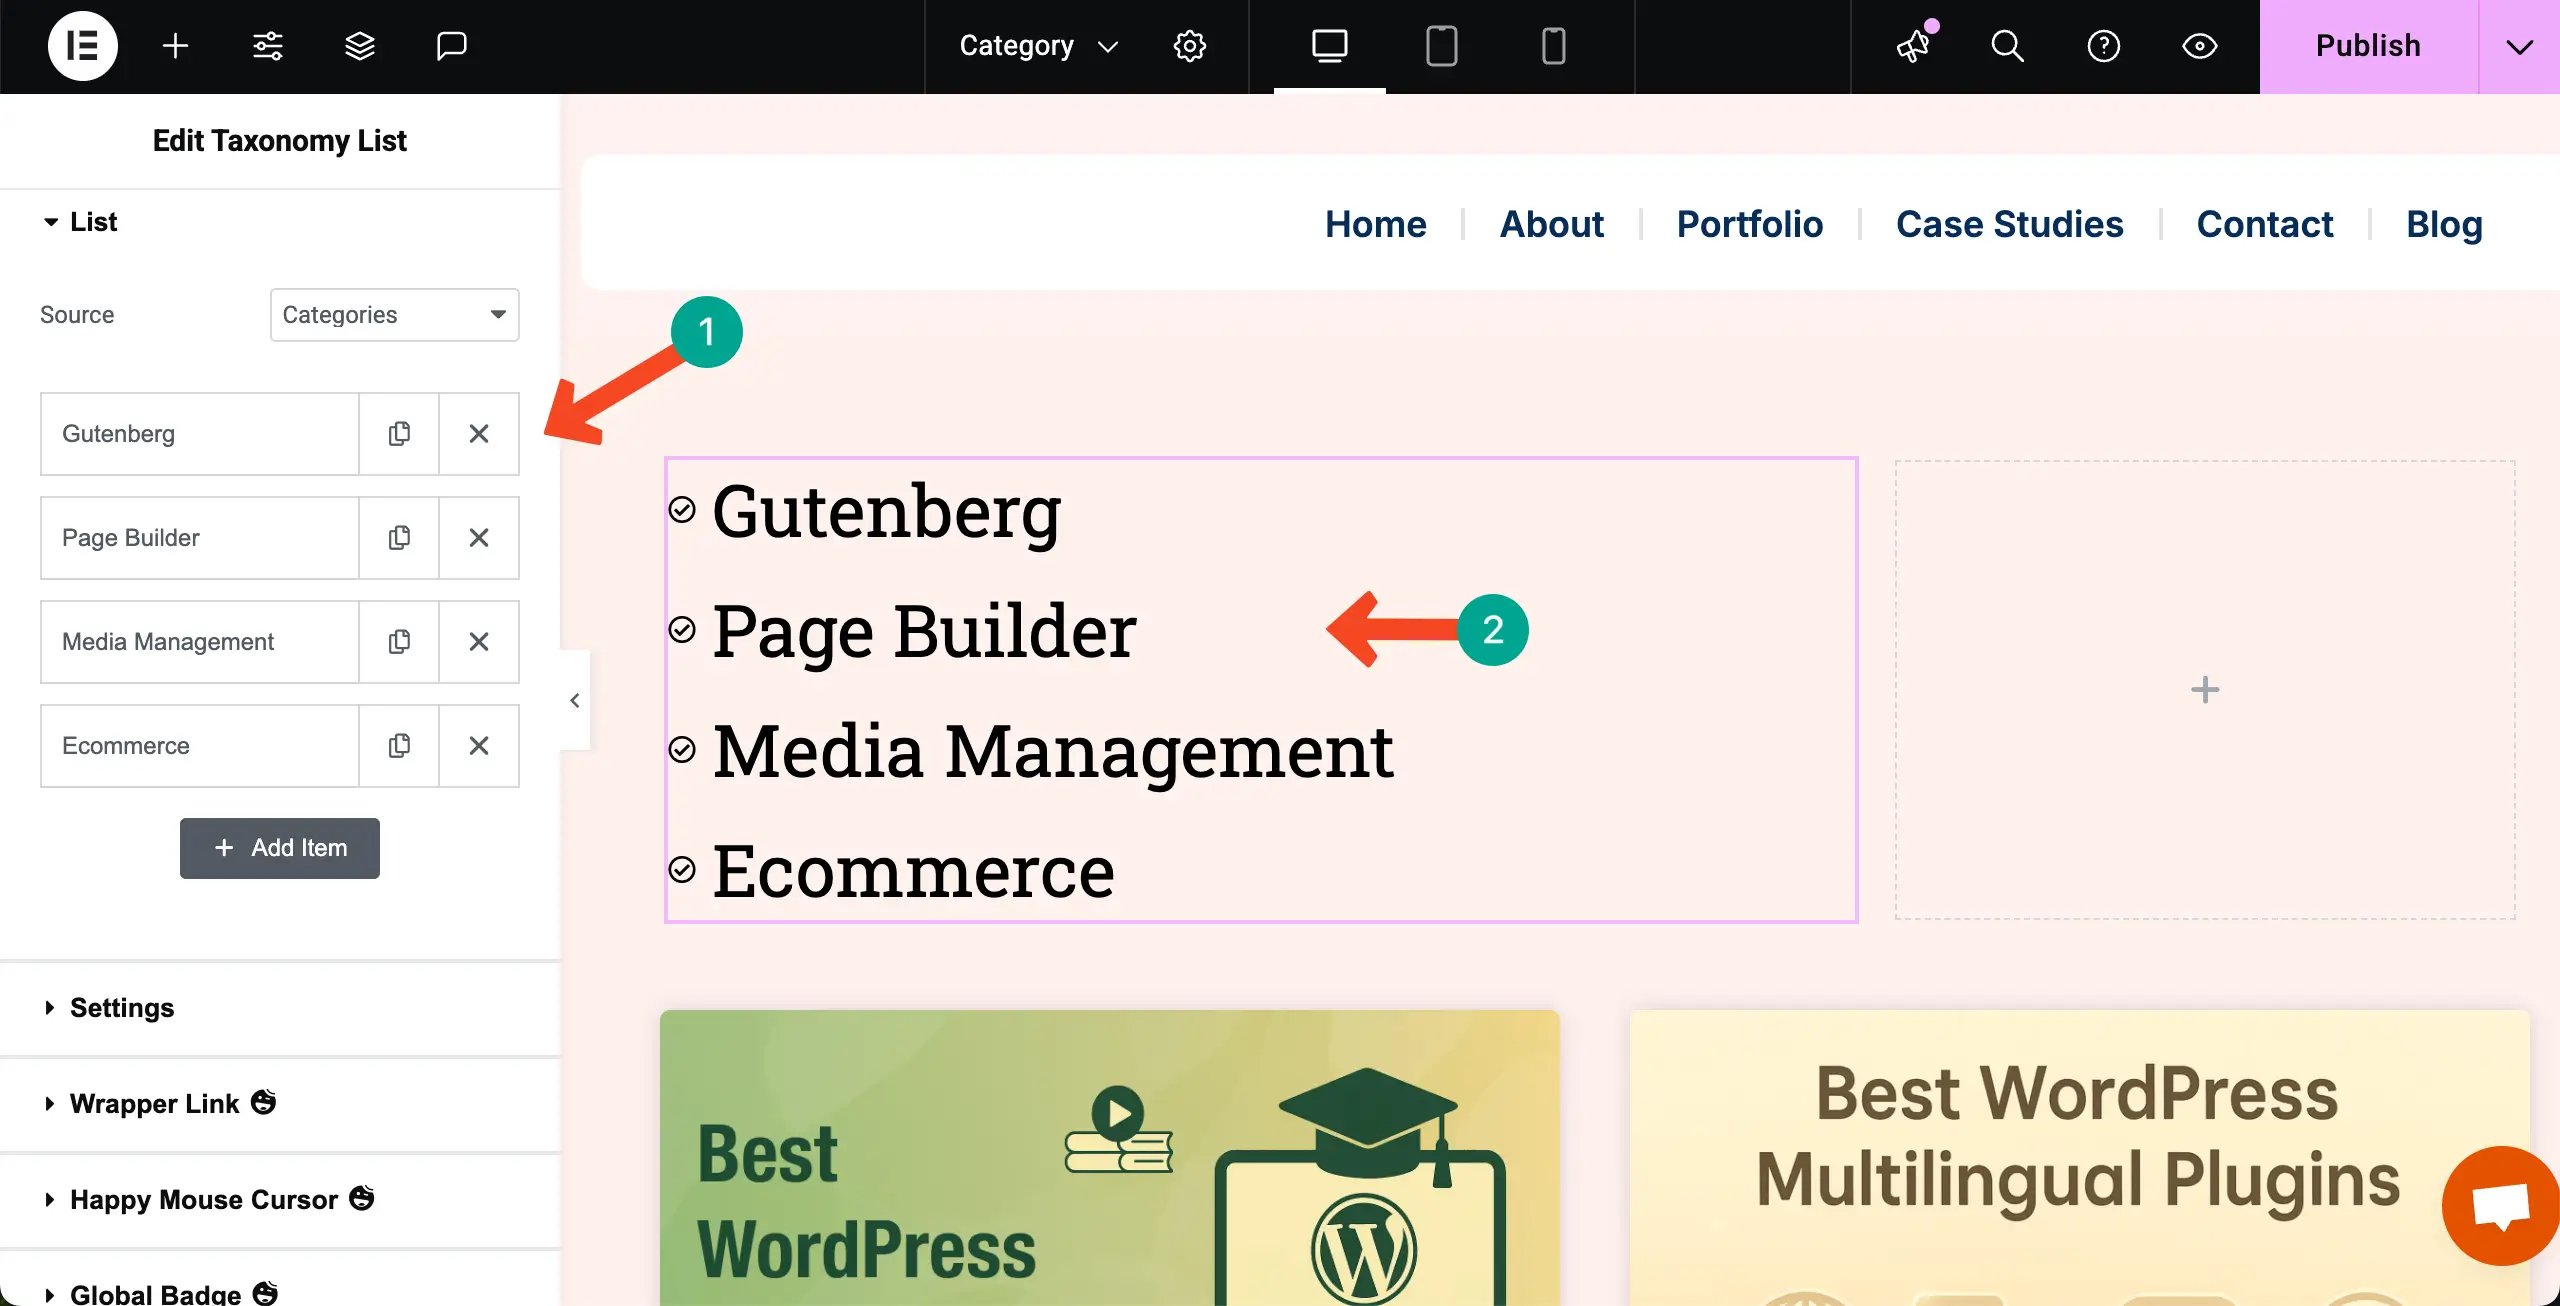
You can add as many categories as you want. See that we have added four categories but they don’t look good. You have to stylize them according to your page’s appeal.
Step 05: Stylize the Categories
To save time, you may select a preset for the stylization.
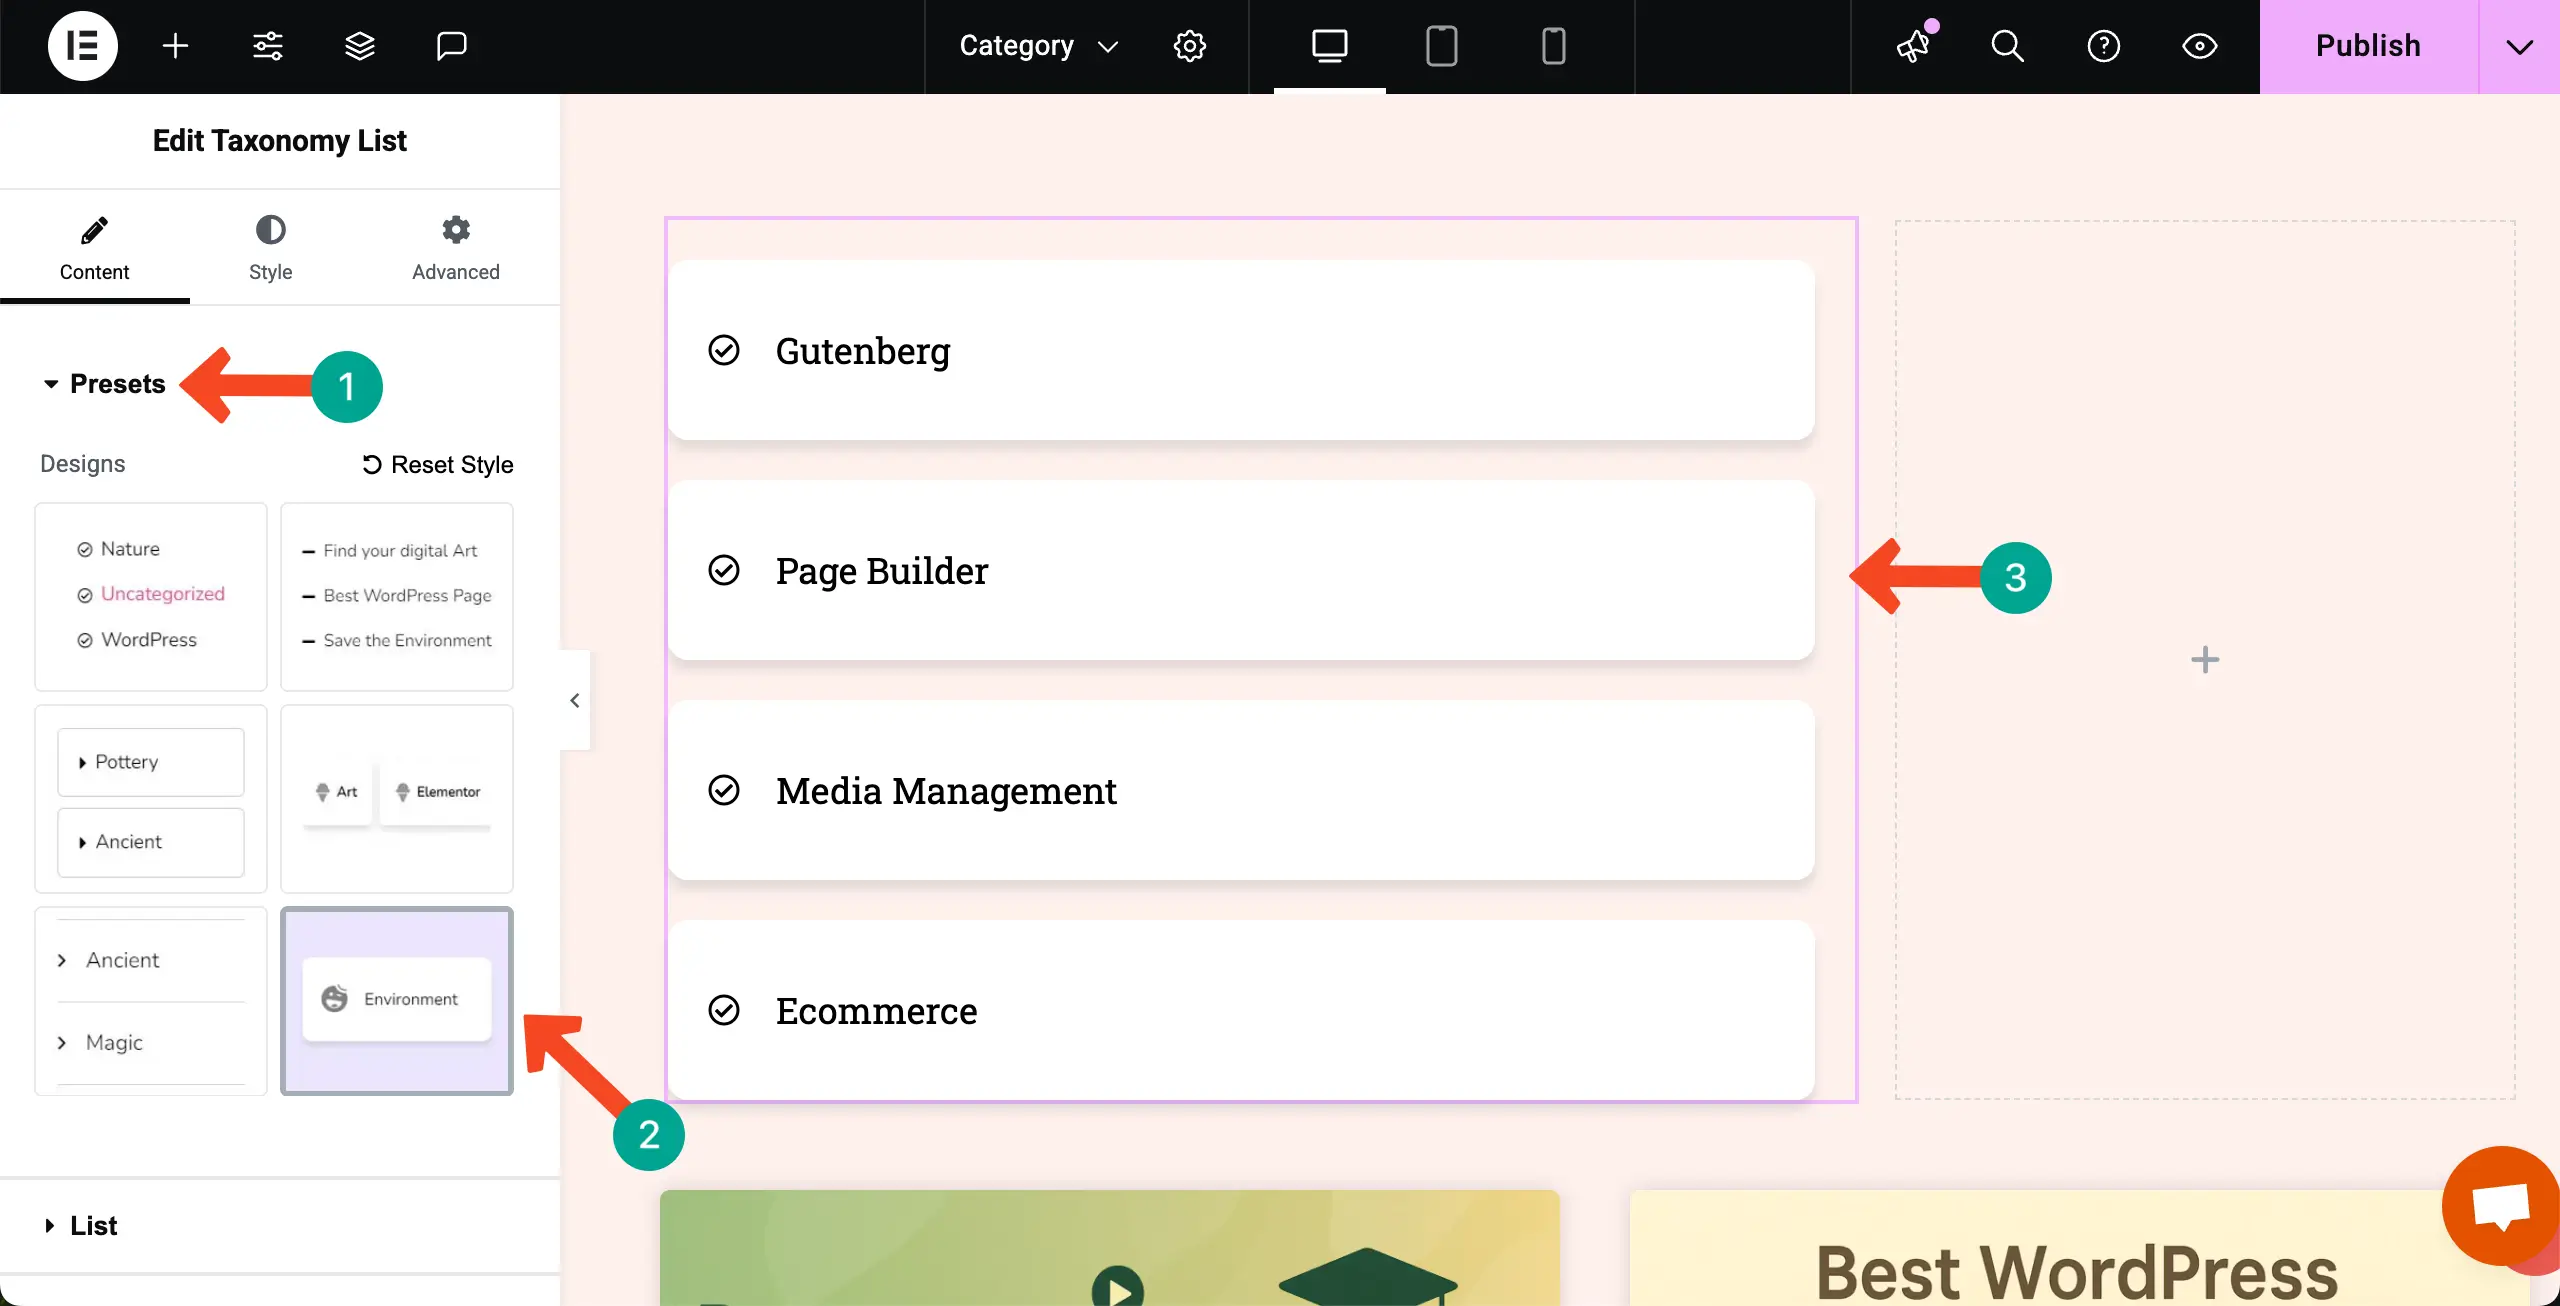
You can further stylize them from the Style tab and make them look similar to the one as you can see in the image below.
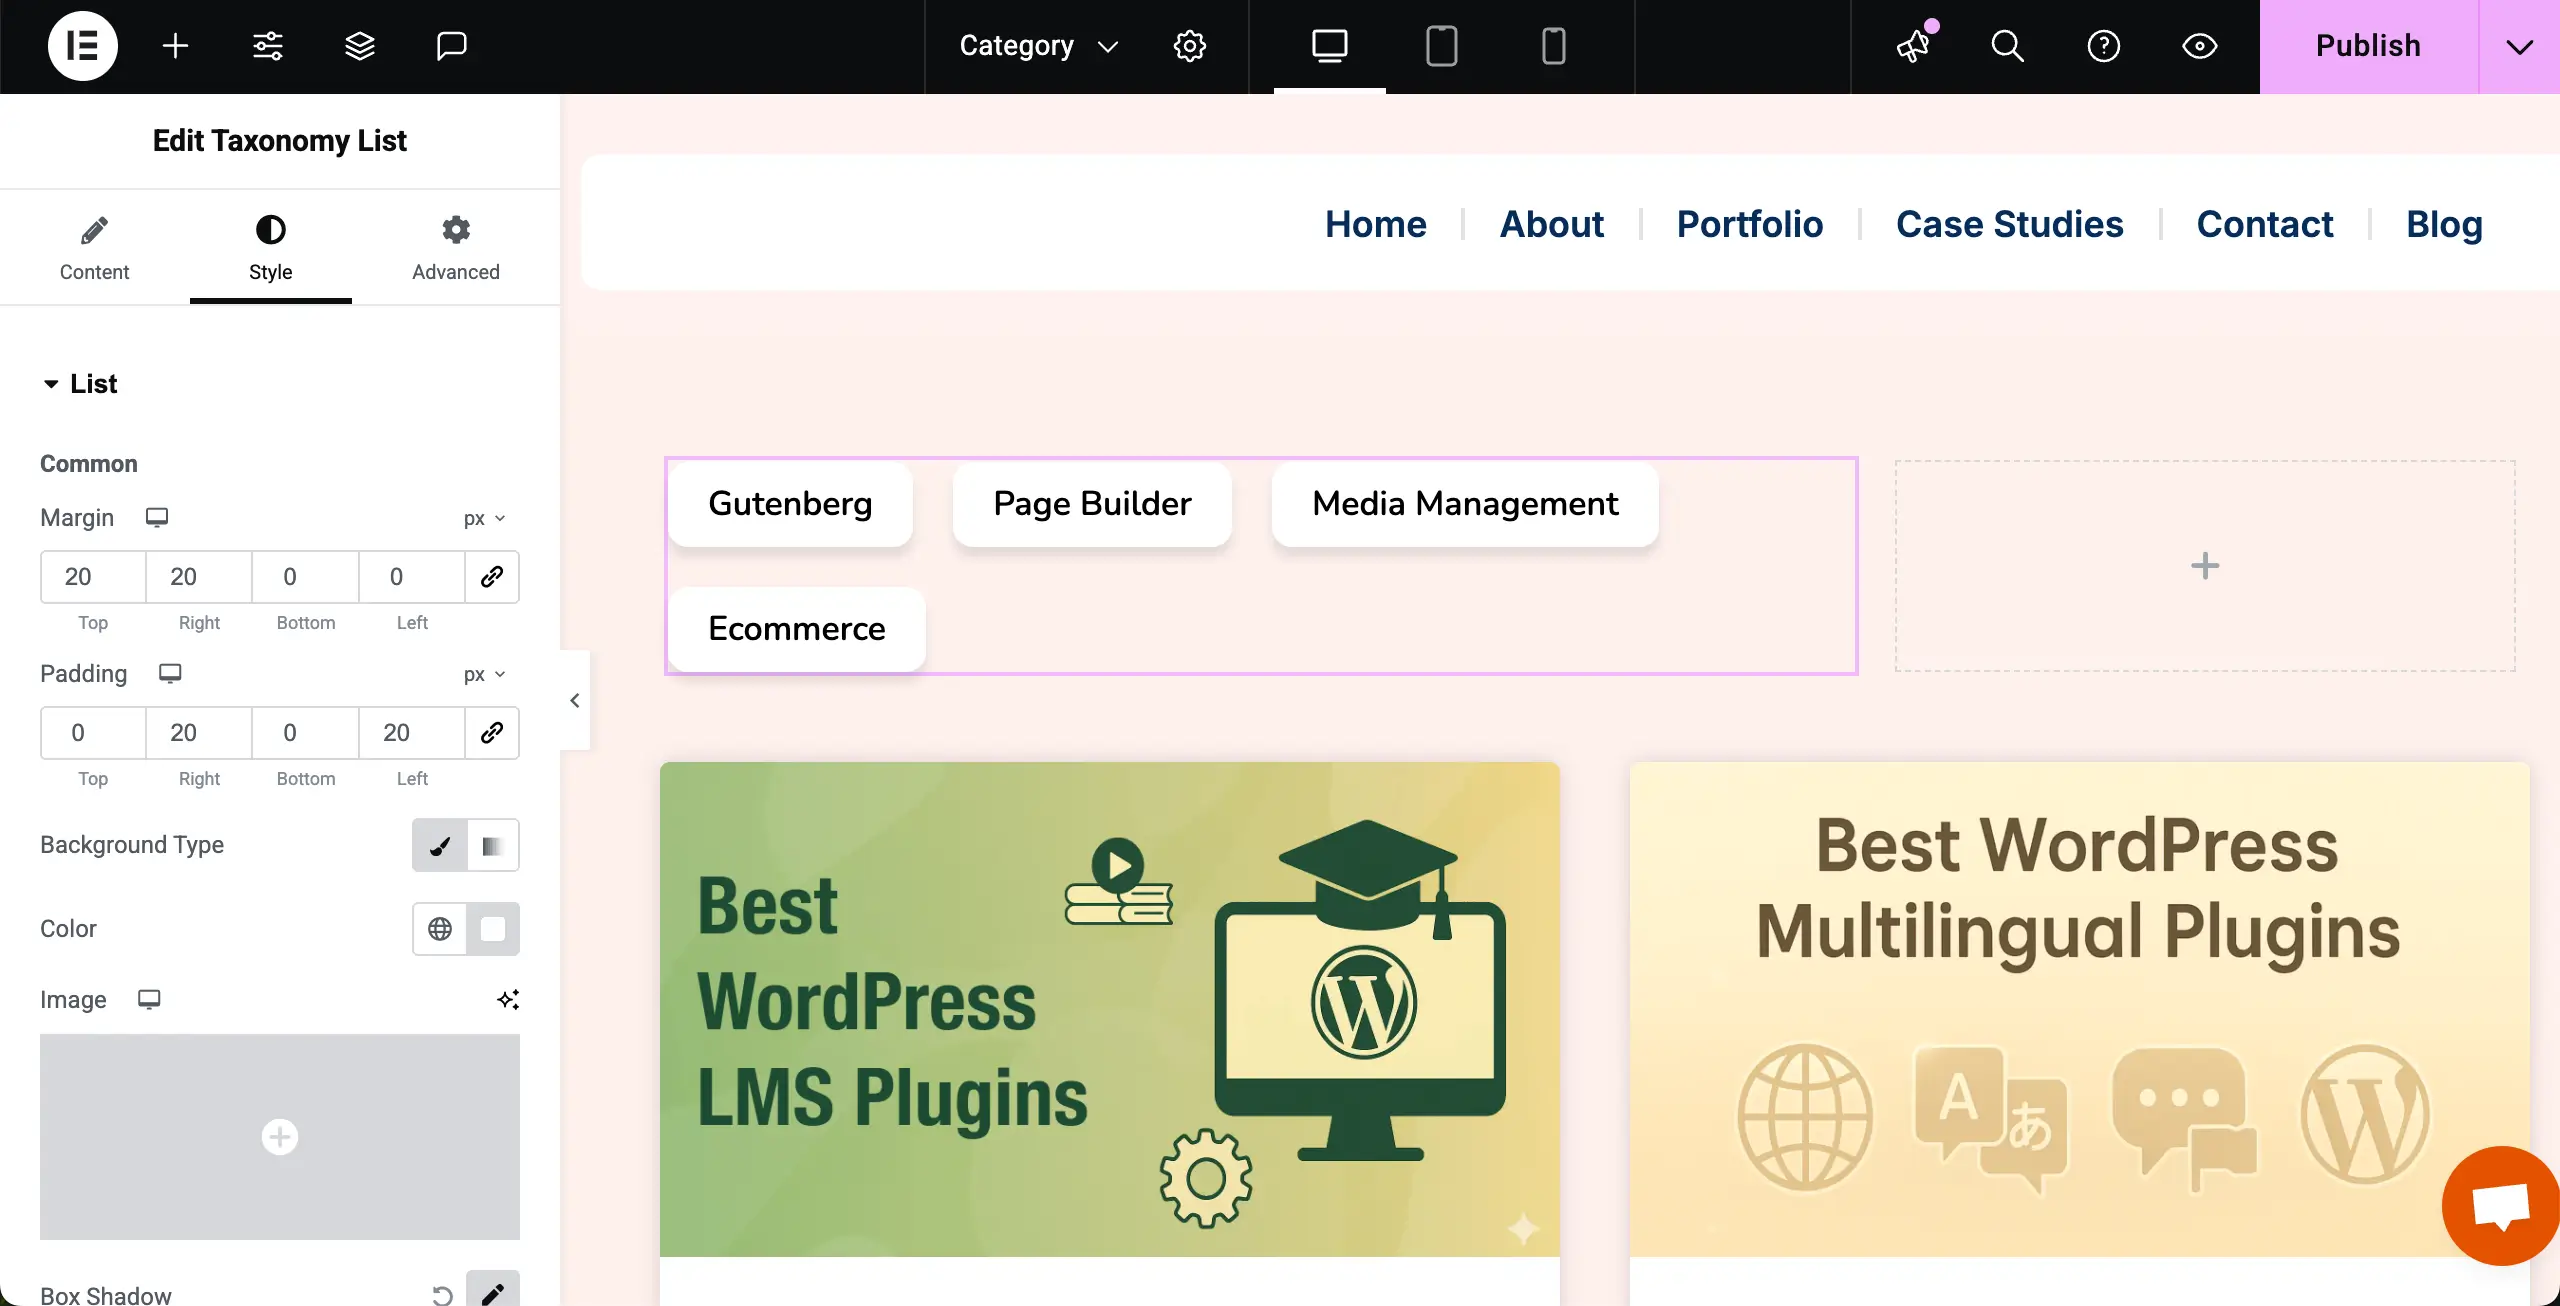
Step 06: Set Conditions and Publish the Page
When necessary stylizations are done, go to the Display Conditions option.
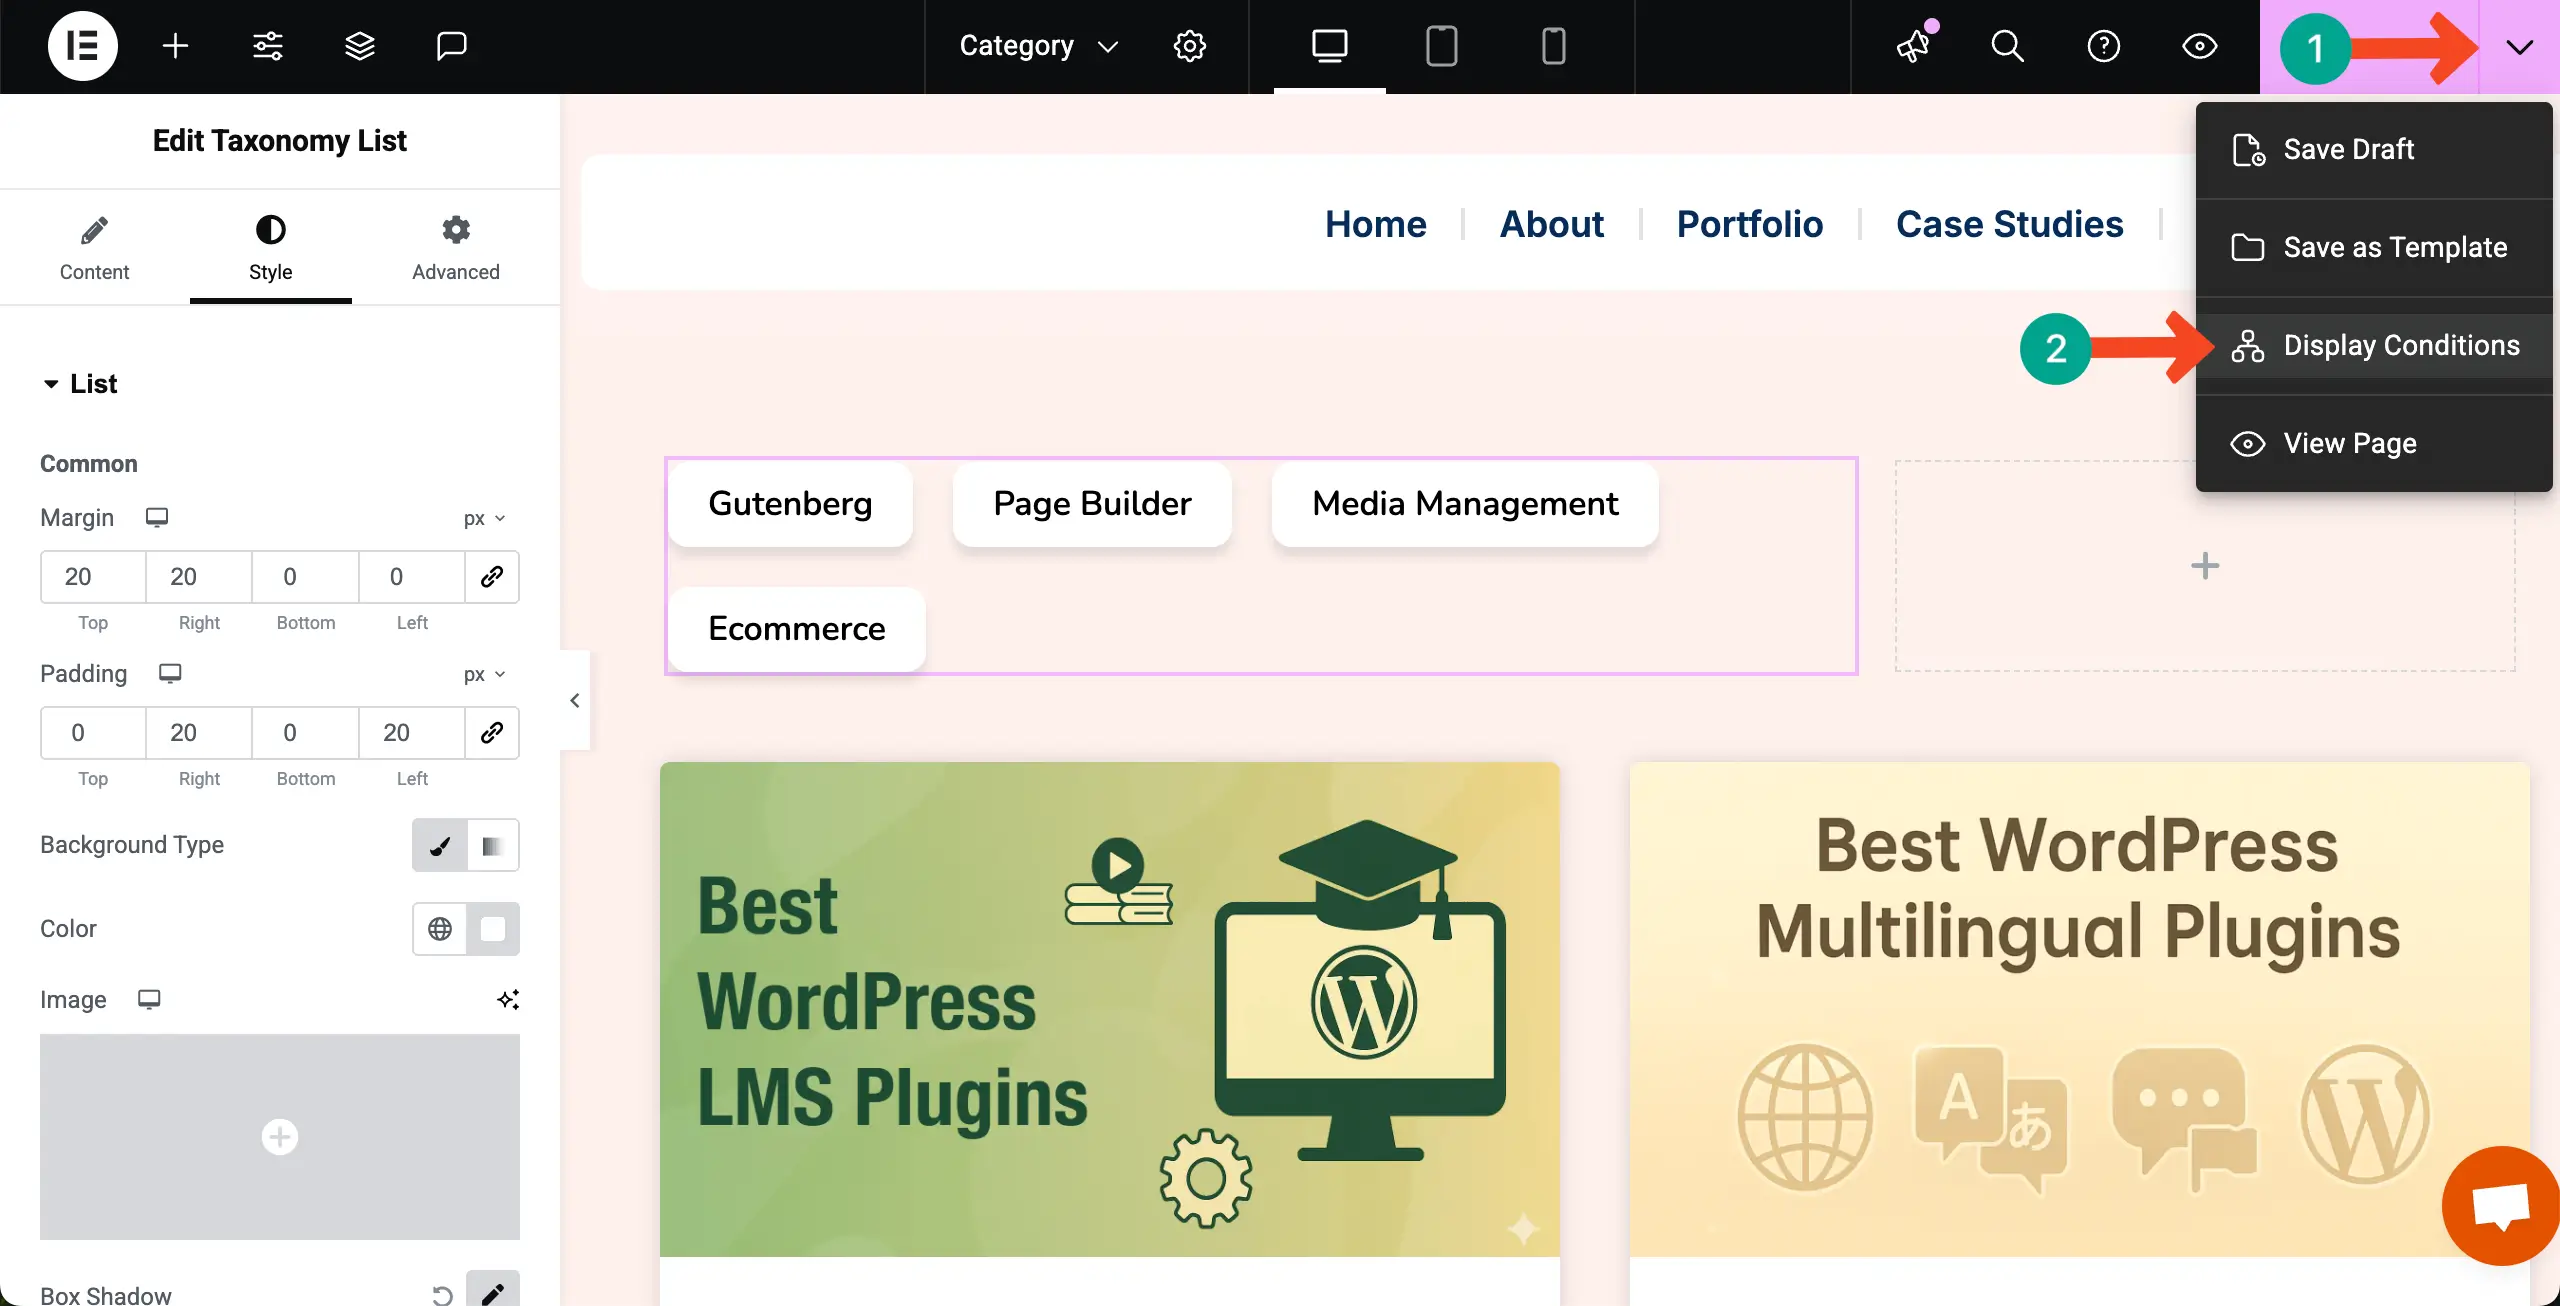
Select Categories for the condition.

Save the condition.

Step 07: Preview the Category Functionality
Come to the preview page. Click on the categories one by one. You’ll see the posts are changing according to the categories.
Thus, you can display your posts on the archive page by categories using the Taxonomy List widget.
Bonus: Try HappyAddons to Use the Theme Builder for Free
HappyAddons is a powerful plugin for Elementor that comes with 130+ widgets and 24+ features to take your website design to the next level. It offers creative design tools, advanced functionality, and many customization options that go beyond what you get with Elementor alone.
Both free and premium versions are available. Even the free version is loaded with useful tools that make web design faster and easier.
# HappyAddons Theme Builder (Free)
One of the standout features in HappyAddons is the Theme Builder, which is completely free to use. With this, you can design custom templates for your WordPress site, including headers, footers, single posts, and archive pages. This means you are not restricted to your theme’s default designs.
When it comes to blog archives, you can add a blog grid, post list, or archive post widget, and even place a taxonomy or category menu on top. This helps you display blog posts by categories in a stylish and user-friendly way. So, displaying blog posts by categories on the archive page becomes free with the HappyAddons plugin.
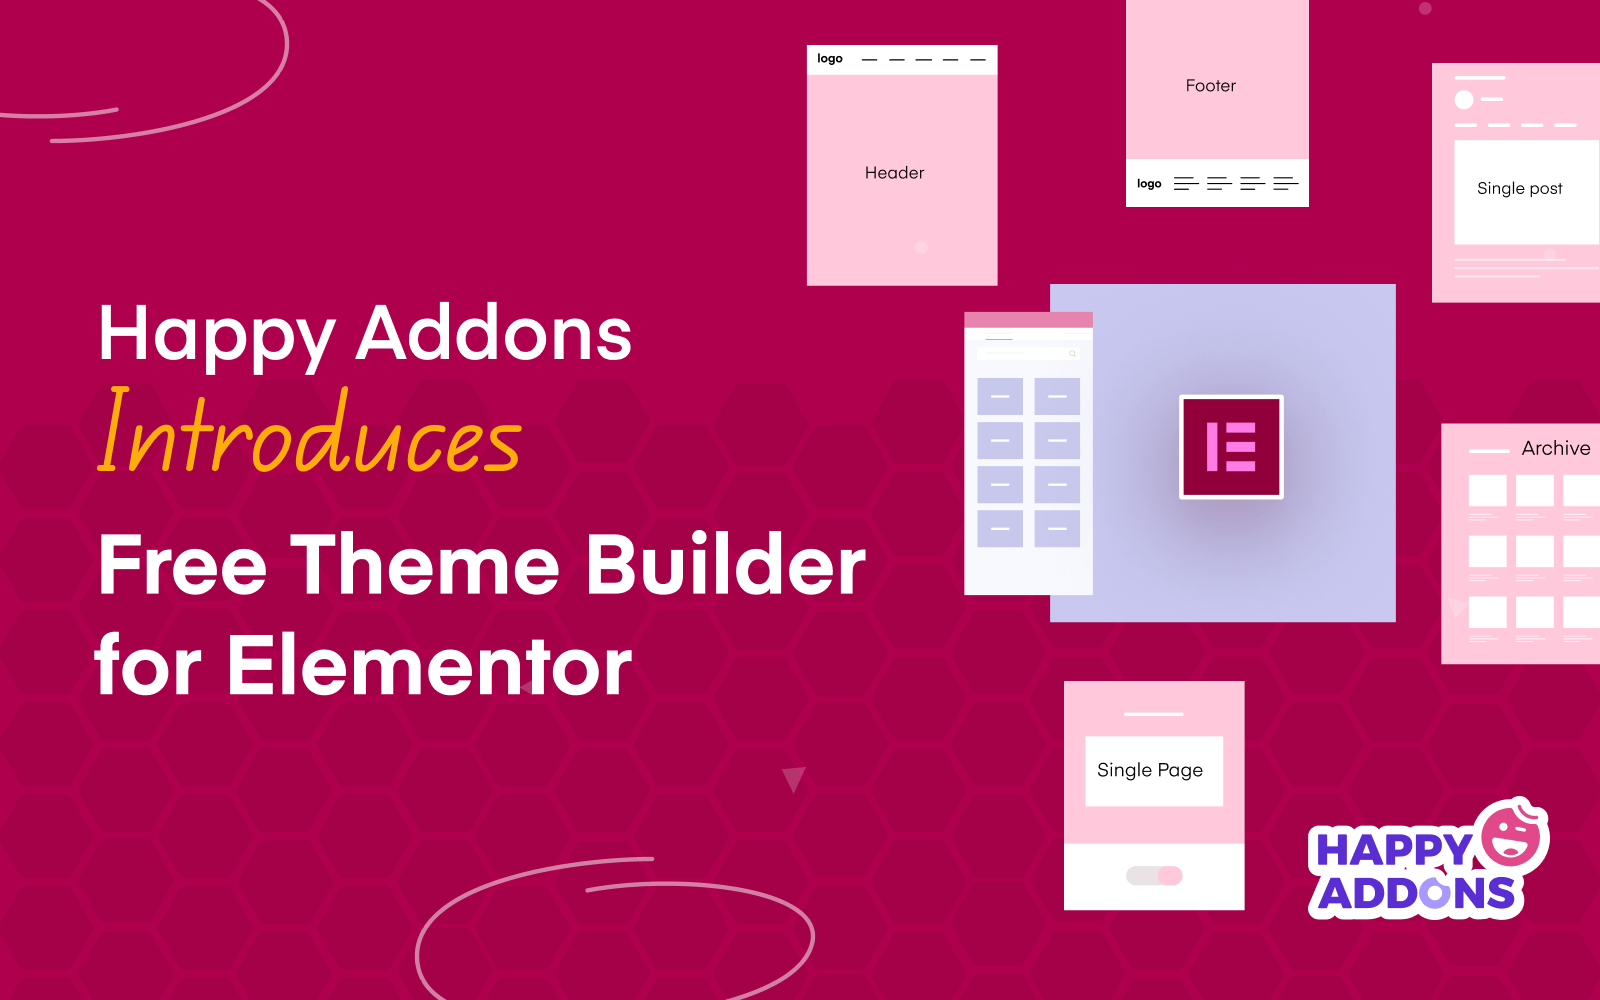
Check how to create a blog post template with HappyAddons.
# Cost Saving Solution
Using HappyAddons Theme Builder is also a cost-saving solution. Normally, Elementor only allows Theme Builder features for Pro users, which requires a premium license. But with HappyAddons, you get a free alternative.
This makes it possible for beginners, bloggers, or small business owners to create category-based archive pages without spending extra money. You get the same level of customization at zero cost, which makes HappyAddons a smart choice for budget-conscious users.
Beyond category-based blog layouts, HappyAddons can do a lot more. It includes advanced widgets like Advanced Slider, Pricing Table, Testimonial Carousel, Logo Carousel, and many creative effects. These allow you to design professional websites that look modern and engaging.
Features like display conditions, cross-domain copy-paste, and preset designs also save time and effort in the design process.
Ending Notes!
Displaying blog posts by categories in WordPress is one of the best ways to organize your content and guide readers to what they want. Whether you use Elementor or HappyAddons, creating a clear archive page with category-based layouts makes your site easier to navigate. It also improves user experience and keeps visitors engaged for longer.
When setting up your category pages, try to follow some best practices. Use clear and simple category names so readers understand them at a glance. Avoid creating too many categories. Keep them focused and meaningful. Add a category menu or filter option at the top of your blog layout to help users explore posts quickly.
Finally, make sure your design is responsive, so visitors can browse categories smoothly on both desktop and mobile devices. By following these tips, you can make your blog more user-friendly, well-structured, and visually appealing.





2 Responses
Thank you, thank you, thank you! I spent hours searching for how to filter by categories and this was so much easier than everything else I was finding
You’re most welcome! We’re so glad the guide saved you time and made the process easier. Thanks for sharing your feedback. It really means a lot!