Nowadays, creating a wedding website becomes an important part of your wedding ceremony. It’s a smart way to notify your guests about your special day’s schedule, location, rituals, dress code, and others. It assists them to get all the information in one place by visiting your site.
You can also make your wedding more memorable and store all your memories inside a website without having any prior expertise. In this definitive guide, we will show you how to create a wedding website step by step in less than 1 hour.
So, let’s create a wedding site following these easy guidelines. But first, let me explain to you-
Why Should You Create a Wedding Website?
In these days, having a website has become a trend. You just need to spend a little for your domain and hosting, otherwise it’s completely FREE to get your own website in no time. In fact, you can build a website and use it to showcase all your wedding details.
It will help your friends and guests to know about your wedding date location as well as the bride & groom and other necessary information about the wedding. You can also send an invitation to your guests using the website. In addition, you don’t need to print RSVP cards, so that you easily save valuable time and money.
Another benefit of having a wedding site is to notify your guests about the gift registry and give a clear idea about the guest list. Besides, you can easily tell your wedding stories, such as how you both met, your wedding plan, and more.
Moreover, you can put the most valuable wedding images and videos on your website to save your precious memories forever. Not only that, you can update this site whenever you want and store your other special moments here. Such as honeymoon pictures, the birth of a first child, or anything you prefer.
How to Create a Wedding Website With WordPress & Elementor (Easy User Guide)

In this part, we’ll show you how to make your own wedding website step by step.
Prerequisites to Make a Wedding Website
In this tutorial, we chose WordPress as our content management system (CMS). Because WordPress is an open-source content management software chosen by millions of people around the world.
Over 60 million people have chosen WordPress to power the place on the web they call “home” — join the family.
WordPress
In addition, you need web hosting and a domain name to launch your website globally.
Besides, you also need the Elementor page builder and Happy Addons to customize your website in your own way.
- WordPress
- Elementor
- Happy Addons (A third party addons of Elementor)
You can easily download and install all the resources for your wedding website. If you are new, go through this beginner’s guide of “How to Use Elementor“.
Let’s make a wedding website step by step.
Step 1: Install Elementor & Happy Addons
After buying a domain and hosting it, you have to install WordPress on your website. Then, you just need to install and activate Elementor and Happy Addons plugins in your WordPress dashboard.
To install the plugins first, you need to visit Plugins > Add new and search for the Elementor like the image below.
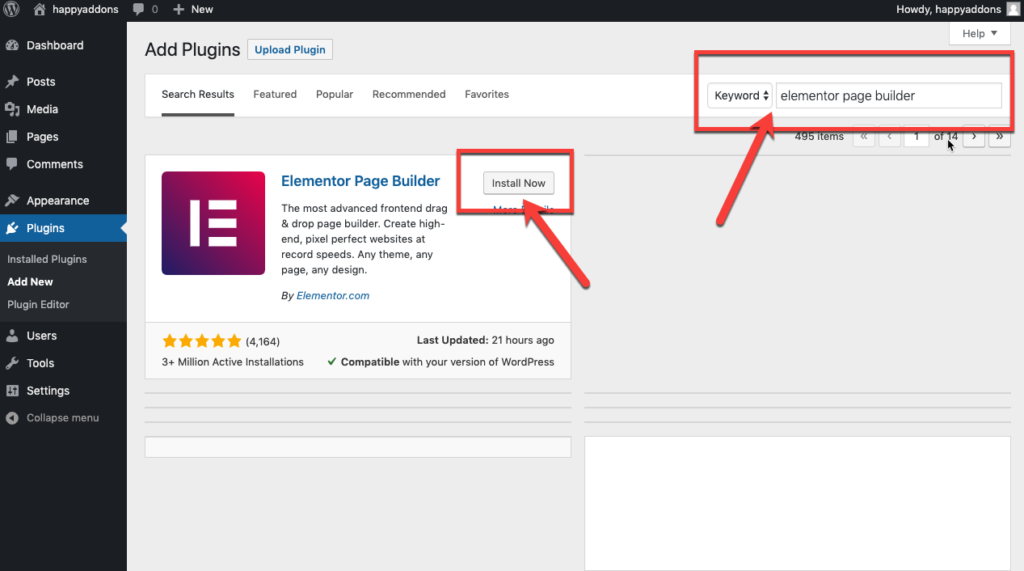
Then click on the Install Now button and activate the plugin. You can also install and activate Happy Addons plugin the same way.
Step 2: Choose a Wedding Template

After installing and activating the essential plugins, you have to focus on selecting a wedding template for your website. Before that, you must create a Home page for your website.
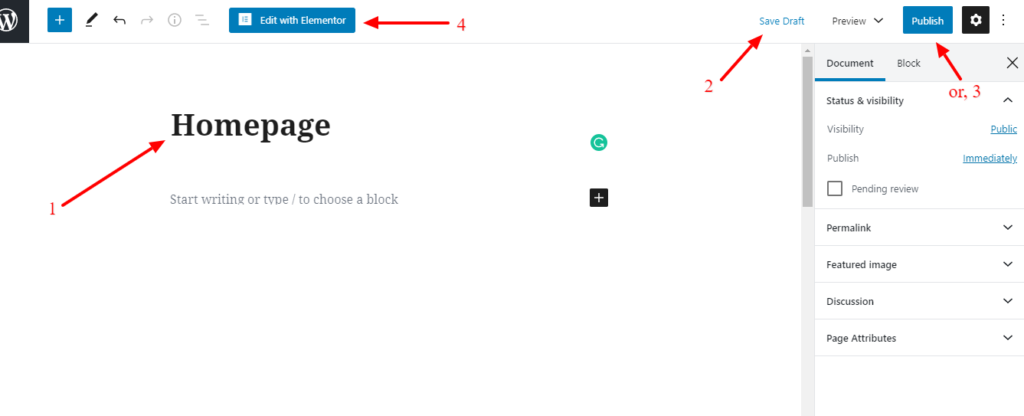
To create a page in your WordPress admin panel, simply click on Pages -> Add New.

Here, you will get a new page.
- Type a page name
- Publish it
- Finally, click the “Edit with Elementor” button.
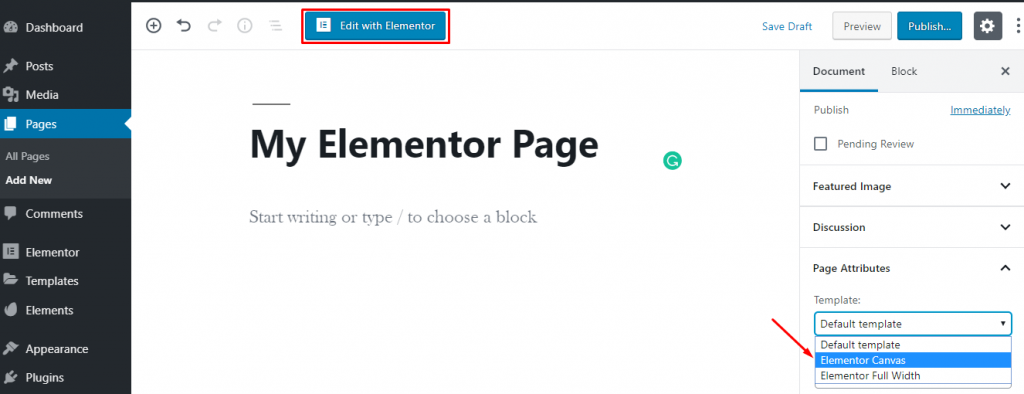
If you need a fresh page to design your site, you need to do the following process.
- Press the setting icon
- Set page layout as “Elementor Canvas”
Then, you’ll choose a wedding template from the Elementor default pre-build template library.
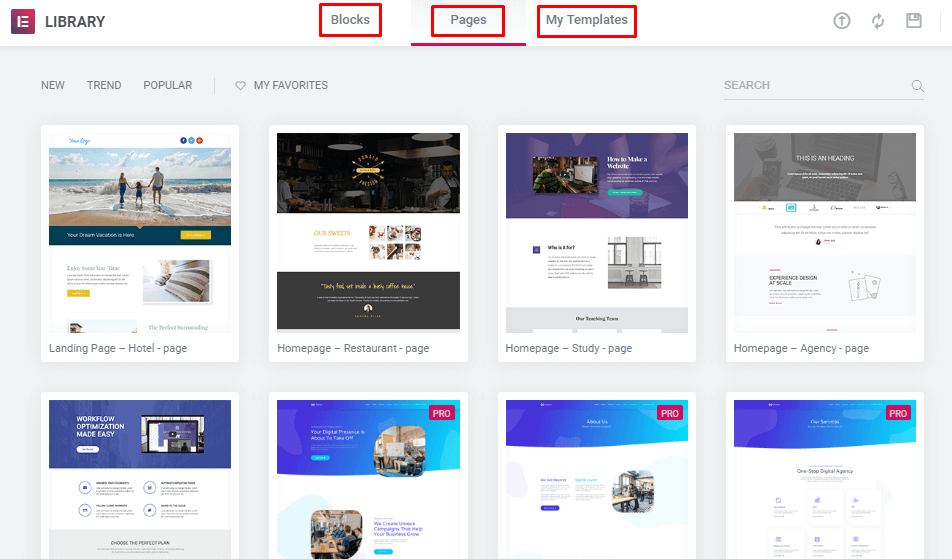
Moreover, you can also install third-party add-ons to add extra templates to your template directory.
However, in the template library, you have to search for a wedding template so that you can easily customize it to design your dream website.
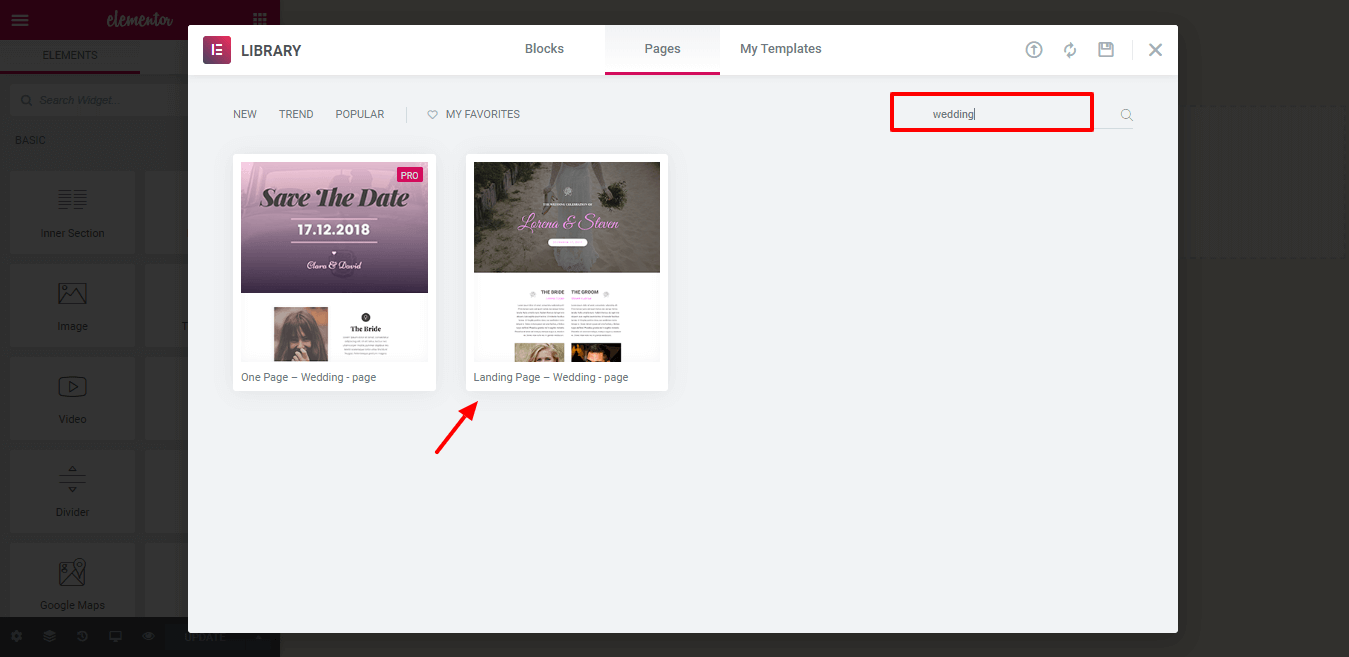
Then, you just need to install and update the template to see the current website design.
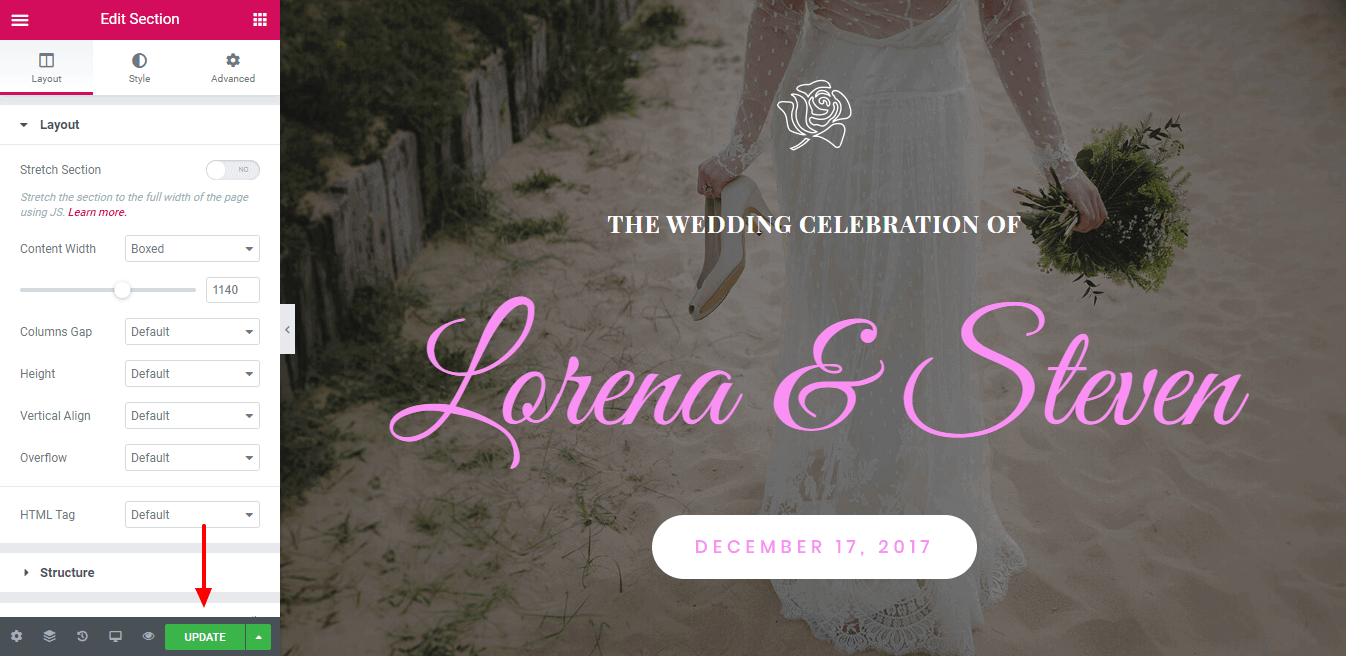
Step 3: Customize Your Wedding Website

Customizing a website using Elementor and Happy Addons is very simple. You can change anything on your website by dragging & dropping the design elements.
Let’s make some changes to our website.
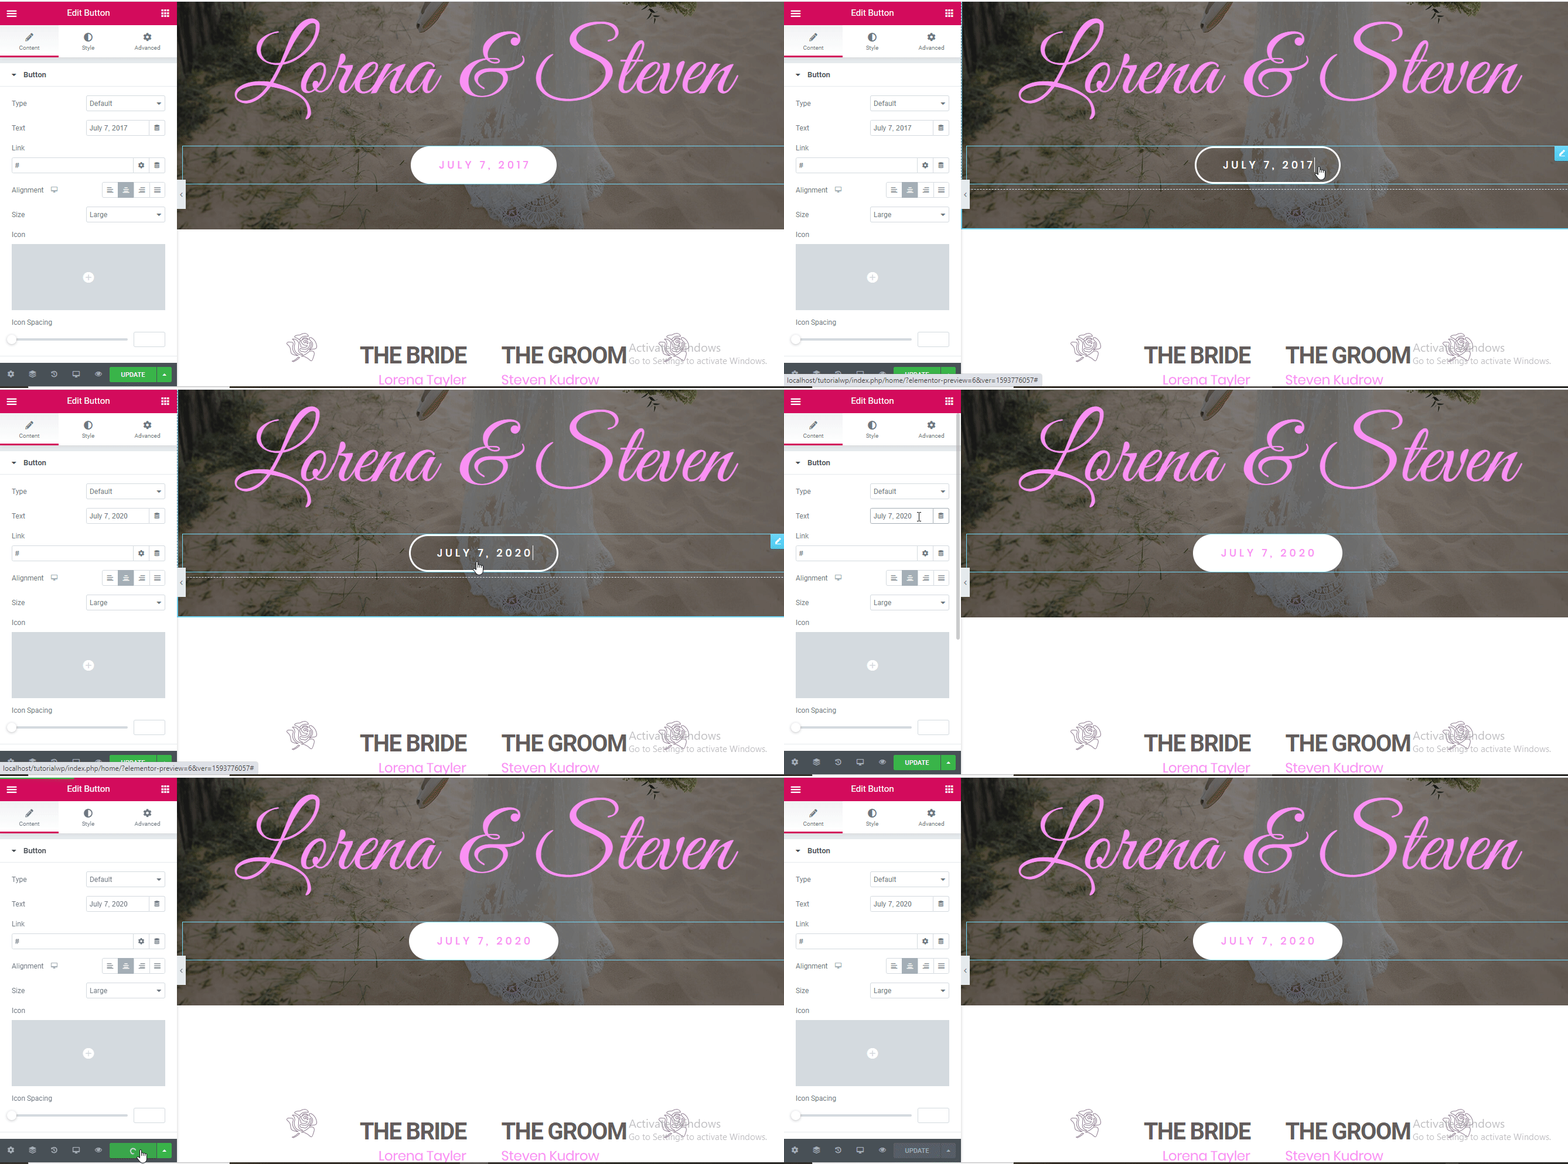
Change Button Text
To change your website button text, you want to click the button and type the desired text here.
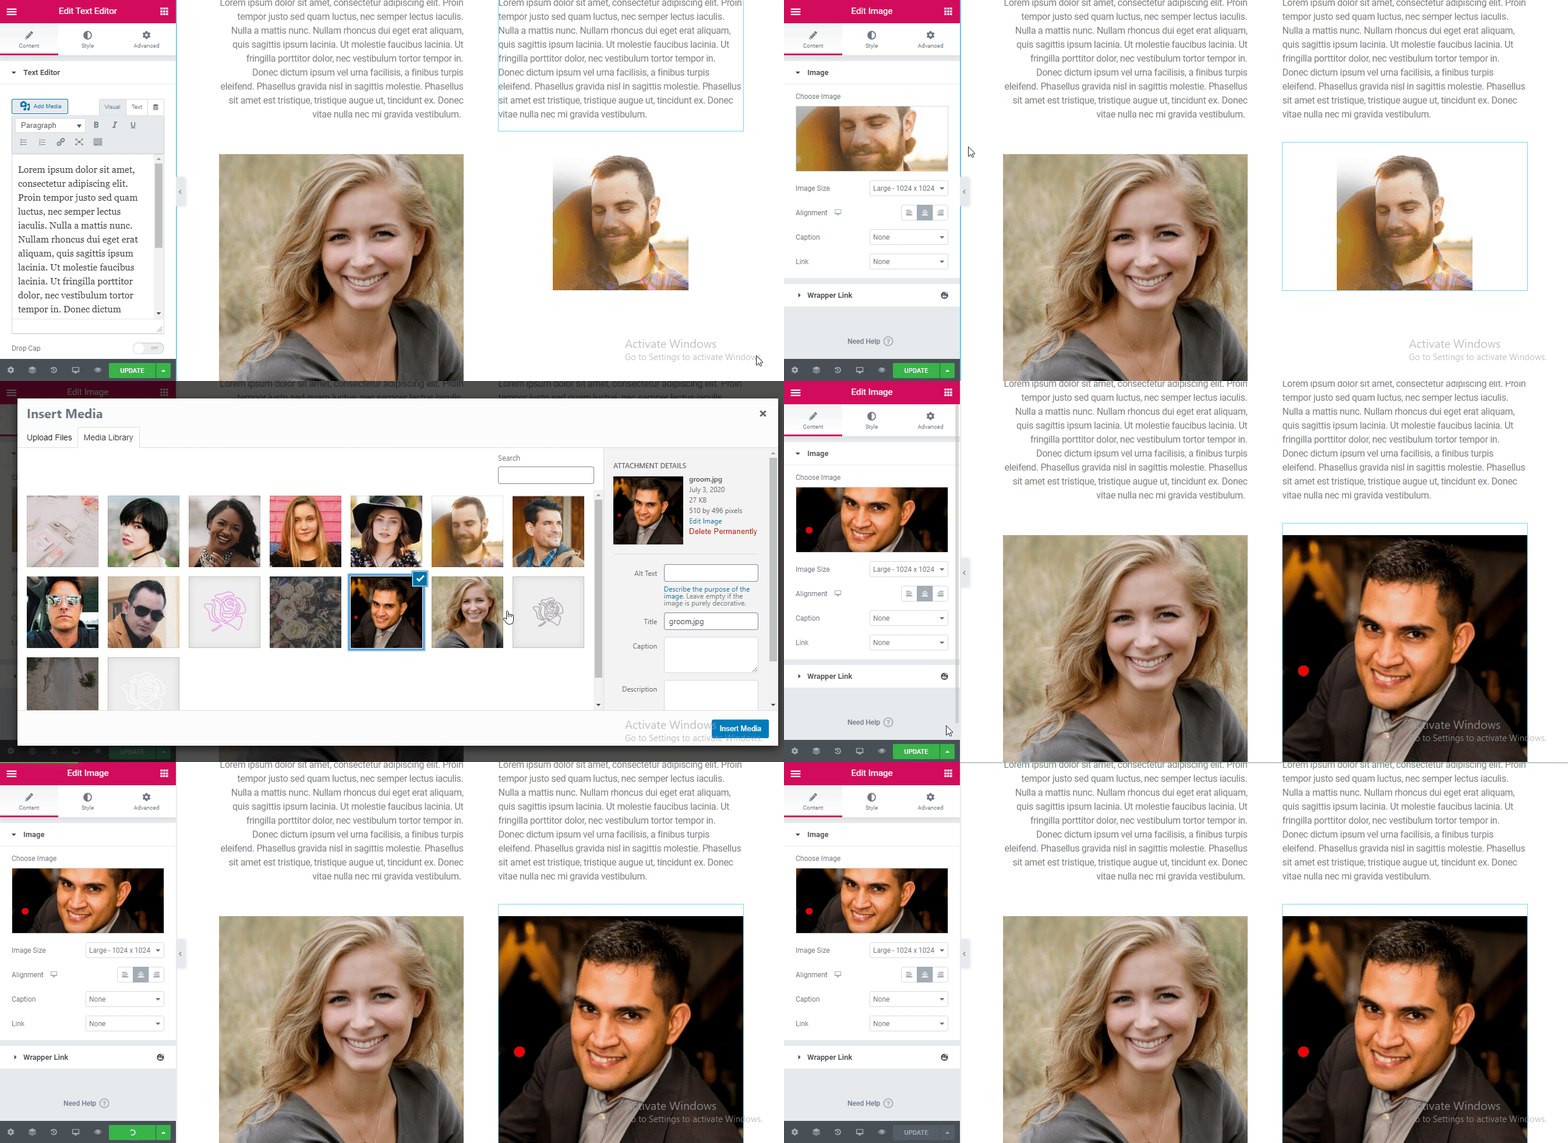
Change Images
If you want to change any website images, you just click on the image that you need to change. And then just replace the old image with a new one that’s all.
Add a Wedding Gallery
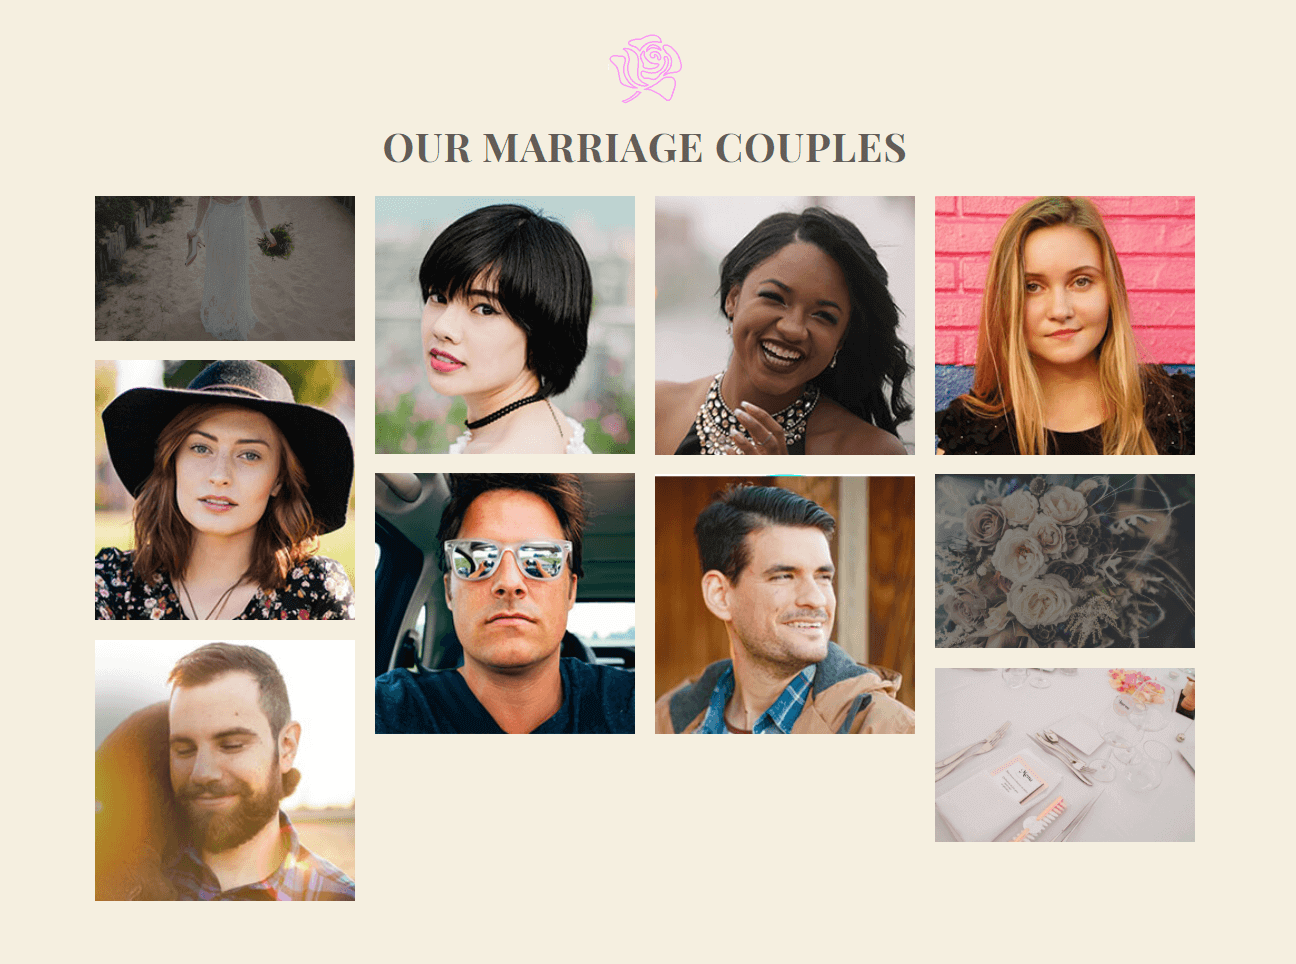
Every wedding website has a wedding gallery. We don’t have it in our wedding template. So, let’s add a gallery where we showcase all our memorable wedding pictures.
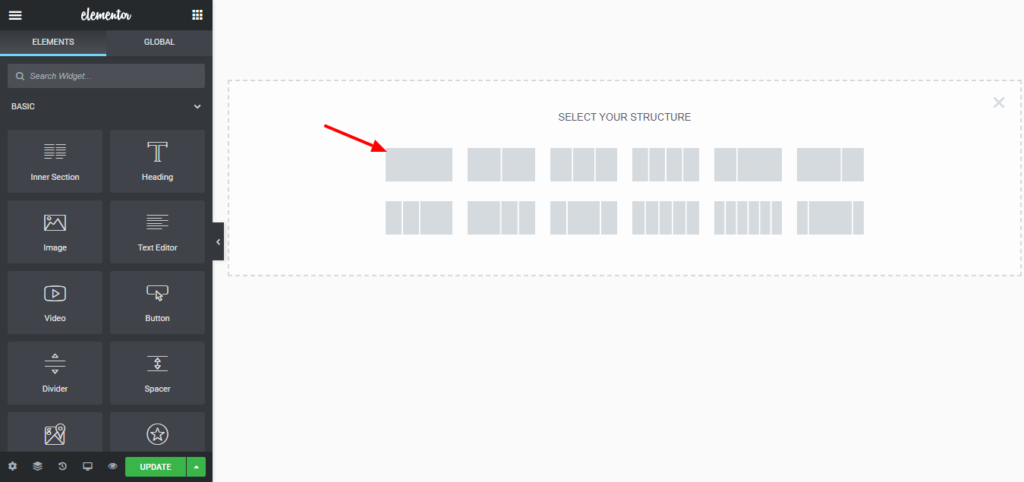
First, you need to select a single column.
Second, you have to find the Happy Addons Justified Grid to add your gallery.

Then you just select your gallery images and update the page.
Include a Countdown
A countdown is an essential part of a wedding website. By adding a countdown feature, you can easily set a reminder to your guest about your wedding date.
To add a countdown functionality, first you need to select a single column and search for the Happy Addons Countdown Widgets.
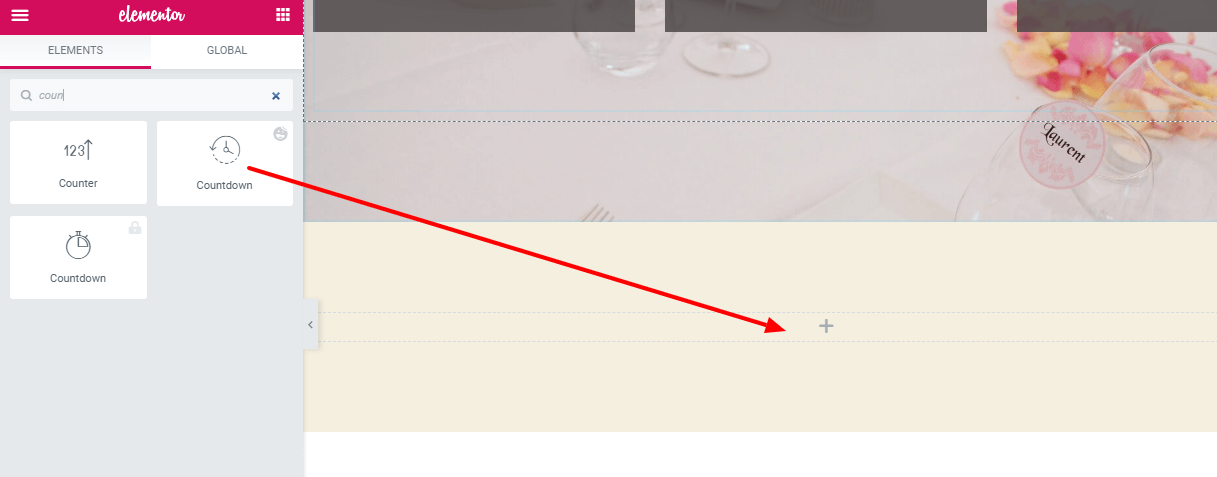
Then you just set your wedding date and countdown design.

Add a Guest Book
A guestbook or guest list helps you a lot to find out who will come to your wedding and who won’t. In fact, it also helps you to plan perfectly for arranging the food and setting.
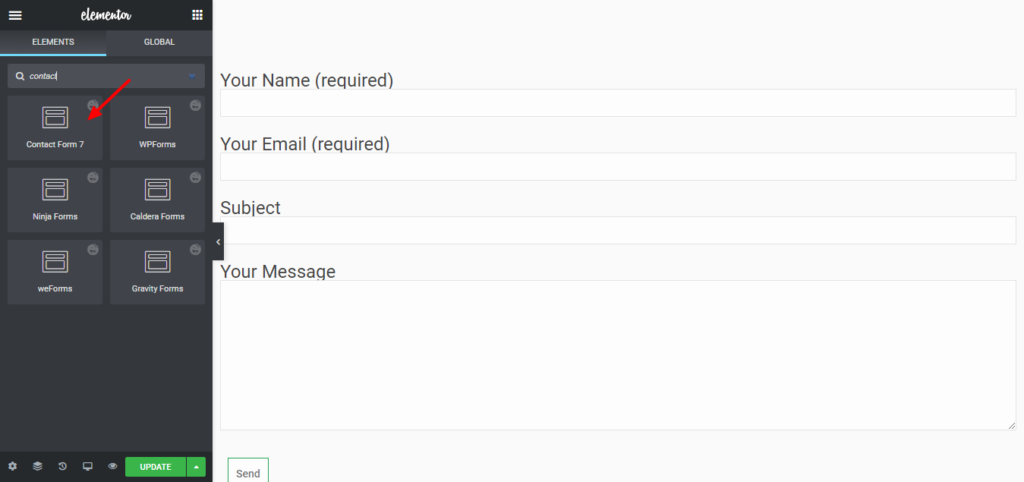
By adding a guest listing feature, you can just add a contact form 7 on your wedding site so that your guest can be listed in the ceremony.
Insert a FAQ Section
In the FAQ section, you can answer some additional questions regarding your wedding. You may put the groom and bride’s personal information as well as add your wedding date, location, etc.
Let’s add a FAQ section. First, select a column and search for the Happy Addons Advanced Toggle.
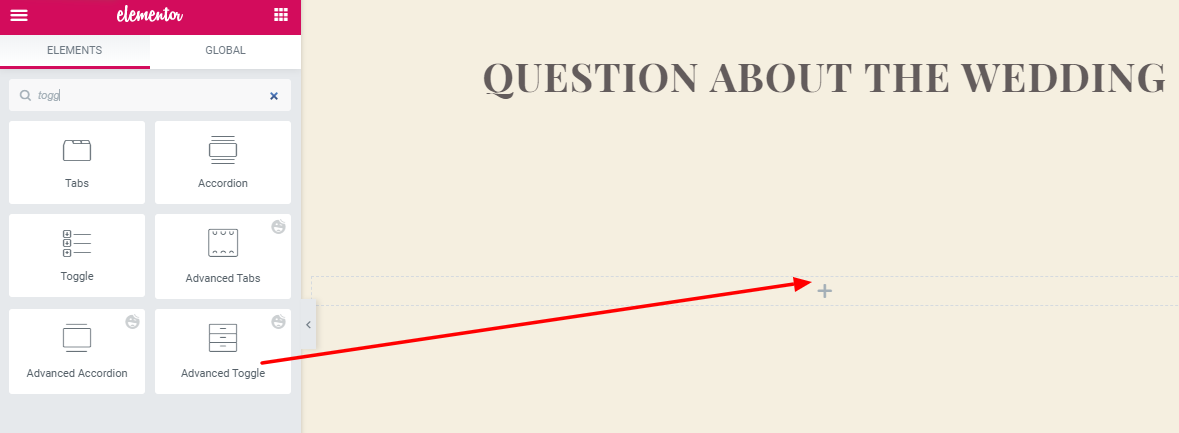
Then drag & drop the Happy Advanced Toggle and set your FAQ questions with proper answer.

Provide a MAP
By adding a Google Map on your website, you can easily add your wedding location so that your valuable friends and guests will able to find your location very easily.
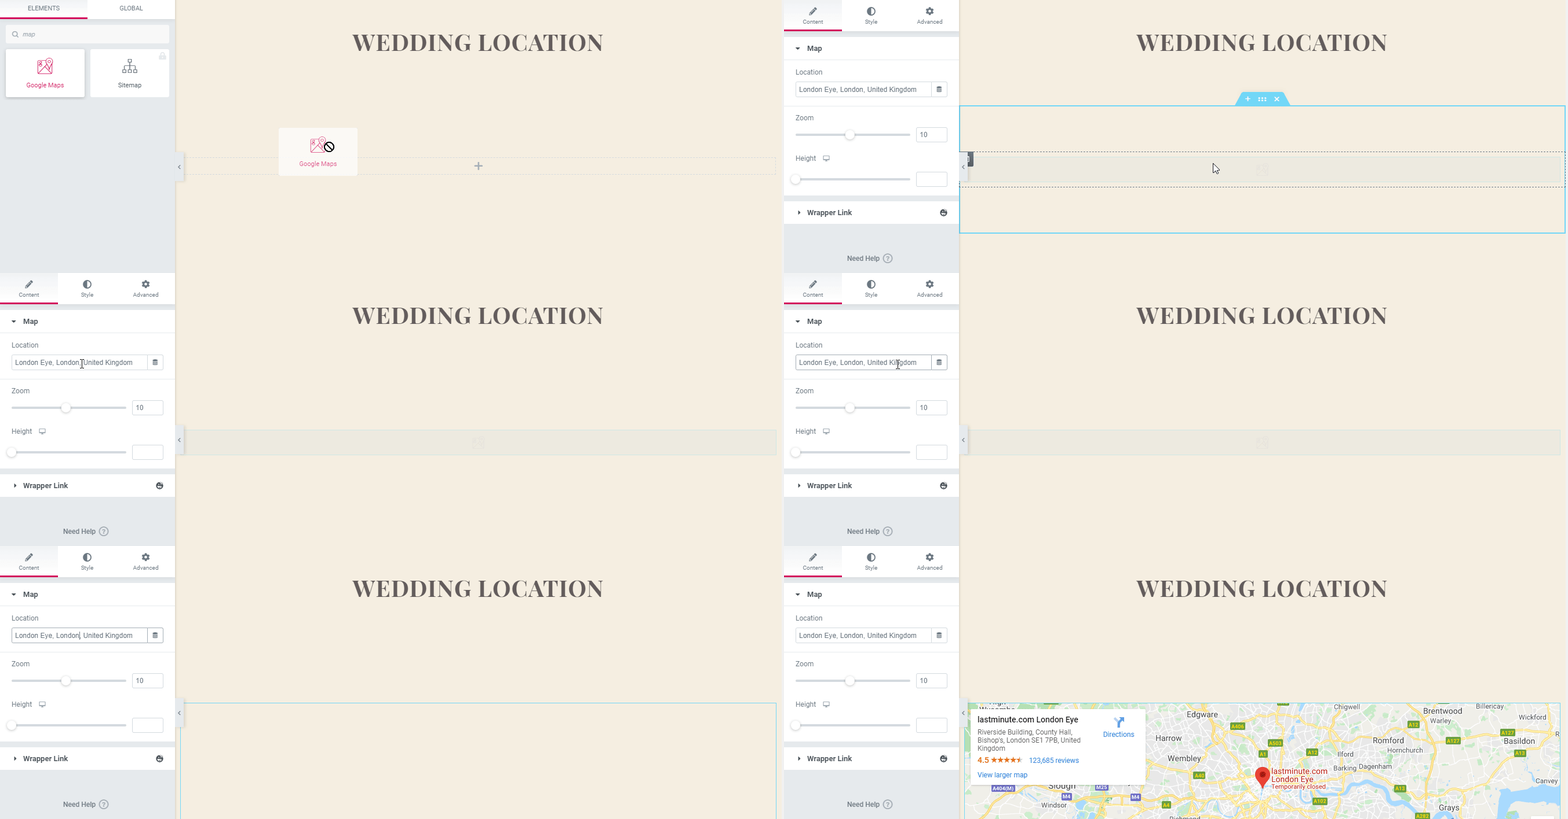
Here you’ll add a map.
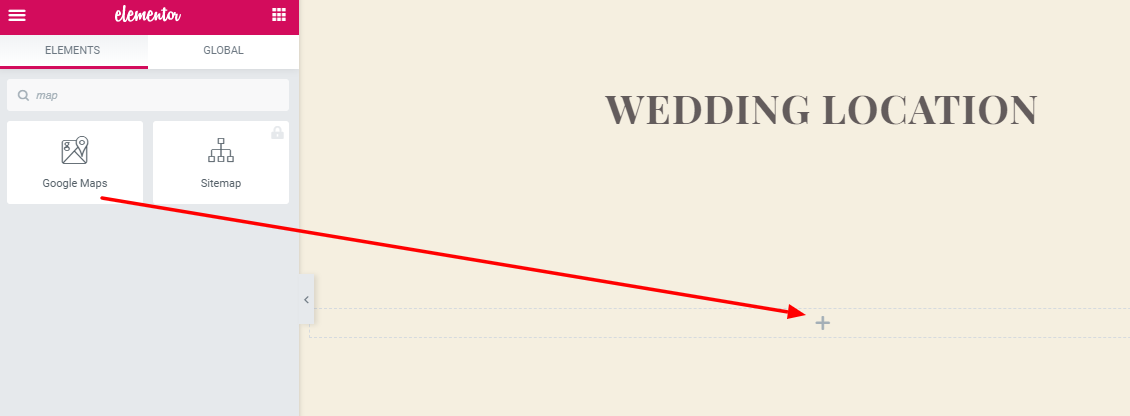
Then, you have to put your valid location and update the page.
Congratulations! Your site is ready to go live. However, you can design your site in your own way. With Elementor, you will get unlimited options to build your site. Besides, Happy Addons will make your hands more powerful, providing advanced animation and floating effects without CSS coding.
Final Preview of Your Wedding Website
After customizing the wedding website, it’s time to check our website. In the picture below, you’ll see the exact same site that we built right now.
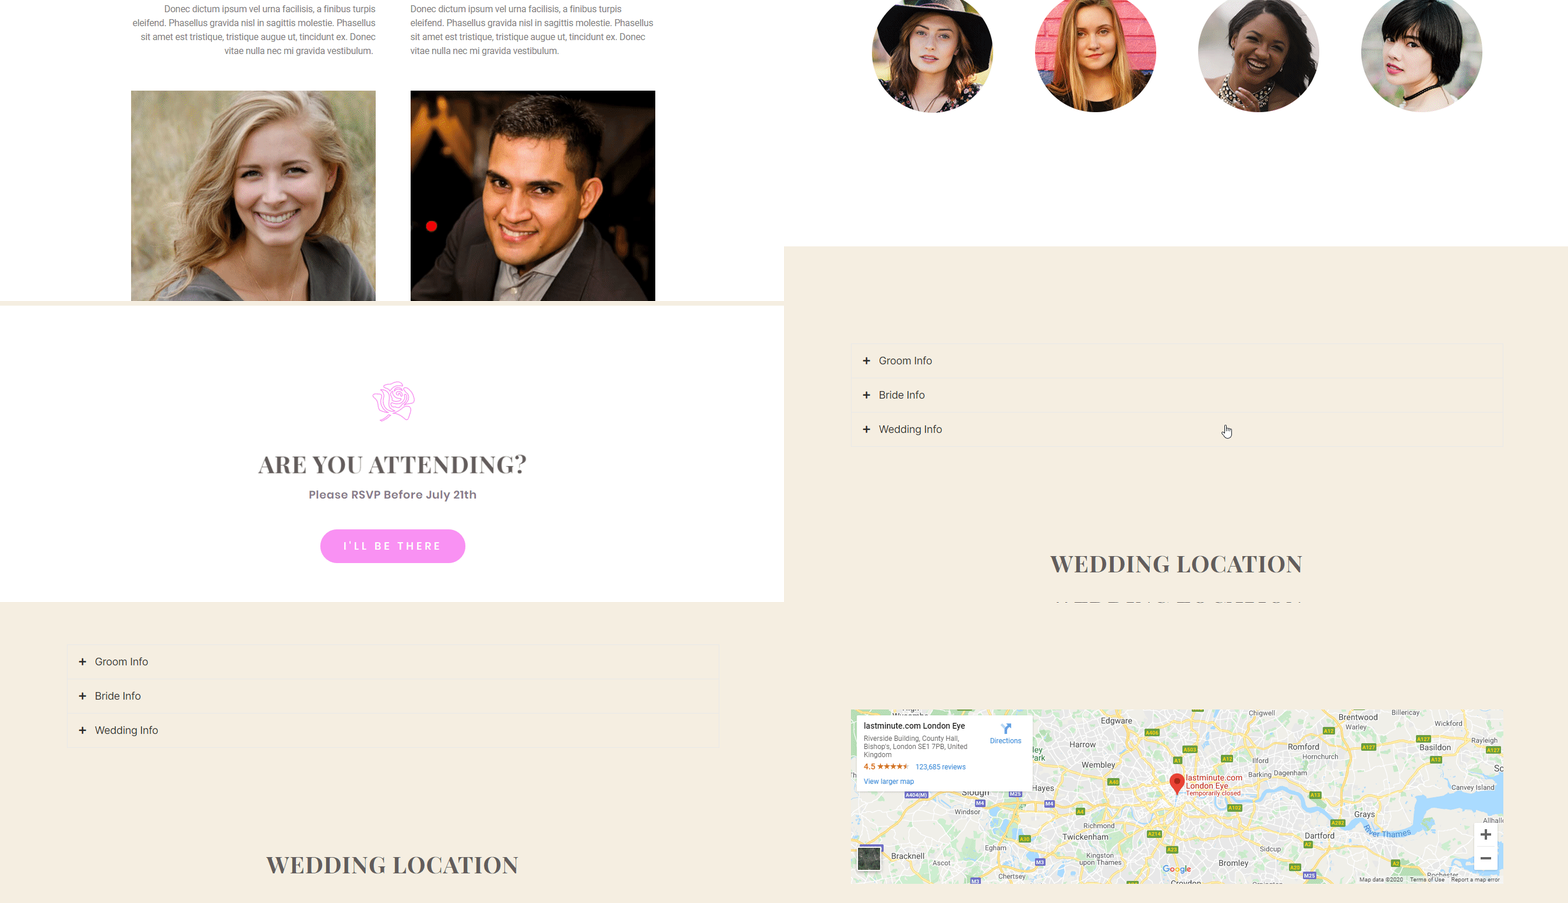
Now you can also make your wedding website too. If you want to learn more about the website-building tutorial, you can go through the list below.
- Create a medical website
- How to create a travel website
- Build an eCommerce website
- Make an online course website
Here, you’ll find more details about website tutorials such as medical websites, travel websites, etc.
Keep Your Memories Alive with a Wedding Website
Creating a wedding website is not as difficult as you thought before. In this article, we demonstrate this and also show how you can easily create your wedding website. Not only that but sometimes you may also use this website for commercial purposes by displaying other wedding information.
Contact us if you are having trouble designing your dream website and need help. Also, share your ideas on how you want to design your site in the comment section.


5 Responses
Thanks for the kind information. I know several event planning companies who are extremely successful at planning weddings.
Great to hear from you. Stay with us.
For wedding events and marriage, thank you for sharing how to create a wedding website. I enjoy the marriage website and plan to utilize it for my wedding website.
Thanks for your kind words. Stay with us by joining the newsletter.