Currently, creating a website with Elementor is one of the most user-friendly ways. It is especially easier for those who are involved with the WordPress ecosystem. Among all the WordPress plugins, Elementor is the finest and most popular one.
Elementor consists of different widgets, sections, and all the website designing materials. Using these features, you can easily create a custom WordPress layout without any hassle.
In today’s post, we’re going to show you a how to create a custom WordPress layout with Elementor. Additionally, we’ll also share how you can speed up Elementor‘s workflow using Happy Addons, at the end.
So, without further ado, let’s begin.
Why You Need to Use a Custom WordPress Layout

The performance of your site largely depends on the themes that you use. These themes consist of different types of layouts. So the importance of layout is very crucial. But unfortunately, some themes may not allow all the access to customize it accordingly. Therefore you need a custom layout to design and give it a fresh look.
Generally, using the default structure of the website or theme may not fulfill all your requirements. Then you have to opt for a solution where you can change your existing layout to improve the website’s look. In that case, Elementor and its unique feature will let you create some wondrous things.
Here’s a brief on what you can do additionally using a custom layout for your WordPress website
- Custom header and footer
- Blog post layout
- Archiving pages
- Email marketing integration
- Contact forms
- Social media button
- Custom post type
- Different templates
So these things can make you realize how fruitful it is to use a WordPress Layout to energize your website in a quick time.
Next, we’ll show the full guideline so that you can employ them accordingly.
Create Custom WordPress Layout in 5 Easy Steps
You can find everything in an organized way in the WordPress ecosystem. So it’s essential to choose the right solution at the right time. Thus it saves your time, money, and effort.
However, we’re going to show how you can easily create a custom layout, In this part. So let’s get started:
Before jumping to the tutorial, let’s see what you’ll need.
Requirements
- WordPress
- Elementor
Using the Elementor page builder plugin, anyone can create a website. It allows users to create any designs in a very simple way. Such as drag-drop features, unlimited addons, sliders, headers, Elementor library, etc.
So, any novice user can use this plugin, even if s/he doesn’t have any programming knowledge. All you have to do is install both WordPress and Elementor. And then just follow the steps carefully.
So, let’s assume that you have successfully installed WordPress and Elementor.
Step One: Creating a Page
The first step is to create a page. You can do it on your existing page or create a new one and then design it.
So navigate to your WordPress admin dashboard > Add a New Page > Give Title. Then click on ‘Edit With Elementor’.
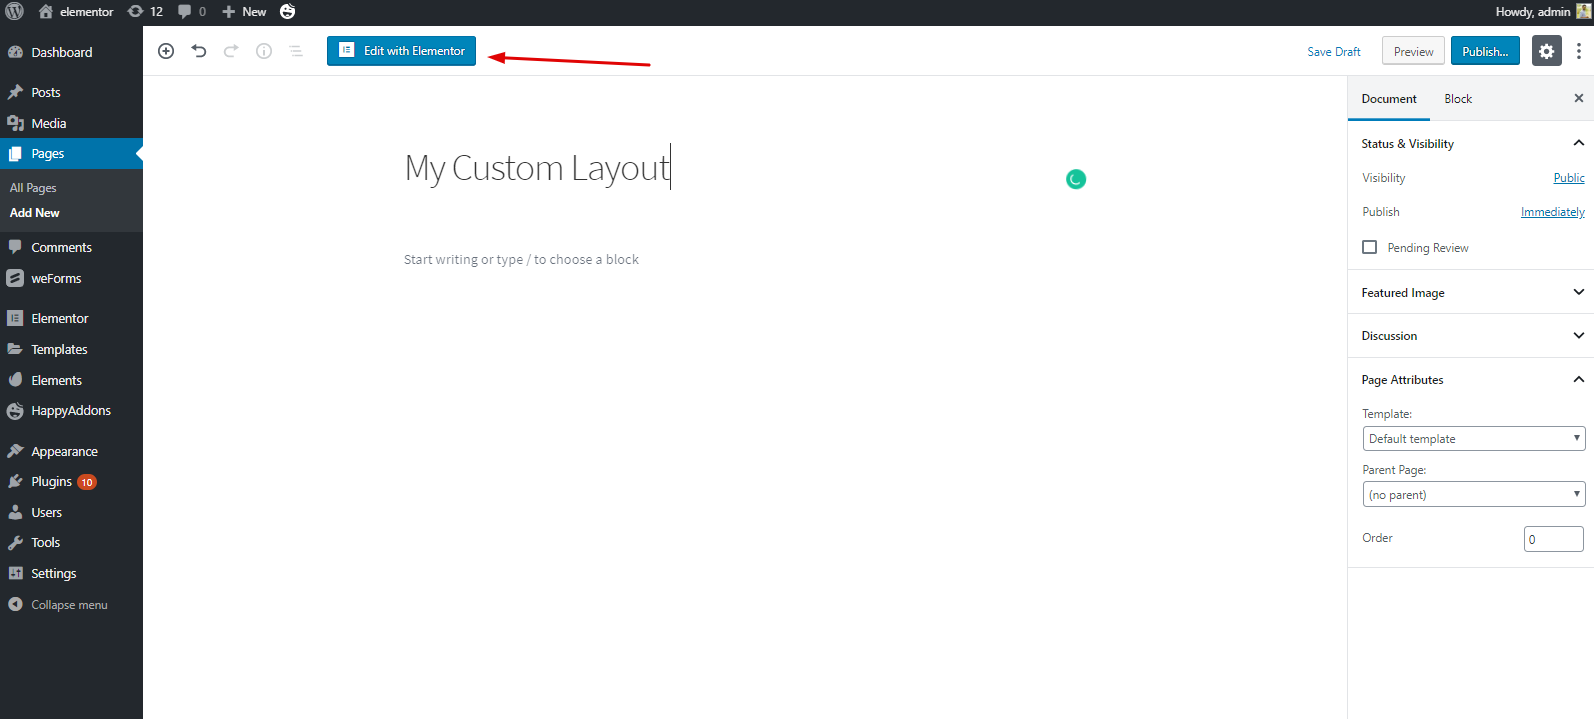
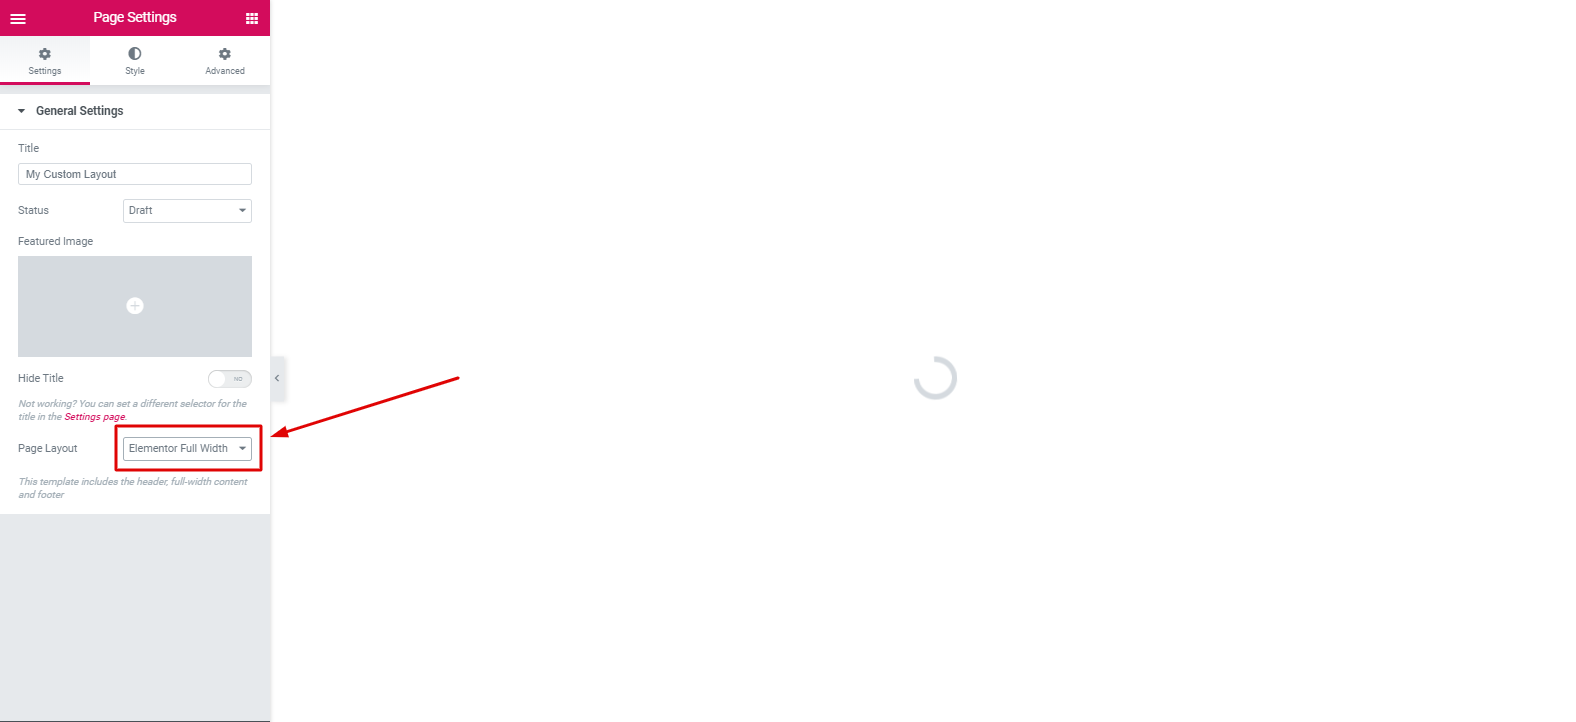
After clicking on this button, you’ll get an editable page. Then you need to select ‘Elementor Canvas’.
Step Two: Adding a Header or Footer
Generally, adding a header or footer using Elementor is a very simple one. You can create a header or footer from the current settings, or you can customize it manually.
Step Three: Choosing The Template
You’ll find different templates in the Elementor gallery. And from them, you have to choose what suits you. However, in our previous post, we mentioned these things several times how to edit Elementor templates and other important things.
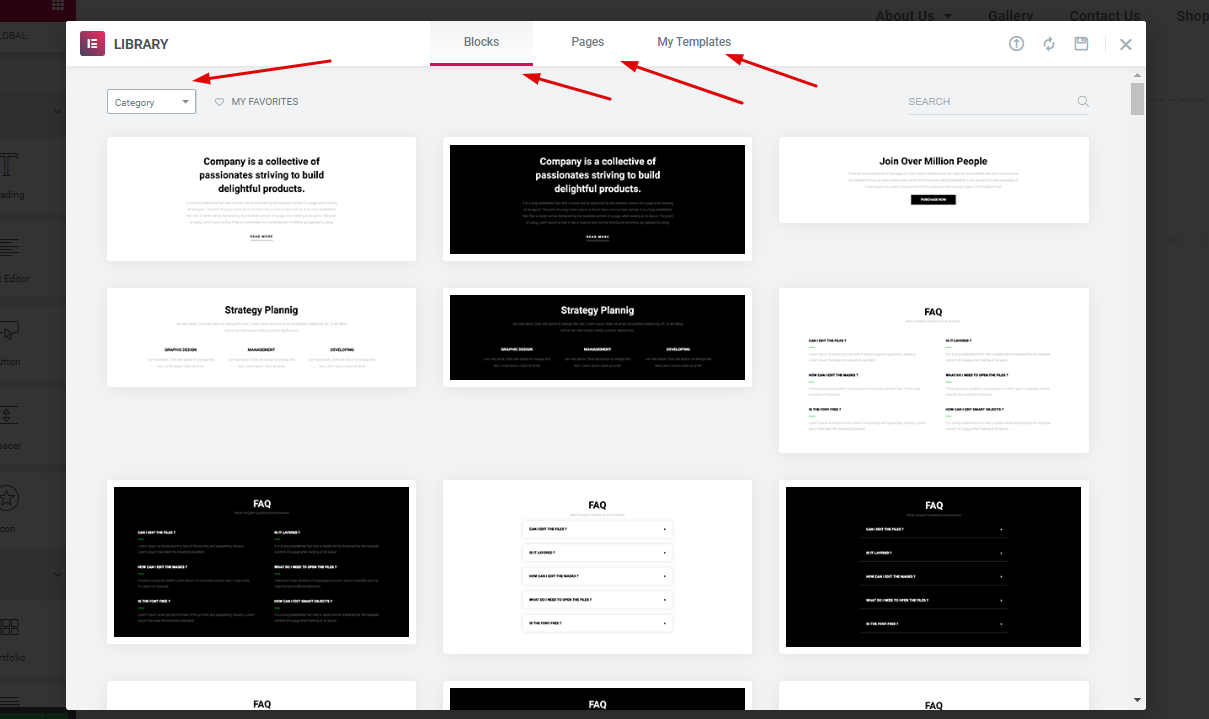
Anyway, we’ll show the process again. To do that, click on the ‘Folder Like’ button.
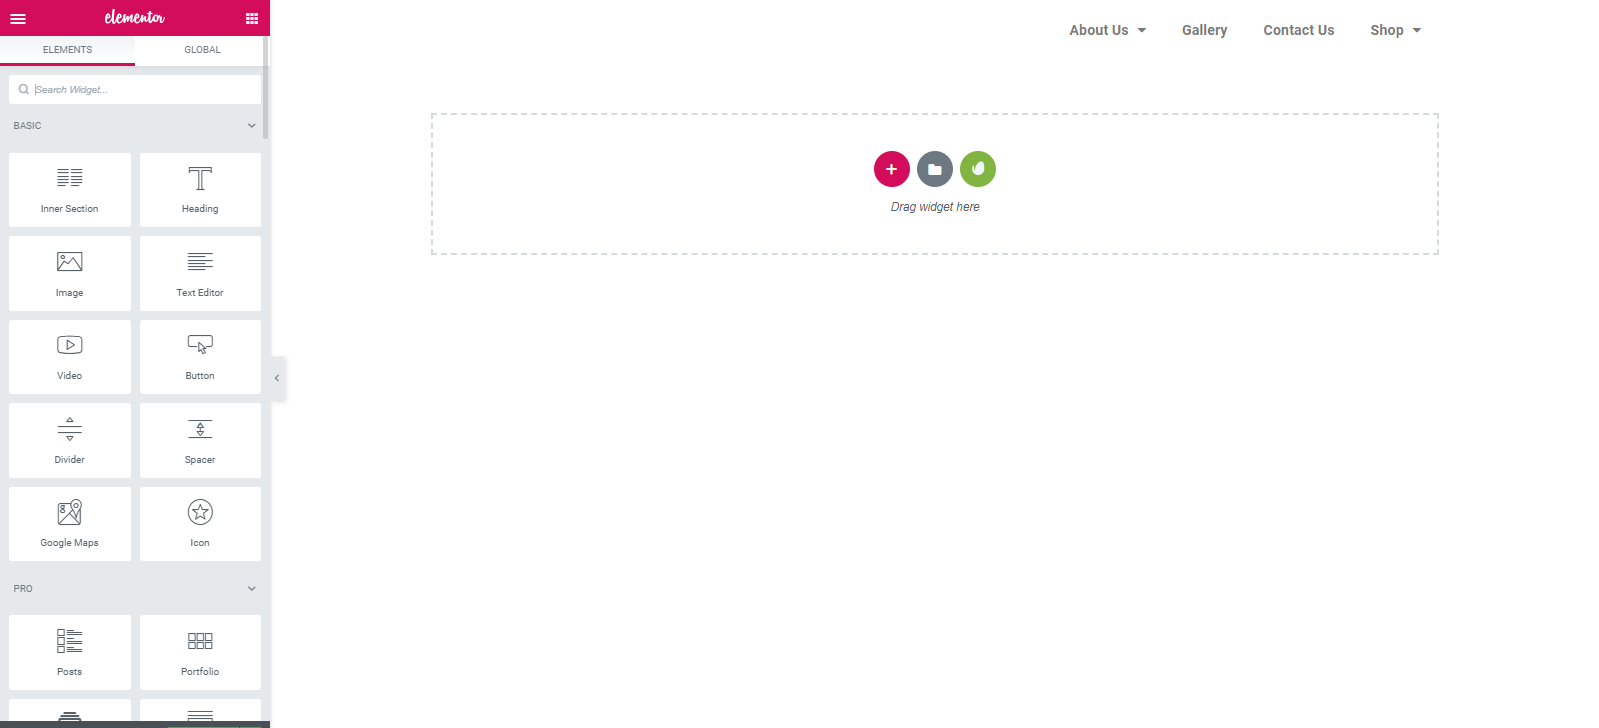
After that, you’ll see different blocks, templates, and saved templates. So, you can choose a single item or select the whole template and then edit them according to your design concept.
In the Elementor library, you can search for blocks, pages, or sections category-wise. Moreover, you can save your favorite template in the ‘My Template’ option. See the screenshot below:
Step Four: Choosing a Block
You’ll have different blocks in the library. Like header, footer, hero banner, contact form, social buttons, about page, archive box, FAQ, and features, etc.
As we have added a header, we now need a hero banner or slider. You can also add a slider to maximize your layout beauty. In that case, we’ve selected this one. However, you can try others.
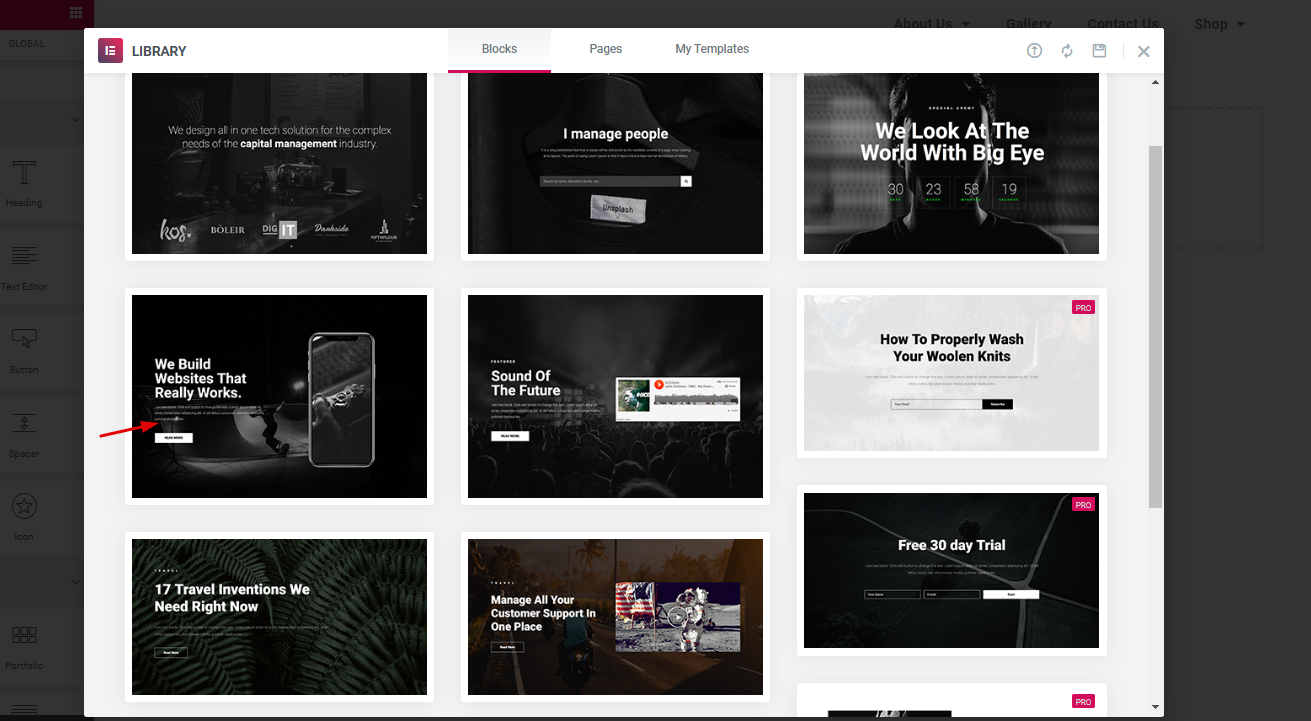
Then, just select the perfect one for you. And click on the item. After that, it will appear on the screen. That’s it.
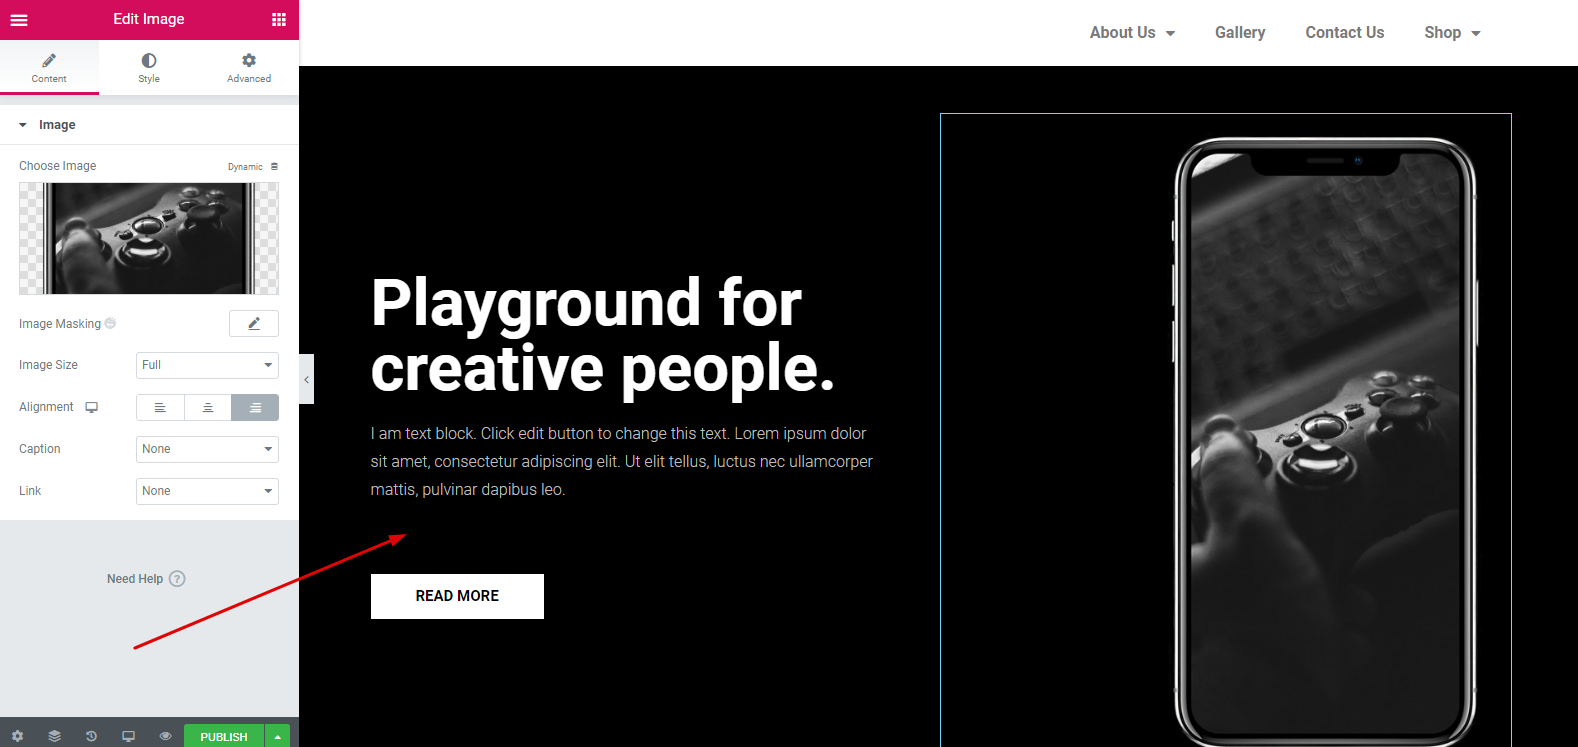
By following this process, you can add other required sections from the ‘Elementor Library’. And you can easily customize it as per your desire. You can go through the following article. It will help you to customize every individual section of your website.
Step Five: Adding a Template
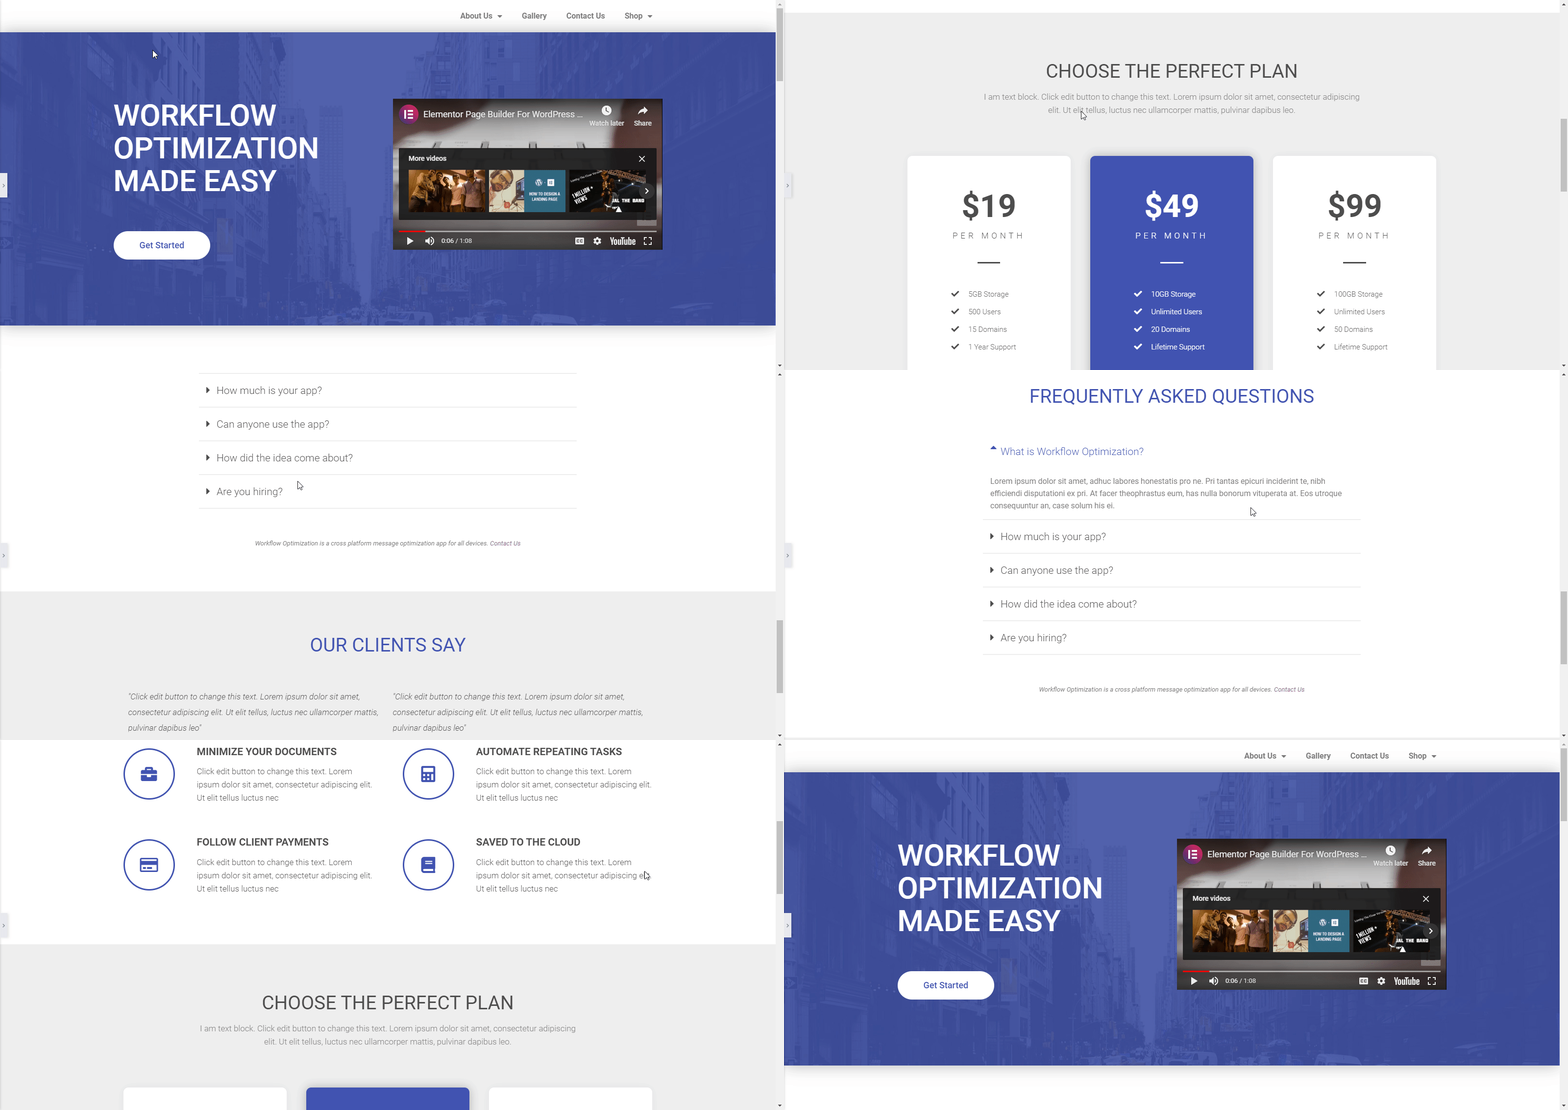
You can add a template following the previous portion. In the Elementor library, you’ll see lots of templates. And you can easily choose any one of them.
To do that, click on the ‘Folder Like’ option. And then click on the ‘Pages’ option. You will find there are a lot of ready-made templates.

Next, choose any one of them. And customize it according to your website structure.
Here is the live preview.
Bonus Tips: How Happy Addons Can Accelerate Elementor Workflow
Sometimes, Elementor alone may not fulfill all your requirements, or you may not get what you’re looking for. In that case, Happy Addons can fill all the gaps by providing some excellent ‘Features’. So in this section, we’ll describe how ‘Happy Addons’ can be a perfect solution to expand more opportunities in designing.
Features that Boost Up Elementor WorkFlows
- Managing mobile responsive mood
- Manage columns by adding Pixels
- Fixed-size controls of Elementor widgets
These features of ‘Happy Addons’ are unique and very useful. If you’re a regular Elementor user, then you can find these features very handy. But first, you have to install ‘Happy Addons’. Then you enjoy all these amazing features.
Managing Mobile Responsive Mood
Inside the Elementor, users don’t have permission to control the column management. Therefore, Elementor doesn’t work smoothly if you have plenty of columns on your page. Fortunately, this feature of Happy Addons can be very helpful to control and manage mobile responsive mood.
Watch the following video on ‘How to use Mobile Responsive Mood of Happy Addons’.
Manage Columns By Adding Pixels
You can use this feature to add some extra pixels in the columns. It helps you to manage columns height-width ratio with the percentage parameter. And this is a really useful feature in terms of making the design more lucrative and fruitful adding pixels manually.
Check out the following video to explore more.
Fixed-sized Controls in Elementor Widgets
Sometimes, you are not happy with the existing size of the Elementor widgets. But you don’t have permission to change the default size. Here is the good news! Now, you can easily do that using the Fixed-sized control feature of Happy Addons.
Watch the following video to get more details.
Give an Exciting Look to Your Site with Custom WordPress Layouts
Any website layout is essential to showcase products, services, and other important things accurately. The purpose of this blog is to provide a suitable and easy method for you. And for sure this article will undoubtedly encourage you to apply this, whether you’re a novice or a professional.
Anyways, this is the full procedure of creating a custom WordPress layout. And we hope that you can apply it to your website. But if you have any questions or queries, feel free to ask in the comment section.




4 Responses