A well-formed single post page gives your readers a good feeling when they read your post. It also helps to attract new or existing visitors to your site, reduce bounce rate, help to improve your site page view, and more. This is why you need to focus on your single-post page design.
If you are looking for an ideal guide to create a custom single post page using Elementor then the following guide will be the perfect one for you.
In this guide, we will show you how to design the Elementor blog post template or page from scratch. Before that, you should have a clear idea of why you need to create a custom single post page.
Let’s get started:
Why You Need To Design Your Custom Elementor Blog Post Template

Most popular WordPress themes have their own single-post design framework. But the default single post design format of your theme may not meet your needs. Suppose you need to add a custom popup to your single post page but the theme you used to design your site doesn’t allow you to do.
What would you do next? From that point of view, you need to design a custom single post page to add the features you need. However, there are some other important aspects you can consider for creating a custom blog post page for your website. The notable facts are:
- Ensure the better user experience
- Reduce bounce rate
- Improve single post page design
- Add custom features
- Ensure better post view
2 Ways to Create Custom Elementor Blog Post Template
You can create a custom Elementor blog post template in two simple ways-
- Method 1: Create Elementor Blog Post Template From Scratch
- Method 2: Create the Single Post Page Using Premade Elementor Template
Make sure that you have installed and activated the both Elementor (Free) and Elementor Pro plugins on your website.
If you are new to Elementor then check this handy blog on How to use Elementor properly.
Method 1: Create Elementor Blog Post Template From Scratch
If you want to design your own single post template from scratch, you can do it using the Elementor widgets.
Step 1: Add Column and Section
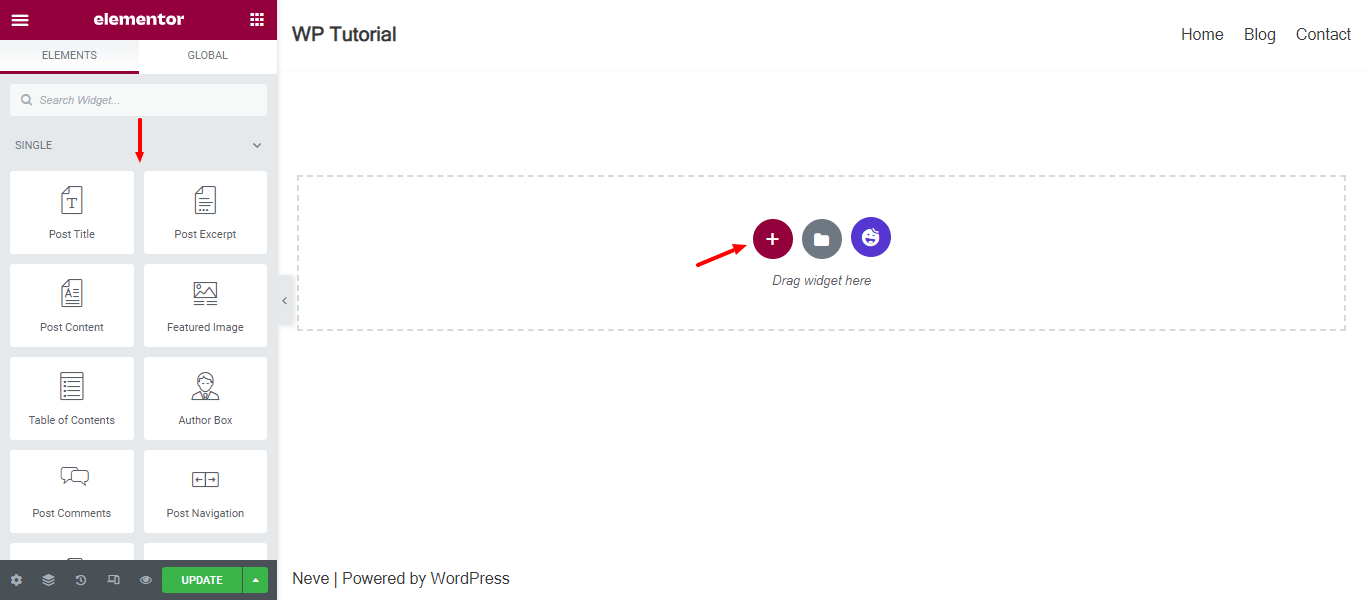
First, you need to add a section and insert a column based on your need. To do this, you should click the (+) icon and column into the section.
Step 2: Add Feature Image Widget
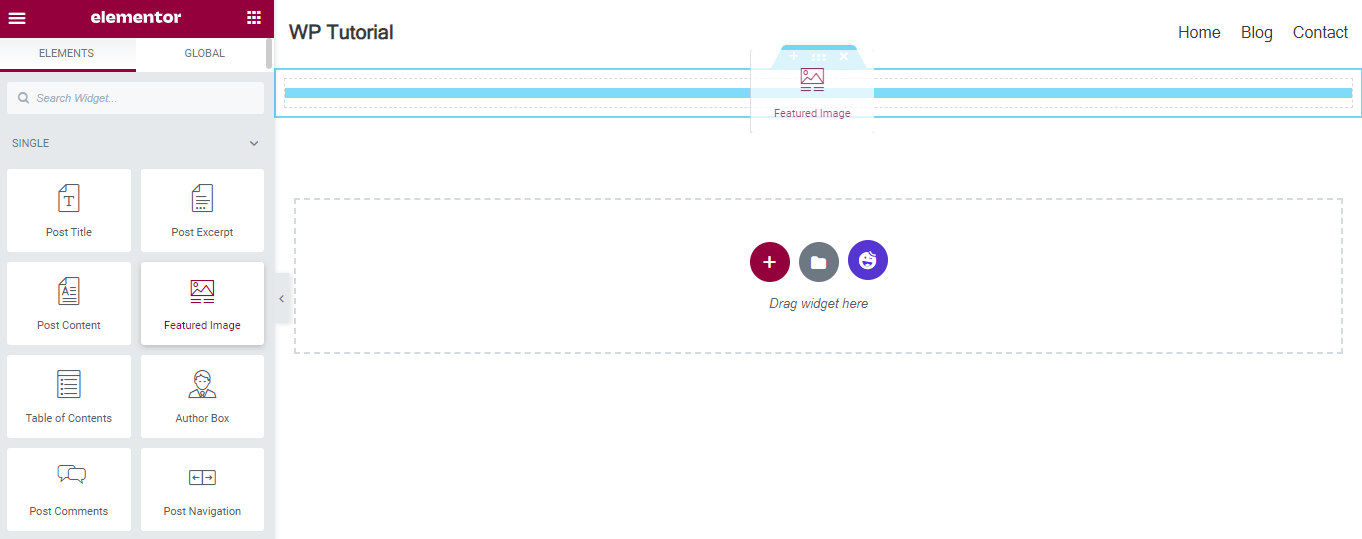
After that, you can add the required widgets to the column. Here, we add the Featured Image widget to display our post feature image. You can find the widget from the left-side menu and drag and drop the widget into the right place.
Content of Feature Image
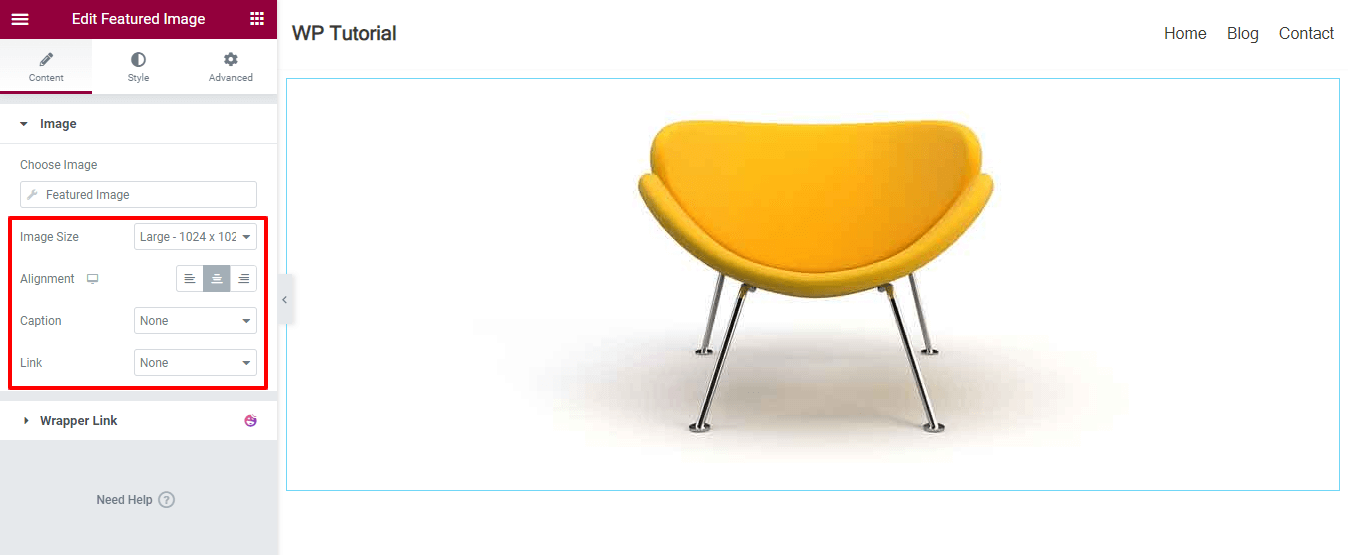
You can manage the feature image in the Content area. You can change the Image Size, set Alignment, add the Caption and insert a Link if you want.
Style Feature Image
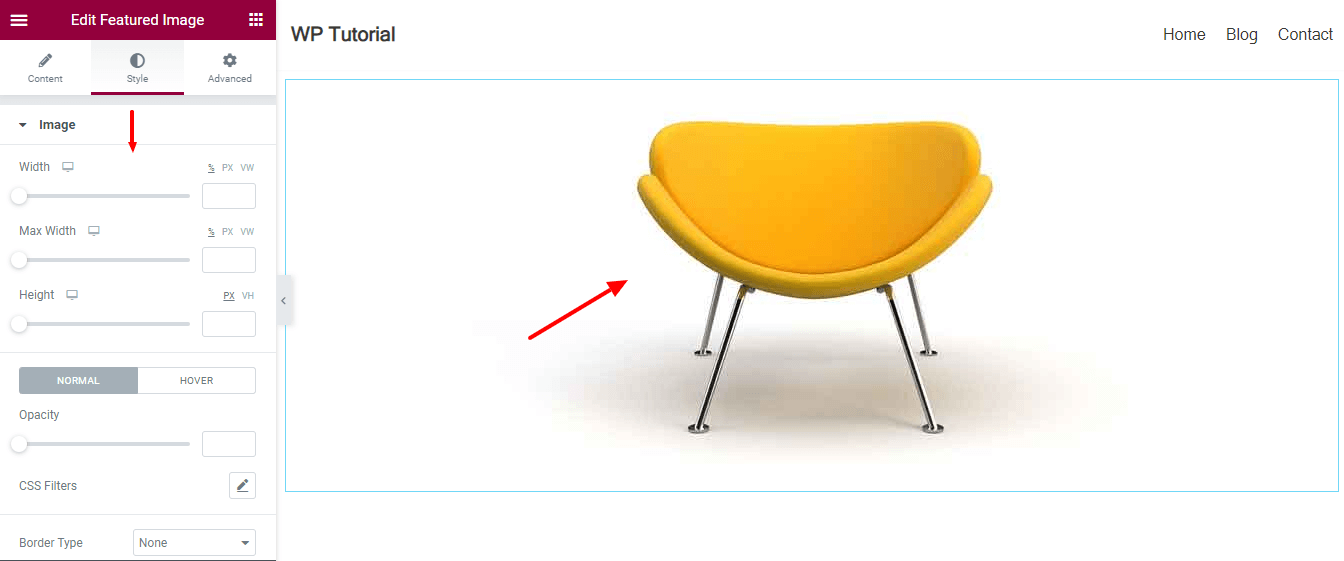
You are able to customize the image design using the Style options. Go to the Style area, you change the necessary settings to make your feature image more appealing.
Step 3: Add New Column and Set Layout
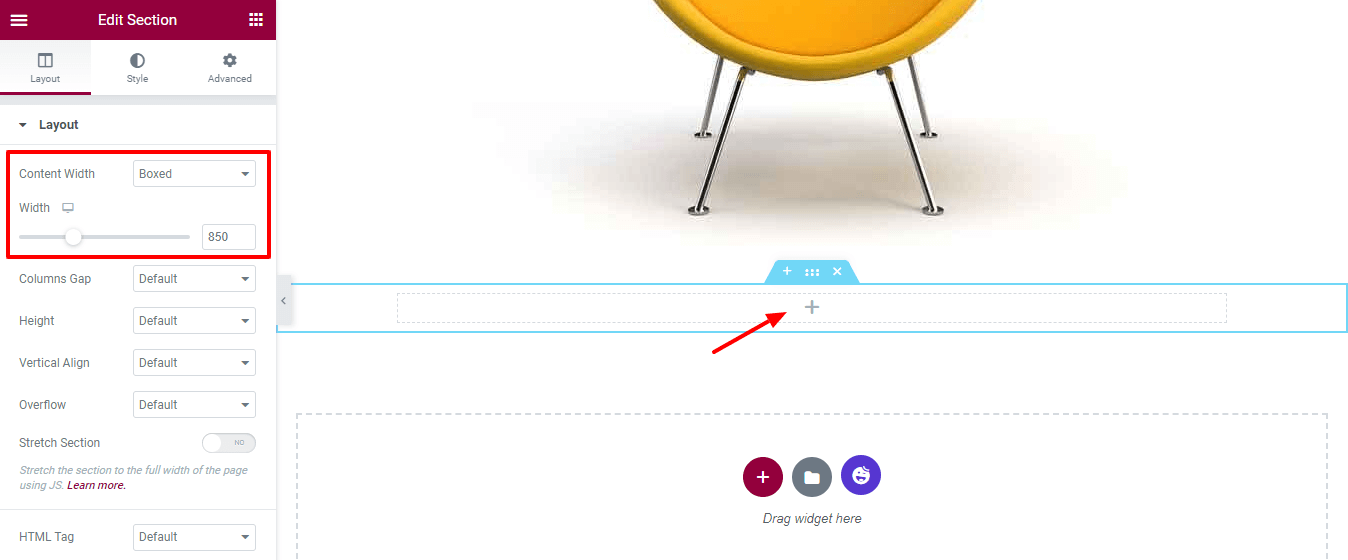
After adding the Feature Image, we want to add the other widgets. Before that, we would like to add a new column and set the layout using the Advanced setting. Check the image below, you see that we set Content Width->Boxed and define the Width as 850px.
Let’s add the other widgets to this column.
Step 4: Add Post Info Widget
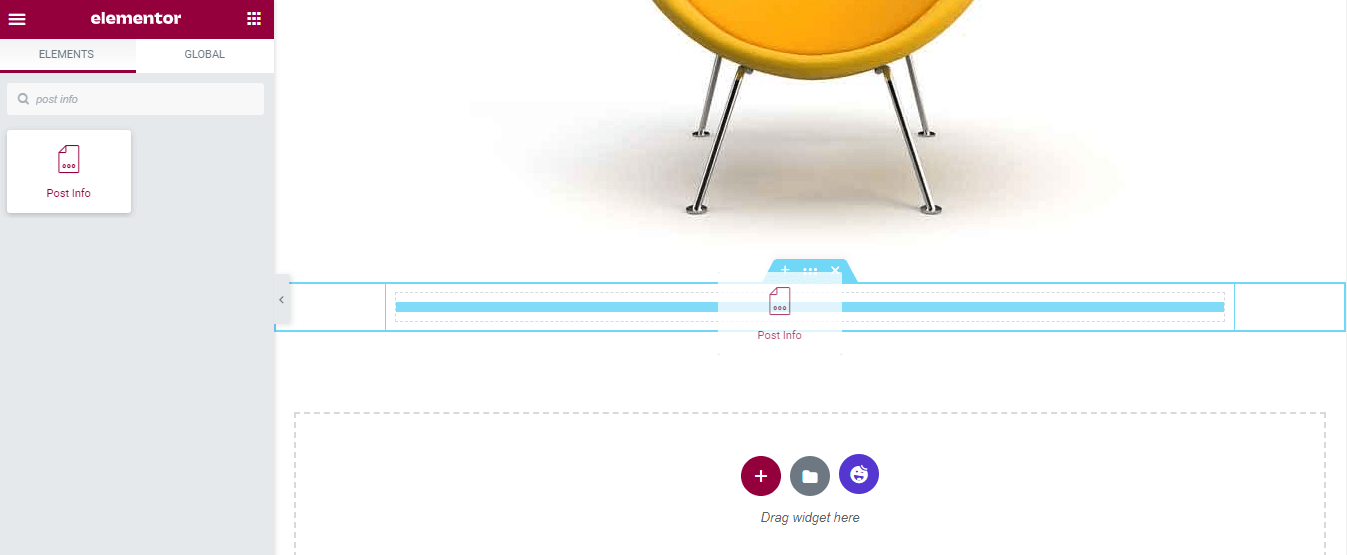
We add the Post Info widget to display our post metadata. Find the widget and drop it into the column.
Content of Post Info Widget
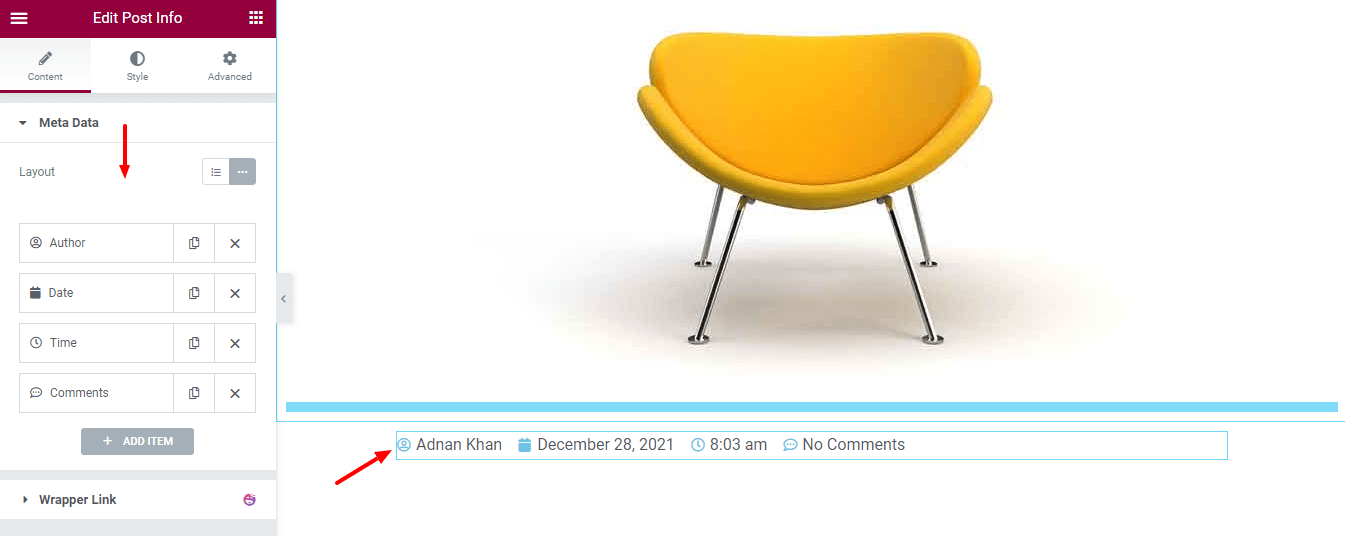
In the Content, you can control the Meta Data of the Post Info widget.
Set Post Info Widget Alignment
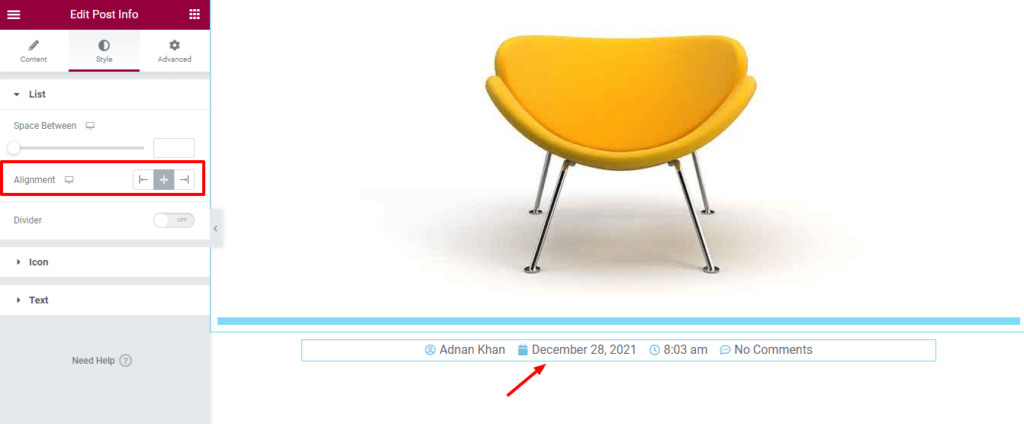
If you want to customize the post info design, you can do it here in the Style area. Here, we set the Alignment of the post meta content.
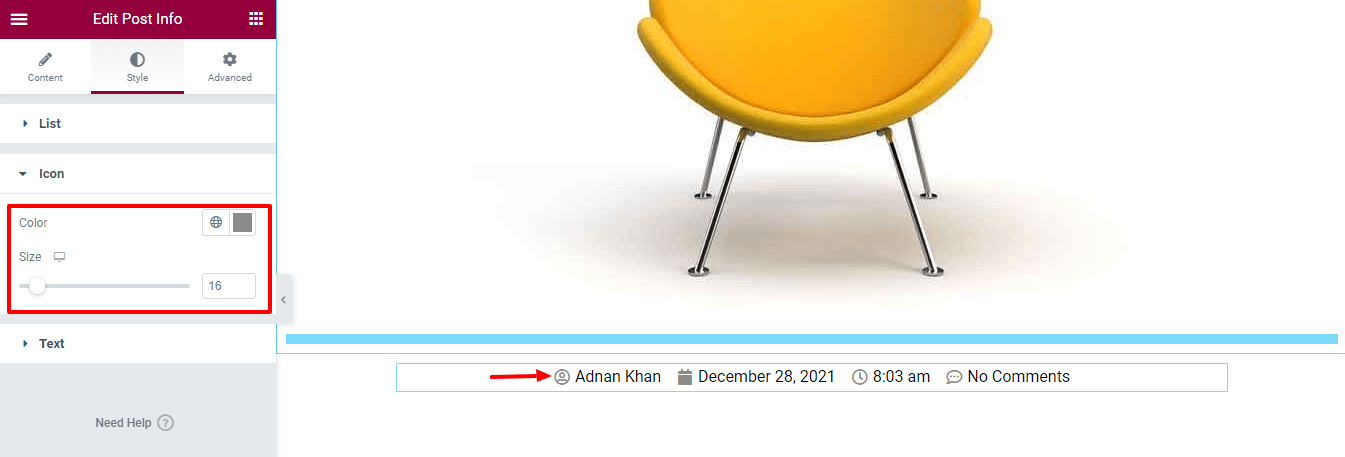
Change Post Info Icon Color and Size
We also change the Icon color and size. You are able to change the Text design by going to the Style->Text area. But we are fine with the default text design.
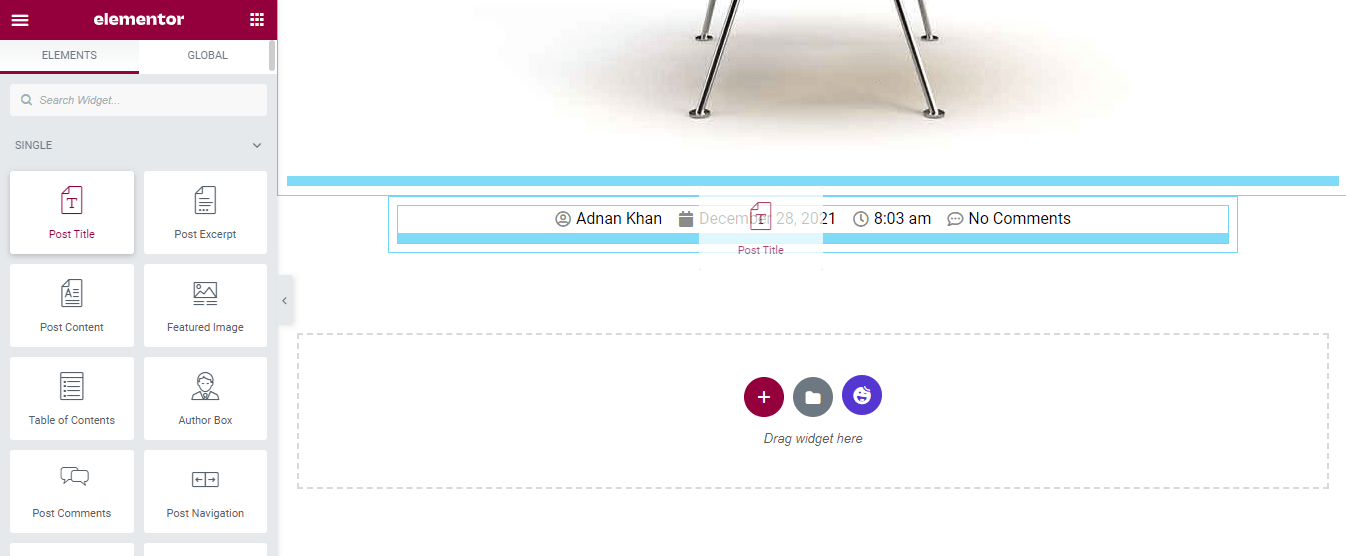
Step 5: Add Post Title Widget
Add Post Title widget and display blog title. You can add the widget by following the procedure above.
Style Post Title
You can also manage the Title style by going to the Style area. Here, you can customize the Text Color, Typography, Text Shadow, and Blend Mode of the Post Title.
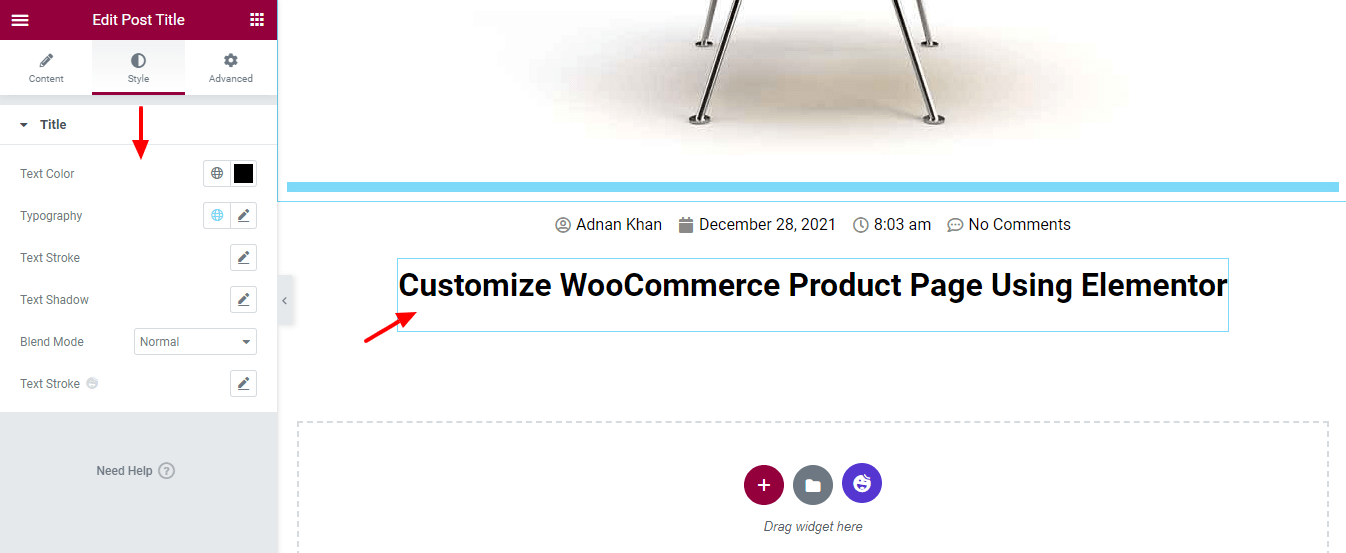
Note: If you have installed the Happy Addons plugin to your site then you will get the Text Stroke option.
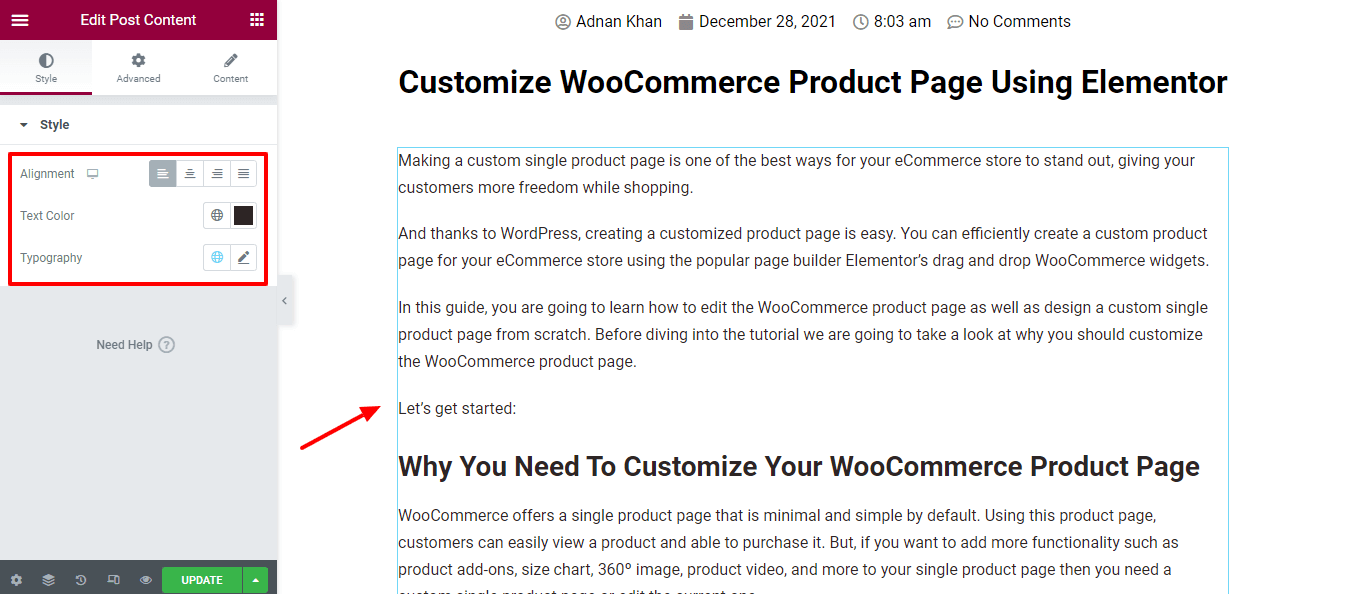
Step 6: Add Post Content Widget
Now it’s time to add the entire post content to our page. To do this, we add the Post Content Widget to the page.
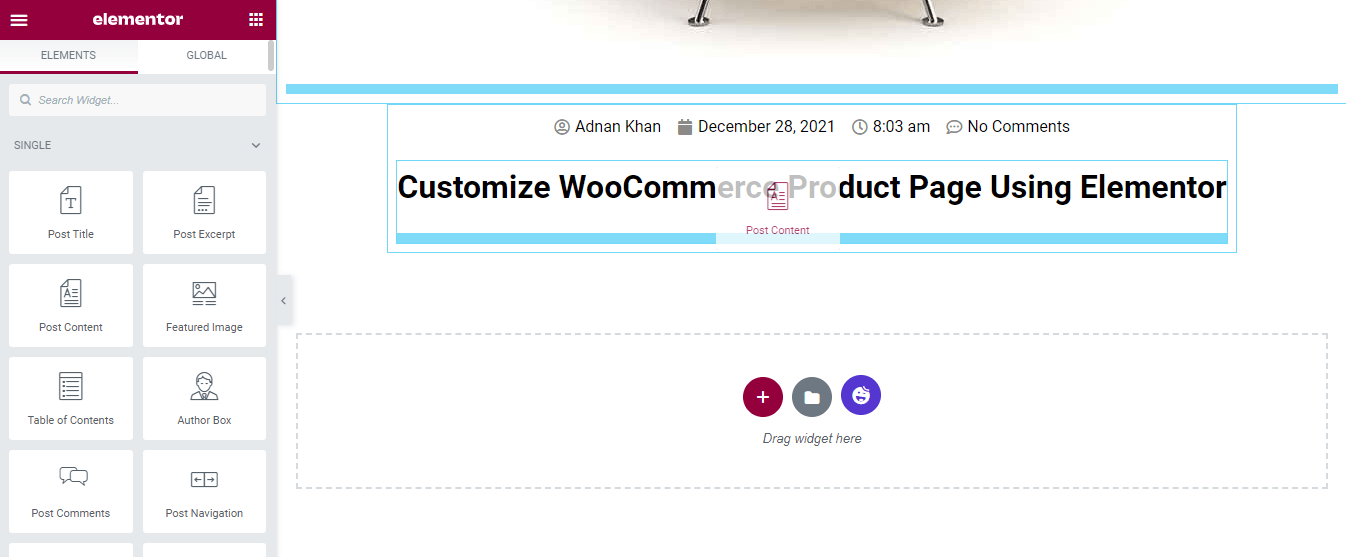
Style Post Content
You are able to set the content Alignment, Text Color, and Typography of the content.
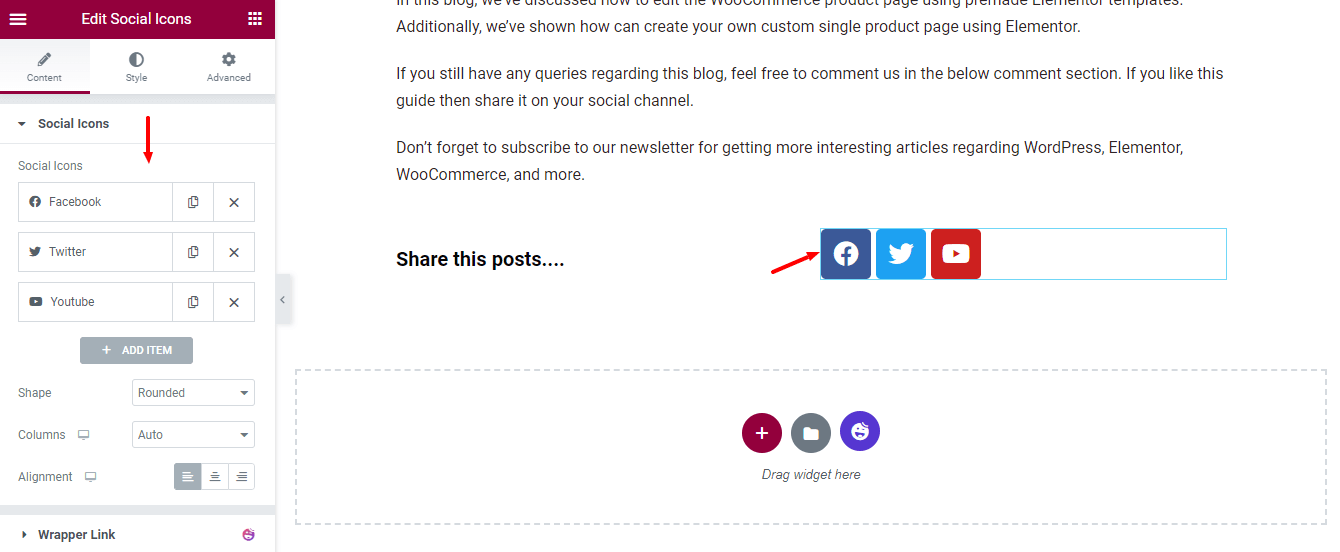
Step 7: Add Social Share Widget
We’ve added the Social Share button for sharing the post.
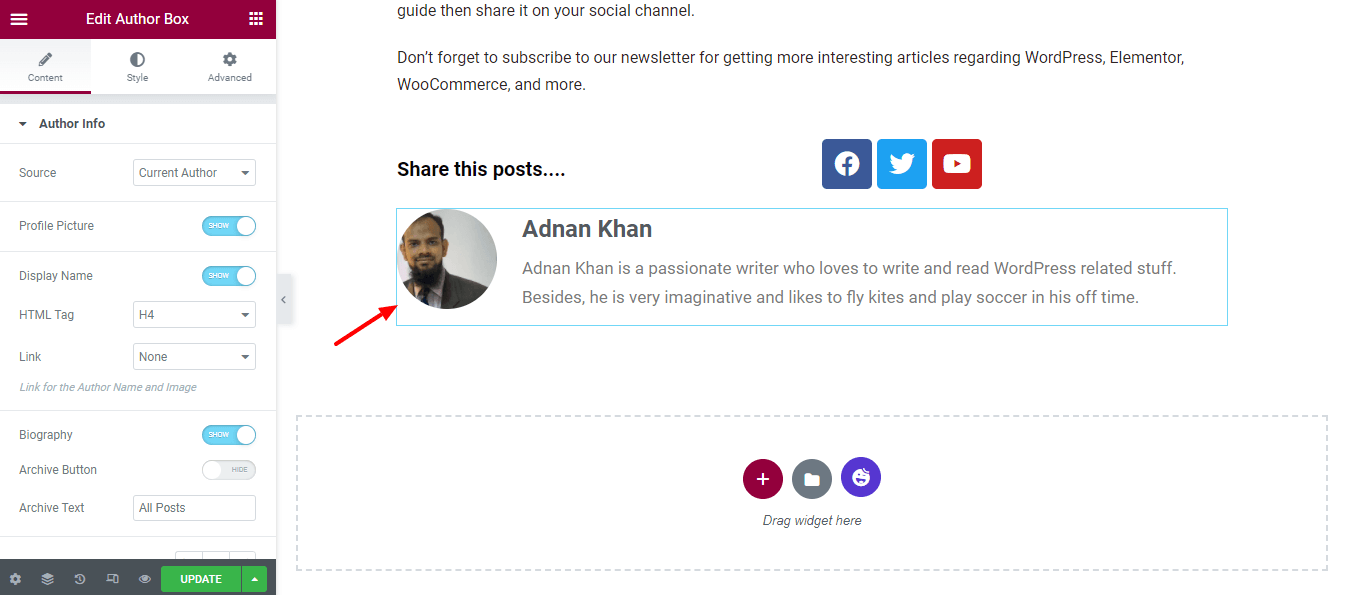
Step 8: Add Author Info Widget
We have also added the Author Info widget to show the post author details.
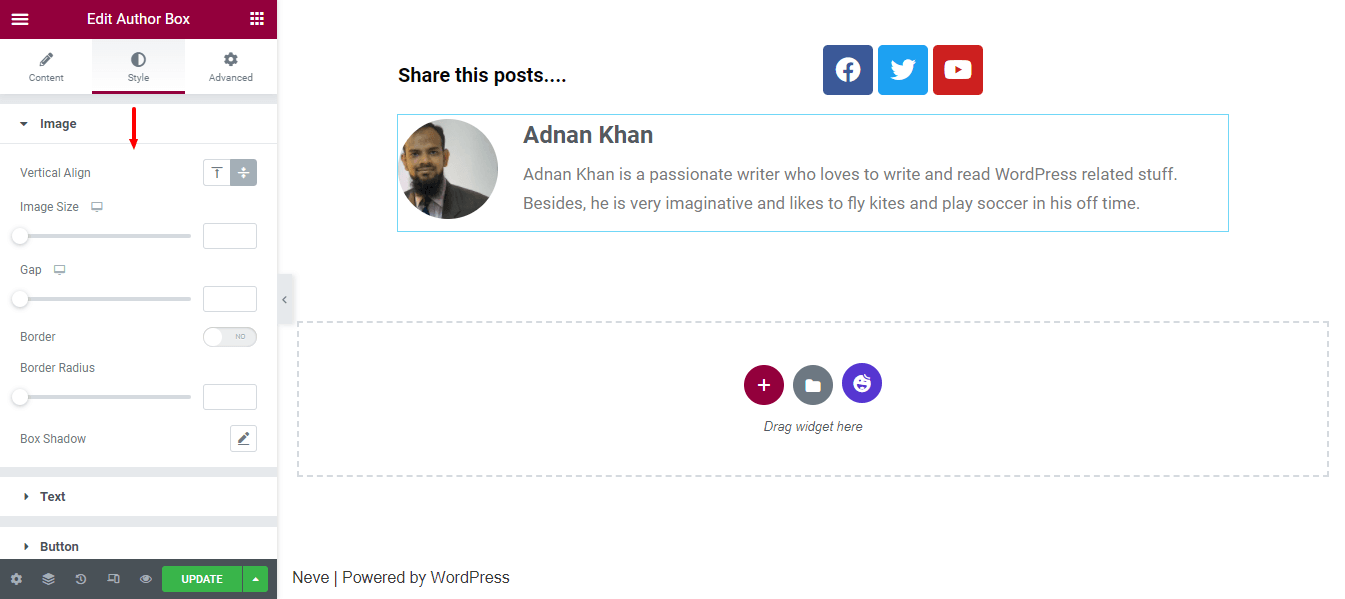
Style Author Box
According to your need, you can change the Author Info default design using the Style options. Here, you get different options to customize the Image, Text, and Button.
Step 9: Add Post Pagination Widget
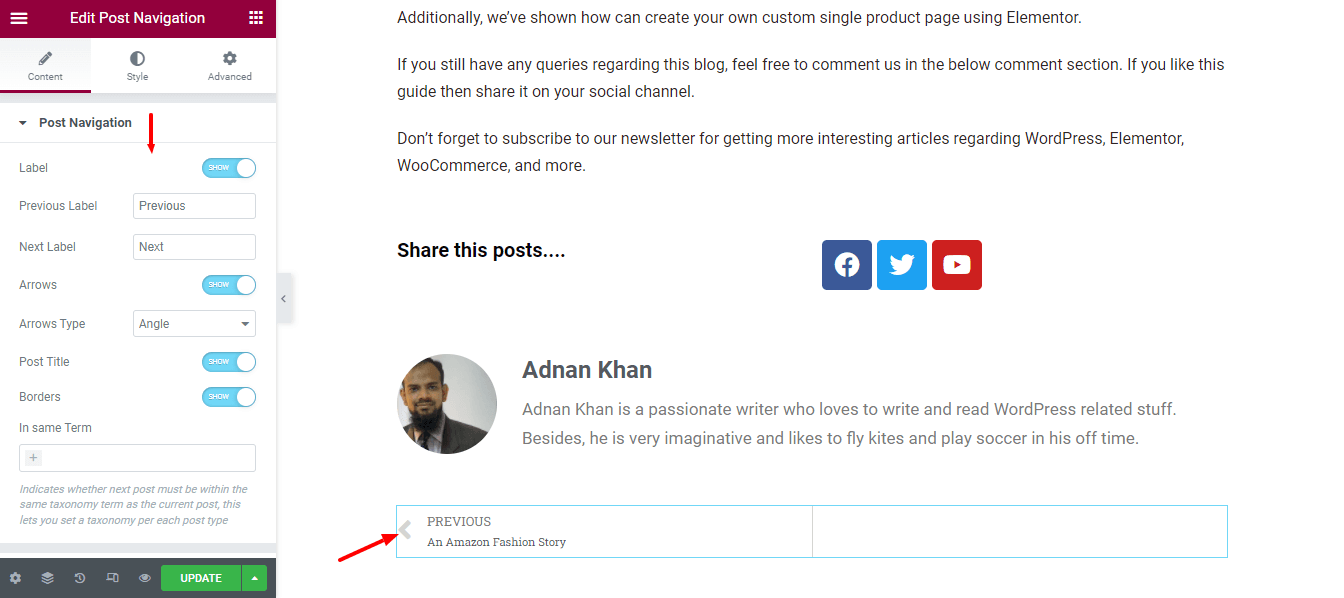
For making the post navigation, we’ve added the Post Pagination widget. Now one can easily navigate the posts.
Step 10: Add Related Posts
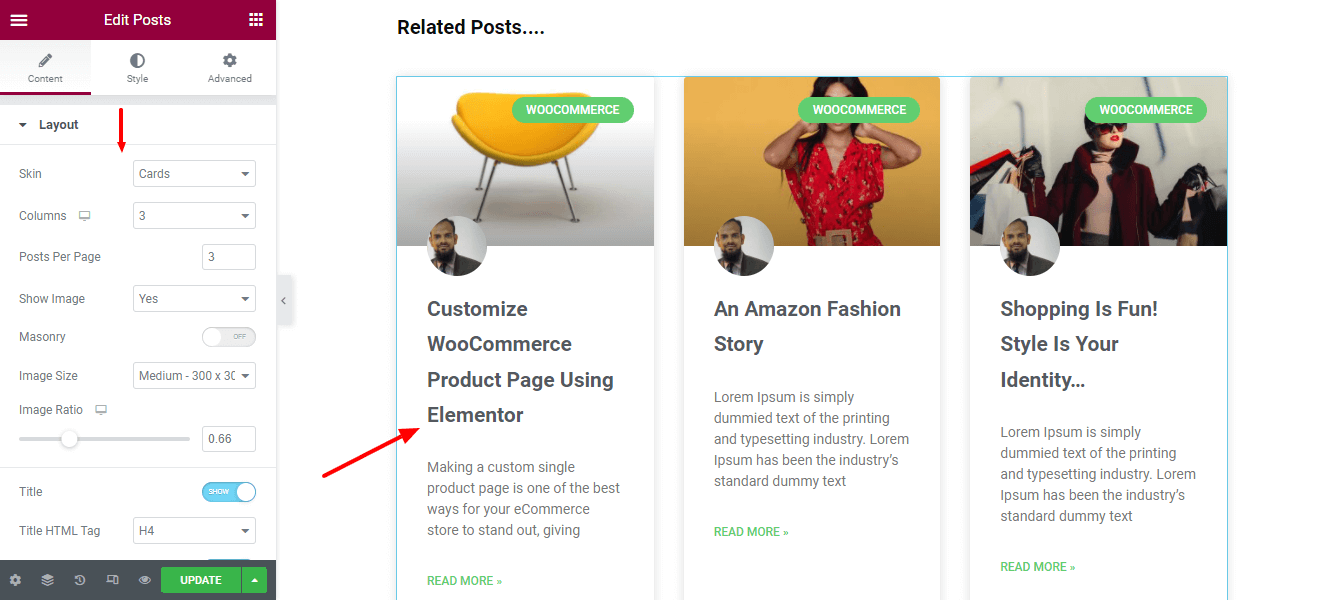
It’s very a common feature that you often see at the bottom of a single blog post. That’s why we’ve decided to add the Related Posts widget to our page. We have also set the Layout and defined the Columns, Posts Per Page, and other necessary post settings of the widgets.
Step 11: Add Post Comment Widget
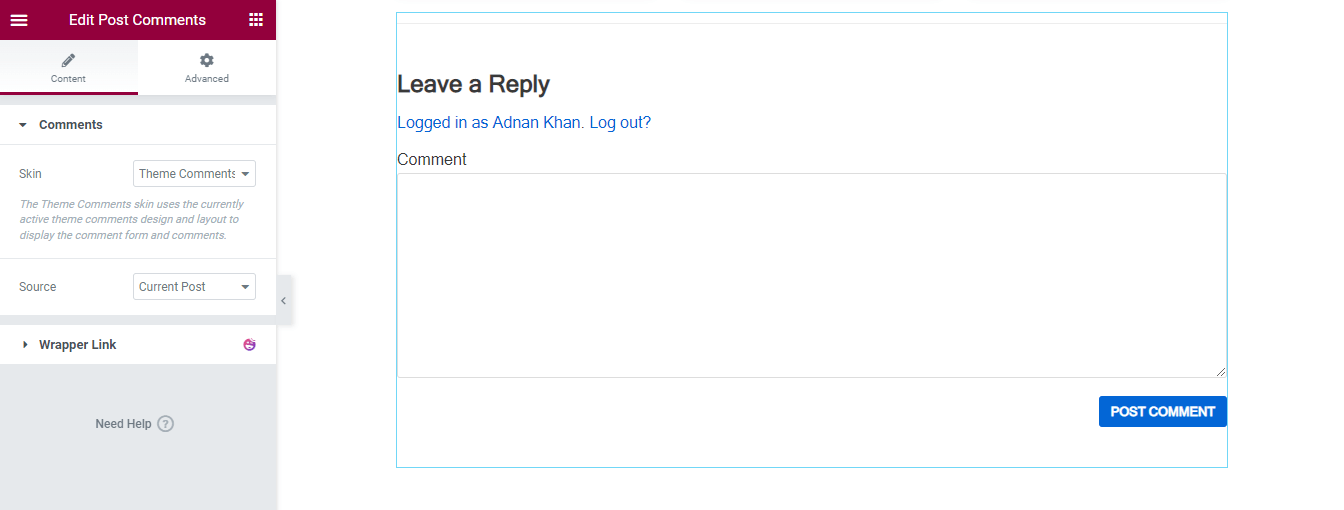
You can easily implement the comment option to your post page by adding the Post Comment widget. You are able to set the comment Skin and comment Source using the Content option.
Final Preview of Elementor Single Post Design
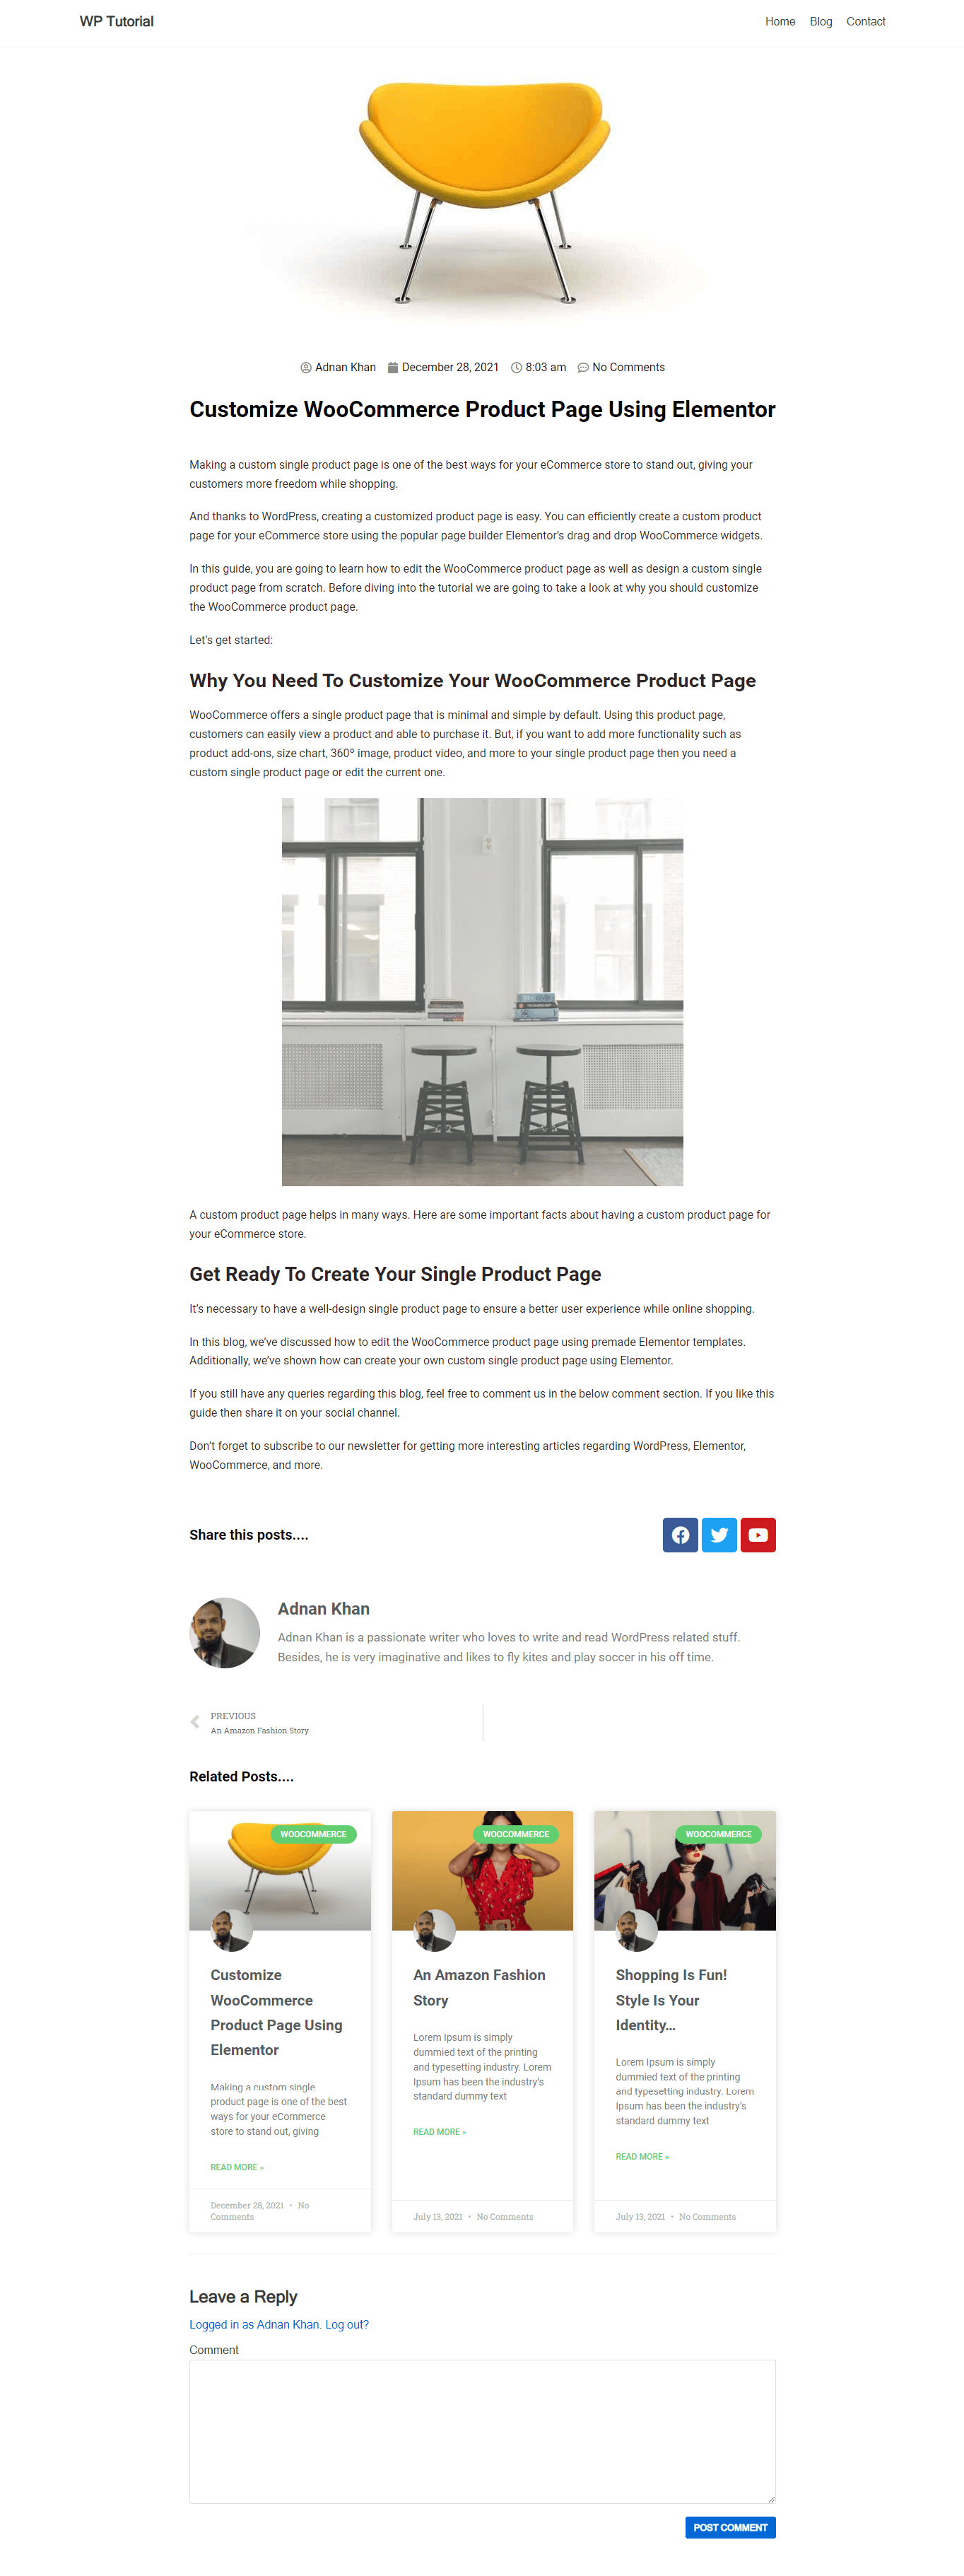
After adding all the necessary widgets and customizing the design this is the current design of our single post page.
Method 2: Create the Single Post Page Using Premade Elementor Template
In this part of our blog, we are going to show how to create a single post template using the Elementor Theme Builder.
Let’s get started:
Go to Template Theme Builder
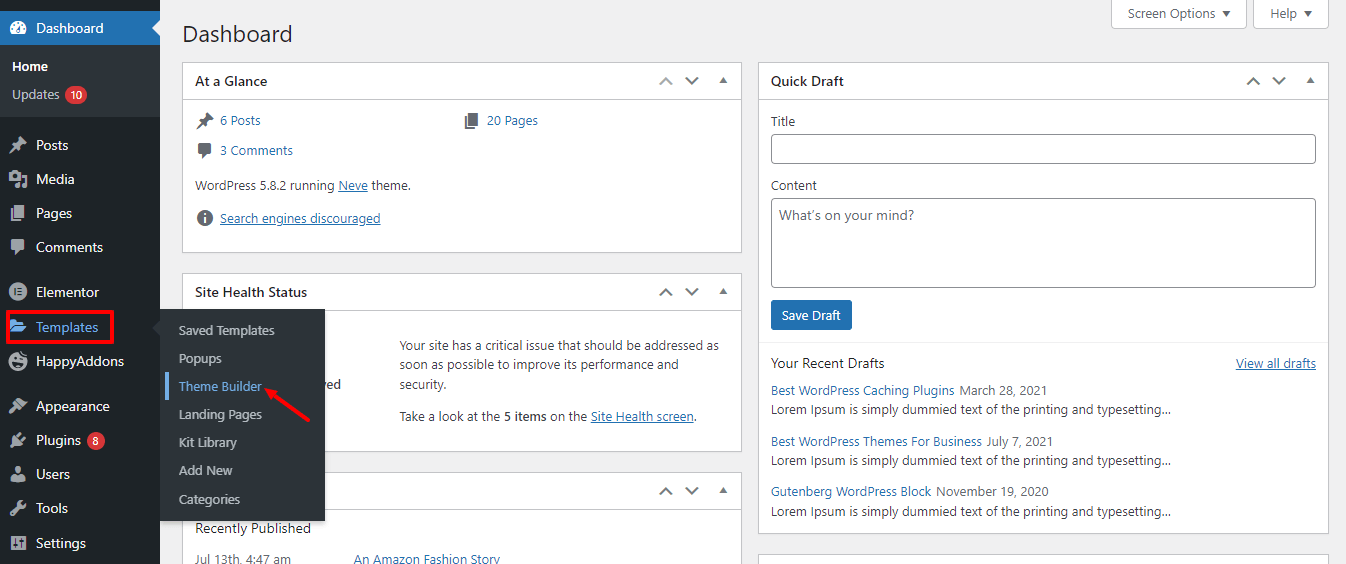
First, you need to go to the Templates->Theme Builder for creating a new single post template.
Add New Single Post
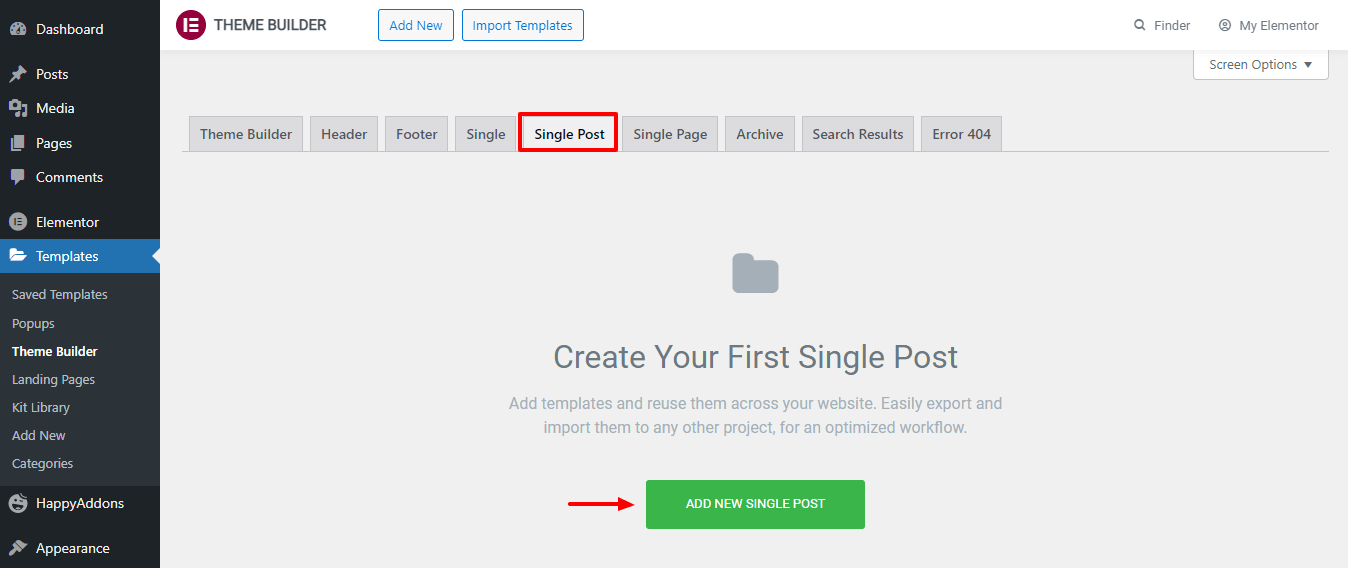
On the following page, you get several options. Click the Single Post tab. Then click on the Add New Single Post button.
Create a Single Post Template
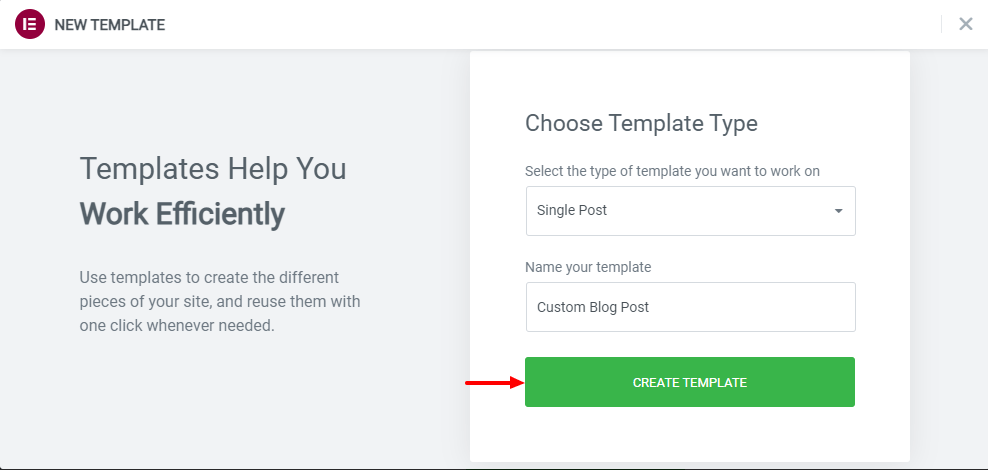
After that, you find the option to create your template. Write the Template Name and click the Create Template button and wait for the upcoming page.
Choose a Suitable Pre-Designed Post Template
Now it’s time to select a suitable pre-made blog template for your blog page. Just Install the template and use it.
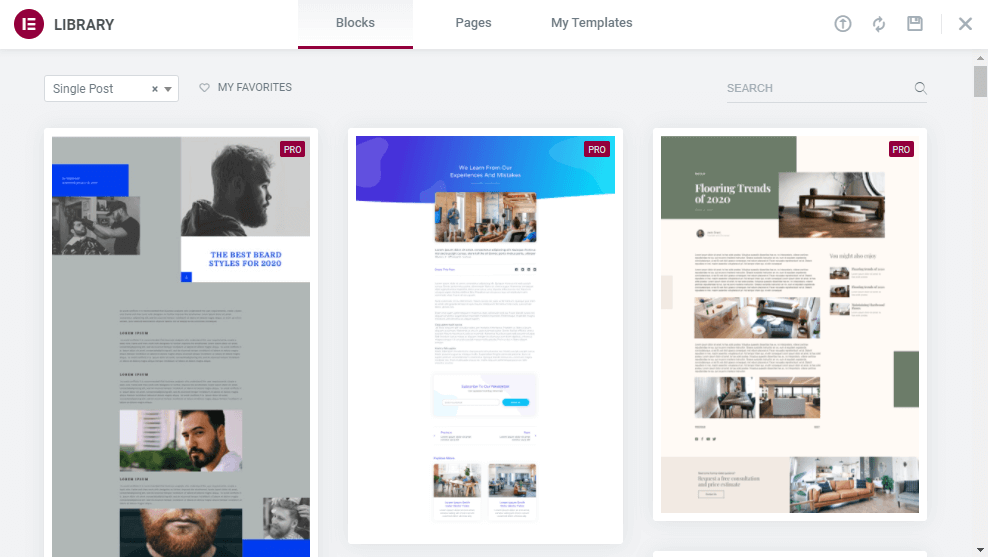
Note: You can also customize the pre-made template according to your need.
That’s it.
Enhance Your Customization Capability with Happy Addons’ Post Widgets
HappyAddons, one of the lightweight and fast-growing Elementor addons, allows you to design a custom single post page using its powerful post widgets.
Currently, it comes with 8 advanced post widgets that are easy to use and fully customizable. You can simply use these handy post widgets to make your Elementor single blog page more engaging and eye-catching.
Let’s give a quick brief about these widgets so that you can understand why you should try these.
Post List (Free)
Want to showcase your blog posts in a list? The Happy Addons’ new Post List free widget allows you to display your blog posts listwise. Try this widget and make your post design exclusive.
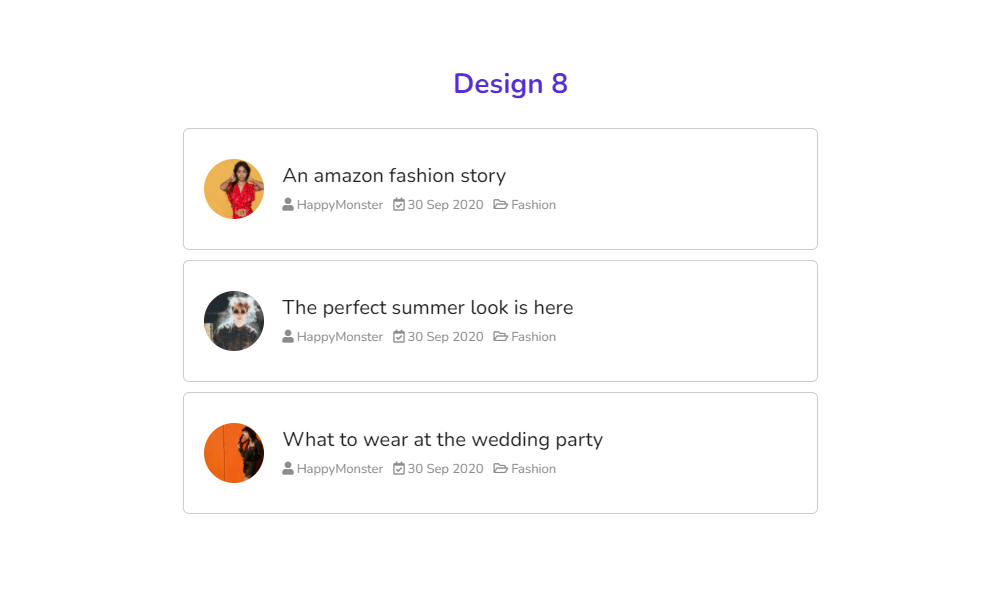
Check out the Post List widget documentation.
Post Tab (Free)
You may notice that many websites display their posts using a tab. And if you want to do so then HappyAddons’ free Post Tab widget will be the perfect tool for this design.
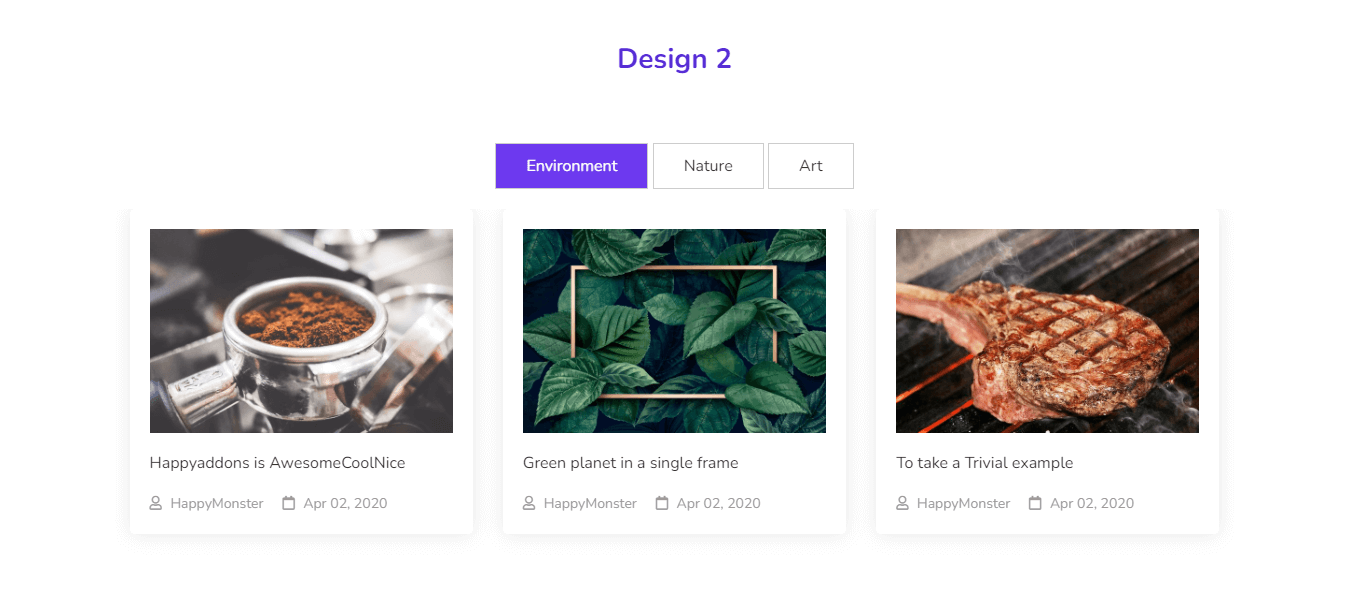
Read the Post Tab widget documentation and learn how to use it.
Taxonomy (Free)
Want to modernize your post-taxonomy? Try the free Taxonomy widget of Happy Addons from now you can efficiently decorate your post-Taxonomy in a more organized way.
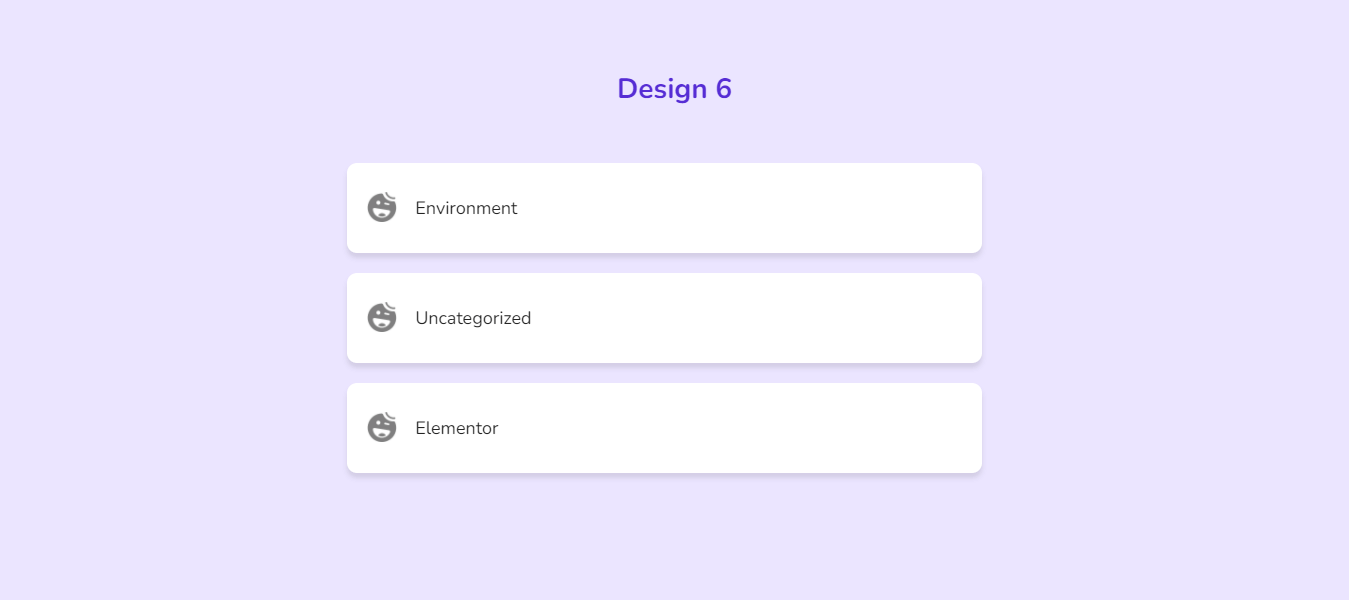
Check the full documentation of the Taxonomy widget.
Post Grid (Pro)
If you are looking for a solid tool to show your blog posts in a grid layout, then you should try the Happy Addons’ Post Grid widget. This creative widget saves you valuable time designing such web elements and makes your blog page more attractive.
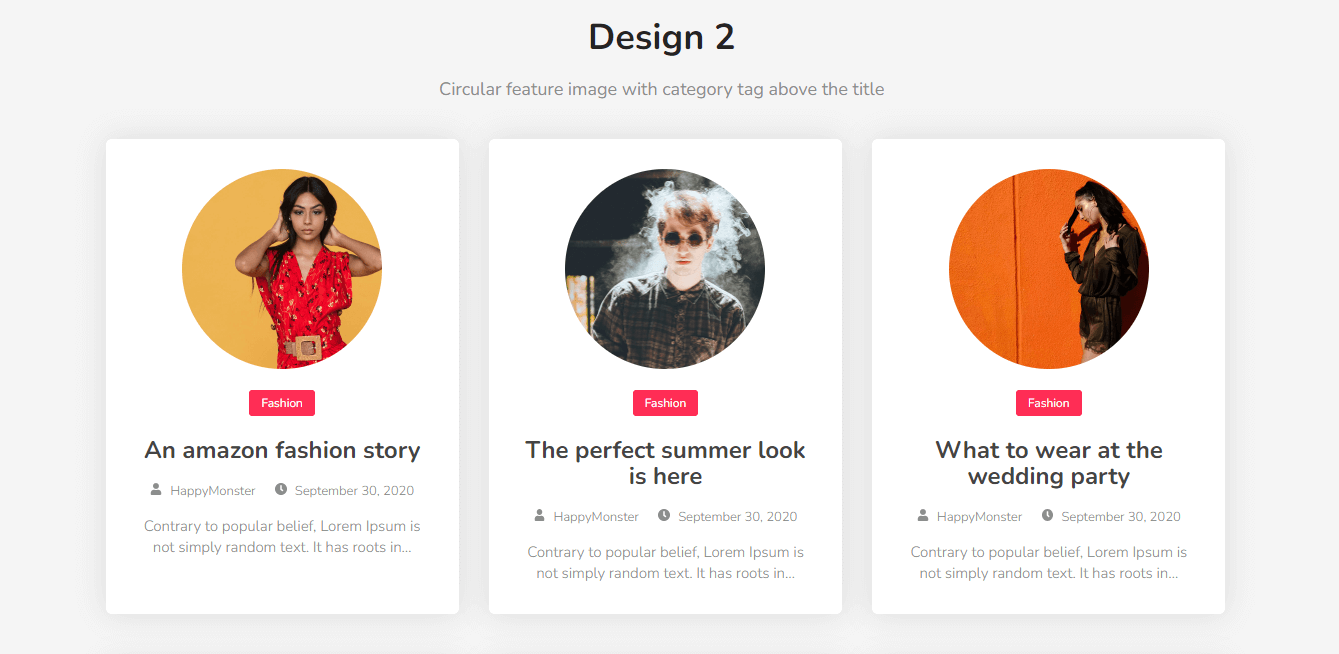
Read the Post Grid widget full documentation.
Post Tiles (Pro)
Happy Addons’ Post Tiles Widget is another advanced tool that lets you display posts in a more organized way. You can add multiple posts at once and manage their width and height. It’s easy to use and fully customizable.
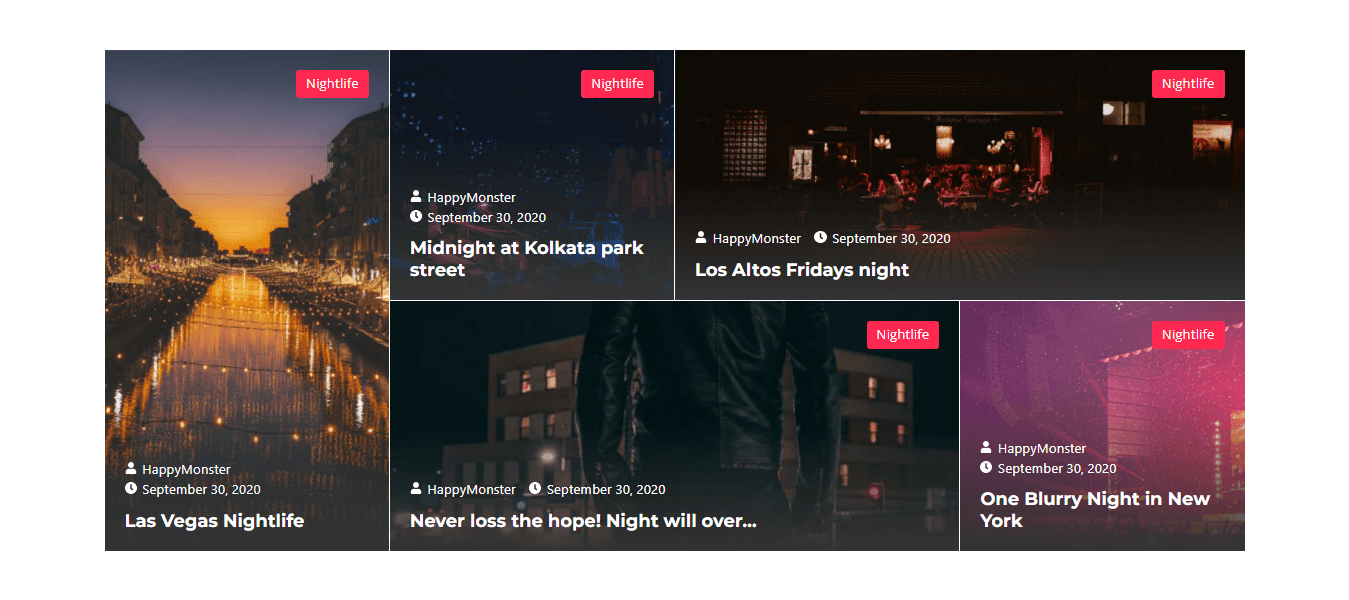
Follow the documentation of the Post Tiles widget and learn how to use this amazing tool.
Smart Post List (Pro)
With this exclusive Smart Post List widget, you can list blog posts on your Elementor website more efficiently than ever before. You can add your sticky posts with the ability to display categorized post lists.
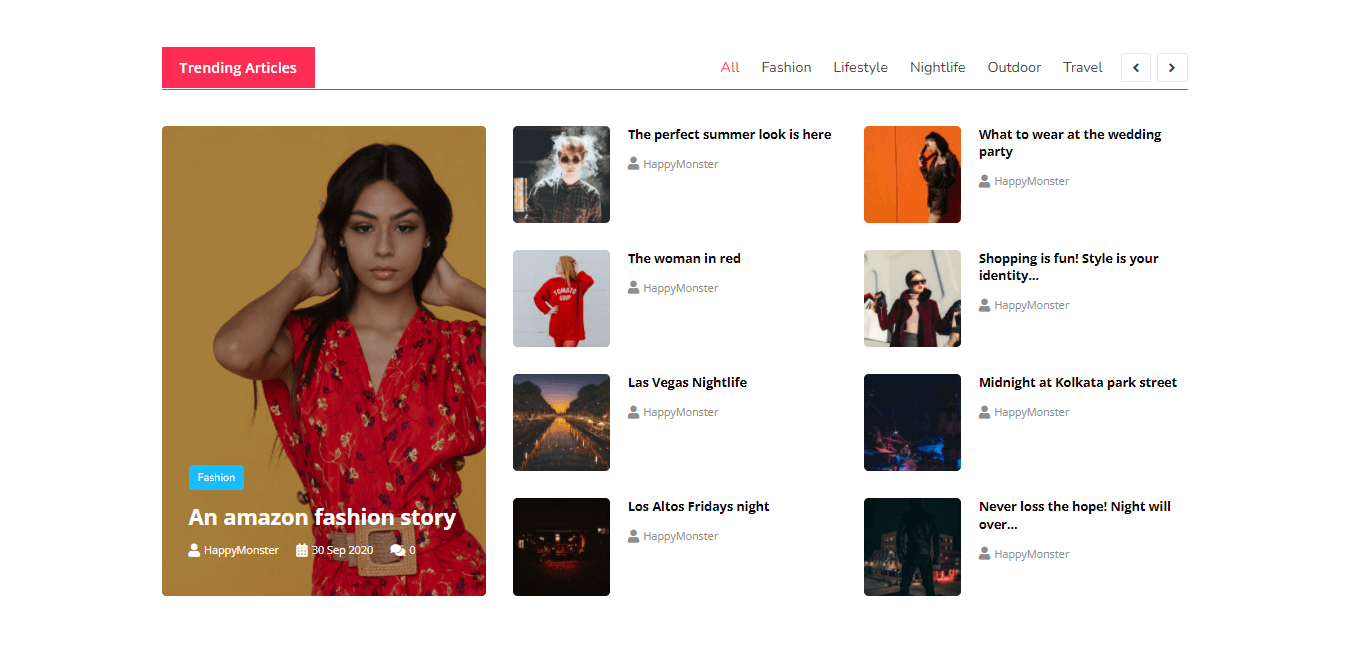
Check out the Smart Post List documentation.
Post Carousel (Pro)
This unique Happy Addons widget lets you feature your blog posts in a carousel layout. Try the Post Carousel widget and make your post design more attractive for your visitors.
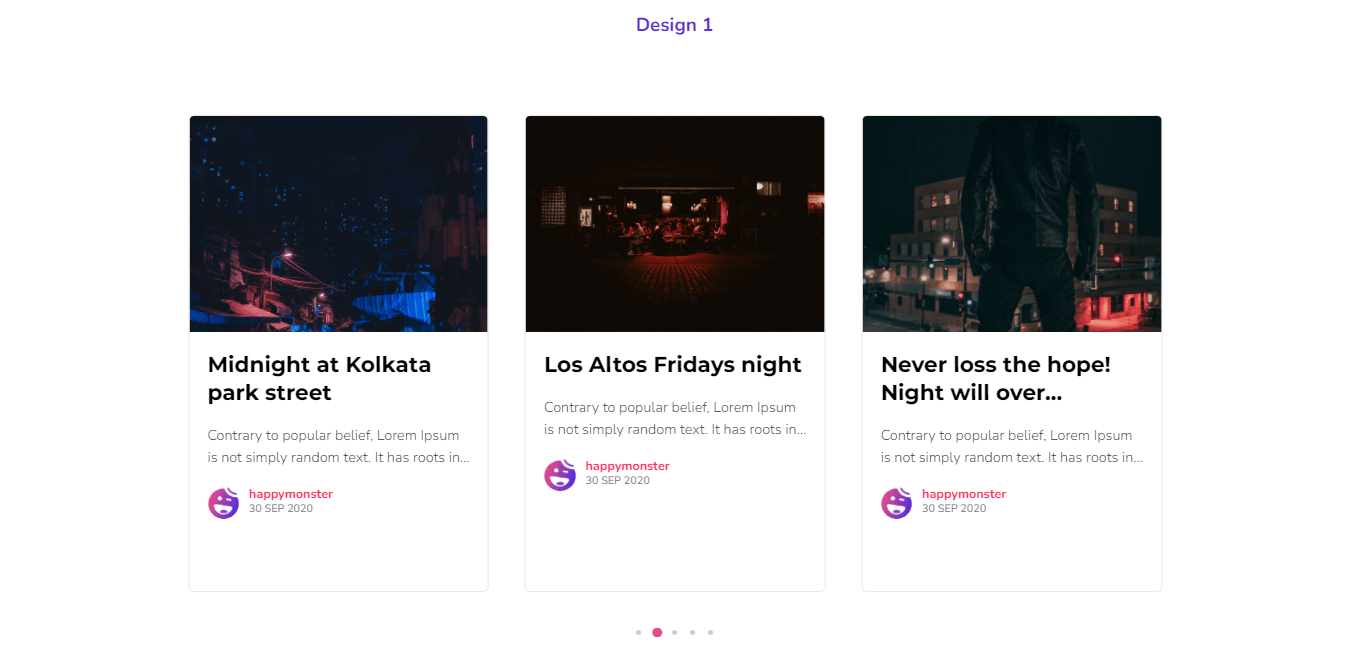
Read the Post Carousel documentation and learn how to work with it.
Author List (Pro)
Try the New Happy Addons’ Author List widget to make a beautiful list of your author and show how many posts they wrote.
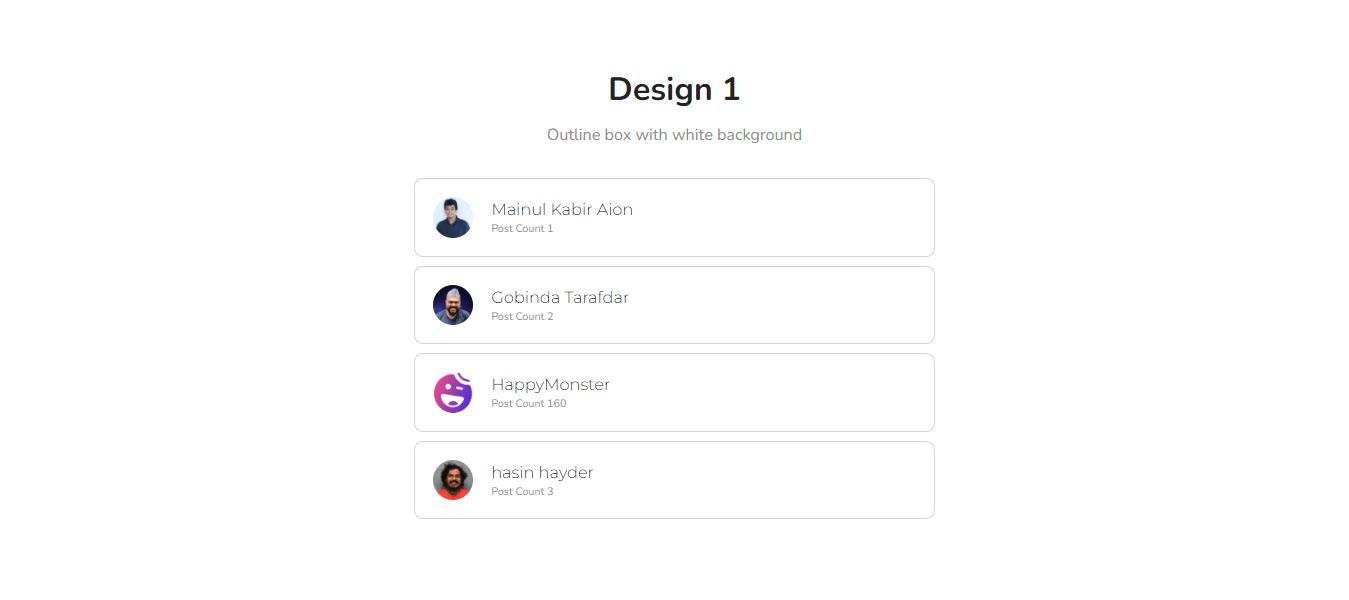
Learn more about the Author List widget by reading the documentation.
Are You Ready To Design Your Custom Elementor Blog Post Template
Now it’s your time to create your own single post page using Elementor.
If you follow the instructions above you will get an accurate idea of how to design a custom Elementor single post page from scratch. We’ve also discussed how to add more value to your post page using HappyAddons Post Widgets.
If you still have any questions regarding the Elementor blog post template design, you can ask using the comment box below. We will try to solve your problem as soon as possible.
If you like this helpful guide, share it on your social channel. And join our newsletter to get more interesting guides about WordPress and Elementor.
Subscribe to our newsletter
Get latest news & updates on Elementor



4 Responses
Hello,
I really enjoy using your Happy Addons for my website (still not published).
I have a little problem with Post Comment section.
I cannot make any style to this part, nothing is changing from the Elementor editor, I have tried several different Themes, changed the Theme and the default setting to what I need and nothing has changed for me,the fonts, colors, background, Reply, edit, delete buttons, just nothing…..
I am really desperate, because the default setting is really ruining the view of my website.
Hello Adriana,
Sorry to hear that. Did you try it with the Hello Elementor theme? If yes and still getting problems then please contact us here at [email protected]. We need to investigate deeply. Please contact us with temporary login access.
Regards,
Gobinda
Team HappyAddons
Hello Gobinda,
after many days I have found solution.
This part was inherited from Jetpack. The Post Comment button was inserted as a picture and it was impossible to change it even with custom CSS…..
I had to disable the Jetpack Modules for Post Comments, Contact Form, Comment likes etc….
I hope somebody will find this useful in the future
https://snipboard.io/pnZlmL.jpgHello Adriana,
Thanks a lot for managing time to share your solution here with us. We really appreciate that.
Regards,
Gobinda