Displaying content on a website is easier than ever with the new Smart Post List widget of Happy Elementor Addons Pro.
All you need to do is follow the instruction below and implement it side-by-side.
Let’s get started:-
How To Utilize Smart Post List Widget
Step One:
First of all, you need to select the widget and drag it to the design canvas.
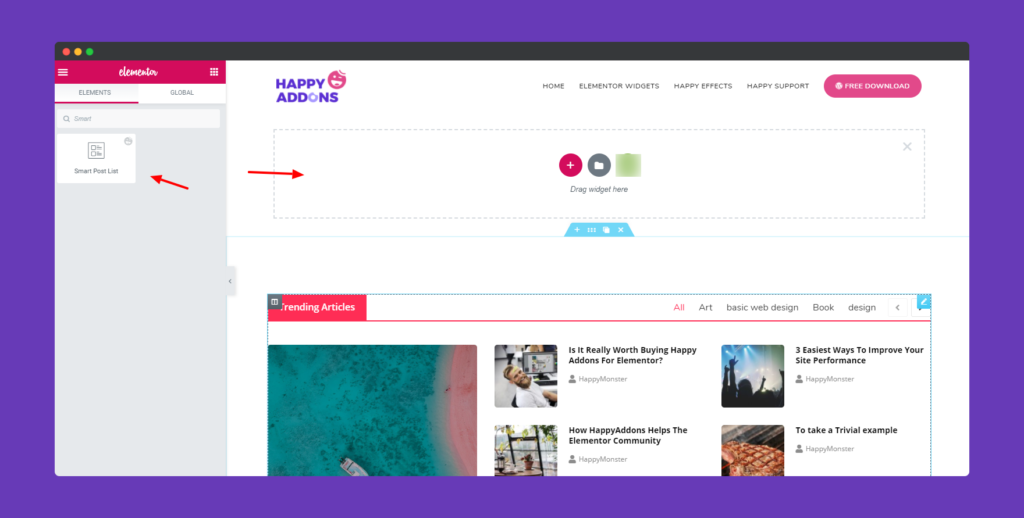
So if you have enough posts on you website, they will appear here automatically. That means you just need to customize the step by step.
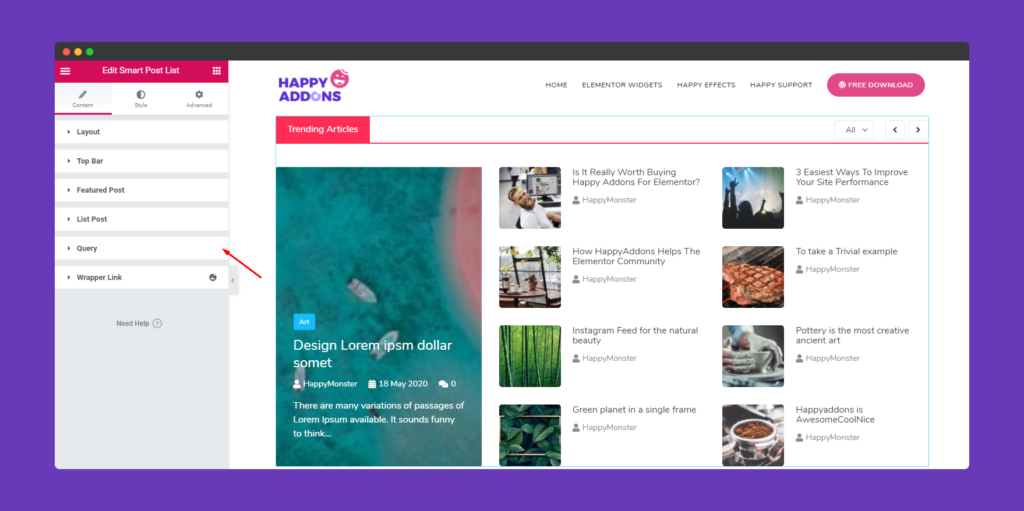
Step Two:
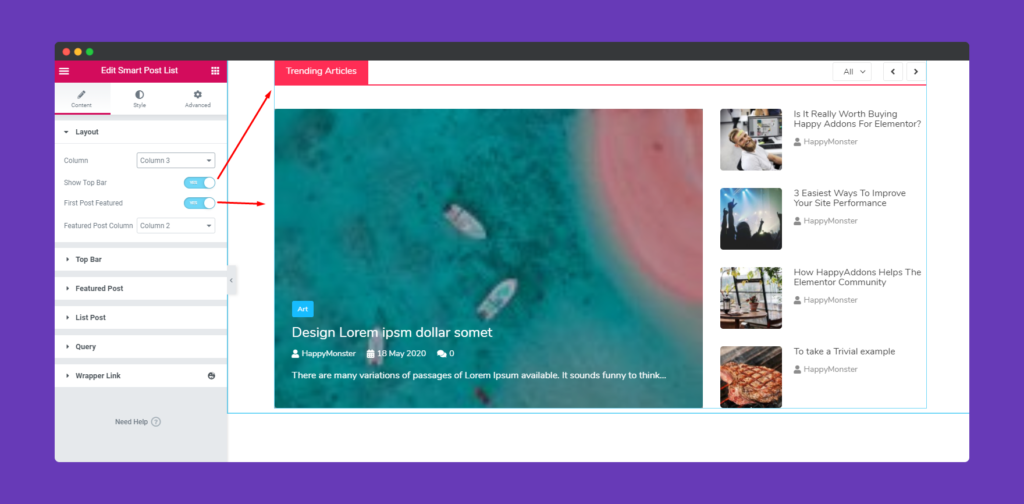
First you will get the layout option to customize. If you want to show the top bar in the bottom, then toggle it on or off. Same goes for the first post feature image.
Remember: Only the post will appear as a featured image. Others will remain the same.
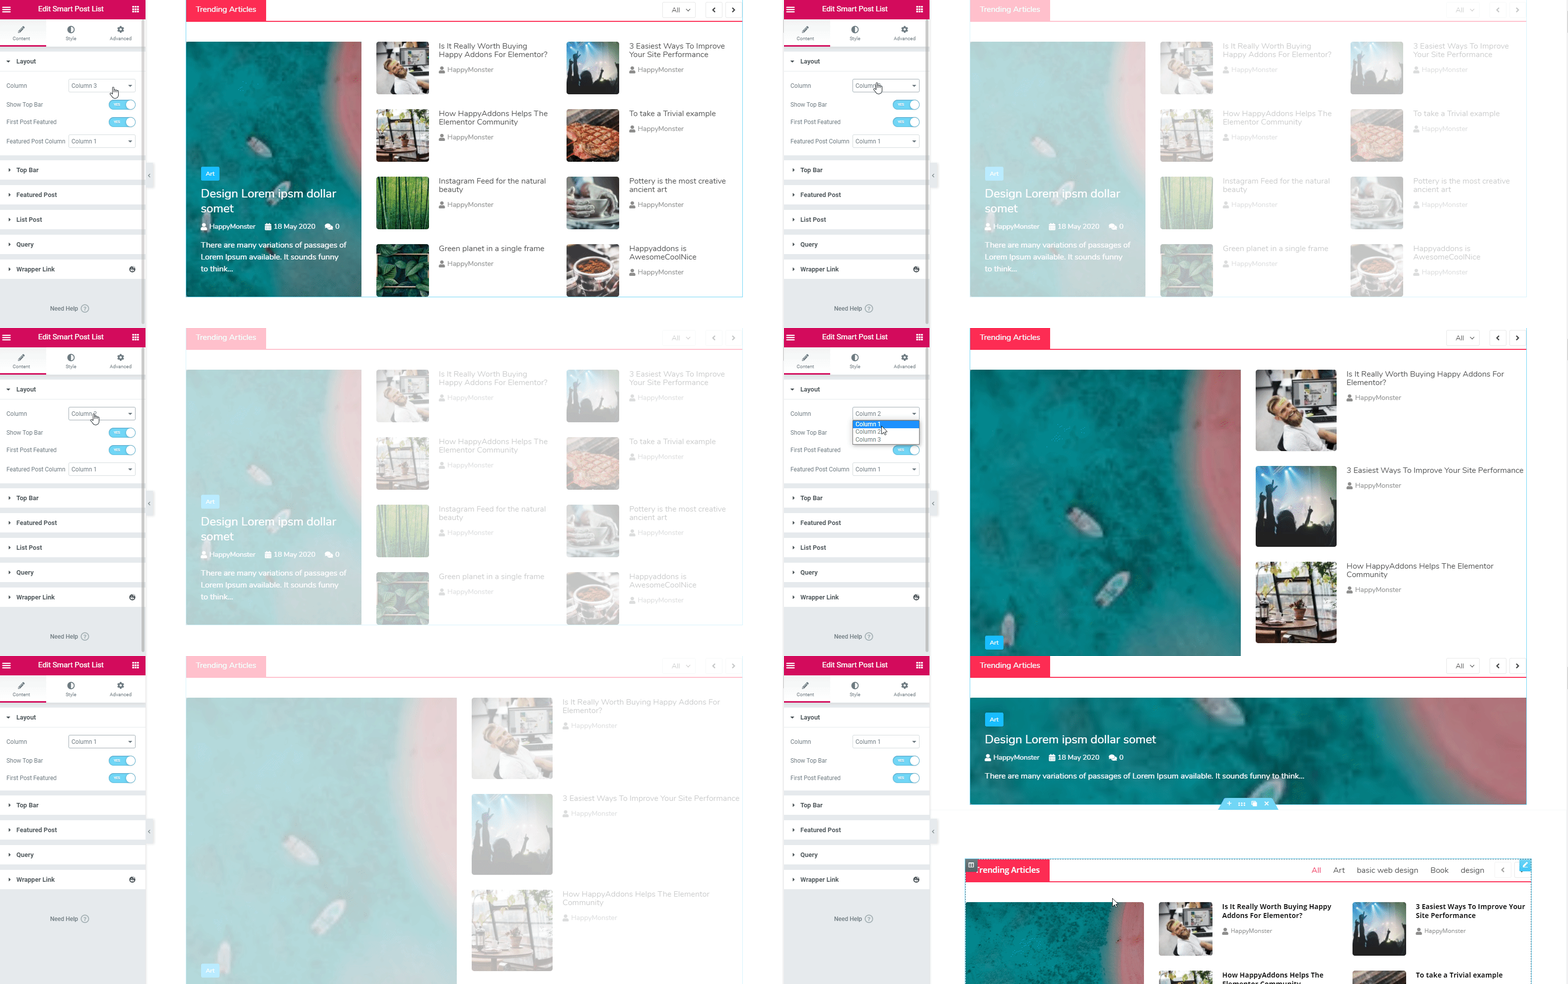
Here you need to be careful about certain things. If you want to get a better view, we’ll recommend you to keep column 2 or 3. Otherwise, it will not look good. Here’s how:-
Now tap on the Top Bar. Here you can show the top bar above the design, or you can turn it of. Even you can give it a name & heading also.
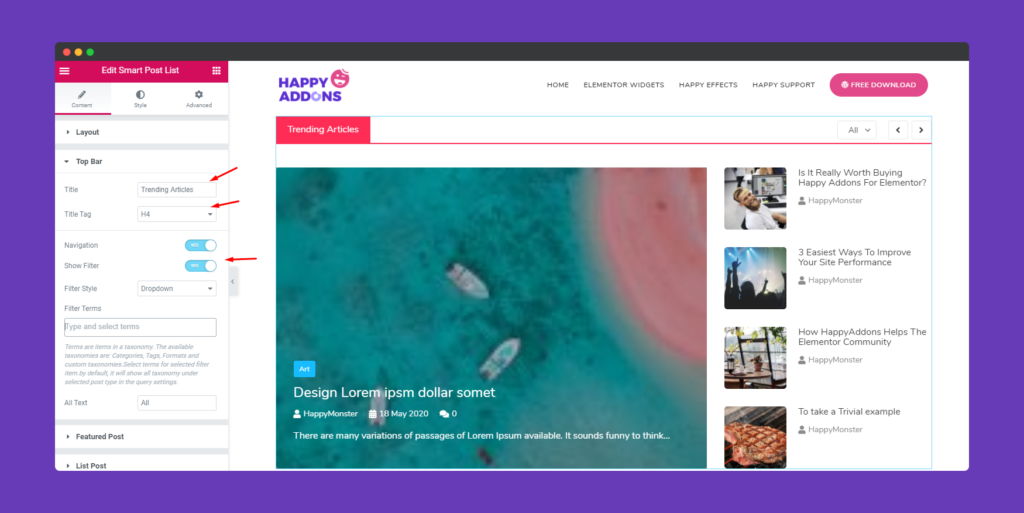
Now the most important part comes. Here you need to very careful on certain things while adding filters.
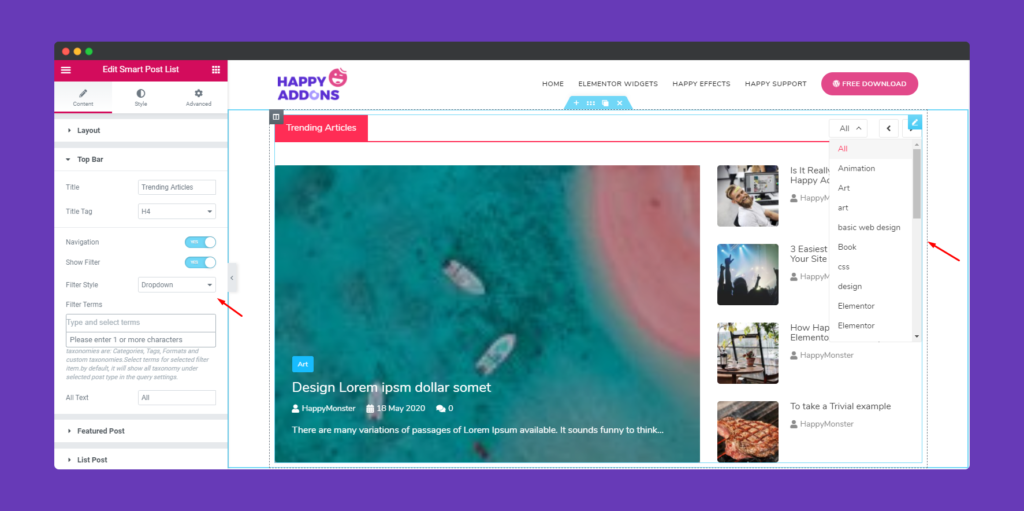
In the filter, you’ll have two options. Drop down and inline. If you choose dropdown, then all the categories that you have created before will automatically show one by one here.
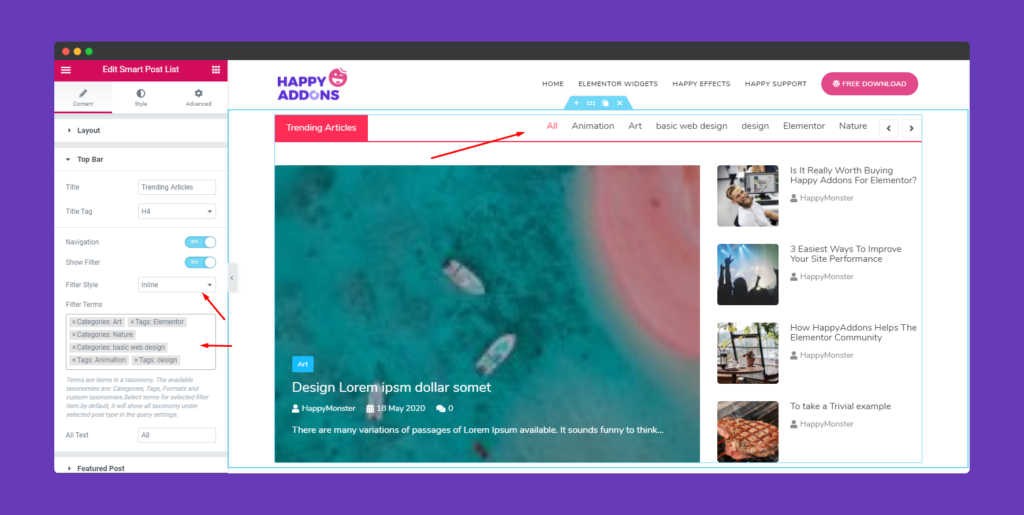
And if you choose inline, all categories will show together. Also, you can just select the specific item from the list to show on the top bar.
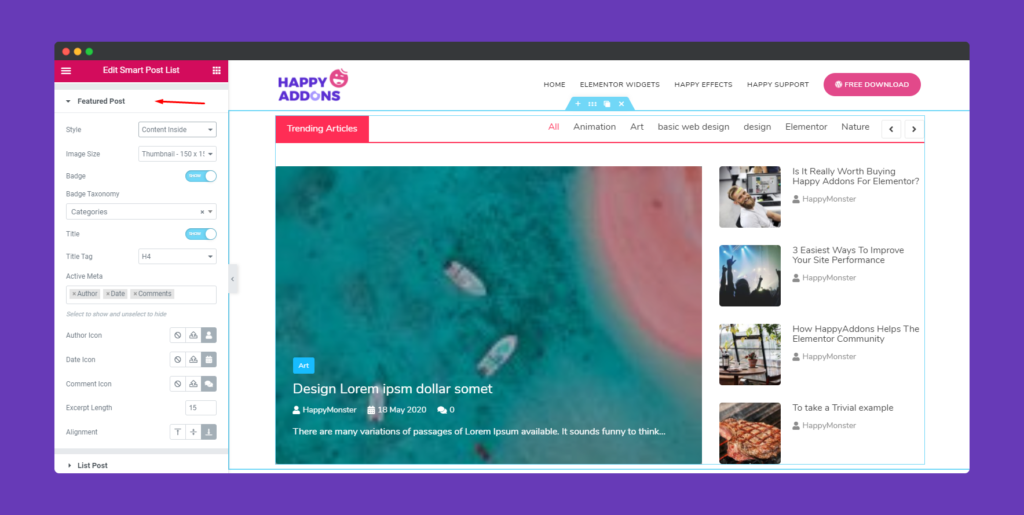
Next, tap on the featured post button, then all the related options will show up. Here you can put the content inside the design or outside the design. Set up badge taxonomy, activate title, title tag, active meta tag, author icon, date icon, comment icon, excerpt length, and align them easily.
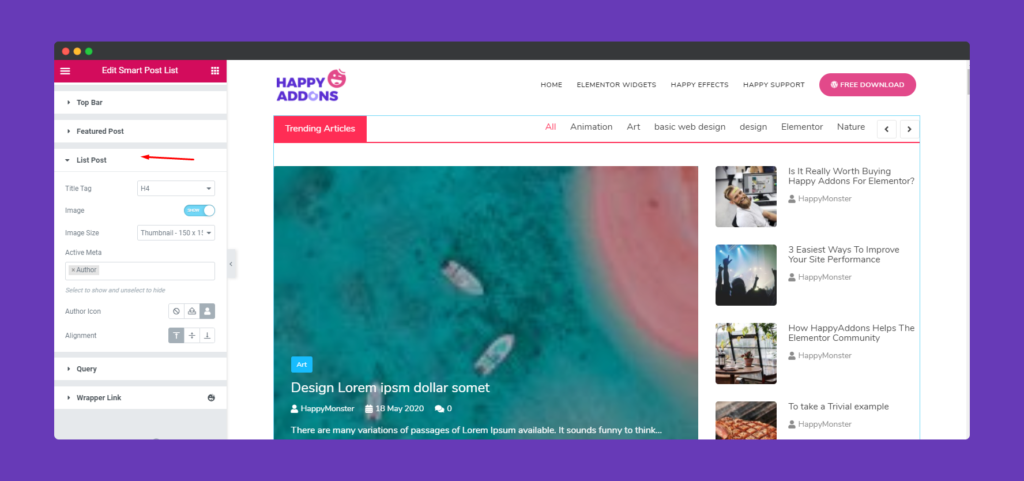
Next, we have list post to customize. Here you’ll get a few items to customize. For example, title tag, image & size, meta tag, author icon, and alignment, etc.
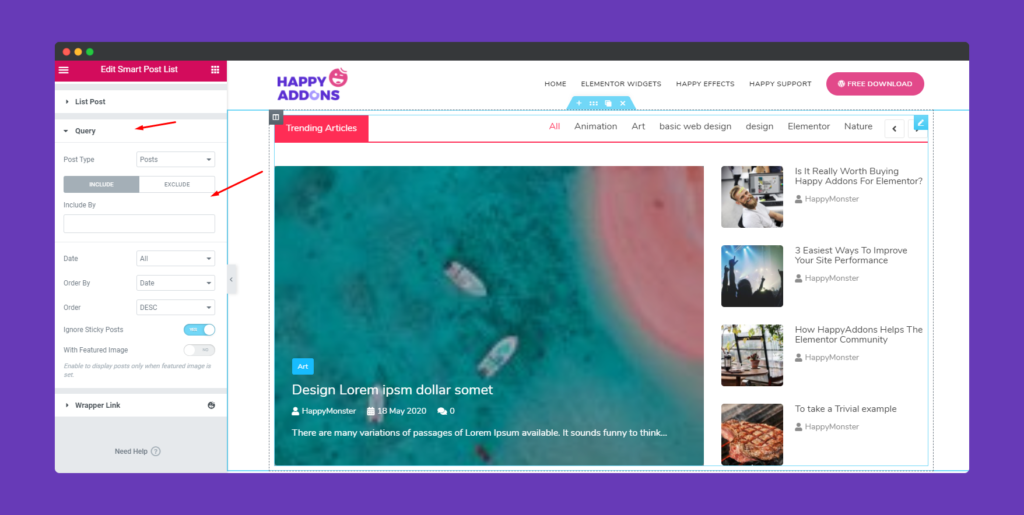
Now tap on the Query button. You can set the post type here, also include & exclude the post. Additionally, you can categorize date, order number, activate or deactivate the feature image & sticky post.
Step Three:
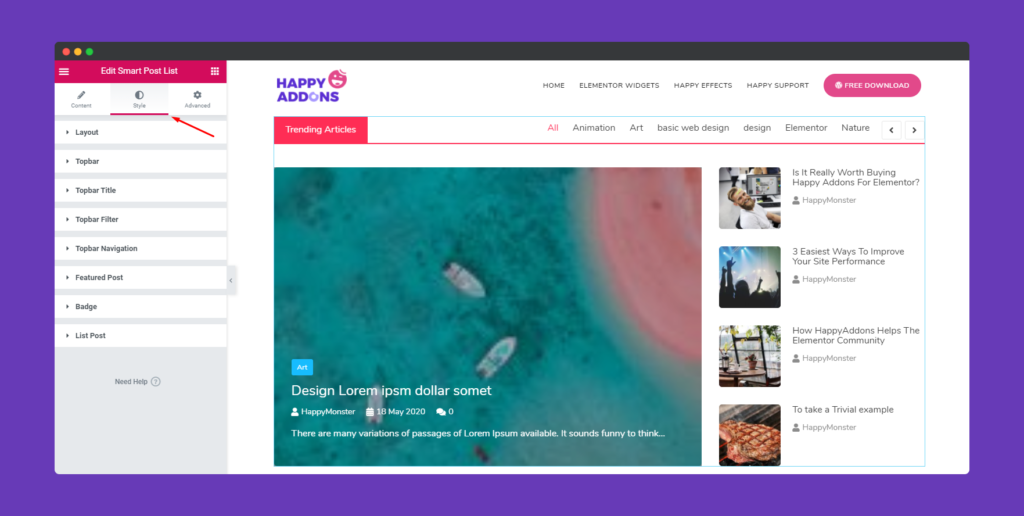
Now it’s time to stylize the design. To do that click on the style option. And you can give it different in every individual portion.
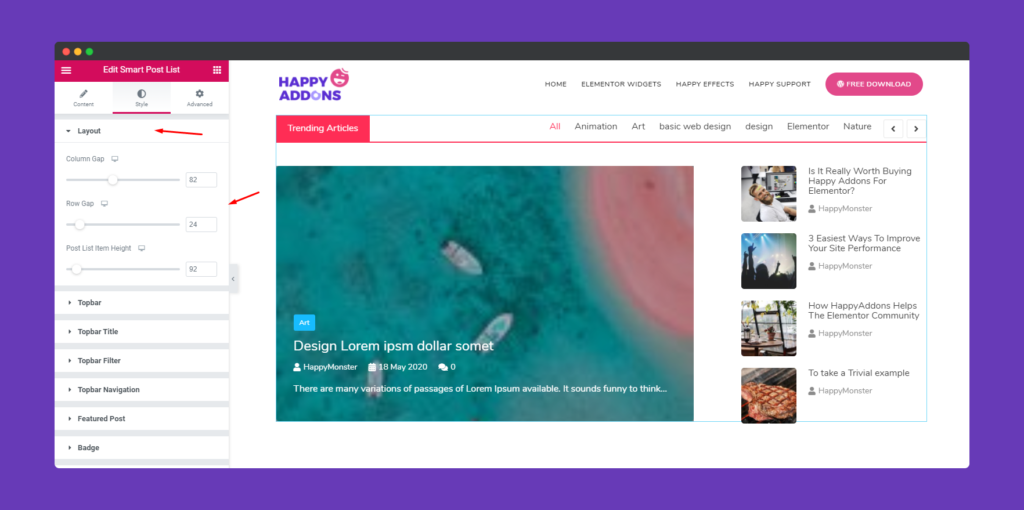
First we have layout to stylize. Here you can slightly change their position through column gap, row gap, and post list height.
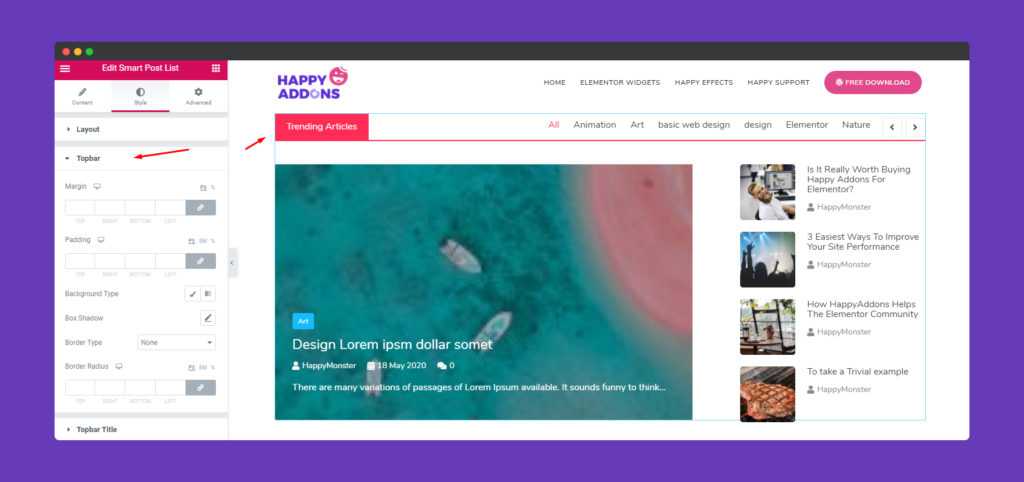
In the top section, you can change the Margin, Padding, Background Type, Shadow, Border Type, and Radius type.
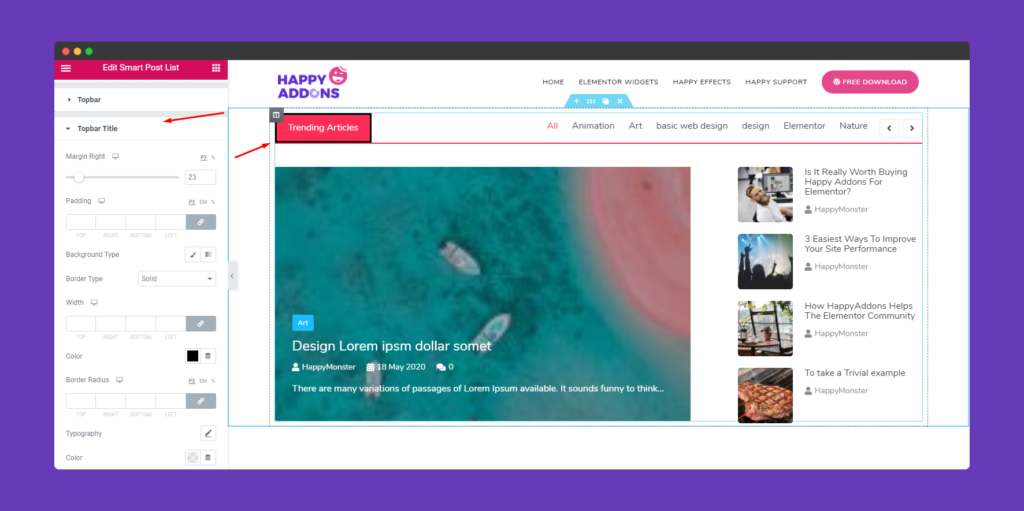
Same way you can also change Top Bar Title design. For example, you can give it a Border, colorize it, add margin & padding, Border Color, and also Title typography, etc.
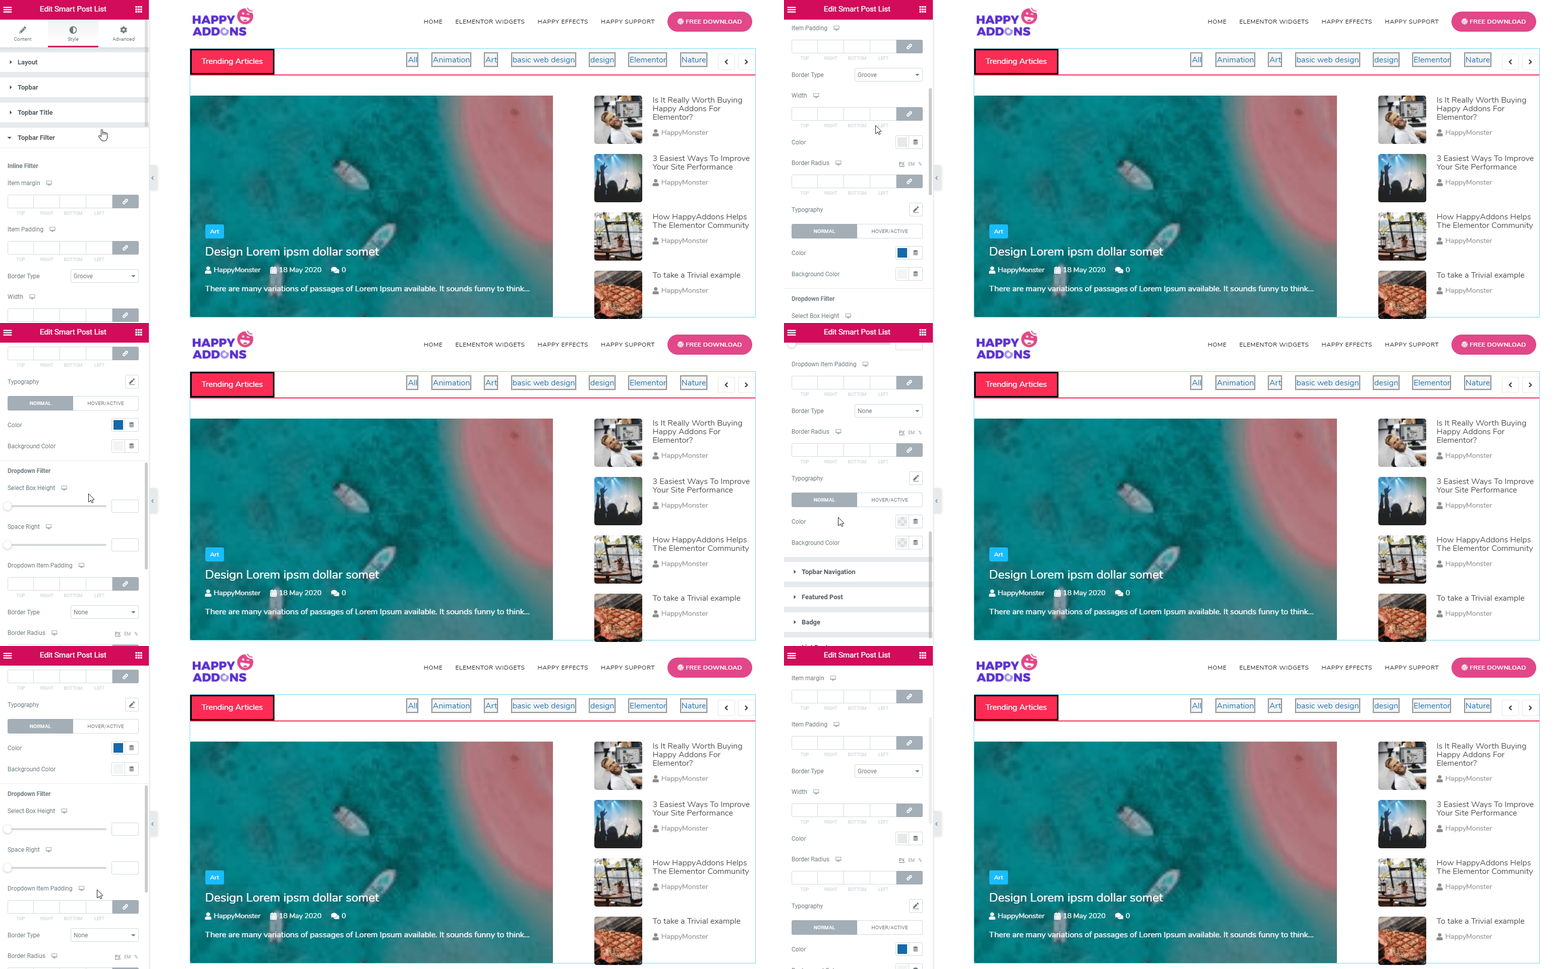
After the Top bar, you can also apply some changes in the Filter menu. Such as their color, background color, inner color, dropdown color, margin, padding, typography, text color and so on. So experiment yourself on these options.
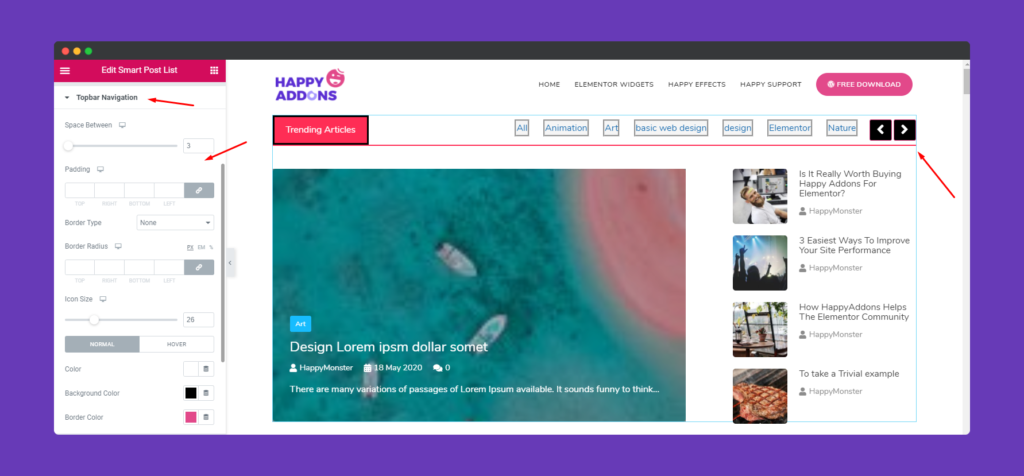
Similarly, you can repeat the process for the navigation also. Colorize it, change the size, background and spacing in between them.
To give a better look over the featured image, you can also customize some settings according to your own way. In this case, you should apply the color and mix them up in the right way.
So be careful while adding colors; let’s have a look at the following example.
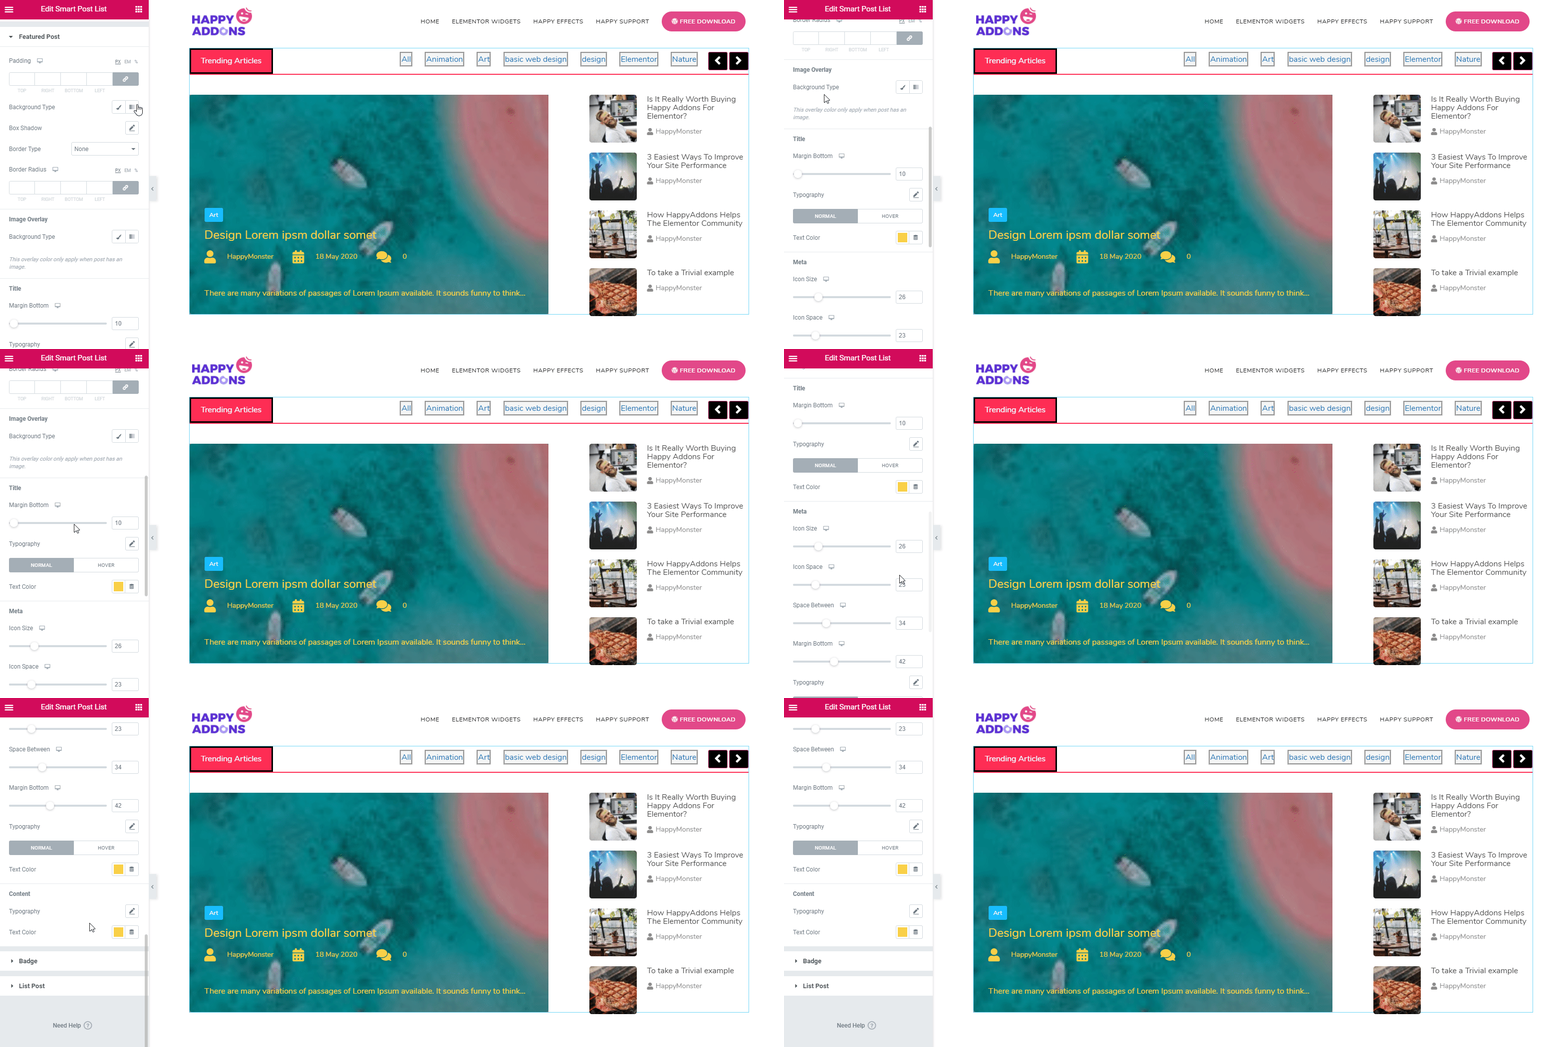
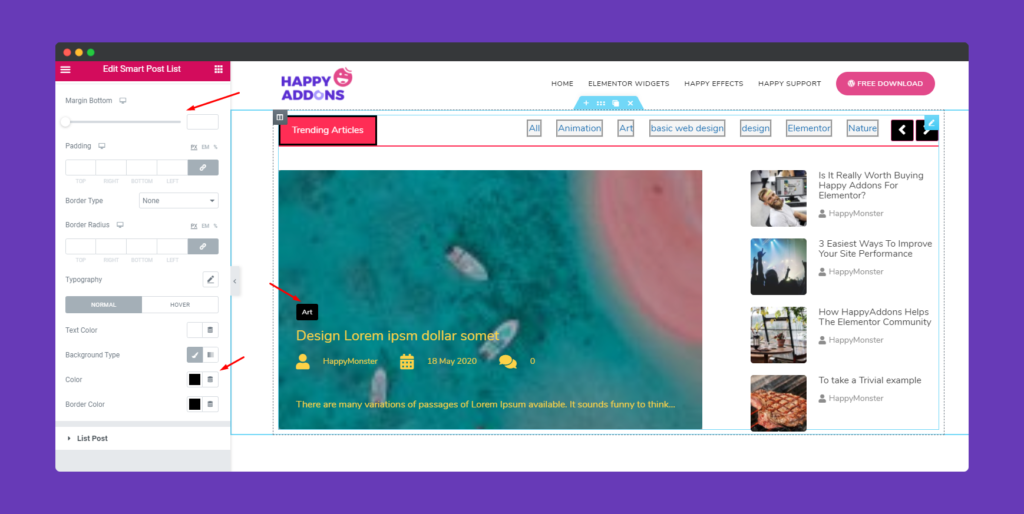
So lastly, we have badge to stylize. Add colors in the text, background and resize the shape.
Step Four:
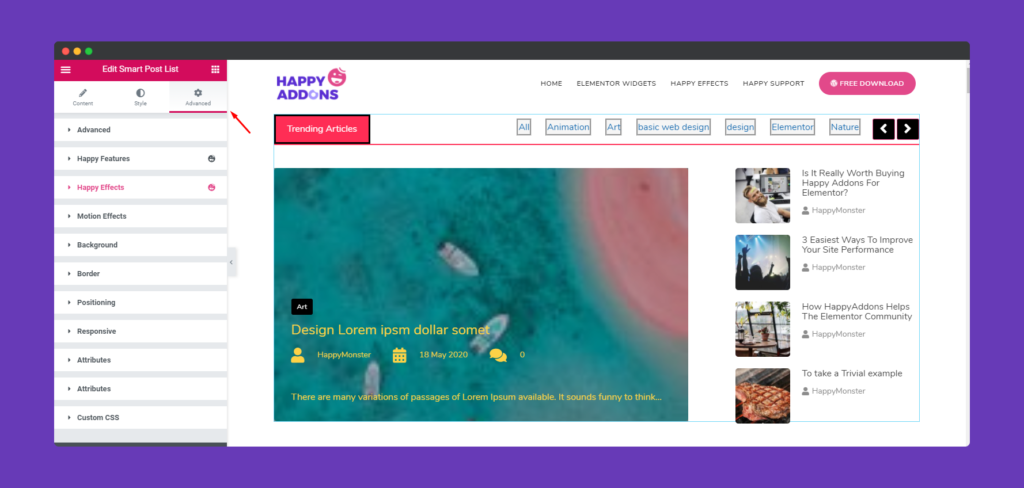
If you want to add motion effects, happy effects, background or make it responsive and more intriguing, click on ‘Advanced‘ to explore those options. the ‘Advanced‘ is a default feature of Elementor. Give a read to this Document to know more about Advanced features and its uses.
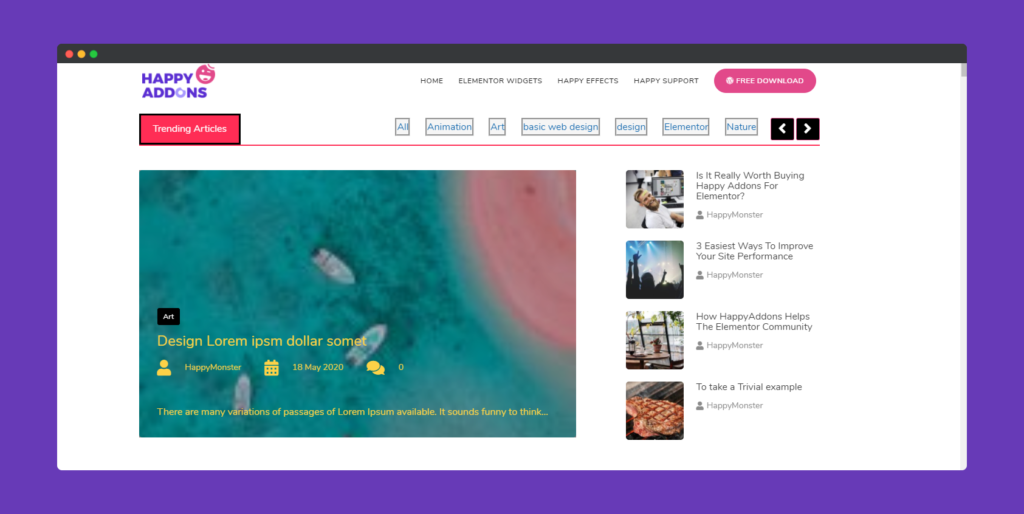
So finalizing the design, click on the Publish button. And your design will look like:-
Update in v2.6.1 – 18 October 2022
Advance Post Queries & Query ID integration with this Smart Post List Widgets is now available in this version of v2.6.1.
Go to your function PHP file. Then add this below code.
function custom_query_callback( $args ) {
	// Modify the posts query here
	return $args;
}
add_filter( "happyaddons/smart-post-list/{$query_id}", "custom_query_callback", 10, 1 );
// Filter Posts by the Posts' order in a Smart Post List Widget.
function my_query_by_post_order( $args ) {
	$args['order'] = "DESC";
	return $args;
}
add_filter( "happyaddons/smart-post-list/{$query_id}", "my_query_by_post_order", 10, 1 );
That’s it!
