A well-designed website always leaves a great impact on visitors. In this digital era, users always expect something extraordinary. Especially to create a sustained relationship with the traffic, a website with a noticeable look is a plus point.
Don’t be afraid if you’re a novice or a non-tech person. With Elementor, you can design a website without having any prior coding knowledge. But sometimes Elementor alone can’t give all the facilities to portray your imagination in the real world.
In that case, Happy Elementor Addons, which is an enhancer of the Elementor workflow, can rescue you. As it comes with a rich library of unique features and widgets. Therefore, it can help you to build a high-functional website design from scratch. ?
Throughout this article, we’ll show how you can give a unique look to your website using some free widgets of Happy Addons, like Image Compare, Image Carousel, Slider, Image Grid, and Logo Grid.
Anyways, enough talk! Let’s dive into the discussion.
Website Design From Scratch Using Free Widget of Happy Addons
In this section, we’ll show how you can implement the free widgets of Happy Addons, step by step. But before showing the procedure, let’s know shortly what actually Happy Addons is and how it works.
There is a ton of splendid Elementor add-ons available in the market. But Happy Addons has received a huge response from users for its powerful widgets and amazing features within a short time period.
Generally, the main purpose of Happy Addons is to take your Elementor website design to the next level. That’s why it works perfectly with any Elementor website. As a result, it helps users to create some exceptional designs within a few seconds.
However, you can check out the following video to learn more about Happy Addons?
Okay, let’s introduce some popular free widgets of Happy Addons one by one. And also know how to implement them perfectly on your website.
However, check out the following requirements before starting.
Requirements
- WordPress
- Elementor
- Happy Addons (Free)
Let’s assume you have already installed WordPress, Elementor & Happy Addons successfully on your site.
How to Use Image Compare?
Image compare widget is a useful feature of Happy Addons. If you’re a product demonstrator, designer, or eCommerce store owner, then it can a perfect tool for you to showcase your products. Using this you can display both the current and previous demo at a time.
To do that, you’ll need a webpage. You can also apply it to your current webpage.
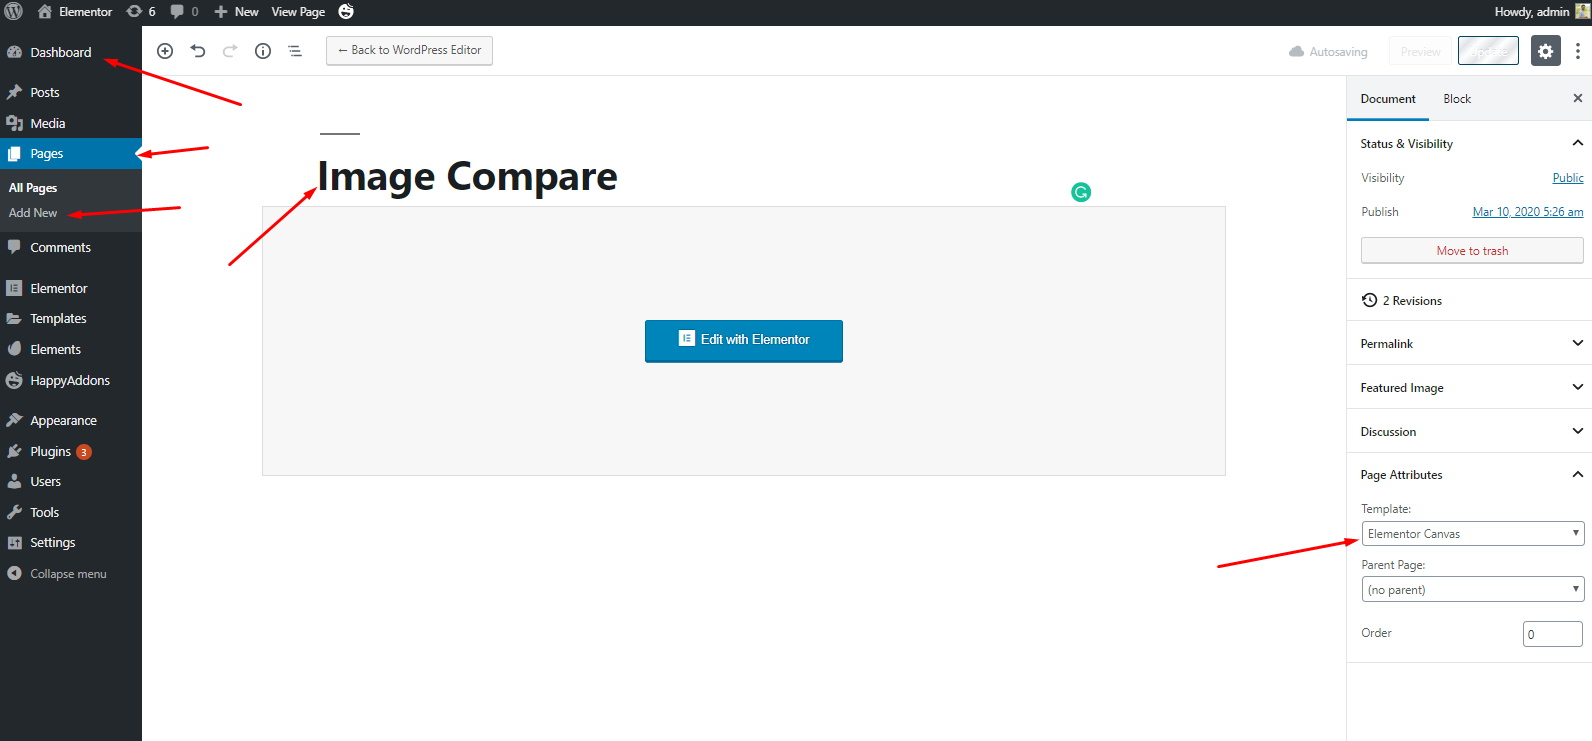
First, navigate to Dashboard>Pages>Add new page>Title>Select Elementor Canvas>Edit With Elementor
Next, select the ‘Image Compare‘ widget from the left sidebar. And drag it to the marked area.
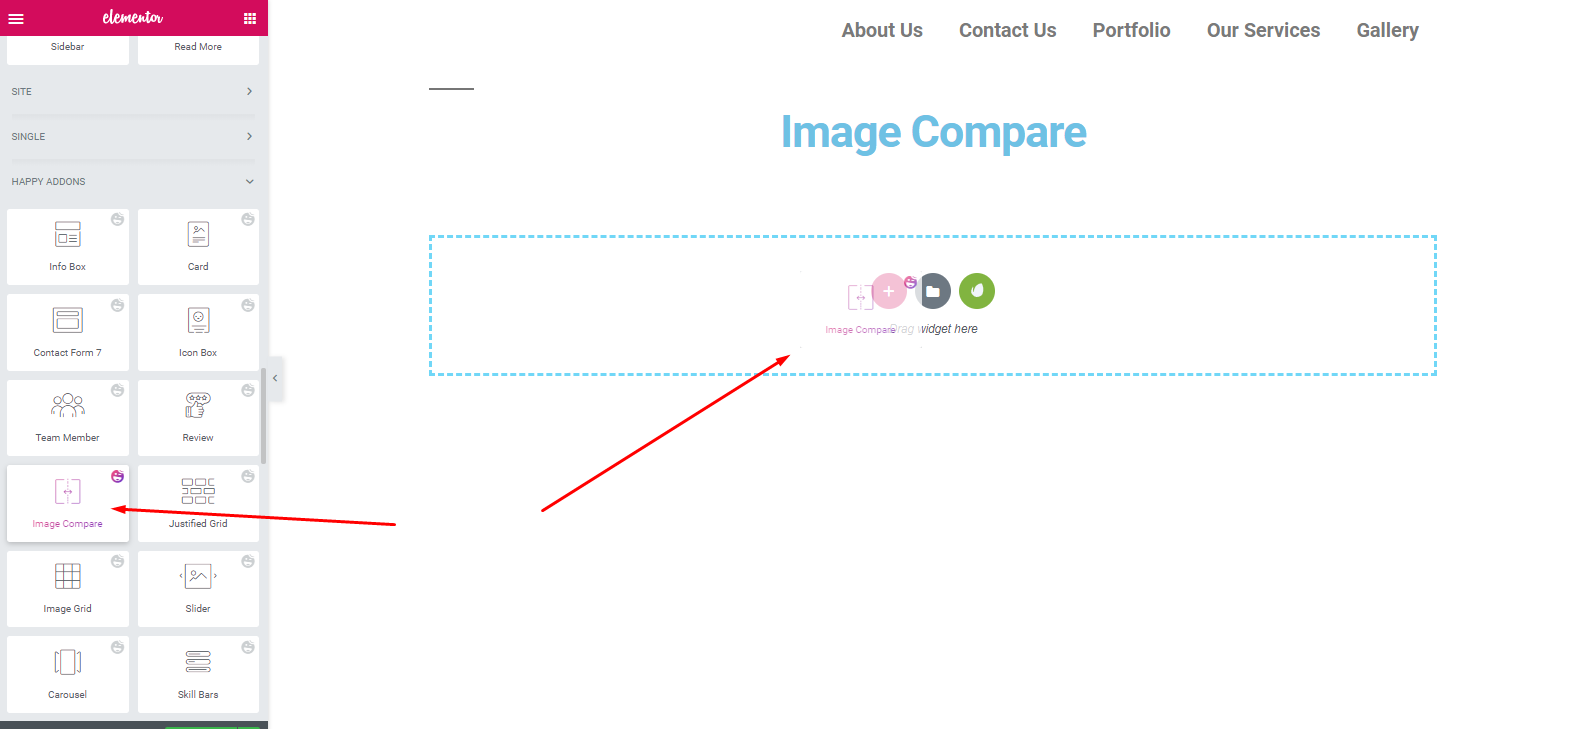
Then a general window will open. From here, you can see the available options to customize. Images, Settings, and Wrapper Link.
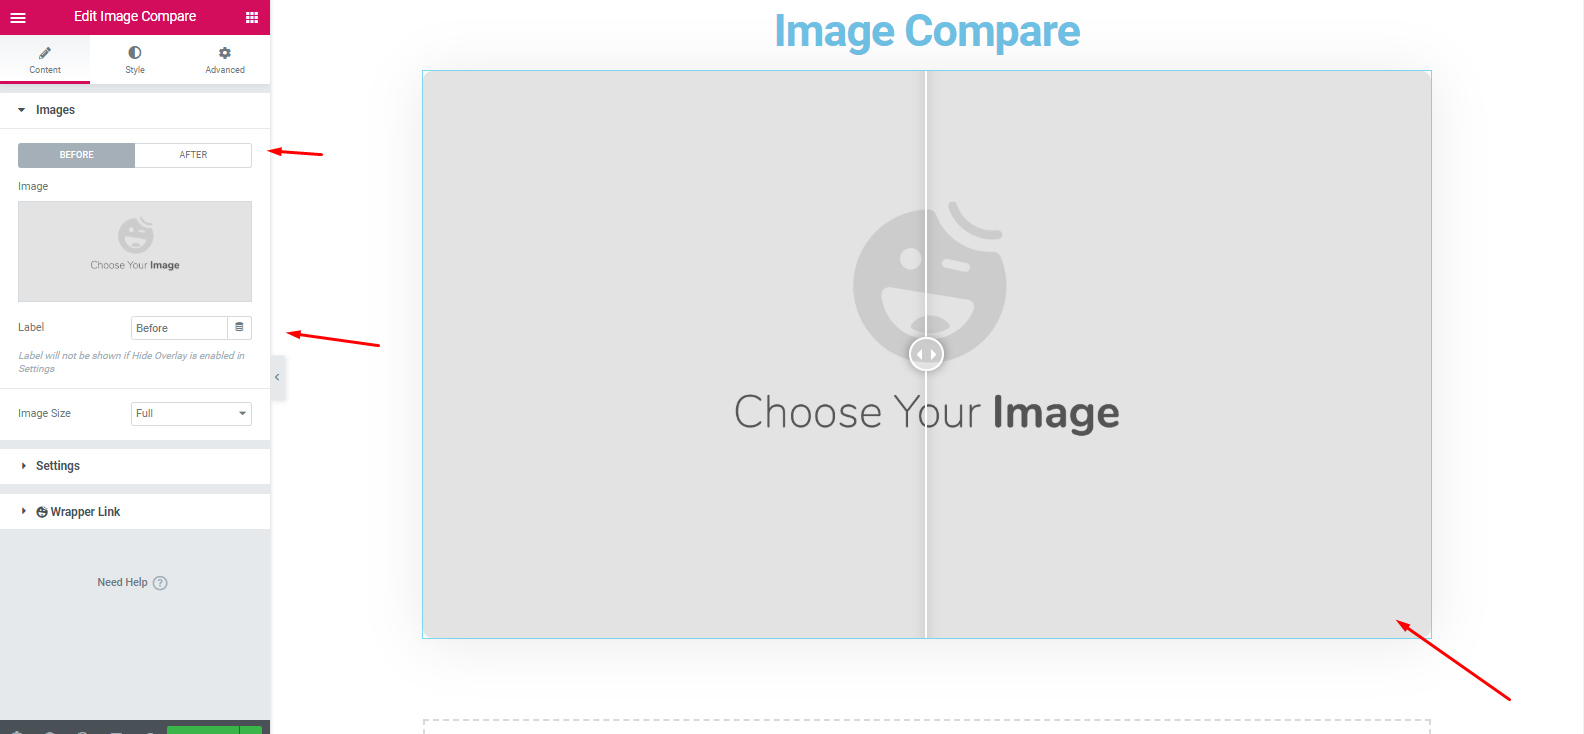
Now, add images in both sections ‘After’ & ‘Before’. And it will look like the following one. Choose the ratio according to your website layout. Here, we selected medium size 300*300. And then add a label.
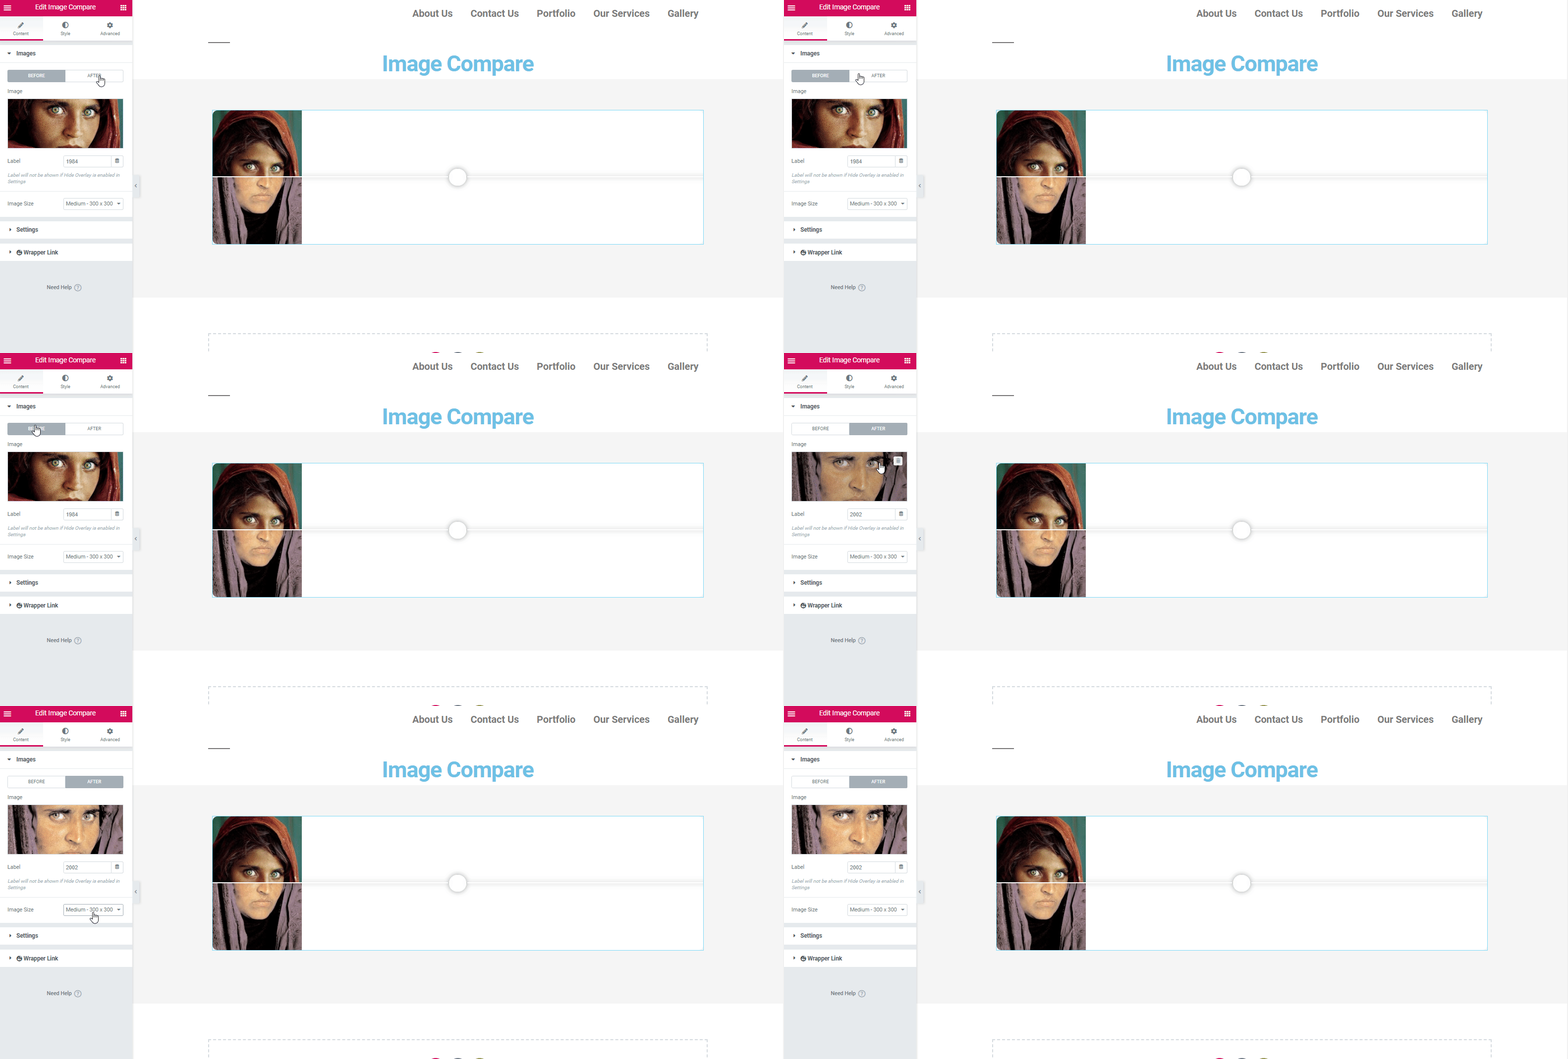
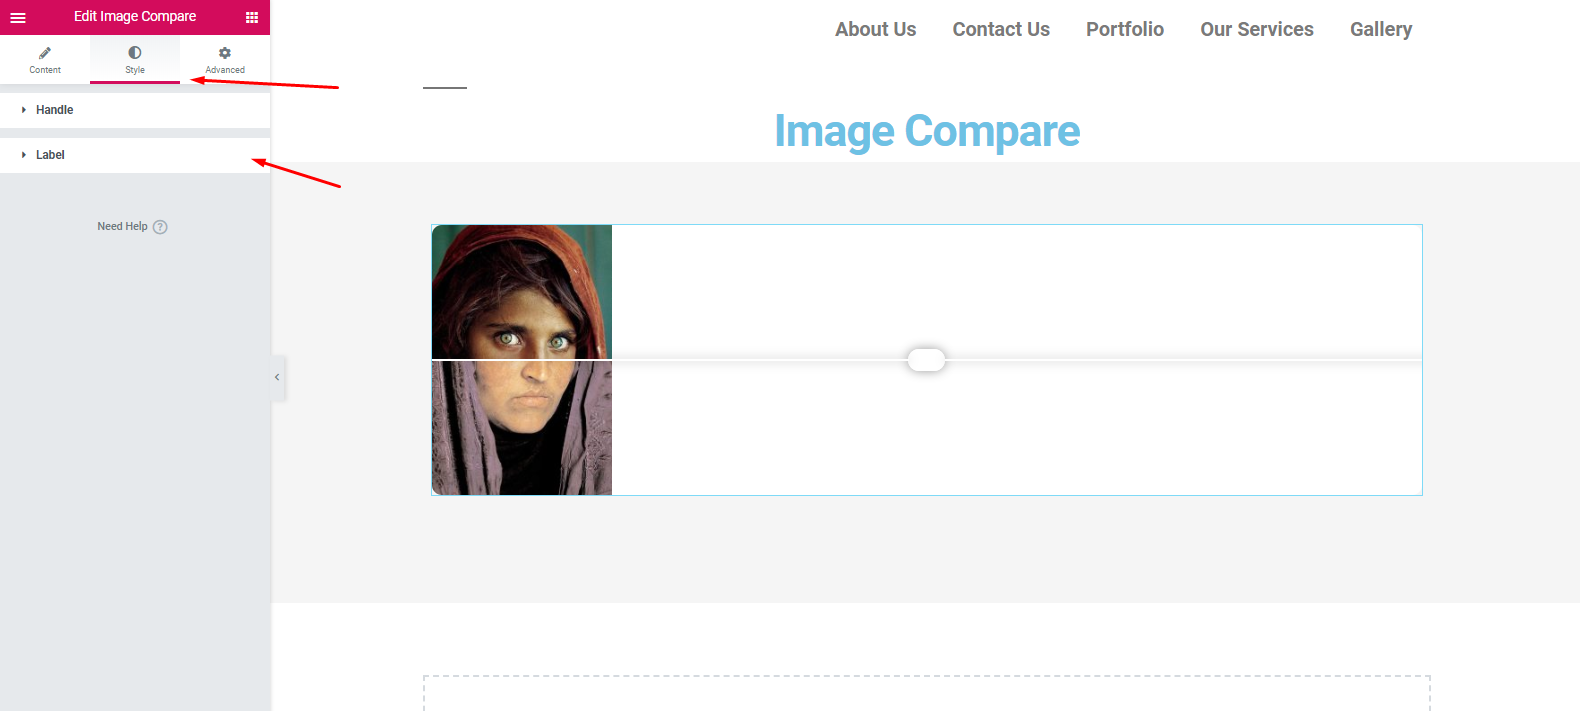
Next, it’s time to stylize the content. To do that, click on the ‘Style‘ button. Here you can experience the options that fit best.
Final Preview
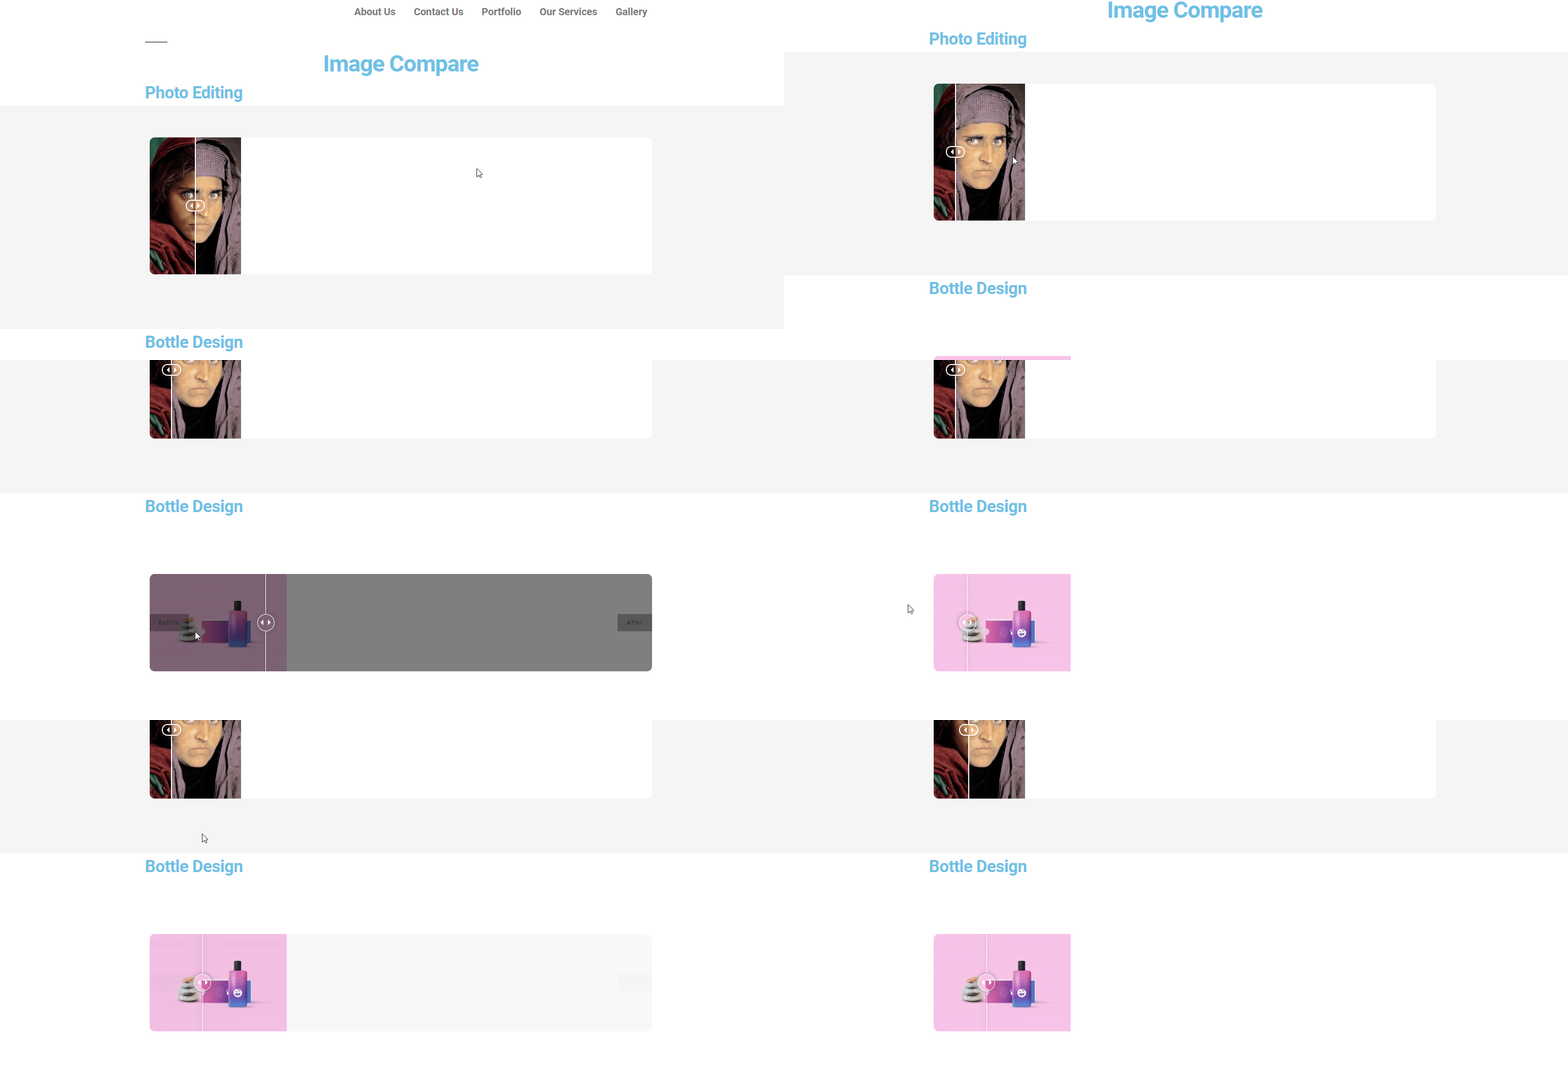
However, you can read the documentation on the Image Compare Widget. And also, check out the following video tutorial to get a visual idea. ?
How To Use Image Carousel?
The procedure of using Image Carousel is kind of similar to other widgets of Happy Addons. So nothing to worry about. If you acknowledge the first process, this process will be easier for you. Just follow the steps and get used to it.
Generally, this widget helps to create an interesting image and text carousel in a comprehensive way. Again, this widget will allow you to showcase images in different ways. For example, product images, profiles, service images, etc. Therefore, you’ll get a lot of options to customize them fruitfully.
To use this widget, navigate the page where you want to use the widget. And then click ‘Edit With Elementor‘. A page will open where you just need to select the widget and drag it to the marked area.
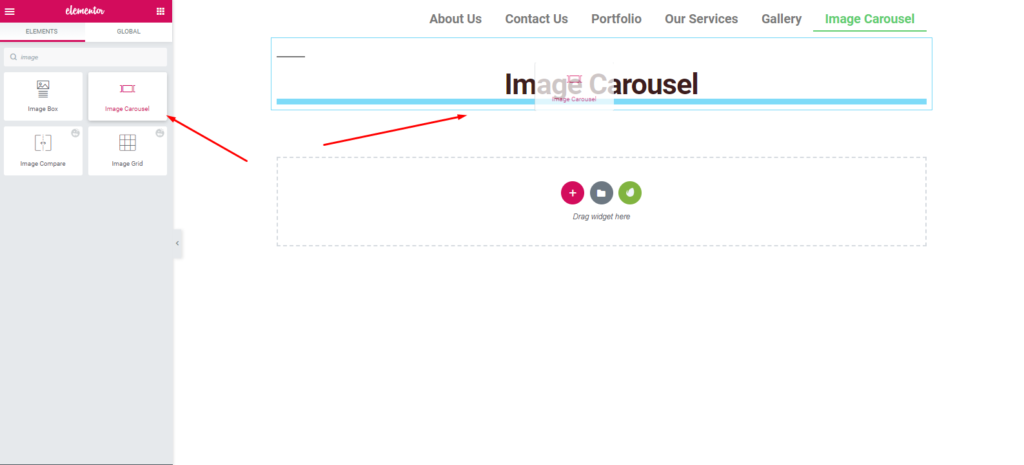
Here you’ll find some useful options to customize the full widget. Like ‘Preset‘, ‘Slides‘, ‘Settings‘, and ‘Wrapper Link‘. Using these options, you can create any type of design.

Note: Preset is a collection of pre-built designs, where you just need to select from the list, and then it will be automatically applied to your design.
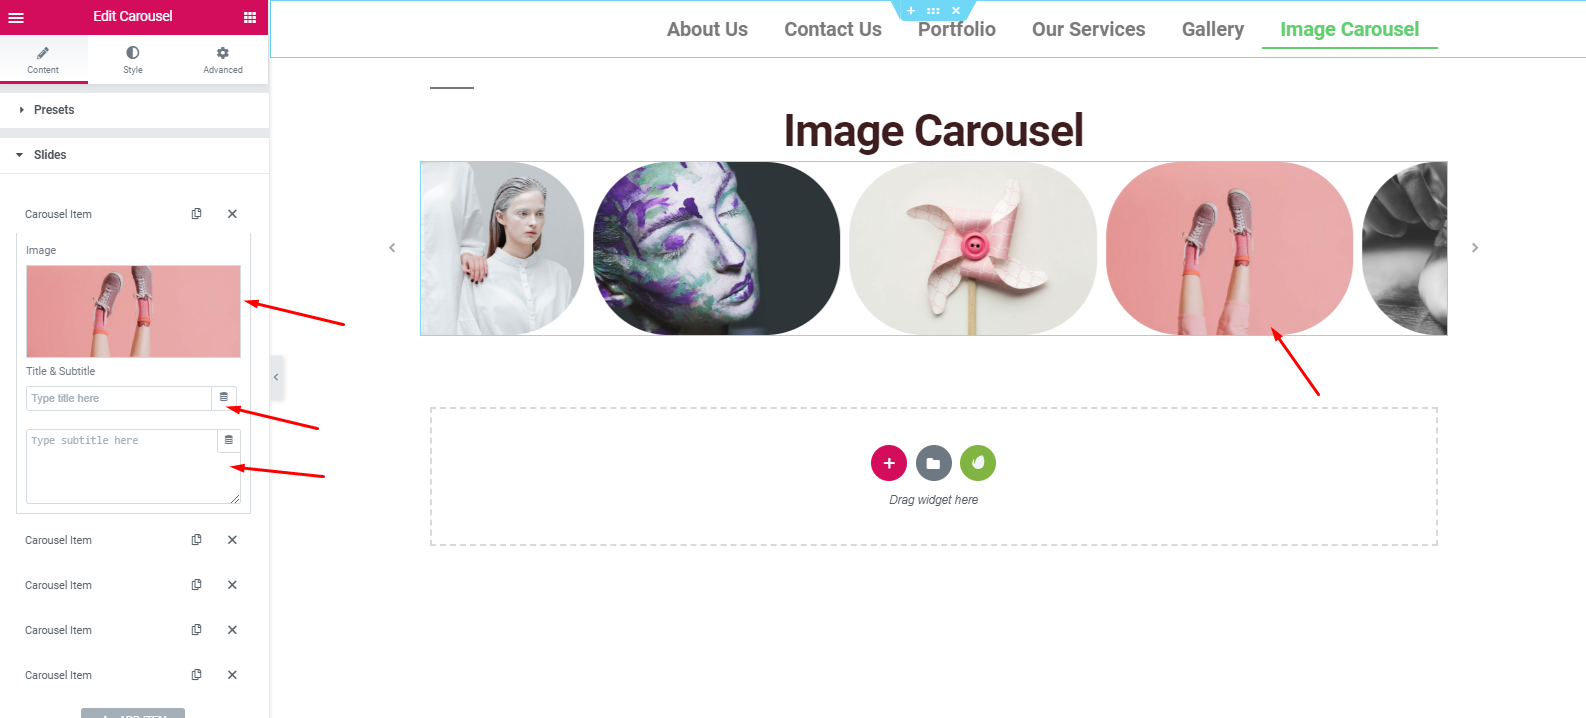
The next step is to add images inside the slides and customize them. So after adding images, you can edit them more. For example, Image Title, Description, etc.
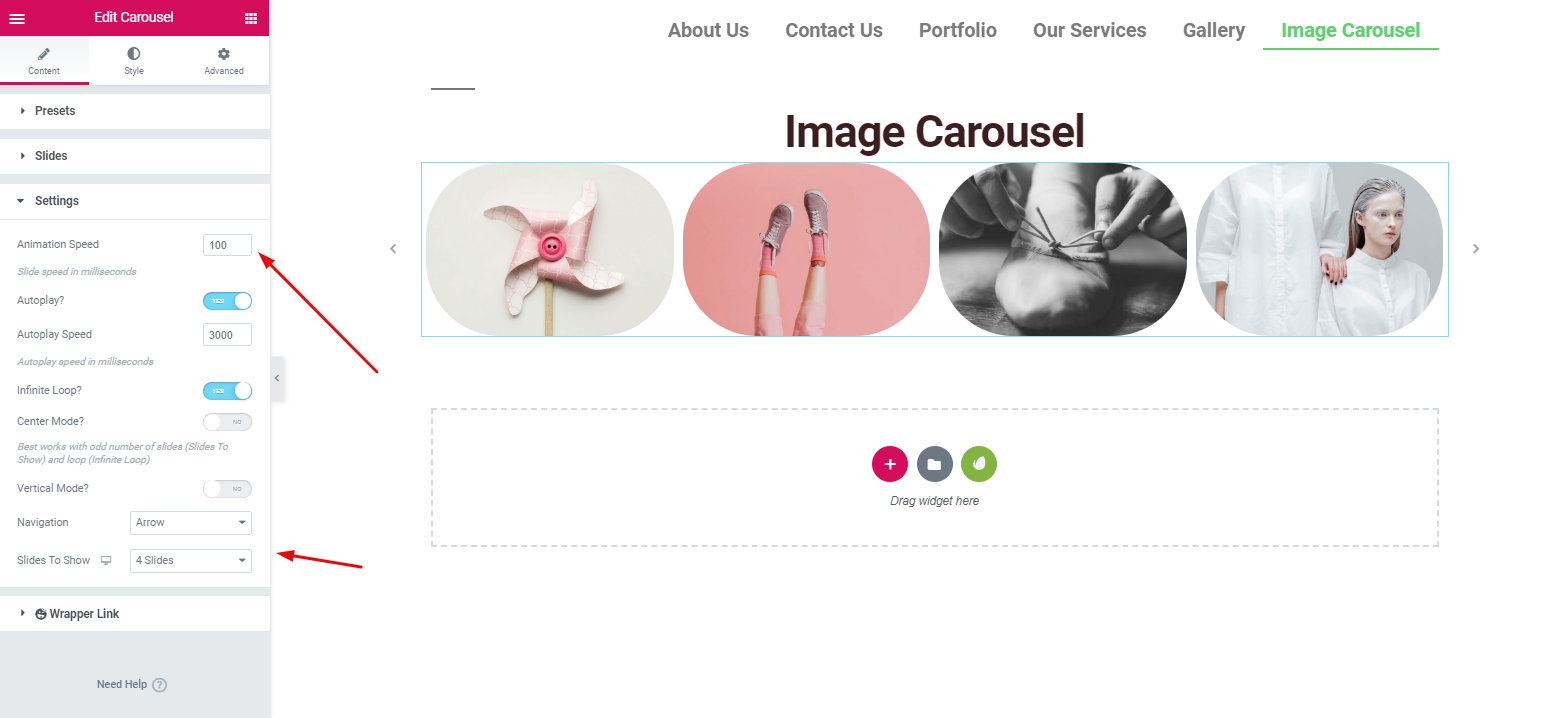
In the setting option, you can control the speed of the images move. And also, you can edit autoplay speed, slides speed, and more.
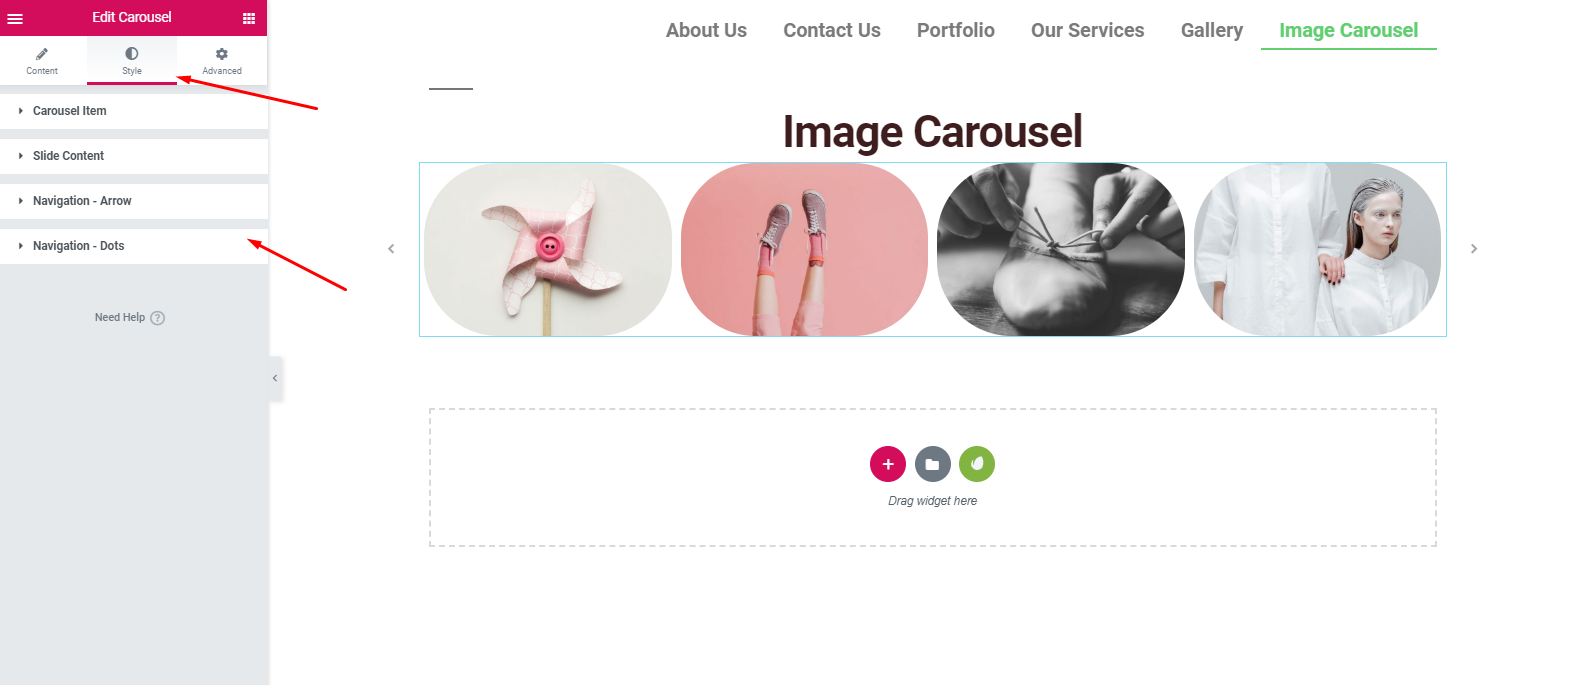
Next, to design your website from scratch, you’ll need to stylize it. Yes, from the ‘Style‘ option, you can do that. So what can you do in this portion?
You can edit carousel item, slide content, navigation arrow & dots, etc.
After completing the whole process, click on the ‘Publish’ button when you’re done with your design.
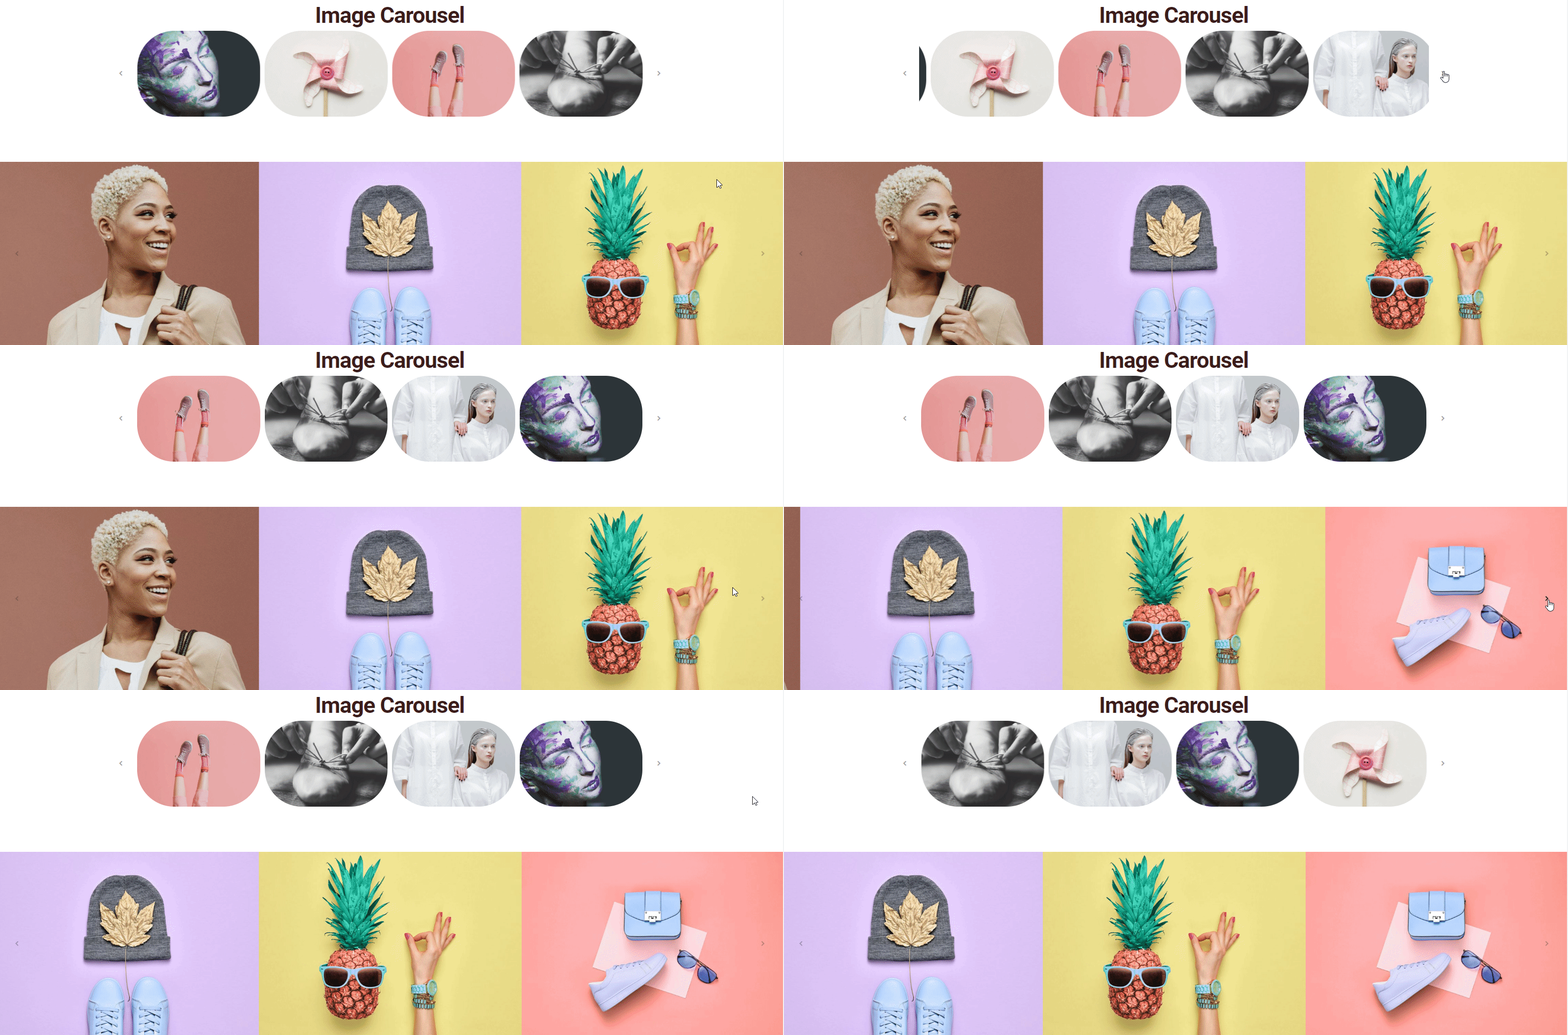
Final Preview after Applying Happy Addons Image Carousel
However, find more on our documentation to get a clear idea and step-by-step guidelines.
How To Use Slider?
We all know what is a slider or what are the basic functionalities of it. However, in a general sense, a slider consists of images, and it’s being used at the start of a Website, especially after the header part or instead of the hero banner.
Designing a slider with different programming languages is very hectic. But using this widget, you can create some beautiful sliders within a second. So we’ll show you how you can do that.
To do that, select the widget from the left sidebar and drag it to the marked area.
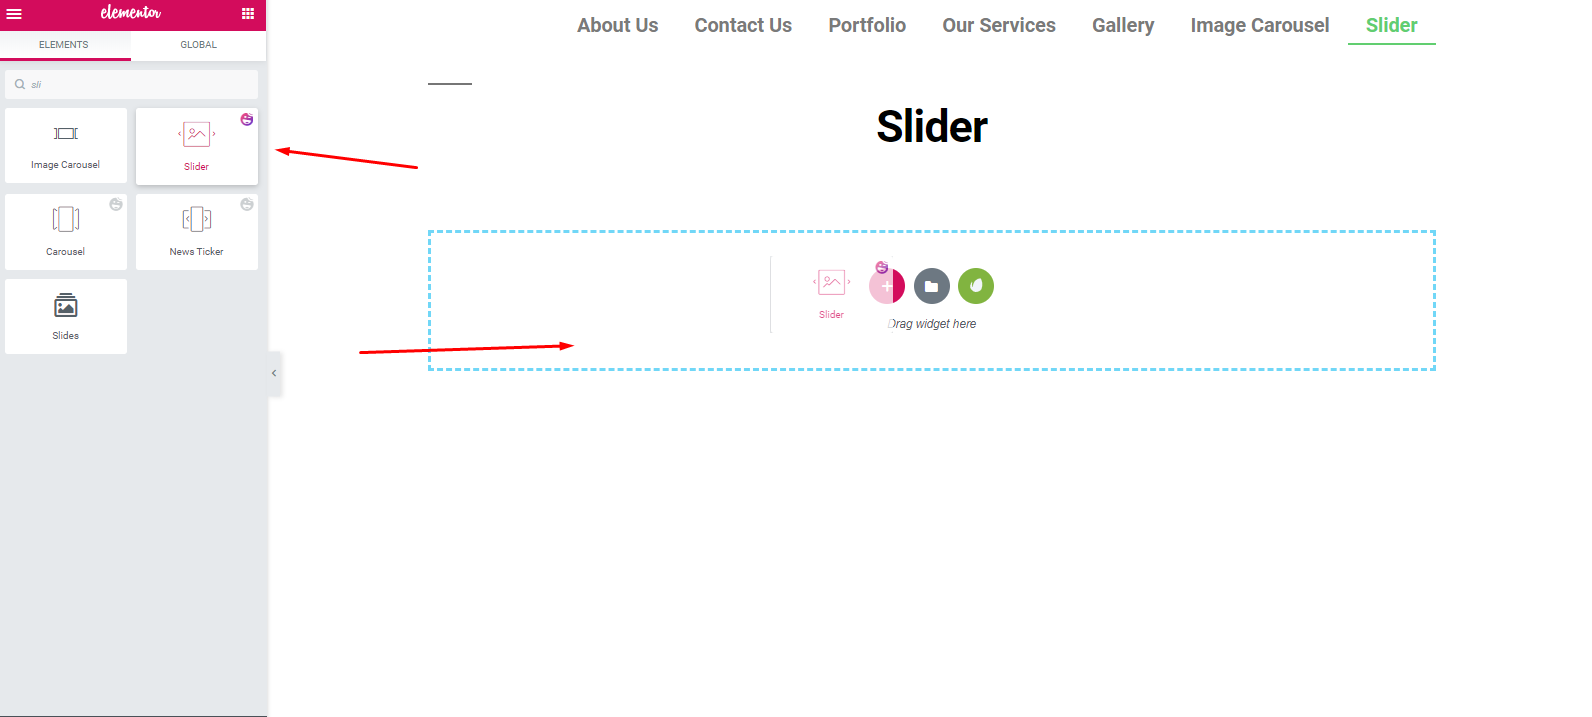
Like before, you’ll get all the options to customize the widget.
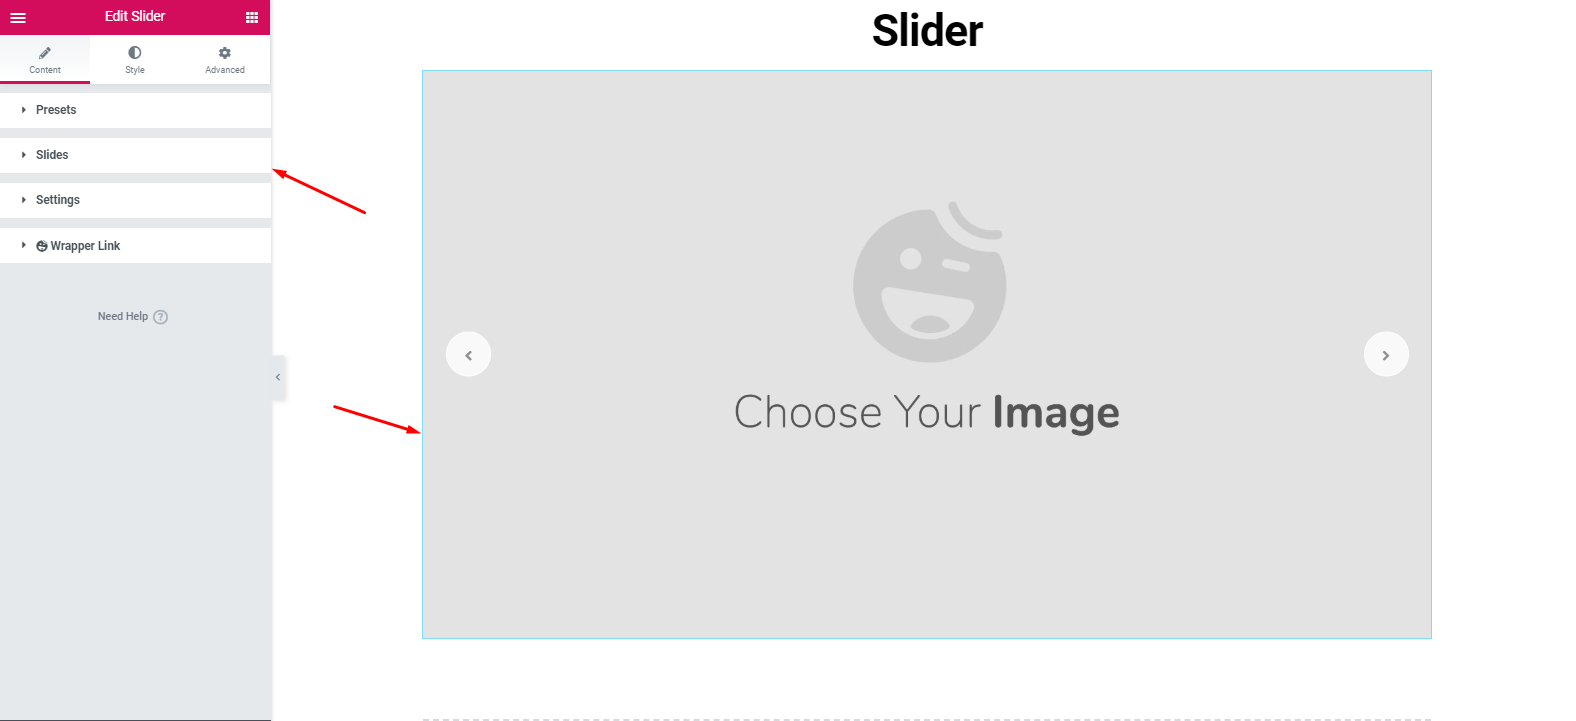
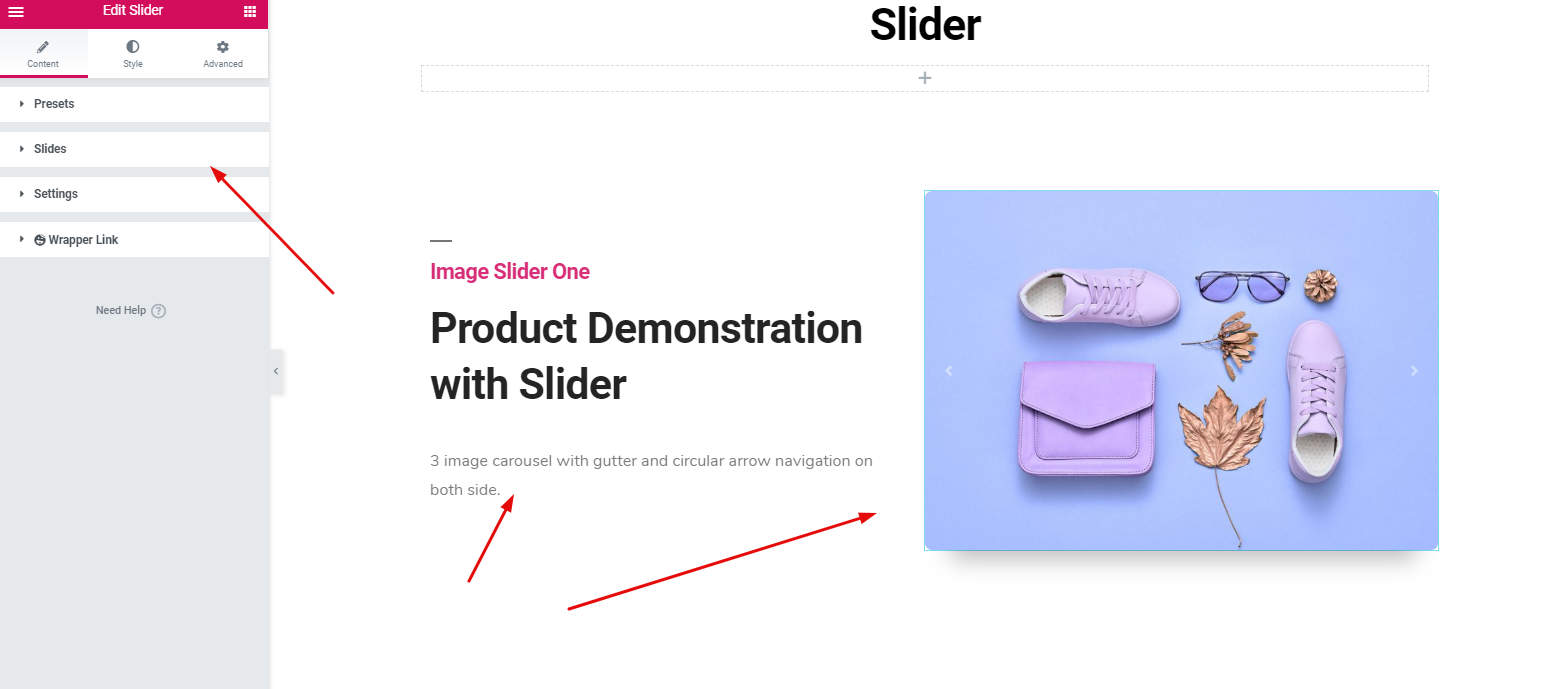
Then add images on your website type.
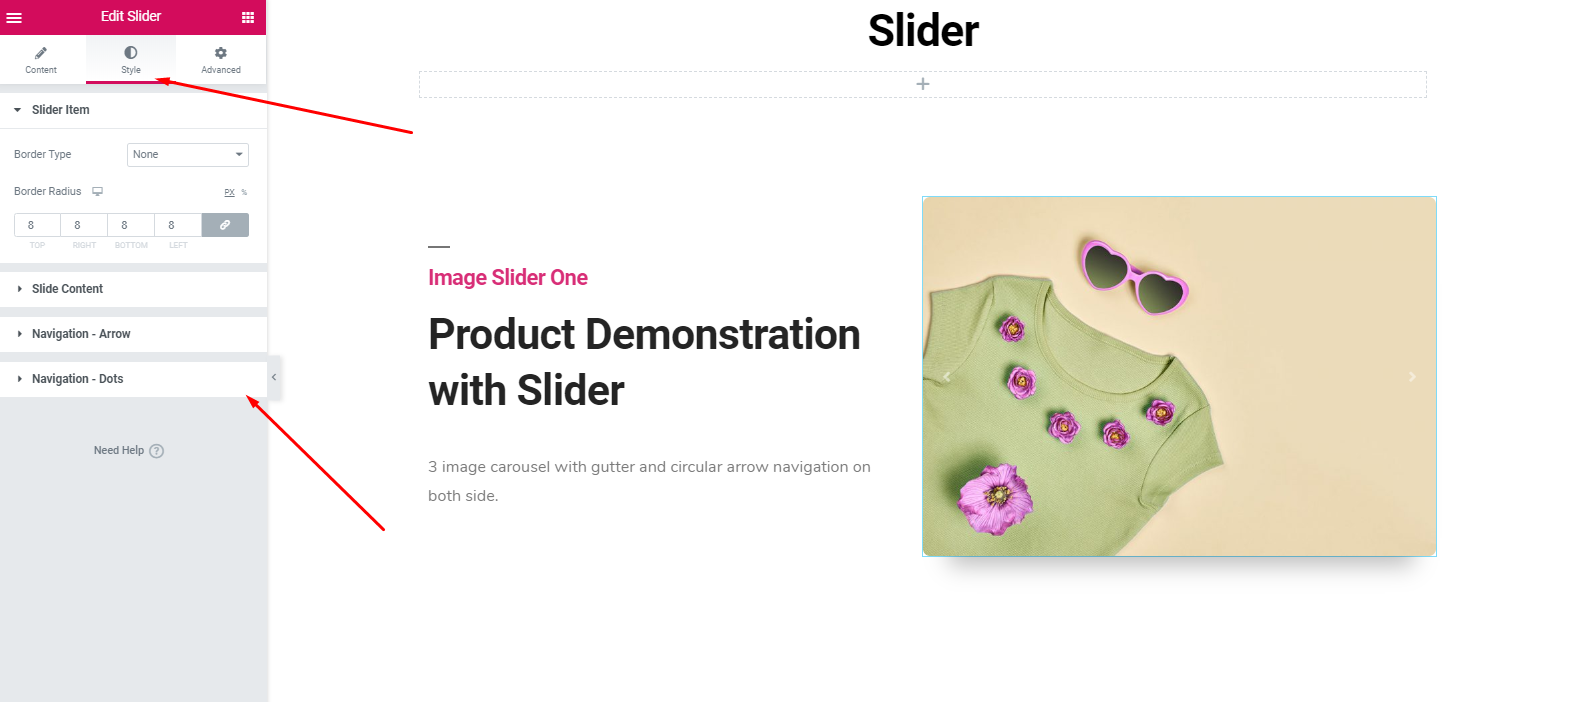
Next, give a unique style according to your design sense.
So it’s very simple to customize. What you have to do is, draw a design frame and then just go for it.
Final Preview after Applying Happy Addons Slider
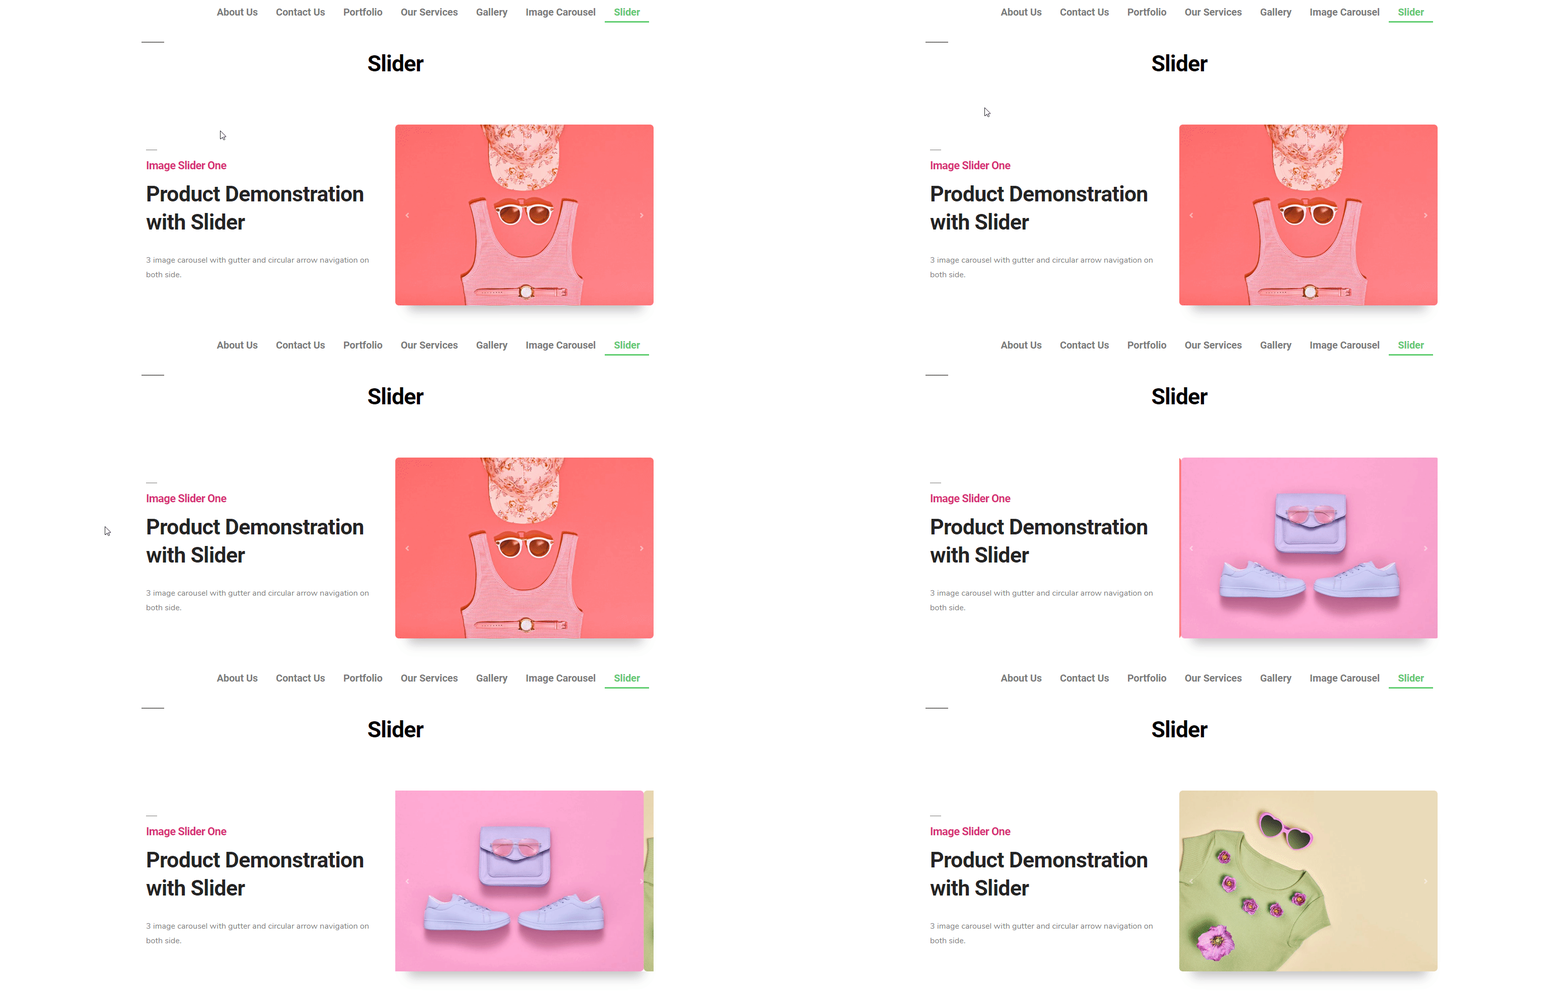
To get a better idea, read our documentation. Or you can read the following article?
How To Use Image Grid?
Now, it’s time to use another free widget of Happy Addons. It’s ‘Image Grid’. You can use this widget to display the most important images or any portfolios on your website. And also, you apply beautiful animation with powerful effects that look very lucrative. Thus it improves your website look.
Okay, to use ‘Image Grid’ widget, navigate to the page where you want to use it. And then, select the widget>drag it to the marked area.
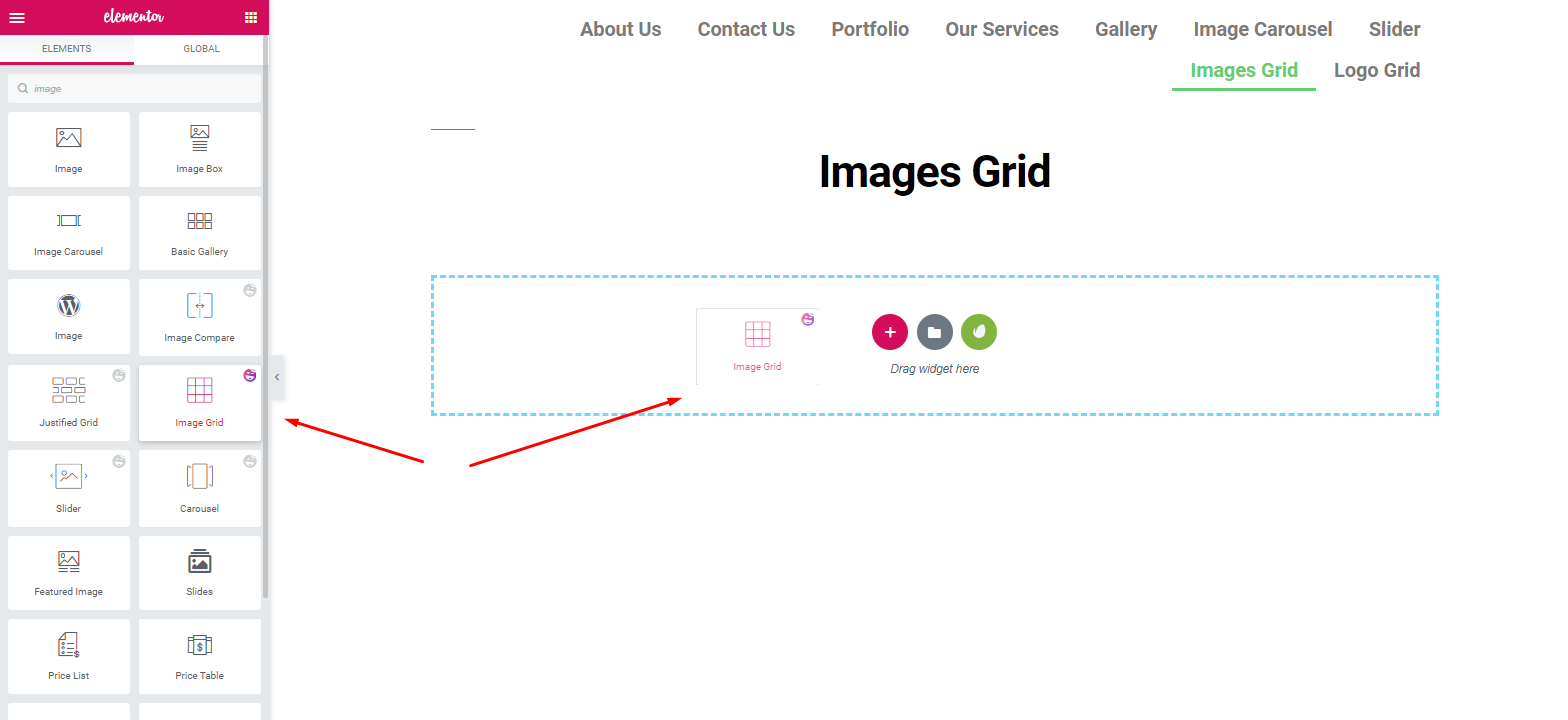
In the same way, you’ll get the option to customize this widget. And then you just need to apply the best-fitted design on it.
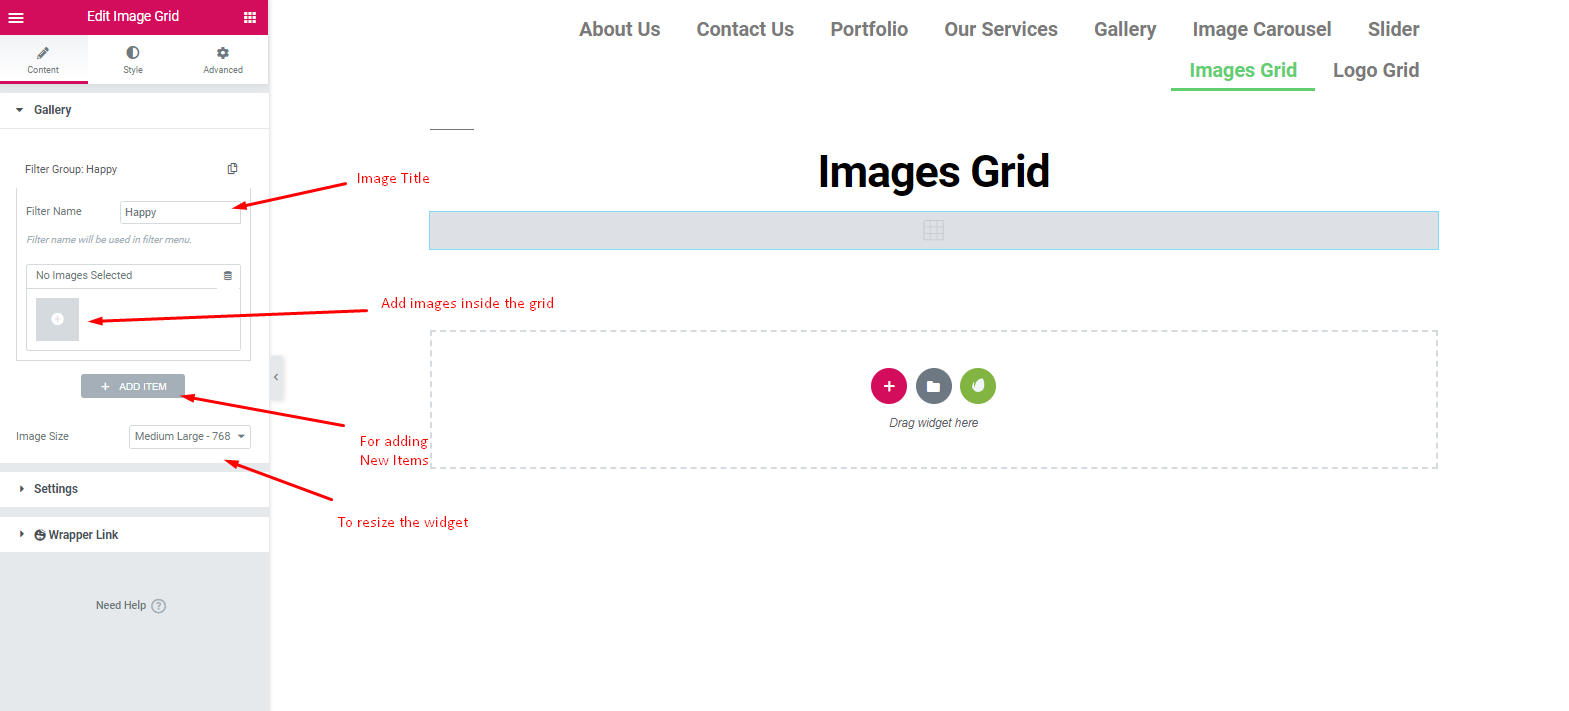
After adding images, it will appear next to the screen. And you can able to customize them easily. To beautify it, you can give a title or the purpose of the images.
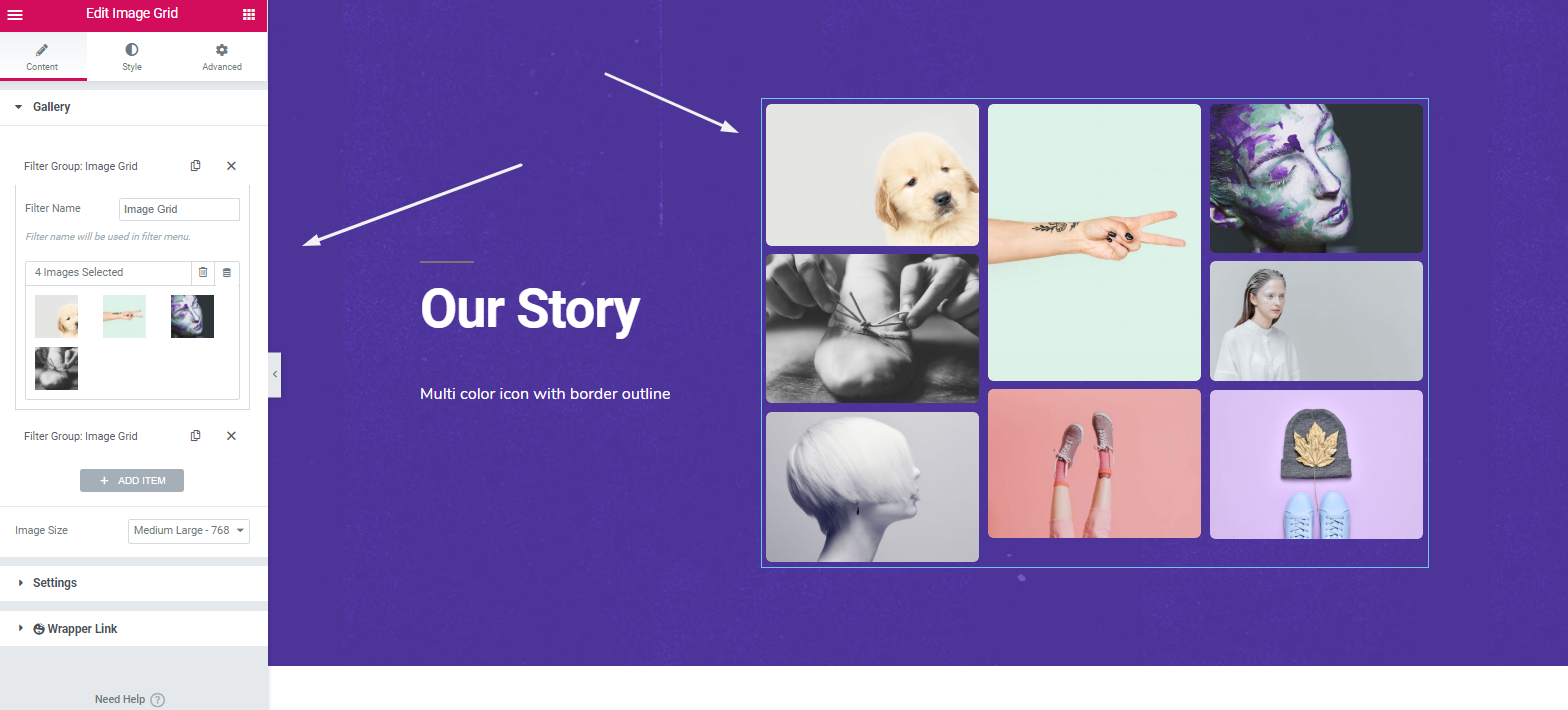
Next, in the ‘Setting’ option, you can do some interesting things. You can keep the entire grid as usual or categorize it.
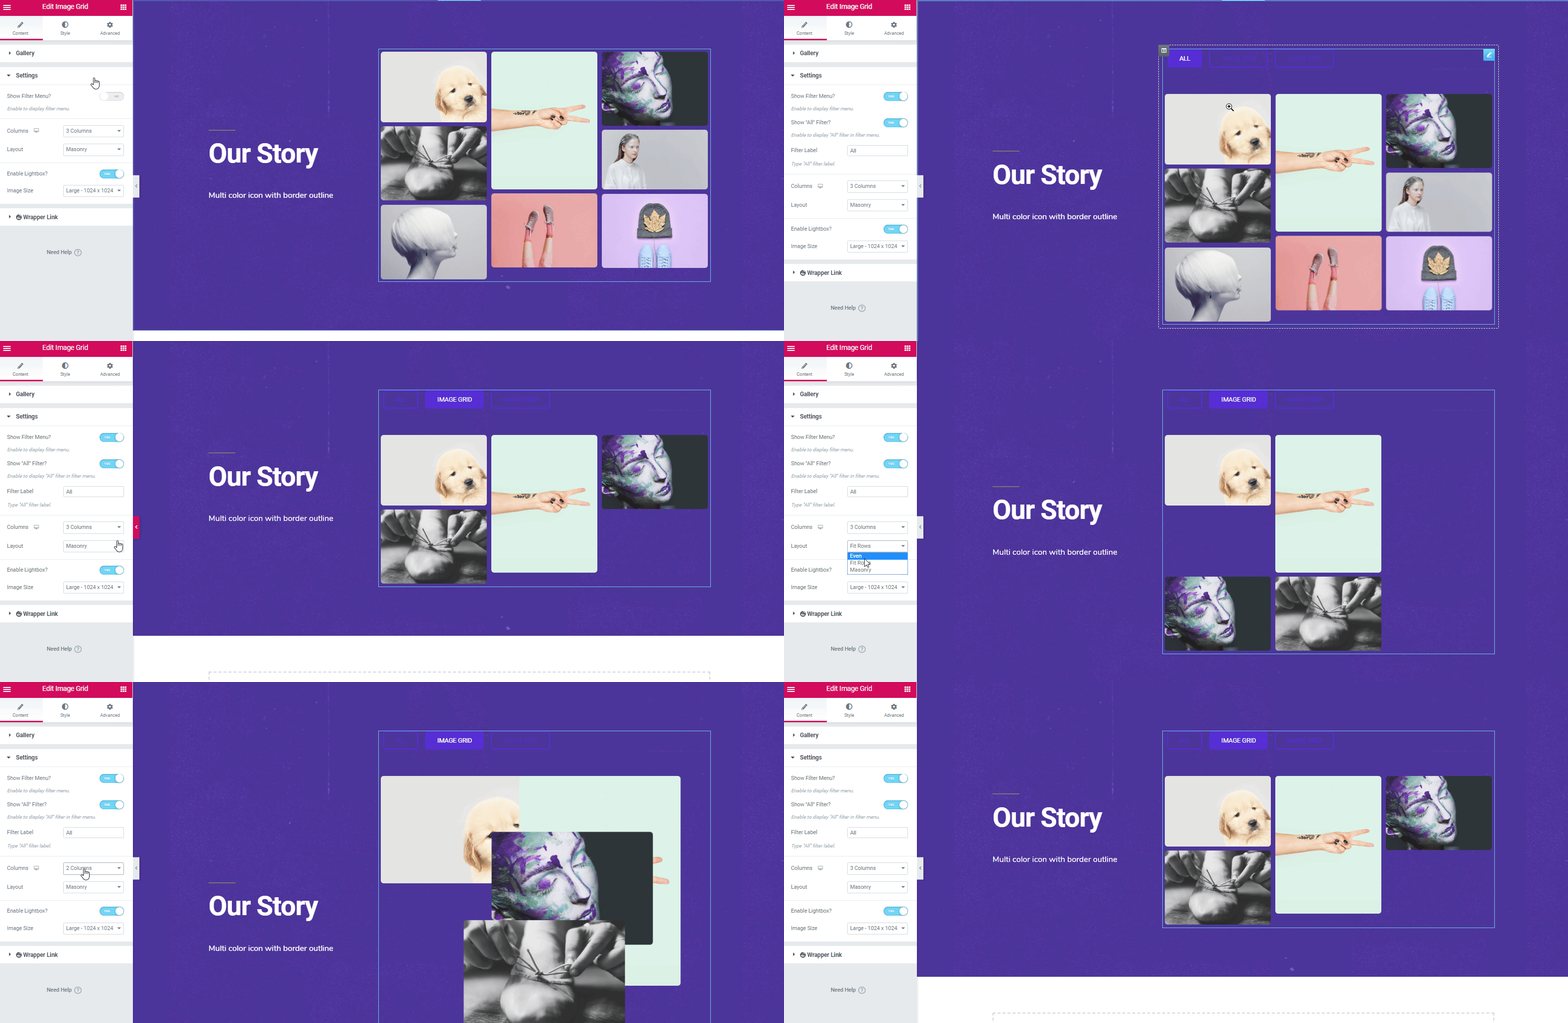
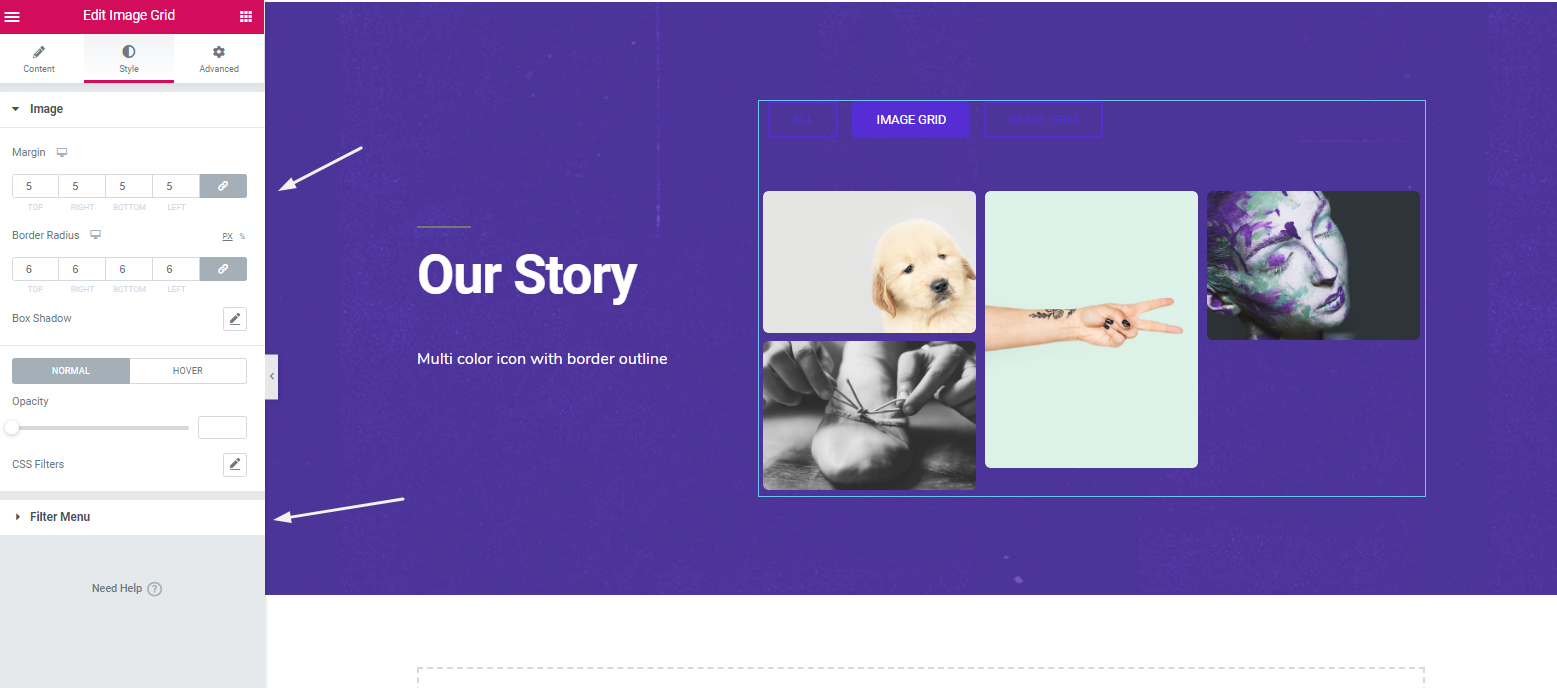
To stylize the widget, click on the ‘Style’ option. From here, you can edit the margin, padding, border-radius, shadow effects, opacity, and more.
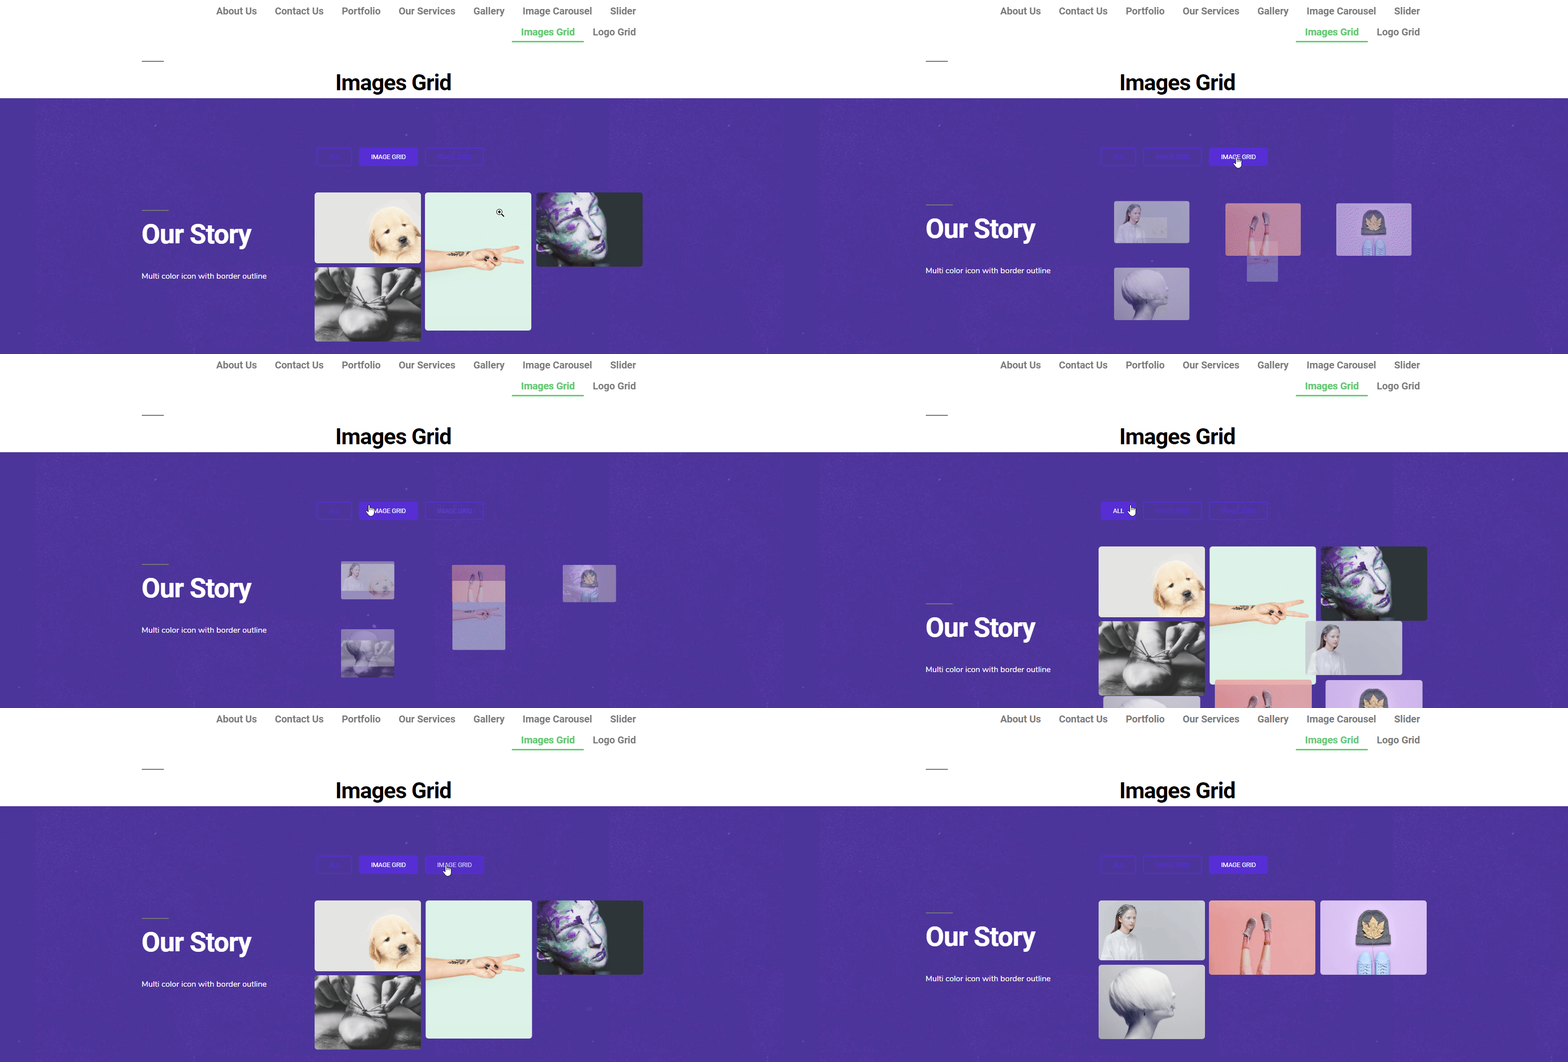
So after finalizing the design, click on the ‘Publish‘ button. That’s it.
Final Preview after Applying Happy Addons Images Grid
Anyways, you can check out the following video tutorial to know more about the ‘Image Grid’ widget?
How To Use Logo Grid?
Logo Grid widget allows you to display the important elements, like photos, client profiles, especially logos, etc, on the website. The uniqueness of this widget makes your website so beautiful and lucrative. Therefore, it could grab the user’s attention, and also there is a high chance of generating potential leads.
Anyways, we’ll show how you can use this widget for your website in this section. Let’s get started.
Similarly, you’ll need a page or an existing page where you can apply it accordingly. Go to add new page>click on edit with Elementor. You’ll be redirected to a white canvas where your task will start. Then just select the widget and drag it to the marked area.
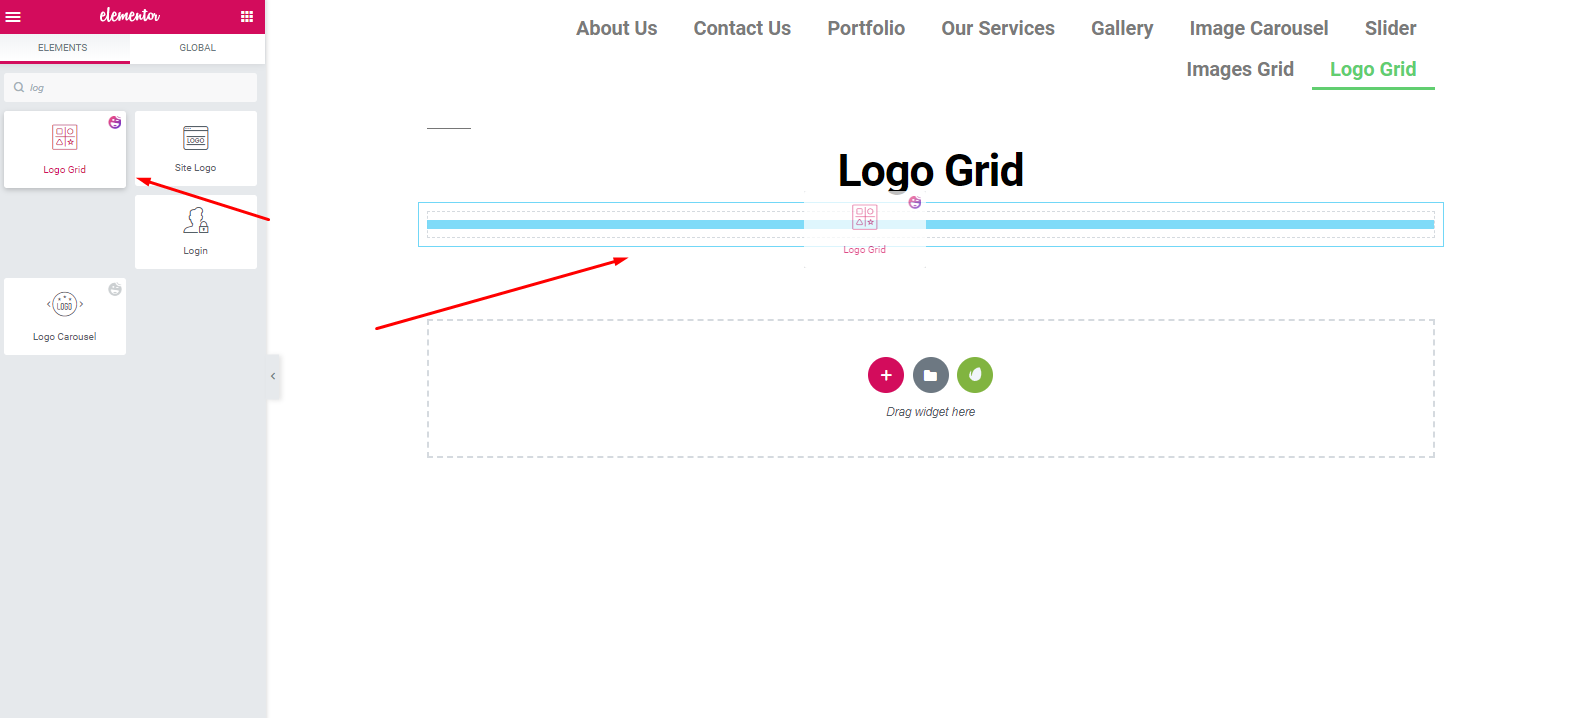
After adding the widget, you’ll see all the options to customize it. Like, Preset, Logo grid, Settings, and Wrapper link. However, we talked about preset in the previous section. Hopefully, you’ve understood that.
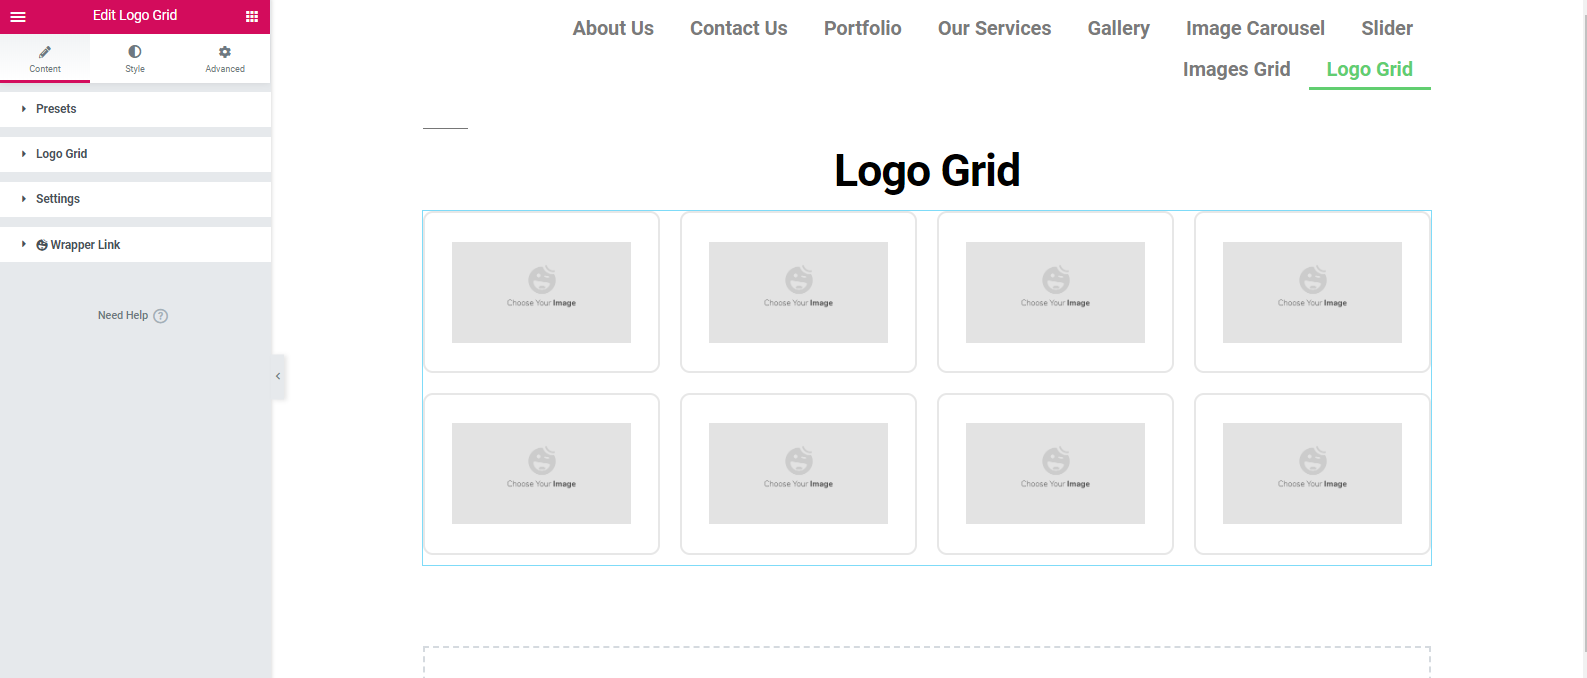
Next, add logos and customize them. First, click on the logo grid option. Upload images or choose from your gallery. Give a brand name. Following the same process, just add more logos, clicking on the ‘Add Item‘ option.
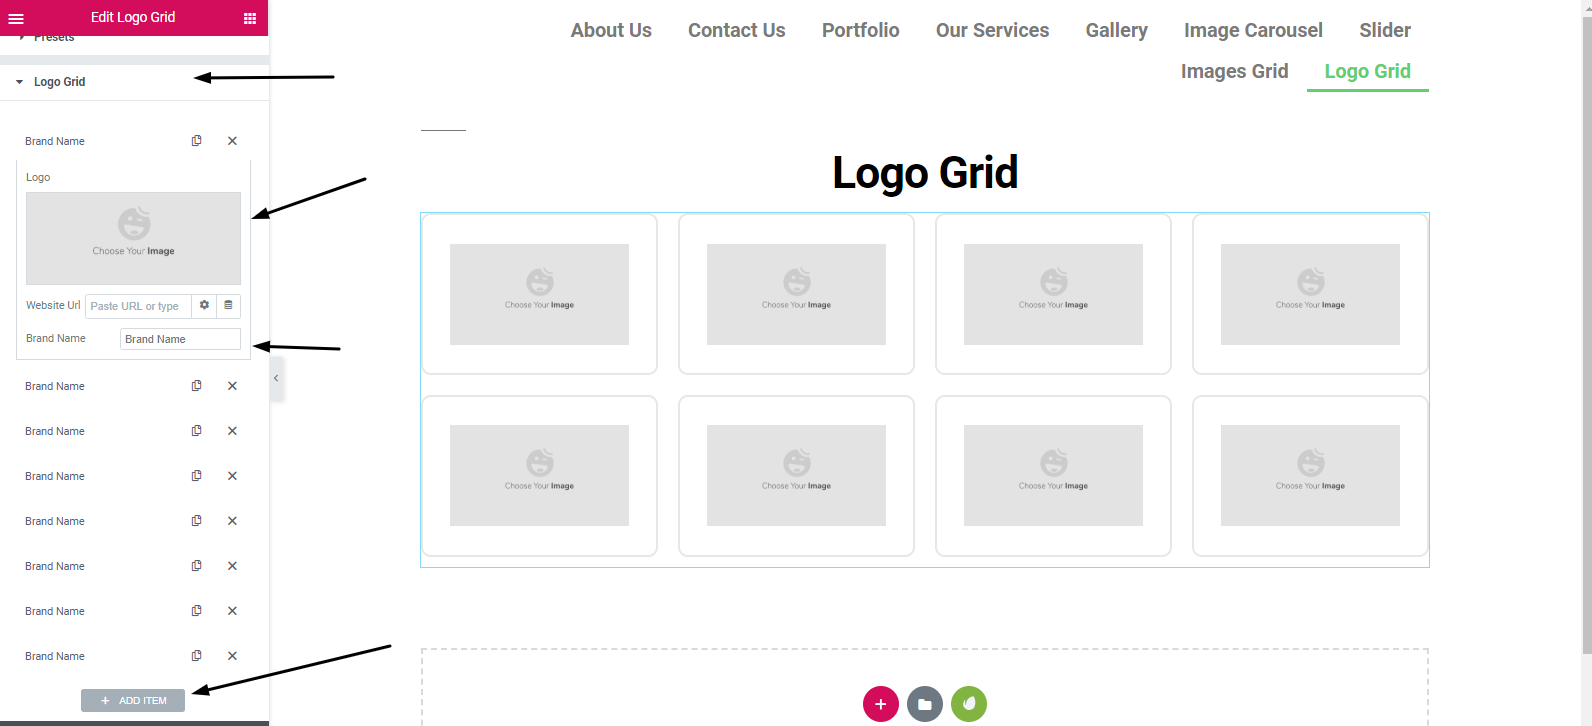
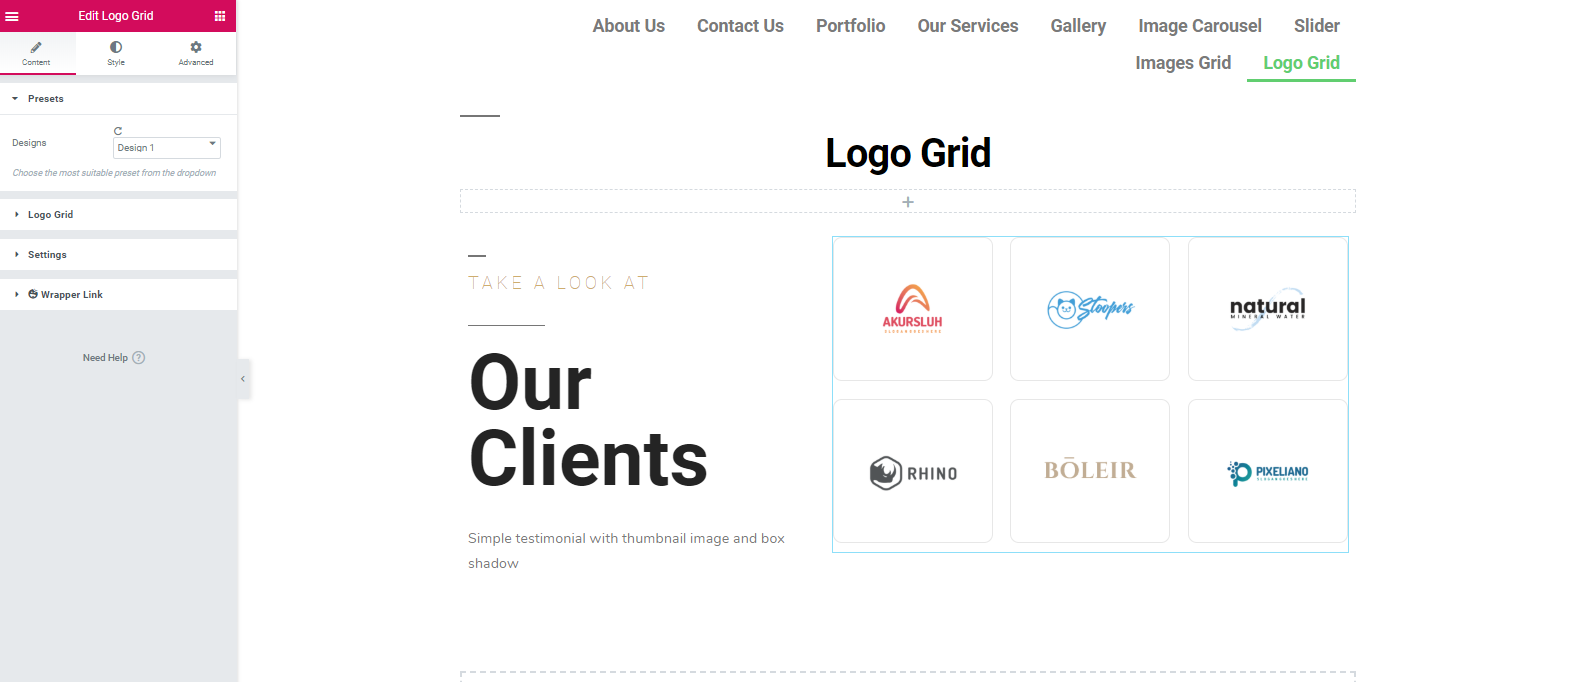
As you can see, after adding the logos, it will appear. Also, the options are available to edit them. It’s all about your design capability and sense of creativity and how you want to produce them.
Okay, you’ll get more editing options in the settings section. The size of the images, Grid Layout, and how many columns you want.
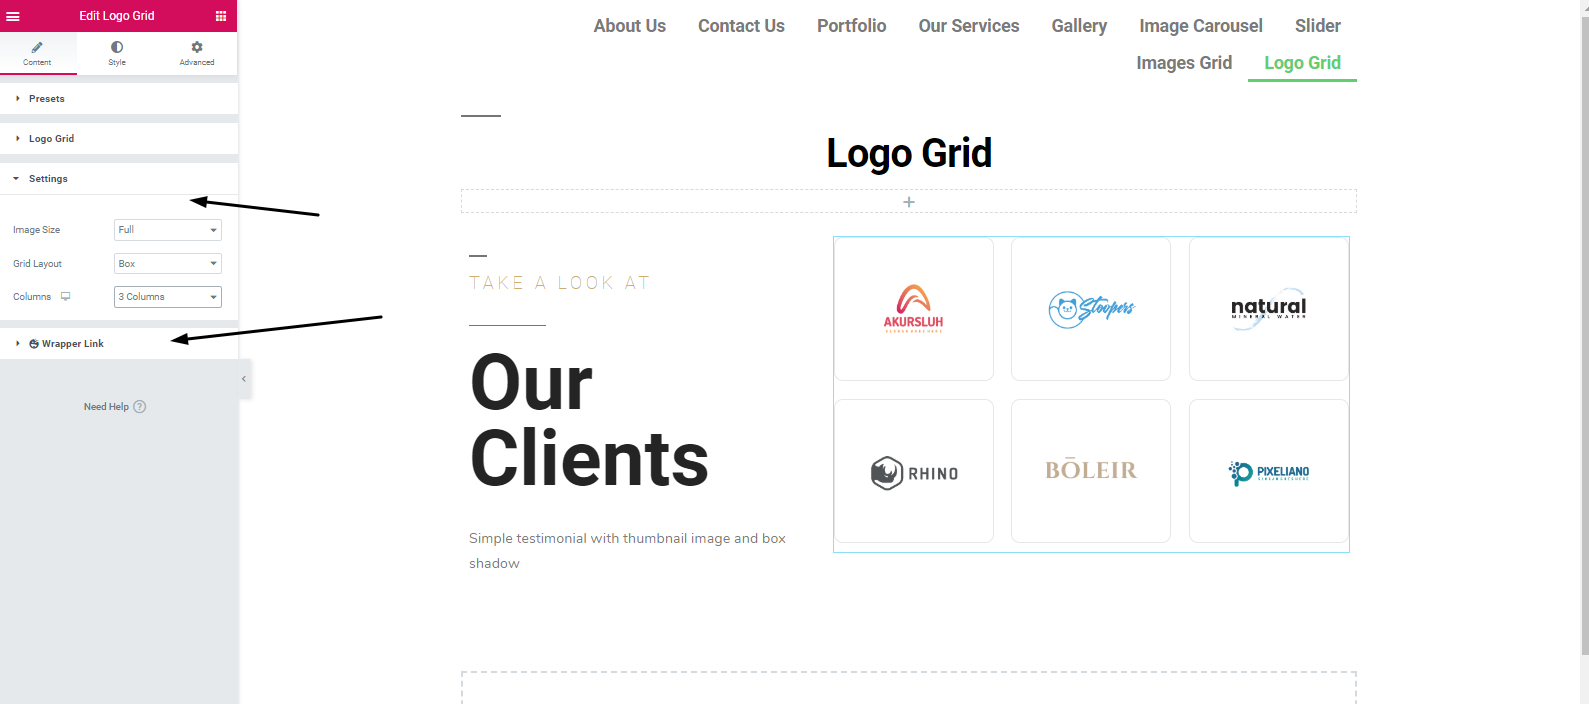
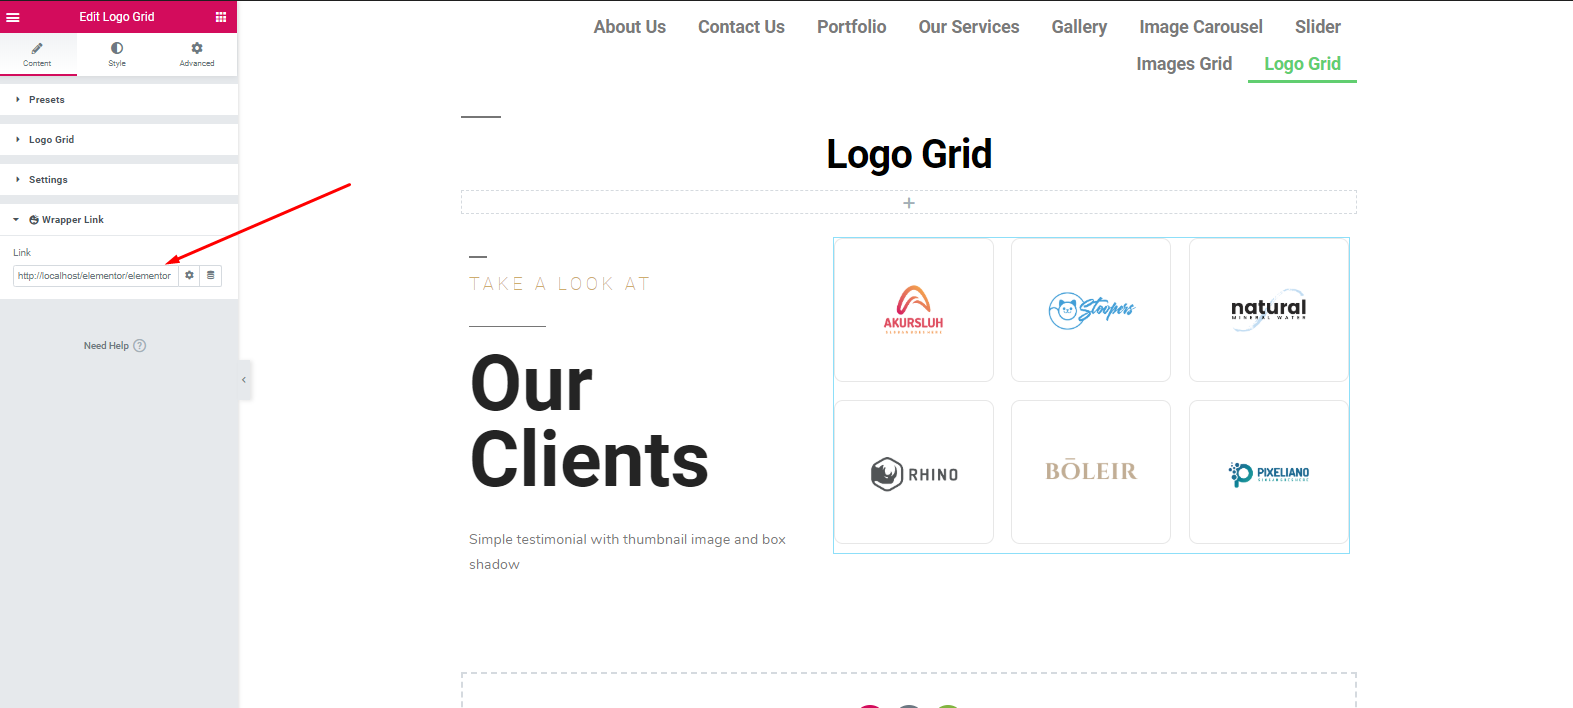
You can also provide a link on the grid. To do that, click on the Wrapper Link.
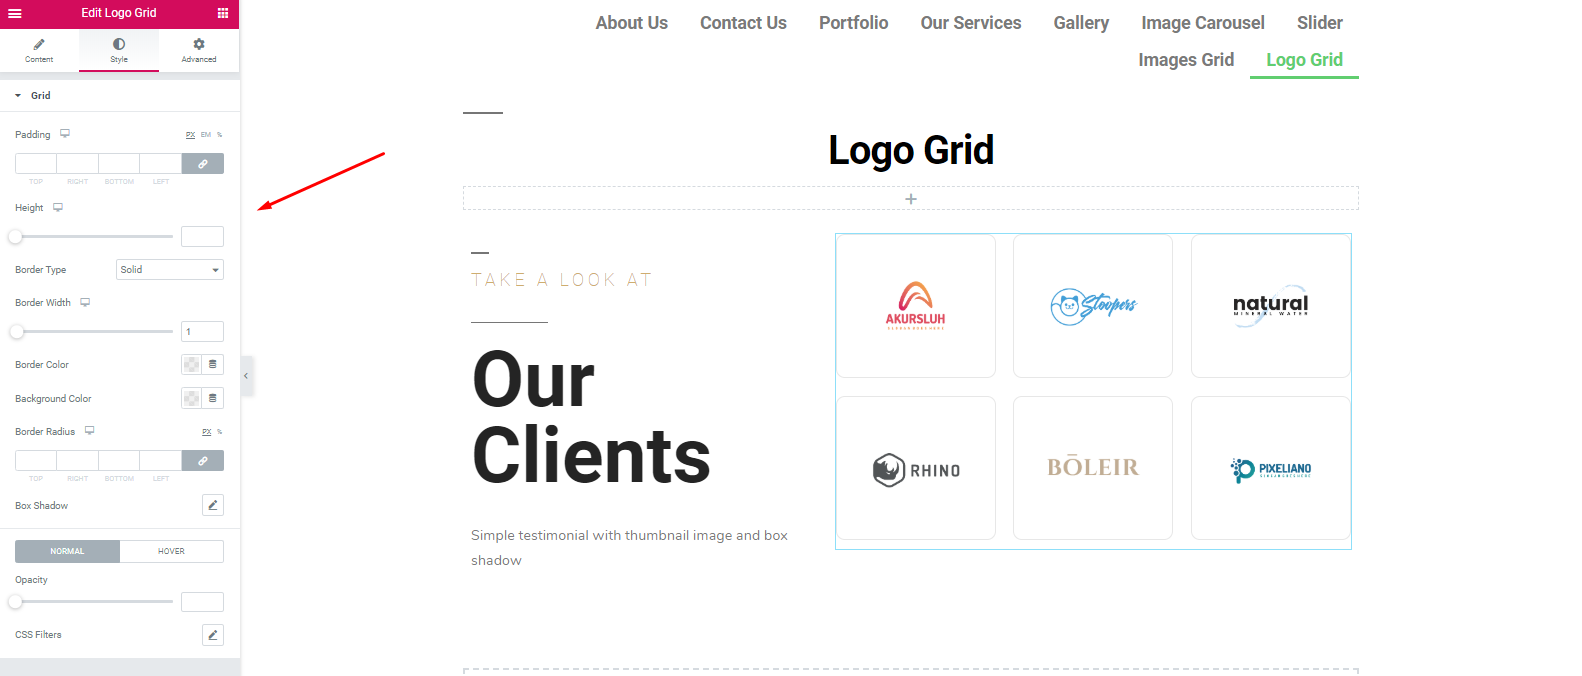
To stylize the widget, click on the ‘Style’ option. Here you’ll able to edit padding, margin, border, box-shadow, border-radius, and colors, etc.
Finally, click on the ‘Publish‘ button if you’re done with the design. That’s it!
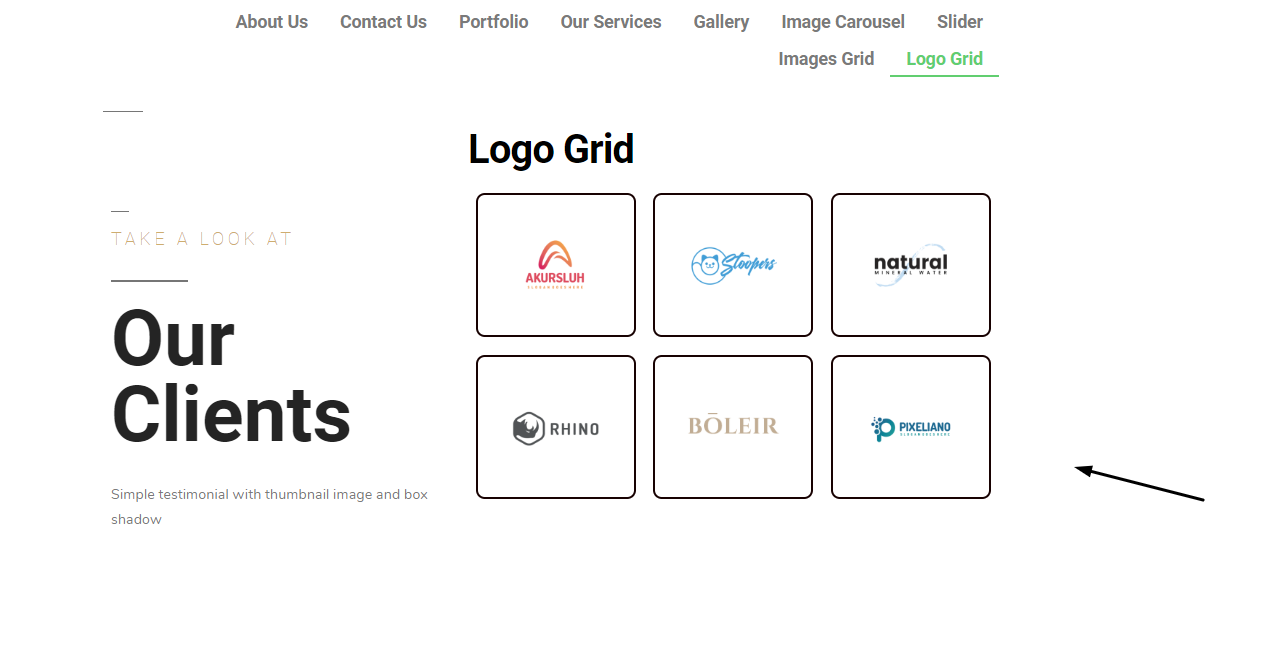
Final Preview after Applying Happy Addons Logo Grid
However, you can read our documentation to know in detail about the procedure. Or can you check the following video tutorial on ‘Logo Grid’?
You will Get More with Happy Addons

Well, the main purpose of this article is to provide a simple guideline so that anyone can do a website design from scratch. However, in the earlier section, we gave you a quick glimpse of Happy Addons.
Now let’s briefly discuss some ‘Happy Elementor Addons’ features that are unique yet easy to apply.
- Cross-Domain Copy-paste: Using this feature, you can easily copy or paste elements from one domain to another. Therefore, you don’t have to do the same task again and again.
- Live Copy: If you’re facing difficulties in designing the website from scratch, then the live copy feature of Happy Addons can be very useful for you. You can just copy the demo work right your website.
- Image Masking: Using the image masking feature, you can change the original size of the images. And apply it according to your layout.
- Wrapper Link: Link anywhere you like to use. This feature will help you to add links to any sections, columns, or widgets.
- Display Condition: Depending on your browser, operating system, and data, you can show the content according to the condition.
These are some fruitful features of Happy Addons. And these features will work perfectly with any Elementor website. Thus it surely reduces your hassle to perform a website design from scratch. ?
Not to mention that people love to visit a site with an easy interface and a good UI/UX design. And Happy Addons helps you to visualize your imagination into reality. However, if you have any difficulties with the tutorial, please let us know in the comment section. Will we definitely respond and give you a solution. ?


2 Responses