






The Marquee Animation feature lets you create an infinite auto-scrolling effect for Elementor containers. You can use it to showcase cards, images, logos, testimonials, and other repeating content.
It supports both horizontal and vertical scrolling, with additional effects available for horizontal layouts.
Prerequisites
Marquee Animation is a HappyAddons Pro feature.
Before using it, make sure you have:
- Elementor Free
- HappyAddons Free
- HappyAddons Pro
Enable Marquee Animation
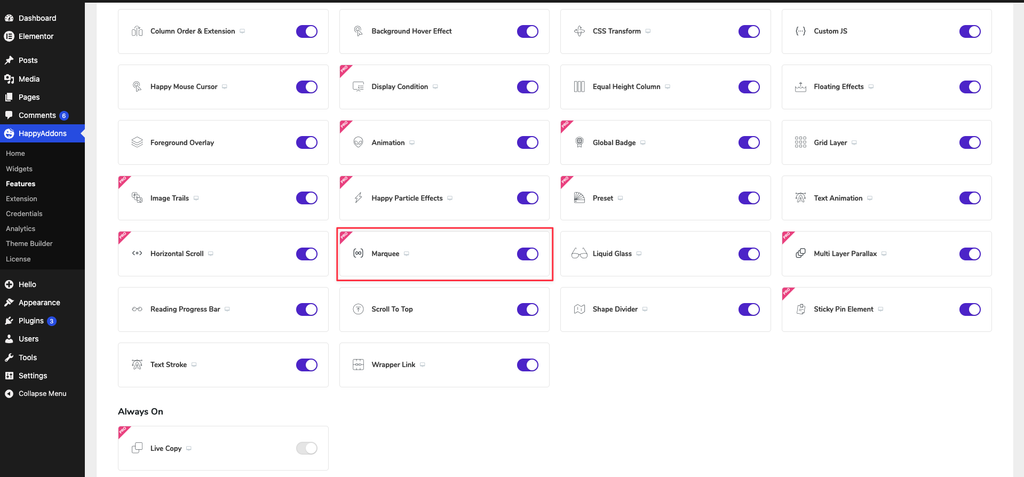
- Go to HappyAddons → Features in your WordPress dashboard.
- Find Marquee and enable it.
Apply Marquee Animation
Marquee Animation works with Elementor Containers.
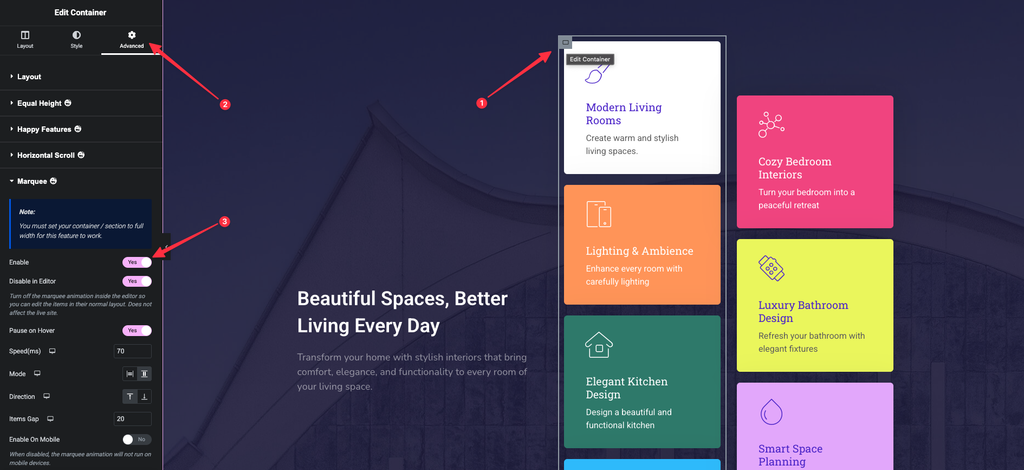
- Create or select an Elementor container.
- Add the content you want to scroll. You can use images, headings, icon boxes, testimonials, or other Elementor widgets.
- Open the container’s Advanced tab.
- Expand Marquee.
- Enable Marquee.
A default marquee animation will be applied to the container.
Marquee Settings
Once Marquee is enabled, you can customize the animation using the following settings.
Pause on Hover
Enable Pause on Hover to stop the animation when visitors hover over the container. The animation resumes when the cursor leaves the container.
Speed
Controls the speed of the scrolling animation.
- Lower values: Faster scrolling
- Higher values: Slower scrolling
Mode
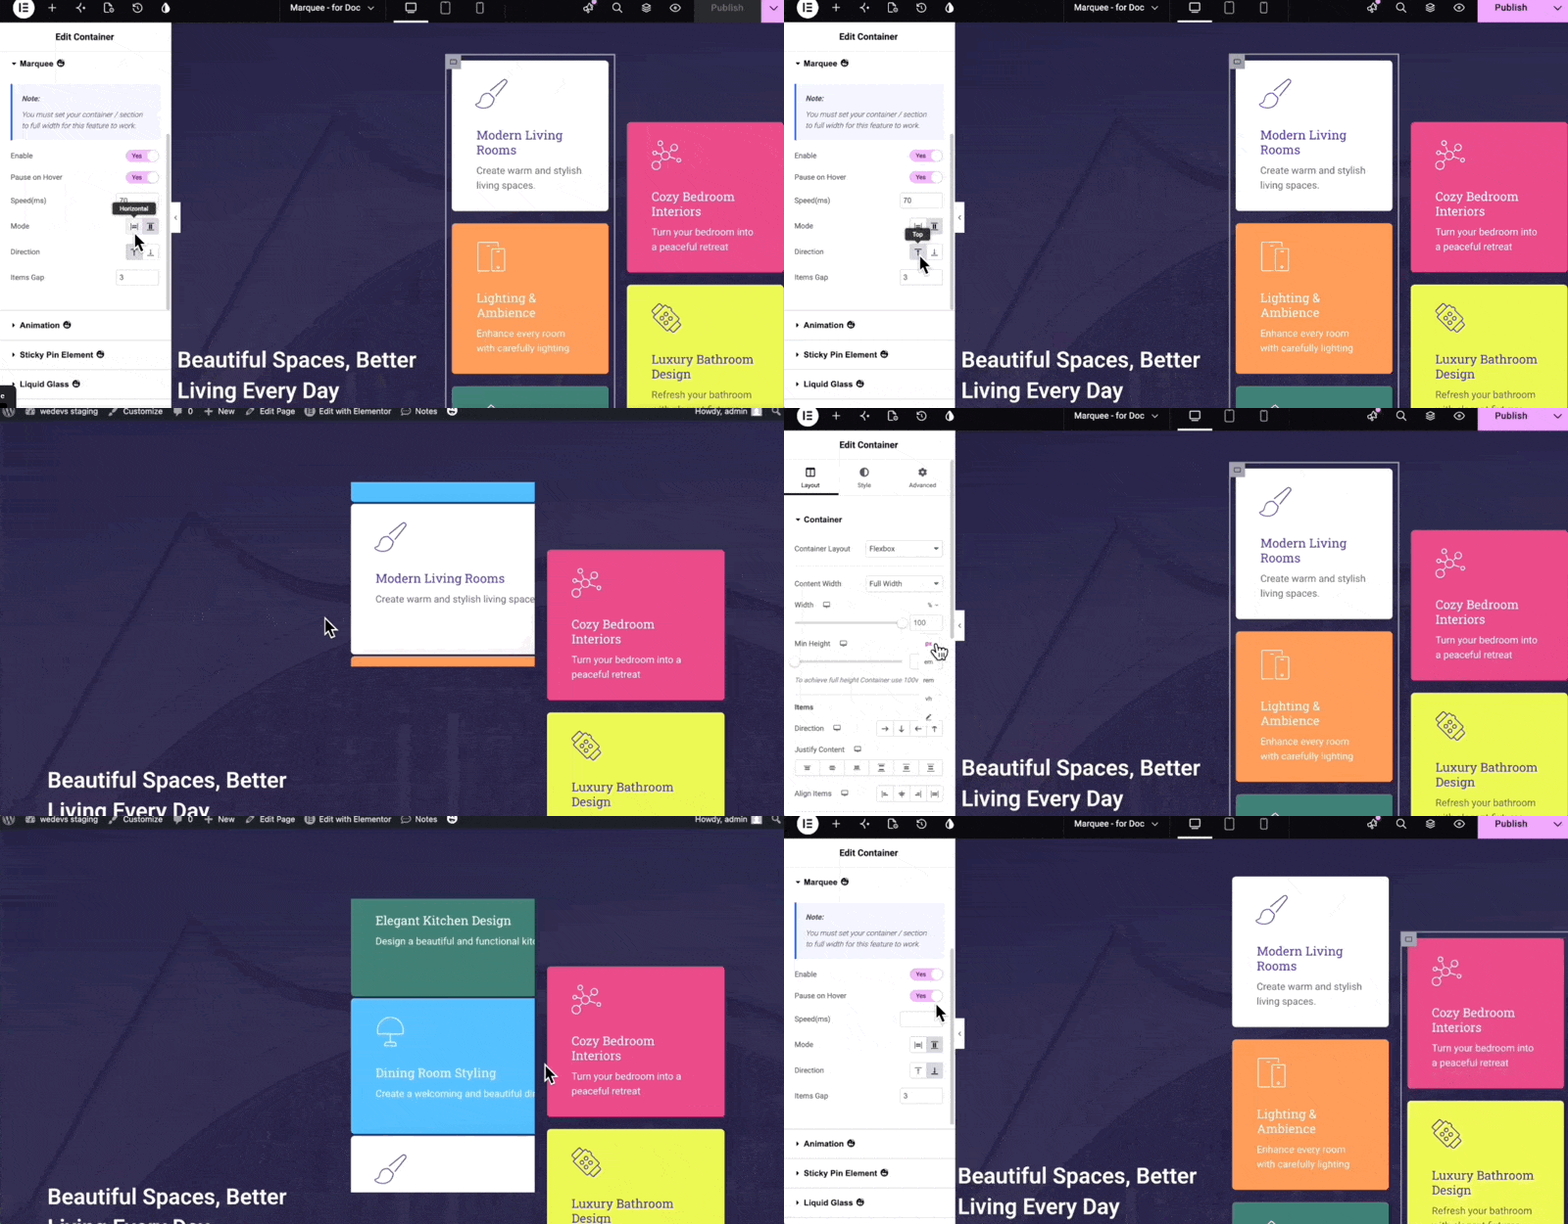
Choose the scrolling layout:
- Horizontal
- Vertical
Vertical Mode
When Vertical mode is selected, you can configure the scrolling direction and spacing.
Direction
Choose whether the content moves:
- Top
- Bottom
Item Gap
Controls the spacing between items in the scrolling area.
If you don’t see enough items in the vertical marquee, increase the container’s Minimum Height:
- Open the container’s Layout tab.
- Set Minimum Height.
- Choose a suitable unit, such as VH (Viewport Height).
- Increase the value until the desired number of items is visible.
Horizontal Mode
When Horizontal mode is selected, you can choose the scrolling direction:
- Left
- Right
The default Item Gap value works well for most horizontal layouts.
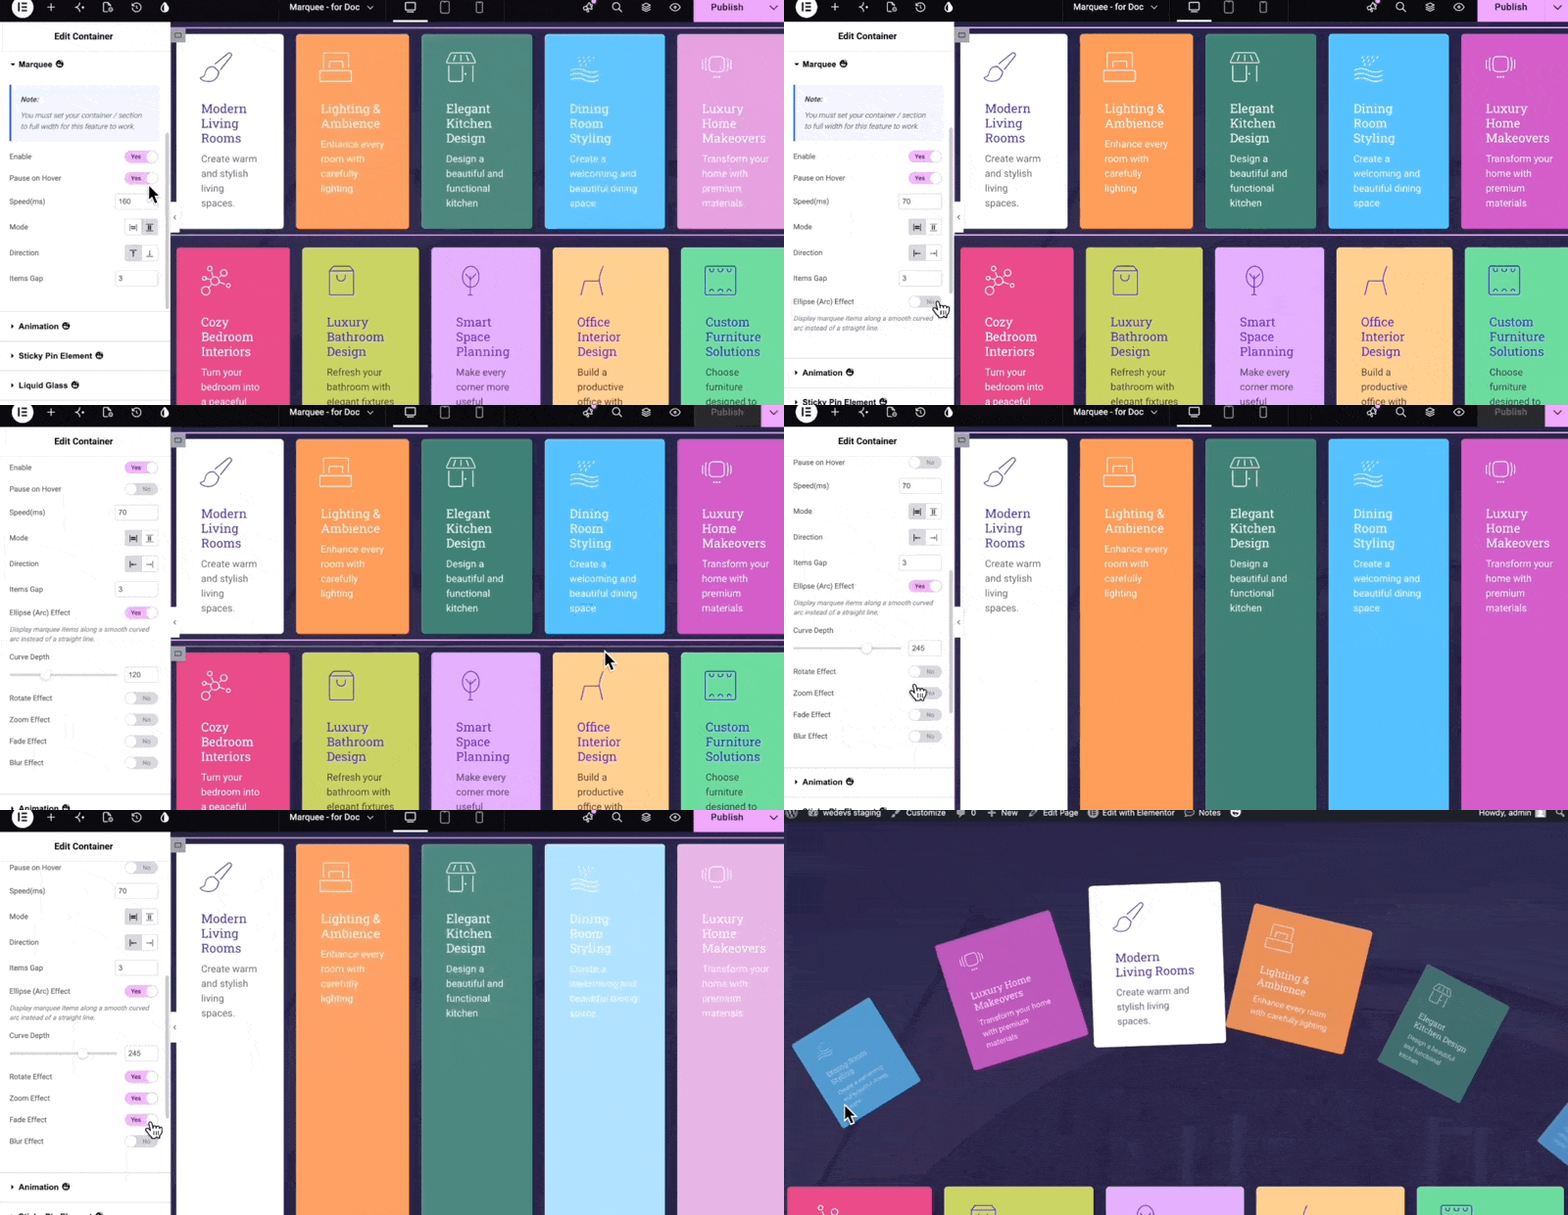
Ellipse Effect
The Ellipse Effect is available only in Horizontal mode.
When enabled, the scrolling content follows a curved path instead of moving along a straight line.
Curve Depth
Controls how pronounced the curve is.
If increasing the Curve Depth doesn’t produce a noticeable change, increase the container’s Minimum Height to provide more space for the effect.
Additional Effects
The following effects are available in Horizontal mode.
Rotate
Adds a rotation effect to the scrolling items.
Zoom Effect
Makes items near the center appear larger while items farther from the center gradually become smaller.
Fade Effect
Keeps items near the center fully visible while gradually fading items farther away.
Blur Effect
Gradually blurs items as they move away from the center, creating a stronger sense of depth.
These effects can also be combined to create different visual styles.
Examples
You can use multiple marquee containers on the same page and configure each one differently.
For example:
- Vertical marquee scrolling upward
- Vertical marquee scrolling downward
- Horizontal marquee scrolling left
- Horizontal marquee scrolling right
- Image gallery with marquee animation
This allows you to create different scrolling experiences within the same page.
Notes
- Marquee Animation works only with Elementor Containers.
- You can add any Elementor widgets inside a marquee container.
- Increase Minimum Height when using Vertical mode or the Ellipse Effect if the animation does not have enough space.
- Multiple marquee containers can be used on the same page.
- Horizontal mode includes additional effects such as Rotate, Zoom, Fade, and Blur.
Recommended visuals for the documentation
Instead of 8 images/GIFs, I’d use 5 screenshots only:
- Enable Marquee — HappyAddons → Features
- Enable Marquee — Elementor Advanced → Marquee
- Marquee Settings — Speed, Pause on Hover, Mode
- Vertical + Horizontal Settings — Direction and Item Gap
- Advanced Effects — Ellipse, Rotate, Zoom, Fade, Blur
This keeps the documentation much lighter and easier to scan while still giving users visual guidance at the important configuration points.