






1. Introduction
The Text Animation feature in HappyAddons allows you to create engaging animated text effects for your Elementor Text widgets. With multiple animation styles, trigger options, easing functions, and highlight color support, you can make your website text more dynamic and visually appealing.
This guide will walk you through enabling and configuring the Text Animation feature step by step.
2. Prerequisites
Before getting started, make sure you have the following plugins installed and activated:
- Elementor (Free)
- HappyAddons (Free)
Once you have these plugins installed, get started with the following steps!
Step 1: Navigate to the HappyAddons Features Section
From your WordPress Dashboard:
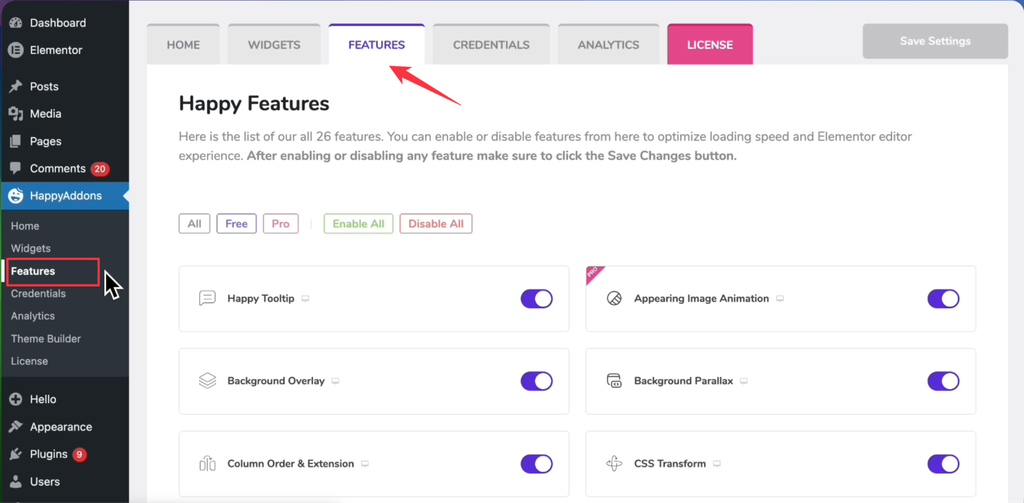
- Go to HappyAddons.
- Click on Features from the left sidebar menu.
- Open the Features tab.
This section contains all available HappyAddons features that can be enabled or disabled.
Step 2: Enable the Text Animation Feature
Inside the Features page:
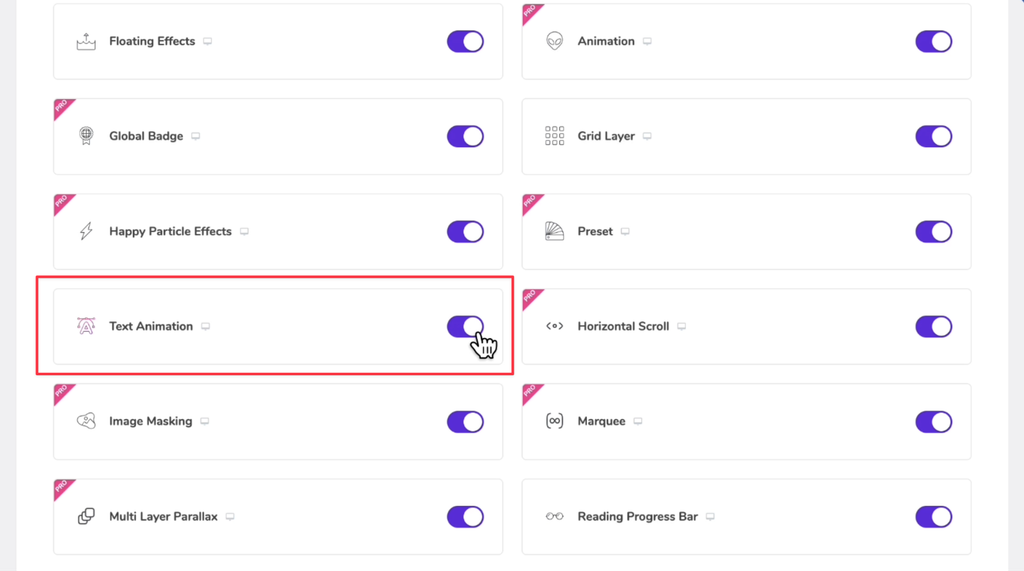
- Locate the Text Animation feature.
- Toggle the switch to Enable it.
- Click Save Settings if required.
Once enabled, the Text Animation controls will become available inside supported Elementor widgets.
Step 3: Enable Text Animation in the Text Widget
PS: In this documentation, we worked with Heading Widget. You can use any Text Widget.
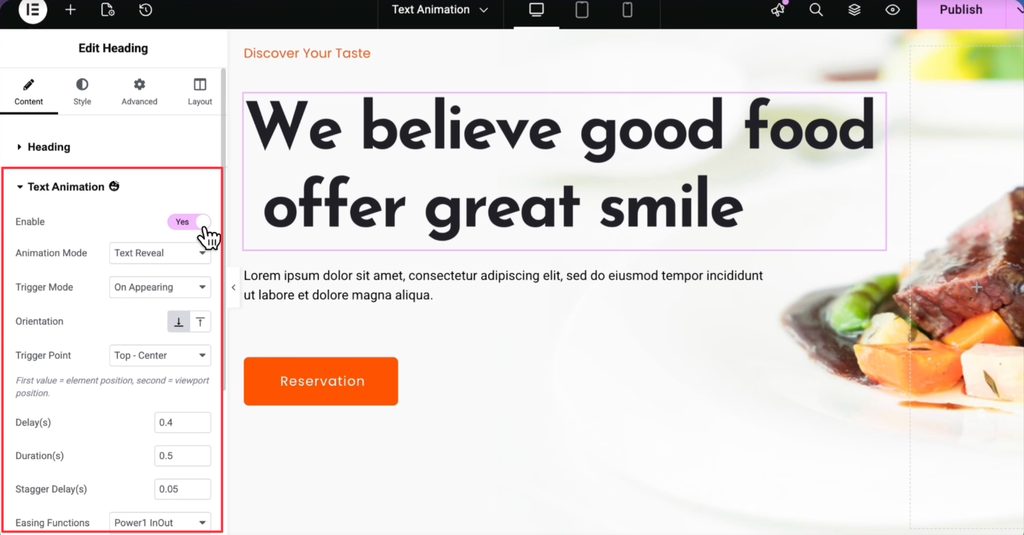
- Open your page with Elementor.
- Add or edit a Heading widget.
- Go to the Content tab.
- Expand the Text Animation section.
- Turn on the Enable switch.
After enabling it, additional animation settings will appear.
Step 4: Select an Animation Mode
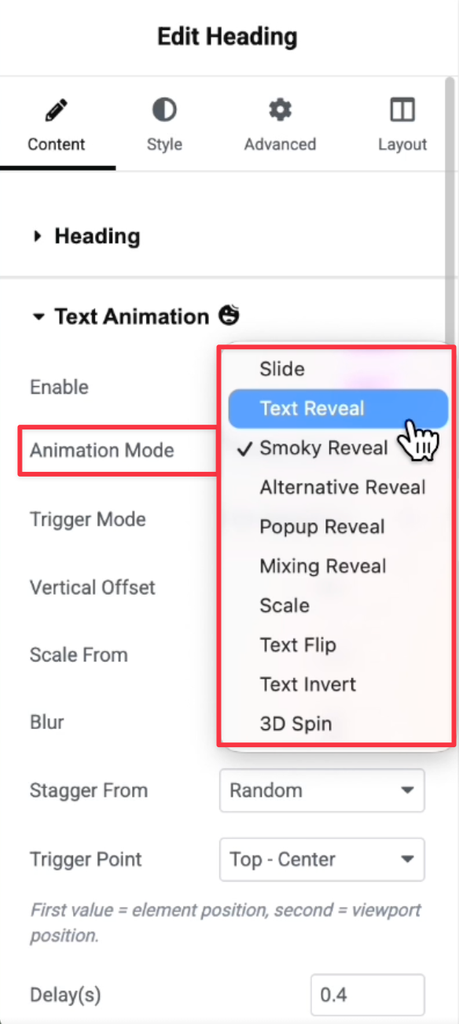
The Animation Mode option allows you to choose how the text will animate.
Available animation styles include:
- Slide
- Text Reveal
- Smoky Reveal
- Alternative Reveal
- Popup Reveal
- Mixing Reveal
- Scale
- Text Flip
- Text Invert
- 3D Spin
Choose the animation style that best fits your design.
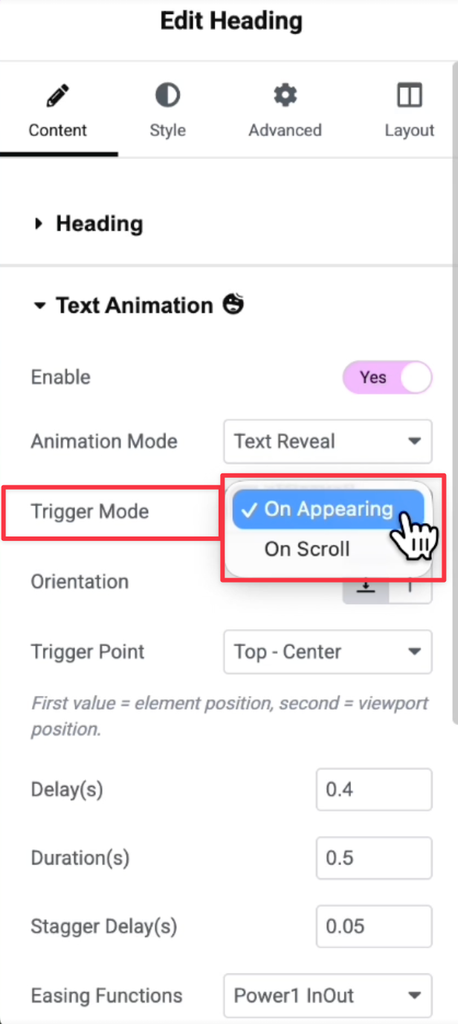
Step 5: Select a Trigger Mode
The Trigger Mode determines when the animation starts.
Available options:
On Appearing
The animation begins automatically when the page loads and the element becomes visible.
On Scroll
The animation starts when the visitor scrolls to the element.
Select the option that best suits your desired user experience.
Step 6: Configure the Trigger Point
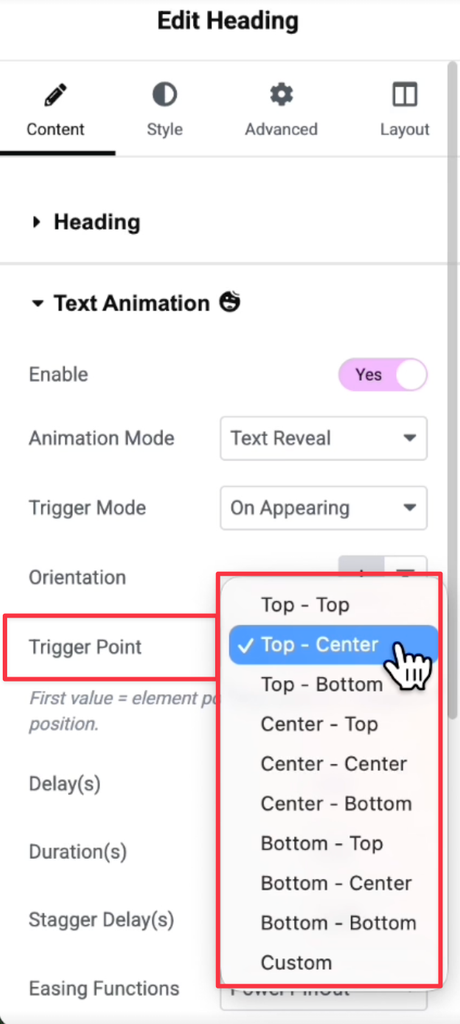
The Trigger Point controls when the animation should be activated based on the element’s position relative to the viewport.
Available options include:
- Top – Top
- Top – Center
- Top – Bottom
- Center – Top
- Center – Center
- Center – Bottom
- Bottom – Top
- Bottom – Center
- Bottom – Bottom
- Custom
For example, selecting Top – Center triggers the animation when the top of the element reaches the center of the viewport.
Step 7: Configure Delay, Duration, and Stagger Delay
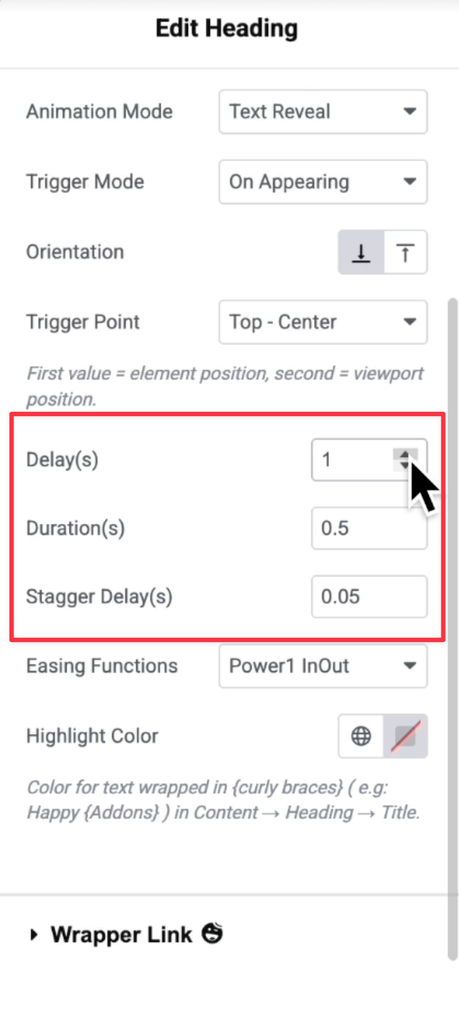
Fine-tune the timing of your animation using these controls:
Delay (s)
Sets how long the animation waits before starting.
Duration (s)
Determines how long the animation takes to complete.
Stagger Delay (s)
Adds a delay between the animation of individual characters, words, or animation segments, creating a smoother reveal effect.
Adjust these values according to your design requirements.
Step 8: Choose an Easing Function
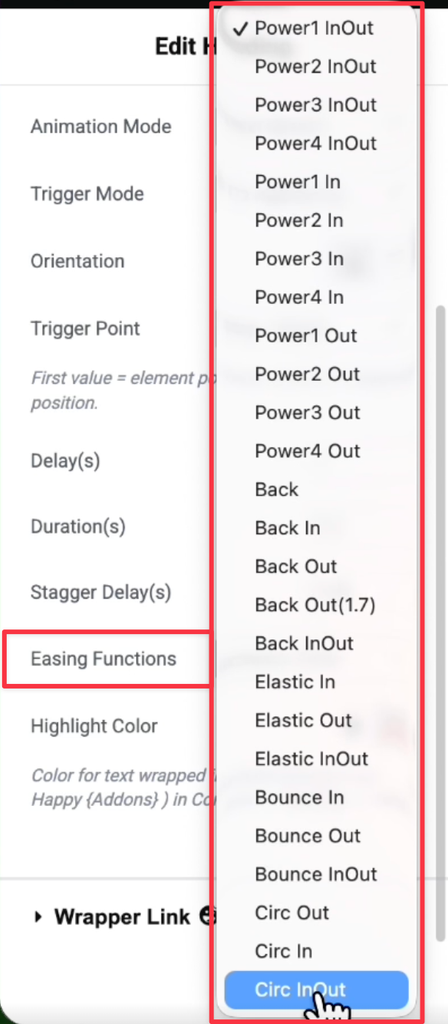
Easing functions control the speed and motion behavior of animations.
Some available options include:
- Power1 InOut
- Power2 InOut
- Power3 InOut
- Power4 InOut
- Power1 In
- Power2 In
- Power3 In
- Power4 In
- Power1 Out
- Power2 Out
- Power3 Out
- Power4 Out
- Back
- Back In
- Back Out
- Elastic In
- Elastic Out
- Elastic InOut
- Bounce In
- Bounce Out
- Bounce InOut
- Circ In
- Circ Out
- Circ InOut
Different easing functions create different motion effects, from smooth transitions to bounce and elastic animations.
Step 9: Highlight Text with Custom Colors
HappyAddons allows you to highlight specific words within your heading.
To highlight text:
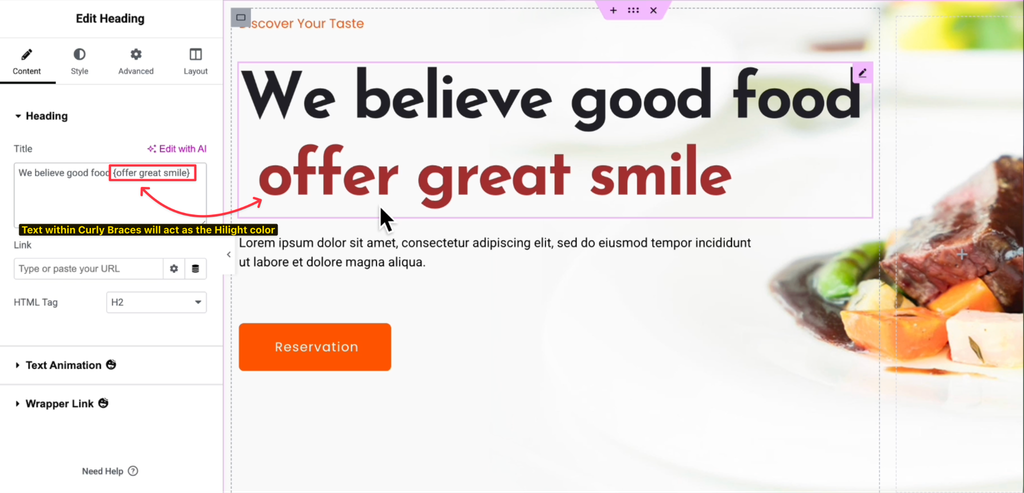
- Wrap the desired text inside curly braces {}.
- Set a color using the Highlight Color option.
Example
We believe good food {offer great smile}
The text inside the curly braces will appear in the selected highlight color.
This is useful for emphasizing important words or phrases in your heading.
Final Result
After configuring your preferred animation settings:
- The heading text will animate based on your selected animation mode.
- Animations can be triggered on page load or scroll.
- Timing and easing can be customized for smoother effects.
- Important words can be highlighted using curly braces and custom colors.
By combining these settings, you can create engaging and attention-grabbing animated Text for your Elementor website using HappyAddons Text Animation.