If you are just planning out your online business, this is the right place for you. From choosing the best platform to launch your own eCommerce website, we have covered everything here.
All we witnessed is how people are shifting their shopping habits these days. Even in this pandemic, when all types of businesses are struggling to survive, online stores are leading the way.
Today, we will walk you through every step of how to build an eCommerce website with Elementor and WooCommerce.
But before the development process let me explain to you some true facts.
The Secret Behind eCommerce Success
As we said, people are now more likely to purchase online. With technological advancement, it becomes quicker and simpler to buy and sell products through eCommerce websites.

Even your physical store should have an online platform to continue business growth. It’s crucial to nurture your online strategy to sustain in this competitive world. Otherwise, you might lose a large number of potential customers for your business.
On the other hand, if you have no physical store, you can still start your online business with a lower investment and sell your products to your customers. All you need is a professional site to operate your business.
By the year 2040, it’s estimated that 95% of all purchases will be through eCommerce.
Nasdaq
The rising number of digital shoppers clearly shows that there’s never been a better time to start an eCommerce business.
But here the question comes how to build an eCommerce website without having any coding knowledge. Well, WordPress, along with its helpful tool kits, solved this issue a few years back. But then you may ask, among all those tools-
Why Use WooCommerce and Elementor for Your WordPress Online Shop

WooCommerce is the plugin to turn your WordPress site into an eCommerce business platform in a blink of eye. No coding, no HTML, just a few clicks. And more amazingly, it comes with all the basic functionalities of an online store and is completely FREE.
Not over yet! You will get a number of free WooCommerce plugin options to extend your store’s capabilities.
WooCommerce provides you all the flexibility and various exciting features like inventory, tax management, secure payments, and shipping integration. This is the reason WooCommerce runs over 28% of all online stores.
See more WooCommerce Stats here →
Now, let the spotlight on Elementor– This drag-and-drop page builder makes website designing as easy as ABC. Just move your cursor and get your site ready to live. Without having any prior knowledge or professional help, this is the best option to build a beautiful site like a pro.
That’s why more than 5 million people are actively using Elementor Page Builder on their WordPress site.
In short, no matter what you’re selling or how much you’re selling with the duo of Elementor and WooCommerce, your possibilities are infinite and endless.
Basic Settings and Customizations of Your E-commerce Store
Here are the pre-requisites to create your online shop:
- A WordPress Site
- WooCommerce (FREE)
- Elementor (Free)
- HappyAddons – A Elementor Addons (Free)
Let’s assume you already have a suitable domain and hosting plan for your website. Then, configure your WordPress site and install all the required plugins, including WooCommerce, Elementor & HappyAddon.
Meanwhile, if it’s your first time with WooCommerce, go through this easy step-by-step guide or you can follow this guide to try WordPress in the localhost. Also, check this guide to estimate your eCommerce Business Budget.
The installation and activating process of WooCommerce is similar to any other WordPress plugin. Let’s show you in detail how to configure basic WooCommerce settings and pages.
Step 1- Start with Installing WooCommerce Plugin
To install and activate the WooCommerce plugin-
- Navigate to the WordPress Admin Dashboard → Plugins → Add New
- Search for ‘WooCommerce’
- After that, install & activate the plugin
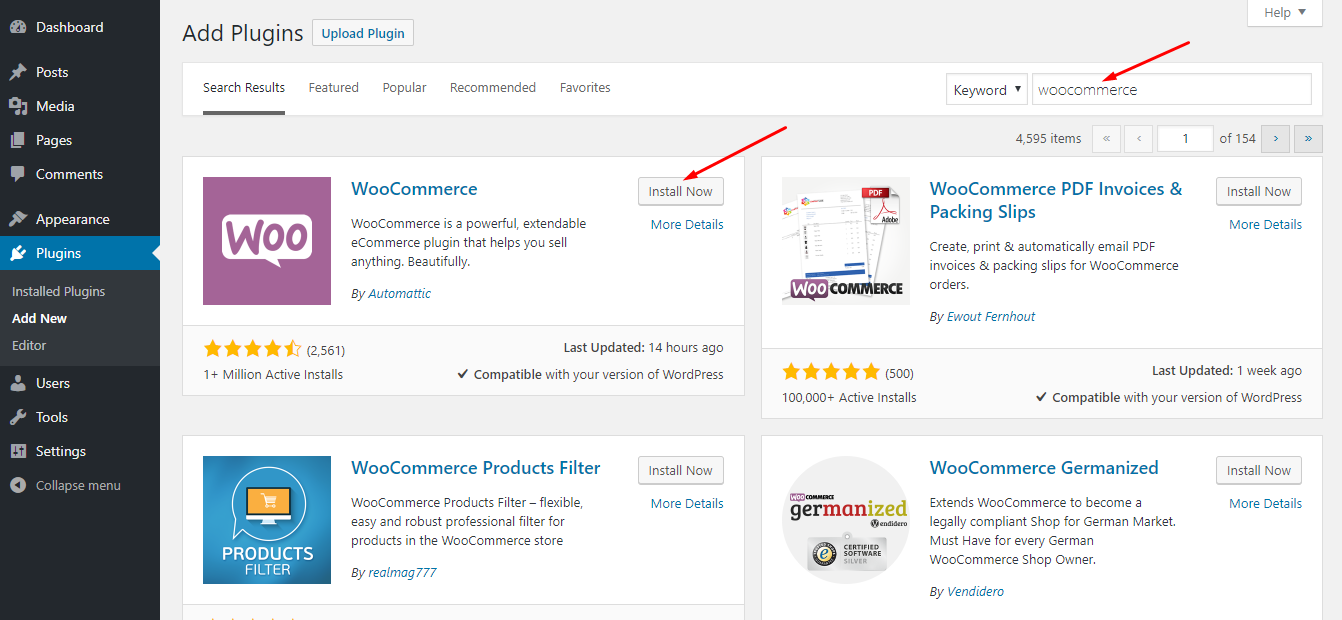
Now, click on “Activate now” as consecutive attempts.

Now, you will get an installation wizard. You can skip this part and do all the changes manually. But it’s better to go through the process and make all the basic customization accordingly. So, here we will choose “Let’s Go” to get started with the setup wizard.

1. Provide Basic Information
At first, it’s asking for your shop’s initial data, including store location, product type, the currency you use, and the types of goods you are planning to sell (physical, digital, both in-person), and others.

Also, you can determine here whether you want to allow WooCommerce to track your usage for your store’s improvement.
Fill up the form appropriately. Then click “Let’s go” button at the bottom to jump right to the next settings.
2. Set Up WooCommerce Payment Gateways
Here, you can configure the payment options for your online store. The options of this step depends on your store location and the product types you want to sell.
If you didn’t mark the “selling products in person” option then you’ll only get Stripe and Paypal.

If you marked the ‘Selling in-person‘ option and live in Canada, Australia, U.S., Japan, UK then you will see Square, PayPal, and Stripe.
Because these payment gateways are available all these countries.

Also, you can select the “Offline Payments” and choose a payment option like check, bank transfer, or cash from the drop-down menu.
Once you are done with all the settings, click the “Continue” button and proceed to the next step.
3. Set up WooCommerce Shipping
In this step it’s all about shipping your product details. WooCommerce supports 2 shipping zone-
- Zone 1 – USA and Canada
- And zone 2 – rest of the countries
You’ll have the live shipping rate option if your shop is in the first zone. But you have the flexibility to set a flat shipping rate or free shipment.
In terms of the actual shipping rate, you have to set up the correct weight and dimension.

Before clicking continue, don’t forget to checkmark the print shipping labels at home to get your credentials printed.
4. Configure Some Extra Options
Here, WooCommerce asks you to install some essential plugins. Such as automated taxes with Jetpack, MailChimp for email marketing, and Facebook for WooCommerce plugin.

Choose whatever you think is essential for your eCommerce website. Select the check box to automatically get all these options on your site. If you want, you can also install them later manually as well.
5. Connect WooCommerce with Jetpack and Finalise the Setup
Now, the setup wizard asks you to connect your site with the Jetpack. This plugin works amazingly with all the functionalities of automated tax, ensuring the highest security. You can install it later also from the WordPress directory.
Click “Continue with Jetpack”.

Now, you are on the last page of the wizard.
From this page, you can create, import product, visit your dashboard, or review the entire settings. Just check and go ahead.
Great job! You have done all the basic settings for your WooCommerce shop. Now, you can add products to your shop.
Step 2: How to Add Products to Your WooCommerce Store
Now, it’s time to occupy your online eCommerce shop with the essential products that people can purchase. Let’s see how to do it!
1. Add a Product
From your WordPress dashboard, go to Products → Add new. And you will get this screen to insert the information about your product.
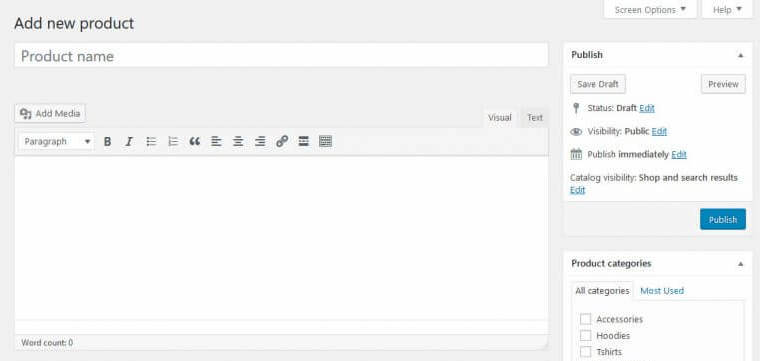
Here, you can add your product details, including product name, category, image, tag, gallery, description, and others. Include all your products one by one in your shop with all the required information.
2. Configure Product Data
Below the main editor window, you will get a panel to set your product data. Customize the data carefully as it’s necessary for your shop to work smoothly.
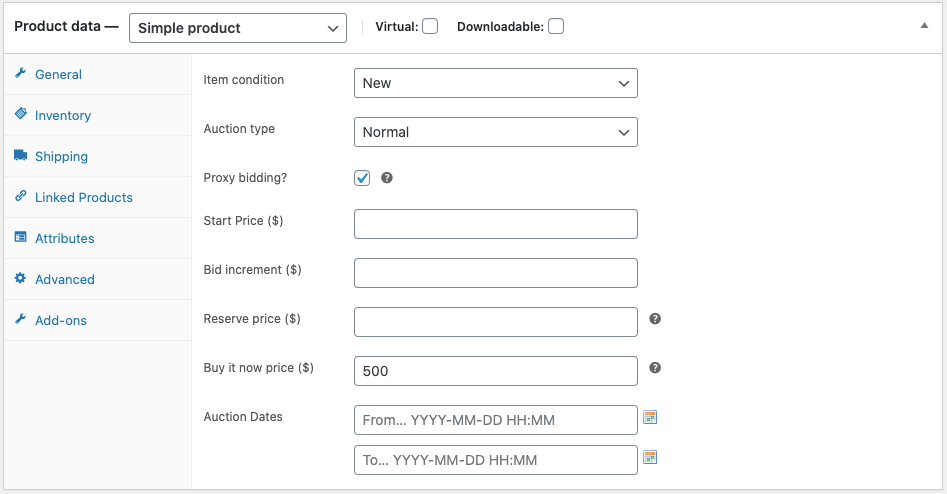
At first, select the data type of the products you are selling from the drop-down menu. Such as-
- Simple product
- Grouped product
- External/Affiliate product
- Variable product
Depending on your choice, you will get different configuration options. So, set all the data according to your business niche, industry type, product categories, and others.
Once you are done and have saved, you can check the product from “All Products”.
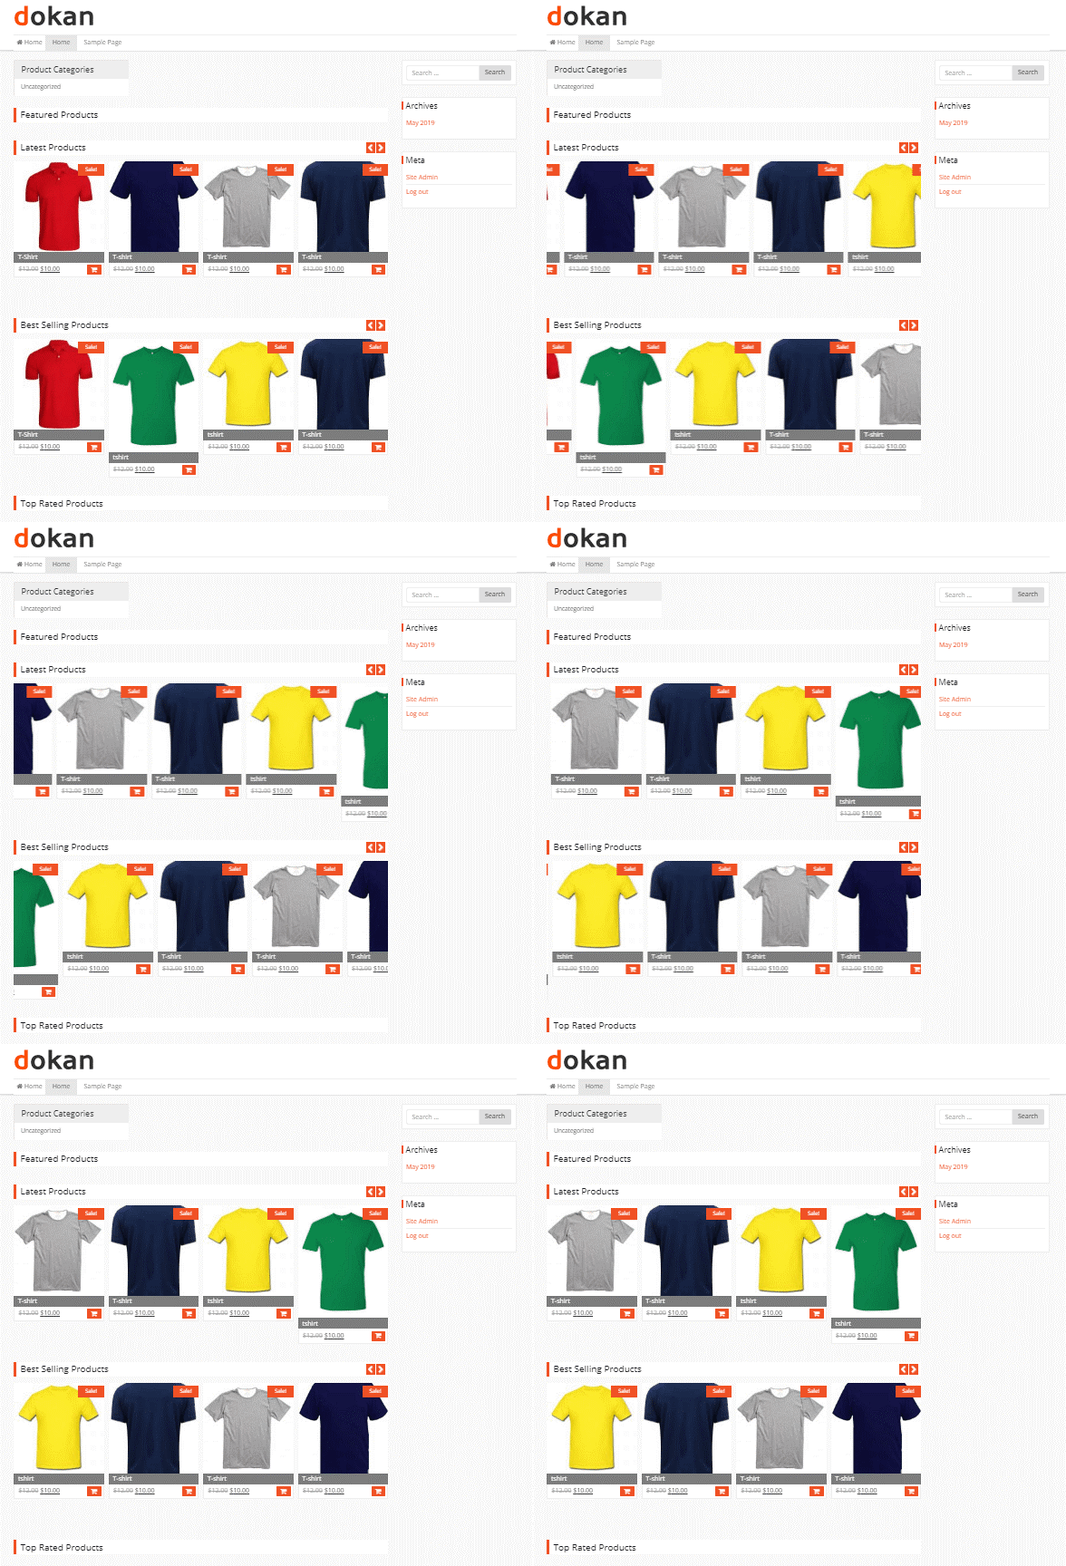
3. Check the Product’s Frontend View
It’s time to see the frowned view of your online store and how the products are appearing. However, it largely depends on the theme you have used. Here, I have use the Dokan theme as it works perfectly with WooCommerce.
Here’s a list of best WooCommerce themes you can choose from.
If you want your single store to turn into a wide multivendor marketplace, check this detailed guide to build and customize your multivendor marketplace.
Step 3: Design Your eCommerce Website with Elementor
In this step, we will design our online store with Elementor. For that-
- Navigate to the WordPress Admin Dashboard → Plugins → Add New
- Search for ‘Elementor’
- After that, install & activate the plugin
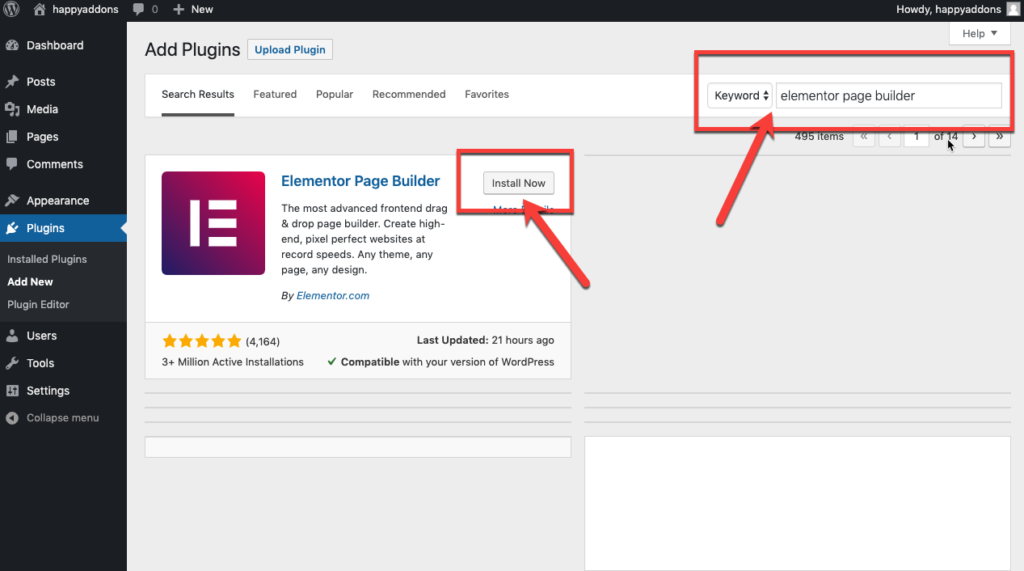
Then, activate the plugin similarly to how we did for WooCommerce.
Alternatively, you can manually download Elementor and upload the file using the Upload Plugin option.
Now, start designing your store pages with Elementor.
1. Build a Product Page via Elementor
You can customize every inch of your online store with dynamic features and Elementor widgets. If it’s your first time with Elementor, then you can follow this step-by-step guideline on How To Use Elementor.
Let’s build a product page to showcase the details of a specific product.
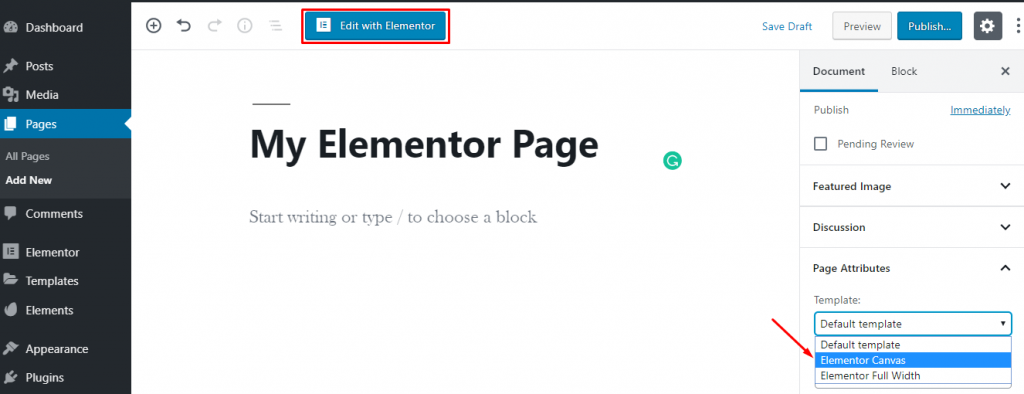
Well, to design the page from scratch, go to WordPress Dashboard→Pages→Add New.
Then, enter a page title and select the Elementor Canvas option from the right-side template dropdown.
Finally, click on the button “Edit with Elementor” and start working with this WordPress builder.
If you want, you can use a pre-built template or block to design your page.
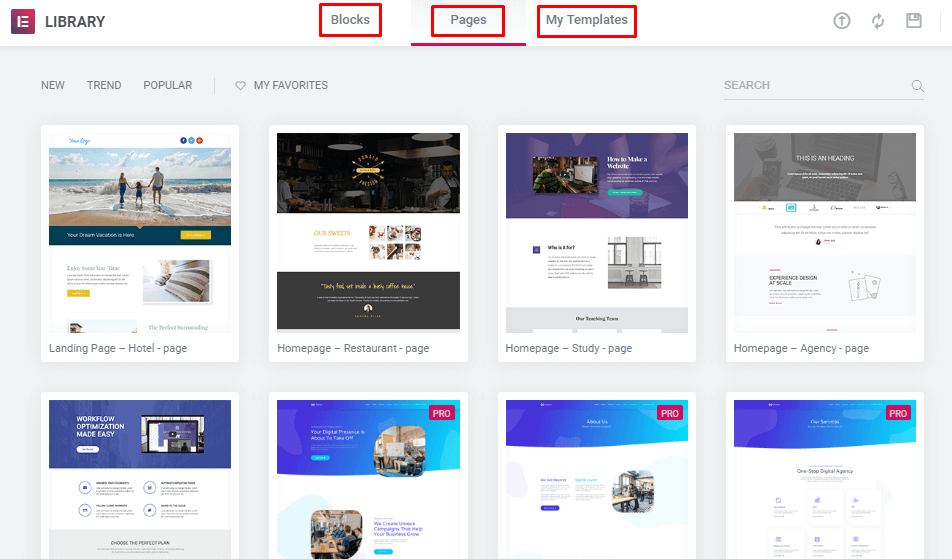
Moreover, you can install third-party add-ons to extent your template library with more exclusive features.
Check out Happy Templates here →
Or design the individual section by inserting multiple types of useful widgets. Here, we have used widgets from core Elementor and HappyAddons- a powerful Elementor Add-on to make the product page stunning. And we have used the FREE version of these tools.
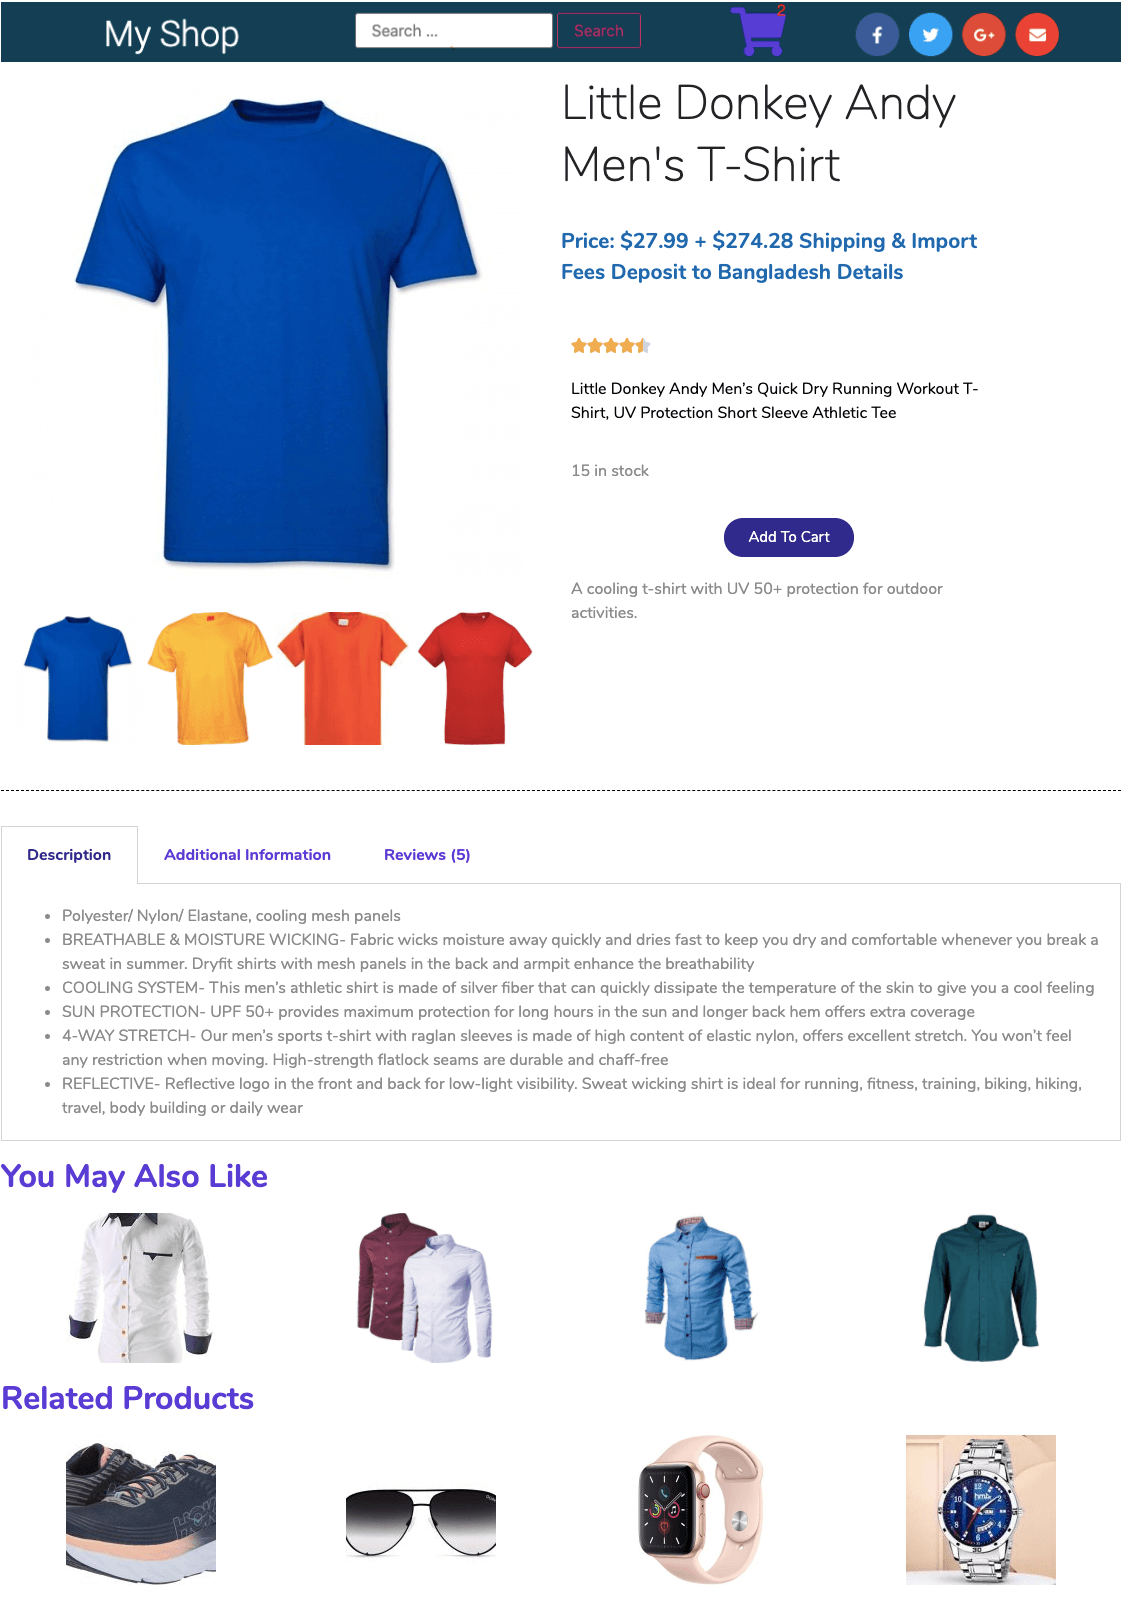
You will get all the basic tools completely free to build a professional site in Elementor. For further help you can go through this guide on How To Create An Online Course Website Using Elementor. It shows you the path to create different categories and publish your products under a specific class.
2. Finalize the Design
After doing all the customization, it’s time to publish the page. But before that, set the condition to show your page under a specific category.
Well, in this way, you can design your other pages as well. There are no bindings here. Think of a design and then portray it in real life using different widgets from the left editor panel.
You may wonder if you can also use animation and move your objects in any direction with Happy Effects.
Let’s have a quick look over those pages you should include while developing the eCommerce site-
Bonus: 10+ Must-Have Pages-Features for Your Online Shop
Your eCommerce site should be engaging enough to hold people fora long time on your site. It will increase your chance to communicate with them and convince them to buy from your shop. But for that, you have to arrange your site in an organized way.
Make your site easily accessible for all types of customers so that they can find their desirable products effortlessly. As an online shop owner, do you know which pages your customers expect on your site? If not, check out the following pages-
Homepage: This is the storefront of your business and the main attraction place to grab your audience’s attention. Give an overall view of your business through the homepage. At the same time, keep it simple so people can navigate other pages easily.
Product Page: Display the details of a particular product with the “add to cart” button. Here, you can also suggest similar products or other related products.
Category Page: This page is the list view for the products of a specific category.
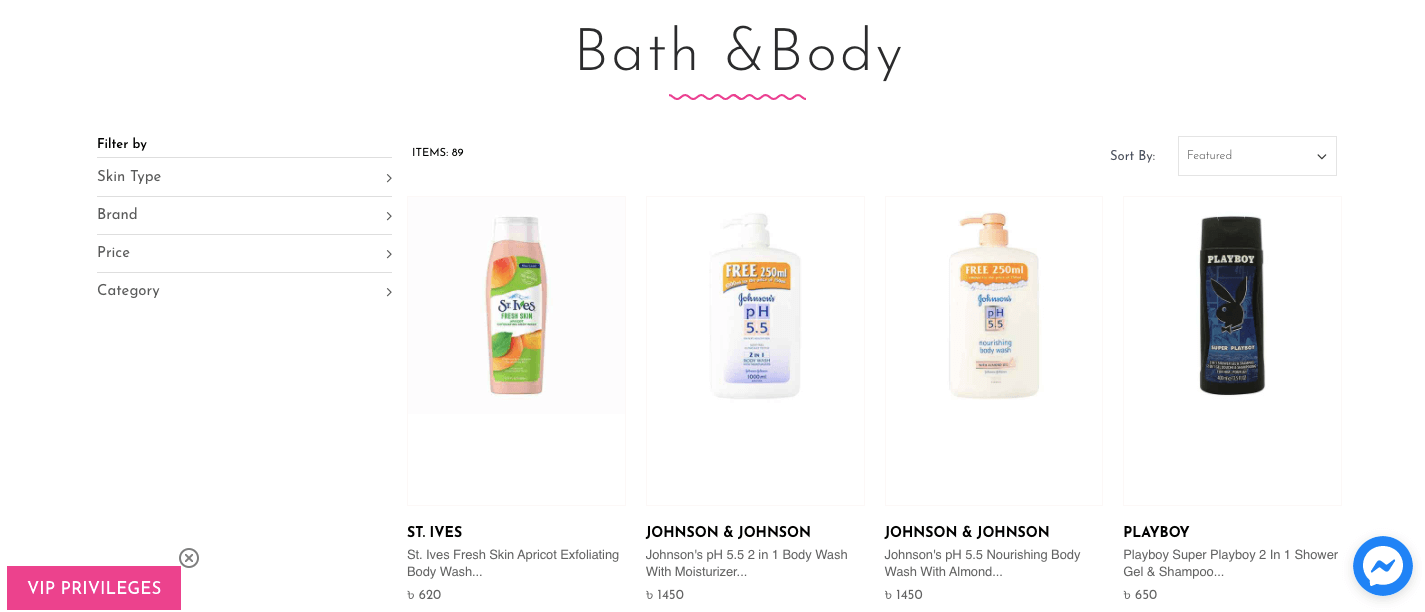
Category Overview: Showcase all the categories of your store, including sub-categories and others. So visitors can easily understand what you are selling and immediately check their required products. If your store has only one category of products, then you can skip this.
Search & Search Results: Provide searching options is essential in an online store to help customers who want quick access to their desired page.
Login/Create Account: It’s a great chance to collect information about your customers. Also helpful for offering special offers and discounts to your loyal customers.
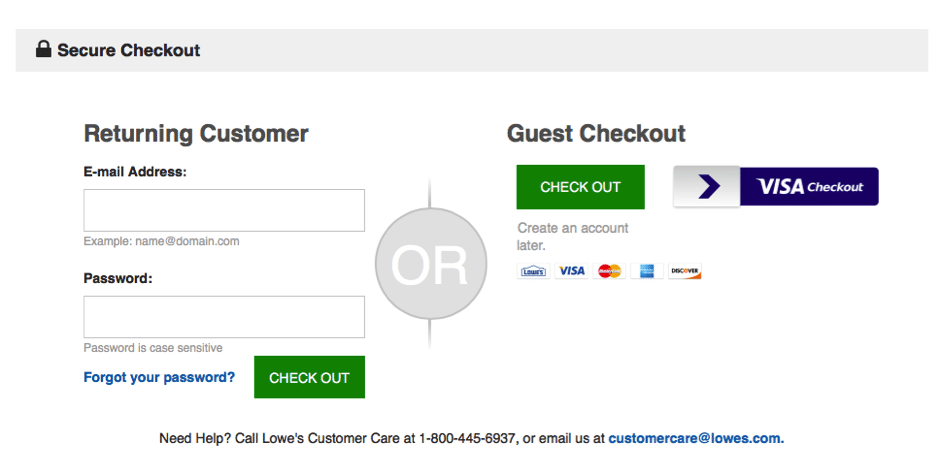
Guest Checkout: Allow users to buy without registering on your site if they don’t want to share their information.
My Order: Order history helps customers to check their previous shopping items- reorder them or cancel an item.
Cart: Here, digital shoppers can see the products they have added to their shop. On this page, they can see the total price, including shipping charges, insert the promo code and discounts. Cart abandonment is a big issue for any eCommerce business.
Returns: Give your customers return/exchange options under some conditions. It gives great confidence to your visitors to continue their shopping on your site.
Physical Store Location: Some people check your site just to know the address of your nearest outlet. So, if you also have physical stores, then include their addresses and contact details separately.
Live Chat: A large number of customers prefer human interaction during their online purchases. Include a live chat option that will surely increase your sales.
Reviews: Allow your customers to share their views, demands, queries, and shopping experience on your eCommerce site. Positive feedback works as a great influencer for new customers.

However, depending on your business niche or product type, you may include or subtract some pages from this list. Apart from this list, you can add a blog section on your website where you can publish informative content related to your business. It can also be a great source to share your products’ usability.
Ensure secured transactions and multiple payment options also can be ignored if you want maximum success for your eCommerce site.
Build Your eCommerce Website and Start Climbing The Success Ladder Today!
Shopping online is not a luxury anymore- it has become a necessity. There is no wonder 25% of the total world population is shopping on PCs or mobiles nowadays. And this number is moving upward so fast.
Undoubtedly, online retail can be a great source of earning quick bucks. But there is always the other side of the coin. A large number of people are getting into online businesses to sell their products or services. To stand out from the crowd, you need a proper strategy and business plan. It helps you to grab the right audience for your brand.
Well, now you know how to build an online store in a simple way. Follow the above instructions carefully, it will not take more than one hour to set up your basic website’s functionalities. We promise you, too, will find the combination of WooCommerce & Elemntor useful for creating your own eCommerce website.
If you need any further help, do a comment in the comment section below.



3 Responses