Nowadays, owners from every sector small to large, are focusing to display their products or services virtually. As online presence creates more impacts, so the online fields have become more competitive.
56% of business owners believe that, using a professional website has always been a handy for them
And the reason is, virtual platforms are easier and hassle-free to provide different online services. Therefore, it’s easy to reach more customers globally. For instance, a website with a professional look can be beneficial, and a matter of relief for you.
However, throughout this article, we’ll know another interesting thing today. Yes, we’ll learn how to create a website with Elementor.
Whether or not you have any idea about Elementor or how it works collaboratively with WordPress, don’t worry you’ll know each and everything here in this post. Or if you’ve already used Elementor before, then just follow the steps till the end.
Okay, enough talking! let’s dive into the tutorial!?
Build Your Personal Website with Elementor & Happy Addons

The benefits of a well-decorated website are undeniable. Such as blogging sites, educational sites, portfolio sites, project type websites, sci-fiction websites, and car rental websites, etc. From these professional website examples, you can choose the suitable one for your business.
Well, there are a ton of benefits to having a professional website. Also, it will help you to reach loyal customers smartly. Now before going in the tutorial, we want to talk a little bit about Elementor and why it’s a well-recognized page builder for all time.
Let’s know how it will facilitate you in terms of designing a professional website.
- Drag & drop editor
- 90+ widgets to implement
- Pre-built 300+ templates
- Responsive editing
- Pop-up builder
- Theme builder
- And WooCommerce builder
So these are the basic features of Elementor that are 100% capable enough to design, redesign, and customize any type of WordPress site with ease. But sometime Elementor alone can’t bring you the best result.
In that case, you need to quicken the power of Elementor. So that you can experiment more with your existing Elementor. Yes, talking about Happy Addons, a compact ‘Elementor addons’ that has a collection of free widgets & features to take your website design up to the next level.
HappyAddons is an unique Elementor Addon. It might be the significant Elementor addon so far – Adam Preiser Founder of WP Crafter
How To Create a Professional Website with Elementor & HappyAddons
Generally, whenever we think about designing any WordPress site, Elementor pop-up in our mind first. And the reason is pretty much clear as we discussed in the previous section. So we’ll not prolong our words saying anything about Elementor or Happy Addons, rather we’ll show the tutorial now.
But before starting, let’s shortly know what you’ll be needing for website designing drill:
- A WordPress site
- Elementor
- Happy Addons
- Envato Elements (Optional)
Do make sure that you’ve successfully installed WordPress, Elementor & Happy Addons. If you’ve already done it, then only follow the below instructions step by step.
Note: This is a tutorial for a portfolio site. So whatever you are, blogger, digital marketer, or any agency, just learn the process and apply them on your existing WordPress site.
Add a Website Header with Elementor
The header is the most important part of any website as the most conversion happens here. In the header, we can notice some general things, for example, website navigation pages, social icons, search button, logo, company tagline, or sometimes a little bit about the company, etc.
So to create this header using Elementor is super easy. You can easily create a stunning header for your website following the tutorial below.
Using First Website Template
Next, a website template is the most important thing after the header. A template will decide how your website looks like be. Fortunately, in the Elementor template gallery, you can find different types of templates. And you can choose the suitable one for your website.
However, to add a template to design a website, click on the ‘Folder’ like button.
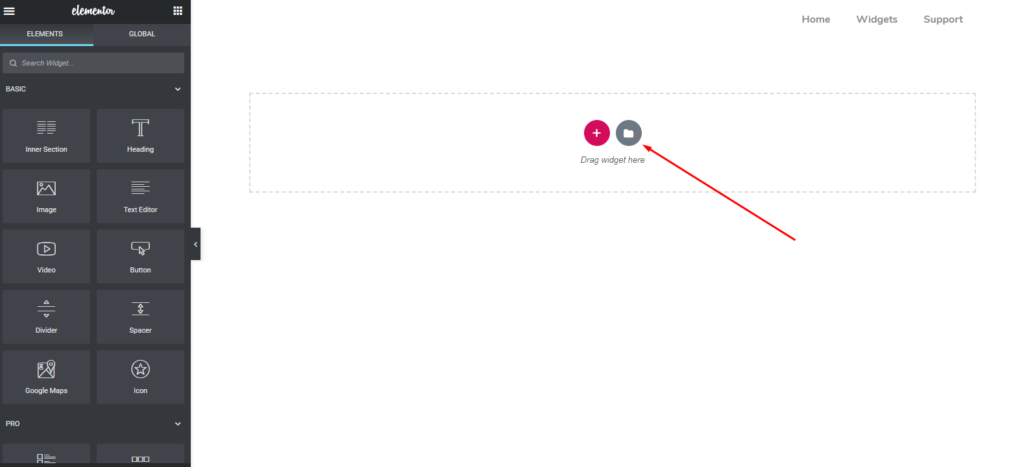
From here, you can see there are so many in-built templates are available here. And you can easily choose the best one for you. Again, if you don’t want the full template, you can choose a single part for your website.
To do that, you can click on the ‘blocks’ option. And there you’ll find different things such as header, footer, hero banner, contact form, map, etc.
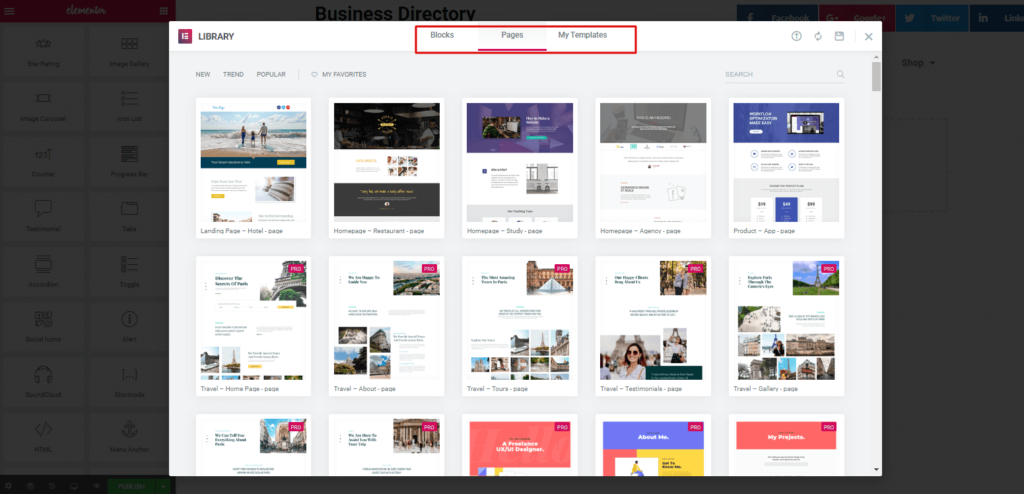
Related Article: Choose the right template for Elementor
So after choosing the suitable template, your entire template will be looking like the following one.
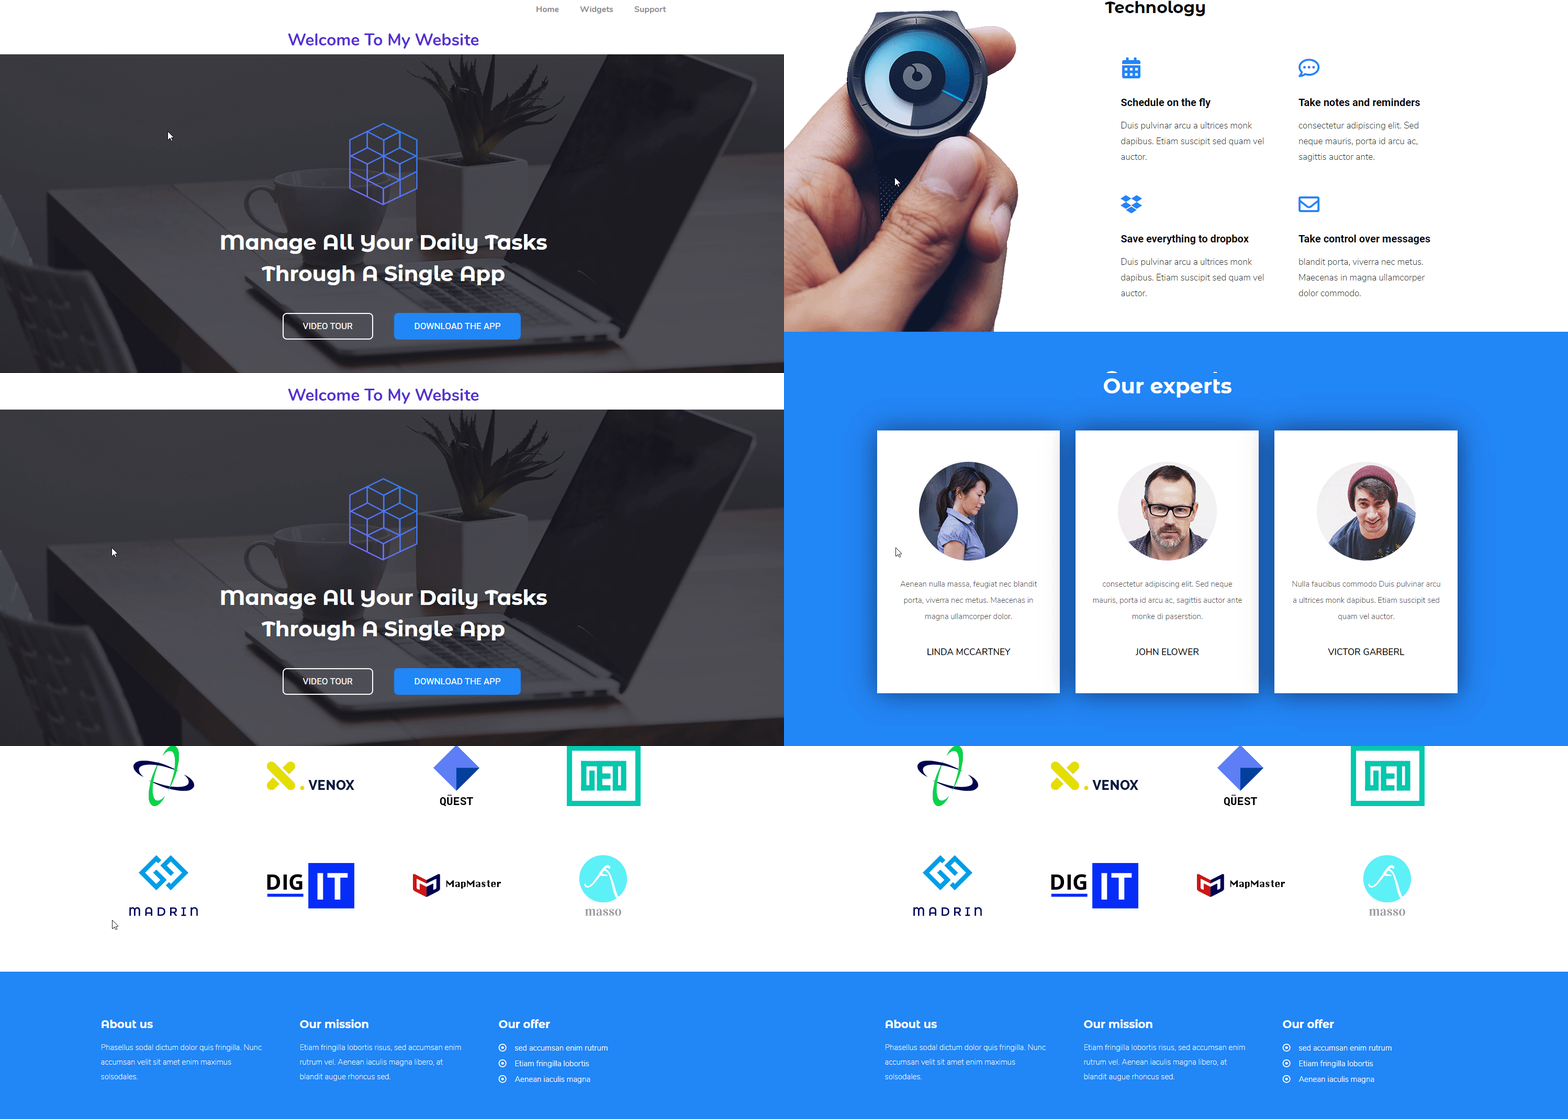
Note: Suppose you’re a project manager. And you want to design a personal website with Elementor that looks like a professional one. Keeping in mind it, we’ll try to design according to that concept.
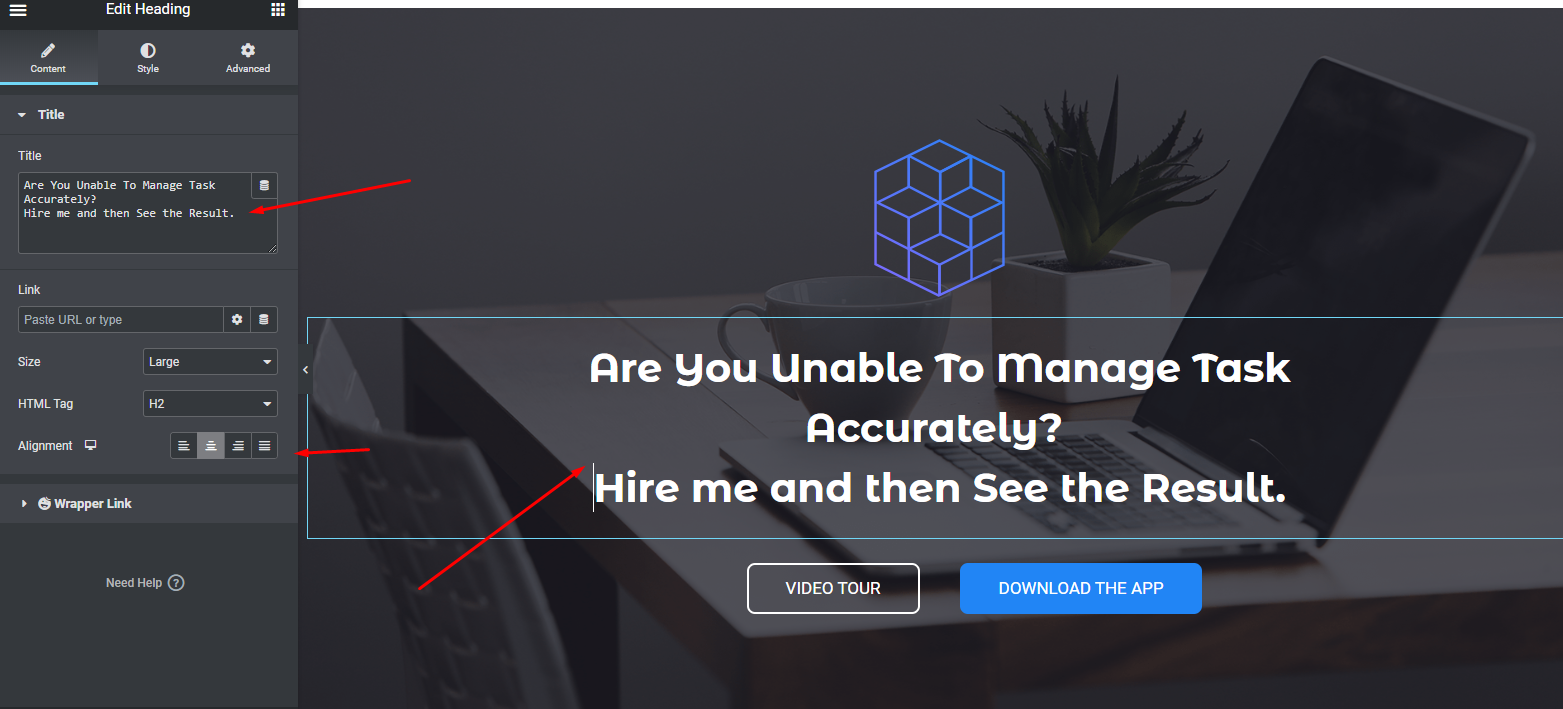
Customizing the Header Part of Elementor Site
In the header part of this template, you can see a header text. So you can edit it and give a fresh tagline of yourself. From the left sidebar, you can see the options are available to customize more.
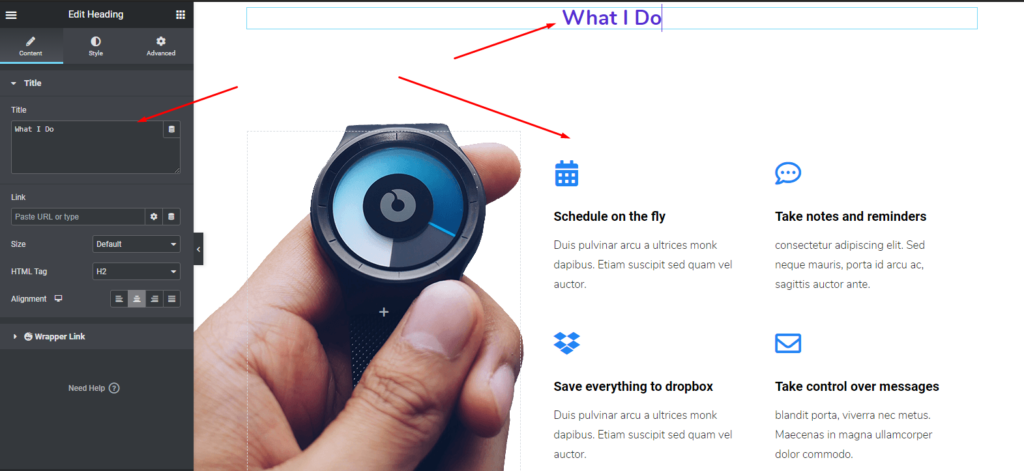
Editing ‘About Me’ or ‘What I Do’
In the same way, you can customize this part. Actually different templates have different ways to organize the content. So you have to think about what you need.
However, in the next section, just put the title ‘About Me‘ or ‘What I do‘. And now you can customize the entire portion by giving your actual data.
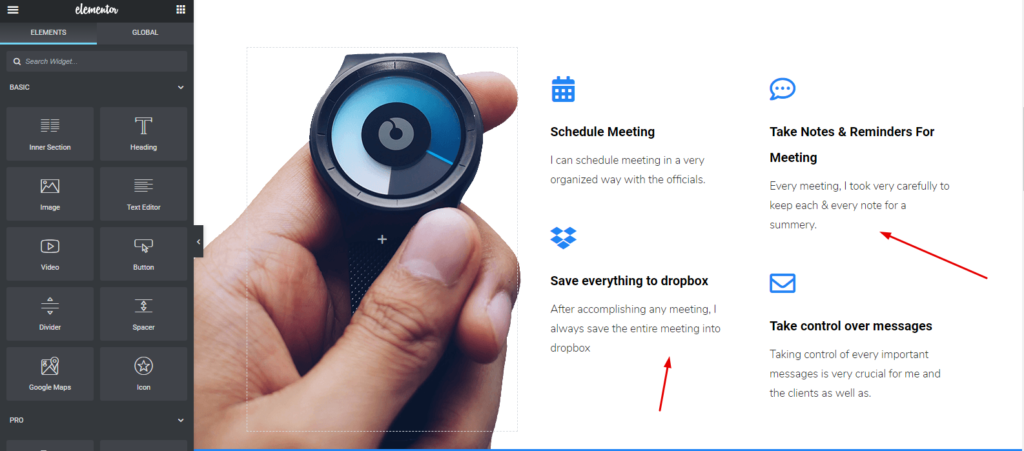
Now its time to customize inside the section. All you need to do is, just click each part and them customize it.
Customizing Testimonial Section of Your Elementor Site
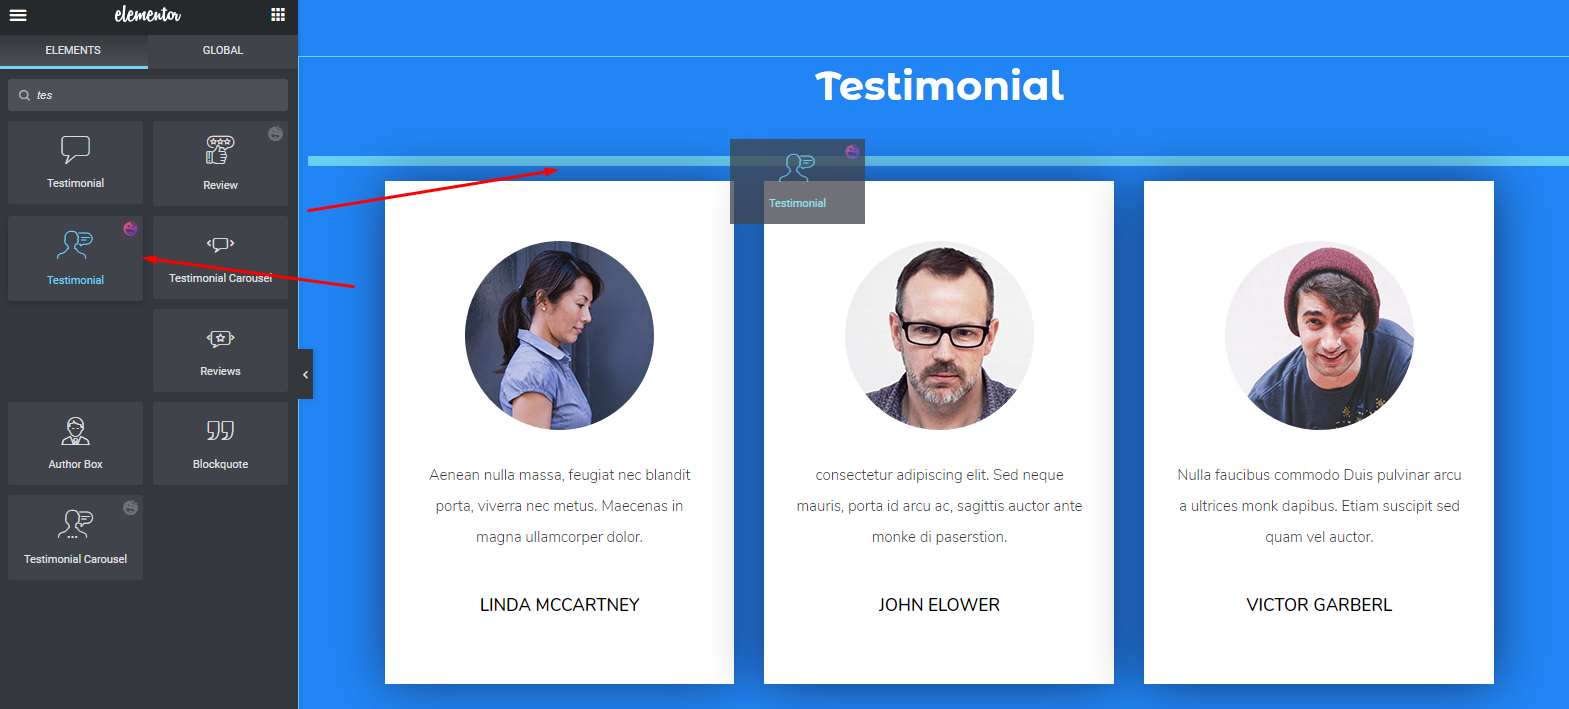
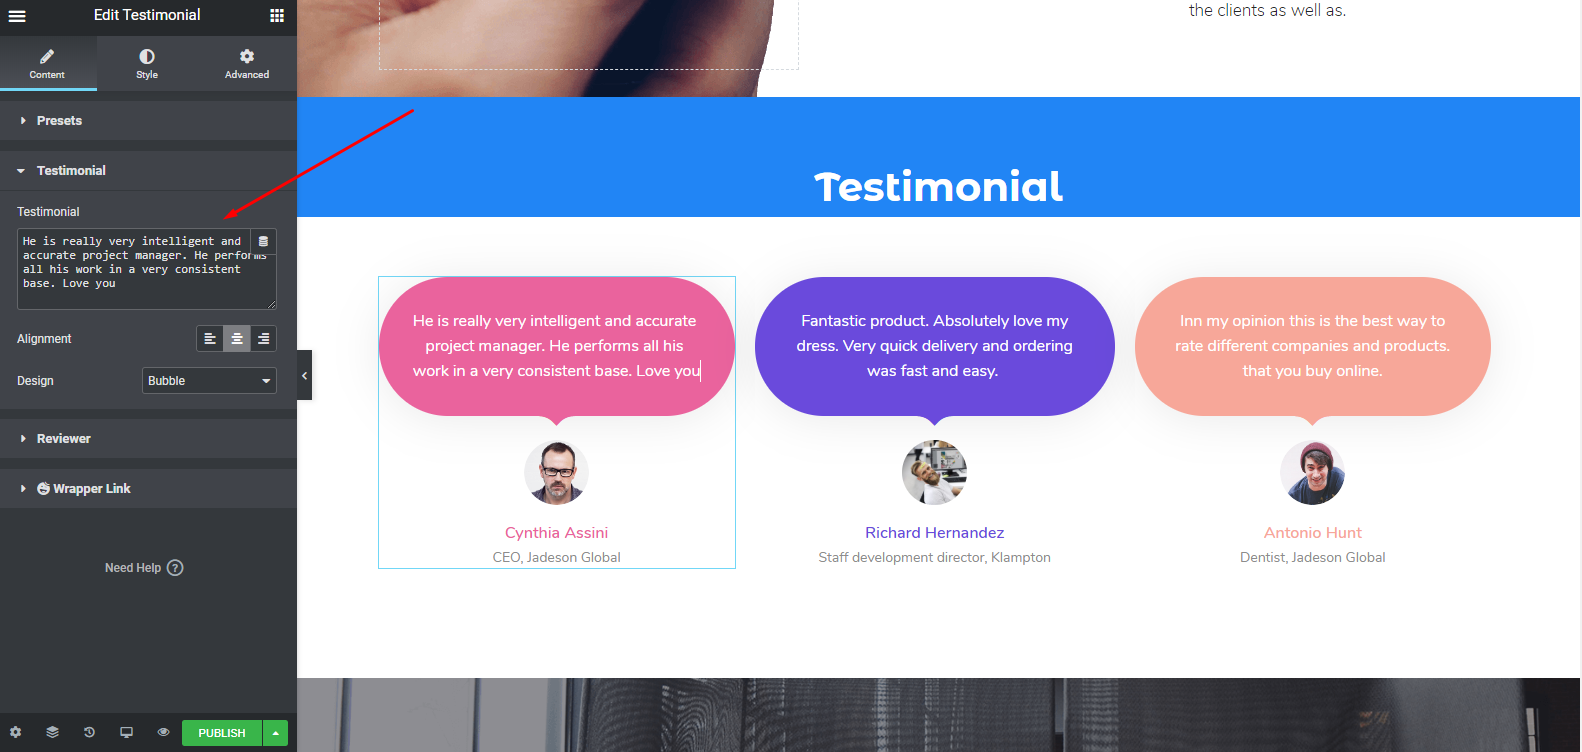
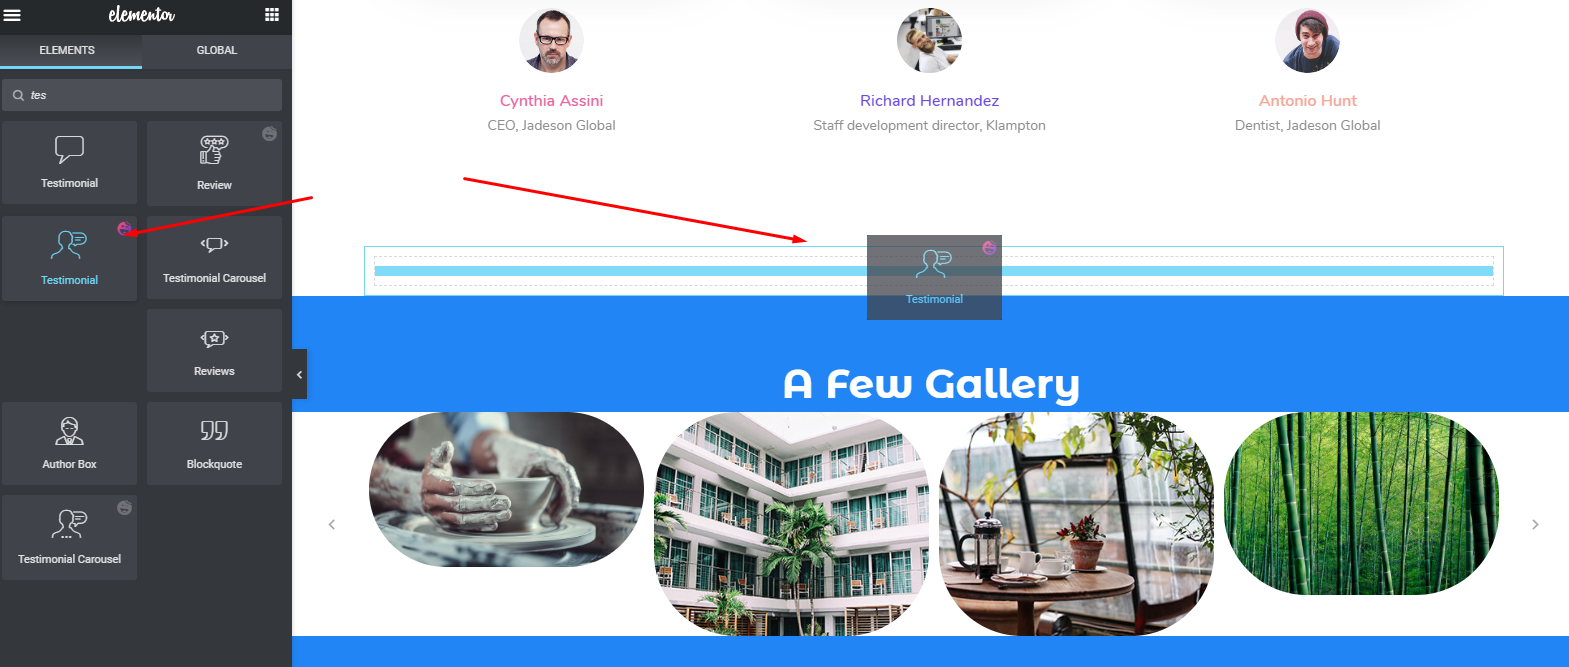
To edit this section, either you can customize the existing section or you can use Happy Addons Testimonial widget. So let’s see how to use it.
First, drag the widget from the left sidebar. And put in on the marked area.
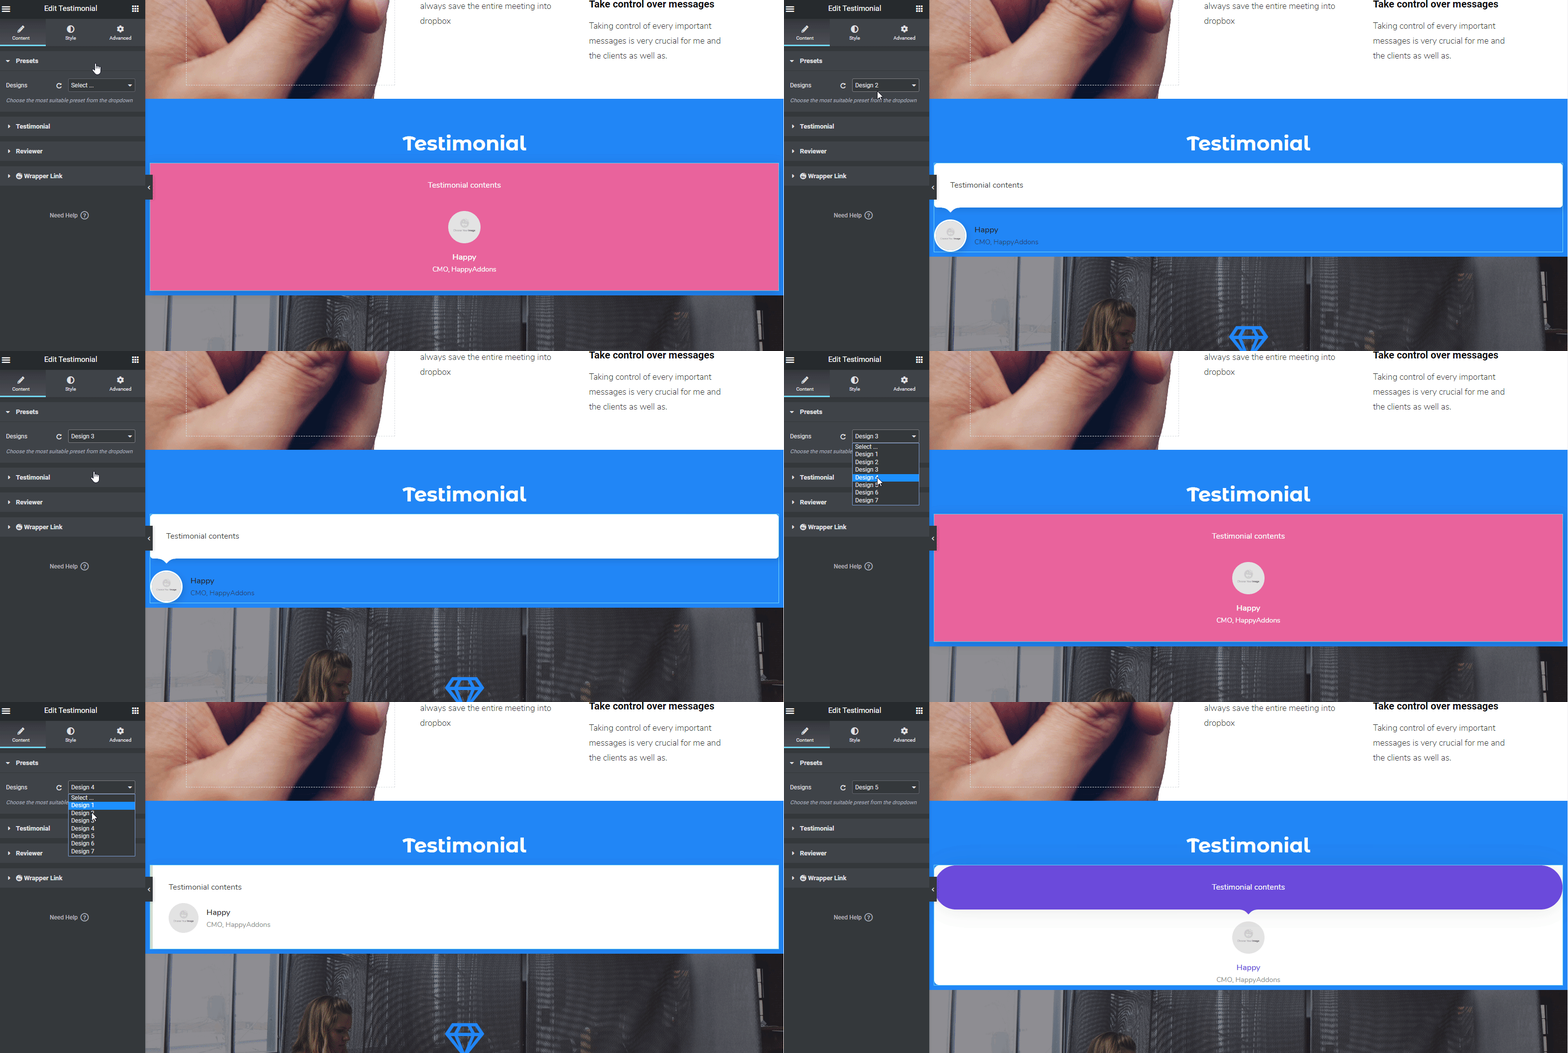
Then select the preset or pre-created design for the section. Now you can see there are different in-built designs are available to use. Just select anyone you like. It will automatically appear on the screen.
After using preset and inserting data into the widget, your design will look like the following. And you’ll able to edit, testimonial from your client, reviewer photo, his/her designation, etc.
However, you can look at the documentation of ‘Testimonial Widget’ to know more precisely. Or you can look at the following video to know how to use this widget.
Adding Projects or Gallery
In this case, we’ve selected the ‘Image Carousel‘ widget of Happy Addons. This widget will let you add your preferred images in a very lucrative way.
Like other widgets of Happy Addons or Elementor, just drag the widget and paste it to the marked area. And then customize it according to your website or design sense. Using this widget will not only beautify your website but also improve the website design as well.
To learn more about ‘Image Carousel’ widget read our documentation or watch the following video tutorial.
Customizing ‘My Clients’ Part
We haven’t change the existing template design. We are just customizing each part and utilizing Elementor and Happy Addons. So this part also remains the same.
To edit this section, we’ll add the ‘Logo Grid‘ widget like the same way. This widget will help you to showcase your personal client’s logos as completed projects. Thus it will increase more beauty of your website.
To add this widget, simply select the widget and drag it to the marked area. That’s it.
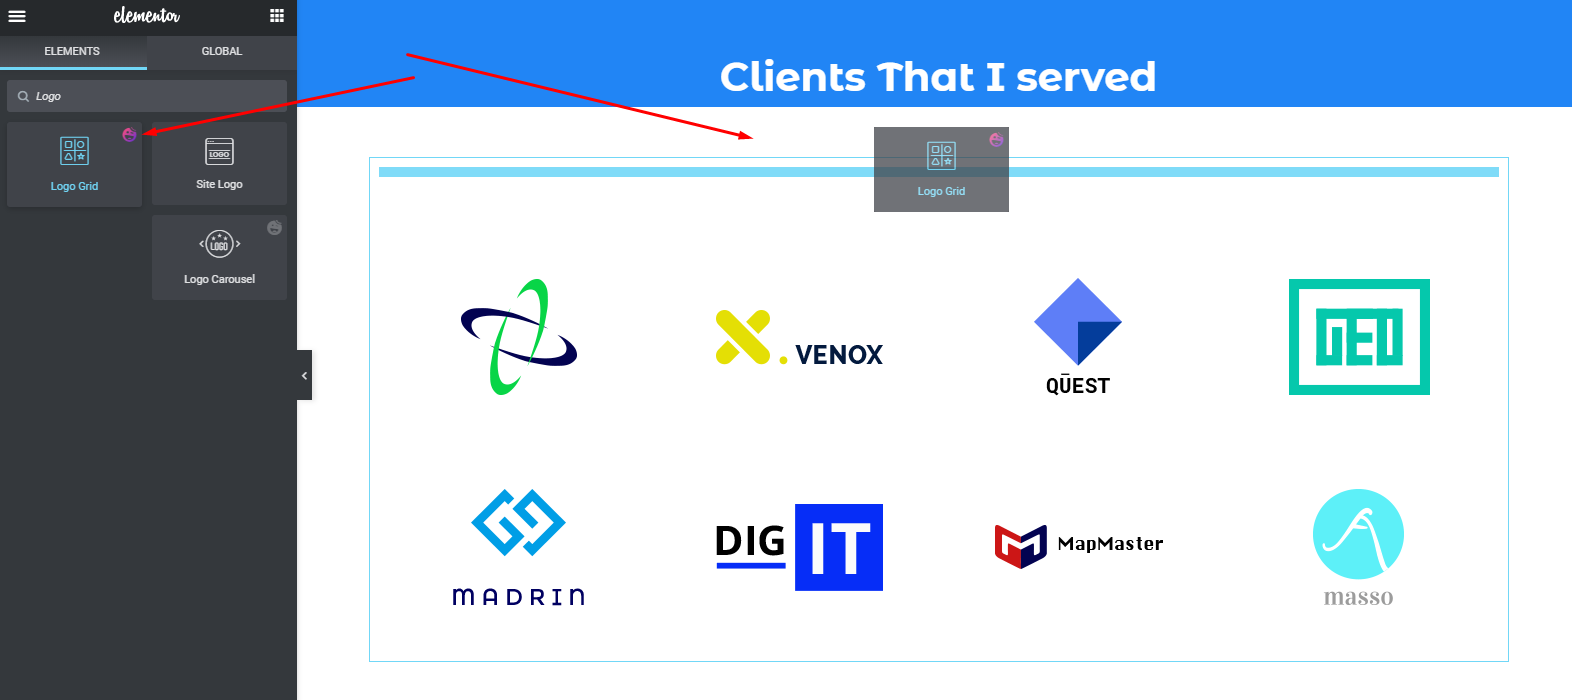
After that, you’ll able to see the widget is ready. Now just edit the widget according to your website theme. Here is the sample, and you can also apply the preset on this widget to get the best-suited design for your website.
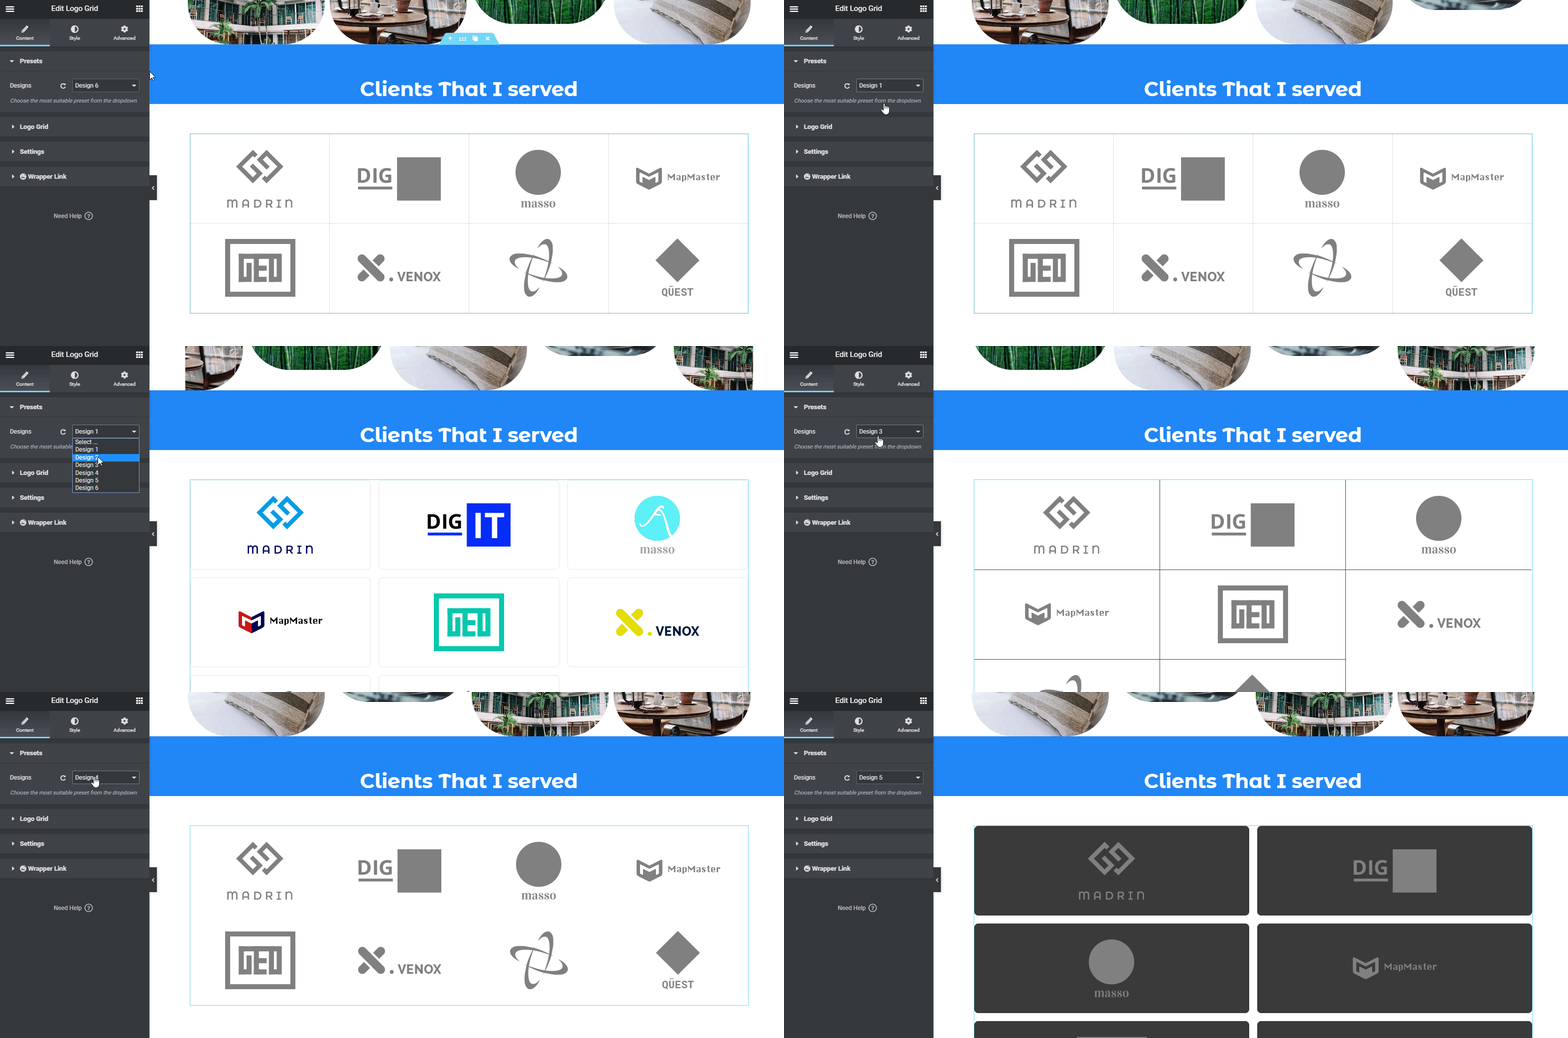
If you still find it difficult, you can check out our documentation of the ‘Logo Grid‘ widget of Happy Addons. Or watch the following video tutorial.
Customizing Footer Section
Finally, you’re almost done with your website design. This section is very easy to customize. Just click on each & every section, and then give the information. That’s it!

However, if you want you can use another widget of Happy Addons in the footer section to make it more attractive. And it’s ‘Feature List‘ widget. But it’s a pro widget of Happy Addons.
So after utilizing it, it will look like the following one.
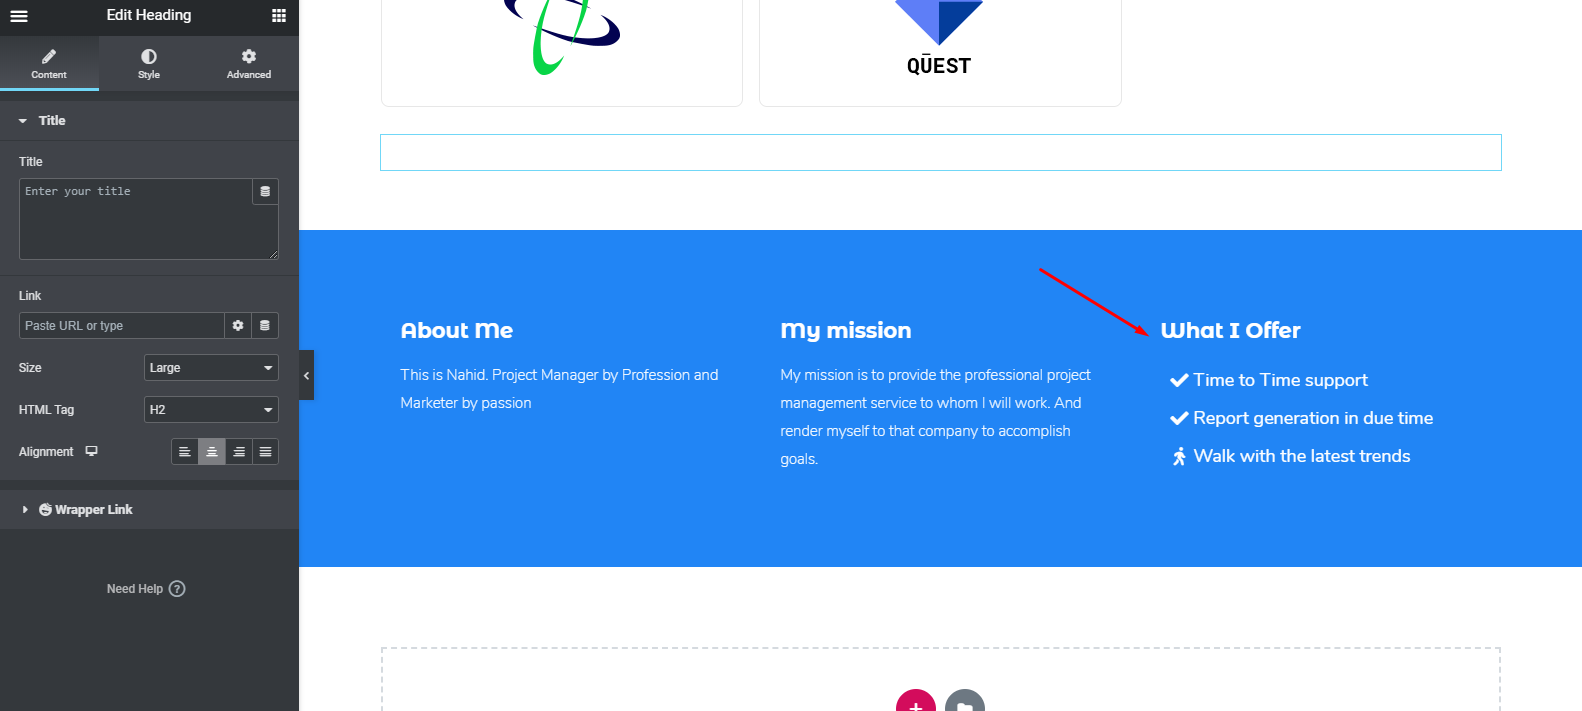
Check out the ‘Feature List’ widget documentation or watch the following video tutorial to know more about this widget.
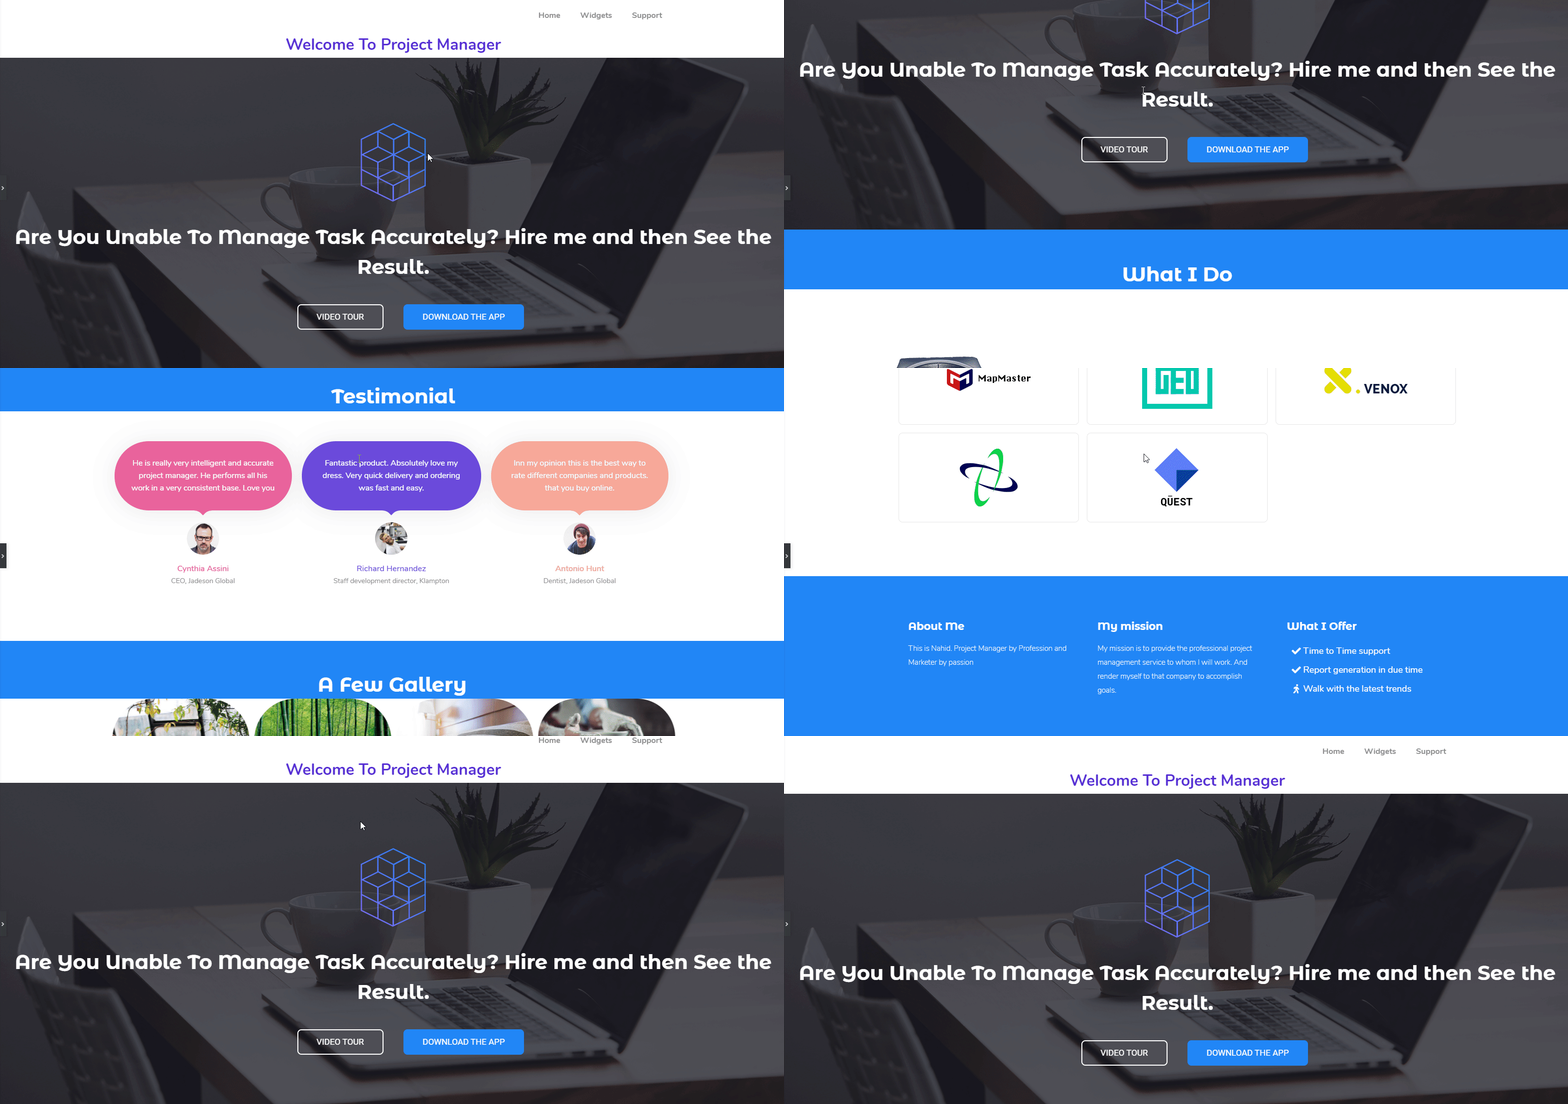
Final Preview of the Entire Website
So after employing all the methods perfectly, you may preview your final output like it can be seen below. And this is how to create a website with Elementor and Happy Addons collaboratively.
Related Article: Is It wise to Use Happy Addons along with Elementor.
More HappyAddons Widgets & Features You Should Give a Check
Well, throughout this article you may get something useful and interesting things so far. And also we’ve shown some widgets of Happy Addons in the tutorial part.
But now, we’re going to share more interesting widgets & features of Happy Addons shortly. And we hope that you’ll enjoy watching it.
So let’s get started:
Widgets You Can Use for Website Design
- Fun Factor Widget: It’s like the Elementor Counter Widget. But you can display all your number related designs with this widget.
- Post List: If you want to showcase your most important or informative posts to any web page, you can do that using this widget.
- Post Tab: This widget will allow you to display posts in multiple tabs. Extremely useful to display grouped contents or related content.
- News Ticker: Display your breaking news headlines or important post title in a nice scrolling way with lots of stunning styles.
- Flip Box (Pro): If you like comparison, then this widget will help you. Yes, it can deliver messages in a beautiful way with before and after-effects.
- Polar Area Chart (Pro): Display your data in different ways. Even in a more organized & animated way.
- Radar Chart (Pro): Visualize your data in different ways; each of them animated and customizable.
- Animated Text (Pro): Using this widget, you can showcase your website taglines or any words. And this will help you display them in an animated way.
Besides, you will get a number of useful and unique widgets with Happy Elementor Addons.
Features You Can Utilize For Website Design
- Floating Effect: Using this feature, you can create stunning animations for any Elementor widget using this feature. Translate, Rotate, or Scale whatever you want.
- Preset: Display any widget in a separate style from a collection of pre-defined collection of designs in a minute using our preset engine
- Live Copy: Tired of designing? Then this widget can make you relief. Yes, you can directly copy the core design and paste it on your site without any hassle.
- Unlimited Nesting: Sometimes it’s very difficult to create or do more things with the stock Elementor section. In that case, this feature will help you to create an unlimited section inside the mother section.
- Display Condition: This feature will help you to display your content depending on different kinds of a condition like Browser, Operating System, Date Range, Time and many more
- Grid Layout: Make your design more Pixel Perfect with this Happy Grid Layout Feature.
So these outstanding features you’ll get with Happy Addons. And using these you can effortlessly empower Elementor with ease.
Related Article: Learn More About Happy Addons Features (Free & Pro)
Are You Ready to Build a Professional Website
So, after a long & elaborate discussion, now you may know how to create a website with Elementor. Right? If your answer is yes, then without spending a single moment please get yourself ready to create a website.
Anyways, we will not prolong our words saying the same thing again and again. Rather we’ll tell you to take the proper initiative at the right time utilizing Elementor & Happy Addons collaboratively.
Still, have some confusion or queries? Drop a line in the comment section below. We will attend you shortly.





One Response