If you are looking for advanced tooltip options for Elementor, then you are in the right place. HappyAddons Advanced Tooltip feature comes with amazing features within the tooltip option. Let’s see what else you can do with this tooltip,
- You can add text tooltip
- You can use images as tooltips
- Also use HTML tags in the tooltips
- Tooltips can be added to any elements of Elementor.
Here you will find a detailed idea on how to add a tooltip to your Elementor site,
How to use Advanced Elementor Tooltips
Let’s jump on the tutorial,
Required tools,
- Elementor Free
- HappyAddons Free (v 3.0)
Step 01: Introducing Advacned Tooltips for Elementor Feature
First of all, our tooltip is a feature, not a widget. If you want to add a tooltip to any element, you have to navigate here,
Edit Element > Go to Advanced Tab from Elementor Side Bar> Scroll down > Unfold Happy Tooltip> Switched to active the tooltip feature.
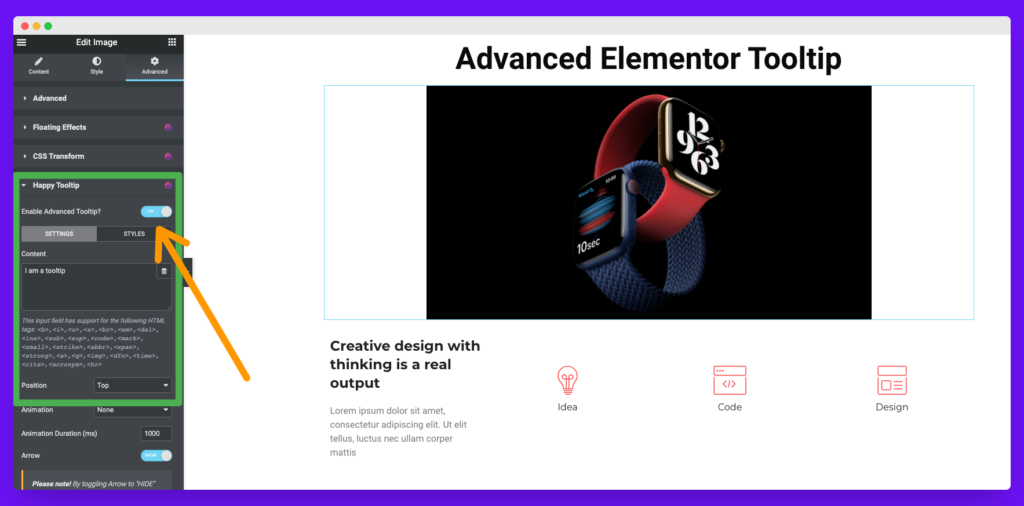
After enabling the tooltip feature, you will get two new tabs, as you can see in the above image. From these two tabs, you have to manage the Advanced Elementor tooltips.
- Content Tab: From this tab you can manage write the tooltip text, position of the tooltips, animation, animation duration, arow for the tooltip. Later on you will get the detailed idea of these features.
- Style Tab: From the style tab you will be able to design the tooltip. Also you can add image for your tooltip from that section. We will show the detailed method here.
Step 02: How to add tooltip texts
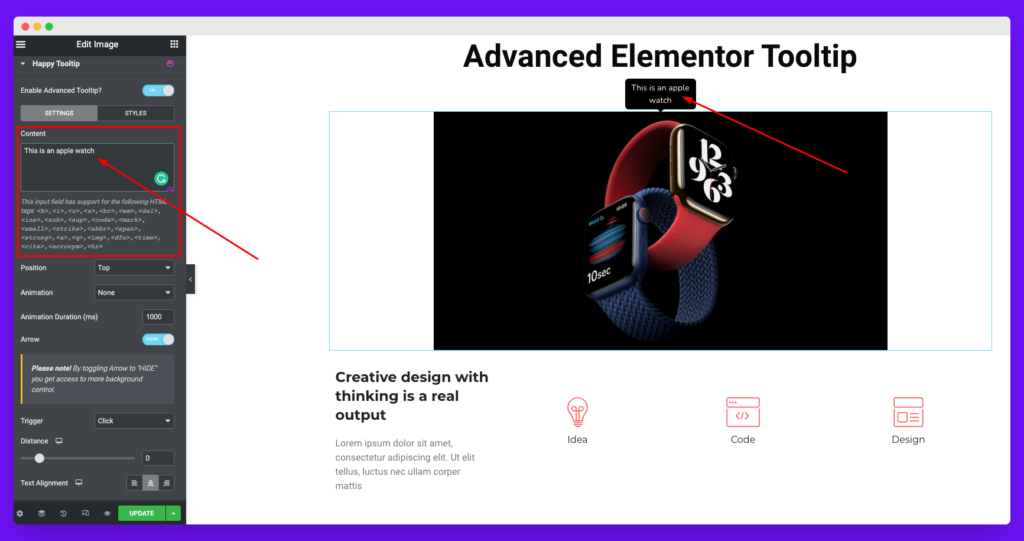
From the content section, you can add your desired text for your tooltip. Also, you can use HTML tags to give extra options to your tooltip texts.
Here are HTML tags that you can use for the tooltip texts,
<b>,<i>,<u>,<s>,<br>,<em>,<del>,<ins>,<sub>,<sup>,<code>,<mark>,<small>,<strike>,<abbr>,<span>,<strong>,<a>,<q>,<img>,<dfn>,<time>,<cite>,<acronym>,<hr>How to add dytamic tags to the tooltip content
We have added dynamic support for the tooltip contents. Unfortunately, there are some limitations as we are trying to show data by using the mark-up process, so it’s challenging for all of us to support all the tags.
We are not supporting the ShortCode dynamic tag.
And another limitation is, the dynamic data will be reflected in the preview mode, not in the editing mode.
How to change the position of the elementor tooltip
Immediately after the content section, you will get the position control settings. From that part, you will be able to change the positions of the tooltips according to your need. By default, it will be on the top, as you can see in the above picture. But it seems messy. So we have changed it right here.
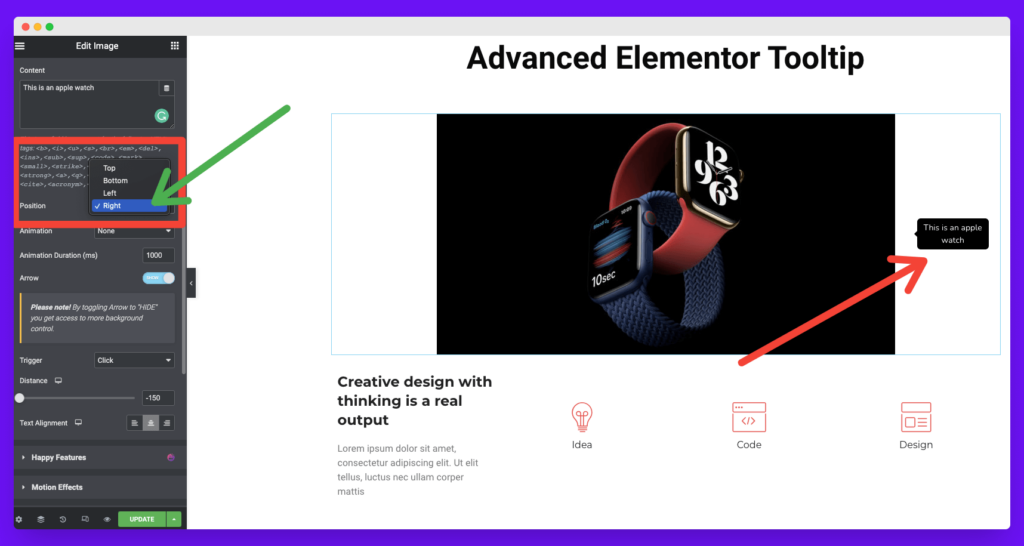
As you may find, you will get four options to change your tooltip position. Those are,
- Set it Top
- Set it Bottom
- Set it Left
- Set it Right
How to add annimation to the elementor tooltips
If you want to add animation to your tooltips, you have to toggle the animation section of the tooltip settings tab. We have eight types of animation effects for now.
- Fade in
- Roll in
- Zoom in
- Bounce
- Slide in down
- Slide in left
- Slide in right
- Slide in up
Watch this video to get the idea.
Animation control settings:
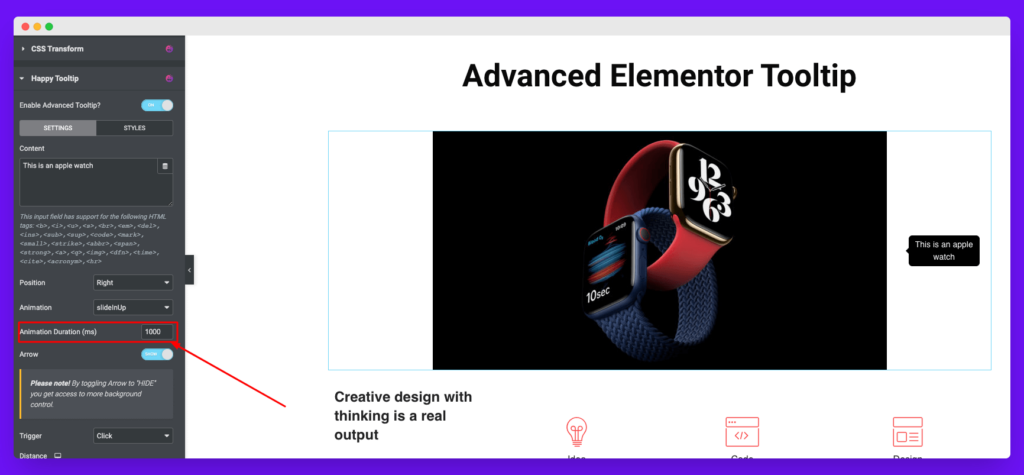
Also, you can manage animation duration for the tooltip animations. By default, we have set it to 1000ms (ms means millisecond)
Adding or Removing the Arrow of the tooltip
Some people called it a tooltip navigation arrow or tooltip pointer. By default, the tooltip arrow will be enabled. But if you want to deactivate it, there is an option for it. Watch this video,
Note: If you want to add an image as your tooltip, then you need to turn off this feature. Otherwise, the image adding option will not be available.
How to trigger Tooltip
Trigger means how your tooltip will appear. We have two options,
- Click
- Hover
How to add gap between element and tooltip
If you want to add an extra gap between your tooltip and element, you can use our distance setting. You can drag not more than -100 px to 500 px. But if you need more, then you can set manual value as much as you need. For example, to make it perfect, I have used -150px. Watch the short clip,
How to align text of the tooltip
If you want to align the text of your tooltip, then you can follow this method.
Step 03: How to style Elementor Tooltip
Now comes the step, how you can style your Elementor Tooltip. To give a custom look to your tooltip, you have to head over to the tooltip’s styles tab.
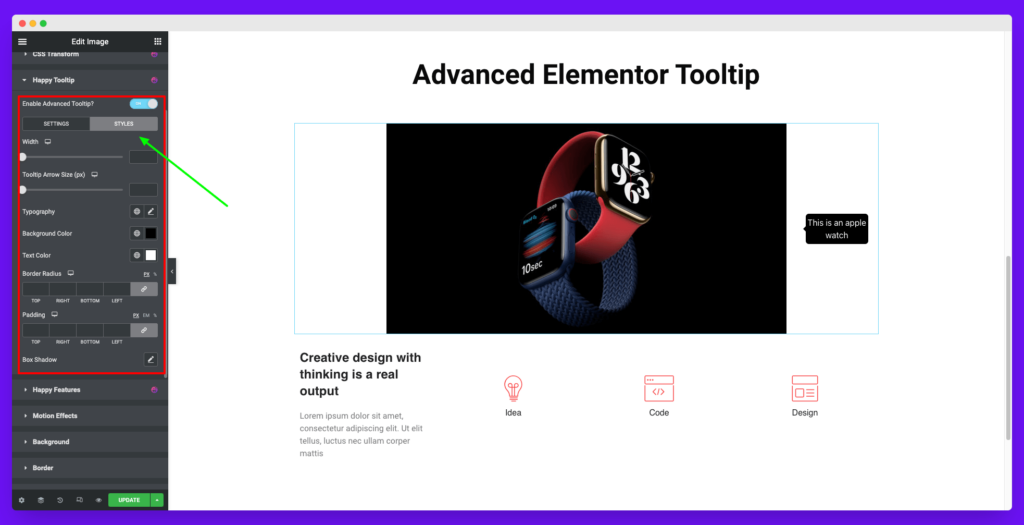
How to increase the width of the tooltip
If you plan to make your tooltip wider, you have to navigate into the width settings panel. Then, drag the line to adjust your desired measurement.
How to increase the size of the tooltip arrow
You can increase or decrease the tooltip arrow size manually. You can handle it from the Tooltip Arrow size measurement section. Drag it and fix it.
Giving different typography style to tooltips
From the typography setting of the tooltip, you can give a different look to your tooltip texts. And you will get all the options of the Elementor Typography settings.
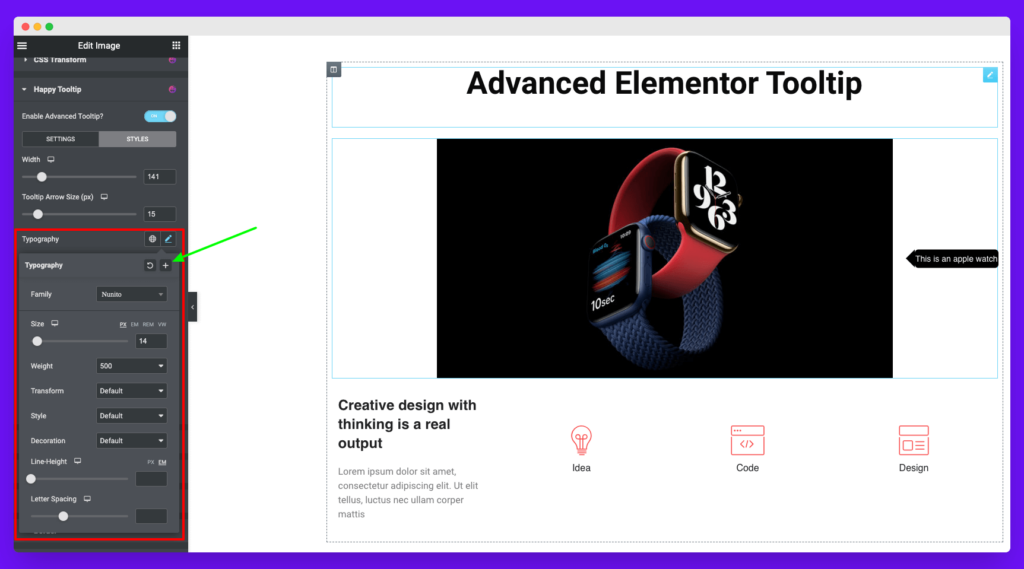
Adding color to tooltip background and tooltip text
You have the full freedom to change the tooltip background color and the text color. It’s the most common styling method. You can manage it from the tooltip color options.
Giving extra border radius to the tooltip
By default, we have added the best-fitted border radius for the tooltip. But you have the flexibility to change or improve it. From the border-radius setting panel, you can manage it.
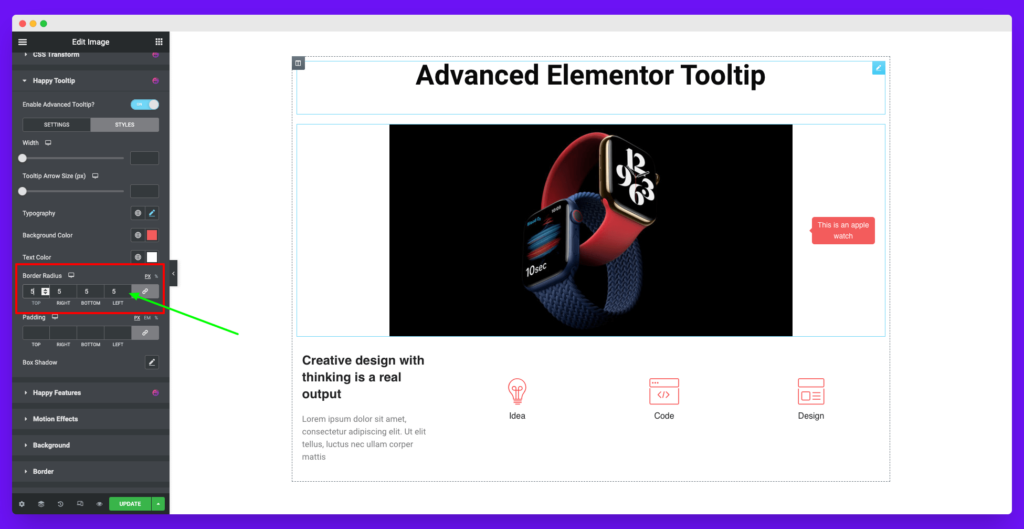
How to add box shadow to the tooltip
You can easily add box-shadow to your tooltips from the box-shadow settings.
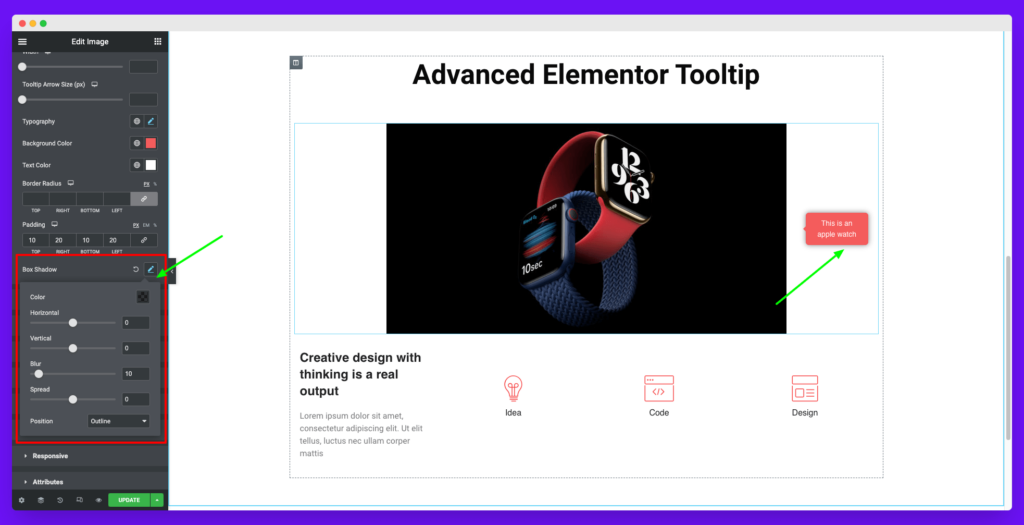
That’s all about the basic customization for the Elementor tooltip.
How to use images as Elementor tooltip
HappyAddons advance Elementor Tooltip comes with an exciting feature. You can create image tooltips for your Elementor site. Here is the process of how you can create an image tooltip with the help of Elementor and HappyAddons.
Enabling the image option first
To enable the image option, you have to disable the tooltip’s arrow from the tooltip’s setting tab. After disabling the option, you will unlock a new option in the background style of the tooltip. Check out the short clip to get a clear idea,
Adding the image and adjusting the tooltip
After disabling the arrow you will unlock the extra feature in the tooltip background styling. From that moment you can add an image or gradient color. Here is the overall idea on how you can add the image and adjust the image position. Also, you have to manage the tooltip size from the tooltip padding section.
This is how you can create an image tooltip for your Elementor Site.
Design inspiration for HappyAddons Advanced Elementor Tooltip
The Avenger video is just for clear view and music is added in video post-processing.
Thanks. ☺️
