How To Use Image Hover Effect Widget Of Happy Elementor AddOns
If you want to add lucrative hover effects to your site’s images, you can try HappyAddons Image Hover Effect Widget. It allows you to add 21 stunning hover effects to your photos to create an eye-catchy design.
Using Image Hover Effect Widget
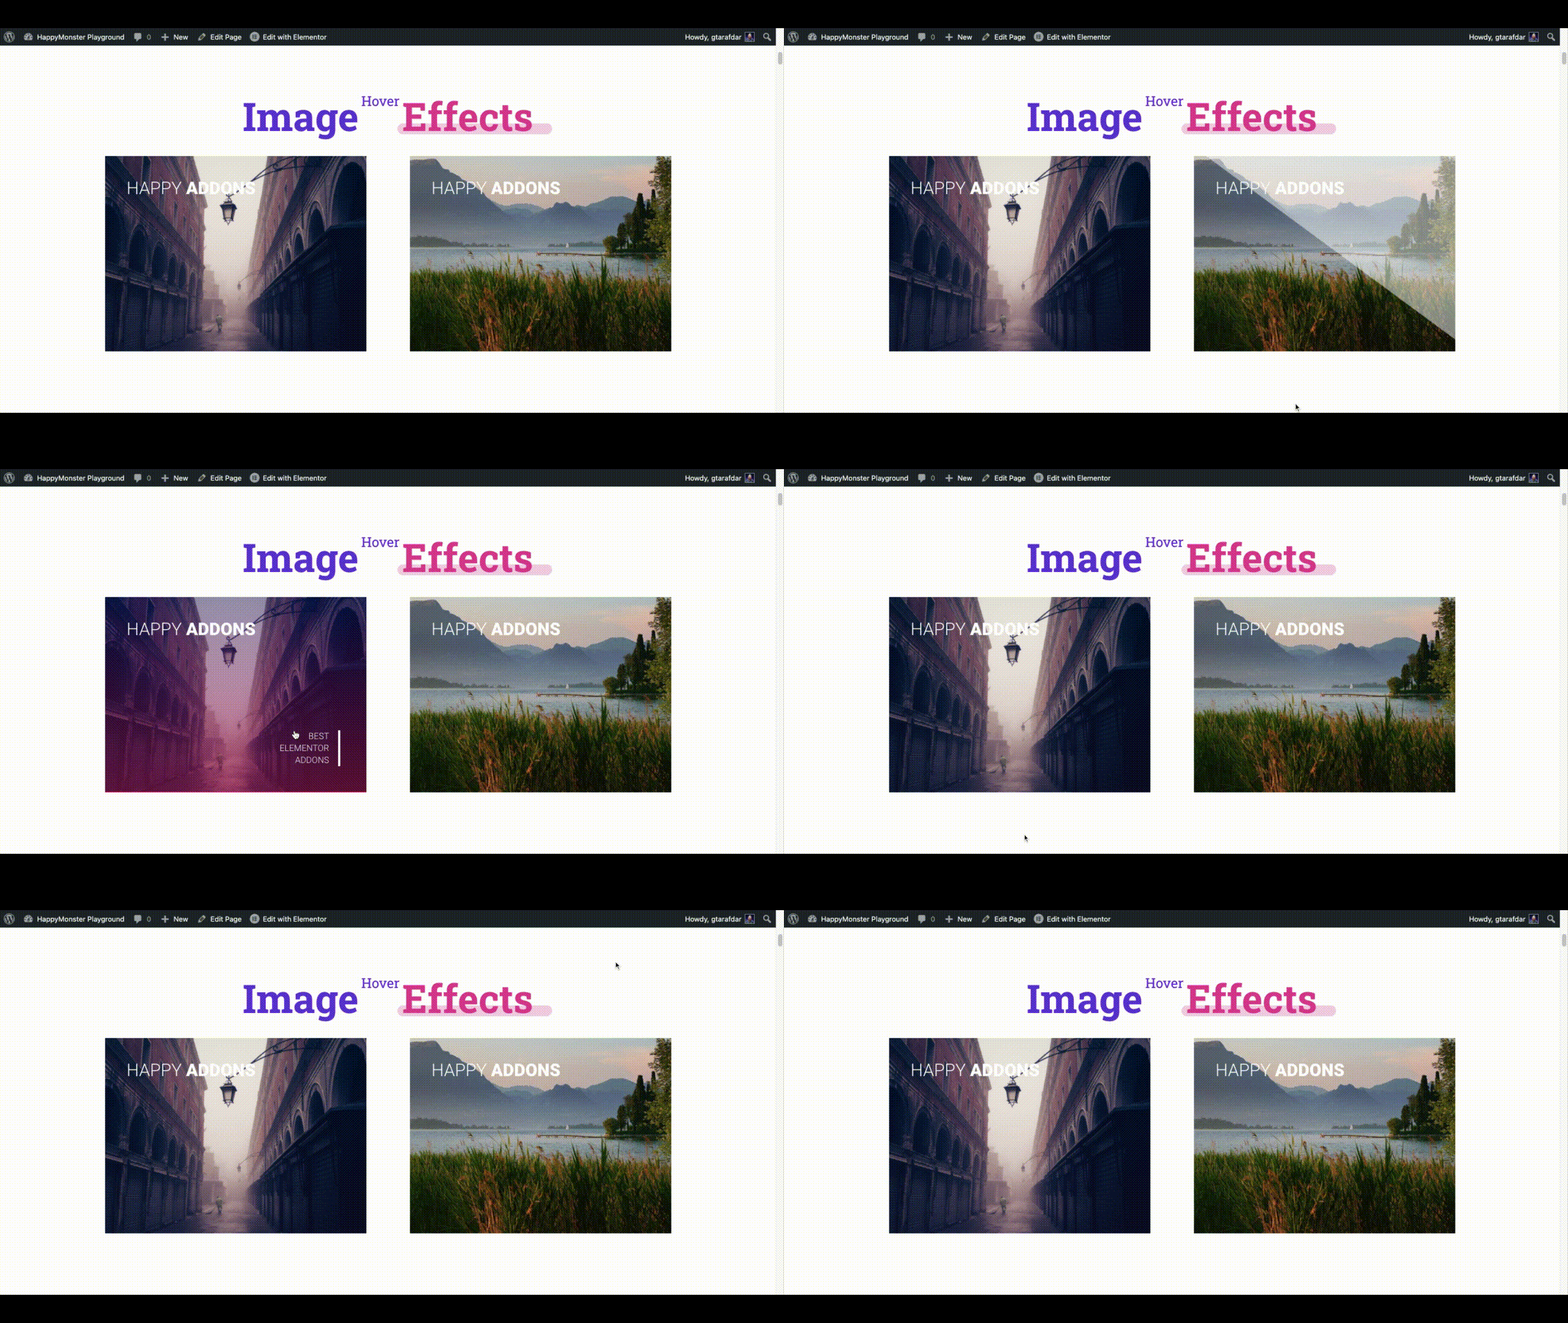
This is the glimpse of HappyAddons Image Hover Effect. You can add more effects to your images. Lets see how you can add them,
Step 01
Search on your Elementor Widget Panel with Image Hover Effect Keywords. And drag it to your canvas like way,
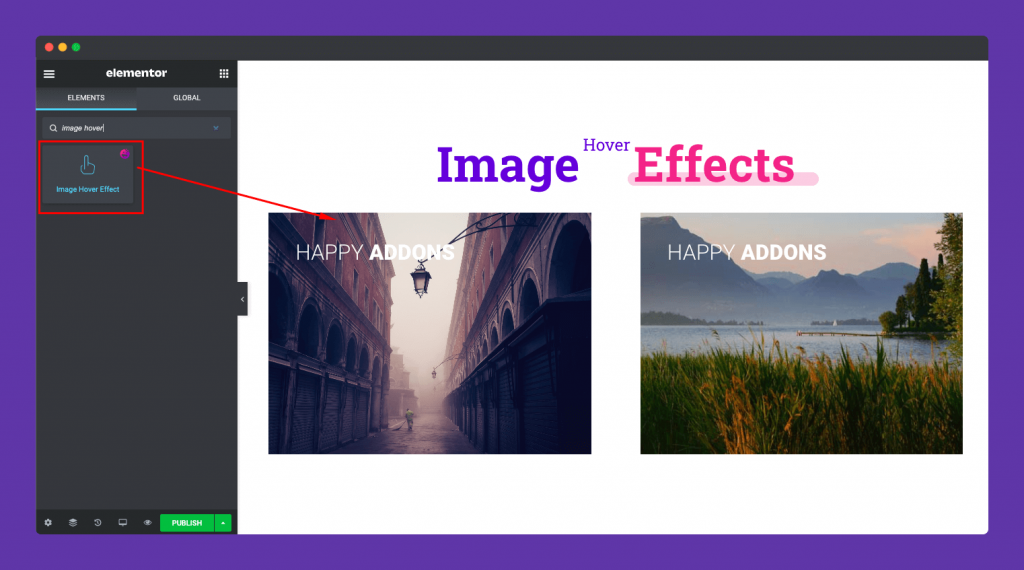
You will get this default style of the Image Hover Effect after dragging the widget.
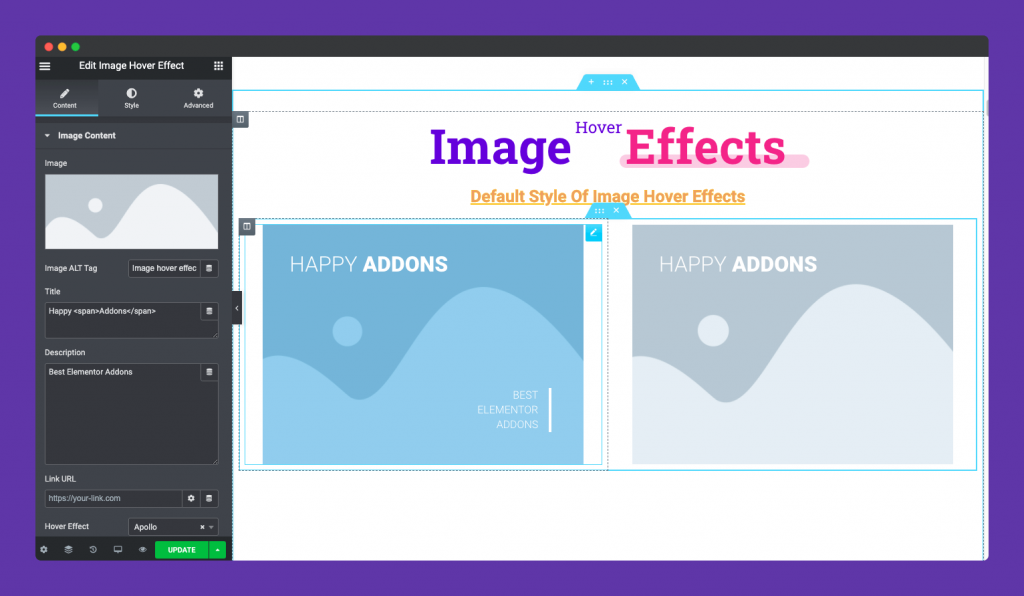
Step 02
Upload your desired image from the left side editing panel of the widget. You can upload images from your media library or from your desktop.
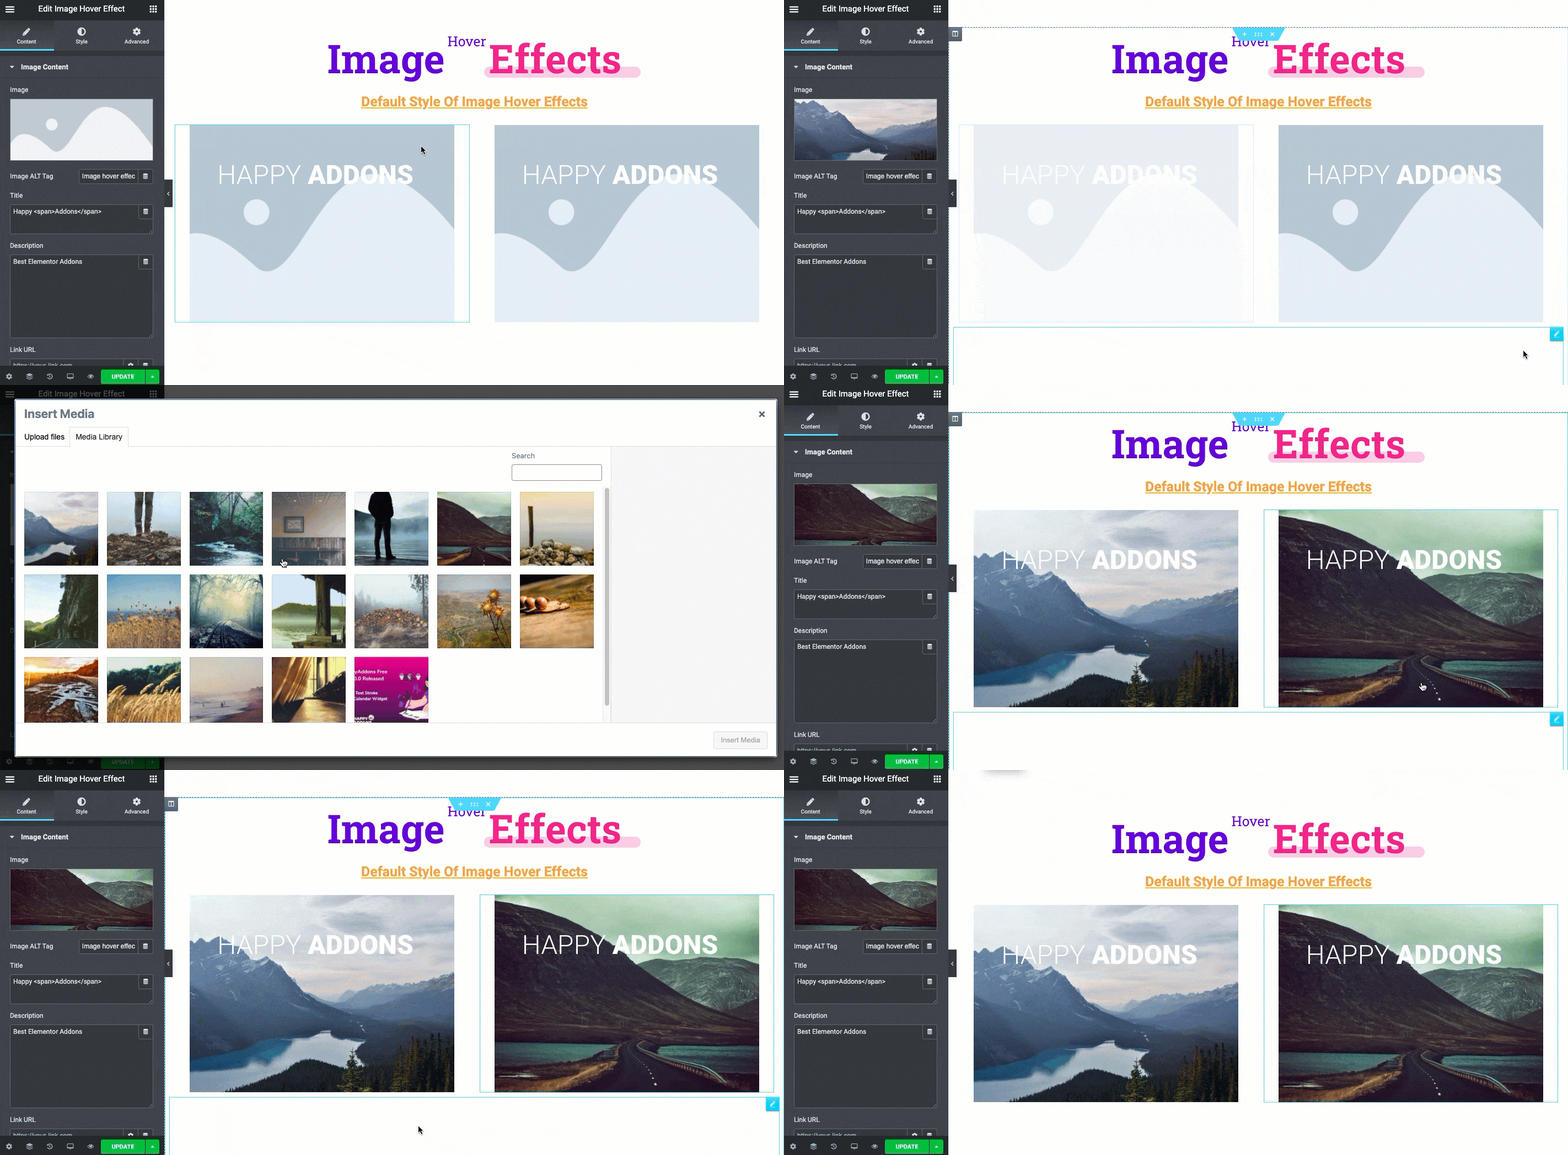
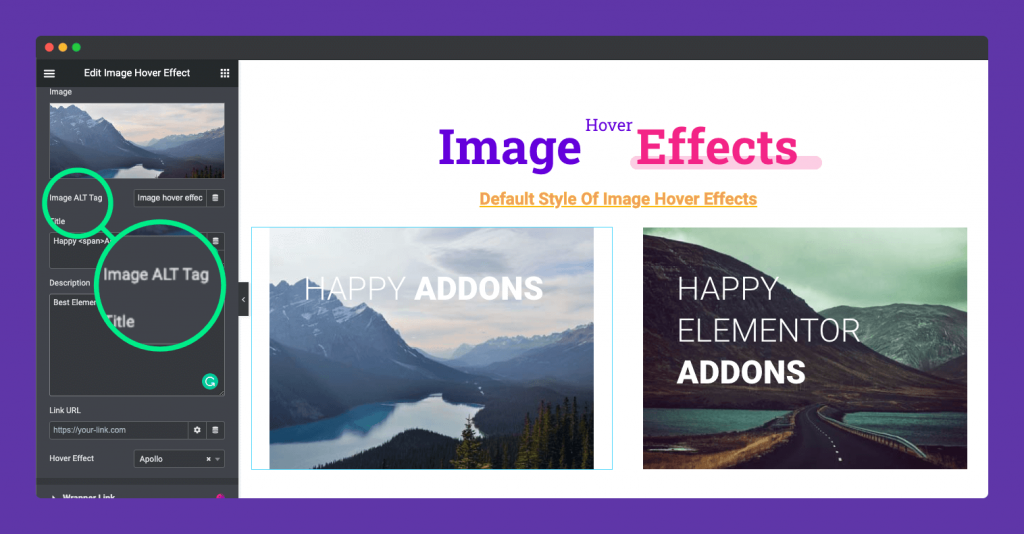
Adding Image Alter Text Directly From Your Editing Panel
Step 03
Styling The Title:
Now change the title of the Images from the Title section.
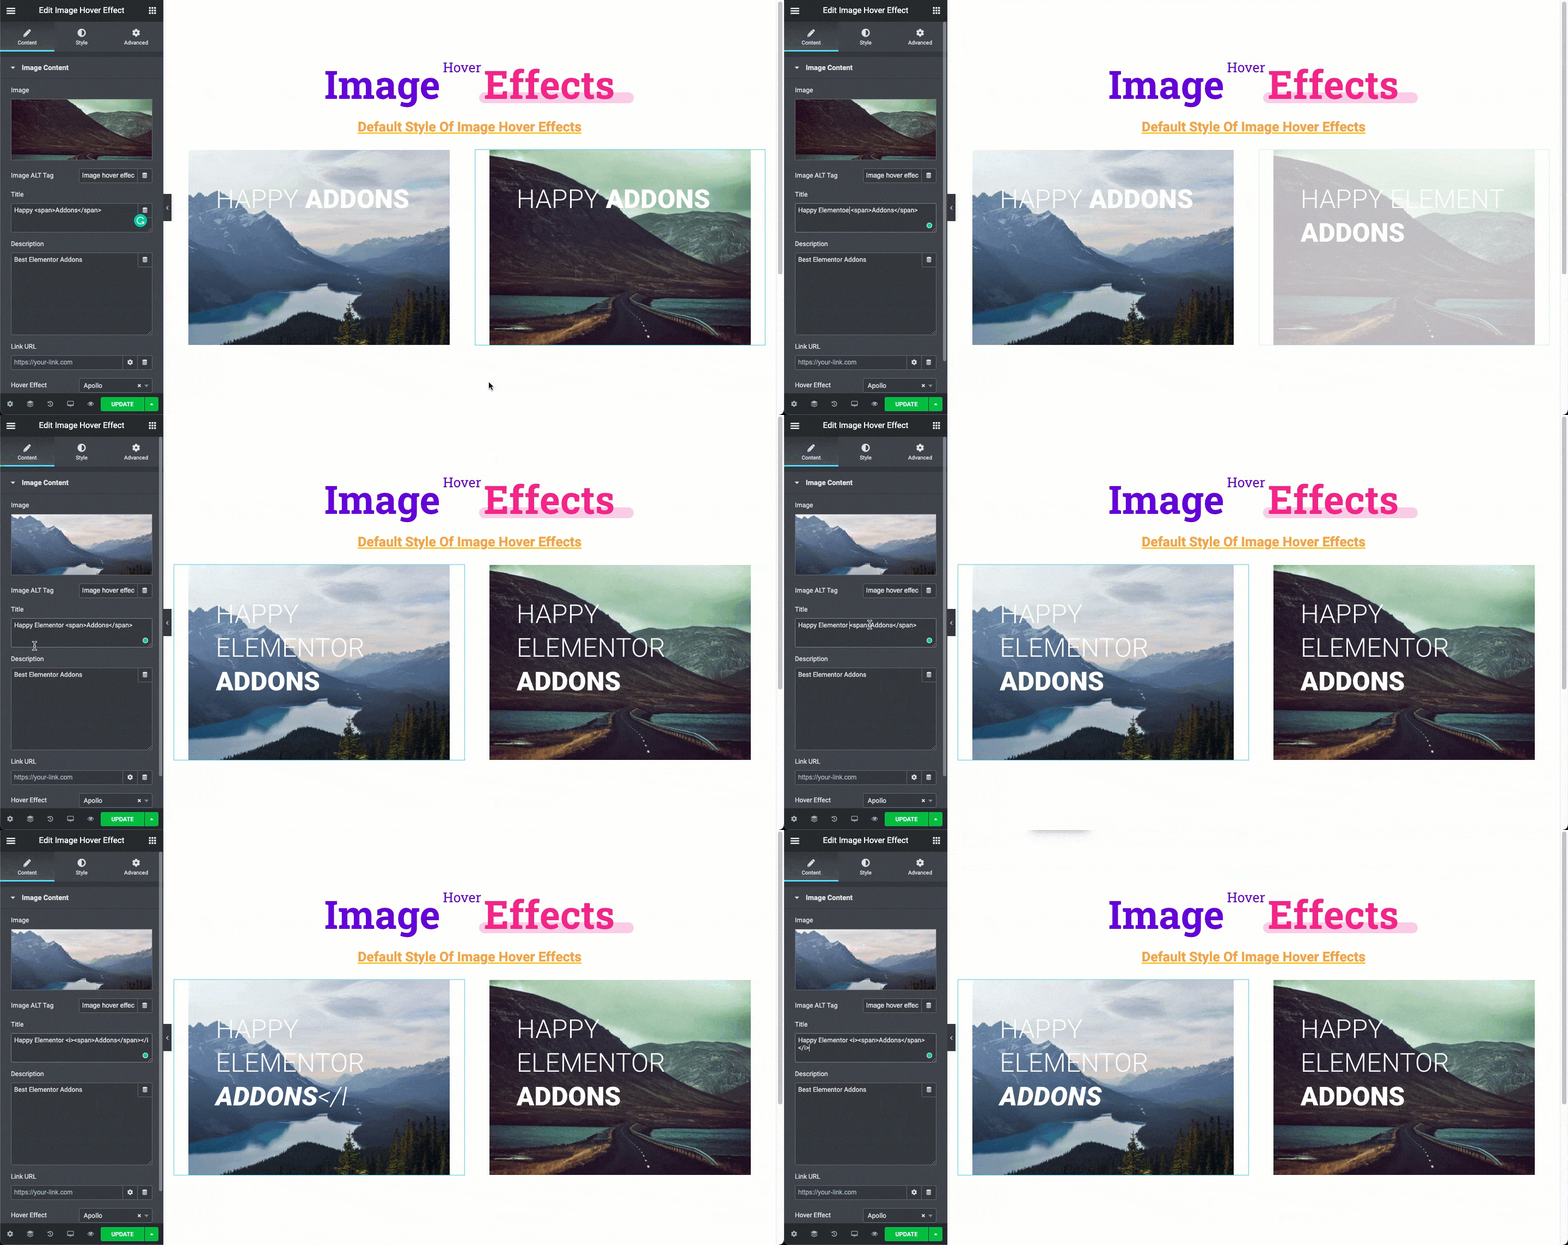
Note: As you see, you can add a special effect to your heading text. To add those effect to the title you can use HTML Tags.
As we used, <i></i> tag to make the “Addons” text in italic format.
You can find HTML tags here, w3shcool HTML Tags.
Exceptional case, use <span></span> tag to make bold your title texts. That’s why we set it as our preload text on the title section.
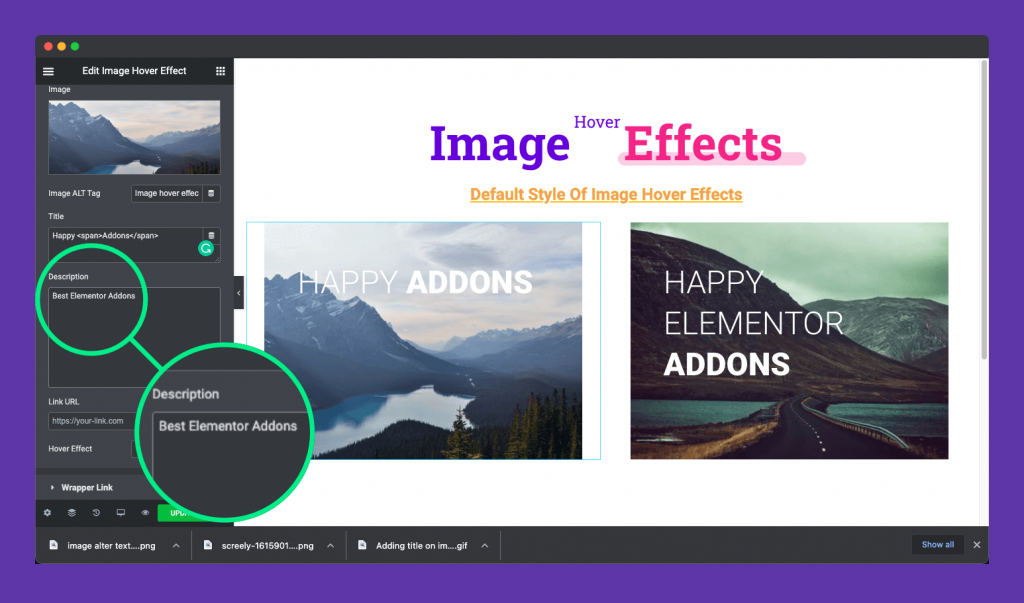
Happy <span>Addons</span>Add Description
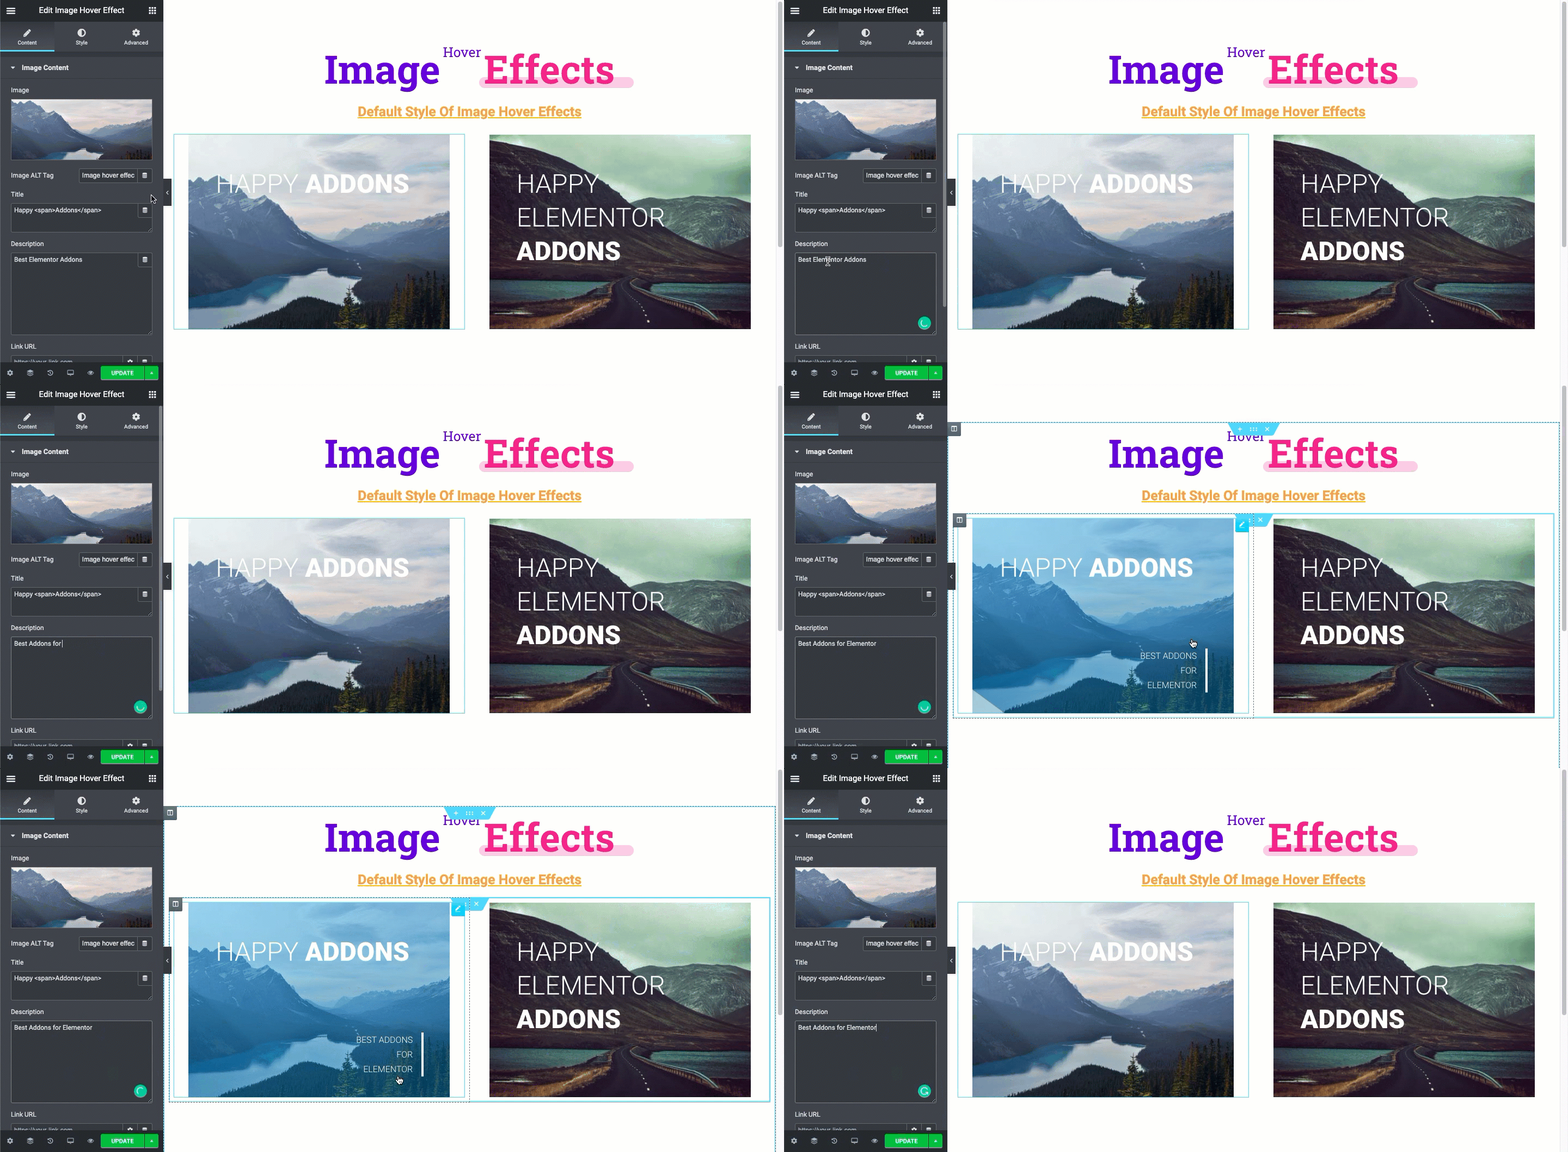
You can easily description to your images. Which will be appeared on the hover animation.
Step 04:
Now add links to your image
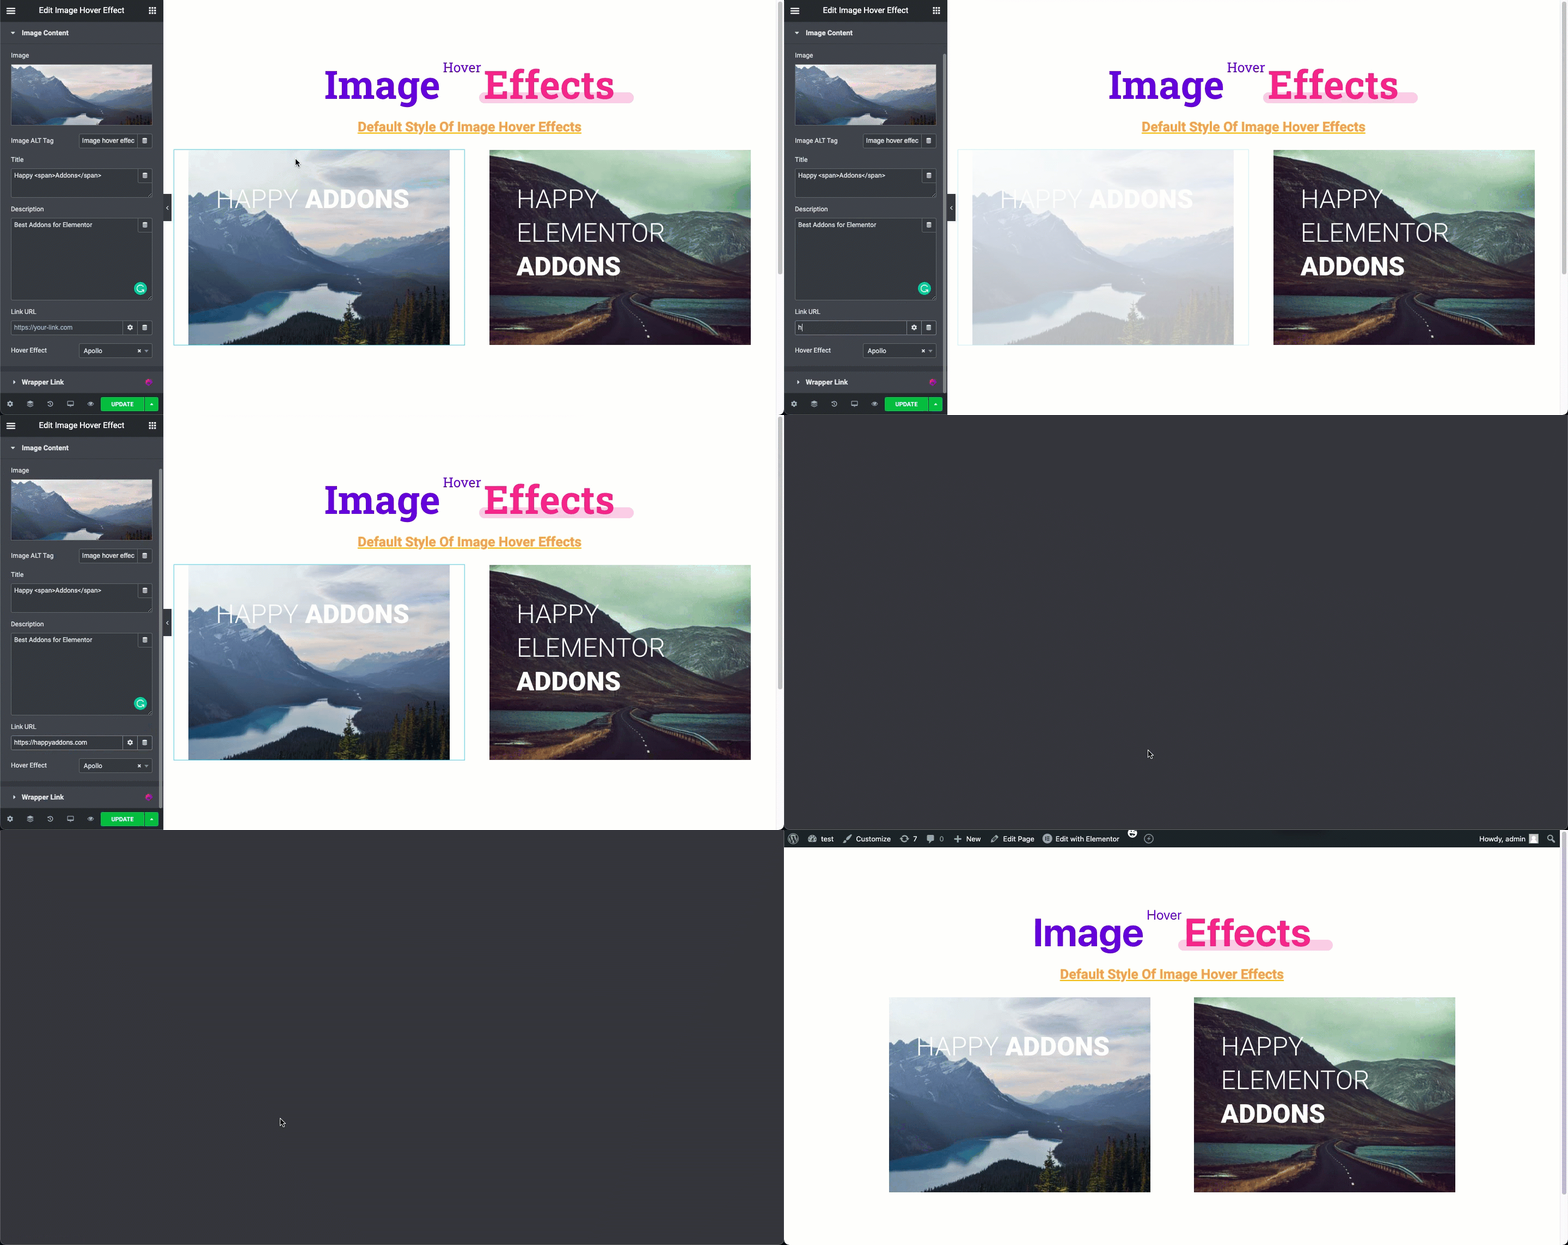
You can easily add special links to your images to redirect your desired landing pages.
Step 05:
Add Hover Animation to Your Images
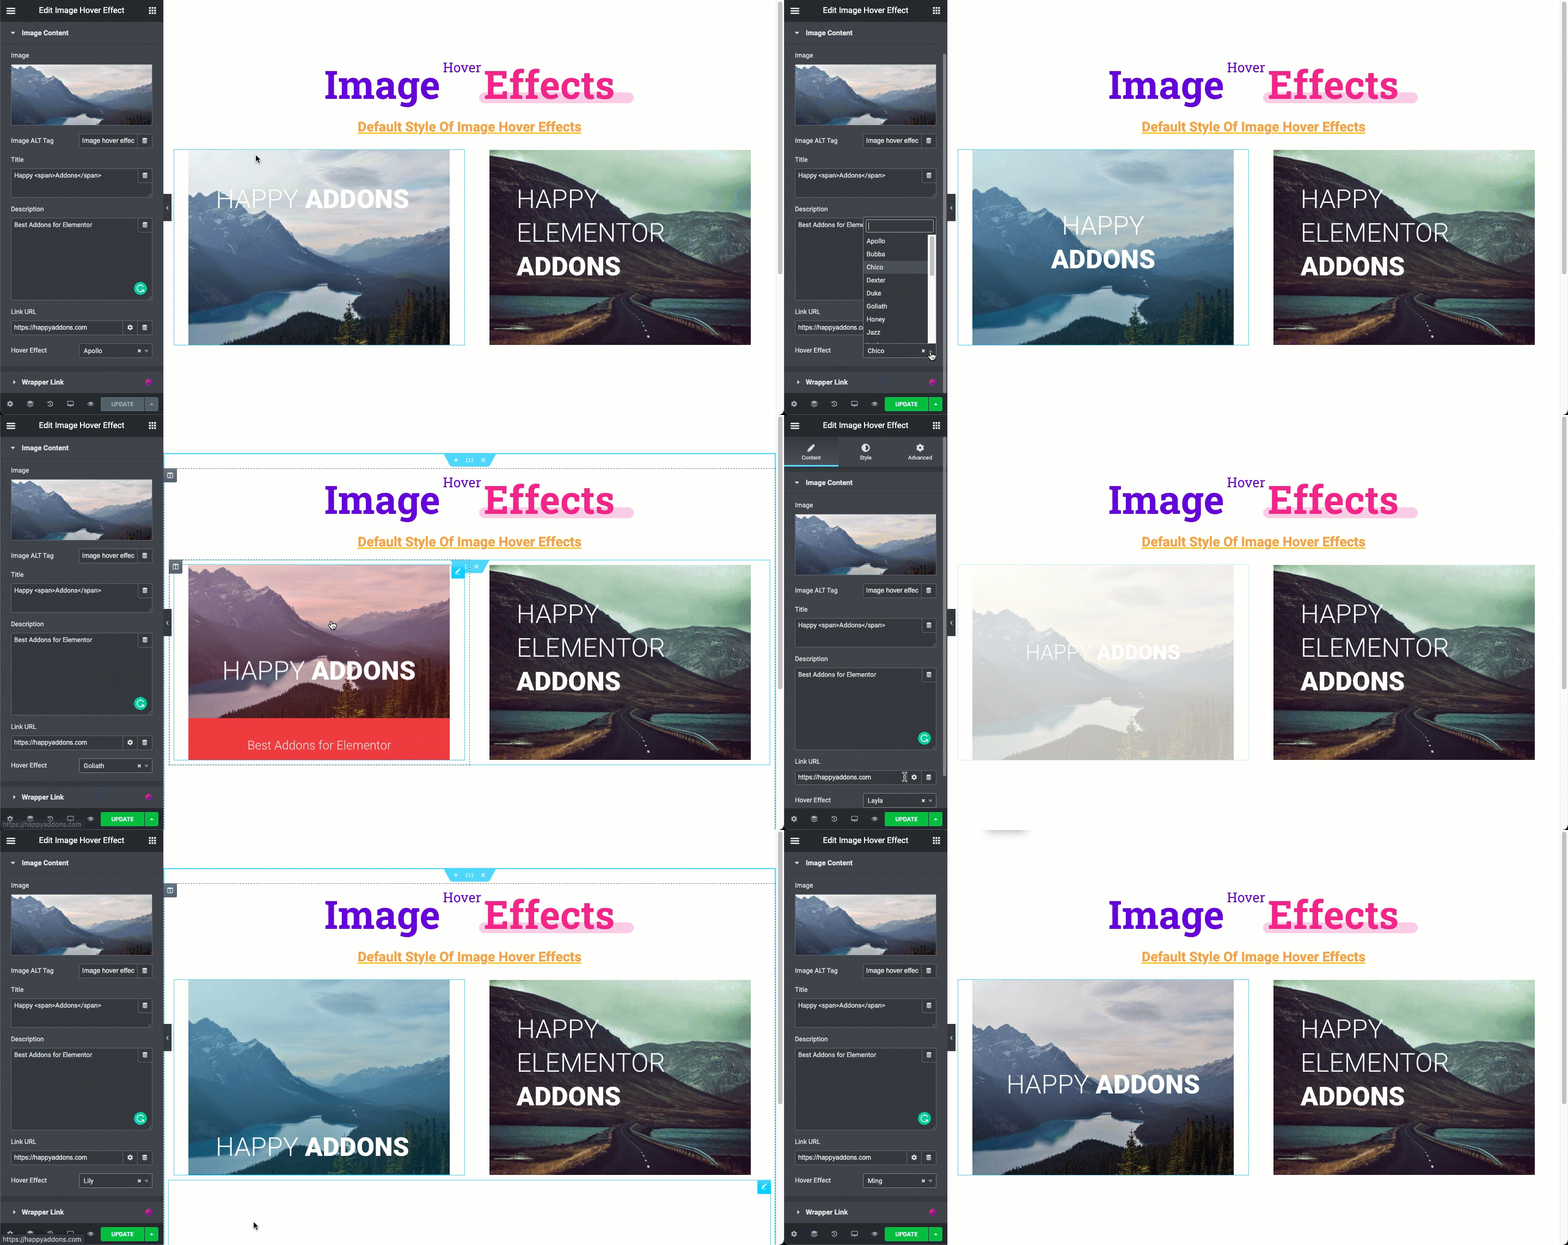
By default you get the “Apollo” Animation effect. But our image hover effect comes with 20+ Image Hover Animation Effects. Choose the best one according to your need.
Here is the list of the Animation Effects,
- Apollo
- Bubba
- Chico
- Dexter
- Duke
- Goliath
- Honey
- Jazz
- Layla
- Lexi
- Lily
- Marley
- Milo
- Ming
- Moses
- Oscar
- Romeo
- Roxy
- Ruby
- Sadie
- Sarah
Step 06:
Styling Image Hover Effects
Check out the video to get the detailed idea on how you can style the Image Hover Effect Widget.
Container Max Width
You can easily set the container width according to your demand. By dragging the container width trim line. Or just turned off the “Container Max Width” option to get the max-width of the image.
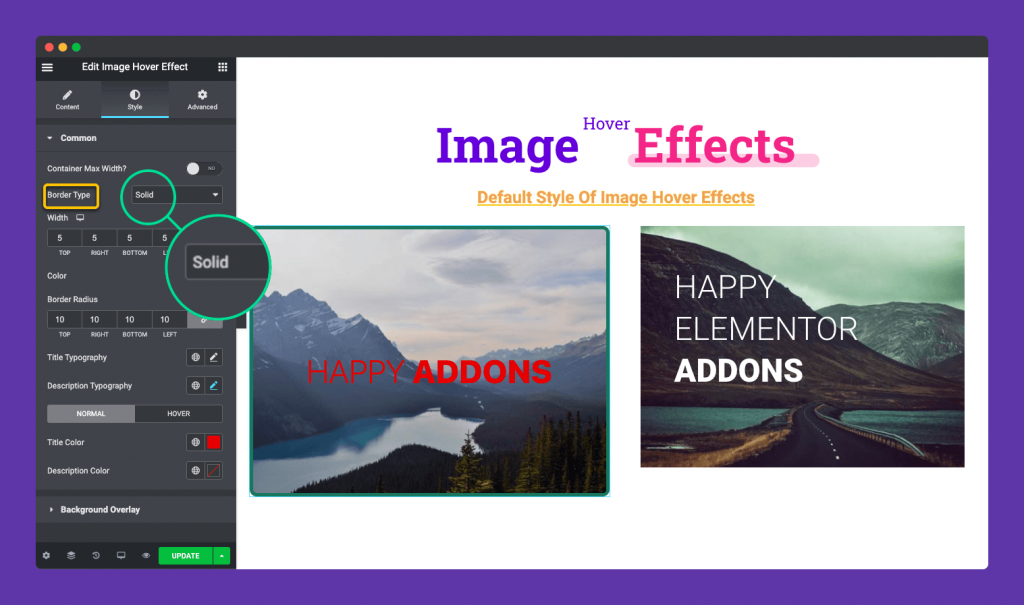
Setting Border Type
Setting Border Radius
You can easily set border radius to your border.
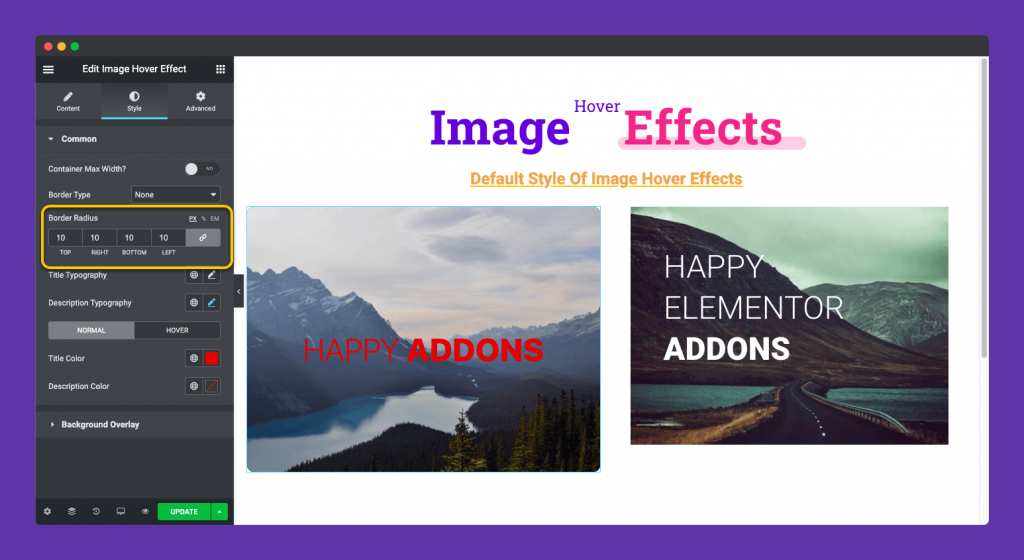
You can set border radius to your images directly by selecting Border Colour to None & then set radius number to the border radius section like the above image. ?
Setting Typography
Enough flexibility to add styles to the texts of the image hover effect.
Setting Colour Effect to The Title & Text
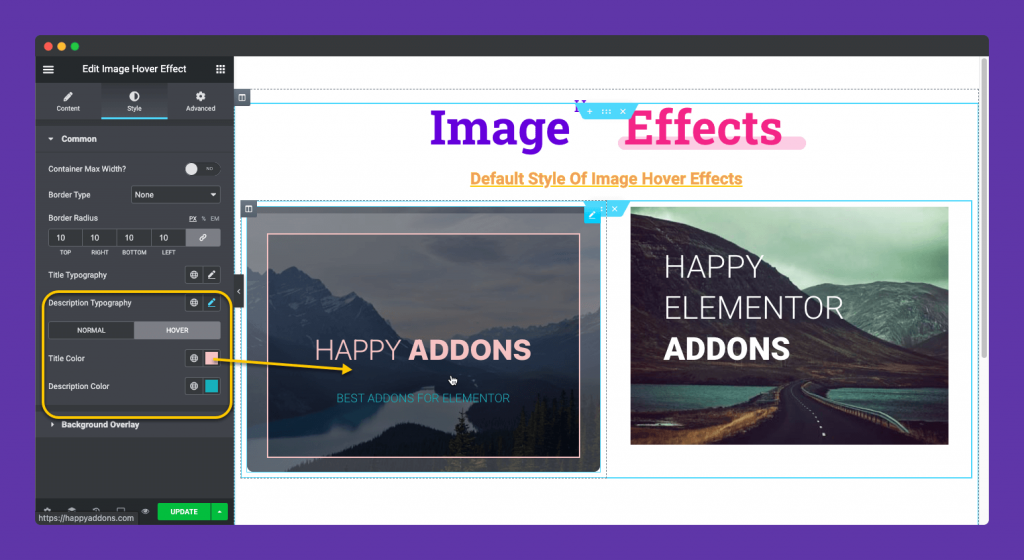
As you see the hover Square Colour also the same colour of the Title Hover Colour. This the cutest thing of this widget. No extra hassle on adding extra colour to that border. It will automatically pick the title colour.
Also you can set different colour of the description.
Step 07:
Now comes the Advanced Tab of the Image Hover Effect Widget. It’s the default styling of the Elementor widgets.
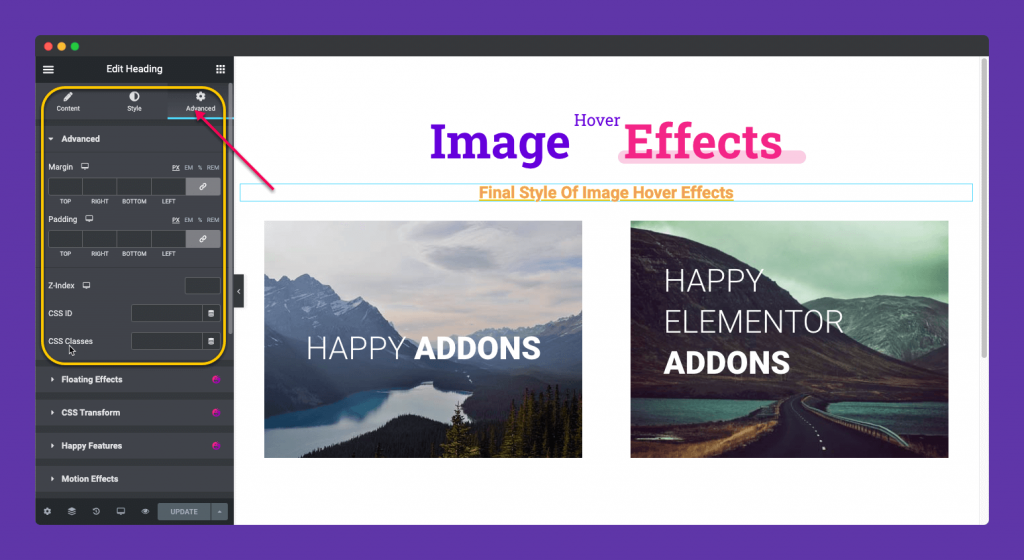
Final Image
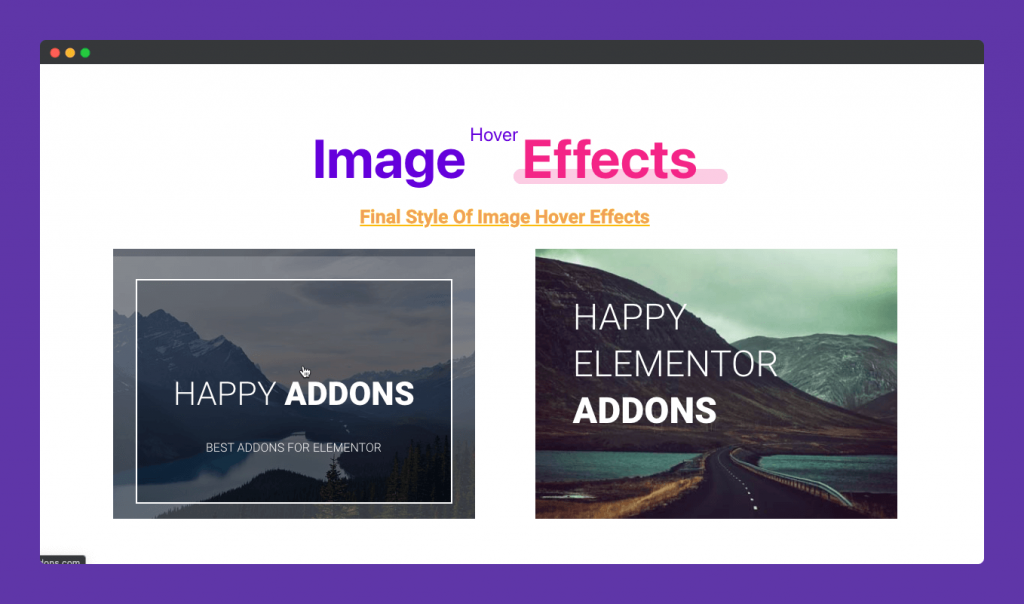
That’s It.
