How To Use A Calendly Widget Of Happy Elementor Addons
With the Calendly Widget of Happy Elementor Addons, you can schedule meetings without the back and forth emails.
Using Calendly:
You can see the below video to get an insight into how you can use the Calendly Widget to create beautiful designs. Or you can follow the documentation whichever you find convenient.
Step 1:
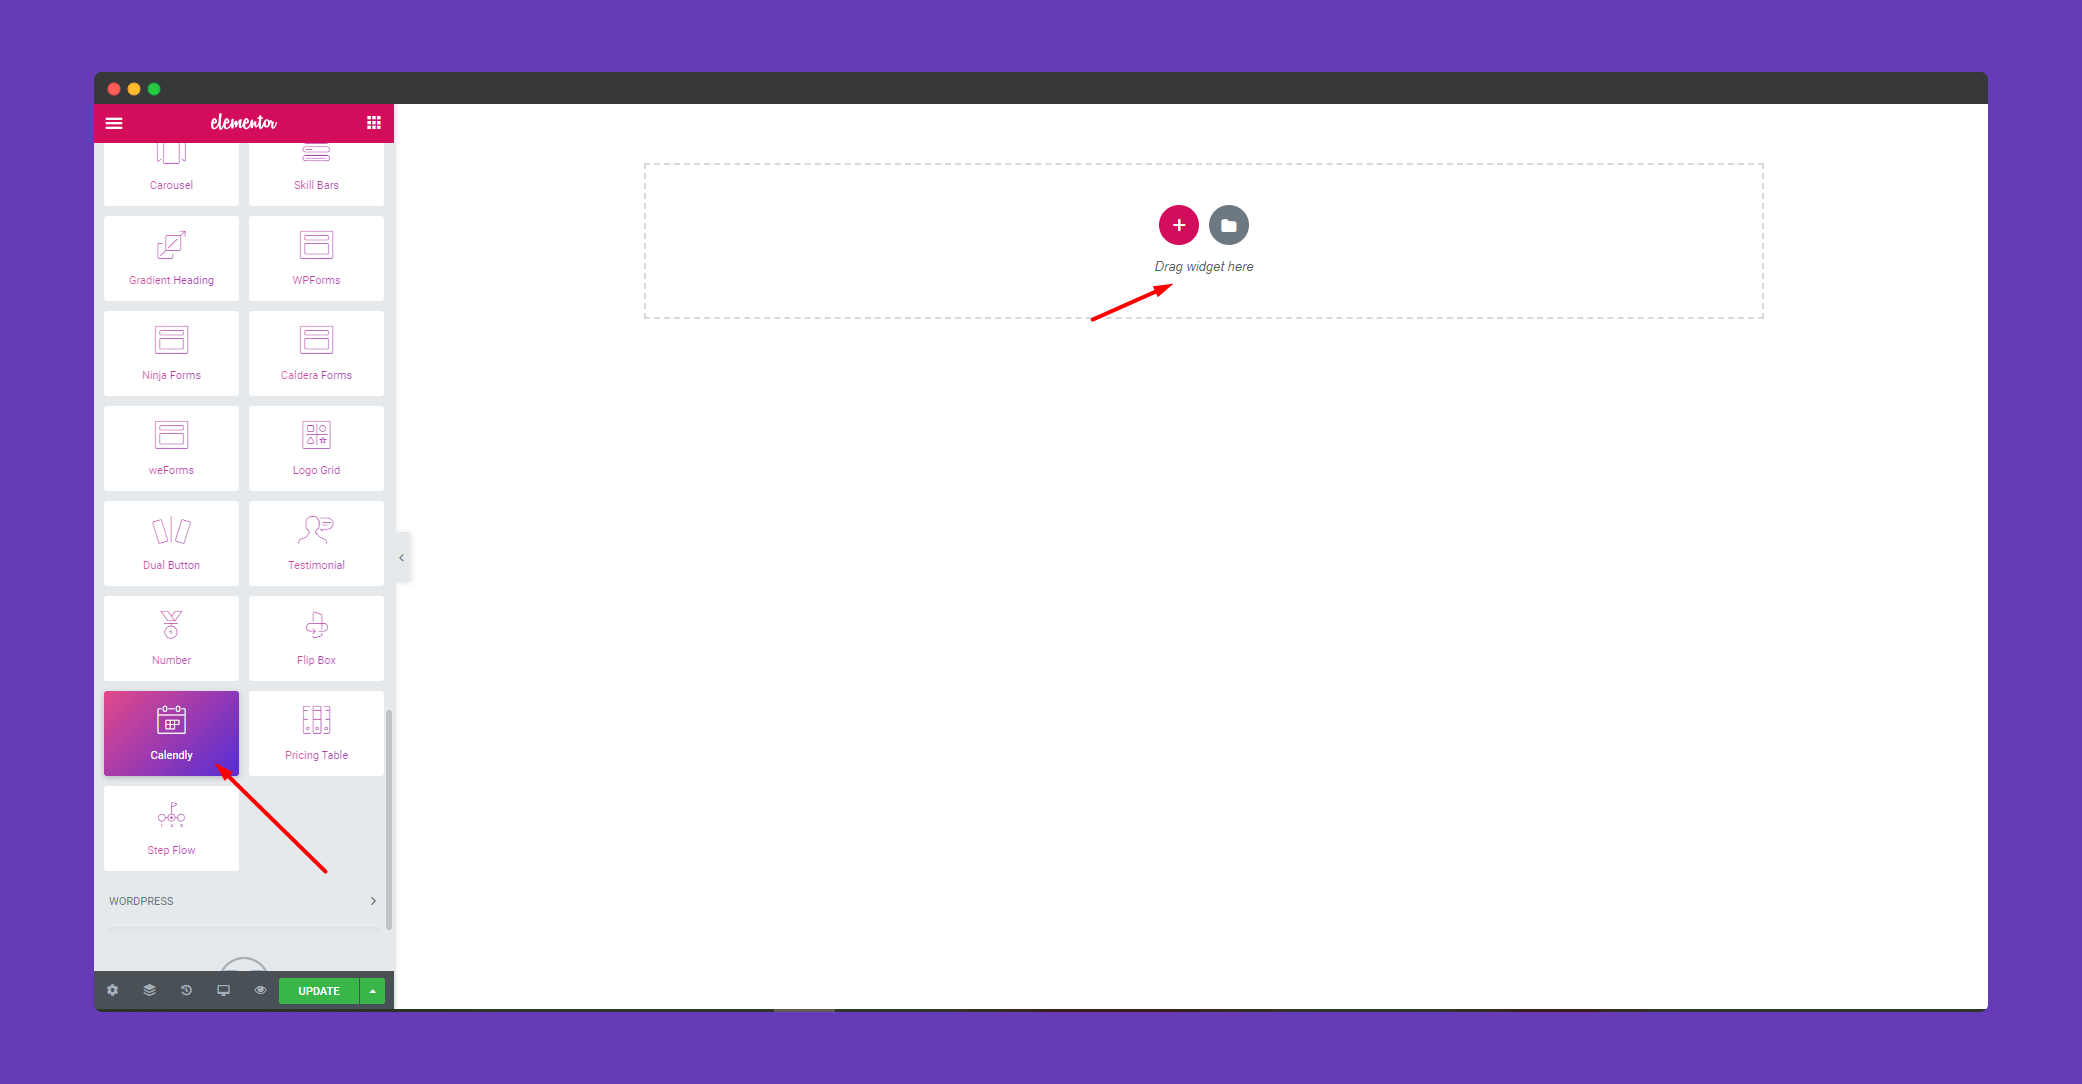
Select the Calendly widget from the menu bar on the left-hand side of the screen then drag and drop it on the selected area.
Step 2:
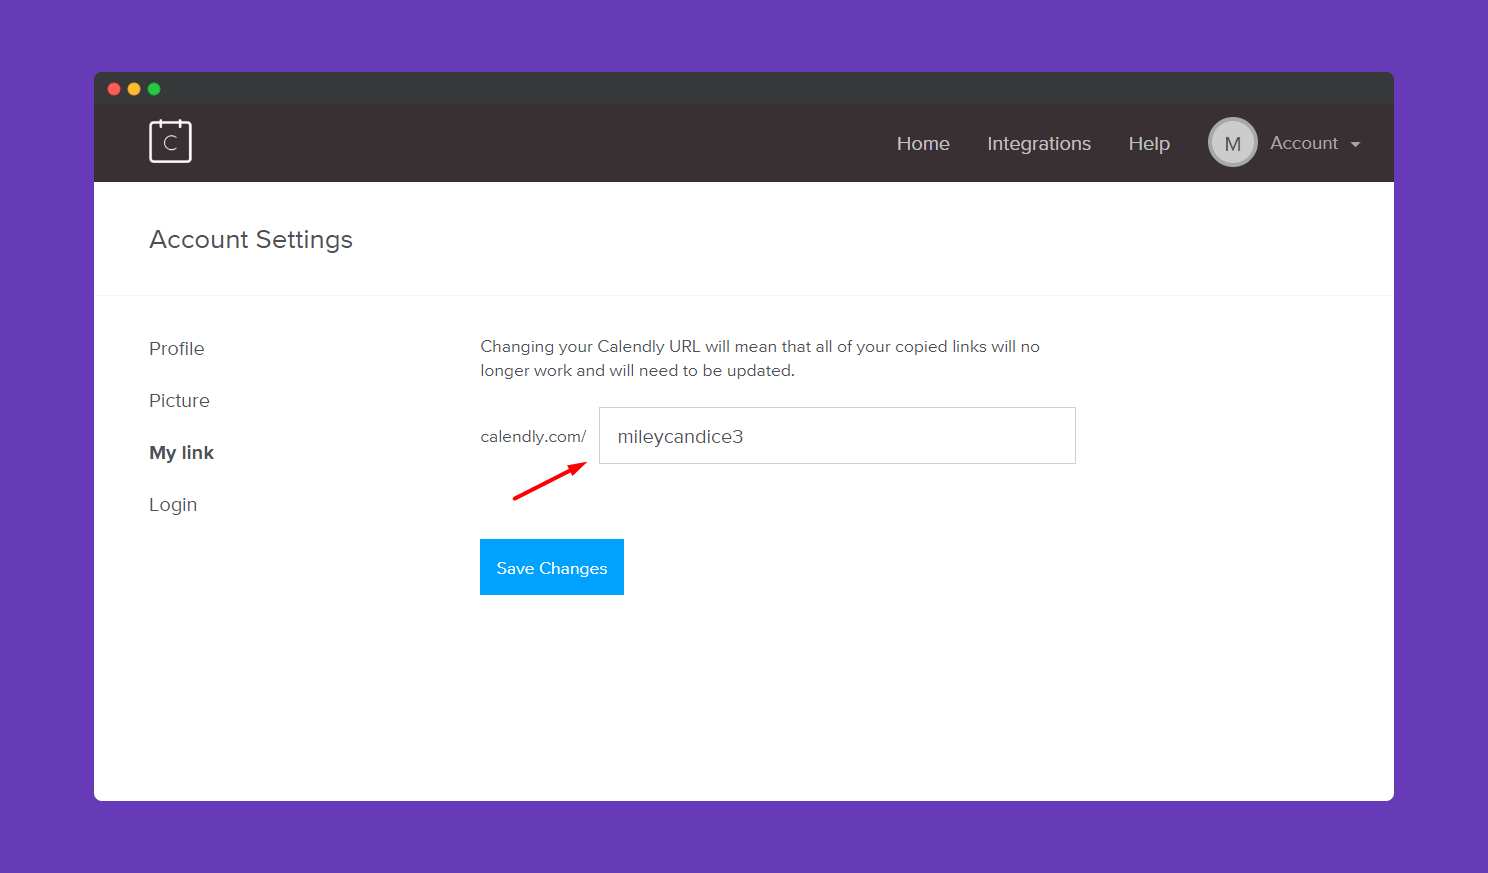
To set the calendar, you have to link it from your Calendly account. Copy the profile link from your Calendly account.
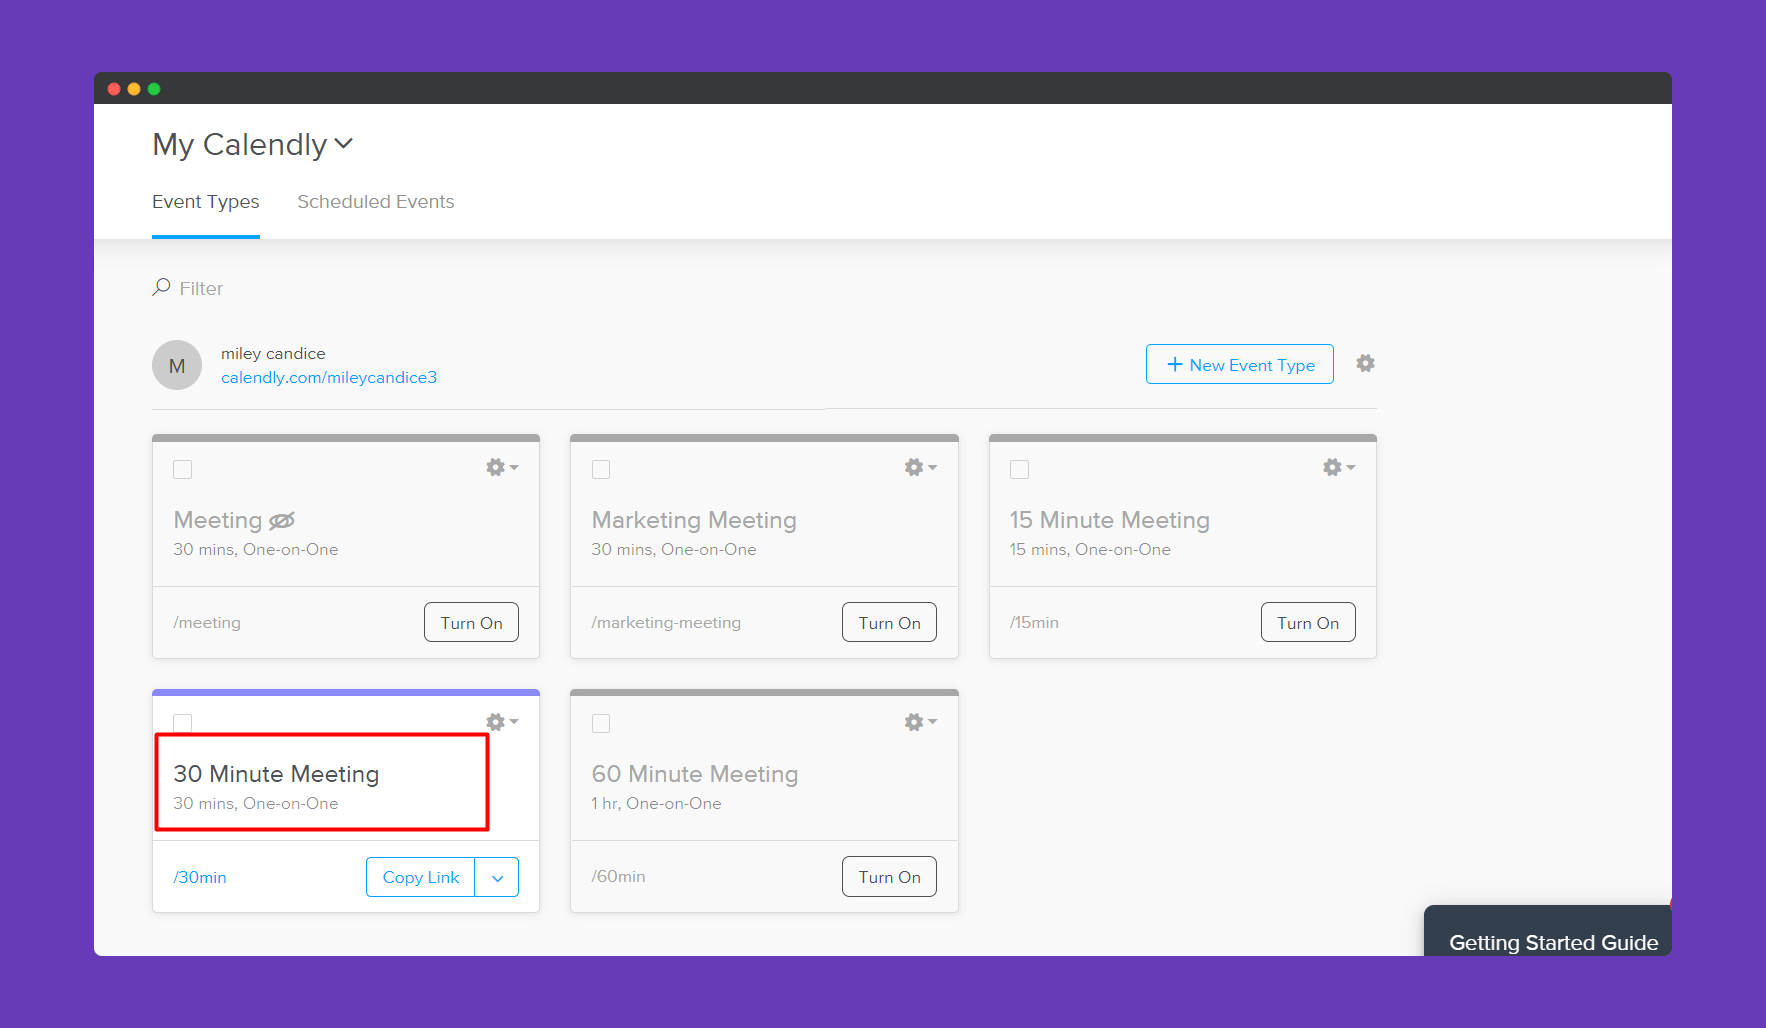
Select the event you want to display on your webpage. For example, I have selected the 30 minutes meeting. You can choose anyone you like.
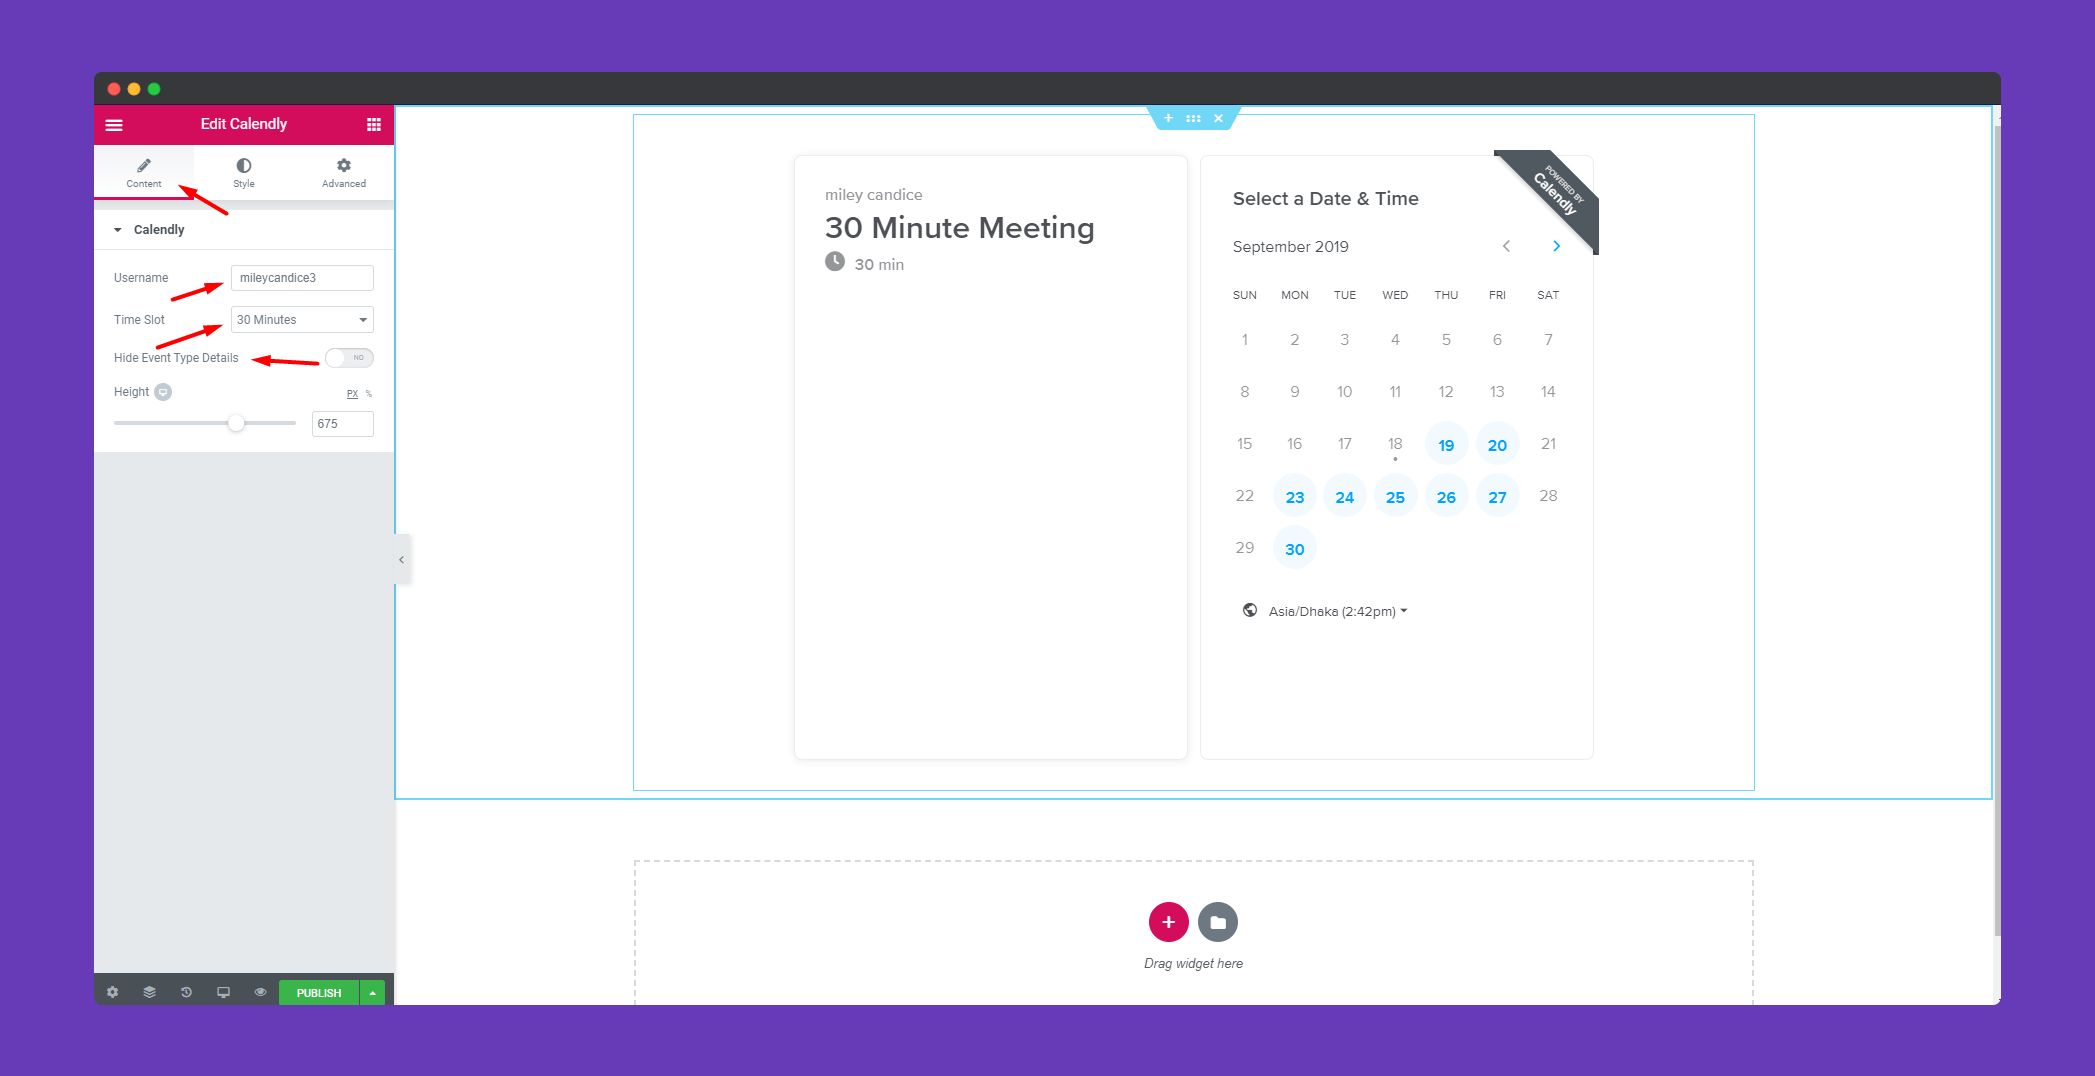
In the ‘Content‘ section, you can upload the calendar. Copy the link of your profile in the username and select the time slot you have selected on your Calendly account. You will see that the calendar will automatically appear on the screen.
Step 3:
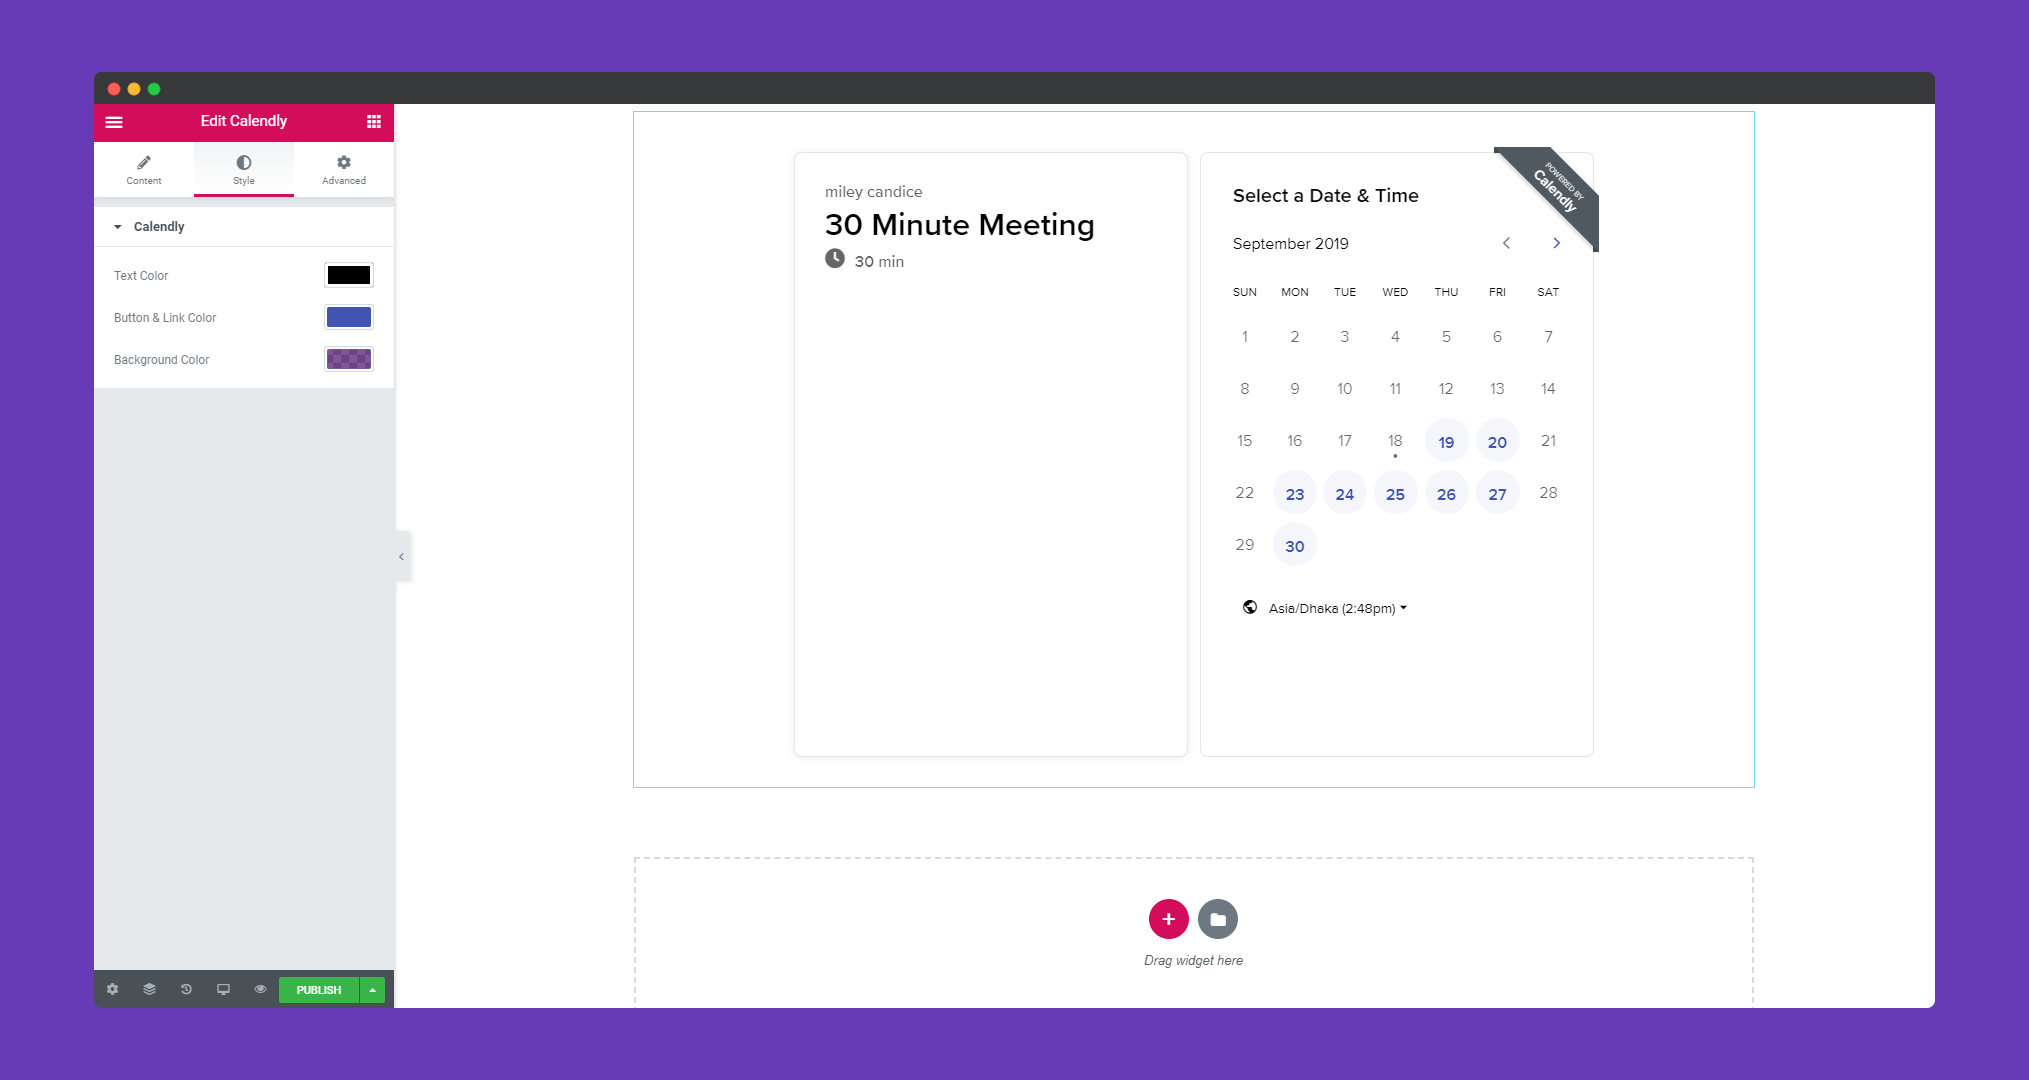
In the ‘Style‘ section you will find the option ‘Calendly‘. Here you can edit the text color, background color, and button & link color.
Step 4:
If you want to add motion effects, happy effects, background or make it responsive and more intriguing, click on ‘Advanced‘ to explore those options. the ‘Advanced‘ is a default feature of Elementor. Give a read to this Document to know more about Advanced features and its uses.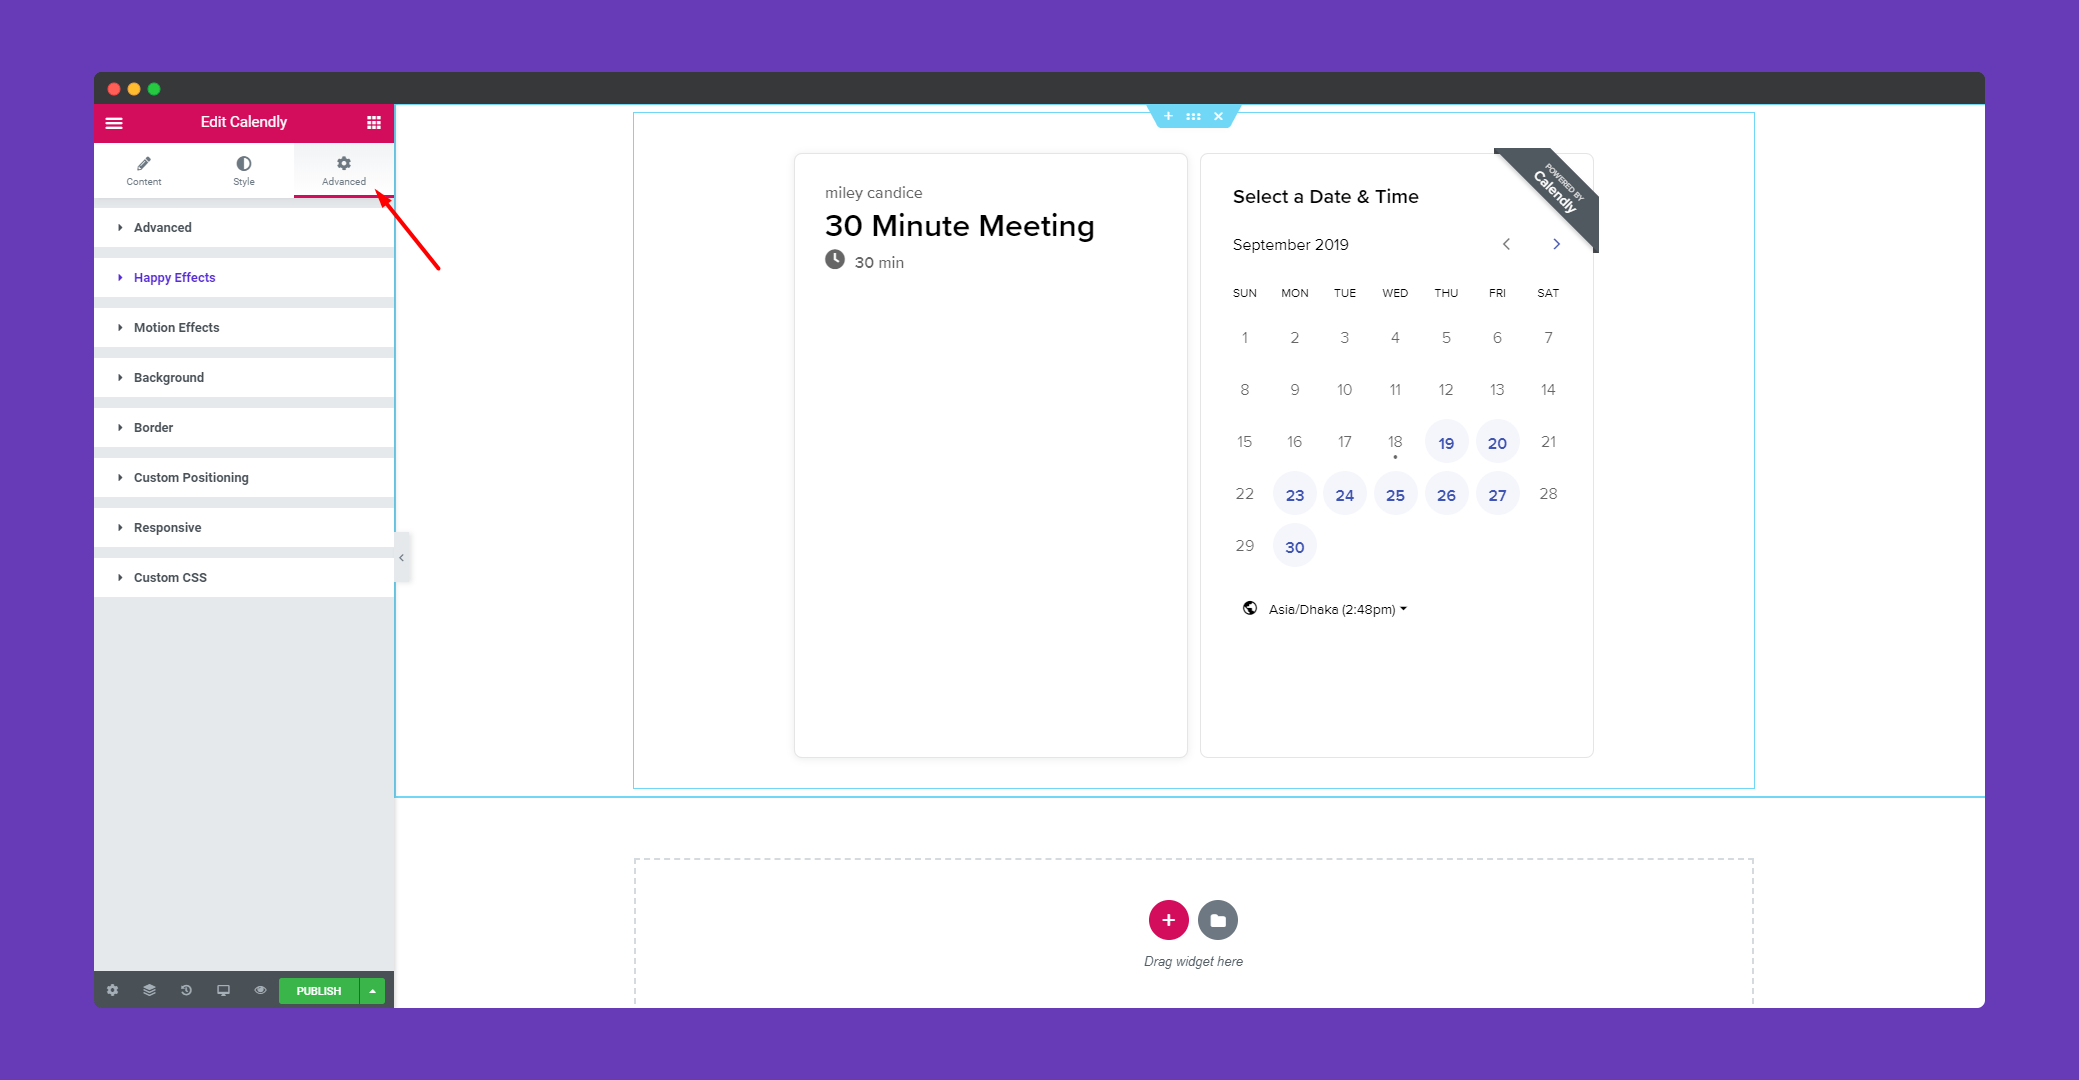
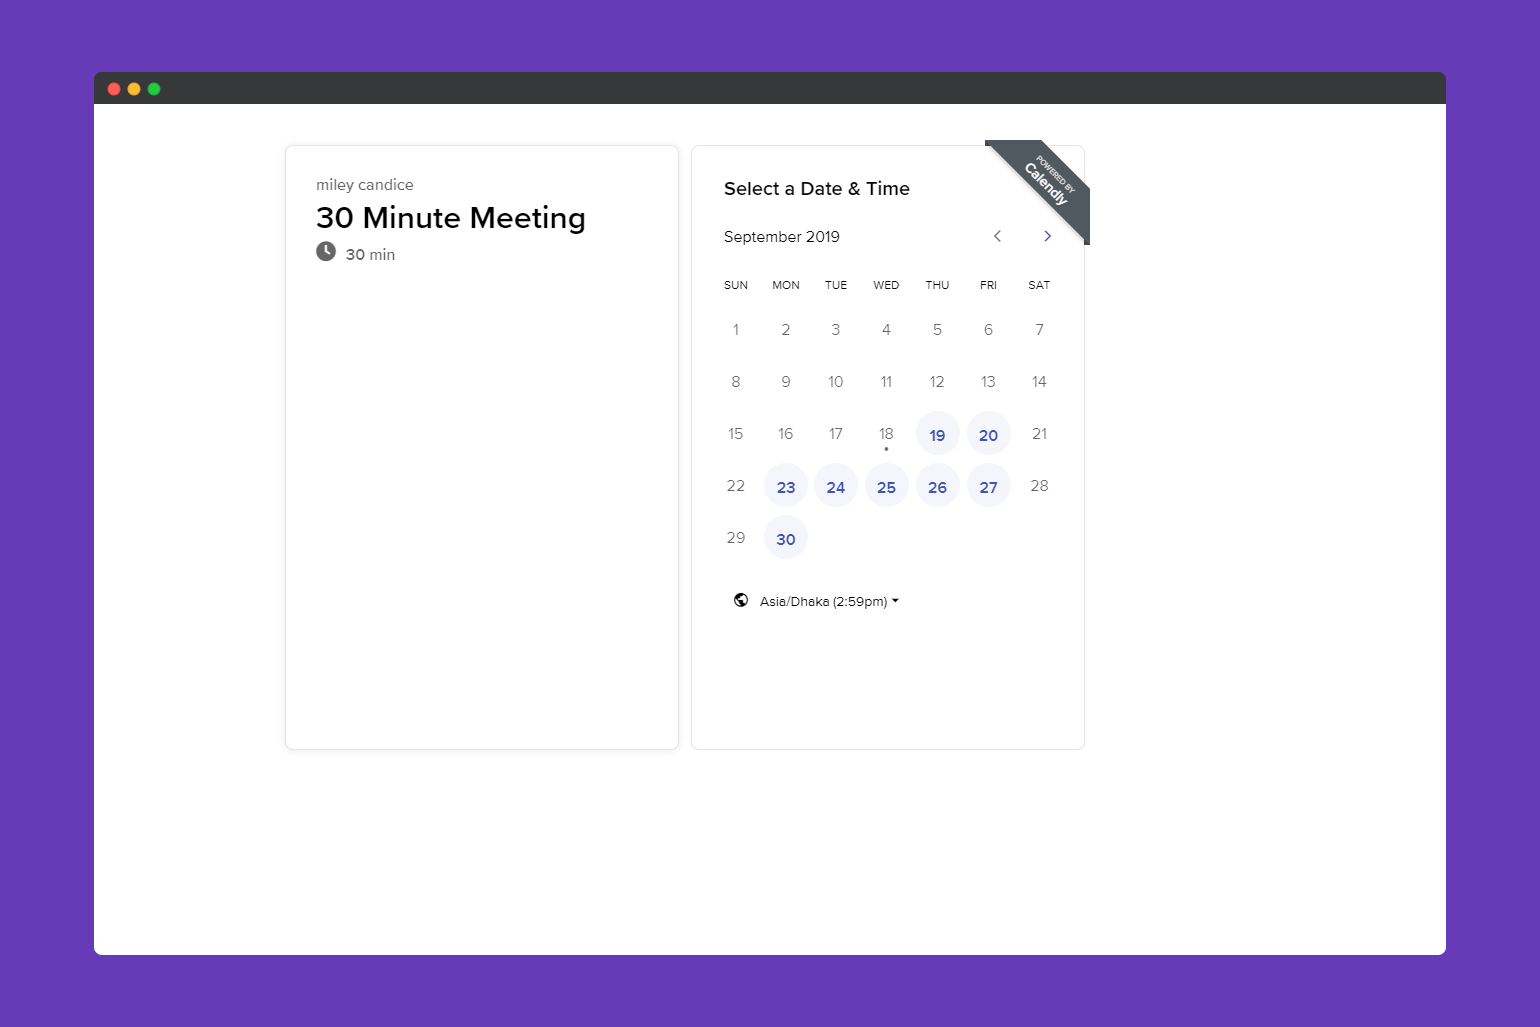
Finally, when you click on the publish button you will see the beautiful calendar on your screen.
Learn How to Add Calendly Meeting Manager to Your Elementor Website Using Happy Addons
That’s it!.
