How To Use Contact Form 7 Widget of Happy Elementor Addons?
Happy Elementor Addons allows you to add the Contact 7 Form widget. You can add different types of forms using Contact Form 7 widget. Before using this widget you must install contact form 7 plugin.
Adding Contact 7 Form Widget:
You can see the below video to get an insight into how you can use the Contact Form 7 Widget to create beautiful designs. Or you can follow the documentation whichever you find convenient.
Step 1:
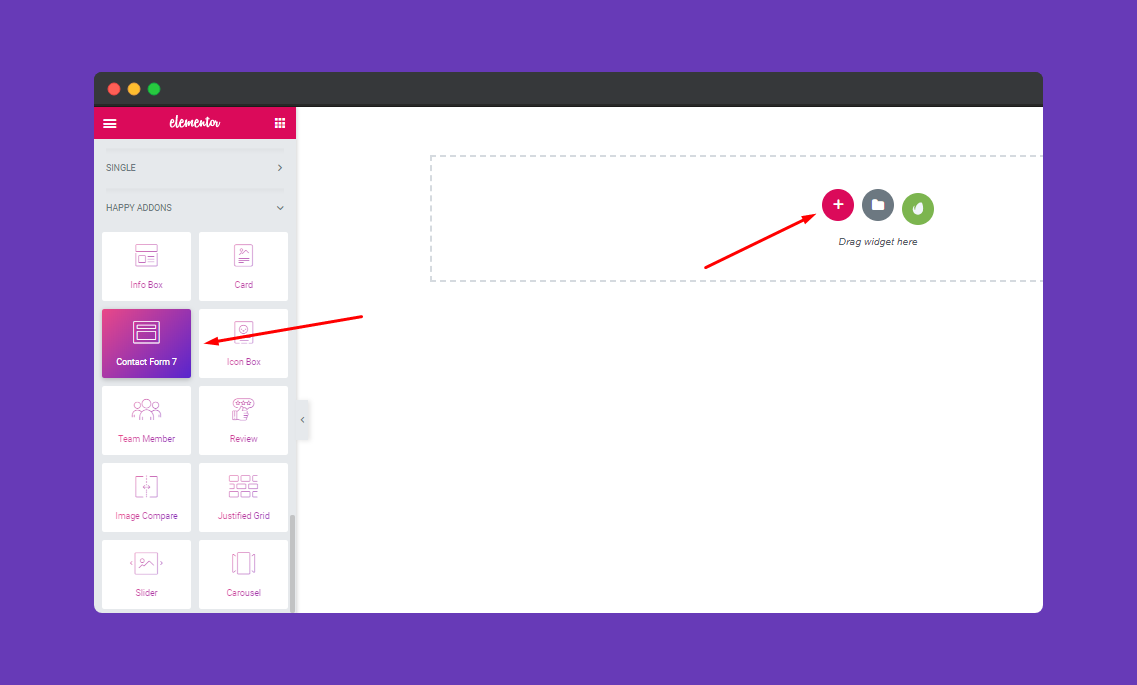
After getting into the canvas, select the “Contact Form 7” widget and drag it to the selected area.
Step 2:
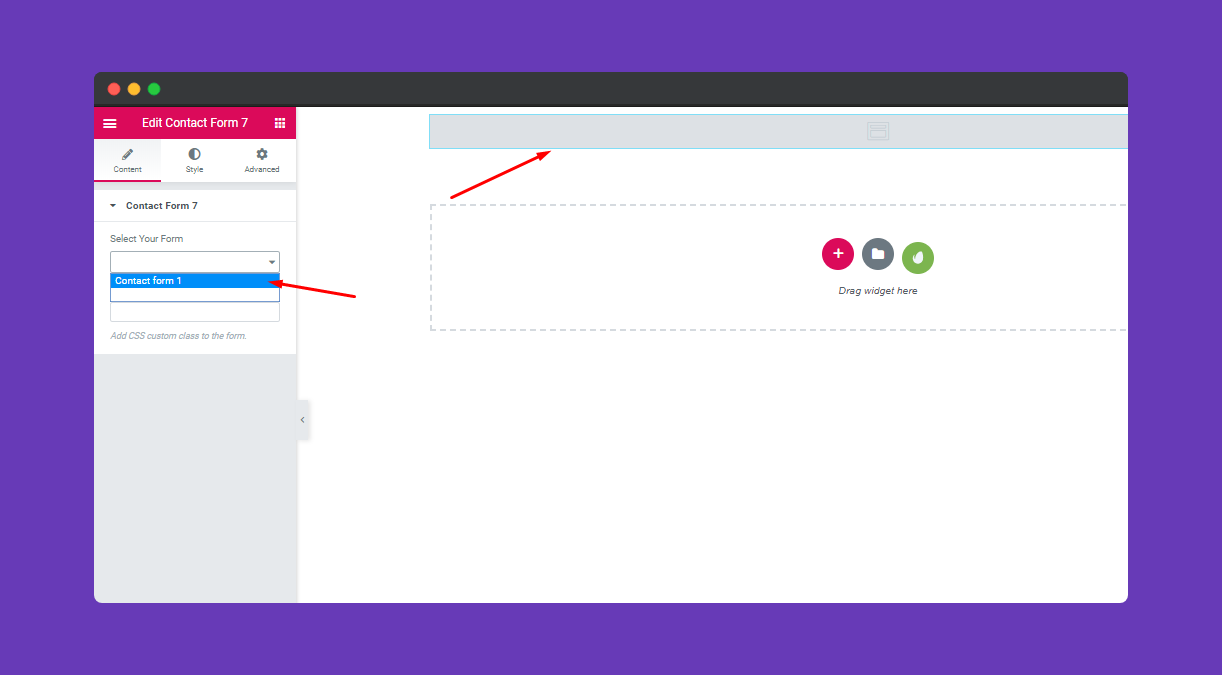
After appearing the window of “Contact Form 7” you can add the form to the selected area. Then select “Contact Form 1”. It’s a default contact form. You can create your own designed form.
Step 3:
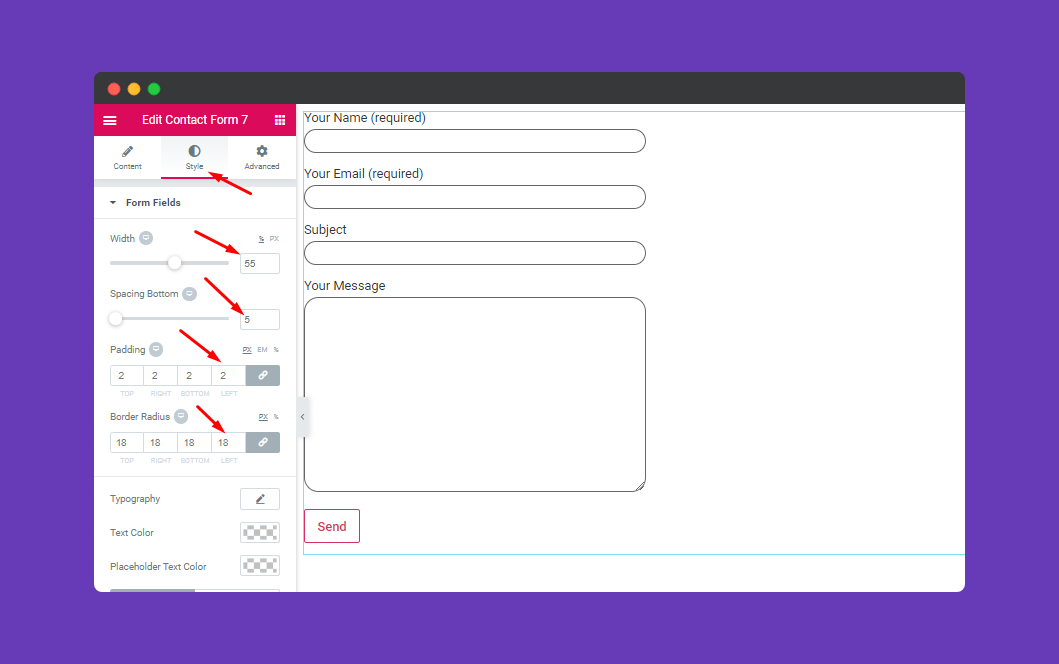
In the style section, you can edit width, Add bottom spacing, padding, border-radius. After putting the value, the form will look like this one.
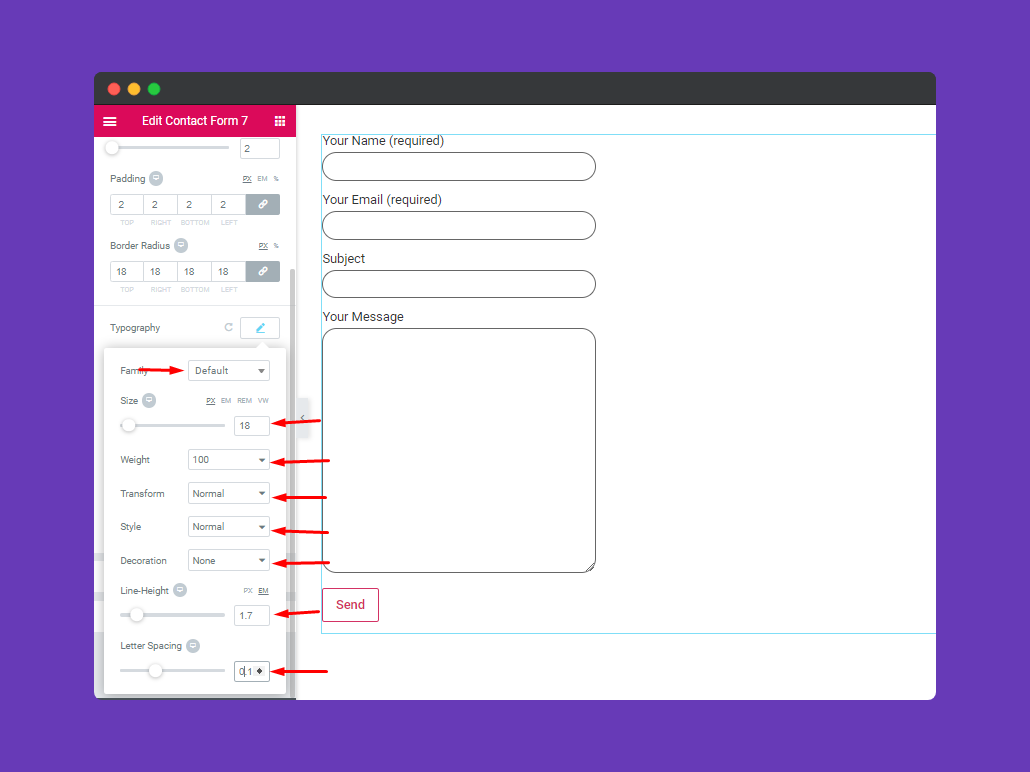
Next, you can stylize your form using typography. Here you will be able to use the font, form field size, font weight, transform, style, decoration, line-height, and letter-spacing, etc.
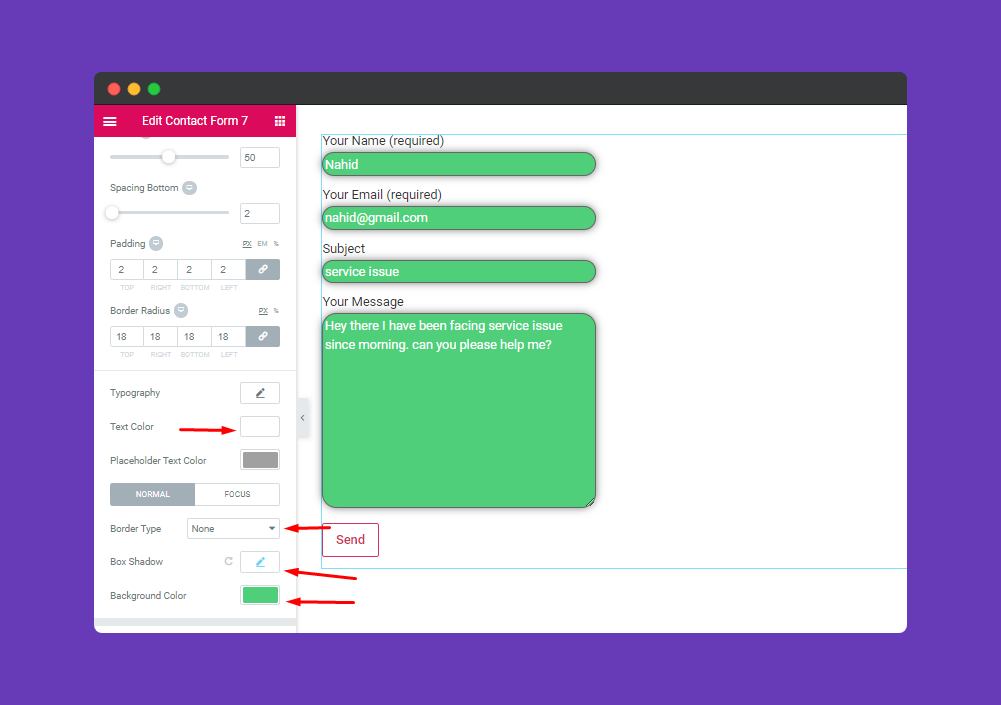
After that, you can do more with the Settings. Like you can change your text color, border type, box-shadow if needed, and the background color.
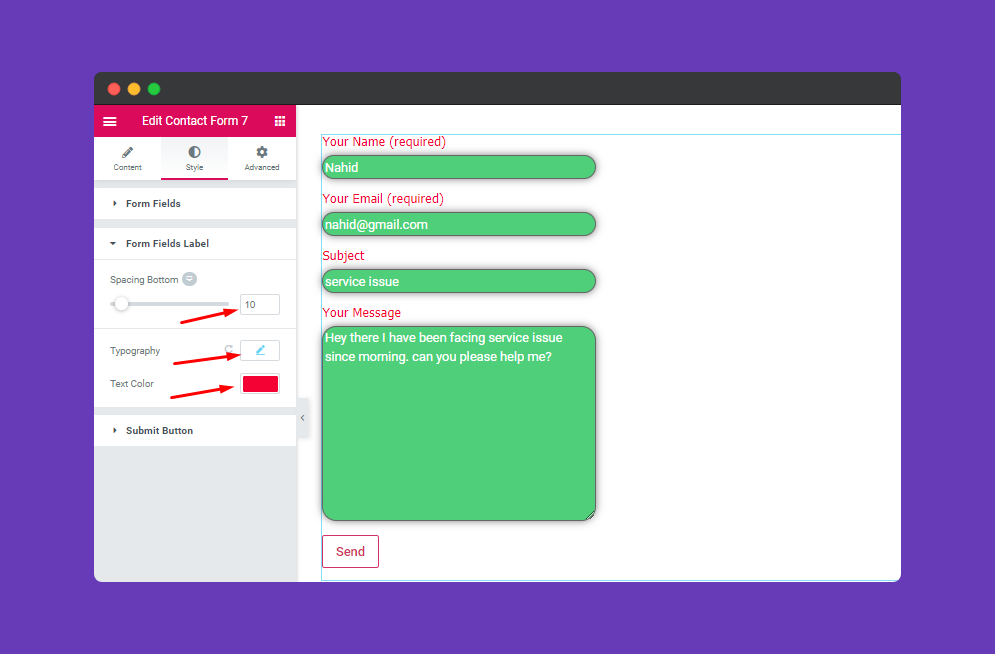
You can increase or decrease space between the field in this feature. Then change typography like the previous section then change the text color.
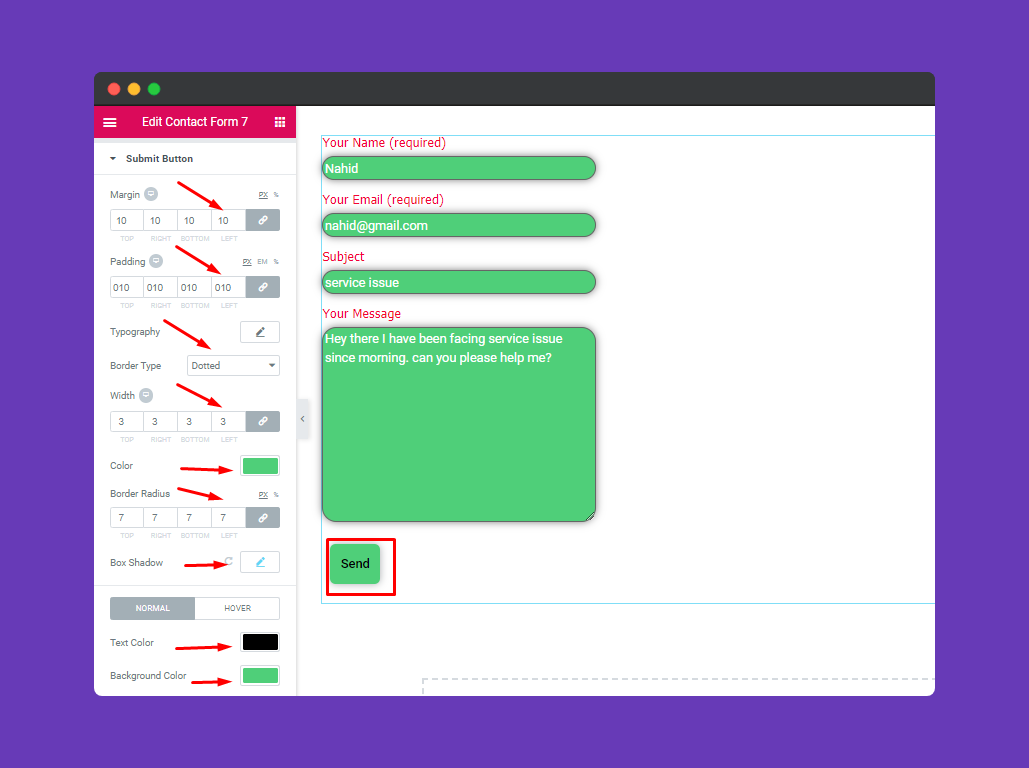
To edit the Submit button from this section you can put values as you want. It’s the same process as the previous section.
Step 4:
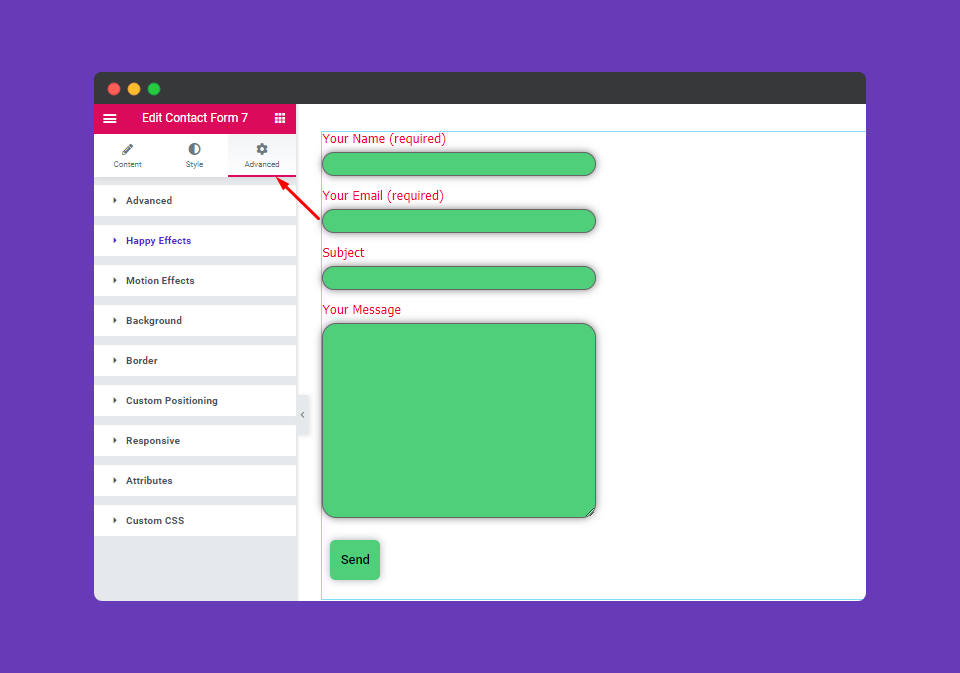
If you want to add motion effects, happy effects, background or make the page responsive, click on ‘Advanced‘ to explore those options. the ‘Advanced’ is a default feature of Elementor. Give a read to this Document to know more about Advanced features and its uses.
Finally, after finishing all the important edits , Publish your form.
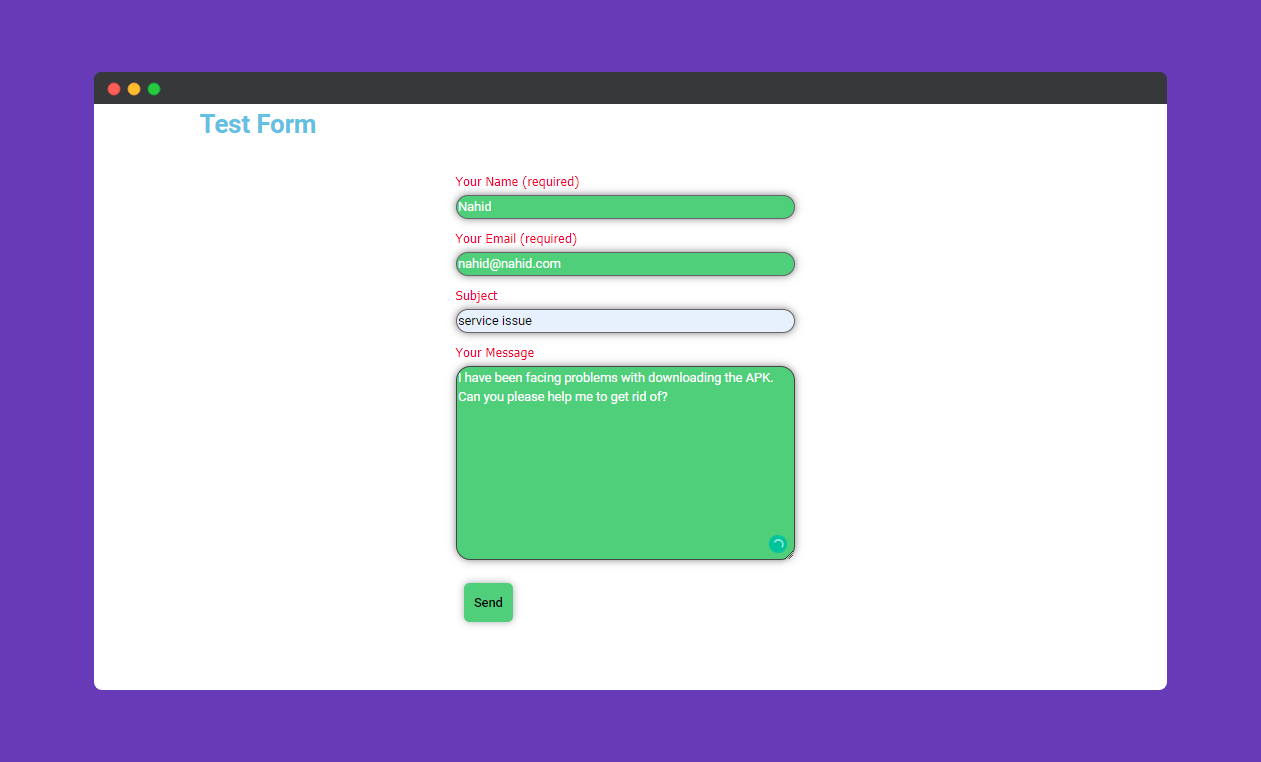
Your form is ready. That’s it.

