How To Use Data Table Widget of Happy Elementor Addons
Using a data table on the website is a difficult task if you don’t have any coding ideas or knowledge. However, the data table widget of Happy Elementor Addons will solve this problem. Because it will enable you to create some remarkable data table for your website. Only you need to have patience & full concentration to use this widget.
So let’s get started:-
Step One:
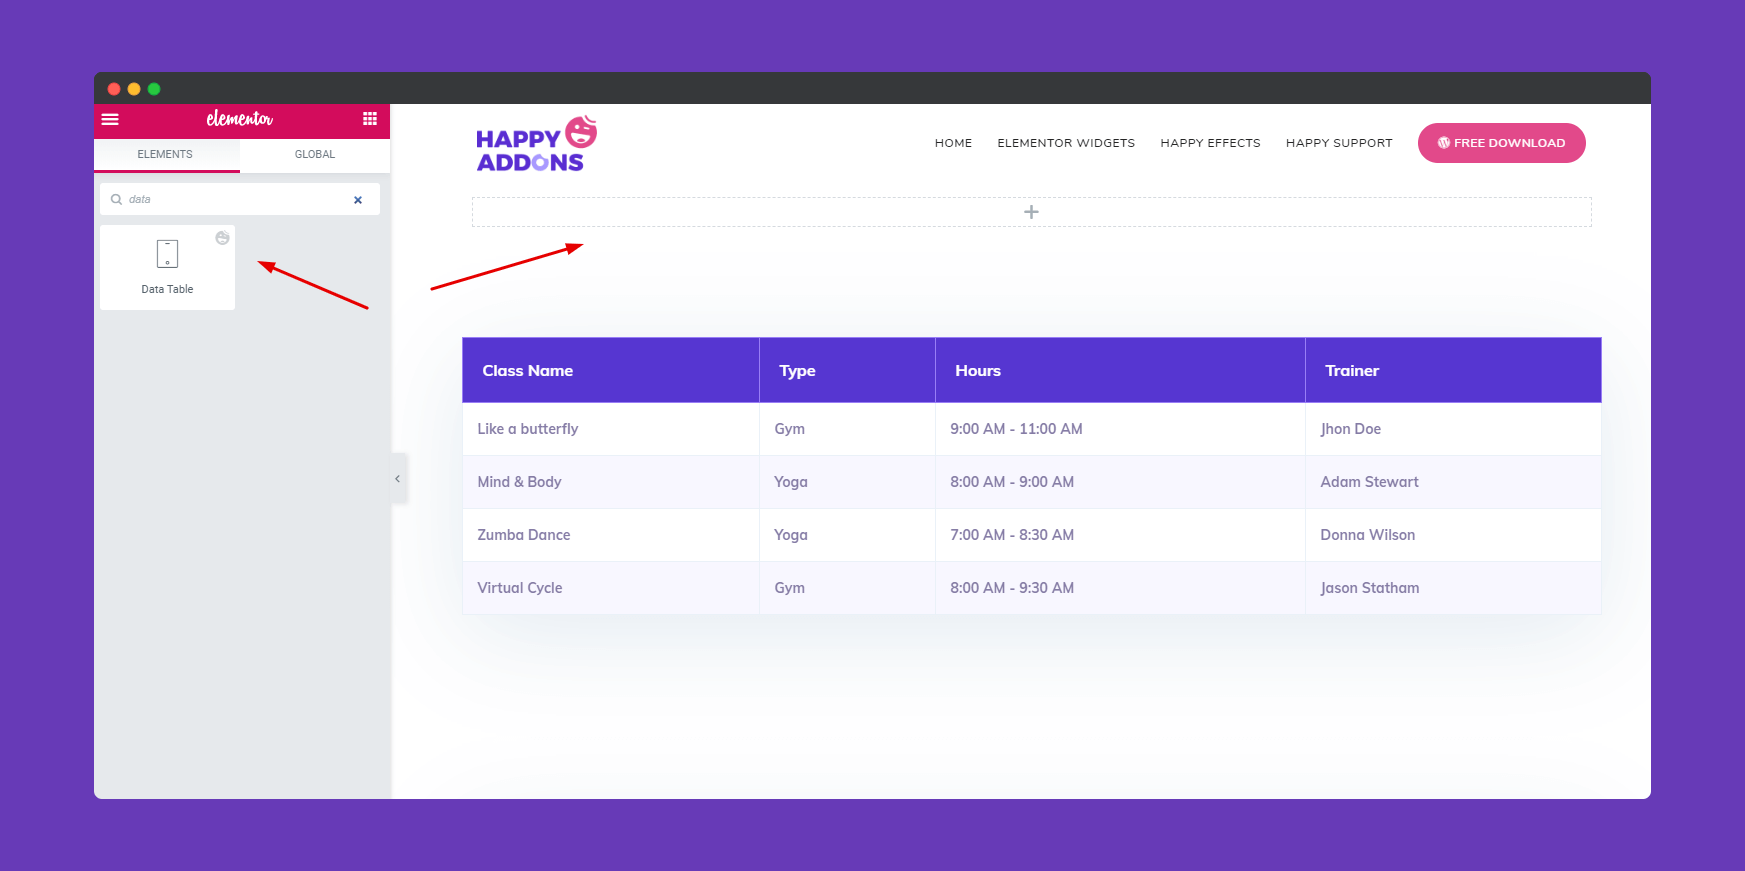
First, add the widget from the left sidebar of your Elementor page screen. Just select the widget and drag it to the marked area.
Step Two:
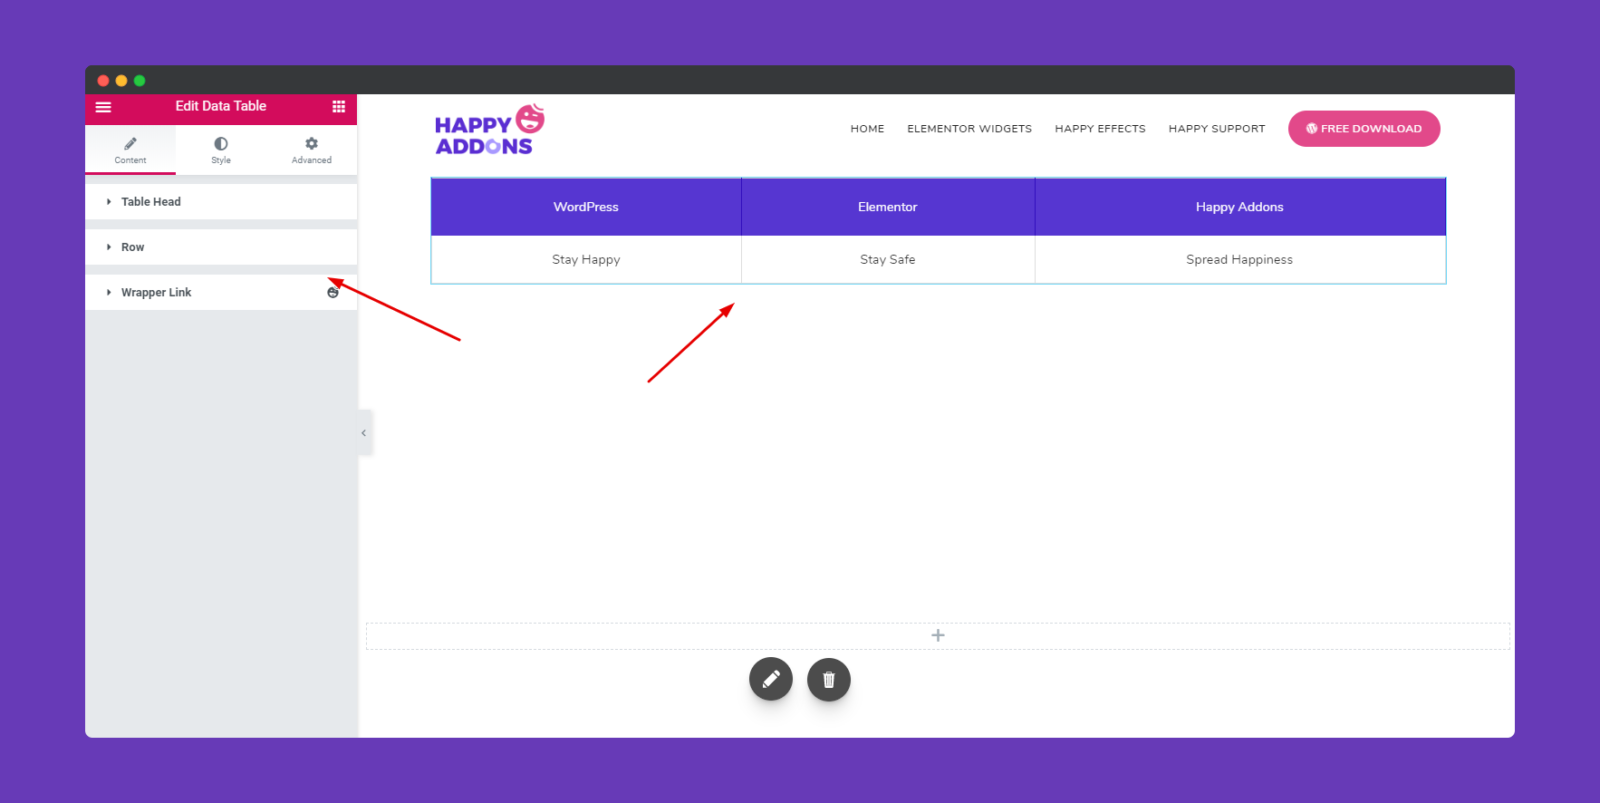
After adding the widget, you’ll see a default data table format. From here you can start designing your table.
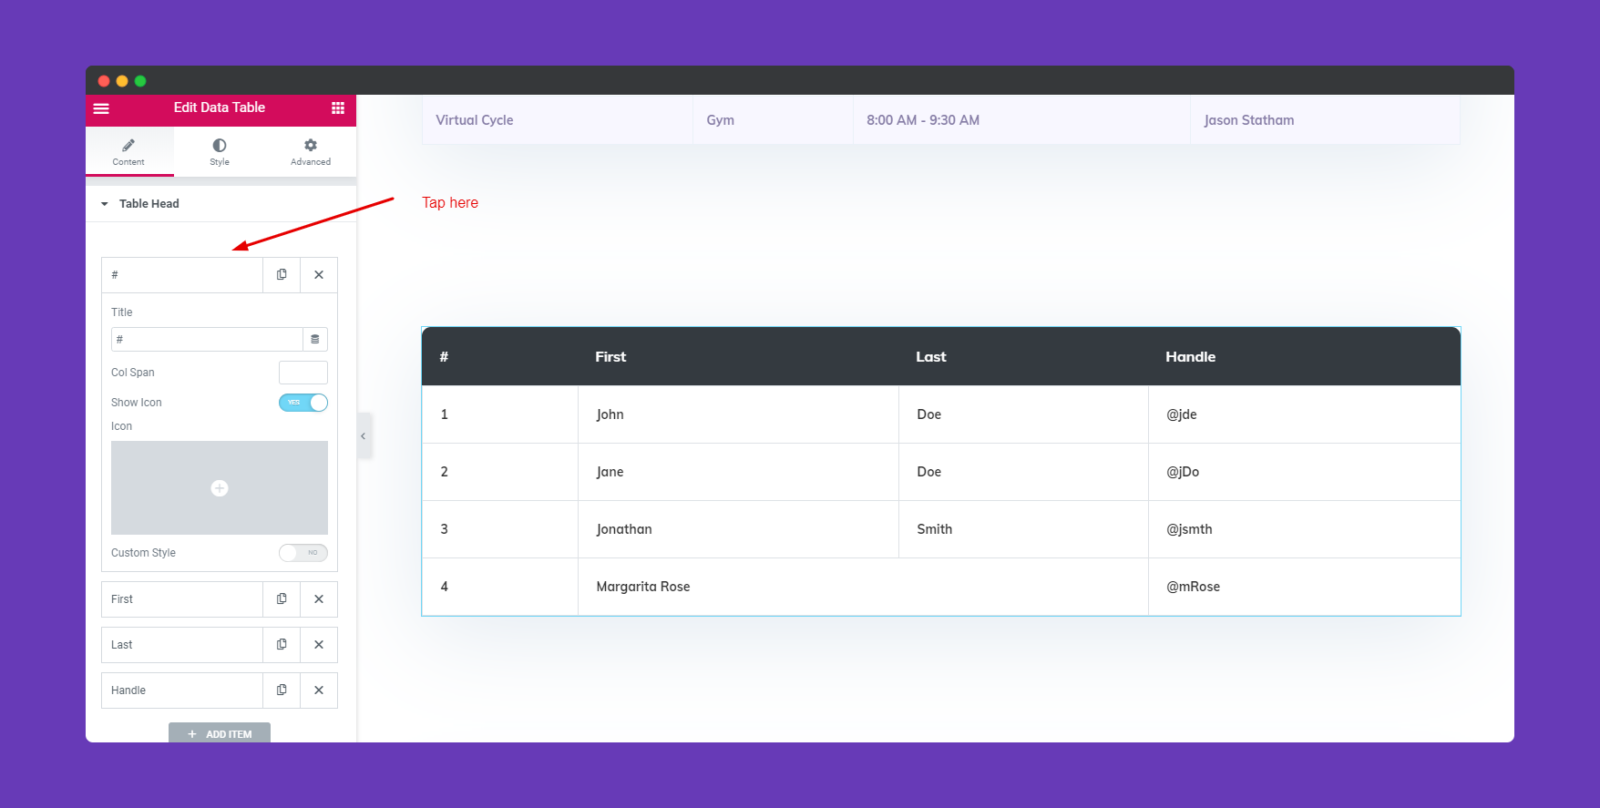
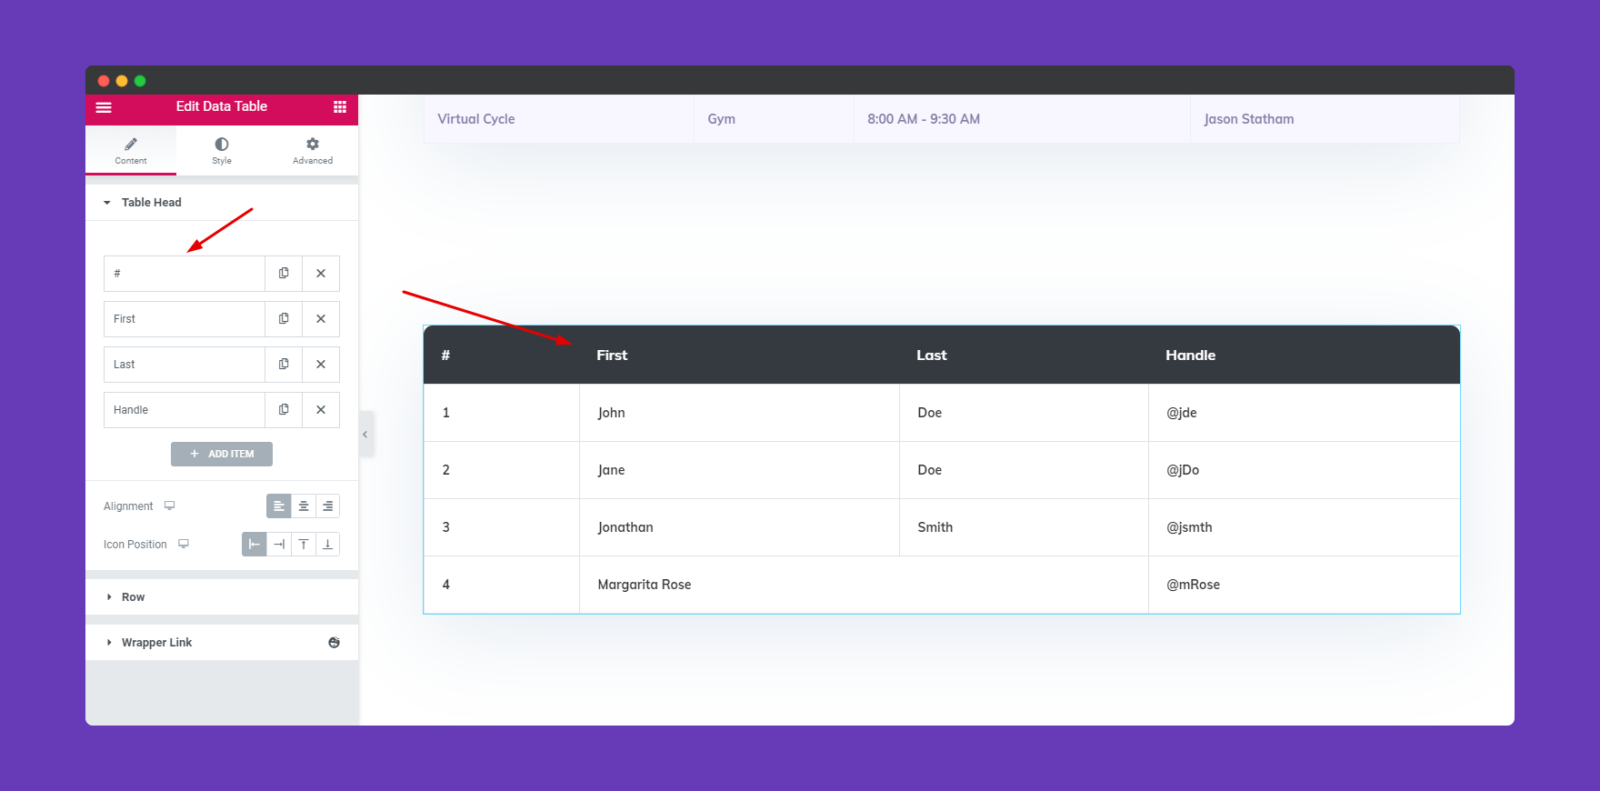
Next, click on the ‘Table Head‘ tab. This tab is the most important part. Because it will help you to add the column header. So after clicking on this tab, you’ll see the default header. So customize it and give your preferred header name.
Also, you can edit in details by tapping on each section. For example, color span, using an icon, custom style, etc.
Next, tap on the ‘ROW‘ button. From here you can add rows as many as you want. Here you’ll get default ROW section for every time you add a new ROW. It’s called ‘ROW Starts’.
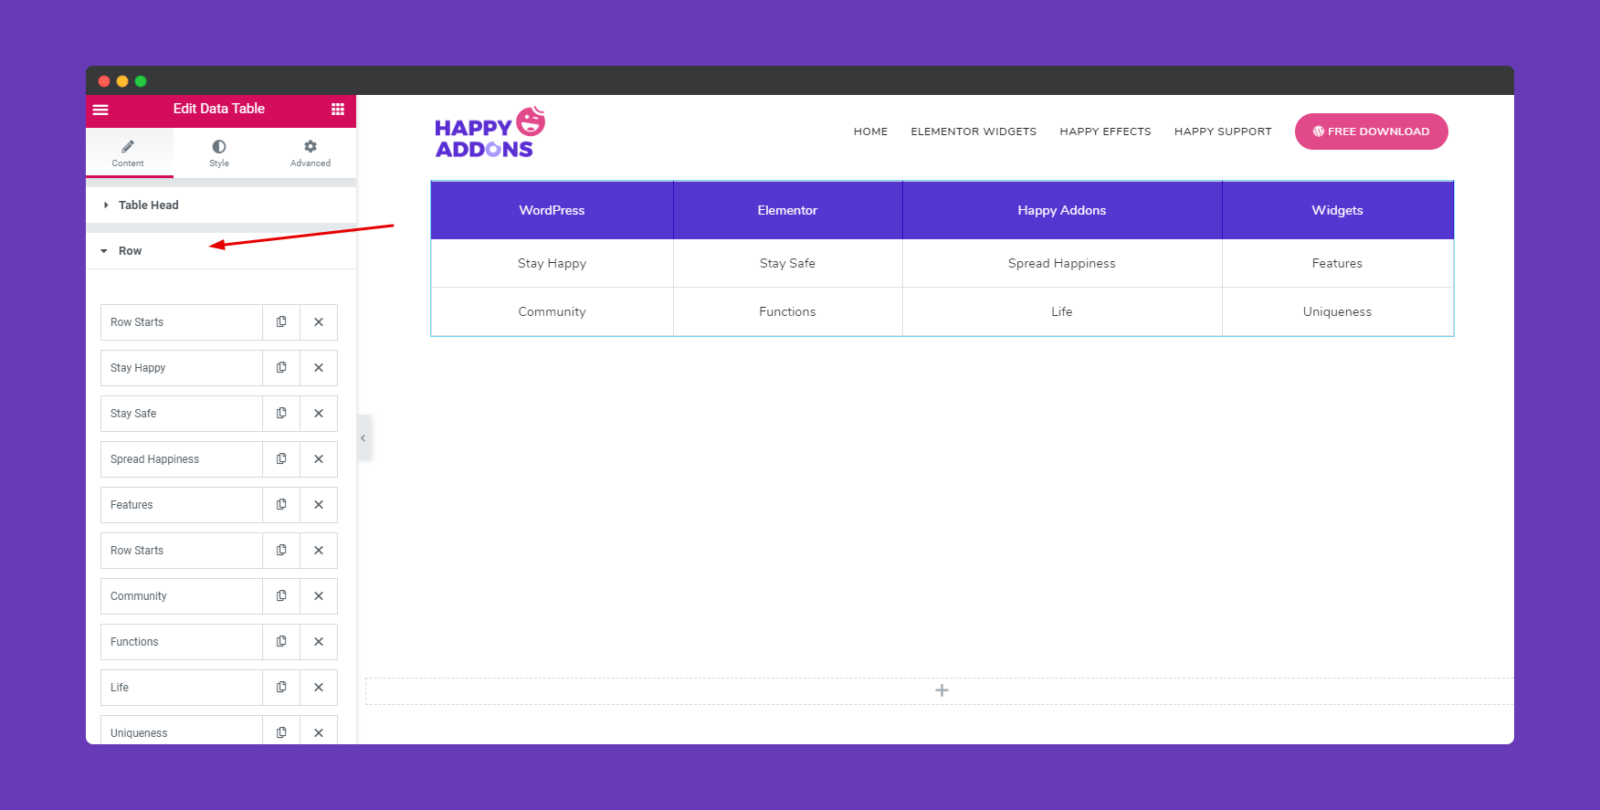
So before adding a ROW, make sure you name it ‘ROW Starts‘. And it will be identified as the individual ROW section. Let’s have a look.
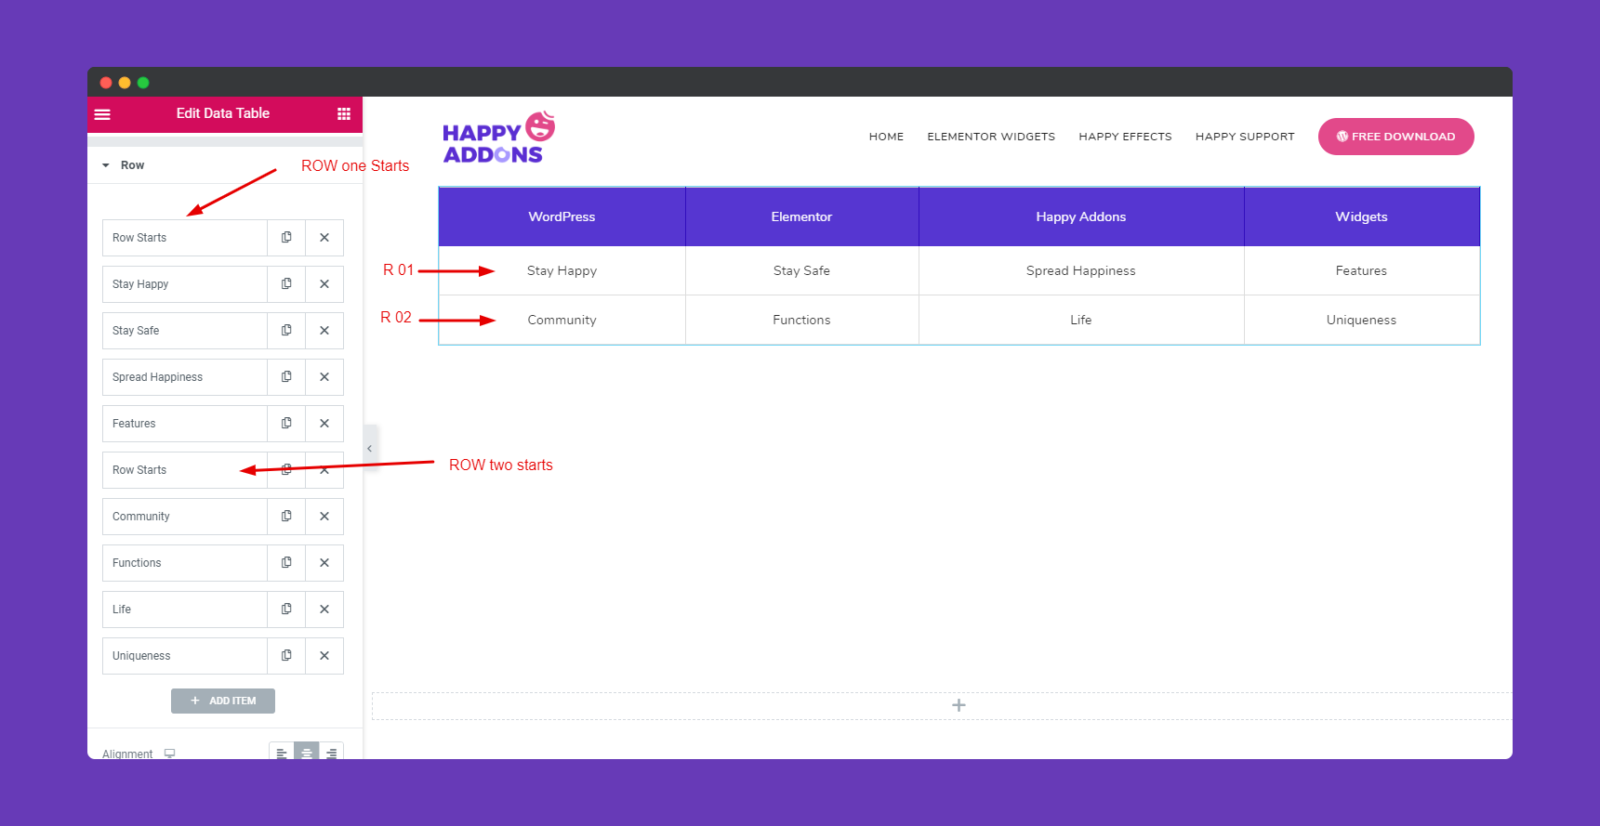
Okay, next, we’ll add another ‘ROW’. So let’s see how to add a new ROW and other items.
- First, add a new ‘ROW‘
- Choose ‘Column‘
- Give a title on it
- Do the same procedure for the rest of the parts
- That’s it!

Suppose, if you want to merge any ROWs or columns, you can do it easily. In that case, we’ll be going to merge ‘Happy Addons’ table head into one table.

To do that, first of all, select the head. Then type 2 in the column span, as we are merging two columns into one. That’s it.
Note: If you want to merge two rows into one, then do the same procedure, but in that time you need to select ‘Row Span‘.

Step Three:
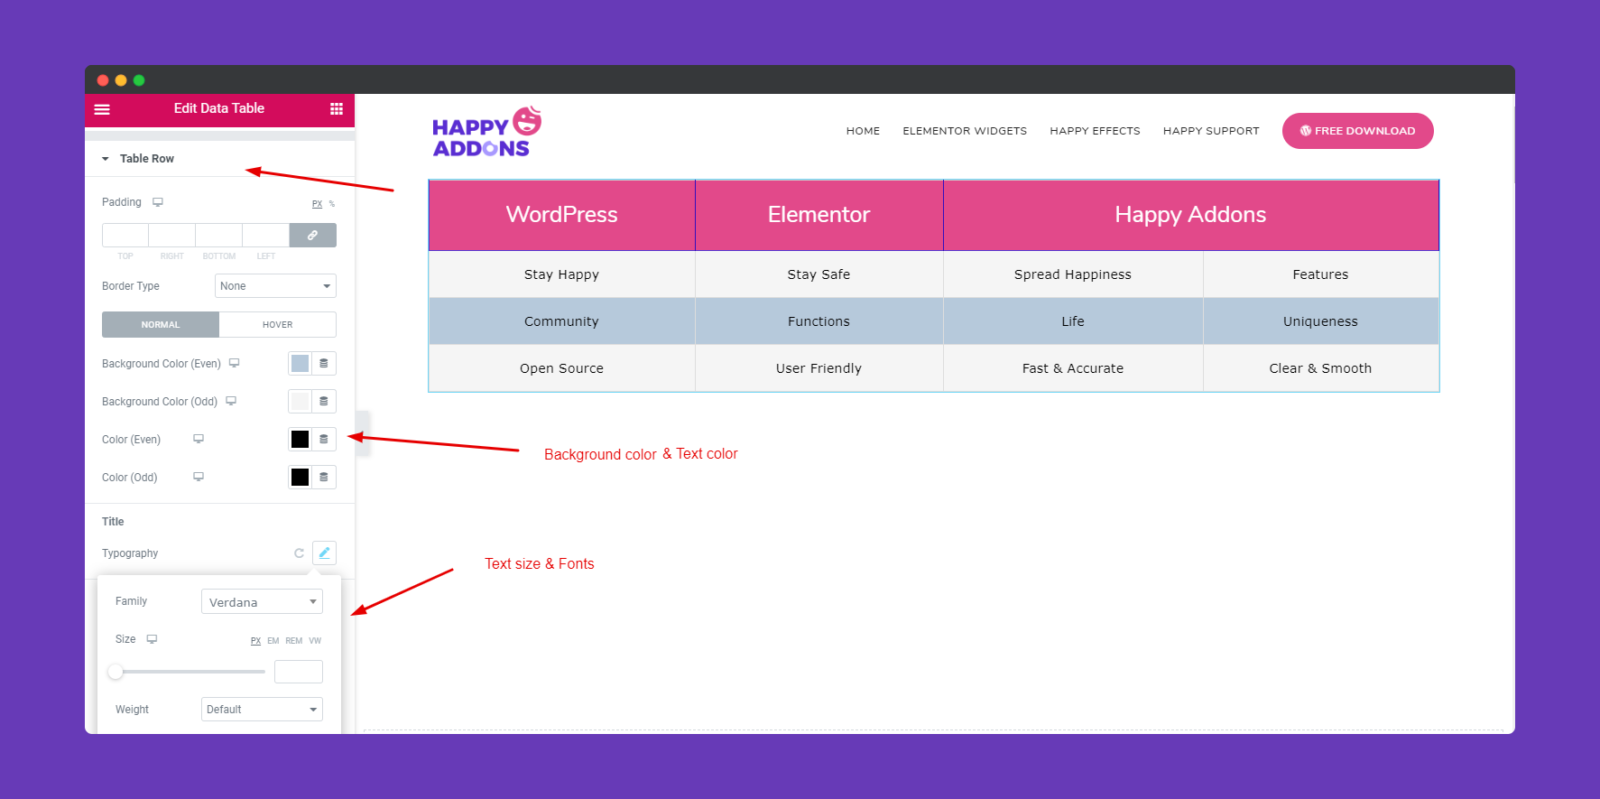
Well, to stylize the table, tap on the ‘Style‘ option. From here, you can change the color of each Row and Column, background color, text size, color margin, padding, and more.
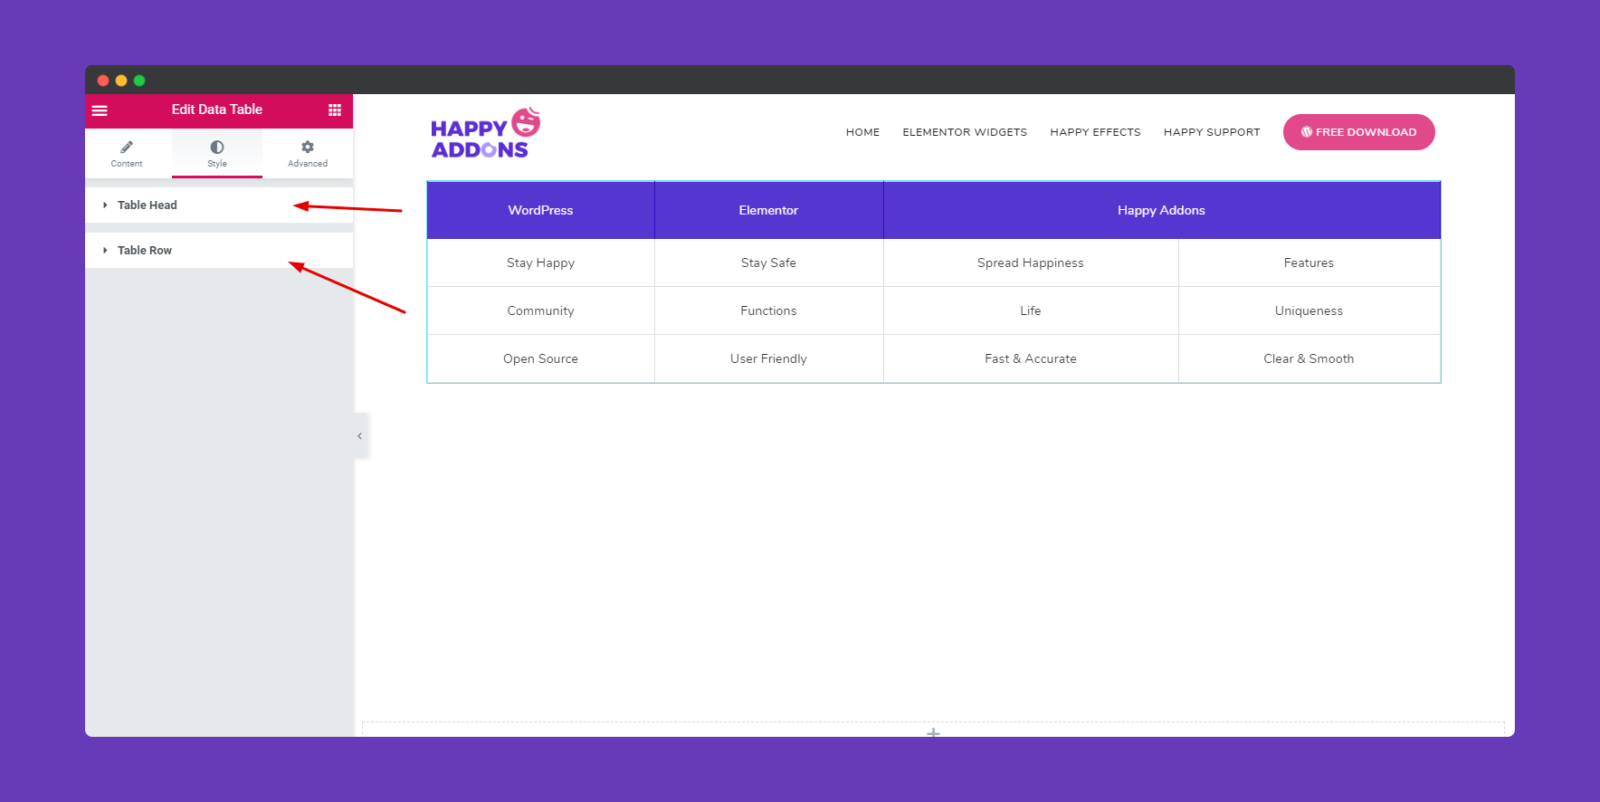
After clicking on the ‘Table Head‘, you’ll get the options for changing its color, size, typography, margin, padding, border, border type, and more.
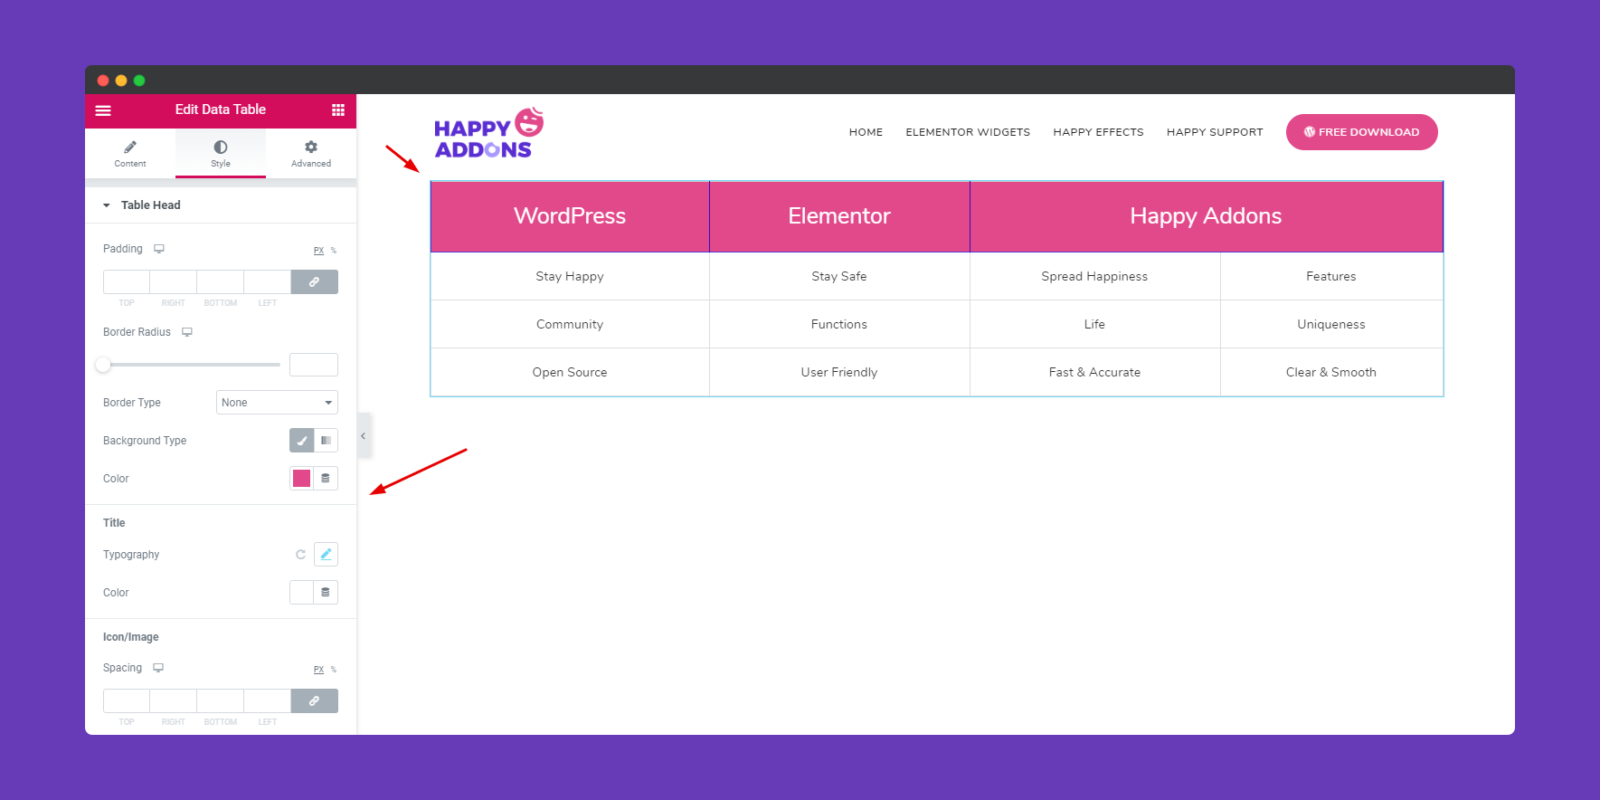
Next, you follow the same process to stylize the ‘Table Row‘ section as well as. For example, background color, font color, text size, and more.
Step Four:
If you want to add motion effects, Happy Effects, background, or make the page responsive, click on ‘Advanced‘ to explore those options. the ‘Advanced’ is a default feature of Elementor. Give a read to this Document to know more about Advanced features and its uses.
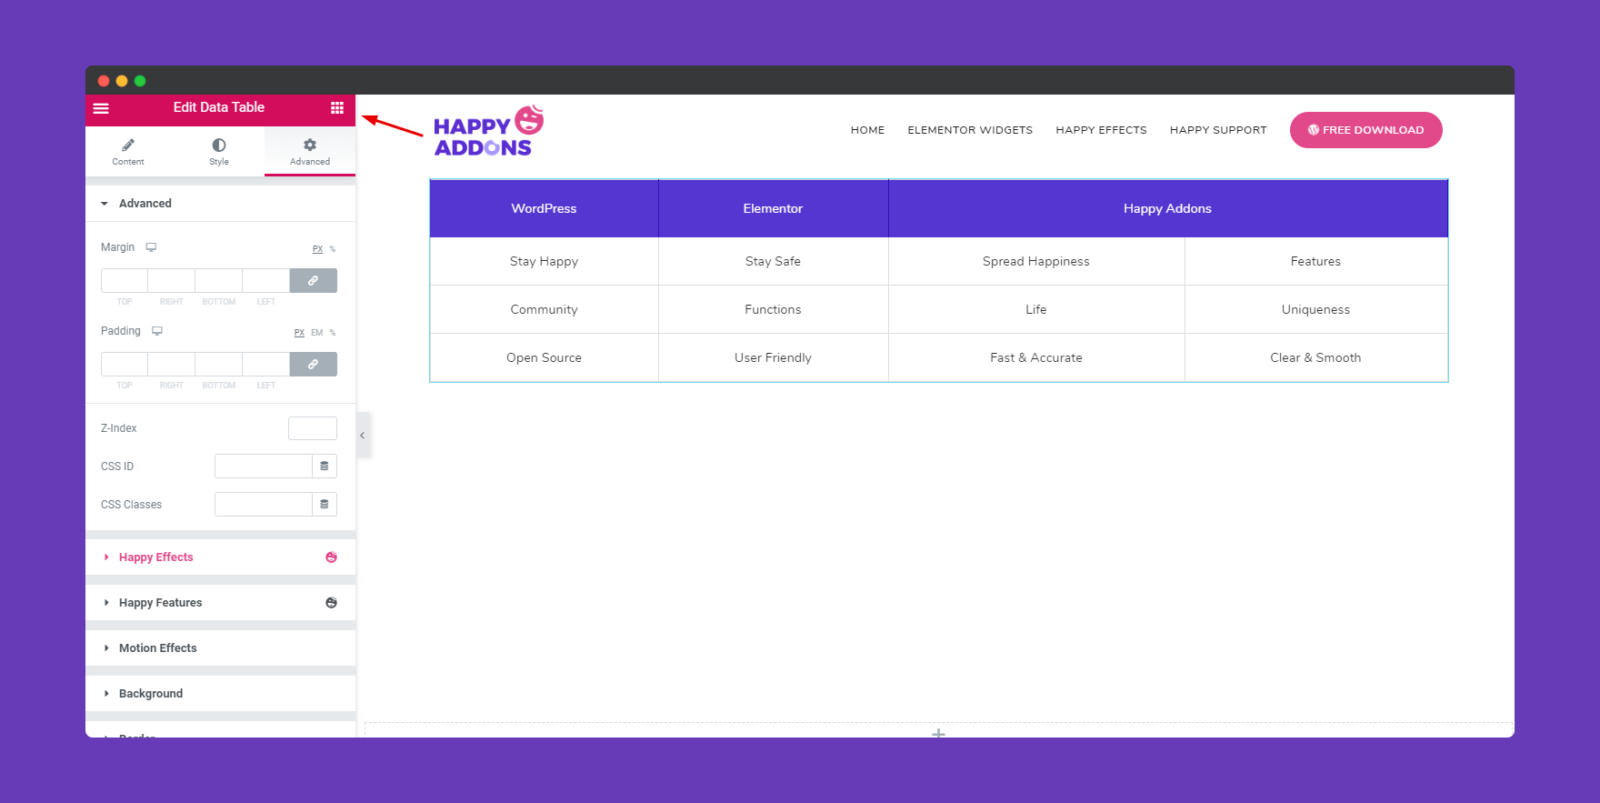
So after finishing all the editing procedures, click on the publish button. And your final preview will be:-

That’s It!
Enhancement in Data Table in Version v3.7.1 – 18 October 2022
You can now enable the scrolling option for your mobile responsive view. To enable that, navigate the Setting Tab and toggle the “Enable Scroll View” button. Enabling the switch will activate horizontal scrolling on a responsive view.
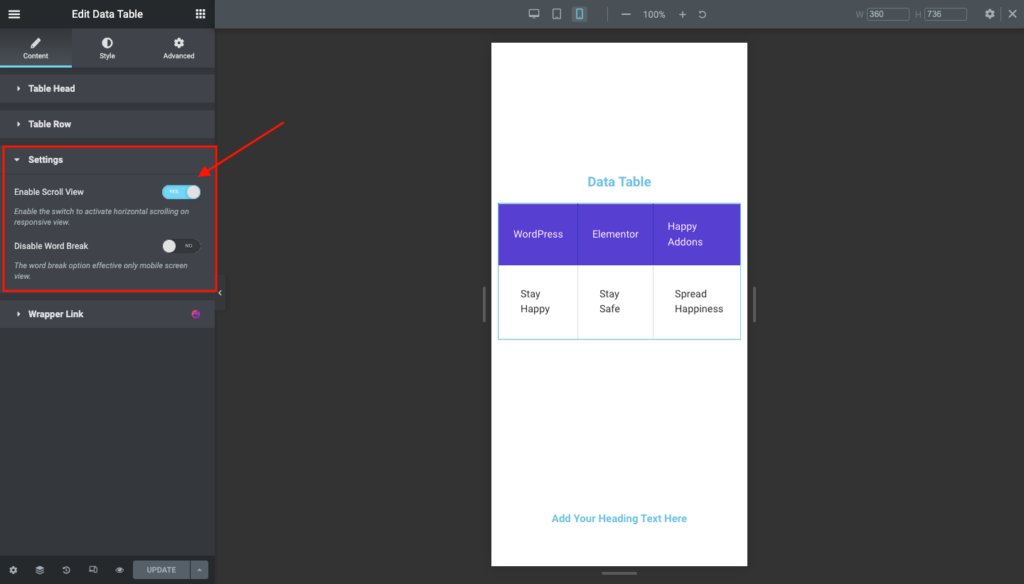
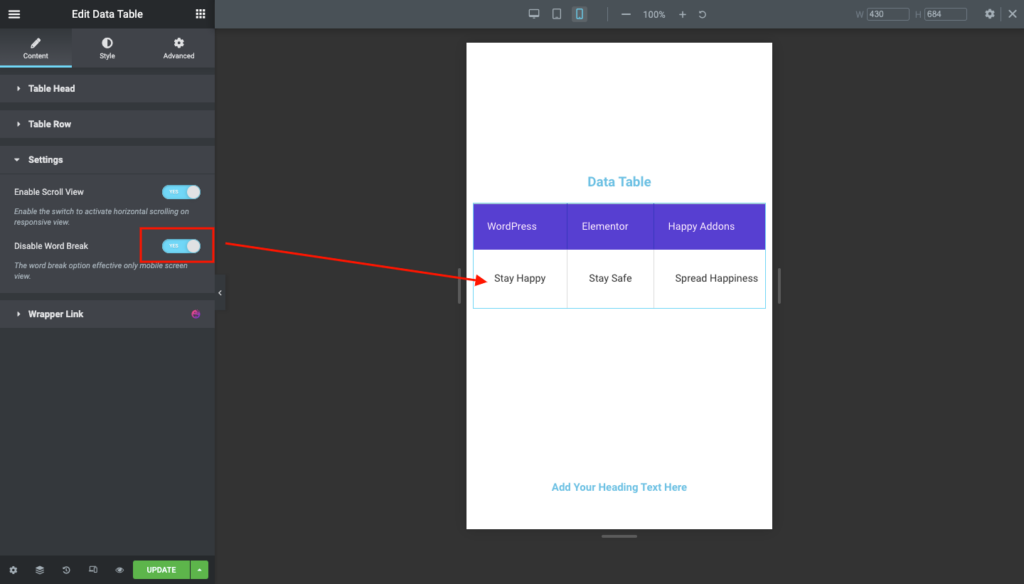
You can enable or disable the Word Break option to separate words.
For example, if you have two or more words in a column, then you can either show them in a line, or you can separate them from one word under another.
With Word Break:
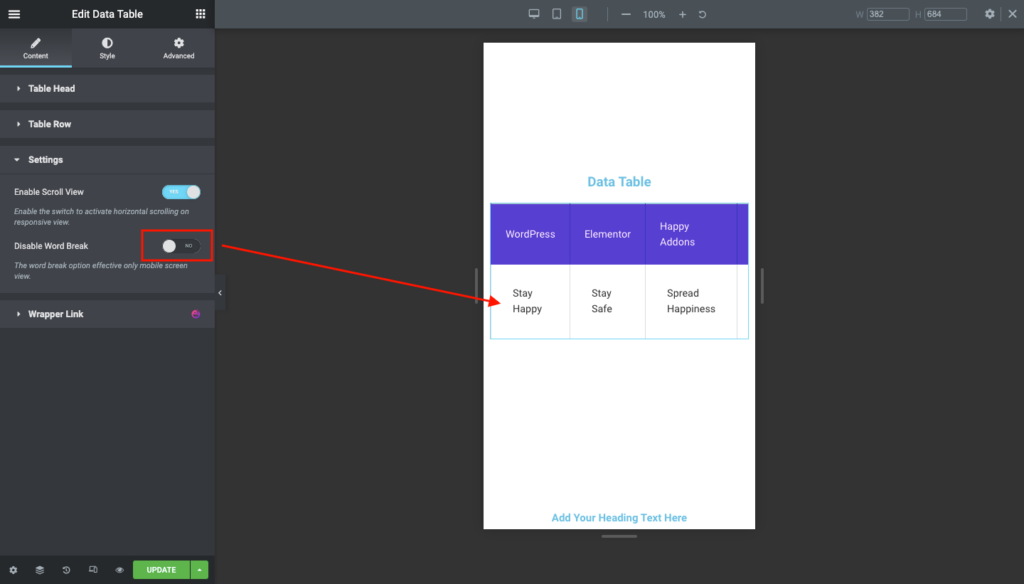
Without Word Break:
The final output will be:


