Happy Addons introduces Events Calendar widget for users to add Calendar on webpages only following some easy steps. However, the entire process is comparatively easy but needs your full concentration!
And this feature of Happy Addons includes three types of calendars. For example, manual calendar, google calendar, events calendar.
So let’s see how to use this widget on your WordPress site. Let’s get started.
How To Use The Events Calendar
Step One:
To use the Events Calendar on your WordPress site, select the widget from the left-sidebar and drag it to the canvas.
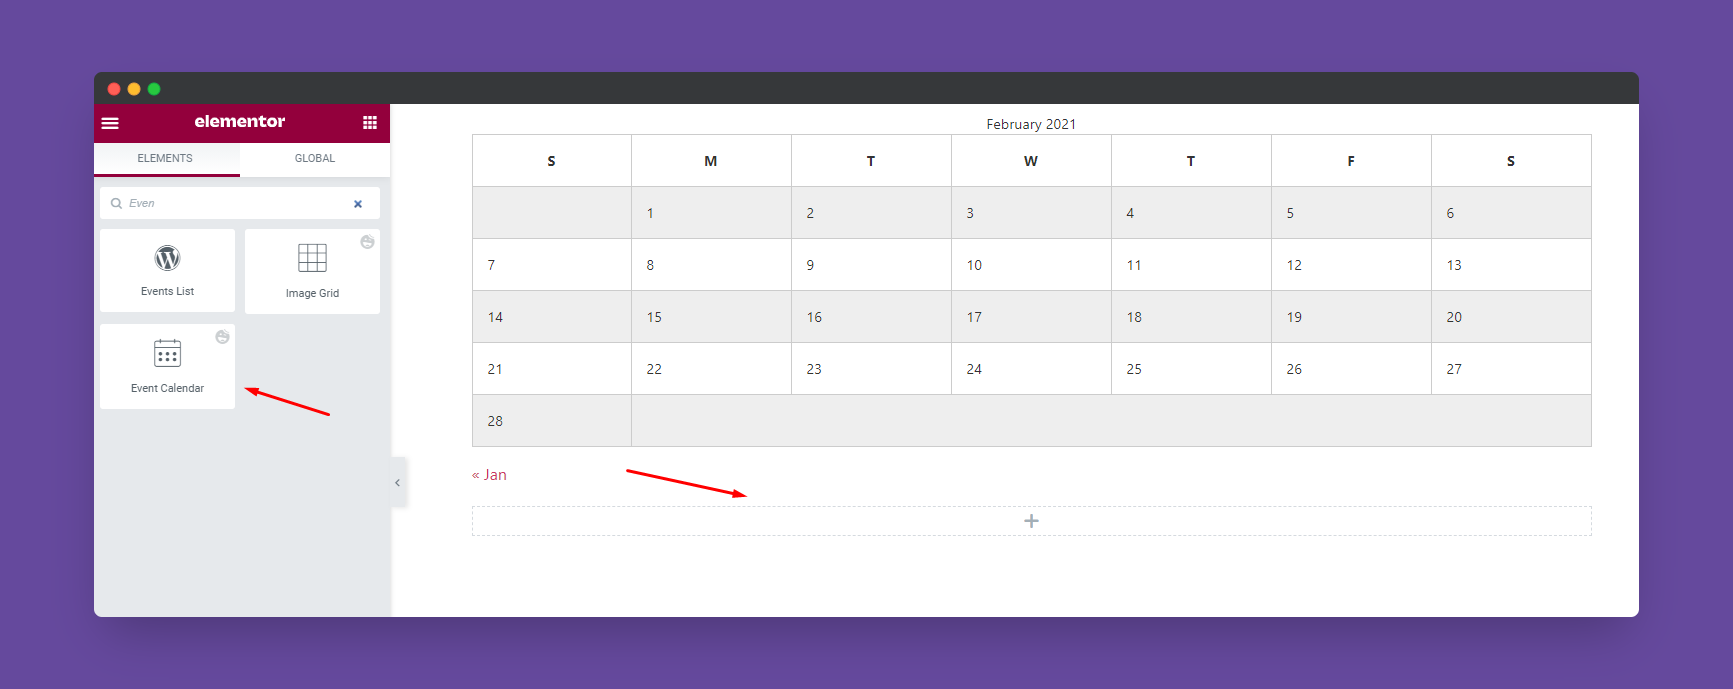
After that you’ll get the initial details of Events calendar.
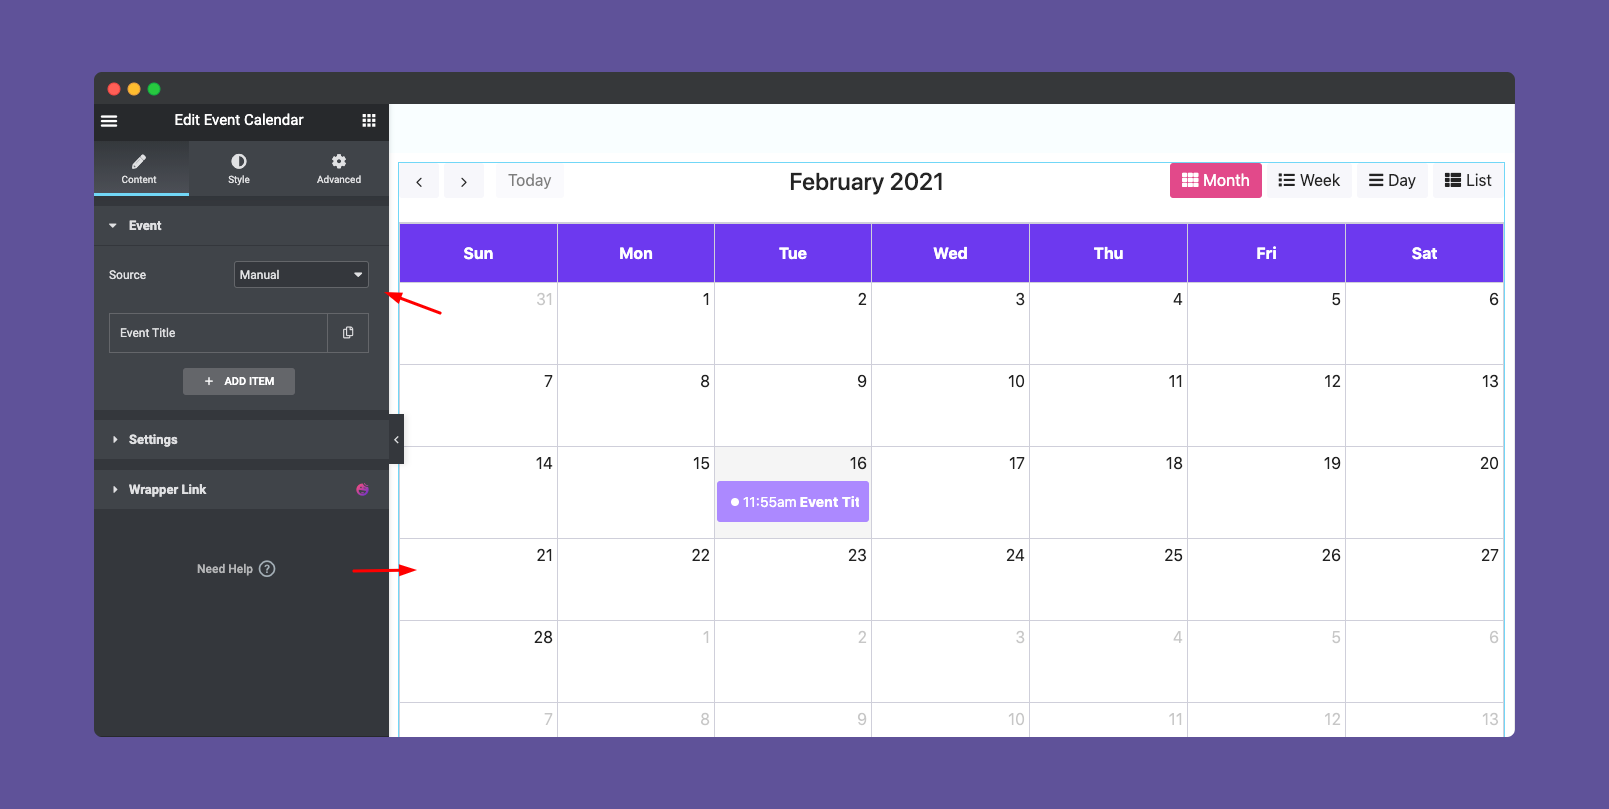
Step Two:
In Events Calendar widget, you can use three types of calendar.
- Manual calendar
- Google Calendar
- Events calendar
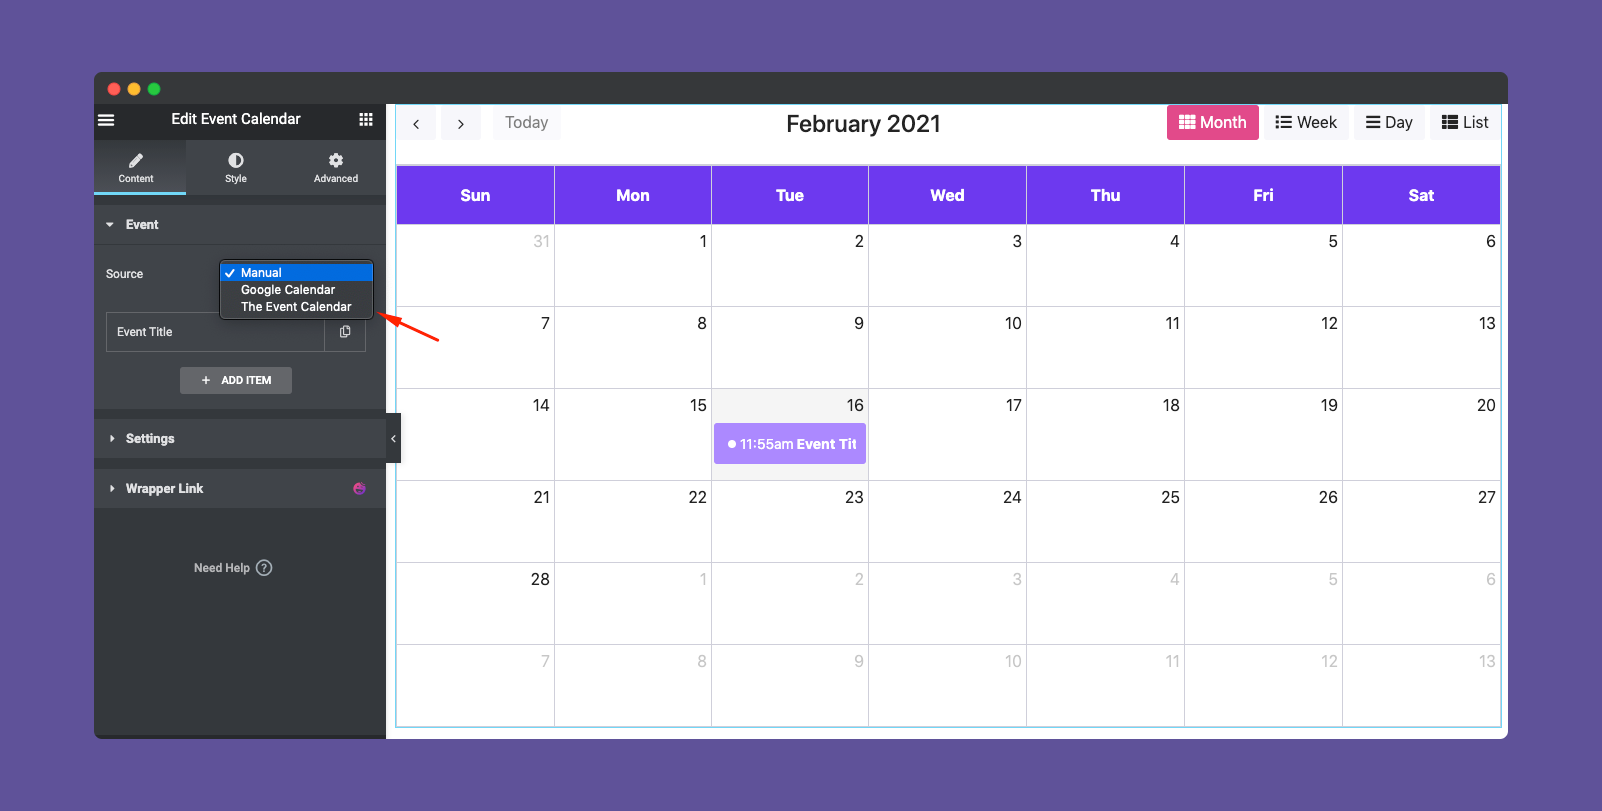
Manual Calendar
The first calendar that you can use is – Manual calendar. It will come initially. So here is the basic configuration that you can do.
You can give a title to your Events, author name and location.
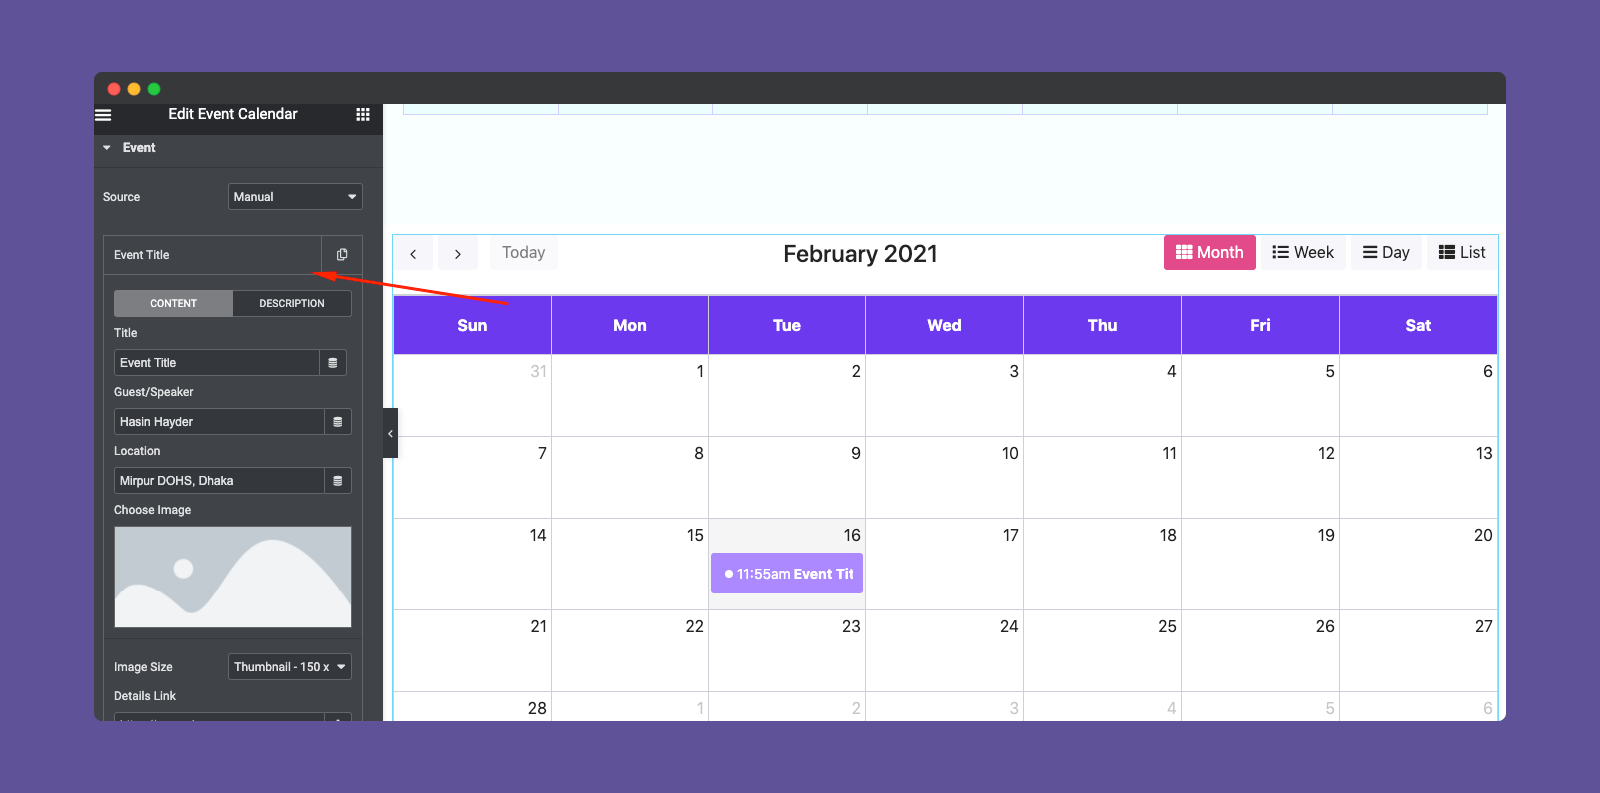
Also, you can give an image, start & end date, etc.
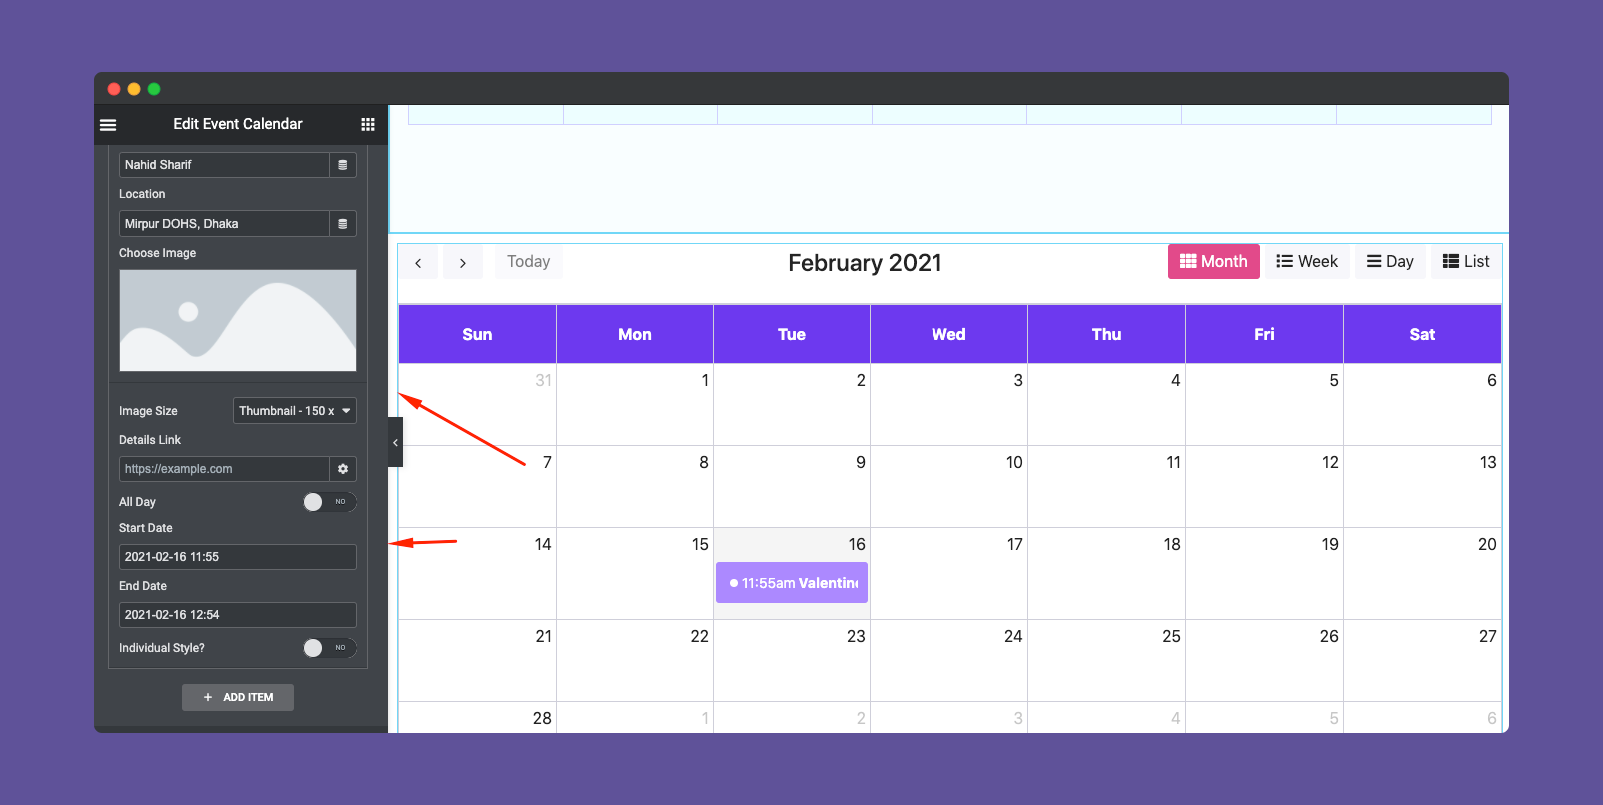
You can customize each event individually. To do that you have to toggle on the ‘Individual style‘ option. And then you can stylize each event.
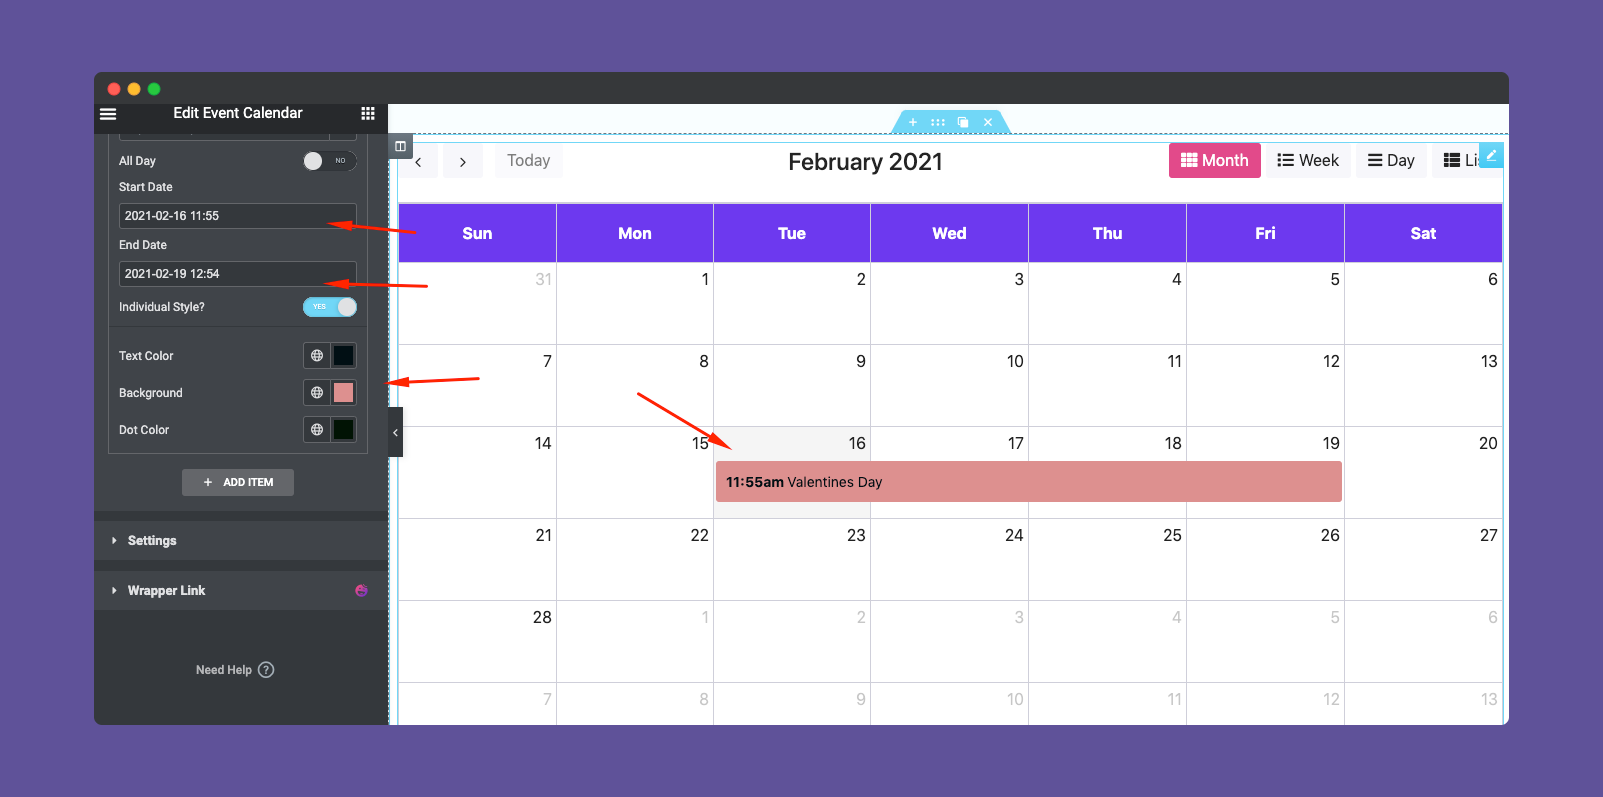
So after customizing Manual events, you can preview it from here. To do that click on the event and see the preview.

Google Calendar
To use Google Calendar, you just need to select the Google Calendar from the dropdown menu.
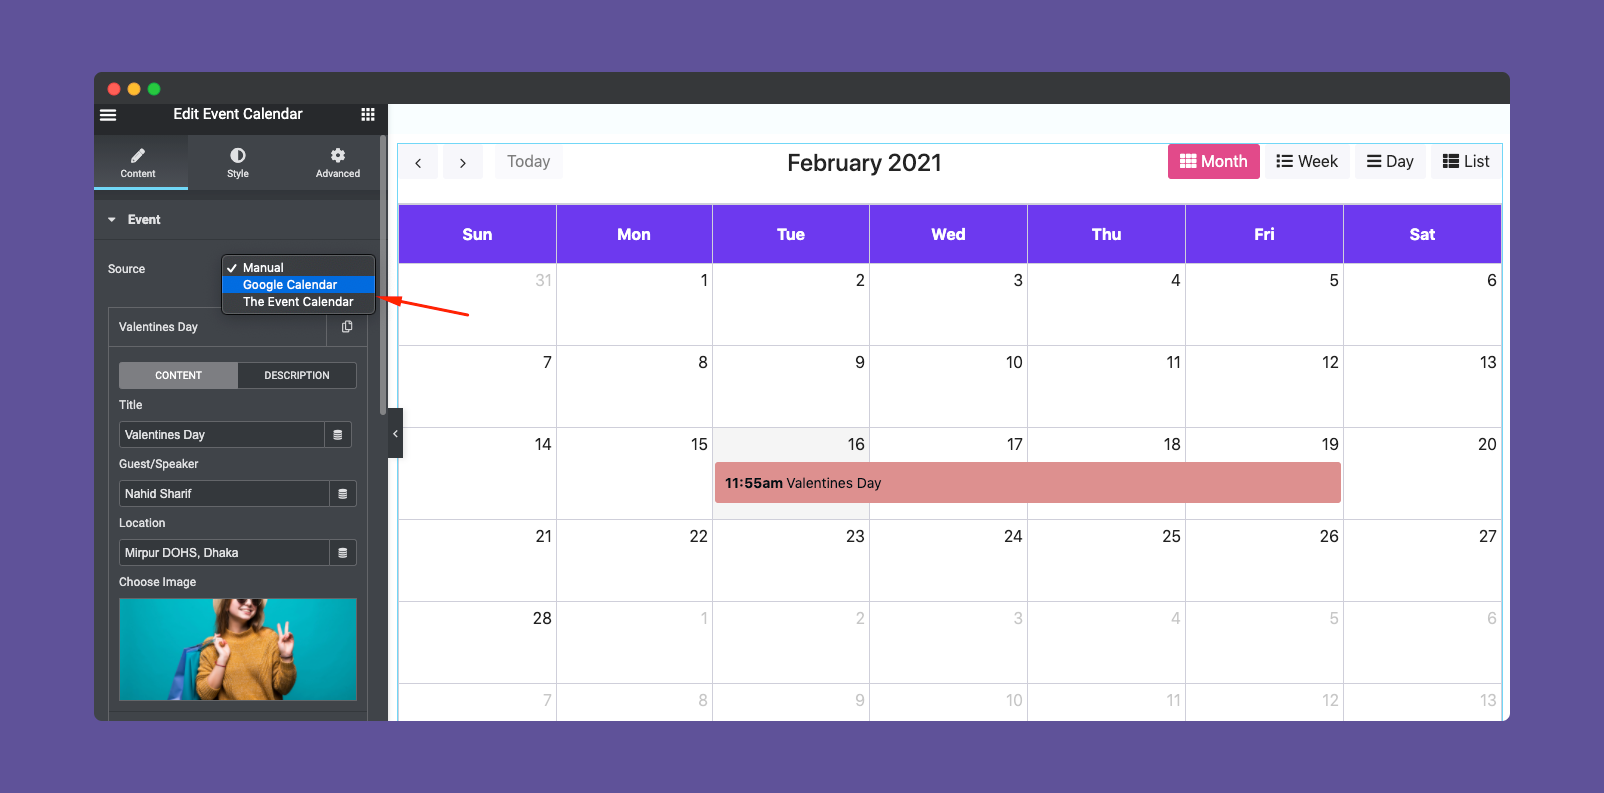
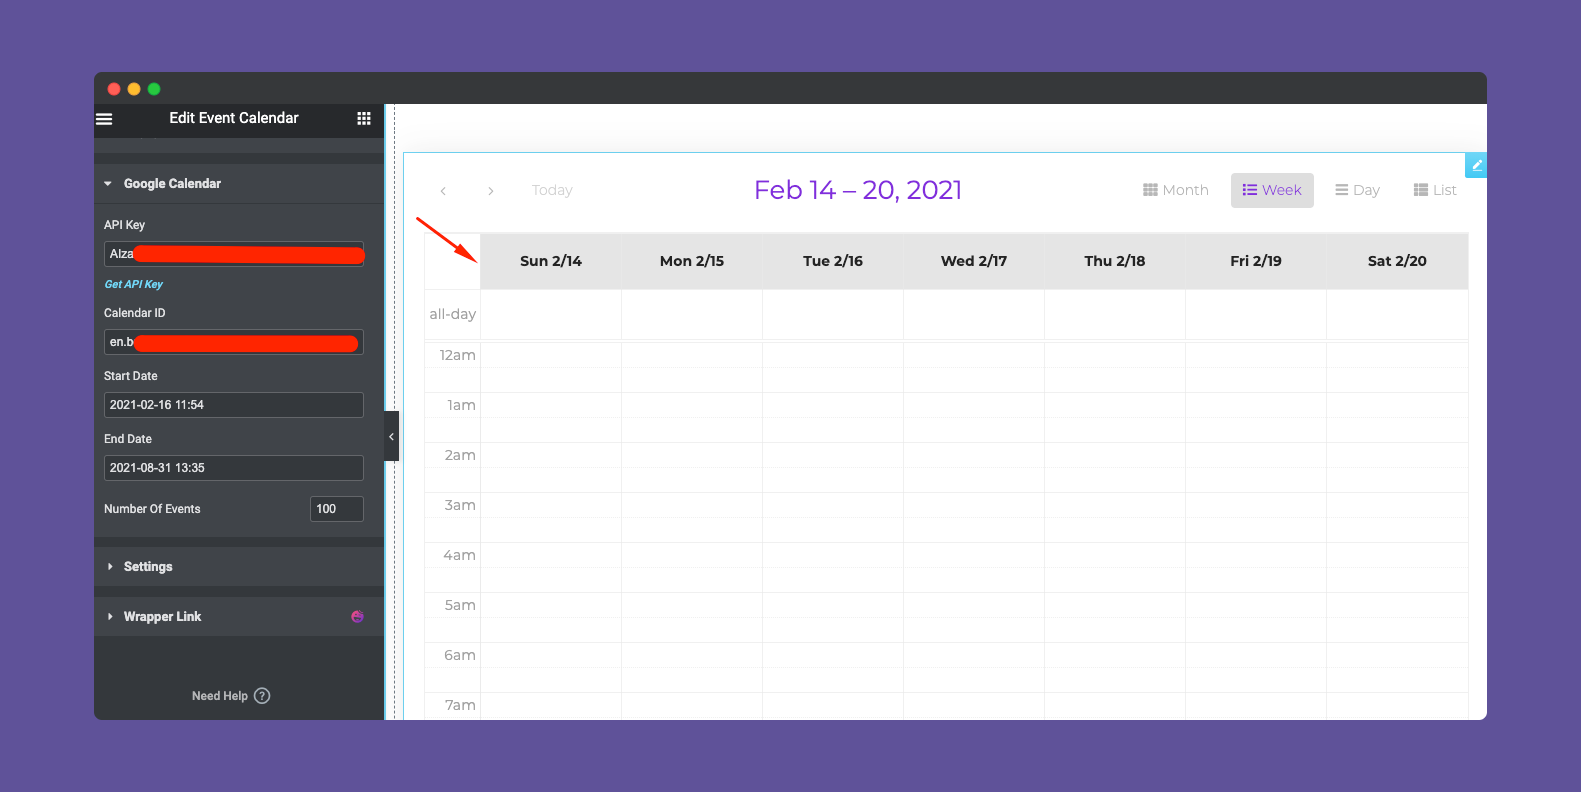
After selecting Google Calendar, you’ll be asked to insert API key & Calendar ID.
Here is guide to create Google API key.
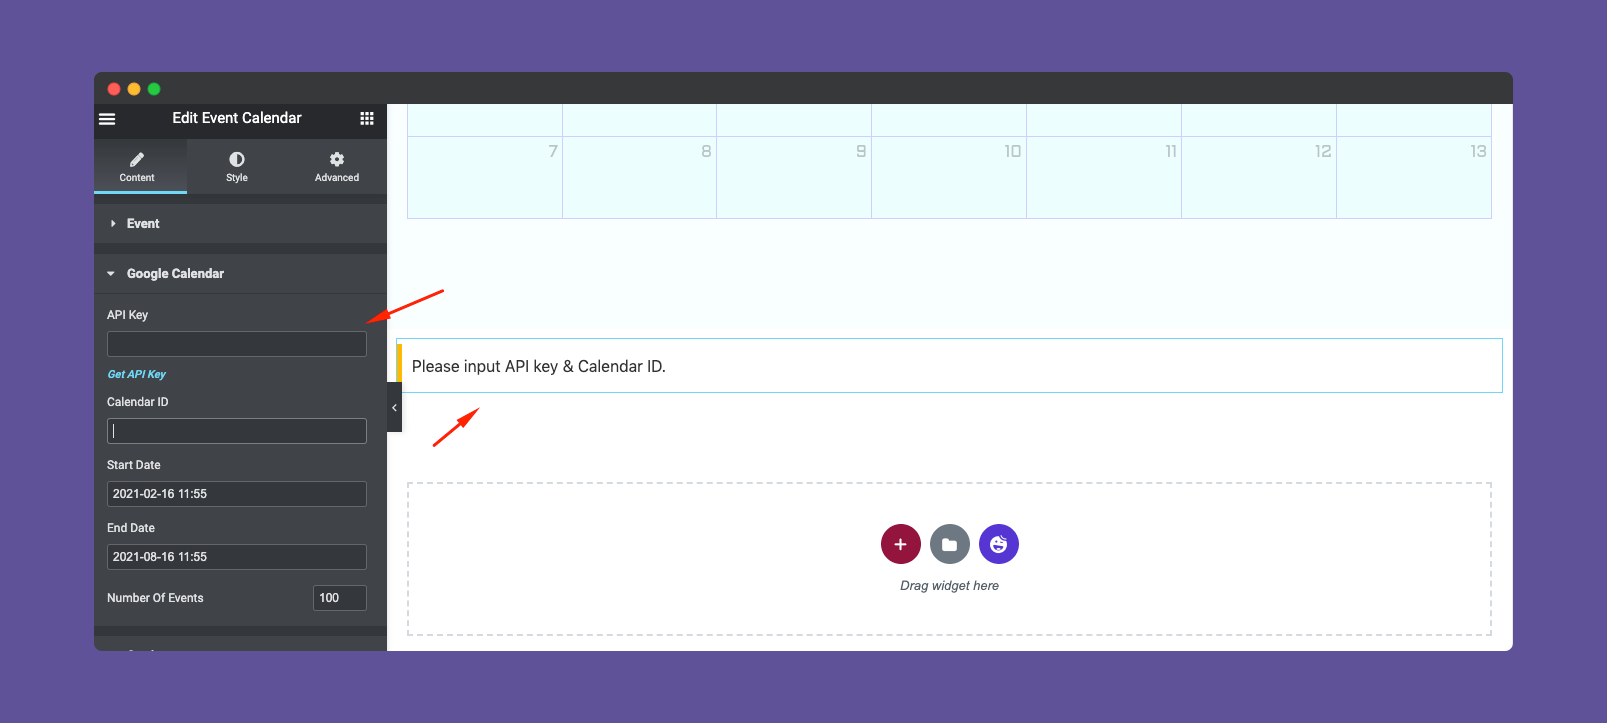
After adding the Google API keys & Calendar ID, the calendar will appear next to the screen. Also, you can set the start & end date along with number of events.
Now click on the setting option, you’ll get many options to customize. For example, set the language, calendar default view, first day of the week, show event pop-up, all-day text, event day text, etc. And you can also add a wrapper link within the event.
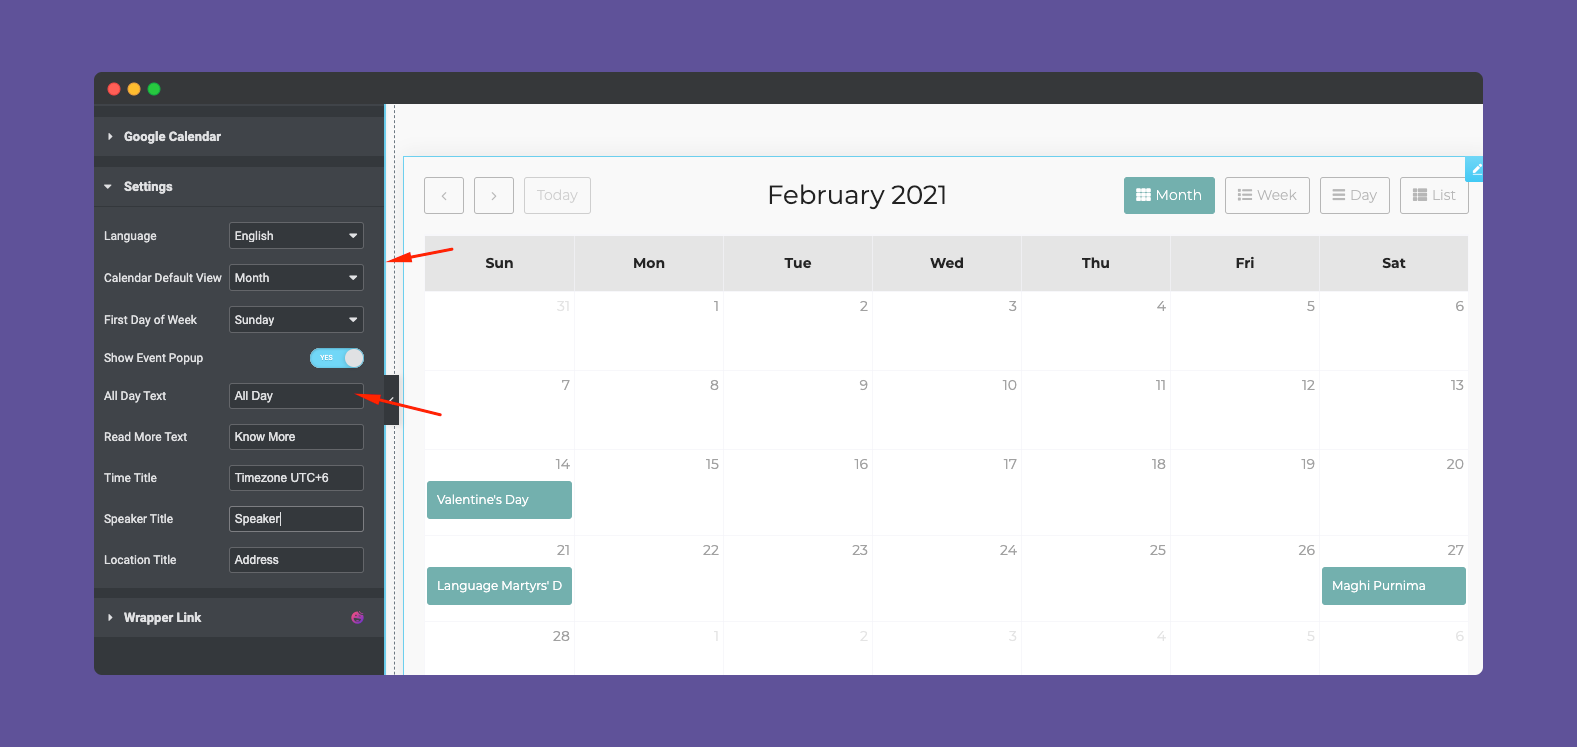
To know more about the Wrapper link, check out the documentation here.
Note: In order to be able to actually link my google calendar with the events calendar from HappyAddons, I had to publish the google calendar. Without it, it won’t fetch the calendars data. And will return the message to “enter a valid API key and calendar ID”
Events Calendar
Now click on the Events Calendar. Similarly, it will appear on the screen.
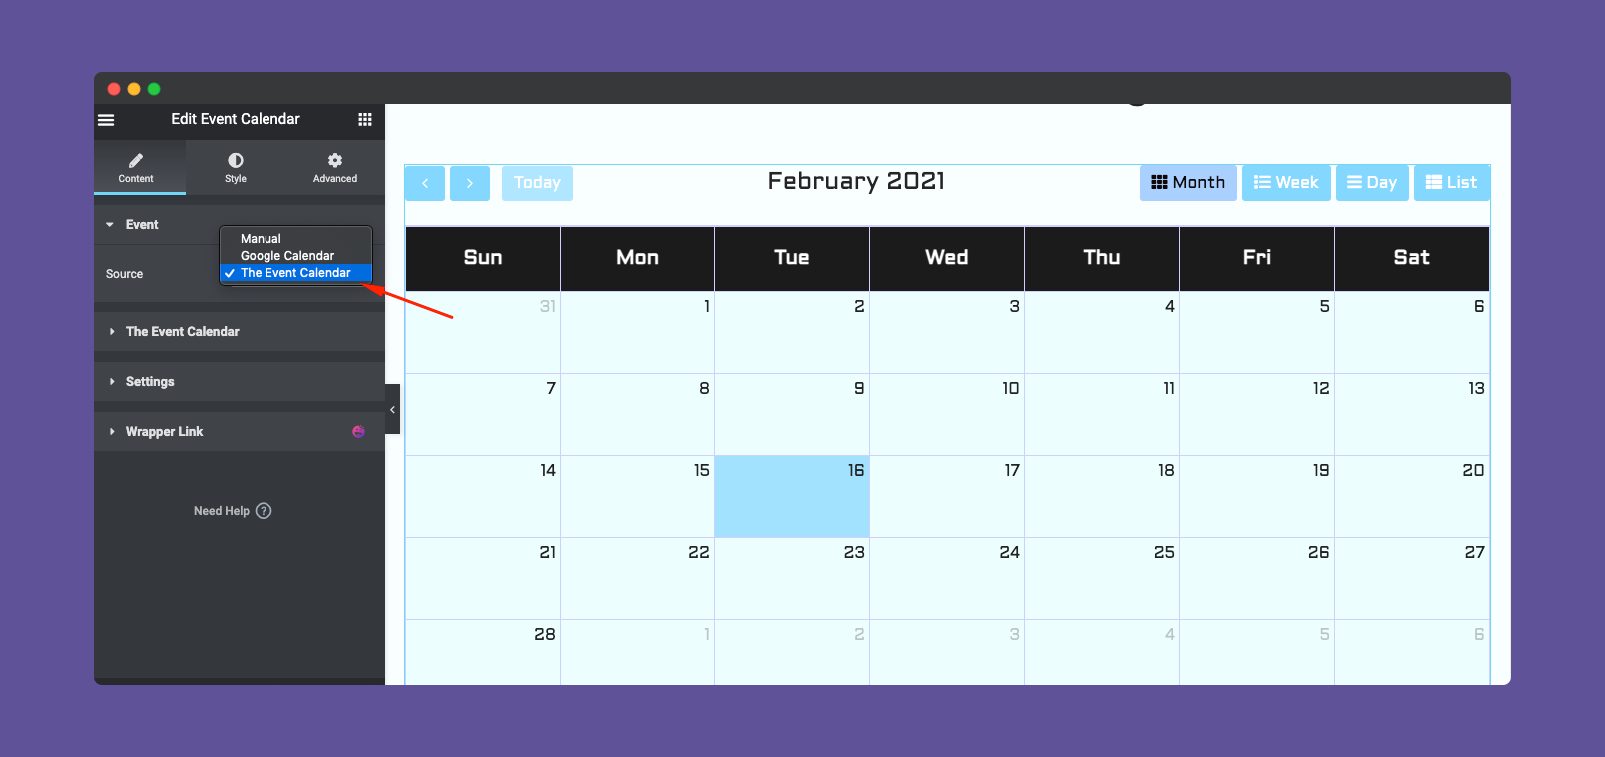
Now tap on the event calendar. And here you can set the event according to all events, category and selected events.
NB: Before using Events Calendar, you’ll need to install it. So if you haven’t installed it yet, here is the link to install the Events Calendar plugin.
Event item: You can set the event number to show many events that you want to show in the calendar.
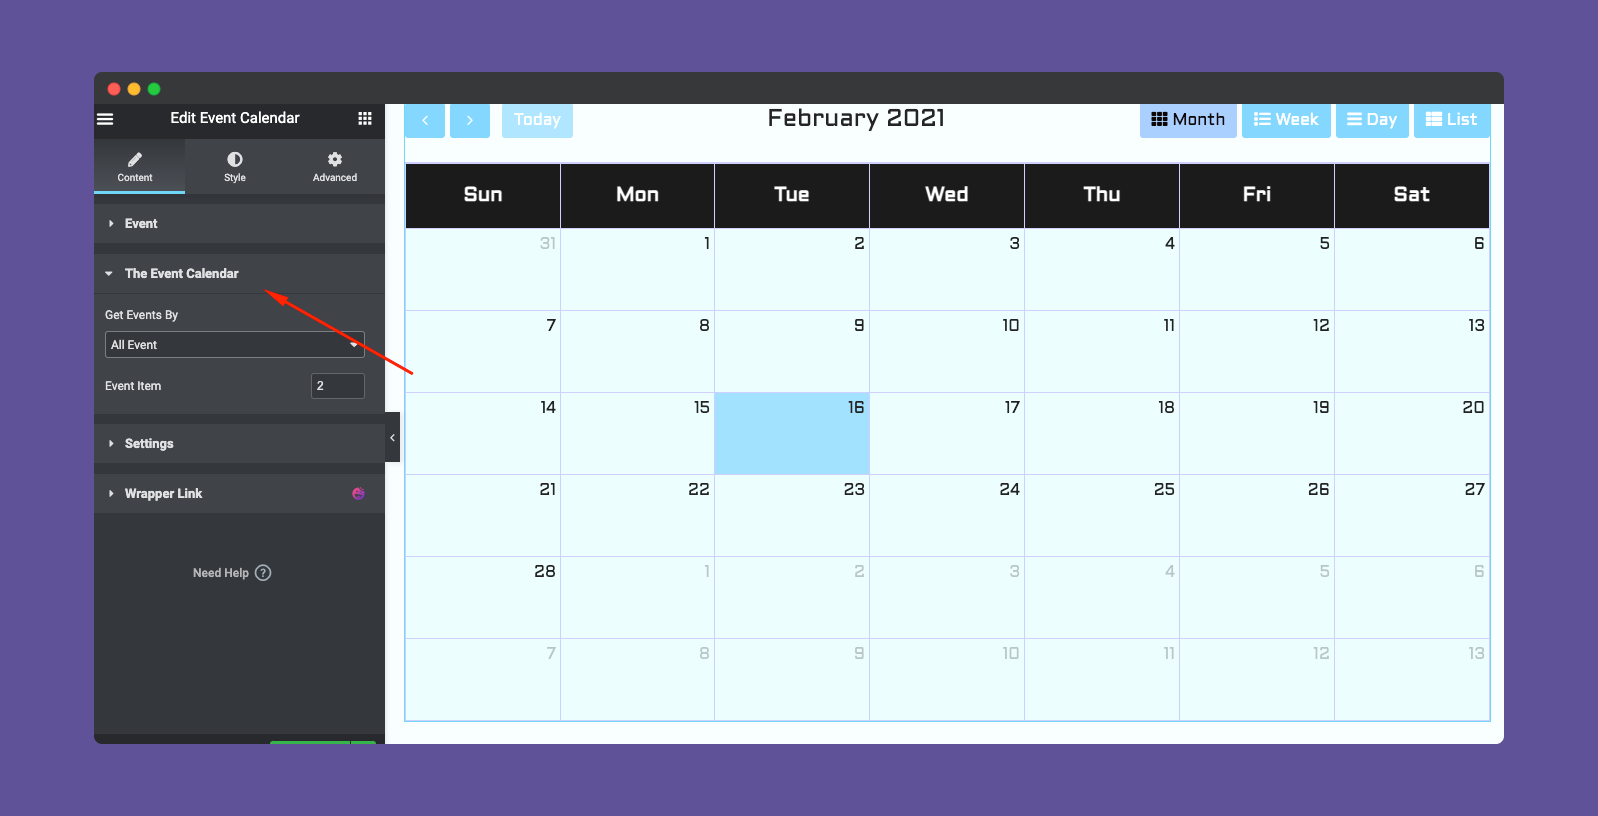
Note: Calendar settings are almost the same for all the calendar types. So you can set it same or keep it different.
Step Three:
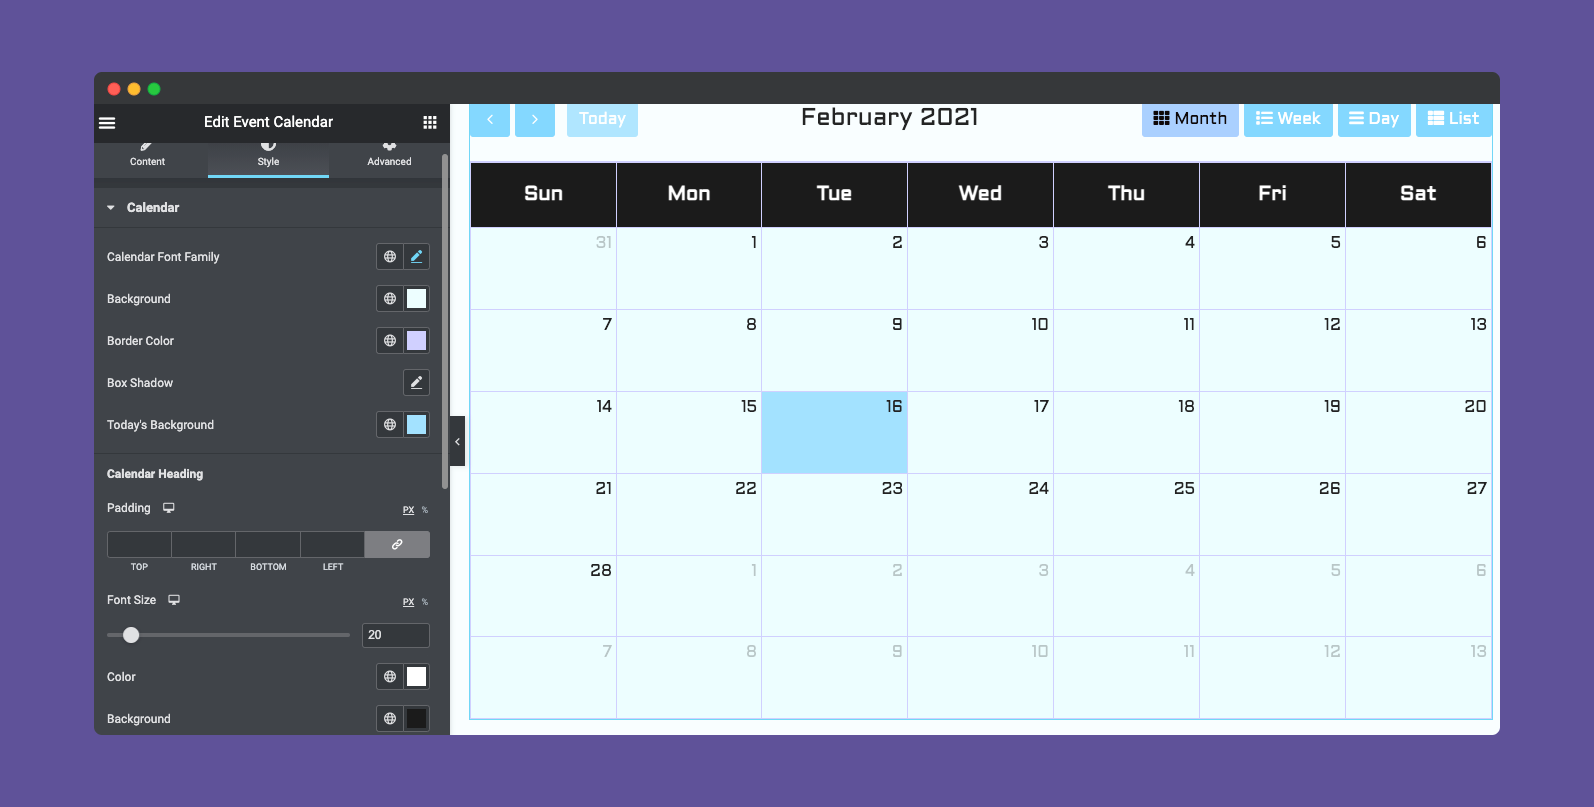
When you click on the Style button, you’ll get four available options.
- Calendar
- Top bar
- Events
- Event popup
NB: These settings are almost same for all calendar types. So we’re showing the style section using Manual calendar.
So here you can change font size, background color, border color, box-shadow, today’s background, calendar heading, padding, etc.
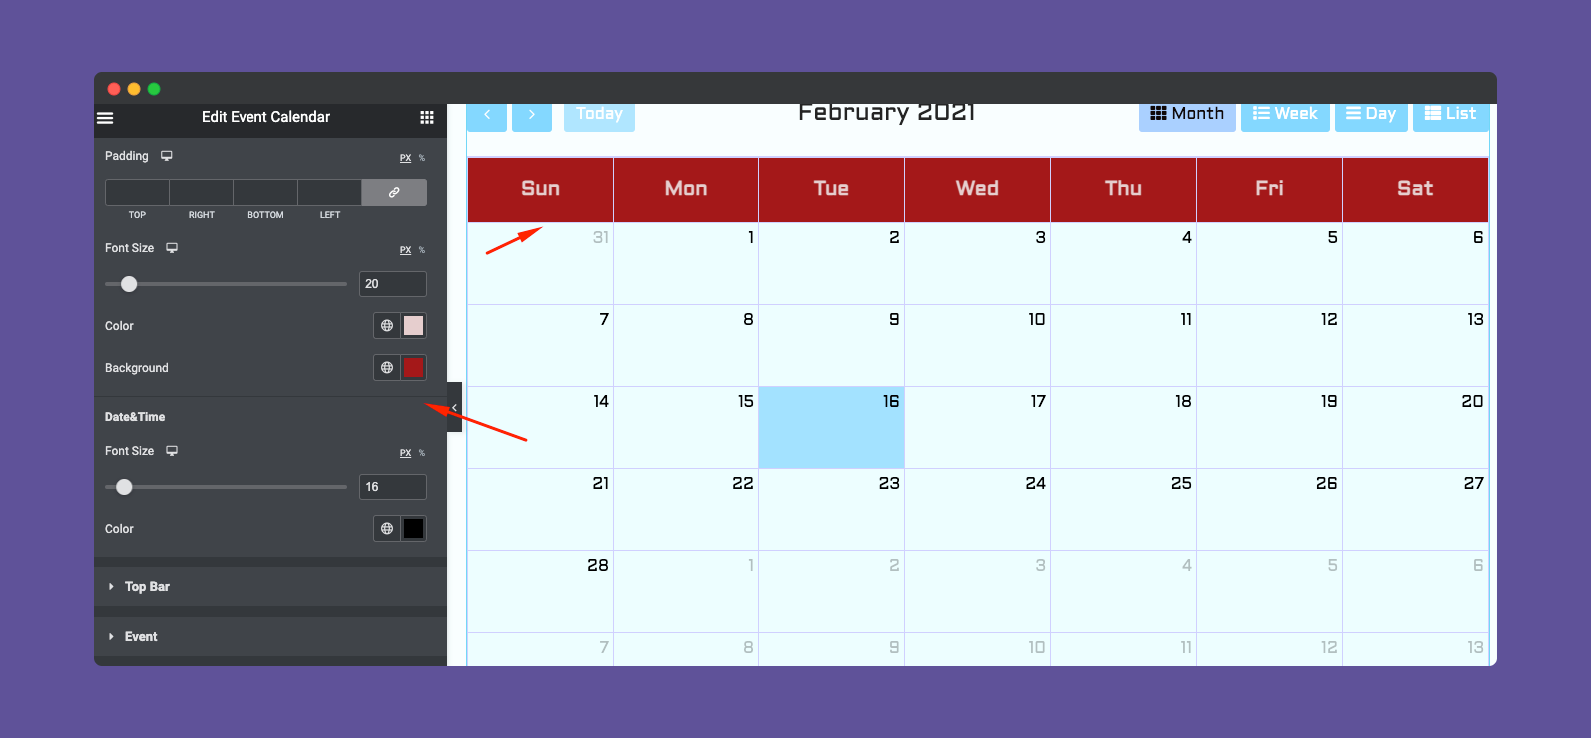
Next slightly scroll down. And here you can change the font size, color, background, top bar font size, etc.
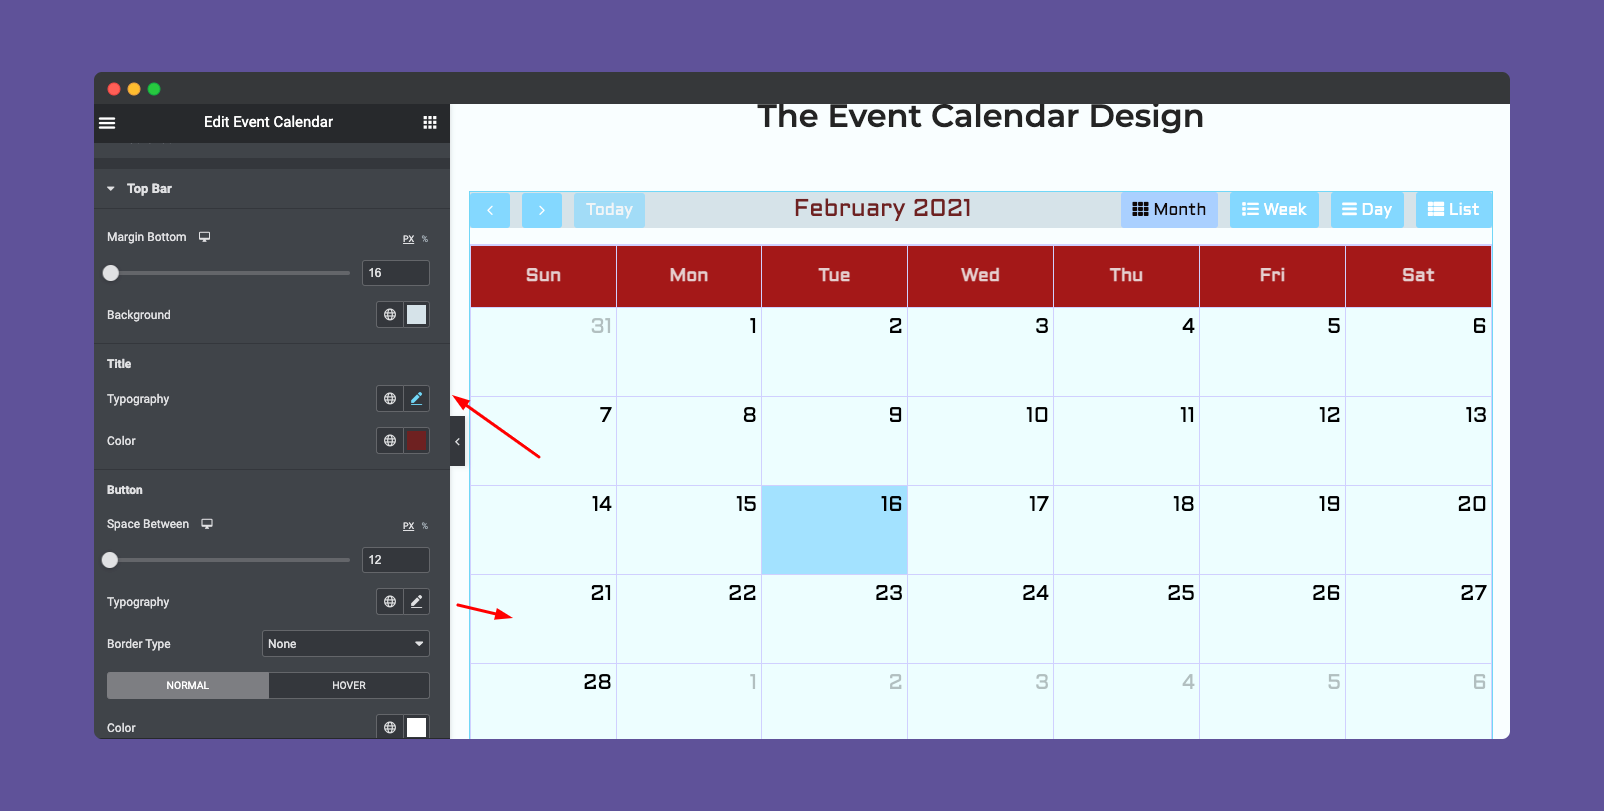
To stylize the top-bar, tap on that section and you can change color, background color, spacing, typography, text color, section space, hover, etc.
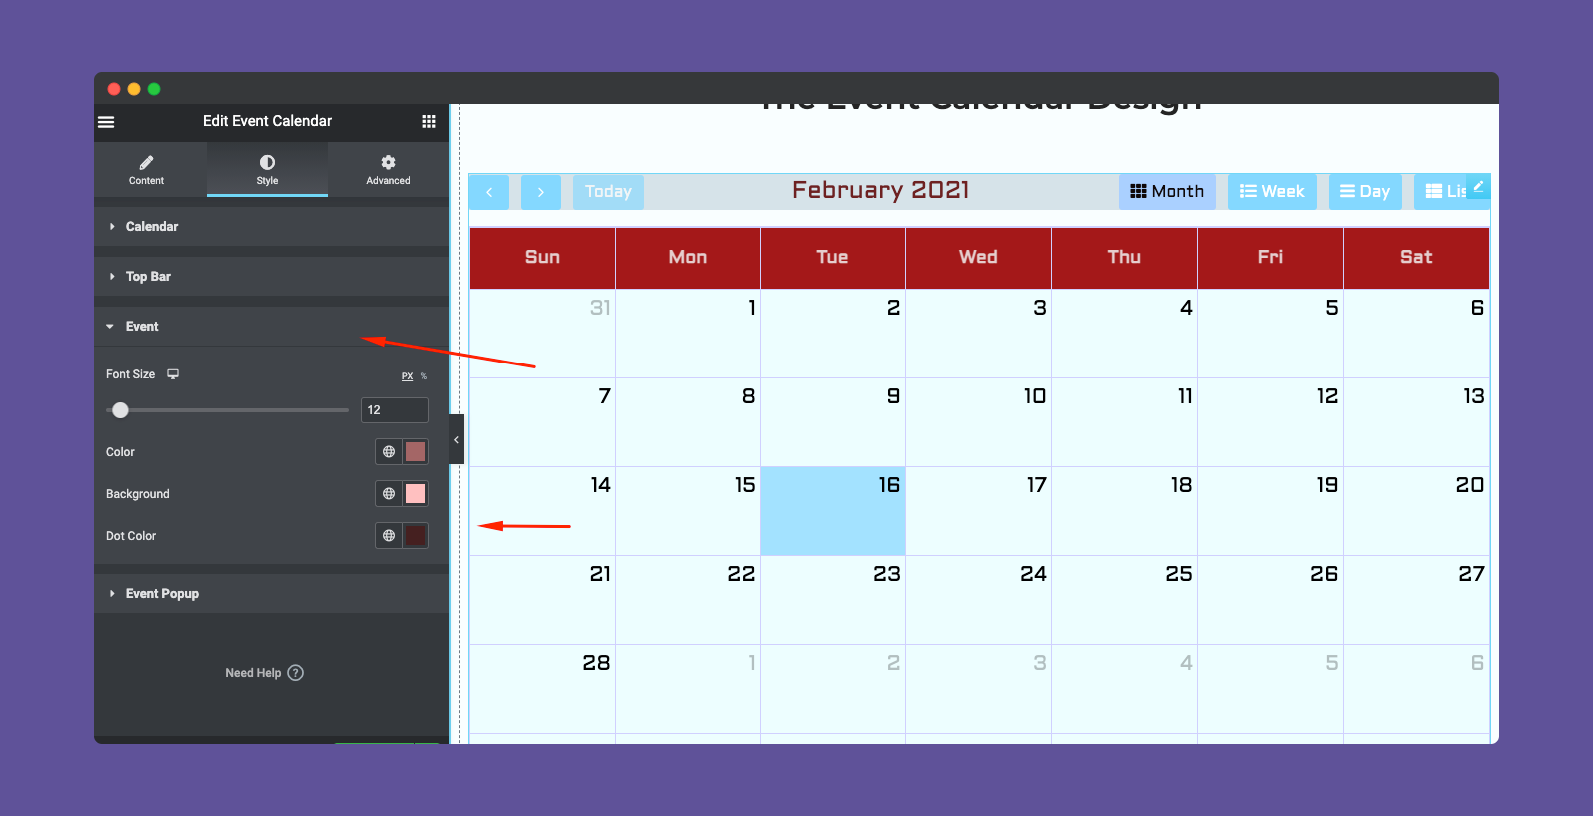
Next, we have the event section to stylize. Here you can similarly change the event’s font size, color, background color, and dot color.
After your users click on your event, they will get an fresh new popup window. And you can also customize it.
To do that click on the event popup. Here you can resize it, add padding, margin, include a border, and border-radius, border type.
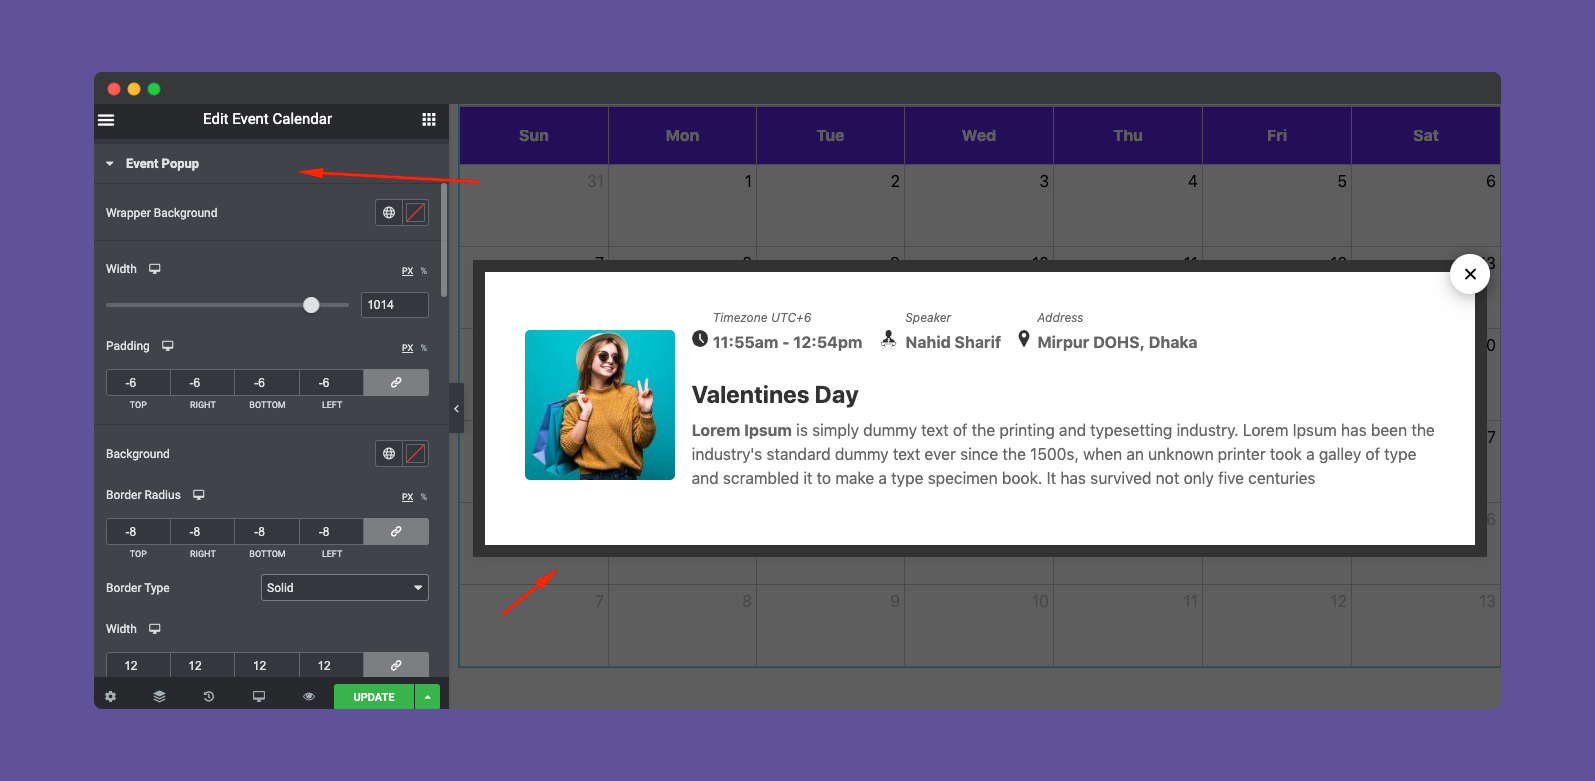
Similarly, you can apply all the styles to every section of the popup. For example, metadata, description, read more, popup close button, etc.
Step Four:
There is also an Advanced option which is an elementor default option. There is a happy effect, motion effects, etc. if you want to add more functions to your widget and make it more fun and stylish.
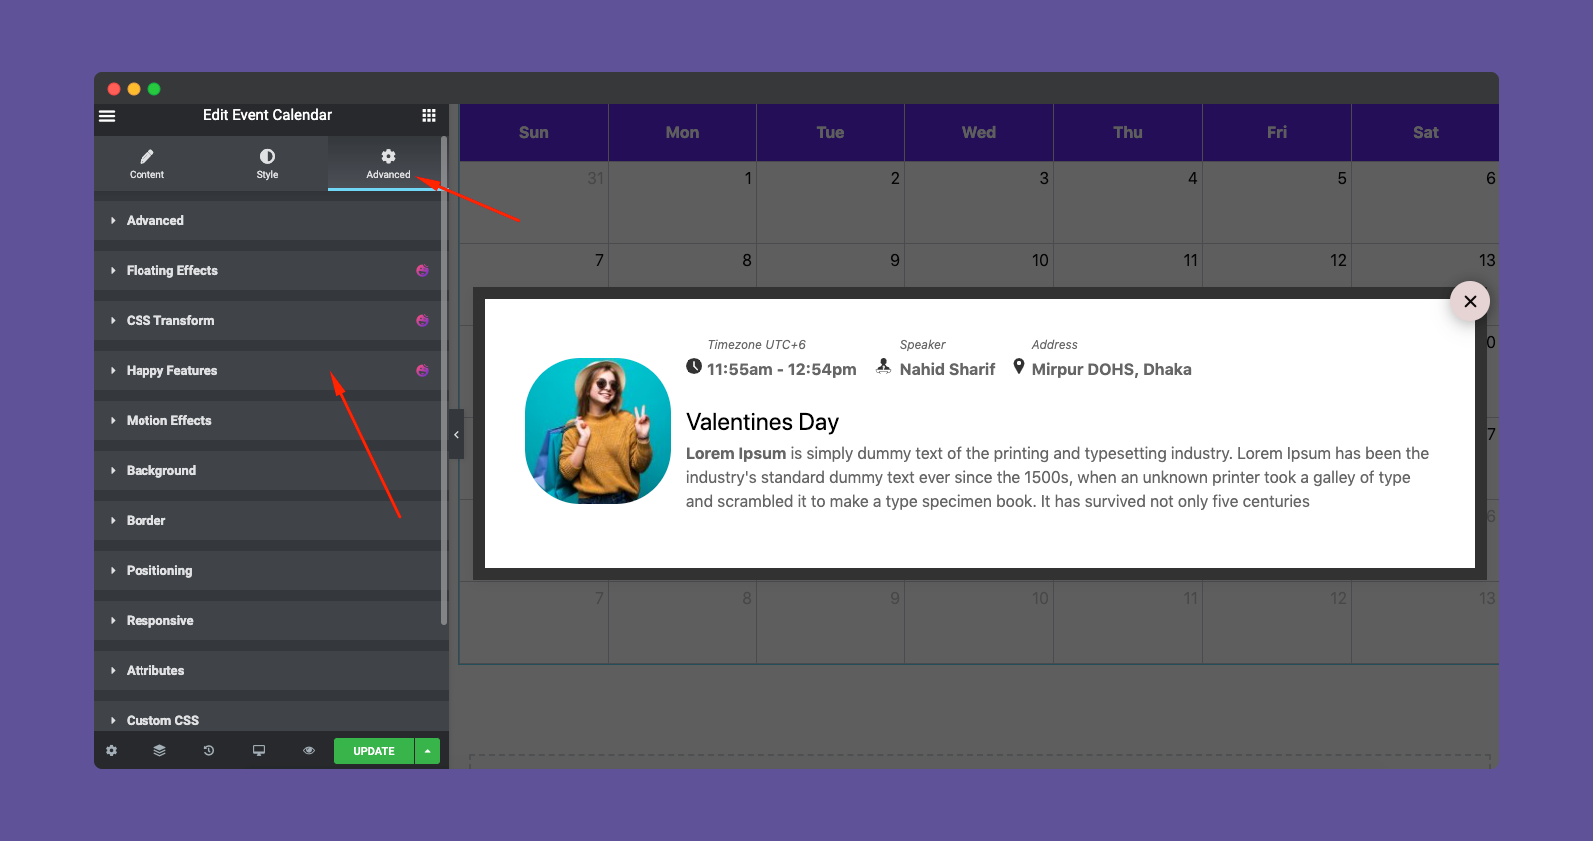
So here is the final preview of the Events calendar widgets of Happy addons.

That’s it!
