How To Use Fluent Form Widget with Happy Elementor Addons?
Now you can customize your Fluent Form with the Help of Happy Elementor Addons Fluent Form widget.
Before start customization, you need to create a form in the Fluent Form plugin. If you want to know how to create Contact forms with Fluent Form Plugin then here is their guideline.
Requirements:
To avail that feature you need these,
Start Customization
Follow the below steps to give an elegant look to your forms.
Step 01:
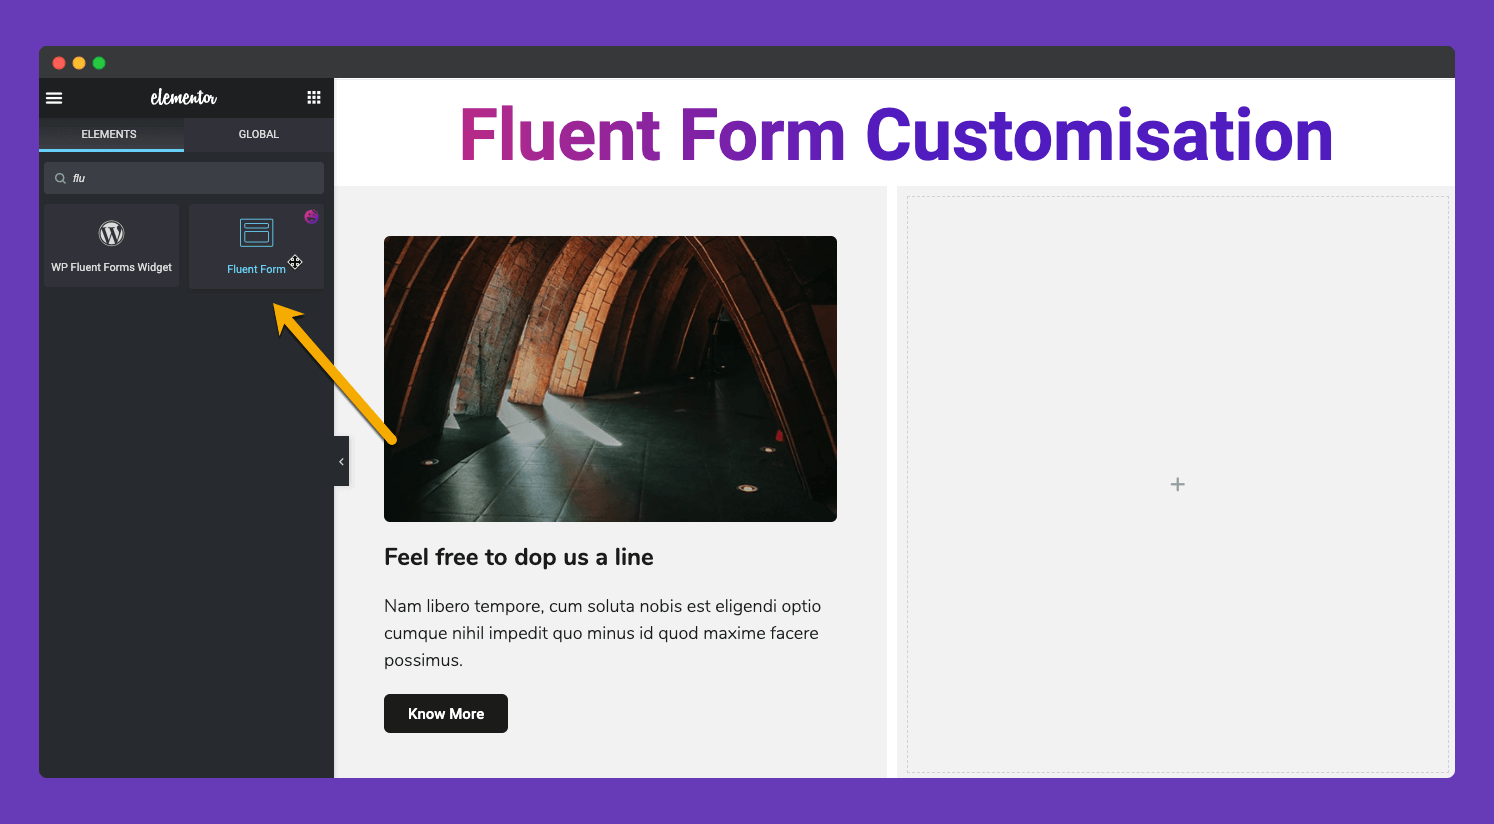
First of all, search for Fluent form in the widget library in the left panner of your Editing Panel.
Step 02:
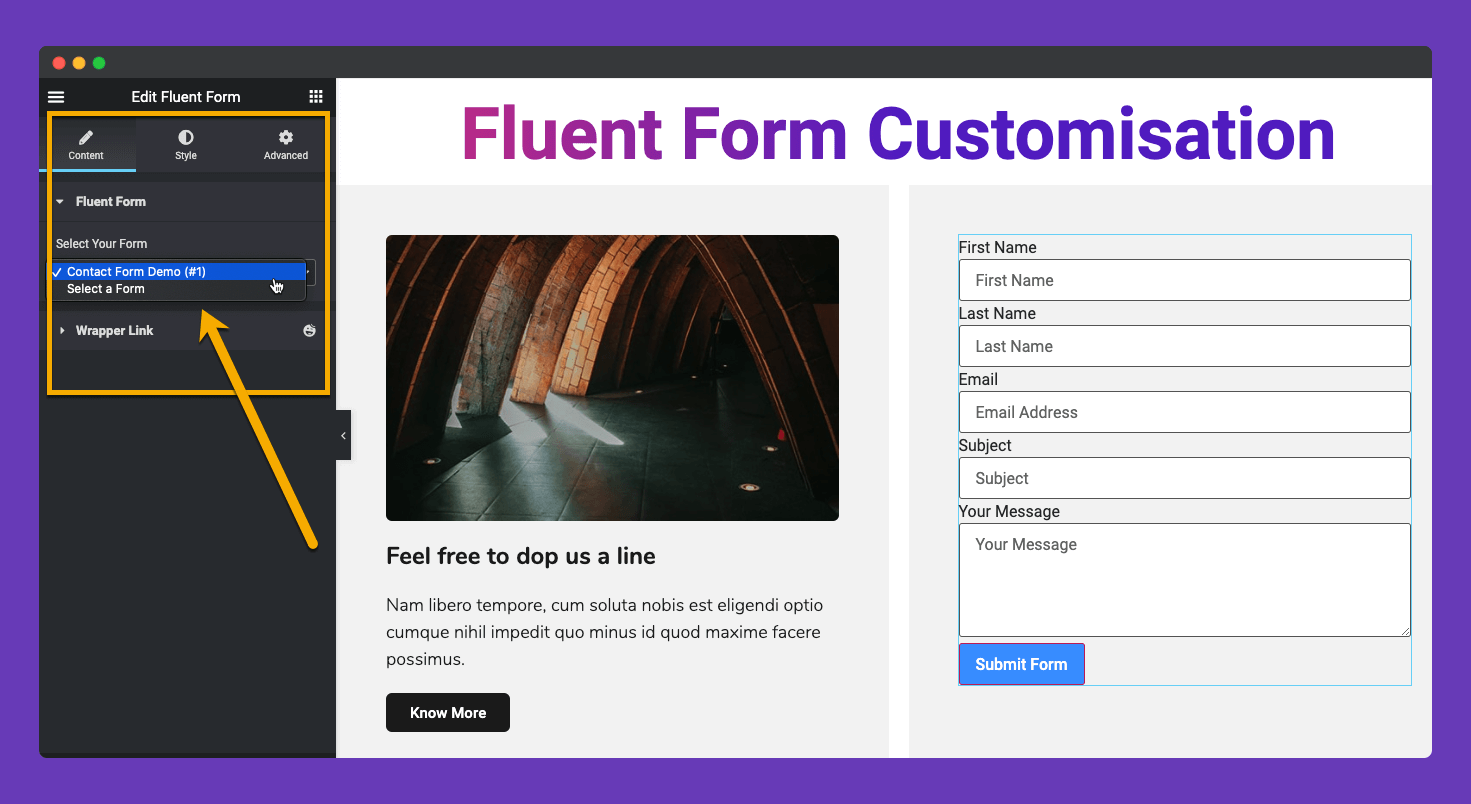
Drag it to your editing panel. And select your previously created form, from the left side editing panel.
Step 03:
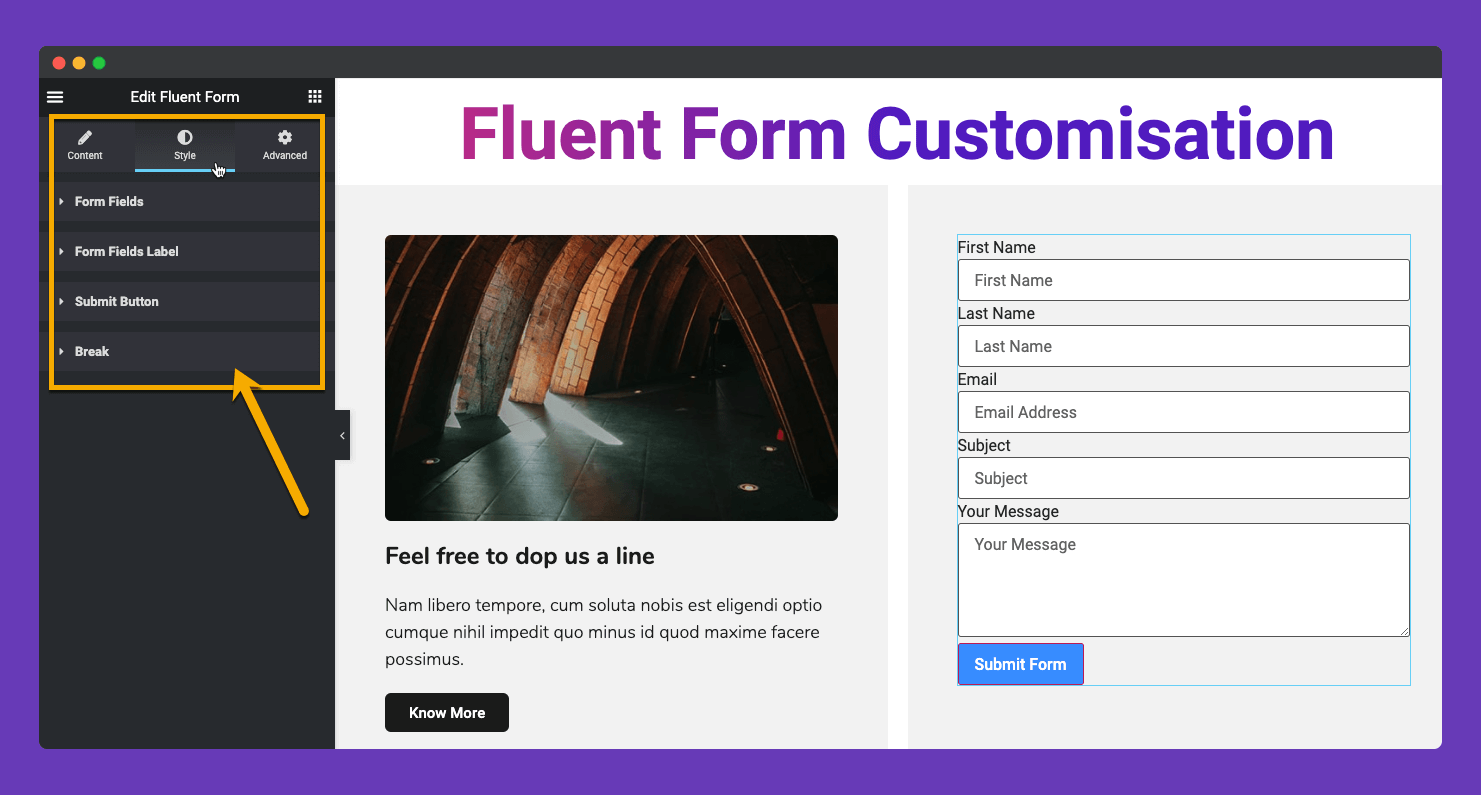
Now move to the style tab and you will get four types of styling functionality. You can customize from here,
- Form Fields
- Form Field labels
- Submit Button
- Break
Step 04:
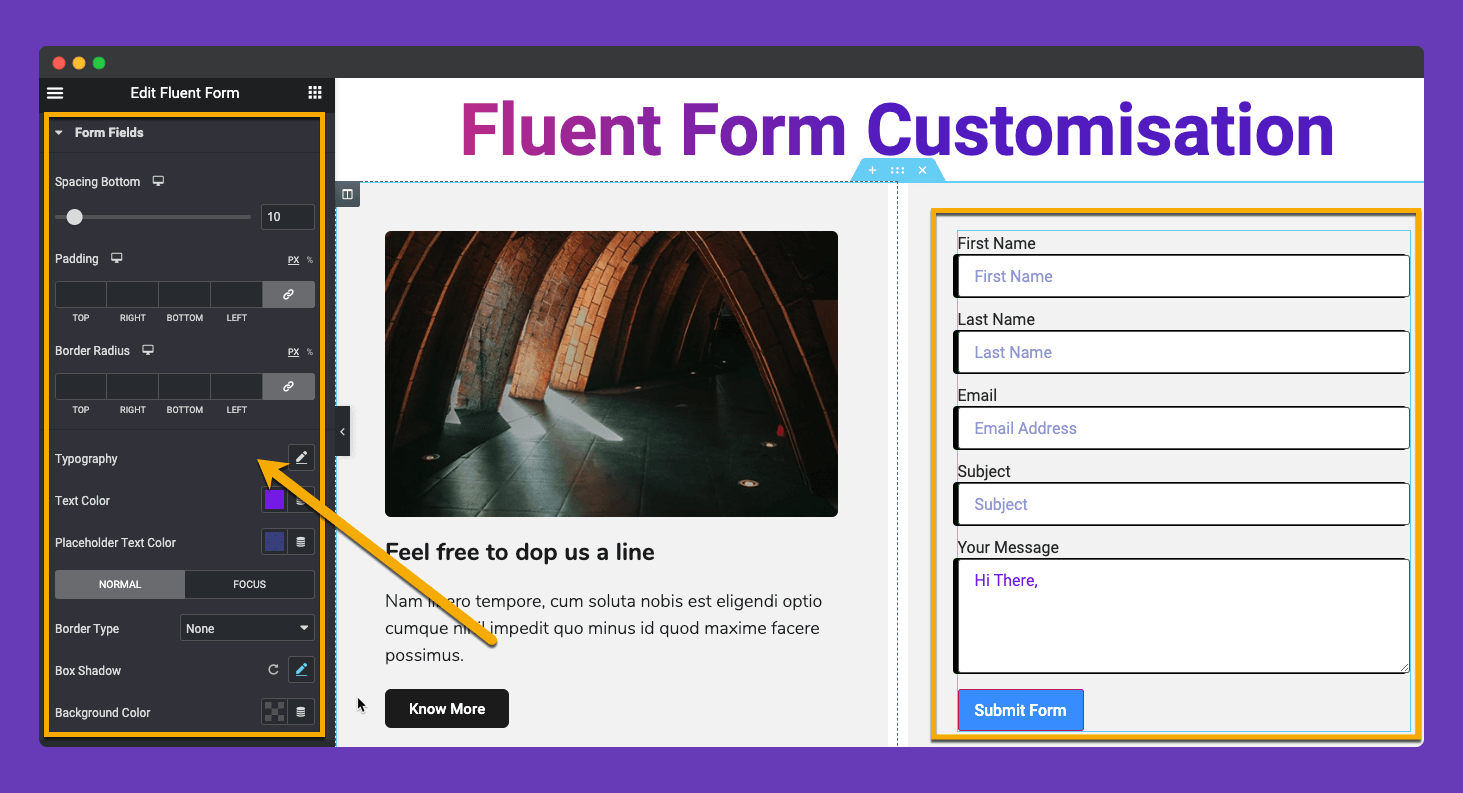
Start customizing your forms fields.
From this setting page, you can add Space between your form fields by dragging the Spacing Bottom feature. In this demo, we set 10 as space bottom to make the same align with the left side column.
You can add customized padding to your form fields from the padding section.
Also, the facility to set custom border radios. We used the default value of the fluent forms.
From the Typography section, you can customize the form’s input text and placeholder text’s typography.
Have the facility to add custom color to input text and placeholder text.
Moreover, you can set Border Type, Box Shadow, Background Color from this menu.
Step 05:
Now go to the Form Field label customization. Here we have grouped the settings into two categories.
The first one is Form Field label Customization. You can add spaces between fields and fields labels according to your need.
Set your own Typography, Text color, Checkbox label color, Required field label color.
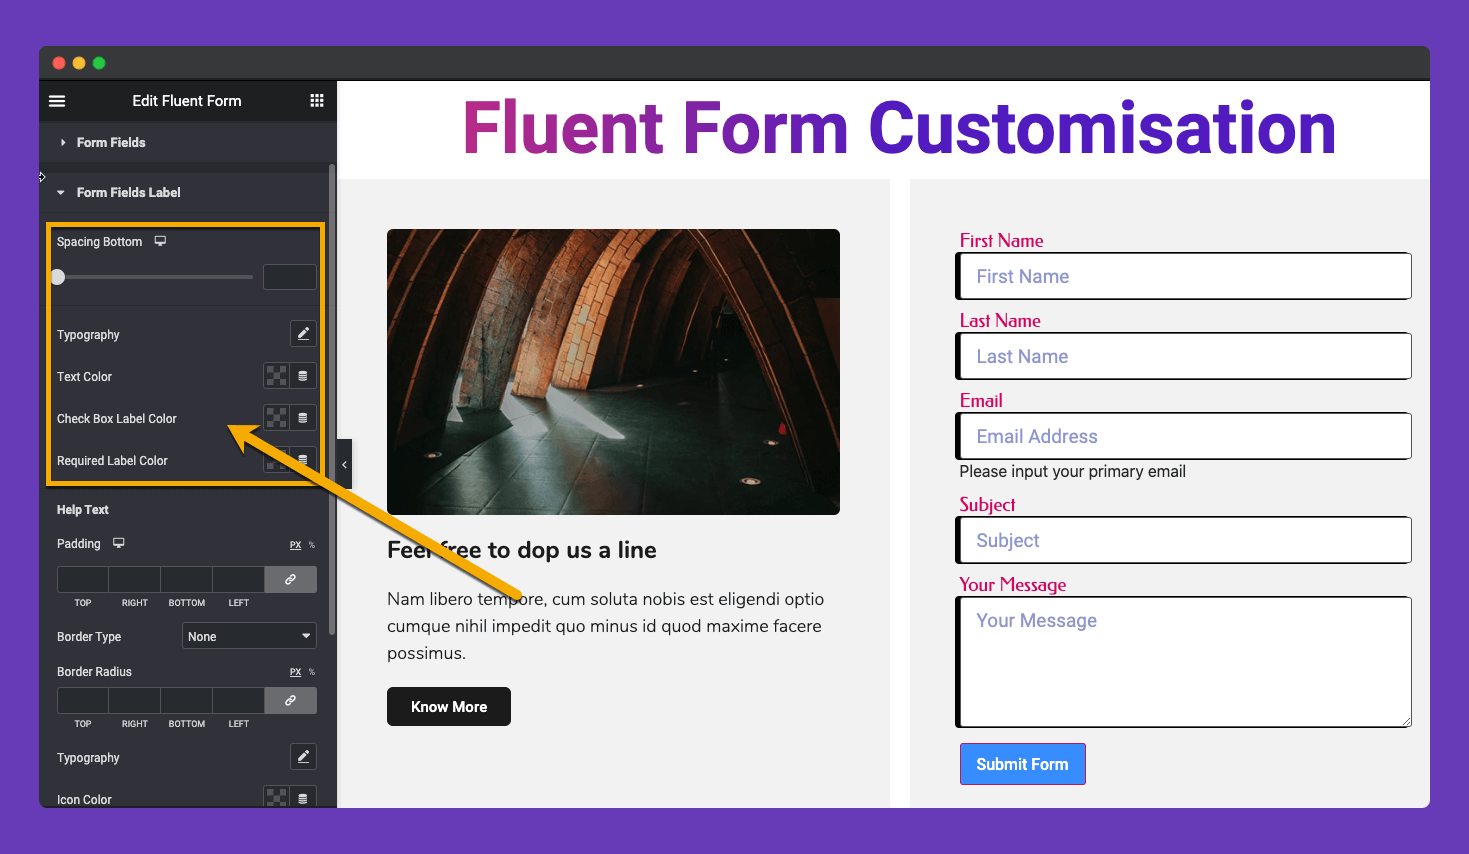
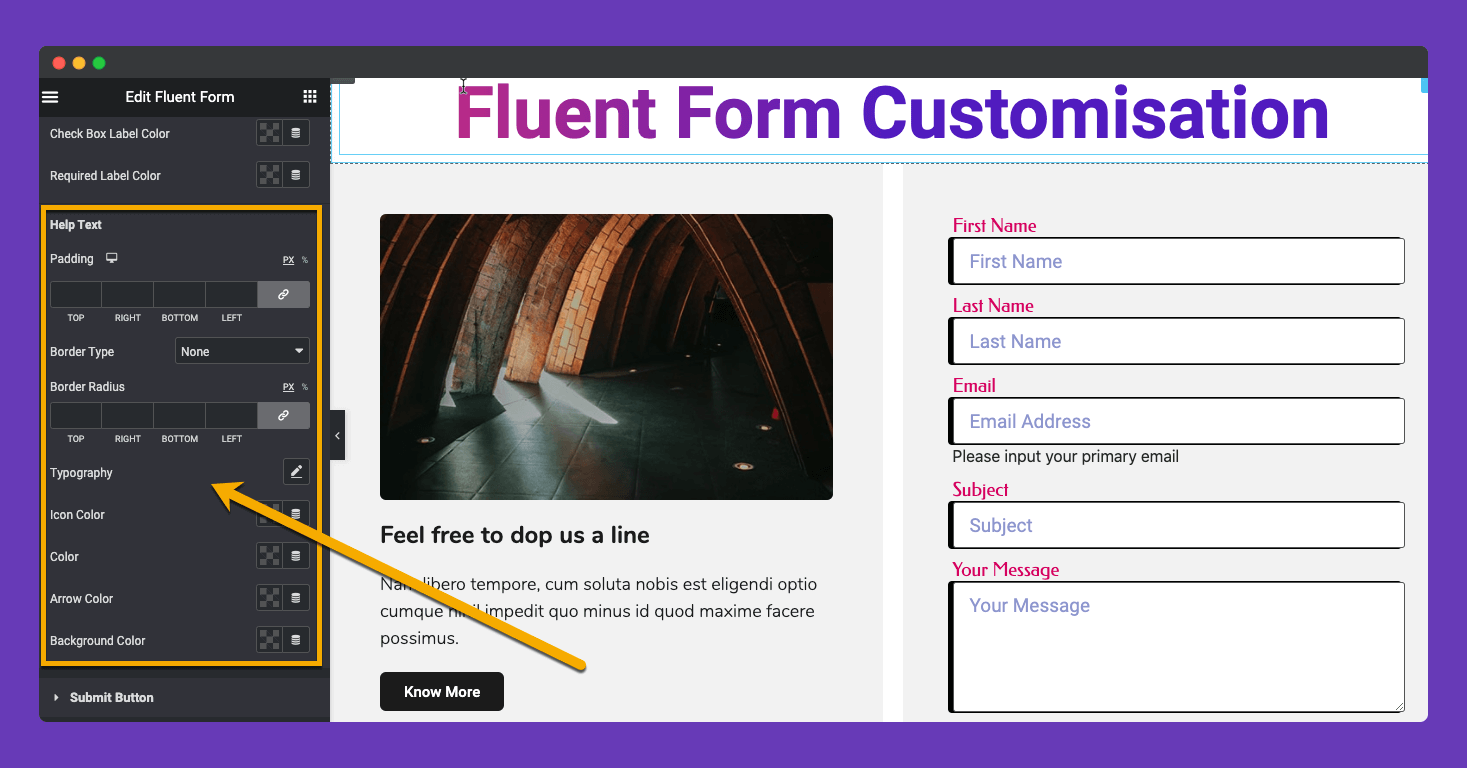
The second group is the Help Text customization setting.
In this segment, you will get all the customization for the Help text.
You can set padding, Border type, and Border Radius, Typography, Help text Icon Color, Help Text Color, Arrow Color, Background Color.
Step 06:
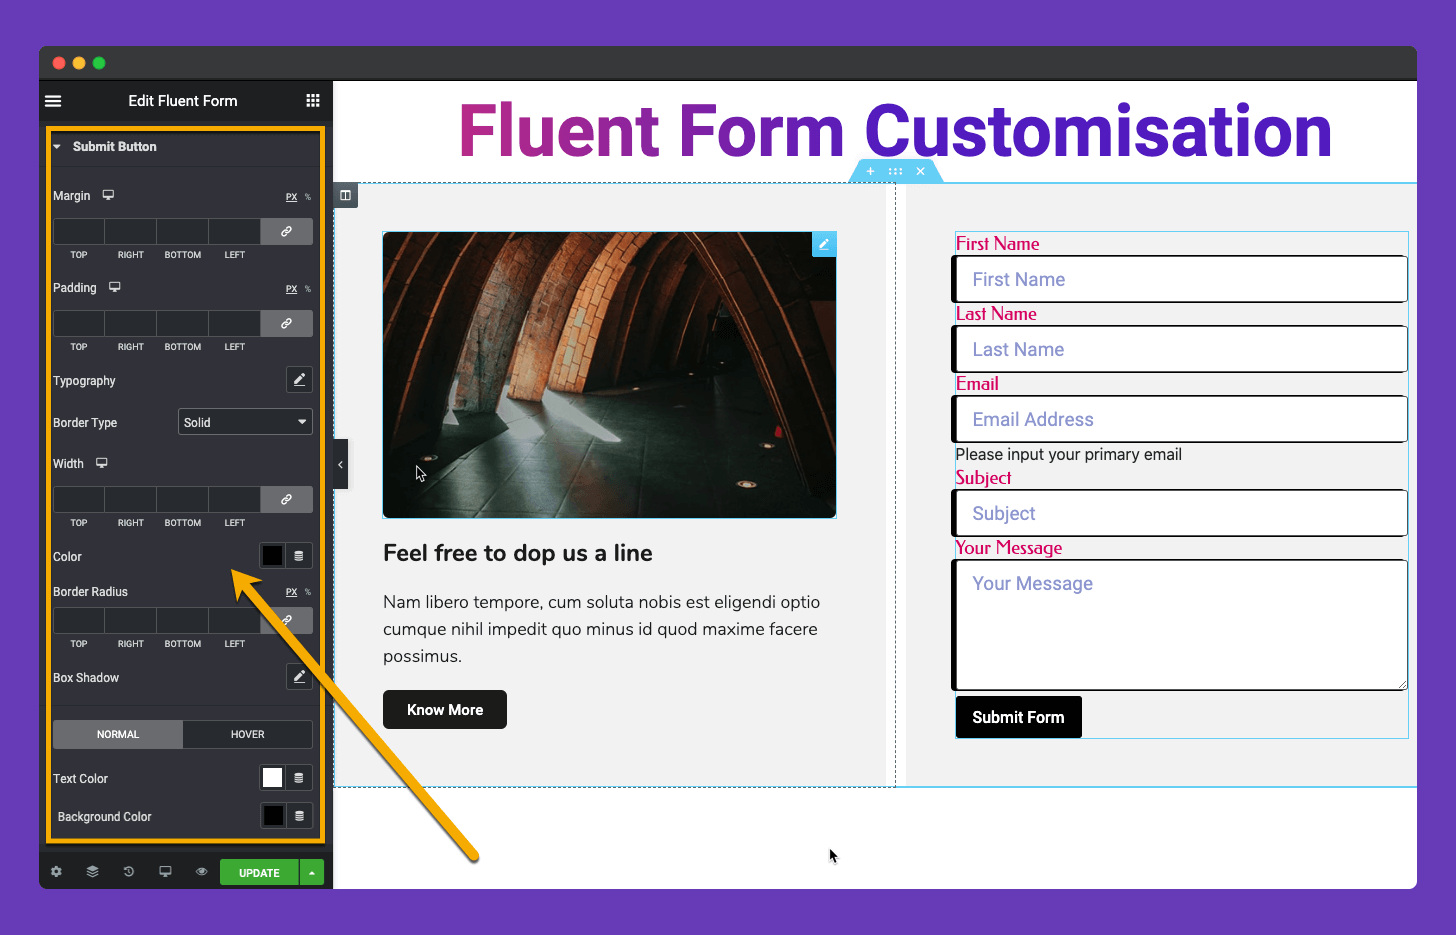
In this section, we will show the Submit Button Styling functionality of this widget,
We have added a huge amount of customization facility here. You can set custom Margin, Padding of your button.
Custom Button width, Border type and it’s customization, Border radios, Color customization on normal and hover stage also available in our widget.
Note: Please set a border as solid to remove the default border-color of the submit button. And set your border color as your button color.
Step 07:
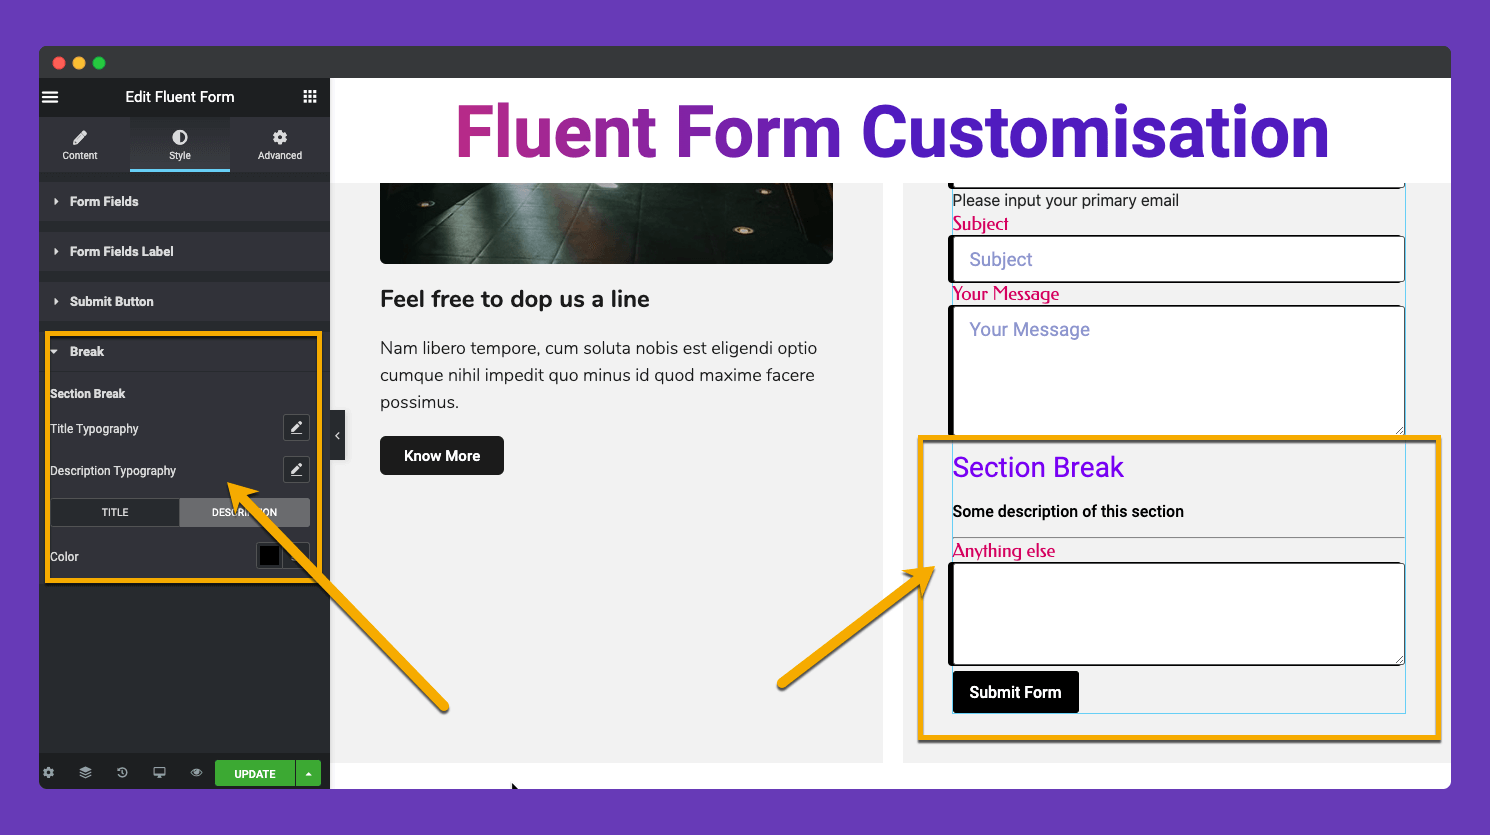
In this step, we will show to customization feature of a Section Break Field of Fluent Form.
Fluent Form has a custom field Section Break. If you add this on your form then we also have added the customization feature to that custom field.
You can set the custom Title & Description Typography and custom color to both of them.
Step 07:
Now comes the Advanced tab settings. As it is a default feature of Elementor give a read to this Document to know more about Advanced features and its uses.
That’s all about the Happy Addons Fluent Form widget.
